36. Animation Fremework
The Qt animation framework provides a way to animate GUI elements in Qt Widgets applications. It lets you animate a Qt property value change of a widget or a QObject
We have already seen the animation framework in action in Chapter 21, where we built an animated bar widget from a progress bar and a label. In this chapter we build several versions of a self-dismissing notification panel: we first animate the panel’s position, then its color, geometry and opacity, after which we demonstrate various easing curves, sequential, and parallel animation groups, ending the chapter with a pause animation demonstration.
36.1 QPropertyAnimation Basics
Not all UI transitions in polished desktop applications are instant - panels slide into view, buttons shift on click, and widgets expand to reveal content. QPropertyAnimation drives any Q_PROPERTY value from a start to an end value over a set duration, and is the foundation everything else in this chapter builds on.
 |
You need to build a |
To use a property animation in your application:
1 from PySide6.QtCore import Slot, QPropertyAnimation, QPoint
2 from PySide6.QtWidgets import QFrame, QPushButton, QLabel, QVBoxLayout
3
4
5 class NotificationPanel(QFrame):
6
7 def __init__(self, parent=None):
8
9 super().__init__(parent)
10
11 self.setFixedSize(200, 100)
12
13 layout = QVBoxLayout()
14 self.setLayout(layout)
15
16 self.message_label = QLabel()
17 self.message_label.setWordWrap(True)
18 self.dismiss_button = QPushButton('Dismiss')
19 self.dismiss_button.clicked.connect(self.deleteLater)
20
21 layout.addWidget(self.message_label)
22 layout.addWidget(self.dismiss_button)
23
24 self.setStyleSheet('''
25 QFrame {
26 background-color: #f8f9fa;
27 border: 1px solid #ccc;
28 border-radius: 4px;
29 }
30 QLabel {
31 qproperty-alignment: AlignCenter;
32 }
33 ''')
34
35 # 1. Create a QPropertyAnimation instance.
36
37 self.animation = QPropertyAnimation(self, b'pos', self)
38 self.animation.setDuration(500)
39
40 def target_y(self):
41 return (self.parent().height() - self.height()) // 2
42
43 def target_x(self):
44 return (self.parent().width() - self.width()) // 2
45
46 @Slot(str)
47 def show_panel(self, message=''):
48
49 self.message_label.setText(message)
50
51 # 2. Set the animation start and end values.
52
53 starting_point = QPoint(-self.width(), self.target_y())
54 end_point = QPoint(self.target_x(), self.target_y())
55
56 self.animation.setStartValue(starting_point)
57 self.animation.setEndValue(end_point)
58
59 # 3. Show the panel and start the animation.
60
61 self.show()
62 self.animation.start()
-
Create a
QPropertyAnimationinstance. For the purpose of this chapter we buildNotificationPanel, a custom panel inherited fromQFramethat has a label to display the notification message and a button to dismiss it. Because the panel will be animated, we add aQPropertyAnimationas an instance member. The constructor takes three arguments:- The animation target object. In this case,
self, theNotificationPanelinstance. - The target object’s property to animate as a
bytesvalue.posis aQPointholding the top-left corner position of the frame within its parent widget. For aQObject’s member to serve as an animation target it must be marked with Qt’sQ_PROPERTYmacro in C++, or with the@Propertydecorator in your PySide6 classes. - The animation’s Qt parent. Passing
selfties the animation’s lifetime to the panel in Qt’s object hierarchy.
We also set the animation duration to 500 milliseconds. The helper methods
target_x()andtarget_y()calculate the horizontal and vertical coordinates needed to center the panel within its parent. Set the animation start and end values. A new
NotificationPanelis created for each notification (inshow_notification()on the main window). Inshow_panel()we set theposstart value to a position just off the left edge of the parent (QPoint(-self.width(), self.target_y())), and the end value to the centered position within the parent.Start the animation. Call
show()to make the panel visible, thenQPropertyAnimation.start()to begin the animation. The panel’sposis interpolated from the start value to the end value over 500 milliseconds, ending up centered in the parent. Clicking the Dismiss button callsdeleteLater(), which removes the panel from memory once Qt returns to the event loop.
1 import sys
2 import random
3 from PySide6.QtCore import Slot
4 from PySide6.QtWidgets import (QApplication,QWidget,
5 QVBoxLayout, QPushButton)
6 from notificationpanel import NotificationPanel
7
8
9 MESSAGES = [
10 'Spending limit reached: Food & Drink',
11 'Transfer of €250.00 completed',
12 'Unusual activity detected on account',
13 'Budget reset on 1 July']
14
15
16 class Window(QWidget):
17
18 def __init__(self, parent=None):
19
20 super().__init__(parent)
21 self.resize(500, 300)
22
23 self.show_button = QPushButton('Click for a notification!')
24 self.show_button.clicked.connect(self.show_notification)
25
26 layout = QVBoxLayout()
27 layout.addWidget(self.show_button)
28 layout.addStretch()
29 self.setLayout(layout)
30
31 @Slot()
32 def show_notification(self):
33 panel = NotificationPanel(self)
34 panel.show_panel(random.choice(MESSAGES))
35
36
37 if __name__ == '__main__':
38
39 app = QApplication(sys.argv)
40 main_window = Window()
41 main_window.show()
42 sys.exit(app.exec())
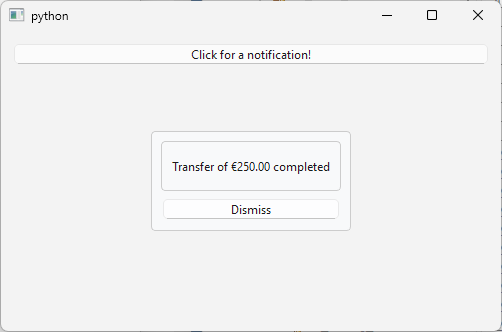
Once you start the application it should look like this:
target_x() and target_y() are evaluated once when show_panel() is called. If the main window is resized while the animation is still running, the panel will land at the position calculated before the resize rather than the new center. For a production application you would recalculate the end value in a resizeEvent() handler. For the examples in this chapter the edge case is ignored to keep the focus on the animation mechanics.
36.2 Animating Color, Geometry, and Opacity
Position is only one of many properties you can animate - any value exposed through Qt’s property system is a valid target. In this section we set up three animations on the same widget: a color transition, a fade-in, and an expanding entrance. Color and opacity animate straightforwad from fixed values, but geometry requires a little more work: because the widget’s position isn’t known until it’s been placed by its parent, the start and end QRect values have to be set at show time rather than in __init__().
|
Your task is to turn the sliding frame from the previous exercise into a status panel. You need to allow the users to choose from three separate |
- Color, which animates a custom property to drive a color transition on the message label from yellow to green.
- Opacity, which fades the panel in from fully transparent to fully opaque.
- Geometry, which expands the panel from a single point to its full size.
To animate widget color, geometry, and opacity in your application:
1 from PySide6.QtCore import Property
2 from PySide6.QtGui import QColor
3 from PySide6.QtWidgets import QLabel
4
5
6 class ColoredLabel(QLabel):
7
8 def __init__(self, text='', color=None, parent=None):
9
10 super().__init__(text, parent)
11 self._color = color
12
13 @Property(QColor)
14 def color(self):
15 return self._color
16
17 @color.setter
18 def color(self, color):
19 if color != self._color:
20 self._color = color
21 self.setStyleSheet(
22 f'background-color: {color.name()}')
- Create a color animation. Qt widgets do not expose a color property, so for the notification panel we introduce
ColoredLabel, aQLabelsubclass that declares a customcolorproperty of typeQColor. Its setter applies the color to the label background via QSS. Create an animation targeting this property that interpolates from yellow to green over 1000 milliseconds.
1 from enum import Enum
2 from PySide6.QtCore import Slot, QPropertyAnimation, QRect
3 from PySide6.QtGui import QColor
4 from PySide6.QtWidgets import (QFrame, QPushButton,
5 QVBoxLayout, QGraphicsOpacityEffect)
6 from customwidgets import ColoredLabel
7
8
9 class AnimationType(Enum):
10 Color = 1
11 Opacity = 2
12 Geometry = 3
13
14
15 class NotificationPanel(QFrame):
16
17 def __init__(self, anim_type=AnimationType.Color, parent=None):
18
19 super().__init__(parent)
20 self.resize(200, 100)
21
22 layout = QVBoxLayout()
23 self.setLayout(layout)
24
25 self.message_label = ColoredLabel(color=QColor(220, 220, 220))
26 self.message_label.setWordWrap(True)
27 self.dismiss_button = QPushButton('Dismiss')
28 self.dismiss_button.clicked.connect(self.deleteLater)
29
30 layout.addWidget(self.message_label)
31 layout.addWidget(self.dismiss_button)
32
33 self.setStyleSheet('''
34 QFrame {
35 background-color: #f8f9fa;
36 border: 1px solid #ccc;
37 border-radius: 4px;
38 }
39 QLabel {
40 qproperty-alignment: AlignCenter;
41 }
42 ''')
43
44 # 1. Create a color animation.
45
46 color_animation = QPropertyAnimation(self.message_label, b'color', self)
47 color_animation.setDuration(1000)
48 color_animation.setStartValue(QColor(250, 250, 0))
49 color_animation.setEndValue(QColor(200, 250, 210))
50
51 # 2. Create an opacity animation.
52
53 opacity_effect = QGraphicsOpacityEffect(self)
54 opacity_effect.setOpacity(1.0)
55 self.setGraphicsEffect(opacity_effect)
56
57 opacity_animation = QPropertyAnimation(
58 opacity_effect, b'opacity', self)
59 opacity_animation.setDuration(1000)
60 opacity_animation.setStartValue(0.0)
61 opacity_animation.setEndValue(1.0)
62
63 # 3. Create a geometry animation.
64
65 self.geometry_animation = QPropertyAnimation(
66 self, b'geometry', self)
67 self.geometry_animation.setDuration(200)
68
69 # 4. Store the animations in a dictionary.
70
71 self.animations = {
72 AnimationType.Color: color_animation,
73 AnimationType.Opacity: opacity_animation,
74 AnimationType.Geometry: self.geometry_animation
75 }
76
77 self.active_animation = self.animations[anim_type]
78
79 def target_x(self):
80 return (self.parent().width() - self.width()) // 2
81
82 def target_y(self):
83 return (self.parent().height() - self.height()) // 2
84
85 def setup_geometry_animation(self):
86 final_rect = QRect(self.target_x(), self.target_y(),
87 self.width(), self.height())
88 center_x = self.target_x() + self.width() // 2
89 center_y = self.target_y() + self.height() // 2
90 start_rect = QRect(center_x, center_y, 1, 1)
91 self.geometry_animation.setStartValue(start_rect)
92 self.geometry_animation.setEndValue(final_rect)
93
94 @Slot(str)
95 def show_panel(self, message=''):
96
97 self.move(self.target_x(), self.target_y())
98 self.setup_geometry_animation()
99 self.message_label.setText(message)
100 self.show()
101 self.active_animation.start()
102
Create an opacity animation. Qt widgets do not expose an opacity property directly - opacity is handled via
QGraphicsOpacityEffect. Create an instance, attach it toNotificationPanelwithsetGraphicsEffect(), then create an animation targeting the effect’sopacityproperty and interpolate from0.0(fully transparent) to1.0(fully opaque) over 1000 milliseconds.Create a geometry animation. A widget’s geometry includes its position within the parent, which is not known at construction time. For this reason the start and end
QRectvalues are calculated insetup_geometry_animations(), called fromshow_panel()just before the panel is shown. The start rect collapses the panel to a single pixel at the center of its final position. The end rect is the full-size centered rect.Store the animations in a dictionary keyed by
AnimationType. TheAnimationTypeenum is passed into the panel’s constructor so the correct animation is selected up front. The main window provides a combobox for selecting the animation type. A newNotificationPanelis created for each notification with the currently selected type.
1 import sys
2 import random
3 from PySide6.QtCore import Slot
4 from PySide6.QtWidgets import (QApplication,QWidget,
5 QVBoxLayout, QPushButton, QComboBox)
6 from notificationpanel import NotificationPanel, AnimationType
7
8
9 MESSAGES = [
10 'Spending limit reached: Food & Drink',
11 'Transfer of €250.00 completed',
12 'Unusual activity detected on account',
13 'Budget reset on 1 July']
14
15
16 class Window(QWidget):
17
18 def __init__(self, parent=None):
19
20 super().__init__(parent)
21 self.resize(500, 300)
22
23 self.anim_combo = QComboBox()
24 for anim_type in AnimationType:
25 self.anim_combo.addItem(anim_type.name, anim_type)
26
27 self.show_button = QPushButton('Click for a notification!')
28 self.show_button.clicked.connect(self.show_notification)
29
30 layout = QVBoxLayout()
31 layout.addWidget(self.anim_combo)
32 layout.addWidget(self.show_button)
33 layout.addStretch()
34 self.setLayout(layout)
35
36 @Slot()
37 def show_notification(self):
38 panel = NotificationPanel(self.anim_combo.currentData(), self)
39 panel.show_panel(random.choice(MESSAGES))
40
41
42 if __name__ == '__main__':
43
44 app = QApplication(sys.argv)
45 main_window = Window()
46 main_window.show()
47 sys.exit(app.exec())
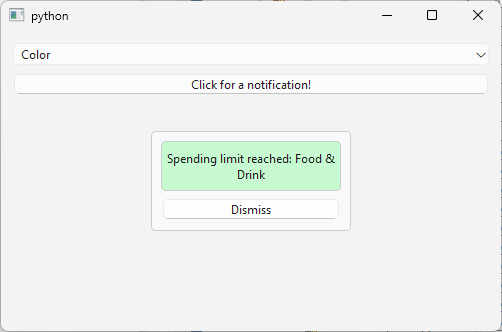
When you run the application, select an animation type from the combobox and click the button to show the notification panel playing the selected animation.
36.3 Easing Curves
A linear animation has constant speed (the same distance per frame from start to finish) which can feel mechanical. Easing curves remap elapsed time to progress non-linearly, giving motion a sense of weight, momentum, or snap.
|
You are tasked with selecting an appropriate easing curve for the notification panel. You add all available easing curve to a combobox so the user can select which one will be applied before the panel is shown. |
To inspect different easing curve types:
1 import sys
2 import random
3 from PySide6.QtCore import Slot, QEasingCurve
4 from PySide6.QtWidgets import (QApplication,QWidget,
5 QVBoxLayout, QPushButton, QComboBox)
6 from notificationpanel import NotificationPanel
7
8
9 MESSAGES = [
10 'Spending limit reached: Food & Drink',
11 'Transfer of €250.00 completed',
12 'Unusual activity detected on account',
13 'Budget reset on 1 July']
14
15
16 EXCLUDED_CURVE_TYPES = (
17 QEasingCurve.Type.Custom,
18 QEasingCurve.Type.NCurveTypes,
19 QEasingCurve.Type.BezierSpline,
20 QEasingCurve.Type.TCBSpline,
21 QEasingCurve.Type.InCurve,
22 QEasingCurve.Type.OutCurve,
23 QEasingCurve.Type.SineCurve,
24 QEasingCurve.Type.CosineCurve)
25
26
27 class Window(QWidget):
28
29 def __init__(self, parent=None):
30
31 super().__init__(parent)
32 self.resize(500, 300)
33
34 # 1. Populate the combo box.
35
36 self.curves_combo = QComboBox()
37 for curve in QEasingCurve.Type:
38 if curve not in EXCLUDED_CURVE_TYPES:
39 self.curves_combo.addItem(curve.name, curve)
40
41 self.show_button = QPushButton('Click for a notification!')
42 self.show_button.clicked.connect(self.show_notification)
43
44 layout = QVBoxLayout()
45 layout.addWidget(self.curves_combo)
46 layout.addWidget(self.show_button)
47 layout.addStretch()
48 self.setLayout(layout)
49
50 @Slot()
51 def show_notification(self):
52
53 # 2. Set the easing curve.
54
55 curve = self.curves_combo.currentData()
56 panel = NotificationPanel(self)
57 panel.set_easing_curve(curve)
58
59 # 3. Show the notification.
60
61 panel.show_panel(random.choice(MESSAGES))
62
63
64 if __name__ == '__main__':
65
66 app = QApplication(sys.argv)
67 main_window = Window()
68 main_window.show()
69 sys.exit(app.exec())
-
Populate the combobox. Iterate over
QEasingCurve.Typewhich exposes all registered curve types and store each enum value as item data. Skip the curve types listed inEXCLUDEC_CURVE_TYPES:Custom- requires a user-supplied callback installed viasetCustomType(). Without one, passing it tosetEasingCurve()raises an error.NCurveTypes- a sentinel value equal to the total count of curve types in the enum, used internally by Qt for bounds checking. It has no curve implementation.BezierSplineandTCBSpline- user-defined spline types that require control points to be added manually viaaddCubicBezierSegment()andaddTCBSegment()respectively before they have a defined shape.InCurveandOutCurve- Internal values.SineCurveandCosineCurve- implement oscillating waveforms. The animated property does not end up atendValue()when the animation finishes.
SineCurveandCosineCurveare particularly dangerous: they break the promise ofQpropertyAnimationthat the animated property will end atendValue()when the animation finishes.InCurve,OutCurve,SineCurveandCosineCUrveare absent from the Qt documentation so you should not use them either. Set the easing curve. When the user clicks the button,
show_notification(s)reads the currently selected curve from the combobox and passes it toNotificationPanel.set_easing_curve(), which forwards it toself.animation.setEasingCurve()before the animation starts.
1 from PySide6.QtCore import (Slot, QPropertyAnimation,
2 QPoint, QEasingCurve)
3 from PySide6.QtWidgets import QFrame, QPushButton, QLabel, QVBoxLayout
4
5
6 class NotificationPanel(QFrame):
7
8 def __init__(self, parent=None):
9
10 super().__init__(parent)
11
12 self.setFixedSize(200, 100)
13
14 layout = QVBoxLayout()
15 self.setLayout(layout)
16
17 self.message_label = QLabel()
18 self.message_label.setWordWrap(True)
19 self.dismiss_button = QPushButton('Dismiss')
20 self.dismiss_button.clicked.connect(self.deleteLater)
21
22 layout.addWidget(self.message_label)
23 layout.addWidget(self.dismiss_button)
24
25 self.setStyleSheet('''
26 QFrame {
27 background-color: #f8f9fa;
28 border: 1px solid #ccc;
29 border-radius: 4px;
30 }
31 QLabel {
32 qproperty-alignment: AlignCenter;
33 }
34 ''')
35
36 self.animation = QPropertyAnimation(self, b'pos', self)
37 self.animation.setDuration(500)
38
39 def target_x(self):
40 return (self.parent().width() - self.width()) // 2
41
42 def target_y(self):
43 return (self.parent().height() - self.height()) // 2
44
45 @Slot(QEasingCurve.Type)
46 def set_easing_curve(self, curve):
47 self.animation.setEasingCurve(curve)
48
49 @Slot(str)
50 def show_panel(self, message=''):
51
52 self.message_label.setText(message)
53
54 starting_point = QPoint(-self.width(), self.target_y())
55 end_point = QPoint(self.target_x(), self.target_y())
56
57 self.animation.setStartValue(starting_point)
58 self.animation.setEndValue(end_point)
59
60 self.show()
61 self.animation.start()
- Show the notification.
show_panel()is called with a randomly chosen message fromMESSAGES. The animation runs with whichever curve is currently selected in the combobox.
When you select a curve and click the button, the panel covers the same distance every time but with a different animation type.
36.4 Sequential Animation Groups
Some transitions require steps in order - a panel slides in, then its label appears, then the Dismiss button pulses with a glow. Wiring this with signals is brittle. QSequentialAnimationGroup chains animations so each starts only when the previous one finishes, and the whole sequence is controlled through a single object.
|
You restructure the notification panel’s entrance into three ordered phases: it slides in from off-screen, its message label fades up, and finally the Dismiss button pulses with an orange glow. |
All three animations go into a single QSequentialAnimationGroup started with one call.
To use a sequential animation group in your application:
1 from PySide6.QtCore import (Slot, QPropertyAnimation,
2 QPoint, QSequentialAnimationGroup)
3 from PySide6.QtWidgets import (QFrame, QPushButton, QLabel,
4 QVBoxLayout, QGraphicsOpacityEffect, QGraphicsDropShadowEffect)
5
6
7 class NotificationPanel(QFrame):
8
9 def __init__(self, parent=None):
10
11 super().__init__(parent)
12 self.setFixedSize(200, 100)
13
14 layout = QVBoxLayout()
15 self.setLayout(layout)
16
17 self.message_label = QLabel()
18 self.message_label.setWordWrap(True)
19 self.dismiss_button = QPushButton('Dismiss')
20 self.dismiss_button.clicked.connect(self.deleteLater)
21
22 layout.addWidget(self.message_label)
23 layout.addWidget(self.dismiss_button)
24
25 self.setStyleSheet('''
26 QFrame {
27 background-color: #f8f9fa;
28 border: 1px solid #ccc;
29 border-radius: 4px;
30 }
31 QLabel {
32 qproperty-alignment: AlignCenter;
33 }
34 ''')
35
36 # 1. Create the animations.
37
38 self.pos_animation = QPropertyAnimation(self, b'pos', self)
39 self.pos_animation.setDuration(500)
40
41 self.opacity_effect = QGraphicsOpacityEffect(self)
42 self.opacity_effect.setOpacity(0.0)
43 self.message_label.setGraphicsEffect(self.opacity_effect)
44 self.opacity_animation = QPropertyAnimation(
45 self.opacity_effect, b'opacity', self)
46 self.opacity_animation.setDuration(500)
47 self.opacity_animation.setStartValue(0.0)
48 self.opacity_animation.setEndValue(1.0)
49
50 self.glow_effect = QGraphicsDropShadowEffect(self)
51 self.glow_effect.setBlurRadius(0)
52 self.glow_effect.setColor('orange')
53 self.glow_effect.setOffset(0, 0)
54 self.dismiss_button.setGraphicsEffect(self.glow_effect)
55
56 self.glow_animation = QPropertyAnimation(
57 self.glow_effect, b'blurRadius', self)
58 self.glow_animation.setDuration(400)
59 self.glow_animation.setStartValue(0)
60 self.glow_animation.setEndValue(10)
61
62 # 2. Create the animation group and add the animations.
63
64 self.animation_group = QSequentialAnimationGroup(self)
65 self.animation_group.addAnimation(self.pos_animation)
66 self.animation_group.addAnimation(self.opacity_animation)
67 self.animation_group.addAnimation(self.glow_animation)
68
69 def target_x(self):
70 return (self.parent().width() - self.width()) // 2
71
72 def target_y(self):
73 return (self.parent().height() - self.height()) // 2
74
75 # 3. Start the animation group.
76
77 @Slot(str)
78 def show_panel(self, message=''):
79
80 self.message_label.setText(message)
81
82 starting_point = QPoint(-self.width(), self.target_y())
83 end_point = QPoint(self.target_x(), self.target_y())
84
85 self.pos_animation.setStartValue(starting_point)
86 self.pos_animation.setEndValue(end_point)
87
88 self.show()
89 self.animation_group.start()
-
Create the individual animations. Create three animations:
- A position animation that moves the panel from off-screen to the center of the main window.
- An opacity animation that fades the message label in from
0.0to1.0via aQGraphicsOpactyEffect. - A glow animation that raises
blurRadiusof aQgraphicsDropShadowEffectattached to the Dismiss button from0to10.
Create the animation group and add the animations. Create a
QSequentialAnimationGroupand add the three animations in the order they will play: position first , then opacity, then glow.Start the group instead the individual animations. In
show_panel(), set the start and end values for the position animation, then callstart()on the group. One call drives all three animations in sequence.
1 import sys
2 import random
3 from PySide6.QtCore import Slot
4 from PySide6.QtWidgets import (QApplication,QWidget,
5 QVBoxLayout, QPushButton)
6 from notificationpanel import NotificationPanel
7
8
9 MESSAGES = [
10 'Spending limit reached: Food & Drink',
11 'Transfer of €250.00 completed',
12 'Unusual activity detected on account',
13 'Budget reset on 1 July']
14
15
16 class Window(QWidget):
17
18 def __init__(self, parent=None):
19
20 super().__init__(parent)
21 self.resize(500, 300)
22
23 self.show_button = QPushButton('Click for a notification!')
24 self.show_button.clicked.connect(self.show_notification)
25 layout = QVBoxLayout()
26 layout.addWidget(self.show_button)
27 layout.addStretch()
28 self.setLayout(layout)
29
30 @Slot()
31 def show_notification(self):
32 panel = NotificationPanel(self)
33 panel.show_panel(random.choice(MESSAGES))
34
35
36 if __name__ == '__main__':
37
38 app = QApplication(sys.argv)
39 main_window = Window()
40 main_window.show()
41 sys.exit(app.exec())
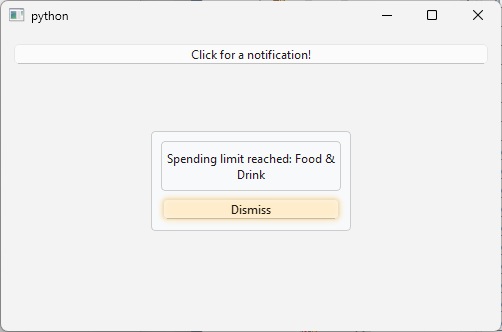
When you run the application and click the button, the panel slides to the center of the window, the message label fades in, and finally the Dismiss button gets an orange glow.
36.5 Parallel Animation Groups
Where sequential groups enforce order, QParallelAnimationGroup runs all its children simultaneously, making it the right tool when several properties should change together as one cohesive motion.
|
You replace the notification panel’s slide-only entrance with a combined effect: position and opacity animate in parallel, so the panel slides in while fading from transparent to opaque. Dismiss reverses the same group before deleting the panel. |
To use a parallel animation group in your application:
1 from PySide6.QtCore import (Slot, QAbstractAnimation,
2 QPropertyAnimation, QPoint, QParallelAnimationGroup,
3 QEasingCurve)
4 from PySide6.QtWidgets import (QFrame, QLabel, QPushButton,
5 QVBoxLayout, QGraphicsOpacityEffect)
6
7
8 class NotificationPanel(QFrame):
9
10 def __init__(self, parent=None):
11
12 super().__init__(parent)
13 self.resize(200, 100)
14
15 layout = QVBoxLayout()
16 self.setLayout(layout)
17
18 self.message_label = QLabel()
19 self.message_label.setWordWrap(True)
20 self.dismiss_button = QPushButton('Dismiss')
21 self.dismiss_button.clicked.connect(self.hide_panel)
22
23 layout.addWidget(self.message_label)
24 layout.addWidget(self.dismiss_button)
25
26 self.setStyleSheet('''
27 QFrame {
28 background-color: #f8f9fa;
29 border: 1px solid #ccc;
30 border-radius: 4px;
31 }
32 QLabel {
33 qproperty-alignment: AlignCenter;
34 }
35 ''')
36
37 # 1. Create the individual animations.
38
39 self.opacity_effect = QGraphicsOpacityEffect(self)
40 self.setGraphicsEffect(self.opacity_effect)
41
42 self.pos_animation = QPropertyAnimation(self, b'pos', self)
43 self.pos_animation.setDuration(1000)
44
45 self.opacity_animation = QPropertyAnimation(
46 self.opacity_effect, b'opacity', self)
47 self.opacity_animation.setDuration(1000)
48 self.opacity_animation.setStartValue(0.0)
49 self.opacity_animation.setEndValue(1.0)
50
51 # 2. Create the group and add both animations.
52
53 self.anim_group = QParallelAnimationGroup(self)
54 self.anim_group.addAnimation(self.pos_animation)
55 self.anim_group.addAnimation(self.opacity_animation)
56
57 self.opacity_effect.setOpacity(0.0)
58
59 def target_x(self):
60 return (self.parent().width() - self.width()) // 2
61
62 def target_y(self):
63 return (self.parent().height() - self.height()) // 2
64
65 # 3. Start the animation group.
66
67 @Slot(str)
68 def show_panel(self, message=''):
69
70 self.message_label.setText(message)
71
72 starting_point = QPoint(-self.width(), self.target_y())
73 end_point = QPoint(self.target_x(), self.target_y())
74
75 self.pos_animation.setStartValue(starting_point)
76 self.pos_animation.setEndValue(end_point)
77 self.pos_animation.setEasingCurve(QEasingCurve.Type.OutBounce)
78 self.anim_group.setDirection(QAbstractAnimation.Direction.Forward)
79
80 self.show()
81 self.anim_group.start()
82
83 @Slot()
84 def hide_panel(self):
85 self.opacity_animation.setDuration(300)
86 self.pos_animation.setDuration(300)
87 self.pos_animation.setEasingCurve(QEasingCurve.Type.Linear)
88 self.anim_group.setDirection(QAbstractAnimation.Direction.Backward)
89 self.anim_group.start()
90 self.anim_group.finished.connect(self.deleteLater)
Create the individual animations. As in the previous section, create a position animation and an opacity animation. This time both are set to 1000 milliseconds (This doesn’t always have to be the case, and the group finishes only when the longest child finishes). Set
OutBounceas the easing curve for the position animation inshow_panel().Create the group and add both animations. Create a
QParallelAnimationGroupand add the position and opacity animations to it. UnlikeQSequentialAnimationGroup, you can’t use pauses here: both animations start at the same moment.Start the animation group.
Rather than discarding the panel immediatelly as in the sequential animation group example, hide_panel() calls anim_group.setDirection(Backward) and restarts the group, which plays both animations in reverse - the panel slides back off-screen while fading out. deleteLater() is connected to finished so the panel is cleaned up only after the reverse animation completes.
When a QParallelAnimationGroup contains animations of different durations and is reversed, shorter animations do not start immediately - they are delayed by the difference between their duration and the group’s total duration. A 300ms animation inside a 1000ms group will sit idle for 700ms before playing in reverse.
1 import sys
2 import random
3 from PySide6.QtCore import Slot
4 from PySide6.QtWidgets import (QApplication,QWidget,
5 QVBoxLayout, QPushButton)
6 from notificationpanel import NotificationPanel
7
8
9 MESSAGES = [
10 'Spending limit reached: Food & Drink',
11 'Transfer of €250.00 completed',
12 'Unusual activity detected on account',
13 'Budget reset on 1 July']
14
15
16 class Window(QWidget):
17
18 def __init__(self, parent=None):
19
20 super().__init__(parent)
21 self.resize(500, 300)
22
23 self.show_button = QPushButton('Click for a notification!')
24 self.show_button.clicked.connect(self.show_notification)
25 layout = QVBoxLayout()
26 layout.addWidget(self.show_button)
27 layout.addStretch()
28 self.setLayout(layout)
29
30 @Slot()
31 def show_notification(self):
32 panel = NotificationPanel(self)
33 panel.show_panel(random.choice(MESSAGES))
34
35
36 if __name__ == '__main__':
37
38 app = QApplication(sys.argv)
39 main_window = Window()
40 main_window.show()
41 sys.exit(app.exec())
When you run the application the panel bounces in while fading up. Clicking Dismis fades and slides it back out before it is destroyed.
36.6 Pause Animations
QPauseAnimation is a duration-only animation - it doesn’t have any visual effects. Its purpose is to introduce pauses inside a QSequentialAnimationGroup without having to use a QTimer.
|
You complete the notification panel by giving it self-dismissing behaviour: on trigger, the position animation plays, waits via a |
To use a pause animation in your application:
1 from PySide6.QtCore import (Slot, QPropertyAnimation, QPoint,
2 QAbstractAnimation, QSequentialAnimationGroup,
3 QPauseAnimation)
4 from PySide6.QtWidgets import (QFrame, QLabel, QPushButton,
5 QVBoxLayout, QGraphicsOpacityEffect)
6
7
8 class NotificationPanel(QFrame):
9
10 def __init__(self, hold_ms=2000, parent=None):
11
12 super().__init__(parent)
13 self.resize(200, 100)
14
15 layout = QVBoxLayout()
16 self.setLayout(layout)
17
18 self.message_label = QLabel()
19 self.message_label.setWordWrap(True)
20 self.dismiss_button = QPushButton('Dismiss')
21 self.dismiss_button.clicked.connect(self.dismiss)
22
23 layout.addWidget(self.message_label)
24 layout.addWidget(self.dismiss_button)
25
26 self.setStyleSheet('''
27 QFrame {
28 background-color: #f8f9fa;
29 border: 1px solid #ccc;
30 border-radius: 4px;
31 }
32 QLabel {
33 qproperty-alignment: AlignCenter;
34 }
35 ''')
36
37 self.pos_animation = QPropertyAnimation(self, b'pos', self)
38 self.pos_animation.setDuration(400)
39
40 # 1. Create the animations.
41
42 opacity_effect = QGraphicsOpacityEffect(self)
43 opacity_effect.setOpacity(1.0)
44 self.setGraphicsEffect(opacity_effect)
45
46 self.opacity_animation = QPropertyAnimation(
47 opacity_effect, b'opacity', self)
48 self.opacity_animation.setDuration(400)
49 self.opacity_animation.setStartValue(1.0)
50 self.opacity_animation.setEndValue(0.0)
51
52 # 2. Create the animation group and add the pause.
53
54 self.animaton_group = QSequentialAnimationGroup(self)
55 self.animaton_group.addAnimation(self.pos_animation)
56 self.animaton_group.addPause(hold_ms)
57 self.animaton_group.addAnimation(self.opacity_animation)
58
59 def target_x(self):
60 return (self.parent().width() - self.width()) // 2
61
62 def target_y(self):
63 return (self.parent().height() - self.height()) // 2
64
65 @Slot()
66 def dismiss(self):
67 if self.opacity_animation.state() != QAbstractAnimation.State.Running:
68 self.animaton_group.stop()
69 self.opacity_animation.start()
70 self.opacity_animation.finished.connect(self.deleteLater)
71
72 @Slot(str)
73 def show_panel(self, message=''):
74
75 self.message_label.setText(message)
76
77 starting_point = QPoint(-self.width(), self.target_y())
78 end_point = QPoint(self.target_x(), self.target_y())
79
80 self.pos_animation.setStartValue(starting_point)
81 self.pos_animation.setEndValue(end_point)
82
83 self.show()
84 self.animaton_group.start()
Create the animations. Create the position and the opacity animations.
Create the animation group and add the animations including the pause. Add the animation in order: slide-in, pause, and fade-out. The group drives the entire lifecycle of the panel with a single
start()call inshow_panel(). It is not necessary to construct aQPauseAnimationyourself.QSequentialAnimationGroupprovides the convenience functionsaddPause()andinsertPause()for that.
It is possible that the user dismisses the panel while the animation group is still playing. dismiss() checks whether the opacity animation is already running (which indicates that the auto-dismiss fade is already in progress) and does nothing in that case. Otherwise it stops the group, starts the opacity animation directly, and connect its finished signal to deleteLater().
1 import sys
2 import random
3 from PySide6.QtCore import Slot
4 from PySide6.QtWidgets import (QApplication, QWidget,
5 QVBoxLayout, QPushButton)
6 from notificationpanel import NotificationPanel
7
8
9 MESSAGES = [
10 'Spending limit reached: Food & Drink',
11 'Transfer of €250.00 completed',
12 'Unusual activity detected on account',
13 'Budget reset on 1 July']
14
15
16 class Window(QWidget):
17
18 def __init__(self, parent=None):
19
20 super().__init__(parent)
21 self.resize(500, 300)
22
23 self.show_button = QPushButton('Show notification')
24 self.show_button.clicked.connect(self.show_notification)
25
26 layout = QVBoxLayout()
27 layout.addWidget(self.show_button)
28 layout.addStretch()
29 self.setLayout(layout)
30
31 @Slot()
32 def show_notification(self):
33 panel = NotificationPanel(2500, self)
34 panel.show_panel(random.choice(MESSAGES))
35
36
37 if __name__ == '__main__':
38
39 app = QApplication(sys.argv)
40 main_window = Window()
41 main_window.show()
42 sys.exit(app.exec())
When you run the applicatio the panel slides in, holds for the specified duration, then fades out on its own. Clicking Dismiss at any point before the fade begins triggers the same fade-out immediatelly.