1. Getting Started
Qt is a cross-platform development framework used primarily for creating graphical user interfaces. It is written in C++, which is also its main development language; however, bindings exist for several other programming languages, including Python.
Qt provides two separate GUI toolkits: the traditional, desktop-oriented Qt Widgets, and the modern, declarative Qt Quick for building customized and fluid user interfaces. Qt applications run on Windows, Linux, macOS, iOS, Android, or embedded systems. It also supports deployment to the web via WebAssembly.
This book covers PySide6, Qt’s official Python binding. It focuses on beginner-level Qt Widgets while tackling a few intermediate, including the Qt’s object model, multithreading, and model-view programming. Each book chapter presents a series of self-contained PySide6 examples that showcase a single key concept or idea using step-by-step code walkthroughs.
1.1 Installation
You can easily start writing small PySide6 applications from a terminal by:
- Creating a Python virtual environment:
1 python -m venv pyside6-env
- Activating the
pyside6-envvirtual environment:
1 pyside6-env\Scripts\activate
on Windows, or
1 source pyside6-env/bin/activate
on Linux or MacOS.
- Installing the PySide6 Python package
1 pip install PySide6
With the pyside6-env virtual environment active, you can now run a PySide6 script from the terminal:
1 (pyside6-env) $ python helloworld.py
To make working through the rest of this book more comfortable, consider using an IDE or text editor with Python support. Several of them can create and manage a virtual environment for you directly from their user interface.
1.2 A Reusable Starting Point
The first example provides a reusable starting point for a PySide6 application, displaying nothing but an empty window.
 |
Your first task is to display an empty Qt window on the screen. |
1 import sys
2 from PySide6.QtWidgets import QApplication, QWidget
3
4 # 1 - Create a class inherited from QWidget
5
6 class Window(QWidget):
7
8 def __init__(self):
9
10 # If you don't init the superclass
11 # you get a run-time error
12 super().__init__()
13 self.resize(300, 120)
14
15
16 if __name__ == '__main__':
17
18 # 2 - Create an instance of the QApplication class
19
20 app = QApplication(sys.argv)
21
22 # 3 - Create an instance of the Window class
23 # and show() it
24
25 main_window = Window()
26 main_window.show()
27
28 # 4 - Start receiving events
29
30 sys.exit(app.exec())
To show a Qt window:
Create a class that subclasses
QWidget.QWidgetis the base class of all Qt widget classes, and is often used as a top-level window. Inside__init__(), you must call__init__()on the superclass or you’ll get a runtime error1.Create a
QApplicationinstance. This should be the first your application does.QApplicationis a singleton, and trying to create it more than once raises a runtime error.Create an object of your
Windowclass and callshow()on it to display it.Use
QApplication.exec()to start the application event loop. With this, your application is ready to interact with the user. When you exit the application, for instance by pressing the window’s close button, theapp.exec()method returns, and your application exits.
Qt is event-driven - the application flow is determined by events like mouse clicks, key presses, or windowing system events. All these events are posted to a queue. While the queue is empty, the event loop simply waits. When an event arrives, it gets enqueued, then dequeued, and dispatched to the QObject responsible for handling it.

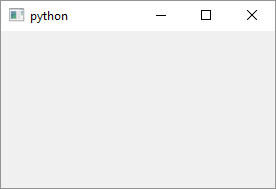
When you run the script you should see an empty Qt Widgets window like this:
1.3 Adding Widgets to the Window
There are a few ways of add a widget to a window. The most common, and the one we use almost exclusively in the book, is by using a “layout”.
|
Your task is to add a widget to the window using the previous example as a template. |
1 import sys
2 from PySide6.QtWidgets import (QApplication,
3 QWidget, QLabel, QVBoxLayout)
4
5
6 class Window(QWidget):
7
8 def __init__(self):
9
10 super().__init__()
11 self.resize(300, 120)
12
13 # 1. Create a layout and
14 # set it as the window's layout.
15
16 layout = QVBoxLayout()
17 self.setLayout(layout)
18
19 # 2. Create a QLabel instance
20 # and add it to the window layout.
21
22 label = QLabel('Hello, World!')
23 layout.addWidget(label)
24
25
26 if __name__ == '__main__':
27
28 app = QApplication(sys.argv)
29 main_window = Window()
30 main_window.show()
31 sys.exit(app.exec())
To add a label to the window:
Create a
QVBoxLayoutinstance and set it as the window layout withsetLayout().QVBoxLayoutarranges its child widgets vertically. We’ll also useQHBoxLayout,QFormLayout, andQGridLayoutlater in the book. Instead of using layouts, widgets can be positioned manually by coordinate, but layouts are the standard approach in Qt applications.Create a
QLabelinstance, set its text, and add it to the layout withaddWidget().QLabelis a widget that displays read-only text or images
Everythine outside __init__() is the same as in the previous example.
When you run the application you should see a window like this:

1.4 Reading the Qt Documentation
The PySide6 Documentation 2 is, for the most part, auto-generated from the original Qt documentation3, which means you may encounter code snippets that were “translated” from C++ to Python and won’t run without corrections. This doesn’t make it any less useful though - it includes Python-specific class information and method signatures, and Qt’s C++ and Python APIs diverge in a few significant details4. It also documents PySide6-specific command-line and GUI tools, along with the official PySide6 tutorials and examples.
The main Qt documentation is very good - each class is documented in detail (QObject, for instance 5), having details like:
- Parent and child classes
- Properties
- Functions
- Slots
- Signals
- Detailed description
Each function’s documenation includes its C++ signature, description, and often a short C++ code snipped demonstrating its use. You can usually rely on the C++ description for the full picture, then check the PySide6 docs for Python-specific details. It also contains extensive overviews of core Qt topics and modules.
With this in mind, you’ll often find yourself consulting both sets of documentation in parallel. Since the main documentation is C++ specific, it’s worth developing minimal C++ reading comprehension - just enough to follow method signatures and code snippets.
1.5 A Map of Qt Widgets
Qt Widgets fall into five main groups:

Layout managers. Non-visual tools for managing widget geometry (size and position).
Display widgets. They present information to the user (text, images, or visual indicators) without allowing direct editing.
QLabel, which we just used, belongs here.Input widgets. Widgets that allow user interaction and data entry, covering data types including binary (on/off), numeric, textual, list-based, tabular, and hierarchical (tree) formats.
Containers. Visual organizers for grouping and managing child widgets.
Complex widgets. Self-contained, specialized interaction components composing display, input, and validation components, like dialogs and date/time widgets.
The next several chapters follow this grouping to provide an overview of a number of commonly used Qt widgets: Chapter 3. covers layouts, Chapter 4. display widgets, chapters 5. through 10. input widgets, and chapters 11. and 12. cover containers with QMainWindow. Before gettin into specific widgets, however, we first need to introduce the Qt’s signals and slots mechanism.