27. Multithreading - moveToThread
Threads of execution let you execute your code concurrently while sharing the program memory and other resources. There are primary two use cases for threads:
- Accelerate processing by utilizing multiple processor cores,
- Maintain GUI responsiveness by offoading long-running tasks to background threads.
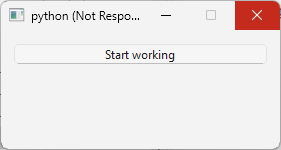
In the following examples, we focus on the second use case. First, however,let’s demonstrate the issue by showing a non-responsive Qt GUI.
27.1 Blocking the Qt GUI: How Not to Do It
 |
You need to search the filesystem for a file and report progress. |
1 import os
2 import sys
3 from PySide6.QtCore import QObject, Signal, Slot
4 from PySide6.QtWidgets import (QApplication,
5 QWidget, QPushButton, QLabel, QVBoxLayout)
6
7
8 class Task(QObject):
9
10 progress = Signal(str)
11
12 def __init__(self, parent=None):
13 super().__init__(parent)
14
15 # 1. Create a long running task
16 # We search for a file using os.walk()
17 # using a tight (blocking) for loop.
18 # The loop blocks the Qt event loop
19 # so no signals are send or events
20 # processed until the loop exits.
21 # This effectively freezes the Gui.
22
23 @Slot()
24 def do_work(self):
25 path = os.path.abspath('.').split(os.path.sep)[0] + os.path.sep
26 name = 'bogus'
27 for root, _, files in os.walk(path):
28 self.progress.emit(root)
29 if name in files:
30 print(os.path.join(root, name))
31
32
33 class Window(QWidget):
34
35 def __init__(self):
36
37 super().__init__()
38
39 layout = QVBoxLayout()
40 self.setLayout(layout)
41
42 # 2. Create a push button
43
44 self.button = QPushButton('Start working')
45 self.label = QLabel()
46
47 self.button.clicked.connect(self.do_work)
48
49 layout.addWidget(self.button)
50 layout.addWidget(self.label)
51
52 # 3. Execute the long running task.
53
54 def do_work(self):
55 self.task = Task()
56 self.task.progress.connect(self.label.setText)
57 self.task.do_work()
58
59
60 if __name__ == '__main__':
61
62 app = QApplication(sys.argv)
63 main_window = Window()
64 main_window.show()
65 sys.exit(app.exec())
Create the task. In the example, we use
os.walk()within aforloop to search the file system for a non-existent file. We attempt to report progress after each iteration using a custom Qt signal namedprogress. This fails because the loop blocks the Qt event loop, preventing the signals from being emitted or events from being processed until the loop completes. Since the loop runs in the main application thread (also known as the GUI thread), the entire application becomes unresponsive - it freezes and you cannot even close it.Create a push button.
Create a slot that starts the long-running task when the push button is clicked.
27.2 A Minimal Working Example
The previous example illustrates how a PySide6 GUI can become unresponsive. Now let’s explore using Qt threads to run long tasks in the background while keeping the GUI responsive.
|
You need to create a minimal working Qt multithreading application. |
1 from PySide6.QtCore import QObject, Signal, Slot
2
3 # 1. Create the worker_obj class
4
5 class Worker(QObject):
6
7 finished = Signal()
8 error = Signal(str)
9
10 def __init__(self, parent=None):
11 super().__init__(parent)
12
13 # This method to be executed
14
15 @Slot()
16 def process(self):
17 print('Hello World')
18 self.finished.emit()
- Create a
QObjectsubclass containing the slot/method to execute in a background thread (i.e., a thread other than the GUI thread). In the example, the slot is namedprocess(); it prints a message and emits a custom signal namedfinished()before returning. TheWorkerclass declares anerror()signal, which could be emitted under error conditions duringprocess()execution.
1 # https://mayaposch.wordpress.com/2011/11/01/how-to-really-truly-use-qthreads-the-full-explanation/
2
3 import sys
4 from PySide6.QtCore import QThread, Slot, Qt
5 from PySide6.QtWidgets import (QApplication,
6 QPushButton, QLabel, QWidget, QVBoxLayout)
7 from worker import Worker
8
9
10 class Window(QWidget):
11
12 def __init__(self):
13
14 super().__init__()
15
16 layout = QVBoxLayout()
17 self.setLayout(layout)
18
19 button = QPushButton('Start background thread')
20 button.clicked.connect(self.on_button_clicked)
21
22 self.label = QLabel()
23 self.label.setAlignment(Qt.AlignmentFlag.AlignCenter)
24
25 layout.addWidget(button)
26 layout.addWidget(self.label)
27
28 @Slot()
29 def on_button_clicked(self):
30
31 # 2. Create the thread object
32
33 self.background_thread = QThread()
34
35 # 3. Create the worker_obj and move it to the thread
36
37 self.worker_obj = Worker()
38 self.worker_obj.moveToThread(self.background_thread)
39
40 self.worker_obj.finished.connect(self.on_finished)
41
42 # 4. Connect the signals and the slots
43
44 self.worker_obj.error.connect(self.on_error)
45 self.background_thread.started.connect(self.worker_obj.process)
46 self.worker_obj.finished.connect(self.background_thread.quit)
47 self.worker_obj.finished.connect(self.worker_obj.deleteLater)
48 self.background_thread.finished.connect(self.background_thread.deleteLater)
49
50 # 5. Start the thread
51
52 self.background_thread.start()
53
54 @Slot()
55 def on_finished(self):
56 self.label.setText('Worker finished')
57
58 @Slot()
59 def on_error(self, message):
60 print(message)
61
62
63 if __name__ == '__main__':
64
65 app = QApplication(sys.argv)
66
67 main_window = Window()
68 main_window.show()
69
70 sys.exit(app.exec())
Then, in the main window class:
Create a
QThreadobject namedbackground_thread(avoid naming itthread, as that name is already used). Useselfto make it the member of the main window, ensuring it remains in scope while running.Create a
Workerobject and move it tobackground_threadusingQObject.moveToThread(). Now,Worker.process()will execute inbackground_thread.-
Connect the appropriate signals and slots:
- Connect
background_thread.started()toworker.process(). This executesWorker.process()when the background thread starts. - Connect
Worker.finished()tobackground_thread.quit(). This quits the background thread whenWorker.process()returns. - Connect
Worker.finished()toWorker.deleteLater()method. This deletes the worker object some time after it emitsfinished(). - Connect
background_thread.finished()tobackground_thread.deleteLater(). This deletes the background thread some time after it finishes.
Start
background_threadusingQThread.start().
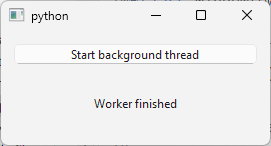
With these steps, process() runs upon thread start, the thread quits when the method returns, and both the worker and thread object are destroyed - all while keeping the GUI responsive.
27.3 Walking the Filesystem
The moveToThread() template provides a basic structure, but the worker does nothing but print a message. For a more practical example, let’s have Worker.process() traverse the filesystem using os.walk() from the root. This operation can be time-consuming and would block the GUI if run on the main thread.
|
You need to use Qt multithreading to search the filesystem for a file and report progress. |
1 import os
2 from PySide6.QtCore import QObject, QThread, Signal, Slot
3
4 # 1. Create the worker_obj class
5
6 class Worker(QObject):
7
8 finished = Signal()
9 progress = Signal(str)
10 error = Signal(str)
11
12 def __init__(self, parent=None):
13 super().__init__(parent)
14
15 # This is the method we want to execute.
16 # We are in a tight loop.
17
18 @Slot()
19 def process(self):
20 path = os.path.abspath('.').split(os.path.sep)[0] + os.path.sep
21 for root, _, _ in os.walk(path):
22 if QThread.currentThread().isInterruptionRequested():
23 return
24 self.progress.emit(os.path.basename(root))
25 self.finished.emit()
- Create the worker class. The method,
process()uses Python’sos.walk()to traverse the filesystem. For each enumerated filesystem object, we emit a customprogresssignal (added toWorkeralongsidefinishedanderror). If the background thread receives an interruption request, we return fromprocess(), triggering the signal-slot chain to stop and delete both the worker and the background thread. Note how inWorker.process(), we access the current (background) thread via the staticQThread.currentThread()method.
1 import sys
2 from PySide6.QtCore import QThread, Slot, Qt
3 from PySide6.QtWidgets import (QApplication, QPushButton,
4 QLabel, QWidget, QVBoxLayout)
5 from worker import Worker
6
7 class Window(QWidget):
8
9 def __init__(self):
10
11 super().__init__()
12
13 layout = QVBoxLayout()
14 self.setLayout(layout)
15
16 self.start_button = QPushButton('Start background thread')
17 self.start_button.clicked.connect(self.on_start_button_clicked)
18
19 self.cancel_button = QPushButton('Cancel')
20 self.cancel_button.clicked.connect(self.on_cancel_button_clicked)
21 self.cancel_button.setDisabled(True)
22
23 self.label = QLabel()
24 self.label.setAlignment(Qt.AlignmentFlag.AlignCenter)
25
26 layout.addWidget(self.start_button)
27 layout.addWidget(self.cancel_button)
28 layout.addWidget(self.label)
29
30 @Slot()
31 def on_start_button_clicked(self):
32
33 self.start_button.setDisabled(True)
34 self.cancel_button.setEnabled(True)
35
36 # 2. Create the thread
37
38 self.background_thread = QThread()
39
40 # 3. Create the worker_obj and move it to the thread
41
42 self.worker_obj = Worker()
43 self.worker_obj.moveToThread(self.background_thread)
44
45 self.worker_obj.finished.connect(self.on_finished)
46
47 # 4. Connect the appropriate signals to ensure
48 # both the worker_obj and the thread are destroyed.
49
50 self.worker_obj.error.connect(self.on_error)
51 self.background_thread.started.connect(self.worker_obj.process)
52 self.worker_obj.finished.connect(self.background_thread.quit)
53 self.worker_obj.finished.connect(self.worker_obj.deleteLater)
54 self.background_thread.finished.connect(self.background_thread.deleteLater)
55
56 self.worker_obj.progress.connect(self.label.setText)
57
58 # 5. Start the thread.
59
60 self.background_thread.start()
61
62 # Stop the work by requesting interruption
63
64 @Slot()
65 def on_cancel_button_clicked(self):
66
67 self.start_button.setEnabled(True)
68 self.cancel_button.setDisabled(True)
69
70 if hasattr(self, 'background_thread'):
71 self.background_thread.requestInterruption()
72 self.background_thread.quit()
73 self.background_thread.wait()
74
75 @Slot()
76 def on_finished(self):
77 self.label.setText('Worker finished')
78
79 @Slot()
80 def on_error(self, message):
81 print(message)
82
83 # Make sure the thread is destroyed
84 # when the main window is closed.
85
86 def closeEvent(self, event):
87 try:
88 self.background_thread.requestInterruption()
89 self.background_thread.quit()
90 self.background_thread.wait()
91 except Exception as e:
92 print(e)
93
94
95 if __name__ == '__main__':
96
97 app = QApplication(sys.argv)
98
99 main_window = Window()
100 main_window.show()
101
102 sys.exit(app.exec())
In the main window class, create the thread object.
Create a
Workerobject and move it to theQThreadusingQObject.moveToThread().Use signals and slots to ensure proper creation and deletion: Starting the background thread triggers
Worker.process();QObject.finished()triggers bothQThread.quit()andWorker.deleteLater();QThread.finished()triggersQThread.deleteLater().Start the background thread. This occurs in
Window.on_start_button_clicked()creating newQThreadandWorkerobjects each time the start button is clicked.
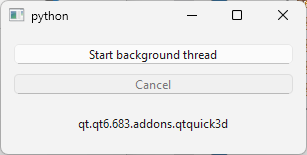
We override QWidget.closeEvent() to interrupt the background thread, ensuring cleanup if the main window closes while the thread runs. The sequence, QThread.requestInterruption() + QThread.quit() + QThread.wait(), is also used in Window.on_cancel_button_clicked() for clean interruption.
27.4 Reusing the QThread object
In the prior examples a new background thread is created each time the task runs. However, the official QThread documentation example creates both thread and worker in the main class constructor. Let’s try to replicate that.
|
Your task is to recreate the official Qt multithreading example in PySide6. |
1 from PySide6.QtCore import QObject, Signal, Slot
2
3 # 1. Create the worker_obj class
4
5 class Worker(QObject):
6
7 result_ready = Signal(str)
8
9 def __init__(self, parent=None):
10 super().__init__(parent)
11
12 @Slot()
13 def do_work(self, parameter):
14 print(parameter)
15 self.result_ready.emit(parameter)
- Create the worker class. The background method is
do_work(), matching theQThreaddocumentation.
1 # https://doc.qt.io/qt-6/qthread.html
2
3 import sys
4 from PySide6.QtCore import QThread, Slot, Signal, Qt
5 from PySide6.QtWidgets import (QApplication,
6 QPushButton, QLabel, QWidget, QVBoxLayout)
7 from worker import Worker
8
9
10 class Controller(QWidget):
11
12 operate = Signal(str)
13
14 def __init__(self):
15
16 super().__init__()
17
18 layout = QVBoxLayout()
19 self.setLayout(layout)
20
21 button = QPushButton('Start background thread')
22 button.clicked.connect(self.on_button_clicked)
23
24 self.label = QLabel()
25 self.label.setAlignment(Qt.AlignmentFlag.AlignCenter)
26
27 layout.addWidget(button)
28 layout.addWidget(self.label)
29
30 # 2. Create the thread object
31
32 self.worker_thread = QThread()
33
34 # 3. Create the worker_obj and move it to the thread
35
36 self.worker_obj = Worker()
37 self.worker_obj.moveToThread(self.worker_thread)
38
39 # 4. Connect the signals and the slots
40
41 self.worker_thread.finished.connect(
42 self.worker_obj.deleteLater)
43 self.operate.connect(self.worker_obj.do_work)
44 self.worker_obj.result_ready.connect(self.handle_results)
45
46 # 5. Start the thread
47
48 self.worker_thread.start()
49
50 # 6. On the button click emit the operate signal
51
52 @Slot()
53 def on_button_clicked(self):
54
55 self.operate.emit('Hello World')
56
57 @Slot()
58 def handle_results(self):
59 self.label.setText('Worker finished')
60
61 # 7. Quit the thread when the main window is closed
62
63 def closeEvent(self, event):
64 try:
65 self.worker_thread.quit()
66 self.worker_thread.wait()
67 except Exception as e:
68 print(e)
69 event.accept()
70
71
72 if __name__ == '__main__':
73
74 app = QApplication(sys.argv)
75
76 main_window = Controller()
77 main_window.show()
78
79 sys.exit(app.exec())
Then, in the main window class:
Create the worker thread.
Create the
Workerobject and move it to the the worker thread usingQObject.moveToThread().Connect signals and slots:
QThread.finished()toQObject.deleteLater()for worker deletion on thread finish;Controller.operate()toWorker.do_work()to start work via custom signal;Worker.result_ready()toController.handle_result()for handling results.Start the worker thread. Steps 2-5 occur in
Controller.__init__(), so the thread and the worker persist until the main window closes or explicit deletion.On button click, emit the
operate()signal to executeWorker.do_work().Override
QWidget.closeEvent()to quit the thread usingQThread.quit()andQThread.wait().
27.5 Walking the Filesystem reusing the QThread Object
|
You need to use Qt multithreading to walk the filesistem but you reuse the same worker thread. |
1 import os
2 from PySide6.QtCore import (QObject, QMutex,
3 QMutexLocker, Signal, Slot)
4
5 # 1. Create the worker_obj class
6
7 class Worker(QObject):
8
9 result_ready = Signal()
10 progress = Signal(str)
11
12 def __init__(self, parent=None):
13 super().__init__(parent)
14 self.interruption_requested = False
15 self.mutex = QMutex()
16
17 @Slot()
18 def do_work(self):
19
20 self.interruption_requested = False
21
22 path = os.path.abspath('.').split(os.path.sep)[0] + os.path.sep
23 for root, _, _ in os.walk(path):
24 with QMutexLocker(self.mutex):
25 if self.interruption_requested:
26 self.progress.emit('Canceled')
27 self.result_ready.emit()
28 return
29 self.progress.emit(os.path.basename(root))
30 self.result_ready.emit()
31
32 @Slot()
33 def stop(self):
34 with QMutexLocker(self.mutex):
35 self.interruption_requested = True
36
37 @Slot()
38 def reset(self):
39 with QMutexLocker(self.mutex):
40 self.interruption_requested = False
- Create the worker class. There are several differences from the first walk filesystem example: We use a boolean flag
Worker.interruption_requestedinstead ofQThread.isInterruptionRequested(); addWorker.stop()andWorker.reset()to toggle the flag; guard each use withQMutexLOckerandQMutexfor thread safety.
1 # https://doc.qt.io/qt-6/qthread.html
2
3 import sys
4
5 from PySide6.QtCore import QThread, Slot, Signal, Qt
6 from PySide6.QtWidgets import (QApplication,
7 QPushButton, QLabel, QWidget, QVBoxLayout)
8 from worker import Worker
9
10
11 class Controller(QWidget):
12
13 operate = Signal()
14
15 def __init__(self):
16
17 super().__init__()
18
19 layout = QVBoxLayout()
20 self.setLayout(layout)
21
22 self.start_button = QPushButton('Start background thread')
23 self.start_button.clicked.connect(self.on_start_button_clicked)
24
25 self.cancel_button = QPushButton('Cancel')
26 self.cancel_button.clicked.connect(self.on_cancel_button_clicked)
27 self.cancel_button.setDisabled(True)
28
29 self.label = QLabel()
30 self.label.setAlignment(Qt.AlignmentFlag.AlignCenter)
31
32 layout.addWidget(self.start_button)
33 layout.addWidget(self.cancel_button)
34 layout.addWidget(self.label)
35
36 # 2. Create the thread
37
38 self.worker_thread = QThread()
39
40 # 3. Create the worker_obj and move it to the thread
41
42 self.worker_obj = Worker()
43 self.worker_obj.moveToThread(self.worker_thread)
44
45 # 4. Connect the signals with the slots
46
47 self.worker_thread.finished.connect(self.worker_obj.deleteLater)
48 self.operate.connect(self.worker_obj.do_work)
49 self.worker_obj.result_ready.connect(self.handle_results)
50
51 self.worker_obj.progress.connect(self.label.setText)
52
53 # 5. Start the thread
54
55 self.worker_thread.start()
56
57 # 6. On the start button click emit the operate signal
58
59 @Slot()
60 def on_start_button_clicked(self):
61
62 self.start_button.setDisabled(True)
63 self.cancel_button.setEnabled(True)
64
65 self.worker_obj.reset()
66 self.operate.emit()
67
68 # 7. On the cancel button click stop the worker_obj
69
70 @Slot()
71 def on_cancel_button_clicked(self):
72
73 self.start_button.setEnabled(True)
74 self.cancel_button.setDisabled(True)
75 self.worker_obj.stop()
76
77 @Slot()
78 def handle_results(self):
79 self.label.setText('Worker finished')
80
81 # 8. Quit the thread when the main window is closed
82
83 def closeEvent(self, event):
84 try:
85 self.worker_obj.stop()
86 self.worker_thread.quit()
87 self.worker_thread.wait()
88 except Exception as e:
89 print(e)
90 event.accept()
91
92
93 if __name__ == '__main__':
94
95 app = QApplication(sys.argv)
96
97 main_window = Controller()
98 main_window.show()
99
100 sys.exit(app.exec())
In
Controller.__init__()create the worker thread object.Create the worker object and move it to the worker thread using
QObject.moveToThread().Connect signals and slots. Main class
operate()signal triggersWorker.do_work().Start the worker thread.
On start button click, reset the worker with
Worker.reset()and emitoperate().On cancel button click, stop the worker with
Worker.stop().Quit the thread on main window close.
But why did we use a mutex-guarded boolean flag? QThread.requestInterruption() is one-time: once requested, QThread.isInterruptionRequested() stays True and it cannot be reset. A signal to toggle a flag would require QApplication.processEvents() in the blocking loop. DIrect flag setting is unsafe across threads, so QMutex and QMutexLocker are used.
27.6 Signals and Slots Across Threads
1 from PySide6.QtCore import QObject, QThread, Signal, Slot
2
3 class Worker(QObject):
4
5 auto_signal = Signal()
6 direct_signal = Signal()
7 queued_signal = Signal()
8 blocking_signal = Signal()
9
10 @Slot()
11 def auto_slot(self):
12 print('Auto connection')
13 print('In', QThread.currentThread().objectName(),
14 ', Loop level', QThread.currentThread().loopLevel())
15
16 @Slot()
17 def direct_slot(self):
18 print('Direct connection')
19 print('In', QThread.currentThread().objectName(),
20 ', Loop level', QThread.currentThread().loopLevel())
21 @Slot()
22 def queued_slot(self):
23 print('Queued connection')
24 print('In', QThread.currentThread().objectName(),
25 ', Loop level', QThread.currentThread().loopLevel())
26
27 @Slot()
28 def blocking_slot(self):
29 print('Blocking Queued connection')
30 print('In', QThread.currentThread().objectName(),
31 ', Loop level', QThread.currentThread().loopLevel())
32 QThread.sleep(10)
1 # https://doc.qt.io/qt-6/qthread.html
2
3 import sys
4
5 from PySide6.QtCore import QThread, Slot, Qt
6 from PySide6.QtWidgets import (QApplication, QPushButton,
7 QLabel, QWidget, QVBoxLayout)
8 from worker import Worker
9
10
11 class Window(QWidget):
12
13 def __init__(self):
14
15 super().__init__()
16
17 QThread.currentThread().setObjectName('Main thread')
18
19 layout = QVBoxLayout()
20 self.setLayout(layout)
21
22 self.button_auto = QPushButton('Auto connection')
23 self.button_direct = QPushButton('Direct connection')
24 self.button_queued = QPushButton('Queued connection')
25 self.button_blocking = QPushButton('Blocking Queued connection')
26
27 self.label = QLabel()
28 self.label.setAlignment(Qt.AlignmentFlag.AlignCenter)
29
30 self.emitting_thread = QThread()
31 self.emitting_thread.setObjectName('Emitting Thread')
32
33 self.emitter = Worker()
34 self.emitter.moveToThread(self.emitting_thread)
35
36 self.receiving_thread = QThread()
37 self.receiving_thread.setObjectName('Receiving Thread')
38
39 self.receiver = Worker()
40 self.receiver.moveToThread(self.receiving_thread)
41
42 self.emitter.auto_signal.connect(self.receiver.auto_slot, Qt.ConnectionType.AutoConnection)
43 self.emitter.direct_signal.connect(self.receiver.direct_slot, Qt.ConnectionType.DirectConnection)
44 self.emitter.queued_signal.connect(self.receiver.queued_slot, Qt.ConnectionType.QueuedConnection)
45 self.emitter.blocking_signal.connect(self.receiver.blocking_slot, Qt.ConnectionType.BlockingQueuedConnection)
46
47 self.button_auto.clicked.connect(self.emitter.auto_signal)
48 self.button_direct.clicked.connect(self.emitter.direct_signal)
49 self.button_queued.clicked.connect(self.emitter.queued_signal)
50 self.button_blocking.clicked.connect(self.emitter.blocking_signal)
51
52 self.emitting_thread.start()
53 self.receiving_thread.start()
54
55 layout.addWidget(self.button_auto)
56 layout.addWidget(self.button_direct)
57 layout.addWidget(self.button_queued)
58 layout.addWidget(self.button_blocking)
59 layout.addWidget(self.label)
60
61 @Slot()
62 def on_result_ready(self, result):
63 self.label.setText(result)
64
65 def closeEvent(self, event):
66 try:
67 self.emitting_thread.quit()
68 self.emitting_thread.wait()
69 self.receiving_thread.quit()
70 self.receiving_thread.wait()
71 except Exception as e:
72 print(e)
73 event.accept()
74
75
76 if __name__ == '__main__':
77
78 app = QApplication(sys.argv)
79 main_window = Window()
80 main_window.show()
81
82 sys.exit(app.exec())
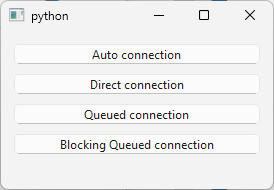
| Connection Type | Emitter Thread | Receiver Thread | Slot Invoked | Slot Executed In | Blocks | Unique |
|---|---|---|---|---|---|---|
| Auto | A | A | immediately when the signal is emitted | A | No | |
| Auto | A | B | when control returns to the event loop of the receiver’s thread | B | No | |
| Direct | A | B | immediately when the signal is emitted | A | No | |
| Queued | A | B | when control returns to the event loop of the receiver’s thread | B | No | |
| Blocking Queued | A | B | when control returns to the event loop of the receiver’s thread | B | No | |
| Unique | A | A | immediately when the signal is emitted | A | Yes | |
| Unique | A | B | when control returns to the event loop of the receiver’s thread | B | Yes |