24. Model-View Programming with QAbstractItemModel
Of the three abstract models we have seen so far, QAbstractItemModel is the most inconvenient to subclass - not because it is more difficult but because QAbstractListModel and QAbstractTableModel, being specialized for lists and tables, provide default implementations for some methods that you have to implement yourself for QAbstractItemModels. At the same time, this makes QAbstractItemModel the most flexible of the three, and suitable for representing more complex data structures such as trees.
In this chapter, we implement a series of models suitable for representing hierarchical data structures to be viewed in a tree view.
24.1 Basic Read-Only Single-Column Tree Model
In addition to data() and rowCount() which are required for a QAbstractListModel subclass and columnCount() which is additionally required for a QAbstractTableModel subclass, creating a read-only QAbstractItemModel subclass requires reimplementing two more methods:
index(row, column, parent), which returns aQModelIndexfor the item at the givenrowandcolumnunder the givenparentindex.parent(index), which returns theQModelIndexof the parent of the item with the givenindex.
These two methods are roughly inverse to each other: index() navigates down the tree (from parent to child), while parent() navigates up (from child to parent). In both cases there are a few edge cases you need to take into account.
 |
You are given a hierarchical JSON file (data.json) contains company employee records. Each record includes an employee id, first name, last name, profession and a list of their direct subordinates. Your task is to represent this data in a tree view by implementing a |
To create a basic read-only tree model:
1 import json
2
3
4 # 1. Create a tree node class.
5
6 class TreeItem:
7 def __init__(self, value, parent=None):
8 self.value = value
9 self.parent = parent
10 self.children = []
11 if parent:
12 parent.children.append(self)
13
14 @classmethod
15 def build_tree(cls, source):
16 root_item = TreeItem("", None) # Empty root
17 with open(source) as json_file:
18 data = json.load(json_file)
19 for json_object in data:
20 name = f"{json_object['firstname']} {json_object['lastname']}"
21 tree_item = TreeItem(name, root_item)
22 if 'subordinates' in json_object:
23 TreeItem.add_children(json_object, tree_item)
24 return root_item
25
26 @staticmethod
27 def add_children(json_object, parent):
28 for child_json_object in json_object['subordinates']:
29 name = f"{child_json_object['firstname']} {child_json_object['lastname']}"
30 child = TreeItem(name, parent)
31 if 'subordinates' in child_json_object:
32 TreeItem.add_children(child_json_object, child)
- Create a Python class to represent a node in the tree. Python does not provide a built-in tree data structure so we make our own. Each
TreeItemholds avalue, a reference to itsparent, and a list ofchildren. When a parent is provided, the item automatically appends itself to the parent’schildren. The class methodbuild_tree()reads the JSON file and builds the full tree.
1 from PySide6.QtCore import QAbstractItemModel, QModelIndex, Qt
2 from treeitem import TreeItem
3
4
5 # 2. Create the QAbstractItemModel subclass
6 # and implement rowCount(), columnCount(),
7 # data() and headerData().
8
9 class JsonModel(QAbstractItemModel):
10
11 def __init__(self, source, parent=None):
12
13 super().__init__(parent)
14 self.root_item = TreeItem.build_tree(source)
15
16 def rowCount(self, parent=QModelIndex()):
17
18 if parent.isValid():
19 return len(parent.internalPointer().children)
20 return len(self.root_item.children)
21
22 def columnCount(self, parent=QModelIndex()):
23 return 1
24
25 def data(self, index, role):
26
27 if role == Qt.ItemDataRole.DisplayRole:
28 return index.internalPointer().value
29 return None
30
31 def headerData(self, section, orientation, role):
32 if orientation == Qt.Orientation.Horizontal:
33 if role == Qt.ItemDataRole.DisplayRole:
34 return 'Employee Name'
35
36 # 3. Implement index()
37
38 def index(self, row, column, parent=QModelIndex()):
39
40 if not self.hasIndex(row, column, parent):
41 return QModelIndex()
42
43 if parent.isValid():
44 parent_item = parent.internalPointer()
45 else:
46 parent_item = self.root_item
47 return self.createIndex(
48 row, column, parent_item.children[row])
49
50 # 4. Implement parent()
51
52 def parent(self, index):
53
54 if not index.isValid():
55 return QModelIndex()
56
57 item = index.internalPointer()
58 parent_item = item.parent
59
60 if parent_item == self.root_item:
61 return QModelIndex()
62
63 row = parent_item.parent.children.index(parent_item)
64 return self.createIndex(row, 0, parent_item)
Subclass
QAbstractItemModeland implementrowCount(),columnCount(), anddata(). These methods are already covered in the two previous chapters with the difference thatrowCount()has to account for the tree structure: if the parent index is valid, the row count is the number of children of the item it points to and the number of the root item’s children otherwise.-
Implement
index(). We first callhasIndex()to check whether the requested position is out of bounds, returning an invalidQModelIndexif so. We then determine the parent item: ifparentis valid, we get it viainternalPointer(); otherwise the parent item is the root item. Finally, we callcreateIndex()with the row, column and a reference to the child item, and return the result.hasIndex()determines whether therow,columnandparentcombination would return a valid index, but it does not tell us if the parent itself is valid. A valid position can exist under either a valid parent item or the invisible root, so we still need to distinguish between the two. Implement
parent(). This method returns the parent of the item with the givenindex. Ifindexis invalid we return an invalidQModelIndeximmediately. Otherwise we retrieve the item viainternalPointer()and get its parent. If the parent is the root, we again return an invalidQModelIndex. Otherwise, we determine the parent’s row within its own parent’s children list and return aQModelIndexcreated withcreateIndex().
1 import sys
2 from PySide6.QtTest import QAbstractItemModelTester
3 from PySide6.QtWidgets import (QApplication, QWidget,
4 QTreeView, QVBoxLayout)
5 from jsonmodel import JsonModel
6
7
8 class Window(QWidget):
9
10 def __init__(self):
11 super().__init__()
12
13 layout = QVBoxLayout()
14 self.setLayout(layout)
15
16 model = JsonModel('data.json')
17 QAbstractItemModelTester(model,
18 QAbstractItemModelTester.FailureReportingMode.Warning)
19 view = QTreeView()
20 view.setModel(model)
21 layout.addWidget(view)
22
23
24 if __name__ == '__main__':
25
26 app = QApplication(sys.argv)
27 main_window = Window()
28 main_window.show()
29 sys.exit(app.exec())
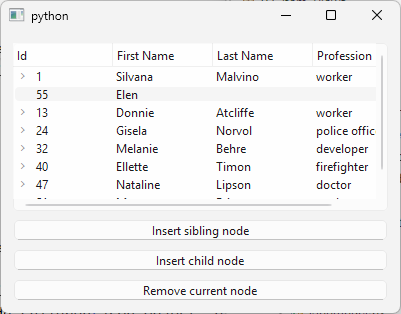
In the main window, create a model and view instances and bind them. When you run the code a read-only tree view with a single column is shown:
24.2 Adding Multiple Columns to the Tree Model
|
You successfully created a |
To create a read-only tree model with multiple columns:
1 import json
2
3
4 # 1. Implement the tree node class
5
6 class TreeItem:
7
8 def __init__(self, data, parent=None):
9
10 self.item_data = data
11 self.parent = parent
12 self.children = []
13
14 if parent:
15 self.parent.append_child(self)
16
17 def append_child(self, item):
18 self.children.append(item)
19
20 def child(self, row):
21 return self.children[row]
22
23 def child_count(self):
24 return len(self.children)
25
26 def column_count(self):
27 return len(self.item_data)
28
29 def data(self, column):
30 try:
31 return self.item_data[column]
32 except IndexError:
33 return None
34
35 def row(self):
36 if self.parent:
37 return self.parent.children.index(self)
38 else:
39 return 0
40
41 @classmethod
42 def build_tree(cls, source):
43
44 root_item = TreeItem(['', '', '', ''], None)
45
46 with open(source) as json_file:
47 data = json.load(json_file)
48 for json_object in data:
49 tree_item = TreeItem.create_item(
50 json_object, root_item)
51 if 'subordinates' in json_object:
52 TreeItem.add_children(json_object, tree_item)
53
54 return root_item
55
56 @staticmethod
57 def add_children(json_object, parent):
58 for child_json_object in json_object['subordinates']:
59 child = TreeItem.create_item(
60 child_json_object, parent)
61 if 'subordinates' in child_json_object:
62 TreeItem.add_children(child_json_object, child)
63
64 @staticmethod
65 def create_item(json_object, parent):
66 child = TreeItem(
67 [json_object['id'],
68 json_object['firstname'],
69 json_object['lastname'],
70 json_object['profession']],
71 parent)
72 return child
73
-
Implement the tree node class. The implementation is similar to the previous example but we add several helper methods and store item data as a list to support multiple columns:
child(row)- returns the child item at given row.child_count()- returns the number of children.column_count()- returns the number of columns.data(column)- returns the data for the given columnrow()- returns the item’s own row index within its parent’s children list.
We also extract item creation into a separate
create_item()static method.
1 from PySide6.QtCore import QAbstractItemModel, QModelIndex, Qt
2 from treeitem import TreeItem
3
4
5 # 2. Create the QAbstractItemModel subclass
6 # and implement rowCount(), columnCount(),
7 # data() and headerData()
8
9 class JsonModel(QAbstractItemModel):
10
11 def __init__(self, source, parent=None):
12
13 super().__init__(parent)
14 self.root_item = TreeItem.build_tree(source)
15 self.header = ['Id', 'First Name', 'Last Name', 'Profession']
16
17 def rowCount(self, parent=QModelIndex()):
18 if parent.isValid():
19 if parent.column() != 0:
20 return 0
21 parent_item = parent.internalPointer()
22 else:
23 parent_item = self.root_item
24 return parent_item.child_count()
25
26 def columnCount(self, parent=QModelIndex()):
27 if parent.isValid():
28 return parent.internalPointer().column_count()
29 else:
30 return self.root_item.column_count()
31
32 def data(self, index, role):
33
34 if role == Qt.ItemDataRole.DisplayRole:
35 item = index.internalPointer()
36 return item.data(index.column())
37 return None
38
39 def headerData(self, section, orientation, role):
40 if orientation == Qt.Orientation.Horizontal:
41 if role == Qt.ItemDataRole.DisplayRole:
42 return self.header[section]
43
44 # 3. Implement index() and parent()
45
46 def index(self, row, column, parent=QModelIndex()):
47
48 if not self.hasIndex(row, column, parent):
49 return QModelIndex()
50
51 if parent.isValid():
52 parent_item = parent.internalPointer()
53 else:
54 parent_item = self.root_item
55
56 childItem = parent_item.child(row)
57 return self.createIndex(row, column, childItem)
58
59 def parent(self, index):
60
61 if not index.isValid():
62 return QModelIndex()
63
64 item = index.internalPointer()
65 parent_item = item.parent
66
67 if parent_item == self.root_item:
68 return QModelIndex()
69 else:
70 row = parent_item.row()
71 return self.createIndex(row, 0, parent_item)
-
Subclass QAbstractItemModel and implement
rowCount(),columnCount(),data()andheaderData(). We make several changes compared to the previous example:rowCount()usesTreeItem.child_count()instead oflen(children)directly. Note that it also returns zero for any column other than the first one - it is a Qt convention for tree models that only items in the first column have children.columnCount()usesTreeItem.column_count()data()usesTreeItem.data(), passing the index column to get the correct field.headerData()returns the appropriate label from theheaderlist.
-
Implement
index()andparent(). The logic is the same as in the previous example, with two changes:index()usesTreeItem.child()to retrieve the child item instead of accessingchildrendirectly.parent()usesTreeItem.row()to determine the parent’s row instead of callingparent.children.index()directly.
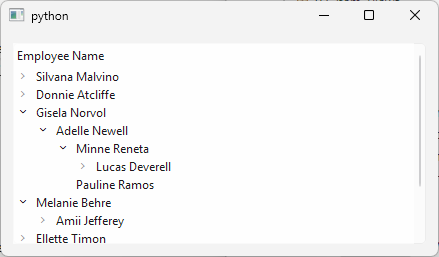
The main window code remains unchanged. When you run it a multi-column tree view is shown:
24.3 Making the Tree Model Editable
|
You have implemented a |
To make a QAbstractItemModel subclass editable:
1 import json
2
3
4 # 1. Add the set_data() method to the tree node class.
5
6 class TreeItem:
7
8 def __init__(self, data, parent=None):
9
10 self.item_data = data
11 self.parent = parent
12 self.children = []
13
14 if parent:
15 self.parent.append_child(self)
16
17 def append_child(self, item):
18 self.children.append(item)
19
20 def child(self, row):
21 return self.children[row]
22
23 def child_count(self):
24 return len(self.children)
25
26 def column_count(self):
27 return len(self.item_data)
28
29 def data(self, column):
30 try:
31 return self.item_data[column]
32 except IndexError:
33 return None
34
35 def set_data(self, column, value):
36 self.item_data[column] = value
37
38 def row(self):
39 if self.parent:
40 return self.parent.children.index(self)
41 else:
42 return 0
43
44 @classmethod
45 def build_tree(cls, source):
46
47 root_item = TreeItem(['', '', '', ''], None)
48
49 with open(source) as json_file:
50 data = json.load(json_file)
51 for json_object in data:
52 tree_item = TreeItem.create_item(
53 json_object, root_item)
54 if 'subordinates' in json_object:
55 TreeItem.add_children(json_object, tree_item)
56
57 return root_item
58
59 @staticmethod
60 def add_children(json_object, parent):
61 for child_json_object in json_object['subordinates']:
62 child = TreeItem.create_item(
63 child_json_object, parent)
64 if 'subordinates' in child_json_object:
65 TreeItem.add_children(child_json_object, child)
66
67 @staticmethod
68 def create_item(json_object, parent):
69 child = TreeItem(
70 [json_object['id'],
71 json_object['firstname'],
72 json_object['lastname'],
73 json_object['profession']],
74 parent)
75 return child
- Add the
setData()method to the tree node class. This method sets the value at the given column in the item’s data.
1 from PySide6.QtCore import QAbstractItemModel, QModelIndex, Qt
2 from treeitem import TreeItem
3
4
5 # 2. Create the QAbstractItemModel subclass
6 # and implement rowCount(), columnCount(), data(),
7 # headerData(), index() and parent().
8
9 class JsonModel(QAbstractItemModel):
10
11 def __init__(self, source, parent=None):
12
13 super().__init__(parent)
14 self.root_item = TreeItem.build_tree(source)
15 self.header = ['Id', 'First Name', 'Last Name', 'Profession']
16
17 def rowCount(self, parent=QModelIndex()):
18 if parent.isValid():
19 if parent.column() != 0:
20 return 0
21 parent_item = parent.internalPointer()
22 else:
23 parent_item = self.root_item
24 return parent_item.child_count()
25
26 def columnCount(self, parent=QModelIndex()):
27 if parent.isValid():
28 return parent.internalPointer().column_count()
29 else:
30 return self.root_item.column_count()
31
32 def data(self, index, role):
33
34 if role == Qt.ItemDataRole.DisplayRole \
35 or role == Qt.ItemDataRole.EditRole:
36 item = index.internalPointer()
37 return item.data(index.column())
38 return None
39
40 def headerData(self, section, orientation, role):
41 if orientation == Qt.Orientation.Horizontal:
42 if role == Qt.ItemDataRole.DisplayRole:
43 return self.header[section]
44
45 def index(self, row, column, parent=QModelIndex()):
46
47 if not self.hasIndex(row, column, parent):
48 return QModelIndex()
49
50 if not parent.isValid():
51 parent_item = self.root_item
52 else:
53 parent_item = parent.internalPointer()
54
55 childItem = parent_item.child(row)
56 if childItem:
57 return self.createIndex(row, column, childItem)
58 else:
59 return QModelIndex()
60
61 def parent(self, index):
62
63 if not index.isValid():
64 return QModelIndex()
65
66 item = index.internalPointer()
67 parent_item = item.parent
68
69 if parent_item == self.root_item:
70 return QModelIndex()
71 else:
72 row = parent_item.row()
73 return self.createIndex(row, 0, parent_item)
74
75 # 3. Implement flags().
76
77 def flags(self, index) -> Qt.ItemFlag:
78 if not index.isValid():
79 return Qt.ItemFlags()
80 return (super().flags(index) |
81 Qt.ItemFlag.ItemIsEditable)
82
83 # 4. Implement setData()
84
85 def setData(self, index, value, role) -> bool:
86 if role == Qt.ItemDataRole.EditRole:
87 tree_item = index.internalPointer()
88 if tree_item.data(index.column()) != value:
89 tree_item.set_data(index.column(), value)
90 self.dataChanged.emit(index, index)
91 return True
92 return False
93 return False
In the model, update
data()to also handleEditRolein addition toDisplayRole.Implement
flags(). As in previous chapters, return the base flags plusQt.ItemFlag.ItemIsEditableto signal to the view that items can be edited. Return an emptyQt.ItemFlags()for invalid indices.Implement
setData(). Check that the role isEditRoleand that the new value is different from the current one. If so, calltree_item.setData()to update the data, emitdataChanged()and returnTrue. ReturnFalseotherwise.
Now, if you double-click a cell in the tree view, an editor opens and you can edit its value. Note that changes are only saved in memory.
24.4 Resizable Tree Model (Inserting and Removing Nodes)
|
You have an editable |
To create a resizable tree model:
1 import json
2
3
4 # 1. Add a counter to the tree node class to set
5 # unique IDs to new nodes.
6
7 class TreeItem:
8
9 counter = 0
10
11 def __init__(self, data, parent=None):
12
13 self.item_data = data
14 self.parent = parent
15 self.children = []
16
17 def append_child(self, item):
18 TreeItem.counter += 1
19 self.children.append(item)
20
21 def child(self, row):
22 if self.child_count() > row:
23 return self.children[row]
24 else:
25 return None
26
27 def child_count(self):
28 return len(self.children)
29
30 def column_count(self):
31 return len(self.item_data)
32
33 def data(self, column):
34 try:
35 return self.item_data[column]
36 except IndexError:
37 return None
38
39 def set_data(self, column, value):
40 self.item_data[column] = value
41
42 def row(self):
43 if self.parent:
44 return self.parent.children.index(self)
45 else:
46 return 0
47
48 # 2. Add methods to insert and remove a child node.
49
50 def insert_child(self, row):
51 TreeItem.counter += 1
52 print('In insert child', row)
53 data = [TreeItem.counter, '', '', '']
54 item = TreeItem(data, self)
55 self.children.insert(row, item)
56
57 def remove_child(self, row):
58 self.children[row:row + 1] = []
59
60 @staticmethod
61 def build_tree(source):
62
63 root_item = TreeItem(['', '', '', ''], None)
64
65 with open(source) as json_file:
66 data = json.load(json_file)
67 for json_object in data:
68 tree_item = TreeItem.create_item(
69 json_object, root_item)
70 root_item.append_child(tree_item)
71 if 'subordinates' in json_object:
72 TreeItem.add_children(json_object, tree_item)
73
74 return root_item
75
76 @staticmethod
77 def add_children(json_object, parent):
78 for child_json_object in json_object['subordinates']:
79 child = TreeItem.create_item(
80 child_json_object, parent)
81 parent.append_child(child)
82 if 'subordinates' in child_json_object:
83 TreeItem.add_children(child_json_object, child)
84
85 @staticmethod
86 def create_item(json_object, parent):
87 child = TreeItem(
88 [json_object['id'],
89 json_object['firstname'],
90 json_object['lastname'],
91 json_object['profession']],
92 parent)
93 return child
Add a class-level
countertoTreeItemto assign unique IDs to newly inserted nodes.-
Add two new methods to
TreeItem:insert_child(row)creates a newTreeItemwith a unique ID and empty fields and inserts it at the given row in the parent’s children list.remove_child(row)removes the child at the given row using slice assignment. Note that unlike previous examples,__init__()no longer auto-appends the item to its parent. This is done ininsert_child().
1 from PySide6.QtCore import QAbstractItemModel, QModelIndex, Qt
2 from treeitem import TreeItem
3
4
5 class JsonModel(QAbstractItemModel):
6
7 def __init__(self, source, parent=None):
8
9 super().__init__(parent)
10 self.root_item = TreeItem.build_tree(source)
11 self.header = ['Id', 'First Name', 'Last Name', 'Profession']
12
13 def rowCount(self, parent=QModelIndex()):
14 if parent.isValid():
15 if parent.column() != 0:
16 return 0
17 parent_item = parent.internalPointer()
18 else:
19 parent_item = self.root_item
20 return parent_item.child_count()
21
22 def columnCount(self, parent=QModelIndex()):
23 if parent.isValid():
24 return parent.internalPointer().column_count()
25 else:
26 return self.root_item.column_count()
27
28 def data(self, index, role):
29
30 if role == Qt.ItemDataRole.DisplayRole \
31 or role == Qt.ItemDataRole.EditRole:
32 item = index.internalPointer()
33 return item.data(index.column())
34
35 def headerData(self, section, orientation, role):
36 if orientation == Qt.Orientation.Horizontal:
37 if role == Qt.ItemDataRole.DisplayRole:
38 return self.header[section]
39
40 def index(self, row, column, parent=QModelIndex()):
41
42 if not self.hasIndex(row, column, parent):
43 return QModelIndex()
44
45 if not parent.isValid():
46 parent_item = self.root_item
47 else:
48 parent_item = parent.internalPointer()
49
50 childItem = parent_item.child(row)
51 if childItem:
52 return self.createIndex(row, column, childItem)
53 else:
54 return QModelIndex()
55
56 def parent(self, index):
57
58 if not index.isValid():
59 return QModelIndex()
60
61 item = index.internalPointer()
62 parent_item = item.parent
63
64 if parent_item == self.root_item:
65 return QModelIndex()
66 else:
67 row = parent_item.row()
68 return self.createIndex(row, 0, parent_item)
69
70 def flags(self, index) -> Qt.ItemFlag:
71 if not index.isValid():
72 return Qt.ItemFlags()
73 return (super().flags(index) |
74 Qt.ItemFlag.ItemIsEditable)
75
76 def setData(self, index, value, role):
77 if role == Qt.ItemDataRole.EditRole:
78 tree_item = index.internalPointer()
79 if tree_item.data(index.column()) != value:
80 tree_item.set_data(index.column(), value)
81 self.dataChanged.emit(index, index)
82 return True
83 return False
84 return False
85
86
87 # 3. Implement insertRows().
88
89 def insertRows(self, row, count, parent=QModelIndex()):
90
91 if 0 <= row <= self.rowCount(parent):
92 print(row, row + count - 1)
93 self.beginInsertRows(parent, row, row + count - 1)
94 if parent.isValid():
95 parent_item = parent.internalPointer()
96 else:
97 parent_item = self.root_item
98 parent_item.insert_child(row)
99 self.endInsertRows()
100 return True
101 return False
102
103 # 4. Implement removeRows().
104
105 def removeRows(self, row, count, parent=QModelIndex()):
106
107 self.beginRemoveRows(parent, row, row + count - 1)
108 if parent.isValid():
109 parent_item = parent.internalPointer()
110 else:
111 parent_item = self.root_item
112 parent_item.remove_child(row)
113 self.endRemoveRows()
114 return True
Implement
insertRows()in the model. Check that the requested row is within bounds usingrowCount(parent), then guard the insertion withbeginInsertRows()andendInsertRows().Implement
removeRows(). Guard the removal withbeginRemoveRows()andendRemoveRows().
1 import sys
2 from PySide6.QtTest import QAbstractItemModelTester
3 from PySide6.QtWidgets import (QApplication, QWidget,
4 QPushButton, QTreeView, QVBoxLayout)
5 from jsonmodel import JsonModel
6
7
8 class Window(QWidget):
9
10 def __init__(self):
11 super().__init__()
12
13 layout = QVBoxLayout()
14 self.setLayout(layout)
15
16 self.model = JsonModel('data.json')
17 QAbstractItemModelTester(self.model,
18 QAbstractItemModelTester.FailureReportingMode.Warning)
19
20 self.view = QTreeView()
21 self.view.setModel(self.model)
22
23 self.insert_sibling_button = QPushButton('Insert sibling node')
24 self.insert_sibling_button.clicked.connect(self.on_insert_sibling)
25
26 self.insert_child_button = QPushButton('Insert child node')
27 self.insert_child_button.clicked.connect(self.on_insert_child)
28
29 self.remove_button = QPushButton('Remove current node')
30 self.remove_button.clicked.connect(self.on_remove)
31
32 layout.addWidget(self.view)
33 layout.addWidget(self.insert_sibling_button)
34 layout.addWidget(self.insert_child_button)
35 layout.addWidget(self.remove_button)
36
37 def on_insert_sibling(self):
38 row = self.view.selectionModel().currentIndex().row()
39 parent = self.view.selectionModel().currentIndex().parent()
40 self.model.insertRow(row + 1, parent)
41
42 def on_insert_child(self):
43 parent = self.view.selectionModel().currentIndex()
44 self.model.insertRow(self.model.rowCount(parent), parent)
45
46 def on_remove(self):
47 row = self.view.selectionModel().currentIndex().row()
48 parent = self.view.selectionModel().currentIndex().parent()
49 self.model.removeRow(row, parent)
50
51
52 if __name__ == '__main__':
53
54 app = QApplication(sys.argv)
55 main_window = Window()
56 main_window.show()
57 sys.exit(app.exec())
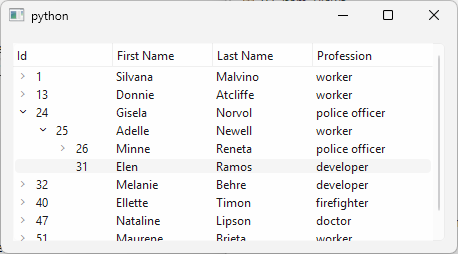
In the main window, add three buttons: Insert sibling, Insert child, and Remove current:
- Insert sibling inserts a new row at
row + 1under the curent index’s parent, placing the new node below the selected one at the same level. - Insert child inserts a new row under the current index itself, making it a child of the selected node.
- Remove current removes the selected row from its parent.
When you run the code you’ll see a tree view with buttons to insert and remove nodes: