Rails Applications Without Scaffold (part 3: Insert and Update)
Creating a Record
So far we’ve encountered tasks that require one controller action and one view as well as a task that required only one action with no views (delete). For next two tasks, creating and updating a record, we will need two actions and one view:
- one action to prepare the form
- one view to render the form to the user
- one action to process the submitted form. This action will simply redirect in case of success or re-render the view in case of an error.
The flow for creating records is slightly more complicated than the previous functions so let’s just discuss the flow as we go along.
Preparing the New Files
First step is to insert new actions into our controller. The pseudocode below explains the basic flow for this function:
  def new
    # create a dummy Product
  end

  def create
    # create a Product based on submitted form
    # save Product
    # if save is successful
    #   show new Product
    # else
    #   go back to current page and display error
  end
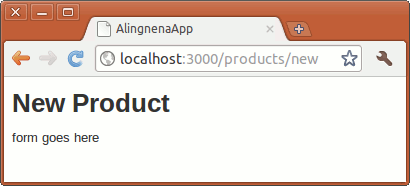
Let’s also create a dummy app/views/products/new.html.erb so we could test the routing before we add the processing logic.
<h1>New Product</h1>

<p>form goes here</p>
Here are the new entries for our routes.rb:
AlingnenaApp::Application.routes.draw do
  resources :debts

  get 'products' => 'products#index', :as => 'products'
  post 'products' => 'products#create'
  get 'products/new' => 'products#new', :as => 'new_product'
  get 'products/search' => 'products#search', :as => 'search_products'
  get 'products/:id' => 'products#show', :as => 'product'
  delete 'products/:id' => 'products#delete'

end
Try out the new screen by going to http://localhost:3000/products/new:
Making the Create Form
Here’s the rest of new.html.erb:
<h1>New Product</h1>
<%= form_for @product do |f| %> <div class="field">
<%= f.label :name %><br>
<%= f.text_field :name %> </div>
<div class="field">
<%= f.label :description %><br>
<%= f.text_area :description %> </div>
<div class="field">
<%= f.label :cost %><br>
<%= f.text_field :cost %> </div>
<div class="field">
<%= f.label :stock %><br>
<%= f.text_field :stock %> </div>
<div class="actions">
<%= f.submit 'Create' %> </div>
<% end %><%= link_to 'Back', products_path %>We’re using a different form helper here; before, we used form_tag in our search screen, while here we used form_for. The former is called a non-model form because it doesn’t use a model. On the other hand, form_for is a model form – it takes a model and uses it to populate the fields inside the form.
The syntax for form_for is as follows:
form_for(record_or_name_or_array, options = {}) do |f|
  ...
end
The record_or_name_or_array parameter determines the model/s used in the form. As the name implies, it accepts a single or an array of Active Record objects and also accepts a name, a symbol or a string that refers to the instance variable where the Active Record is stored. The options argument can accept two options:
-
:url– the URL where the form is supposed to be submitted to. Normally, the URL is derived from the model in the first argument but we can override that by using this option. The expected value for this option is the same expected values forlink_toandredirect_to, namely, either a string, a hash, or an object (i.e. this option also usesurl_for). -
:html– you can pass a hash of HTML attributes to this option
Inside the block are model form helper counterparts to the non-model form helpers we used in search. There are some noticeable differences, though:
- They use symbols for their first parameter. This signifies that they refer to a specific field in the model provided in the
form_forcall. - They are prefixed by an “
f.”. When the block is called byform_for,form_forpasses an object that refers to the model of the form. When we prefix a form helper with the “f”, we say that the field is a member of the form. We can do away with thefprefix, but doing that would require us to tell the form helpers what model they should refer to. e.g.:
<%= text_field(:products, :name) %>You may notice that we haven’t initialized the @product instance variable yet. Let’s do just that in the new action:
  def new
    @product = Product.new
  end
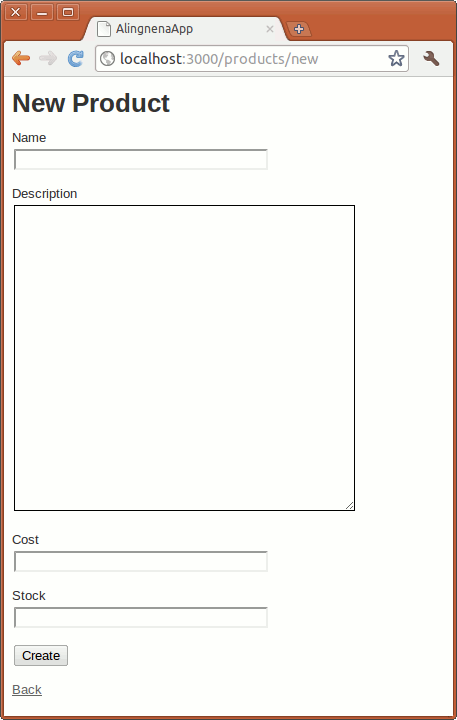
Opening http://localhost:3000/products/new will give us a blank form.
Product.new is the constructor of the Product class. We can even define the fields at this point passing a hash of “field name – value” pairs. Try replacing Product.new with Product.new(:name => "dummy name"). You should see the name field in the form populated by “dummy name”.
Saving the New Record
When we click on submit, the contents of the form are submitted and Rails converts the form into a single hash parameter.

This hash is now part of the params hash and can be accessed directly like any hash entry. Here’s a visual representation of params:
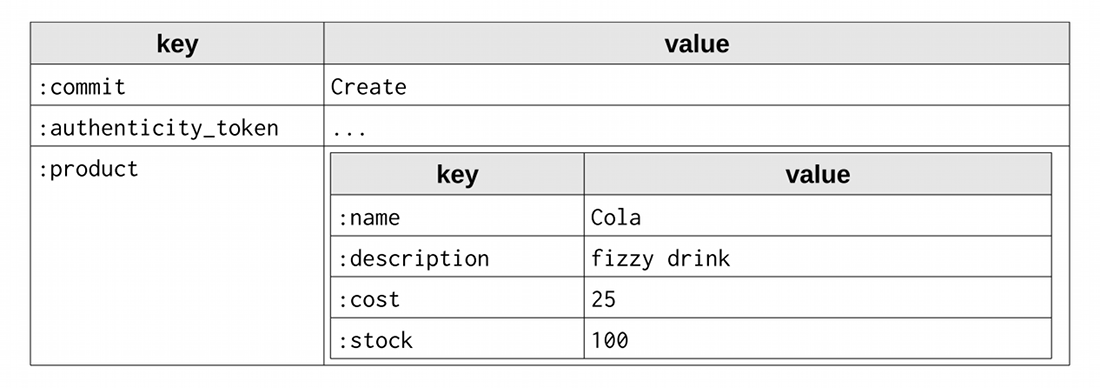
Here we can see that we could access the value “Cola” via params[:product][:name] or the whole product hash via params[:product].
Now the only thing left to do is code the logic that we wrote in pseudocode, namely, to create a record based on the submitted form, save that record, then redirect the user based on the results of the save.
The first part can be done by using Product’s constructor
  def create
    @product = Product.new(params[:product])

    # save Product
    # if save is successful
    #   show new Product
    # else
    #   go back to current page and display error
  end
Recall that the constructor accepts a hash and fills out the fields based on that hash. Passing params[:product] (which is a hash) creates a new Product object based on the submitted form.
The saving and redirection can be done via the following code:
  def create
    @product = Product.new(params[:product])

    if @product.save
      flash[:notice] = "Product has been successfully created."
      redirect_to @product
    else
      render :action => "new"
    end
  end
Here we called save, an instance method that saves the record to the database. This method returns true if the record passes validation and false otherwise.
On a successful save in our code, the user is redirected to the “show product” page of the newly created Product record. Try using the new product form now.
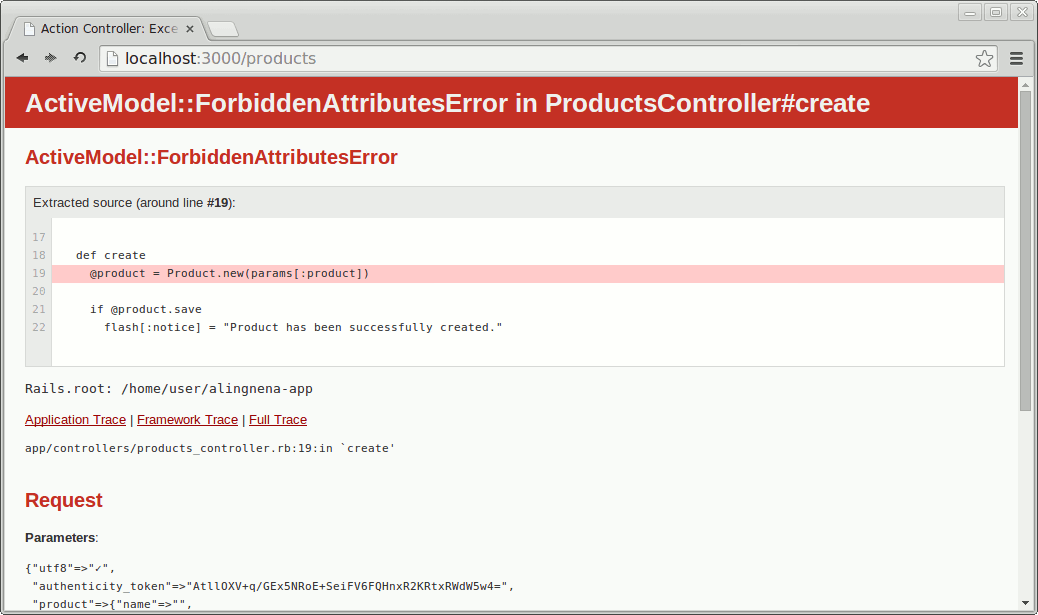
There seems to be an error in our code!
Never fear, this ForbiddenAttributesError is Rails’s way of warning us to not trust user’s input when creating or updating our models - a clever user can modify the data they send over our application and could modify the fields that we didn’t specify in our forms.
To avoid this, we must directly state which parameters to accept in our controllers. This is the concept of strong parameters:
  def create
    @product = Product.new(params.require(:product)
                                 .permit(:name, :description, :cost, :stock))
    if @product.save
Now that we have fixed the error try resending the data by refreshing the page:
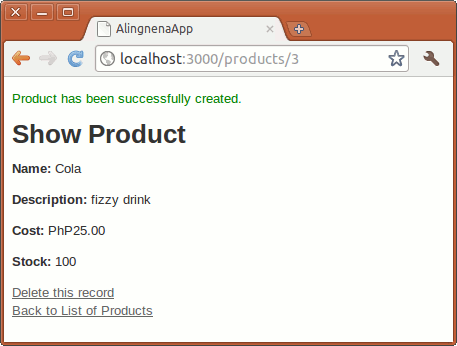
To display the success notice in the show product page, add the following line from app/views/products/index.html.erb to show.html.erb:
<p id="notice"><%= flash[:notice] %></p>
If the save fails, it calls the render method to render the view of the new action. By rendering the view of the new action, the user is presented a form that contains the data that he submitted along with the error messages that comes along with it. This is the reason why we initialize the @product variable in the new action instead of initializing it directly at new.html.erb.
Unfortunately, we can’t see this in action because we haven’t set validation rules for Product yet.
Basic Validation
Let’s add some basic validation to our Product model. Add the following line to app/models/product.rb:
class Product < ActiveRecord::Base
  validates(:name, :presence => true)
  validates(:description, :presence => true)
end
This method call to validates_presence_of tells Rails to check whether the specified fields are present when the object undergoes validation. In other words, it defines the mandatory fields for the model.
We also add the following lines to new.html.erb to display the error messages:
<h1>New Product</h1>
<%= form_for @product do |f| %>
  <% if @product.errors.any? %>
    <div id="error_explanation">
      <h2><%= pluralize(@product.errors.count, "error") %> prohibited this product from
        being saved:</h2>
      <ul>
      <% @product.errors.full_messages.each do |msg| %>
        <li><%= msg %></li>
      <% end %>
      </ul>
    </div>
  <% end %>
  <div class="field">
    <%= f.label :name %><br />
...
Try submitting a blank new product form now.
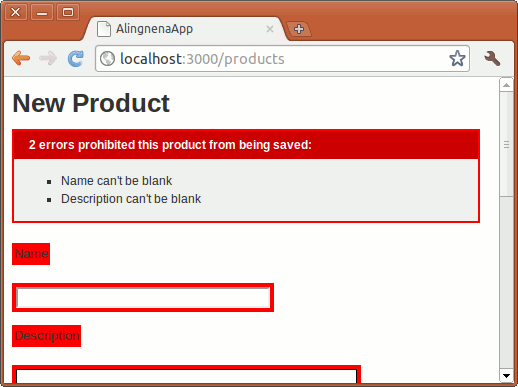
You are redirected to new.html.erb along with messages detailing the errors in your form. As you may have guessed, the error messages at the top are the work of the f.error_messages call.
Before we end this part, add a link to the “new product” page in the “list products” page (i.e. index.html.erb):
...
</table>

<p><%= link_to "Create a new Product", new_product_path %></p>
We’re done with creating new product records and we only have one more function to code.
Editing a Record
Editing a record is not that different from creating a record. We still have two controller actions sharing one single view which contains the form; we just don’t create the record from scratch this time.
Rails Conventions
Here are the conventions for editing records:
- the controller action that prepares the editing form should be named
edit. The view displaying the empty form also follows (edit.html.erb) - the URL to the form should be in the form
/[plural model]/[id]/edit, so in theProductcase, this should be/products/:id/edit. This RESTful URL tells us that we are doing an action to a particular product resource. - the controller action that processes the submitted form should be named
update. - the URL to the form processing action is similar to the one we used in showing and destroying a record:
PATCH /products/:idorPUT /products/:id.
Routes and View
Insert the following new entries in routes.rb:
AlingnenaApp::Application.routes.draw do
  resources :debts

  get 'products' => 'products#index', :as => 'products'
  post 'products' => 'products#create'
  get 'products/new' => 'products#new', :as => 'new_product'
  get 'products/search' => 'products#search', :as => 'search_products'
  get 'products/:id' => 'products#show', :as => 'product'
  delete 'products/:id' => 'products#delete'
  patch 'products/:id' => 'products#update'
  put 'products/:id' => 'products#update'
  get 'products/:id/edit' => 'products#edit', :as => 'edit_product'
end
Create the view file for edit, app/views/products/edit.html.erb:
<h1>Edit Product</h1>
<%= form_for @product do |f| %> <% if @product.errors.any? %> <div id="error_explanation">
<h2><%= pluralize @product.errors.count, "error" %> prohibited this product from
being saved:</h2>
<ul>
<% @product.errors.full_messages.each do |msg| %> <li><%= msg %></li>
<% end %> </ul>
</div>
<% end %> <div class="field">
<%= f.label :name %><br>
<%= f.text_field :name %> </div>
<div class="field">
<%= f.label :description %><br>
<%= f.text_area :description %> </div>
<div class="field">
<%= f.label :cost %><br>
<%= f.text_field :cost %> </p>
<div class="field">
<%= f.label :stock %><br>
<%= f.text_field :stock %> </div>
<div class="actions">
<%= f.submit 'Update' %> </div>
<% end %><%= link_to 'Show', @product %> |
<%= link_to 'Back', products_path %>We did not need to change the declaration for form_for, it already checks the model and determines which route to use based on conventions. If the model is new (i.e. create), it will use the products_path. Otherwise (i.e. update), it will use product_path.
For convenience, add the following links to show.html.erb
...
</p>

<%= link_to 'Edit this record', edit_product_path(@product) %> <br>
<%= link_to 'Delete this record', @product,
  :confirm => 'Are you sure?', :method => :delete %> <br>
<%= link_to 'Back to List of Products', products_path %>
and index.html.erb
...
<% @products.each do |product| %> <tr>
<td><%= product.name %></td>
<td><%= product.description %></td>
<td><%= number_to_currency product.cost, :unit => 'PhP' %></td>
<td><%= product.stock %></td>
<td><%= link_to 'Show', product_path(product.id) %></td>
<td><%= link_to 'Edit', edit_product_path(product) %></td>
</tr>
<% end %>...
New Controller Actions
Add the following actions to app/controllers/products_controller.rb:
def edit
@product = Product.find(params[:id])
end
def update
@product = Product.find(params[:id])
if @product.update_attributes(params.require(:product)
.permit(:name, :description, :cost, :stock))
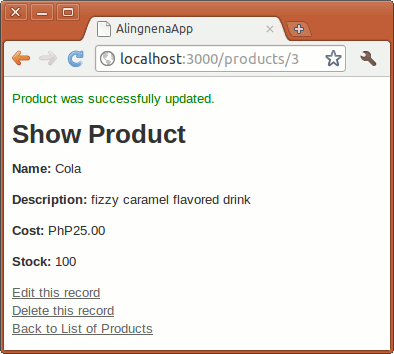
redirect_to @product, notice: 'Product was successfully updated.'
else
render action: "edit"
end
end
Since we’re already familiar with how records are created, this code should be easy to understand. Instead of creating records with Product.new, we use Product.find to retrieve the record from the database. The @product.update_attributes() method is similar to save; it first updates the fields based on the hash then validates and saves the object.
And that’s it; we finally created a full table maintenance program without using rails generate scaffold. We also learned almost everything that goes on behind the scaffold generated code.
There are still a bunch of things we add to our maintenance program. We’ll spend the next chapter on those things in order to get them out of the way before the next lesson.