Ajax
Ajax (formerly known as Asynchronous JavaScript and XML) is a set of technologies used to improve the user’s experience when browsing websites. It does this by allowing the users to perform actions and let the browser and server handle it in the background instead having them go from page to page. This makes the user interfaces in websites more dynamic and responsive to the user.
At the core of Ajax is JavaScript which can send requests to the server in the background thanks to the XMLHttpRequest (XHR) object, and can modify the page based on the results thanks to the Document Object Model (DOM). There are 4 main approaches to Ajax depending on how XHR and DOM are used:
- status codes – XHR sends the request and DOM modifies the page based on the HTTP status code returned by the server.
- page fragments – XHR sends the request and the server returns a fragment of an HTML page. DOM inserts this fragment somewhere in the current page.
- code fragments – XHR sends the request and also requests for a JavaScript response. The returned data is in the form of JavaScript code that will modify the page through DOM which is then executed by the browser.
- data – XHR sends the request and also requests for a specific format (e.g. XML, JSON). The server returns data in the requested format, which will then be processed by JavaScript in the page. This will eventually lead to DOM calls to change the page’s contents.
Manually coding XHR and DOM calls can be hard. Fortunately, there are JavaScript libraries available to make these tasks easier. In this tutorial, we will discuss the two approaches available in Rails: using the built-in unobtrusive jQuery-powered ajax functions i.e. number 3 above, and Turbolinks which is basically number 2 above but sending entire pages.
Using jQuery with Rails
To demonstrate the basic uses Rails built-in jQuery functions, we’ll use a simple shoutbox program that allows visitors of Aling Nena’s website to leave a message for all to see:
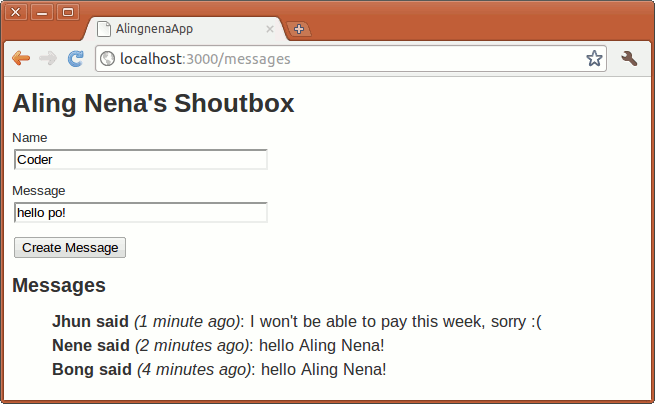
The program is straightforward: a user can submit his/her name and a message which will be added to the list on the page.
By now you should be able to code this on your own, but if you still can’t, just study the code snippets below to have an idea on what you need to do.
jQuery basics
Let’s run through the basics of jQuery before we proceed with the Ajax concepts. Add the following code at the end of /app/assets/javascripts/application.js:
$(document).ready(function() {
  // do stuff
});
Here we can see the first major feature of jQuery: you can register functions that would handle element events. In this case, we assigned a function to the ready event of thedocument element of the page. This function would be called when thedocument is ready – something like window.onload but works even before all images are loaded.
We could add an alert call to test if it’s working:
$(document).ready(function() {
  alert("hello world!");
});
Open Aling Nena’s Shoutbox to see this code in action.
Two things to note about this basic code: first, the $ is an alias for jQuery, thus the call $(document) calls the constructor for jQuery and in turn creates a jQuery object based ondocument. This basically extends the document object, allowing us to use jQuery functions like the ready event handler we used.
Another thing is the use of an inner function. You could extract the inner function to another function when it becomes more complicated, but since we’ve been using Procs and Blocks already in Ruby, you should be comfortable with using them for simple tasks.
Using alert for the “hello world!” program doesn’t do justice to jQuery’s capabilities. Let’s modify the program to make it more jQuery-friendly:
$(document).ready(function() {
  $("#notice").text("hello world!");
});
Here we see the second major feature of jQuery: you can select elements from the page with CSS selectors. Here we selected the p element with id="notice" and called the jQuery manipulation function text() to change the text of the element to “hello world!”.
Just like in CSS, selectors can match multiple elements. Calling jQuery functions or registering handlers to a jQuery object will apply those functions and handlers to all elements that the object refers to. For example, using
$(document).ready(function() {
  $("li").css("color", "blue");
  $("li").mouseover(function () {
    $(this).css("color", "red");
  }).mouseout(function() {
    $(this).css("color", "black");
  });
});
Will first set thecolor CSS attribute of all li elements to blue. We then registered the mouseover event handler that would set thecolor to red when the mouse is over the element. Finally, since the mouseover function returns the same jQuery element, we can chain another function, this time setting the mouseout handler to turn the element to black when the mouse leaves the element.
Now that we’re familiar with jQuery, let’s proceed with Ajax.
Preparing the Page fragment
In this lesson, we want to modify the page so that we could refresh the table to show the new messages without having to refreshing the entire page. The easiest way to do this in Rails 3 would be to use the 3rd Ajax approach, that is, to create JavaScript code which will insert the updated list inside the page, then use jQuery to retrieve run that code.
The first part is easy. We just have to add a new action:
resources :messages do
  collection do
    get 'message_table'
  end
end
# app/controller/messages_controller.rb
def message_table
  render partial: Message.order("created_at DESC")
end
and partial for the list:
# app/views/messages/index.html.erb
...
<h2>Messages</h2>
<ul style="list-style-type:none;font-size:125%;line-height:150%" id="message_list">
<%= render partial: @messages %></ul>
# app/views/messages/_message.html.erb
<li>
<strong><%= message.author %> said</strong>
<em>(<%= time_ago_in_words(message.created_at) %> ago)</em>:
<%= message.message %></li>
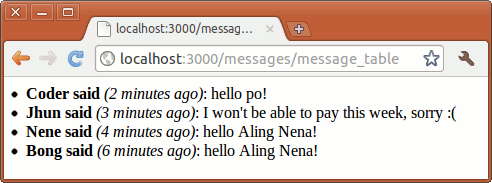
The partial can now be accessed at http://localhost:3000/messages/message_table
The second part is also easy but will require a bit more effort.
Updating a Part of the Page via remote link_to
We need to modify the controller to add a JS handler:
# app/controller/messages_controller.rb
def message_table
  @messages = Message.order("created_at DESC")
  respond_to do |format|
    format.js
    format.html { render partial: @messages }
  end
end
And create a message_table.js.erb file that will contain the code to update the message table:
$("#message_list").html("<%= escape_javascript( render partial: @messages ) %>");
Then, all that’s left to do is to add this link to our page:
# app/views/messages/index.html.erb
<%= link_to "Refresh List", message_table_messages_path, remote: true %>The :remote => true option tells Rails that the link should be processed as an AJAX call and not as a normal link. When you click the “Refresh List” link, it will process the JavaScript returned by our app, and in turn replacing the contents of the message table.
Form submission via Ajax
Let’s move on from the simple GET example to a slightly more complicated POST example. Here we’ll convert our form to use Ajax.
First, modify the create action to add the JS responders:
# app/controllers/messages_controller.rb
  def create
    @message = Message.new(params[:message])

    respond_to do |format|
      if @message.save
        format.html { redirect_to messages_path, notice: 'Message was successfully crea\
ted.' }
        format.json { render action: 'show', status: :created, location: @message }
        format.js  { @messages = Message.order("created_at DESC") }
      else
        @messages = Message.all(order: "created_at desc")
        format.html { render action: 'new' }
        format.json { render json: @message.errors, status: :unprocessable_entity }
        format.js { render text:
          "$('#notice').show().html('There was an error in creating the message.')" }
        end
      end
    end
  end
Then we create our new create.js.erb view:
$("#message_list").html("<%= escape_javascript( render partial: @messages ) %>");
$("#notice").show()
  .html("Message was successfully created.").delay(20000).fadeOut("slow");
$("#new_message")[0].reset();
This also adds a fade-out animation after 20 seconds.
We also need to update our view in order for the Ajax call to work.
# app/views/messages/index.html.erb
<p id="notice"><%= notice %></p>

<%= form_for(@message, remote: true) do |f| %>
  <p>
    <%= f.label :author, "Name" %><br />
...
Just like in link_to, we only needed to add a remote: true option to tell Rails to process the form submission as an Ajax call.
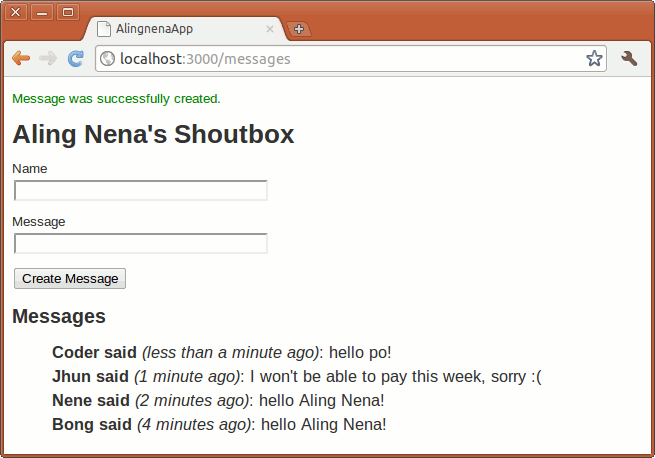
Trying out the code will result in the following:
It looks like it behaved normally, but if you use the Mozilla Firefox extension Firebug or Google Chrome’s Developer Tools (Tools -> Developer tools), you’ll notice something different about the request and the response.
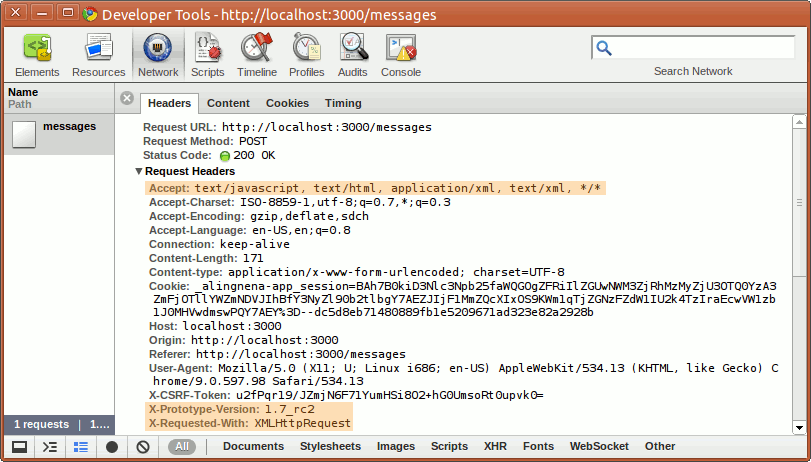
From the request headers, we could see that it’s using XHR and Prototype. However, the important thing here to note is the text/javascript in the Accept header which tells Rails the format the request requires.
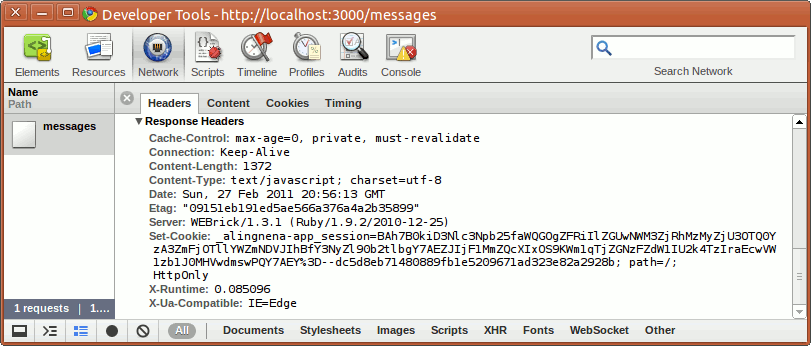
As for the response, there’s nothing unusual about the headers aside from the explicit disabling of caching.
Unobtrusive JavaScript and graceful degradation
Before we move on to Turbolinks, you may want to take note that the JavaScript used in the examples above are not inline scripts. In other words, the a and form elements are still basic HTML without any JavaScript within them:
<form accept-charset="UTF-8" action="/messages" class="new_message"
data-remote="true" id="new_message" method="post"><div style=
"margin:0;padding:0;display:inline"><input name="utf8" type="hidden"
value="✓" /></div>
...
<a data-remote="true" href="/messages/message_table">Refresh List</a>
What jQuery does is look at the elements after the page has loaded and check if the data-remote attribute is set. When set, jQuery adds the necessary event handlers for these elements. Some people call this approach “unobtrusive JavaScript” or UJS, in contrast to old “obtrusive” ways of adding JavaScript into elements via inline scripts.
Aside from being cleaner, UJS has better support for disabled JavaScript. Remember, Ajax’s primary goal is to improve user experience. Therefore, it does not make sense for a program to stop working if the user disables JavaScript in his/her browser.
With UJS, one could easily see what would be the behavior in case the JavaScript is disabled. In our example above, link_to will just open a list of messages (we could easily redirect this back to index) while form_for will just behave like it used to.
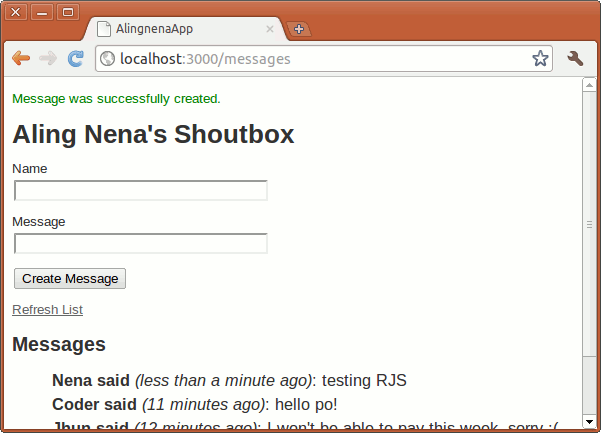
Simple polling implementation
To wrap up this lesson, let’s modify the “Refresh List” code to use jQuery. Also, instead of making the user click the link, let’s modify the page such that it automatically polls the server at certain intervals. We first remove the link from the page:
<% end %><%= link_to "Refresh List", message_table_messages_path, remote: true %><h2>Messages</h2>
Then we add the polling code to application.js:
$(document).ready(function() {
  if ($("#message_list").length) {
    setInterval( function() {
      $.getScript("/messages/message_table.js");
    }, 60000 );
  }
});
Here we just used the JavaScript function setInterval() to make an Ajax call every minute (60,000 milliseconds). The actual call is done by jQuery’s getScript() function which makes an asynchronous GET call and executes the returned data as JavaScript.
Turbolinks
Back when we introduced the JavaScript asset tags, we mentioned that both jQuery and Turbolinks are added to Rails by default. We’ve already discussed jQuery so let’s give a quick intro to Turbolinks.
Turbolinks converts all GET links into Ajax calls like the one we did for the “refresh list”. However, instead of replacing just a fragment of the page, Turbolinks replaces the entire page via the Ajax call and modifies the browser state/URL with the target page. If the browser does not support PushState for manipulating browser history and state, Turbolinks will fall back to normal link GET behavior. You can verify this by opening your browser’s developer tools and clicking on any “Show” link, for example the “Show Product” link:
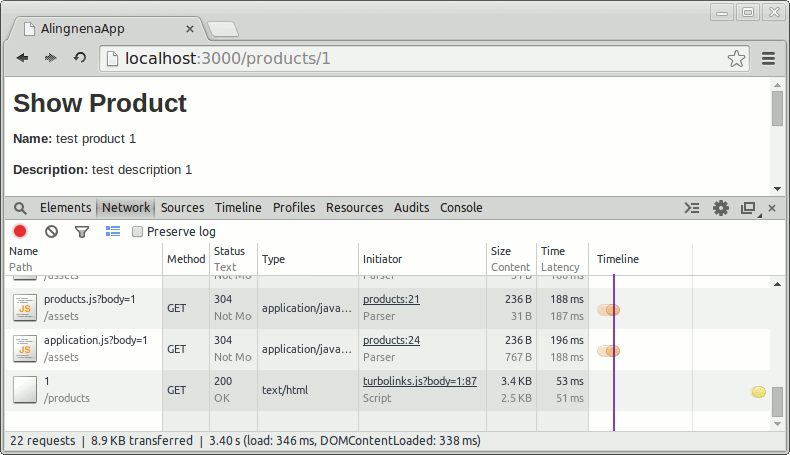
As you can see, this can theoretically reduce a page load down to a single HTML GET – all CSS and JS that apply to the old page will just be reused. Looking again at the layout code, we see how Turbolinks decides what assets to load:
<%= stylesheet_link_tag "application", media: "all", "data-turbolinks-track" => true\
%><%= javascript_include_tag "application", "data-turbolinks-track" => true %>In production mode, the data-turbolinks-track option tells Turbolinks to track the asset based on its fingerprint. We’ll discuss fingerprinting later at the Asset Pipeline discussion, but basically this allows Turbolinks to check if the asset was updated or not. It will only load the asset if it was updated.
Note that enabling Turbolinks would mean that many of your JavaScript code that runs on page load will not load when Turbolinks retrieves and loads a page. They will have to be modified to work with Turbolinks to use the page:change event e.g.:
$(document).on("page:change", function() {
  if ($("#message_list").length) {
    setInterval( function() {
      $.getScript("/messages/message_table.js");
    }, 60000 );
  }
});
If you’re using many third-party JavaScript code, it may be difficult to convert them to support Turbolinks. At the worst case, you can disable Turbolinks by removing the references in your application.js as well as your Gemfile. (Modifying your Gemfile will require a bundle update to refresh it.)