Chapter 3 - Setting Up the Raspberry Pi
“Don’t worry about what anybody else is going to do! The best way to predict the future is to invent it. Really smart people with reasonable funding can do just about anything that doesn’t violate too many of Newton’s Laws!”
–Alan Kay
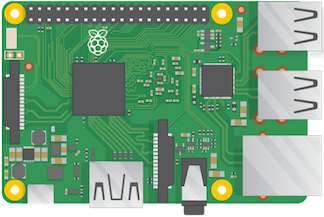
When students first see a Raspberry Pi computer they are often curious because it looks different and enticing. This is your teachable moment. They may ask: How is this is a computer? Is this similar to a smartphone or tablet? Where is the hard drive? How do you plug it in? I have found it is through these questions that students begin to want to learn more about the device. The Raspberry Pi ethos encourages tinkering and it is through this exploration, problem-solving, and the making of mistakes where students learn best.
A question you may have straight away is: How many Raspberry Pi computers do I need for effective teaching and learning in the classroom? The best answer is: As many as you can afford! A more practical answer is: two/three students per Raspberry Pi computer seems to work best.
Before you unleash your students unto the power of the Raspberry Pi computer, you should dive in first yourself! Gather all the necessary cables and accessories before plugging the Raspberry Pi in and get ready to log-in for the first time.
Network/internet access
This book will focus on using the Raspberry Pi as a standalone device outside the school network. This allows you and your students to write programs and make electronic projects without the fear of harming school-owned devices and/or the school network. As such, I will not be detailing how to connect your Raspberry Pi to a network/internet via WiFi. There is obviously tremendous value in having your Raspberry Pi connected to a network and the internet. There are far too many school network variations for me to address them all here. I would encourage you to talk to your school or district IT staff before purchasing a Raspberry Pi to see if they can assist you in connecting it to the school network. If they can/will not, do not worry. There are plenty of projects your students can complete without network/internet connectivity. Most projects in this book do not require an active network/internet connection. If they do, it will be clearly noted.
Minimum Requirements
At a minimum, in order to use the Raspberry Pi computer in the classroom you will need the following:
- A Raspberry Pi computer (any model will work, but Raspberry Pi 2 B or Raspberry Pi 3 B are recommended)
- SD card (4 GB or higher - 8GB is recommended)
- Power supply (for Raspberry Pi 3 B you will need a 5V 2.5mA power supply)
- A monitor/display (HDMI or VGA w/ adapter)
- Monitor cable (HDMI or VGA w/ adapter)
- A keyboard (USB or wireless)
- A mouse (USB or wireless)
- Internet connection for Windows or Apple computer to download the Raspberry Pi operating system
Setting Up Your Raspberry Pi
Prepare the SD card
Video Tutorial from the Raspberry Pi Foundation
- You will need a Windows or Apple computer with an SD card reader to setup the Raspberry Pi operating system. Go to Raspberry Pi Downloads and download NOOBS (New Out of the Box Software). NOOBS is an easy operating system installer which contains Raspbian - the official operating system developed for the Raspberry Pi. NOOBS also provides a selection of alternative operating systems which are then downloaded from the internet and installed.
- Click on the Download Zip button under NOOBS and select a destination folder to save extracted files
- Extract the files from the zip
- Download SD Formatter 4.0
- Follow the instructions to install the software
- Insert your SD card into the computer’s SD card reader and make a note of the drive letter allocated to it, e.g. G:/
- In SD Formatter, select the drive letter for your SD card and format it.
- Once the SD card is formatted, drag-and-drop all the files from the extracted zip folder onto the drive letter of the SD card
- When this process has finished, safely remove the SD card and insert it into your Raspberry Pi. This may take several minutes … be patient and do not eject card until ALL files have been copied to the SD card
First Boot
- Plug in your keyboard, mouse, and monitor cables.
- Now plug the USB power cable into your Pi. Note - You MUST plug in the monitor cable before you power on the Raspberry Pi.
- The Raspberry Pi will now boot and you will see lots of text scroll by. This is the computer preparing itself for use. At the first screen, select Raspbian and click Install.
- Once the Raspbian operating system is installed (which make take a while) the Raspberry Pi configuration will begin.
- You can now setup the time, date, and other more advanced options.
- Use the Tab key to navigate to Finish.
Logging in
The Raspberry Pi computer requires a username and password to log-in. When typing in a password, you will not see any text appear on screen. This is a security feature.
The defaults are:
Username: pi
Password: raspberry
To load the Graphical User Interface (GUI) - type: startx
You are now at your “desktop” which is similar to your Windows or Mac desktop. From here you can launch software, program the next great app, or begin connecting peripherals to your Raspberry Pi to extend its capabilities.
Now What?
Application Menu
Great! You booted the Raspberry Pi for the first time. Many people look at the desktop and are not sure what to do next. I recommend looking through each application category and launch each one. Discover what each one does, or at least, what you think it does. This is a great way to become familiar with each application and be able to answer student questions.

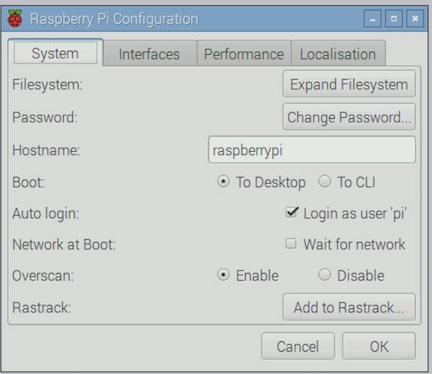
Raspberry Pi Configuration
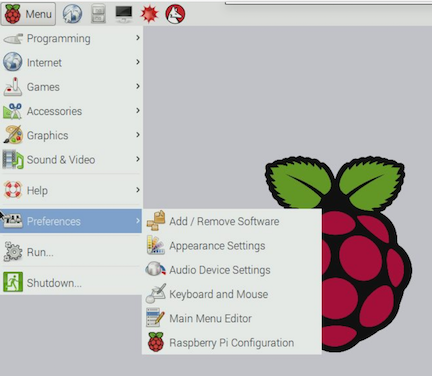
There are a few settings you may want to change straight away. To do this you will use the Raspberry Pi Configuration tool. Click Menu –> Preferences –> Raspberry Pi Configuration
Password
You should change your password by clicking the Change Password button.
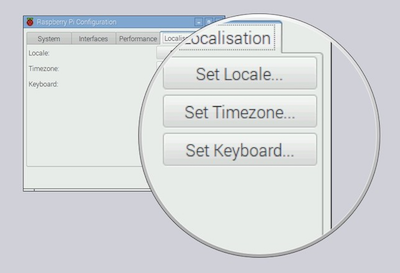
Localization
The Raspberry Pi is designed in the UK. As such, the default configuration uses British English and a British keyboard layout. This can be lead to confusion because some keys are in different spots on British English keyboards. Change the Locale, Timezone, Keyboard, and WiFi Country settings, accordingly.
Chapter content is derived from Raspberry Pi Foundation learning resources found at Raspberry Pi Foundation under a Creative Commons license.