Chapter 2 - Where to Start?
“Schools have a responsibility to expose kids to things they don’t yet know they love.”
–Gary Stager
You are probably thinking - where do I start? It may be a little intimidating when you look online for information about the Raspberry Pi or when you purchase one, open the box, and realize there is not much direction on what to do next. We will explore some basic information about the Raspberry Pi before we jump in and start creating with it. It is important to know what models are available, what accessories may be of use to you and your students in the classroom, and where to purchase these items.
Raspberry Pi as a Desktop Computer
Before we begin, a quick note - The Raspberry Pi can be used as a traditional desktop computer, but its real educational value lies in its abilities to be hacked and tinkered with. Remember the device is only $35 and you can expect $35 worth of performance. The Raspberry Pi 2 B and Raspberry Pi 3 B are fast enough to be used as a traditional computer without much frustration. The other models will be VERY slow and often frustrating to use as a desktop computer.
Another option is to use the Raspberry Pi is in what is called “headless” mode. This simply means you operate the computer without a monitor/display, mouse, or keyboard directly connected. You connect to the Raspberry Pi computer via a network through technologies called SSH and VNC. See Appendix A for details - note this does require a network/internet connection.
Models
The Raspberry Pi computer comes in several models. As of September 201612, the following variants are available:
- Raspberry Pi 1 A+
- Raspberry Pi 1 B
- Raspberry Pi 1 B+
- Raspberry Pi 2 B
- Raspberry Pi 3 B
- Raspberry Pi Zero
While each of these models have their own advantages/disadvantages this book will focus on the Raspberry Pi 2 B or Raspberry Pi 3 B. Either one of these models generally costs $35, by itself, and will be sufficient for the classroom. The Raspberry Pi 3 B has the advantage of built-in WiFi and Bluetooth (i.e. you do not have to purchase a separate WiFi dongle), so if they are the same price when you go to purchase, pick up the Raspberry Pi 3 B! The other models are either older (and thus often sold for a lower price) or are purpose-built for specific applications. In a classroom environment we want to ensure maximum compatibility. The Raspberry Pi 2 B or Raspberry Pi 3 B will do just that.
Anatomy of the Raspberry Pi
!(images/pi2_labels.png)
The Raspberry Pi is a single-board computer. All components are surface-mounted. That means they are attached to one circuit board.
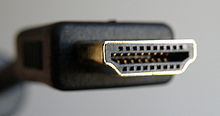
HDMI Connector
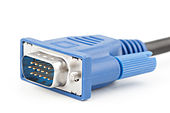
The Raspberry Pi computer requires an HDMI monitor/display (older models allowed for RCA-style television connector). If you do not have a HDMI monitor/display, you can purchase an inexpensive adapter that converts the older style monitor connector (VGA) to HDMI.
Micro USB Power Connector
You power the Raspberry Pi via the micro USB connector. A standard mobile phone charger should be sufficient for the Raspberry Pi 2 B or lower models. If you are using a Raspberry Pi 3 B, you will need at least a 5V, 2.5mA power supply. A typical mobile charger generally does not output this amount of power. Notice there is no On/Off switch on the Raspberry Pi. Plugging in the micro USB power connector = turning on the Raspberry Pi computer! You shut down the Raspberry Pi using the Shutdown command via the computer menu system.
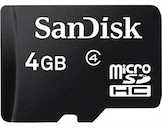
Memory Card Slot
The Raspberry Pi computer uses a Micro SD card for storage/hard drive. You will need a 4GB (minimum) Micro SD card. This is one of the great educational features of the Raspberry Pi. Students can experiment with different operating systems on the Raspberry Pi simply by swapping out SD cards!
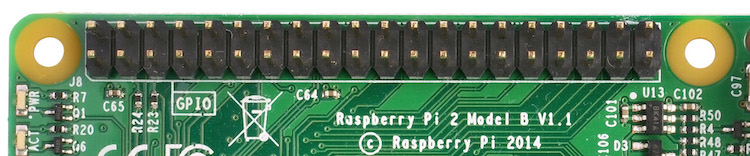
General Purpose Input/Output Pins (GPIO)
Arguably, the best feature for educational use. GPIO pins allow you to add electronics, LEDs, sensors, and other devices to your Raspberry Pi. This allows for almost limitless creative projects!
Sound Out
Plug in headphones, ear buds, or a powered speaker. If your HDMI monitor/display has speakers, you can use HDMI for sound output, as well.
Processor
The “brain” of the computer. The Raspberry Pi uses a Broadcom SOC (system-on-a-chip).
USB Ports
Plug in wired/wireless mouse and keyboard here. You can also plug in many standard USB devices - printer, USB key/flashdrive, USB headset, gamepad, etc. Not all USB devices will work properly on a Raspberry Pi. Check with the peripheral manufacturer for compatibility with the Raspberry Pi.
Accessories
On its own, the Raspberry Pi computer is a great device for digital building and creating, but there are several extras for purchase that can make your classroom projects even better.
Case
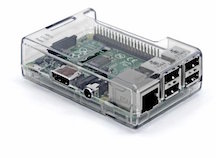
As previously mentioned, having a case is a good idea. A case protects your device from electric shock/charge. There are clear, as well as many designed, cases available. Cases generally cost $5 to $15.
Camera Module

The Raspberry Pi camera module can be used to take high-definition video, as well as still photography. It’s easy to use for beginners, but has plenty to offer advanced users if you’re looking to expand your knowledge. It costs $25.
Sense Hat
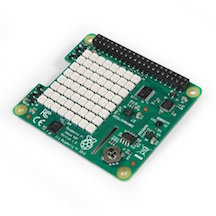
The Sense HAT is an add-on board for Raspberry Pi. It was designed for the Astro-Pi project that went to the International Space Station in December 2015. It contains 8×8 RGB LED matrix, a five-button joystick and includes the following sensors:
*Gyroscope
*Accelerometer
*Magnetometer
*Temperature
*Barometric pressure
*Humidity
The Sense Hat is a “must-have” for the classroom. It makes collecting, processing, and analyzing data very accessible. Students can easily setup a weather sensing station in an hour using the Raspberry Pi and the Sense Hat. More about this project can be found in Chapter 9 - Curriculum Connections. The Sense Hat costs $40.
Touchscreen
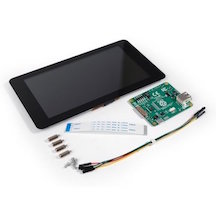
The 7″ Touchscreen Monitor for Raspberry Pi gives makers the ability to create all-in-one, integrated projects such as tablets, infotainment systems and embedded projects.
Purchasing
There are several places to purchase the Raspberry Pi computer. While Amazon often offers the best in terms of price and convenience, I prefer Adafruit.com. They are a US-based company (Brooklyn, NYC) and in my opinion offer the best mix of exceptional customer service with a wide variety of purchasing options. They provide educator and bulk discounts, purchase ordering, and a plethora of tutorials designed for beginners. They have not paid me for this endorsement, I just genuinely like what they have to offer.
The standard Raspberry Pi computer costs $35 by itself, but you are going to need more than just the computer itself for effective use in the classroom. The computer comes shipped in a tiny box with little else - no cables, no SD card, and only minimal instructions. You can purchase Raspberry Pi computer kits (complete with from SD card, USB power chord, etc.) from Adafruit.com or other vendors. Buying a pre-packaged kit of is often the best place to start. Below are a few I find great for classroom use:
Official Raspberry Pi Starter Kit (from Raspberry Pi Foundation)
www.raspberrypi.org/blog/ten-millionth-raspberry-pi-new-kit/
This is an unashamedly premium product: the latest Raspberry Pi, official accessories, the best USB peripherals around, and a copy of the highest-rated Raspberry Pi book. The kit is available to order online in the UK from element14 and RS Components, priced at £99+VAT. It will be coming to the rest of the world in late 2016.
Raspberry Pi 3 Model B Starter Pack
This kit comes with a Raspberry Pi 3 and LOTS of extra electronics components. It also includes a power supply and SD card pre-installed with the NOOBS operating system.
Raspberry Pi Projects Kit by Science Buddies
store.sciencebuddies.org/SPF-6000-KIT/raspberry-pi-projects-kit.aspx
For students who love to create games, artwork, or music, Science Buddies has put together a kit that allows all of these things with a modern twist: interactivity! The Science Buddies Raspberry Pi Projects Kit teaches students basic programming and electronics skills so that they can use sensors, sounds, images, and lights to create interactive projects.
Kano Computer Kit
The Kano Computer Kit is an all-in-one (minus a monitor/display) Raspberry Pi kit aimed at helping young learners understand computer hardware and software. The kit comes with a Raspberry Pi 3 B, a small keyboard with trackpad, a reloaded SD card, and all necessary cables. Their version of the operating system - Kano OS - is the best part of this kit. It is designed for young students to get them started making with the Raspberry Pi straight away. Kano’s mission is to give people a simple, fun way to create with technology, and take control of the world around them.
CanaKit Raspberry Pi 3 Complete Starter Kit
An exclusive Starter Kit from CanaKit that includes the Raspberry Pi 3 Model B and everything you need to get up and running within minutes in the exciting world of Raspberry Pi! Also included in this Raspberry Pi 3 Starter Kit is a high quality Raspberry Pi 3 case as well as the recommended Raspberry Pi 32 GB Class 10 MicroSD Card pre-loaded with NOOBS. Just Plug and Play! The kit also includes a CanaKit 2.5A Micro USB power supply (UL Listed) specially designed and tested for the Raspberry Pi 3.
pi-top and pi-topCEED
If you are interested in using the Raspberry Pi as a desktop/laptop computer, check out the pi-top and pi-topCEED. These are pre-assembled devices, with a built-in monitor, for your Raspberry Pi. Both devices allow for multiple-viewing angles and hardware expansion. You still need to provide your own mouse and keyboard, but this is a nice option for those without an available monitor for their Raspberry Pi and/or for those looking for a compact solution.