Using AG2 Open-Source AgentOS LLM-Based Agent Framework for Generating and Executing Python Code
AG2 Open-Source AgentOS is a fork of Microsoft’s Autogen agent framework by many or the original creators. While I am a fan of Autogen, I find AG2 simpler to work with when using local models on my laptop and we will use the forked library here.
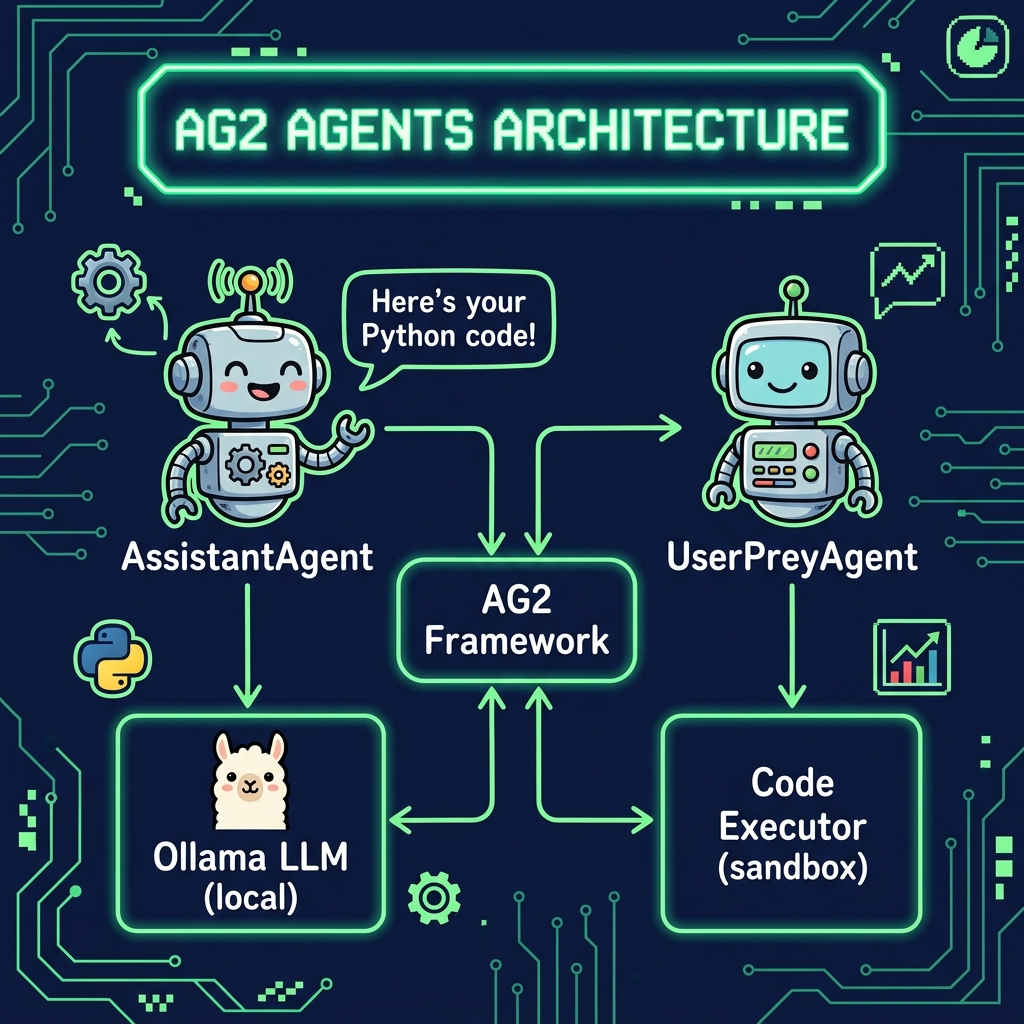
The AG2 agent framework is an excellent tool for creating multi-agent applications, though it was originally designed to work primarily with OpenAI’s models. In this chapter, we demonstrate how to use its capabilities with a local Ollama model (qwen2.5:14b.) We use a modified version of an AG2 example that combines Python and Matplotlib with AG2, showcasing how local deployment can be achieved without sacrificing the robust tool calling features the framework offers.
This approach provides several benefits. By leveraging a local model via Ollama, developers reduce dependency on external APIs, enhance privacy and security, and potentially lower operational costs while retaining the power of AG2’s code generation and execution. The example illustrates how an assistant agent generates the necessary code to perform tasks, and a user proxy agent executes that code to produce dynamic visualizations, such as plotting stock price changes. This decoupling of code generation from execution not only enhances reliability but also allows for greater customization of the execution environment.
The example for this chapter is in directory AG2_agents.
Example Implementation
As I update this chapter in March 2026 most reasoning models work very well. You can specify which model is used using the MODEL environment variable.
 1 from autogen import AssistantAgent, UserProxyAgent
 2 import sys
 3 from pathlib import Path
 4
 5 # Requirements:
 6 # pip install ag2 ollama fix_busted_json yfinance matplotlib
 7
 8 ROOT = Path(__file__).resolve().parents[1]
 9 if str(ROOT) not in sys.path:
10     sys.path.insert(0, str(ROOT))
11
12 from ollama_config import get_model
13
14 config_list = [
15  {
16   "model": get_model(), # Choose a model that supports tool calling
17   "api_type": "ollama", # Specify Ollama as the API type
18   "client_host": "http://localhost:11434", # local Ollama server
19   "api_key": "fakekey",
20   "native_tool_calls": True # Enable native tool calling
21  }
22 ]
23
24 # Create the AssistantAgent using the local model config
25 assistant = AssistantAgent("assistant",
26                            llm_config={"config_list": config_list})
27 # Create the UserProxyAgent; adjust code_execution_config as needed.
28 user_proxy = UserProxyAgent("user_proxy",
29                             code_execution_config={"work_dir": "coding",
30                                                    "use_docker": False})
31
32 # Initiate an automated chat between the agents.
33 user_proxy.initiate_chat(assistant,
34                          message="Plot a chart of NVDA and TESLA stock price change YTD.")
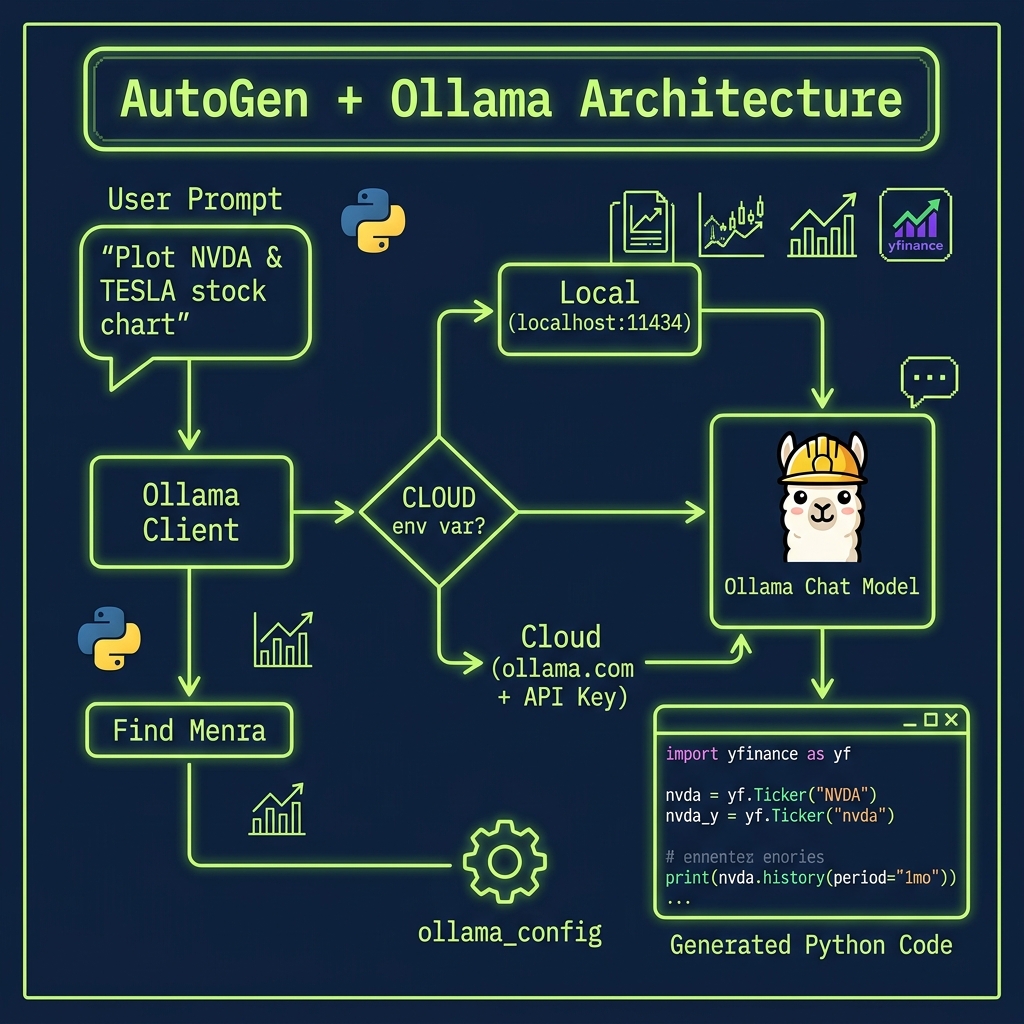
This code sets up a multi-agent workflow using AG2 by configuring an assistant agent and a user proxy agent. First, it defines a configuration for a local Ollama-based model that supports native tool calling. The configuration specifies details such as the API type (“ollama”), the local server URL (“http://localhost:11434”), a placeholder API key, and an option to enable native tool calls. This configuration is then passed to instantiate the AssistantAgent, which uses it to generate responses based on the local LLM.
This example uses a UserProxyAgent configured for Python code execution with a designated working directory (“coding”) and Docker disabled. Finally, the user proxy agent initiates an automated chat with the assistant by sending a message requesting the plotting of a chart for NVDA and TESLA stock price changes year-to-date. This setup demonstrates a simple, automated multi-agent interaction where the assistant generates responses (potentially including code) and the user proxy executes those responses to fulfill the requested task. You will either want to remove the generated code directory coding after running this example of add coding to your .gitignore file.
We use uv to run Python examples in this book. Internally the AG2 agent library will write, install dependencies in a sandbox, and run automatically generated code. Therefore, we must explicitly install pip* inside the directory local uv .venv environment:
1 export MODEL=nemotron-3-nano:4b
2 uv run autogen_python_example.py
The agent will generate Python code that it tries to run in a sandbox.
Example Output
Here is a partial listing of the output:
1 $ uv venv
2 $ uv pip install pip
3 $ uv run autogen_python_example.py
4
5 user_proxy (to assistant):
6
7 Plot a chart of NVDA and TESLA stock price change YTD.
8
9 -------------------------------------------------------------
10 assistant (to user_proxy):
11
12 To plot a chart of NVDA (NVIDIA) and Tesla's stock price changes year-to-date, we will need to fetch their historical data from an API or a financial data source such as Yahoo Finance.
13
14 Let's use Python with the `yfinance` library to get the data and then plot it using `matplotlib`.
15
16 Here is a step-by-step plan:
17
18 1. **Install Required Libraries**: If not already installed, install `yfinance` for fetching stock data and `pandas` & `matplotlib` for processing and plotting the data.
19 2. **Fetch Stock Data**: Use `yfinance` to get the year-to-date historical data for NVDA and TSLA stocks.
20 3. **Plot Data**: Plot the closing prices of both stocks on a chart.
21
22 Let's start by fetching and plotting the stock price data with Python code:
23
24 ``python
25 # filename: plot_stock_prices.py
26
27 import yfinance as yf
28 import matplotlib.pyplot as plt
29 import pandas as pd
30
31 # Fetch year-to-date historical data for NVDA and TSLA
32 stocks = ['NVDA', 'TSLA']
33 data = yf.download(stocks, start='2023-01-01')['Close']
34
35 # Plot the closing prices of both stocks
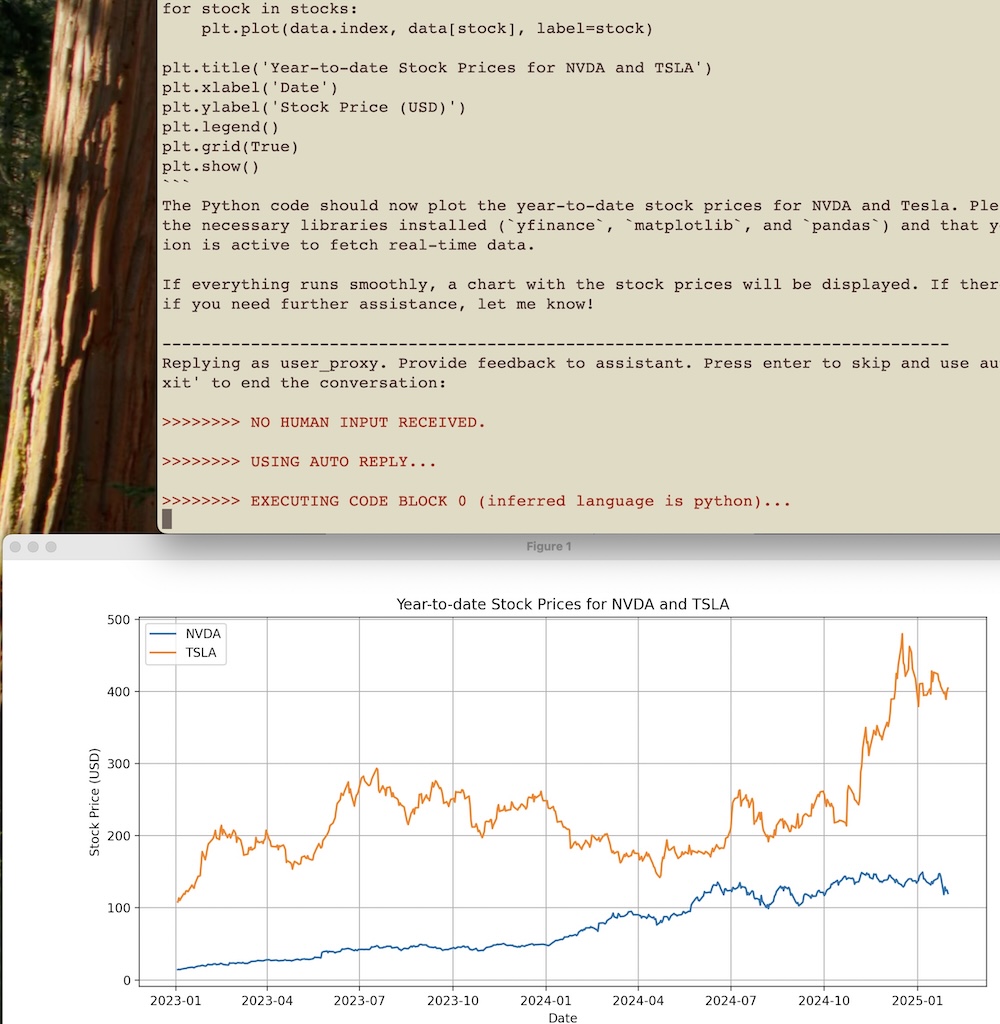
36 plt.figure(figsize=(14,7))
37 for stock in stocks:
38 plt.plot(data.index, data[stock], label=stock)
39
40 plt.title('Year-to-date Stock Prices for NVDA and TSLA')
41 plt.xlabel('Date')
42 plt.ylabel('Stock Price (USD)')
43 plt.legend()
44 plt.grid(True)
45 plt.show()
46 ``
47
48 You can execute the above Python script to generate the plot. Please make sure you have `yfinance`, `matplotlib`, and `pandas` installed in your environment. If not, install them by running:
49
50 ``sh
51 pip install yfinance matplotlib pandas
52 ``
53
54 After executing the code, you should see a chart showing the year-to-date closing prices for both NVDA and TSLA stocks.
55
56 Once you have executed this script, please inform me of any issues or if everything is plotted correctly.
57
58 -------------------------------------------------------------
59 Replying as user_proxy. Provide feedback to assistant. Press enter to skip and use auto-reply, or type 'exit' to end the conversation:
60
61 >>>>>>>> NO HUMAN INPUT RECEIVED.
62 >>>>>>>> USING AUTO REPLY...
63 >>>>>>>> EXECUTING CODE BLOCK 0 (inferred language is python)...
Wrap Up for Using AG2’s Agent Framework for Generating and Executing Python Code
Here we experimented with using Ollama and a local model to use the powerful AG2 agent framework.
The AG2 framework for Python tool calling agents streamlines the development of multi-agent applications by enabling seamless interaction between an assistant agent and a user proxy agent. In the example, we configured a local LLM (using a model like “qwen2.5:14b” via Ollama) and instantiated an AssistantAgent to generate responses and code, while a UserProxyAgent was set up to execute the generated code. This automated conversation allowed the agents to collaborate on a task—plotting a chart for NVDA and TESLA stock price changes year-to-date—demonstrating how AG2 bridges code generation and execution in an autonomous workflow. 
This example highlights AG2’s ability to leverage native tool calling within a Python environment, reducing the need for manual intervention during code execution and debugging. By decoupling the generation of task-specific code from its execution, developers can build systems that are both flexible and scalable. The assistant agent focuses on planning and generating code, while the user proxy agent reliably executes that code, creating an effective feedback loop for refining results. This pattern not only simplifies complex workflows but also provides a foundation for robust, error-resilient applications.
To further explore the potential of AG2, you dear reader might experiment with integrating additional tools—such as web scraping modules, database connectors, or advanced visualization libraries—to expand the capabilities of their agents. Another interesting avenue is to adjust the configuration parameters: try different LLM models, enable Docker-based code execution, or incorporate human-in-the-loop feedback to refine responses. Additionally, extending the workflow to include more specialized agents (e.g., a dedicated CodeExecutorAgent or a DebuggingAgent) can provide insights into multi-agent orchestration and the scalability of autonomous systems. These experiments will help readers understand the full versatility of AG2 in creating dynamic, multi-step applications.
Optional Practice Problems
Introducing Human Intervention. In the AG2 script (
agent.py), the agents converse fully autonomously. Modify the configuration ofUserProxyAgentto sethuman_input_mode="ALWAYS". Run the conversation and practice intervening at various steps to steer the assistant’s python script development manually.A Three-Agent Group Chat. Refactor
agent.pyto use AG2’sGroupChatandGroupChatManager. Add a third agent calledQualityAssuranceAgentwhose system prompt directs it to review code generated by the Assistant for potential errors. The developer agent should not finish until the QA agent gives an “APPROVED” verdict.Tool Execution in AG2. Register a custom python tool (like one of the local SQLite or web-search tools built in previous chapters) with an AG2 assistant agent. Configure the agent so that it can suggest tool calls and the user proxy agent can execute them. Test it by asking the user proxy to query database data.
Debugging and Self-Correction Loop. Test the agent’s ability to self-correct by writing a task prompt that is intentionally slightly wrong or lacks imports. Observe how the user proxy agent reports the python execution error back to the assistant, and verify if the assistant agent successfully writes a corrected script to resolve the issue.