1. October 2012
- Using a Git Branch to fix a Bug
- Git and GitHub commands to create and deploy new version of TeamMentor
- Idea: Sync Blogger Posts with a GitHub repository
- Approving a GitHub Pull Request Workflow
- Deploying TeamMentor to AppHarbor (.NET Cloud) using Git push
- The need to create forks/clones for TeamMentor.net website
- Using Git Branches to deal with the multi-config variations of TeamMentor
- Handling content changes made on hosted site created by Git clone (with auto Git commits and pushes)
- Going back in time using Git’s checkout
- Adding Tags to TeamMentor Master repository
- Creating the final TeamMentor with SI Library repository via multiple Git pulls and pushes
Using a Git Branch to fix a Bug
On Git I don’t tend to use branches for big code changes, and the only time I tend to use them (on development) is when trying new code changes or fixes.
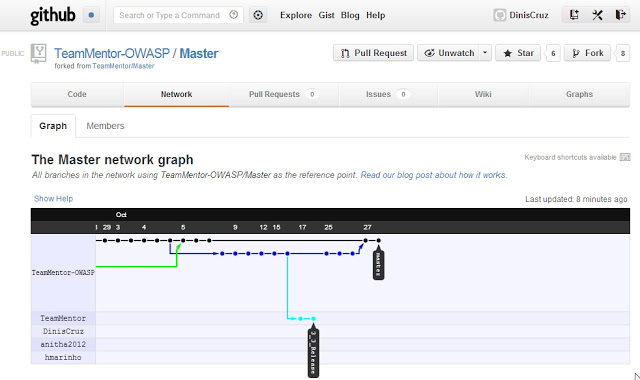
For example I was working last night on a CRSF fix for TeamMentor (more on that later) and I created a new branch using ($ git checkout -b crst_test) which contained a number of temp commits, like the ones that selectively disabled some Admin security demands so that I could debug the issue better :) :
{width=512px)
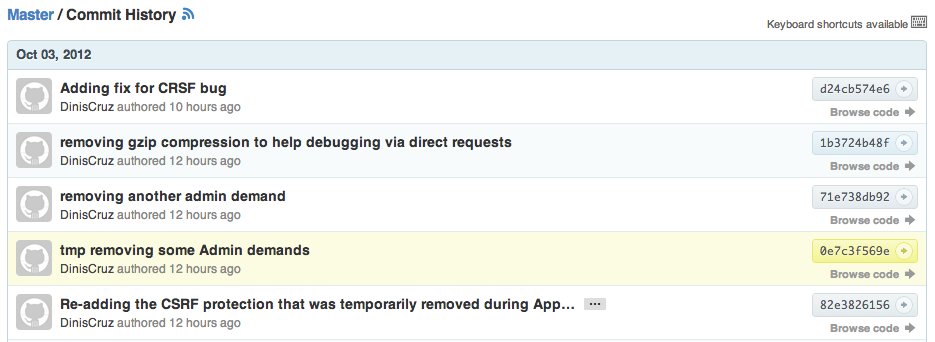
As you can see by the Commits, I did a number of changes that where only pushed to the crst_test branch ($ git push origin crst_test:crst_test) and not be propagated to the main code base.
Then then once I finally found the issue and fixed (see last commit), I went back to the the main branch ($ git checkout master) added my fixes, commit them and pushed them to the master branch ($ git push origin master).
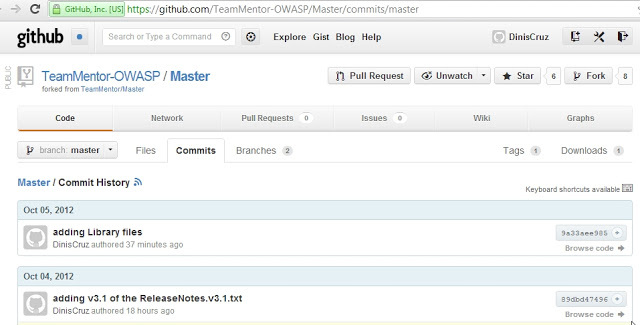
At the moment this is what the main repo looks like:
{width=612px)
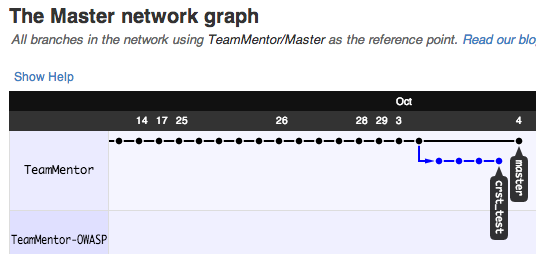
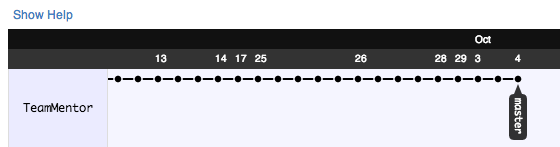
The final step is to remove the local branch ($ git branch -D crst_test) and the branch from GitHub ($ $ git push tm_master –delete crst_test), which after GitHub recreates the graph (sometimes it takes a couple minutes), it looks like this:
{width=712px)
Git and GitHub commands to create and deploy new version of TeamMentor
With the new Release of TeamMentor, I needed to upgrade the main GitHub repositories to the new version. This is the detailed version of the Git and GitHub workflow used.
My objective was to create a set-up where I could push the new code base (3.2) while keeping a clean separation with the previous one(s).
My solution was to use branches to hold each version (yes I could have used tags, but I prefer the isolation provided by branches).
The actions taken are:
- Identify the repository with the latest version of TeamMentor (the Code)
- Identify the repository with the TeamMentor Library to use (the Content)
- Identify the repository to upgrade (with both the Code and Content)
- Download the repository to upgrade and store it on a separate branch (the Backup)
- Download the Code repository
- Download and merge the Content repository
- Publish changes
More specifically (using some Git commands)
- Set up tm_master remote with the latest version of source-code (for example): https://github.com/TeamMentor/Master
- Set up tm_library remote with the TeamMentor library to use (for example): https://github.com/TeamMentor-OWASP/Library_OWASP
- Set up origin remote with the version to upgrade, which is the Code+Content version (for example): https://github.com/TeamMentor-OWASP/Master
- pull origin into master
- move master branch into master_Old.Version (for example) master_3_1
- create a new ‘orphan’ branch called master (and delete all files from it)
- pull tm_master into master
- pull (using tree merge strategy) tm_library into the Library_Data/XmlDatabase/TM_Libraries folder
- push all branches to origin
Step-by-Step workflow:
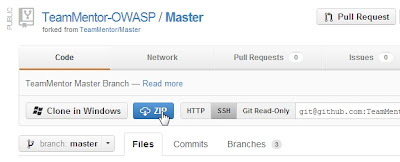
1) Create a local clone from the version to upgrade and back it up:
In this this case from https://github.com/TeamMentor-OWASP/Master
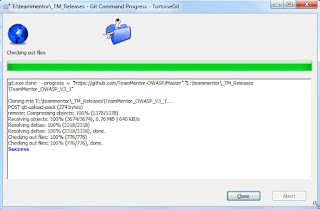
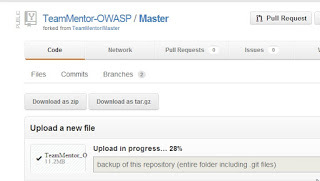
Once the repository is created locally, zip it up and upload it to the GitHub repository download section. It is important that this is the version with the .git folder (and not the .zip you can download from the repository main page). The fact that we can easily create a full backup of a complete Git repository is one of my favorite features of Git, and it allows for an easy restore for the inevitable mistakes that will be made :)
Tip: make sure to test the download, since I’ve seen cases where the upload fails and even if there is a download link on the page, there is no file downloadable:
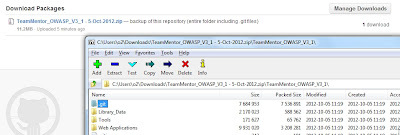
Once you’re happy that you have a backup, you can delete the folder locally created (the one you zipped)
2) Create a local repository with new version:
Start by creating a folder to hold the files (in this case E:\teammentor_TM_ReleasesTeamMentor_with_OWASP_Library)
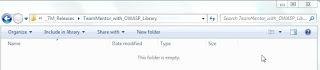
Open a git bash and cd into that folder
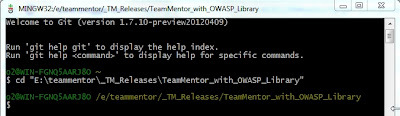
Execute the following commands in sequence:
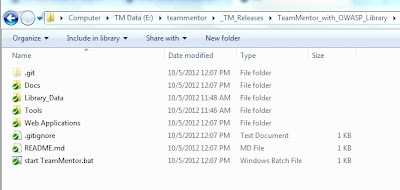
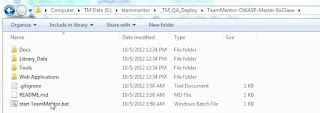
After completion the target folder should look like this:
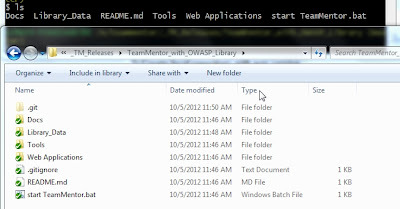
To quickly test TeamMentor, double click on ‘start TeamMentor.bat’
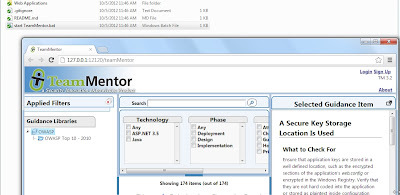
3) Test rolling back to an earlier version:
What is really cool with this set-up (and the power of Git), is that it is very easy to change to an earlier version. Leaving the webserver on (which is running from the ToolsCassiniDev_4.0.ex folder), go to the git batch and run the command: $ git checkout -f TeamMentor_3_1
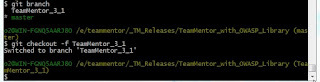
What this will do is to replace the current files in the target dir with the files from the TeamMentor_3_1 branch (which are the files from the repository we are upgrading).
This is what the file system looked like before the : $ git checkout -f TeamMentor_3_1 command
And this is after

Can you spot the differences?
I can’t overstate how powerful this is, specially due to the speed that it happens. What we are looking at here is a virtual file-system based on a Git database. It was this feature that really made me have a massive paradigm shift, and realize that Git gives us a Version Control File-System (maybe one day we will have an OS-Level git based file-system).
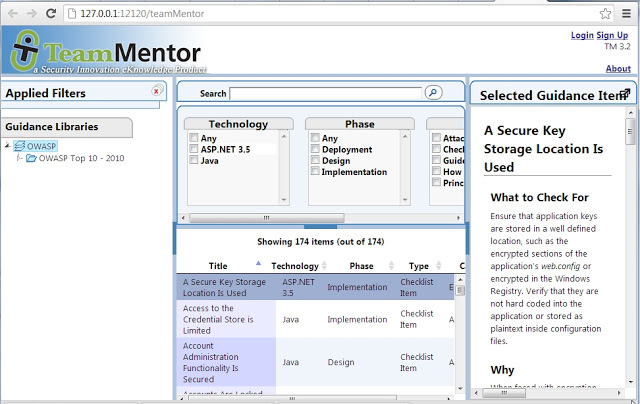
And just to make sure that we did change into the previous version of TeamMentor, refresh the browser and reopen http://127.0.0.1:12120 (which will be the 3.1 version of TM)
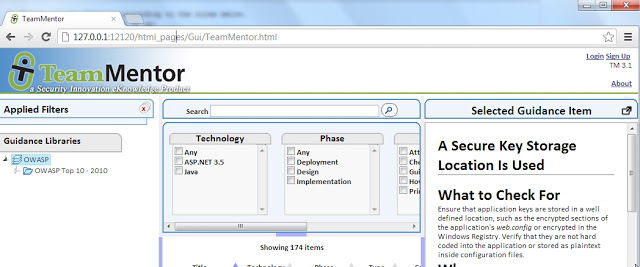
Now go back to the Git Bash, switch to the master branch (via $ git checkout -f master) and refresh the browser:
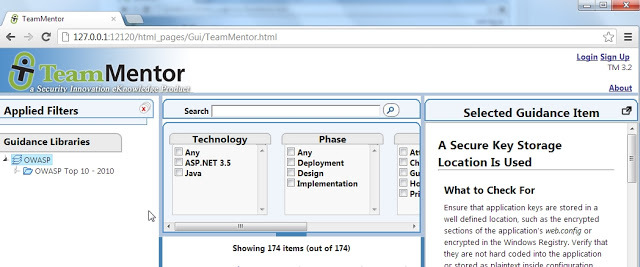
And we’re back to version 3.2 (note the version number on the top right, under the ‘Sign Up’ link).
I have to say that I never get tired of seeing this ‘virtual file system created by branches’ in action. Try the checkouts a couple times with a windows explorer window open (so that you see the files change in real time).
4) Confirm that both repositories have merged successfully:
A key part of the structure created is the ability to have a merge of two Git repositories (one with the Code and one with the Data) while keeping track of their commit history (and allowing pulls of new content/data).
This is achieved using the Git subtree merge strategy, which can be seen in action if you run the $ gitk command (note: I did a $ git stash first to remove a couple temporary files created by the TeamMentor engine).
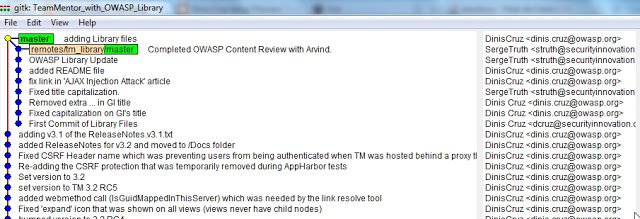
On the Git Commit tree shown above, the dots on the left column are from the tm_master repository (the Code) and the ones on the next column are from the tm_library repository (i.e. we have the Commits from both repositories :) )
5) Push changes to the main repository:
The final step is to push the changes (of both branches) to the origin repository using:
$ git push -f origin master:master and
$ git push -f origin TeamMentor_3_1:TeamMentor_3_1
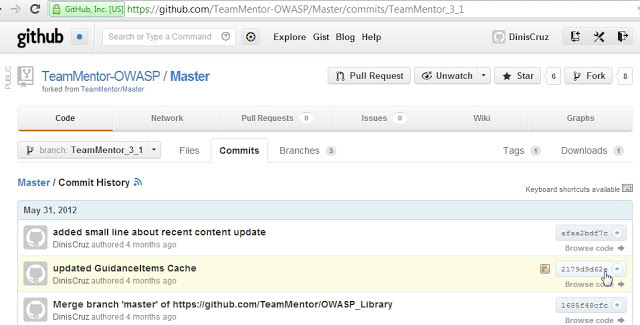
After completion we can double-check that the master branch is now the 3.2 version:
… and the TeamMentor_3_1 branch is the 3.1 version:
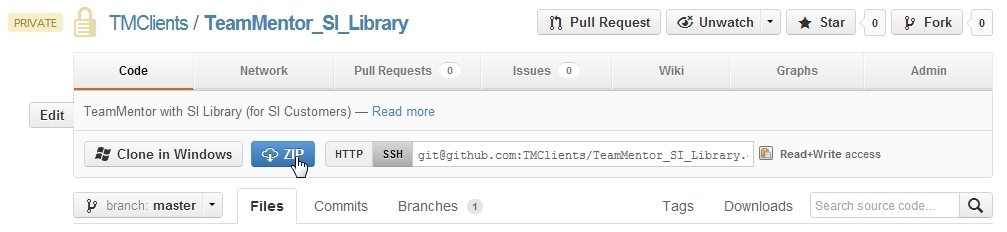
6) Download the zip file and check that everything is okay:
As a final test, download the zip file from the repository master branch home page:
Extract the zip file somewhere on your disk, stop the running Cassini server (if it’s still running) and double-click on the ‘Start TeamMentor.bat’ file:
And you will see a clean 3.2 version of TeamMentor running locally:
Idea: Sync Blogger Posts with a GitHub repository
From the end of the So if my blog account is compromised can I sue Google? post comes an interesting WebService idea:
Sync Blogger posts with a GitHub repository
The idea is to backup the contents of a blogger account into a Git repository hosted by GitHub, which would give it version control and reusability.
In practice this shouldn’t be that hard:
- Subscribe to RSS feed (starting with the big XML export that Blogger already provides)
- Create Git repository locally with ability to:
- Push to GitHub
- Download
- Pull directly
- There needs to be some thinking on the best way to organize the files on the git repository
- It would be really cool if the files could be stored in a way that they could be consumed by other tools (like TeamMentor or http://jekyllrb.com/ )
Approving a GitHub Pull Request Workflow
I just received a GitHub’s Pull Request from Roman for some new content that he added to TeamMentor’s Documentation Site.
Here is the workflow I used to approve this request using GitHub’s web-based workflow:
1) Receive GitHub email alert:
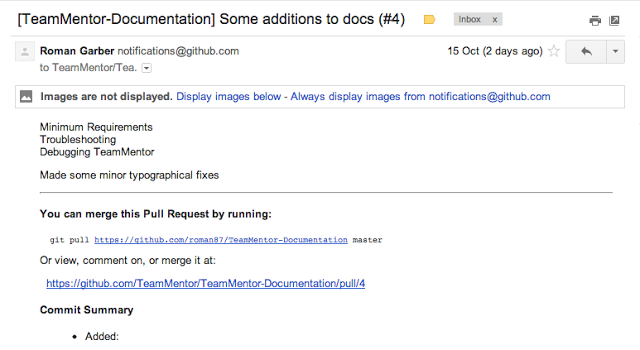
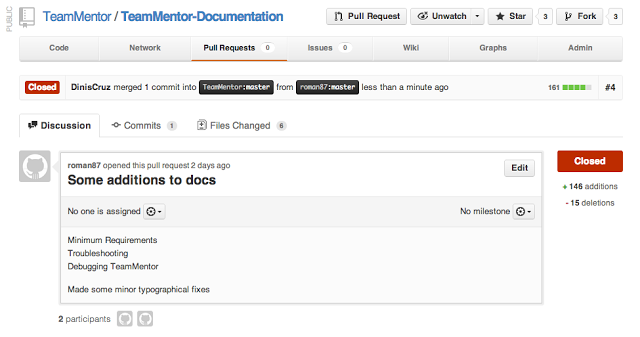
2) Go to GitHub and see the Pull Request there:
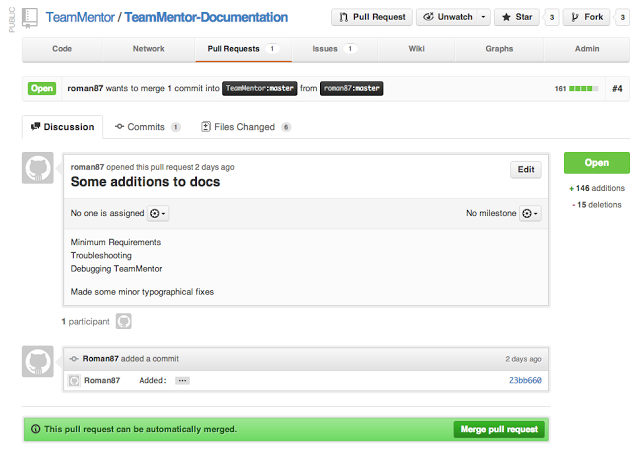
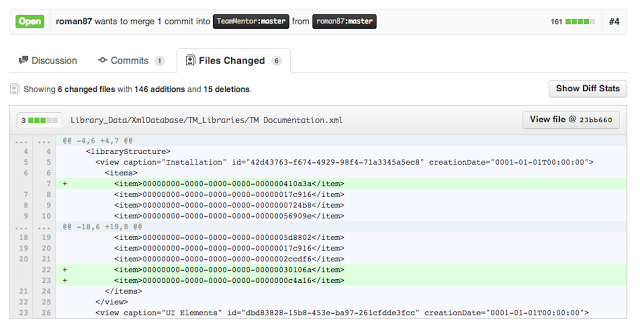
The main page (https://github.com/TeamMentor/TeamMentor-Documentation/pull/4) gives us a nice overview of the Pull Request:
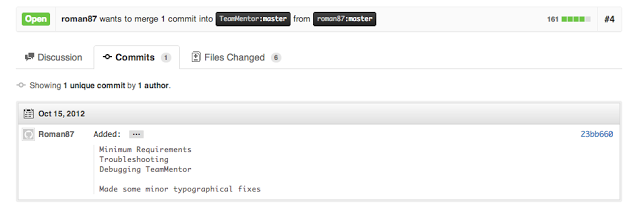
Here are the Commits:
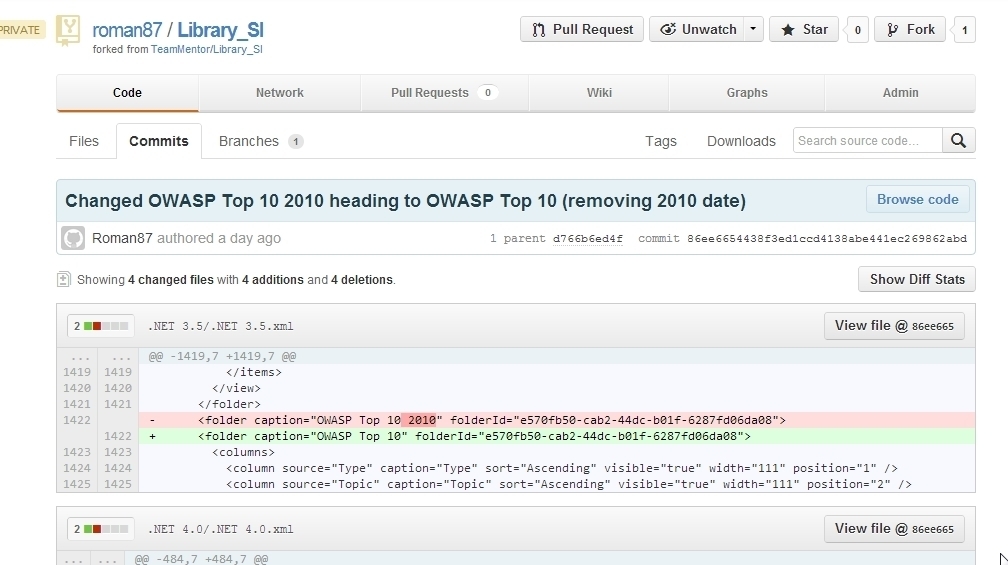
On the Files Changed tab we can easily see (in colours) the proposed changes.
For example, here is a change to the main TM Library xml file with a couple new articles added:
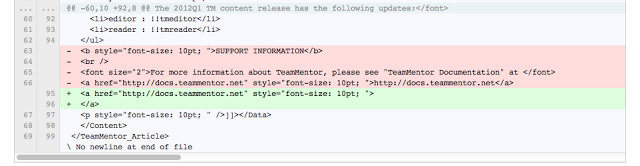
Here are a couple lines removed and some added:
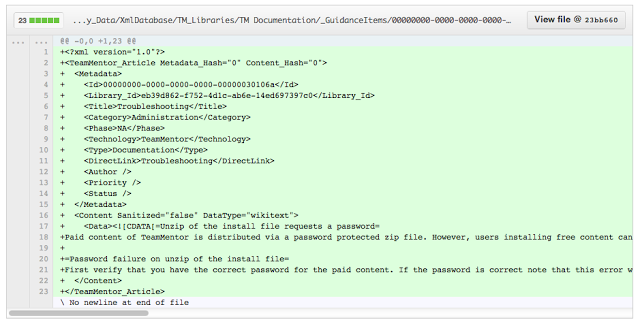
This is a new file:
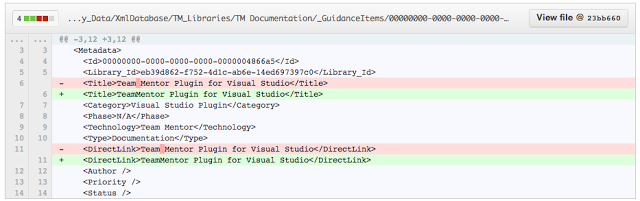
These are a couple metadata changes:
3) Approving the Pull request
Going back to the first page (the Discussion tab) the most important part of this whole process is the green bar that shows that this Pull Request can be merged ok
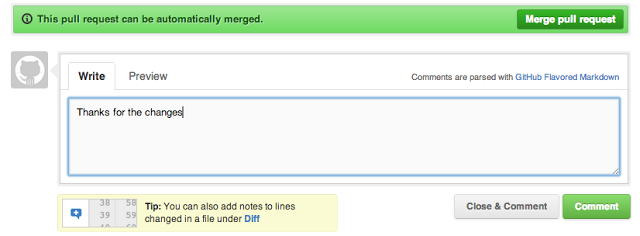
This basically means that there are no conflicts between the new changes and the current content. When this is not possible (and you get a red bar), the best thing is to do this ‘manually’ (i.e. via a git bash on your local box)
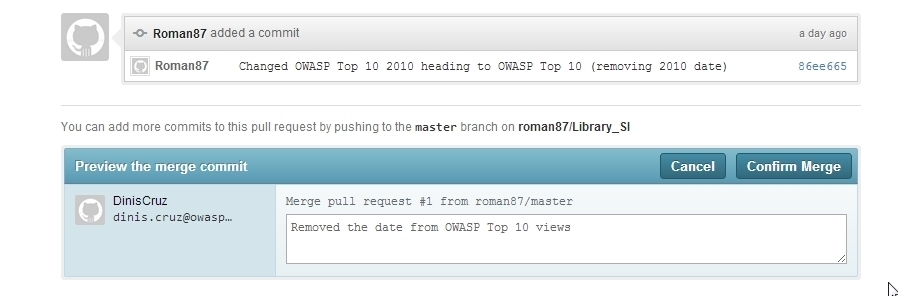
When you click on the ‘Merge Pull Request’ button you get this confirmation request:

And clicking on ‘Confirm Merge’ will do the commit and close this Pull Request:
Deploying TeamMentor to AppHarbor (.NET Cloud) using Git push
Now that AppHarbor supports git publishing (i.e. they create a git repository for an ‘AppHarbor Application’), it is very easy and fast to deploy a new version of TeamMentor.
First step is to go to AppHarbor.com and create an application (for this example I’m calling it ‘Testing-AppHarbor’):
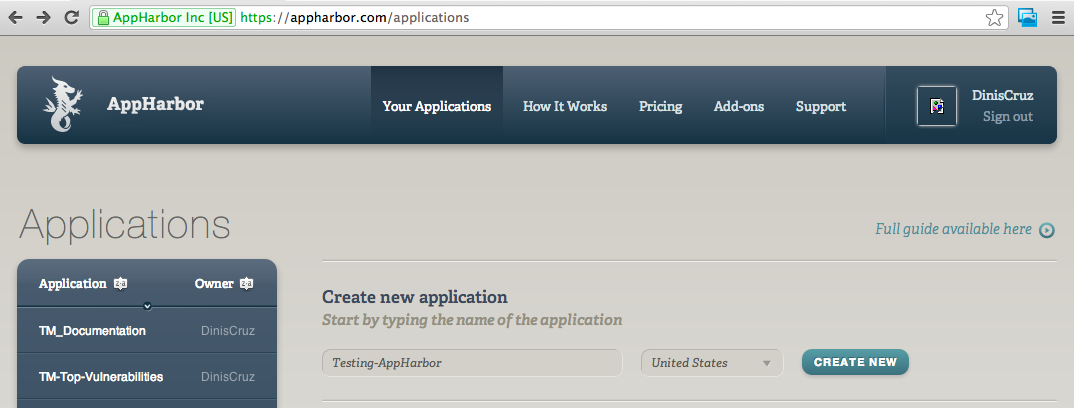
Once the application is created, click on the bottom-left ‘Repository URL’ button, which will copy to your clipboard the AppHarbor Git url:
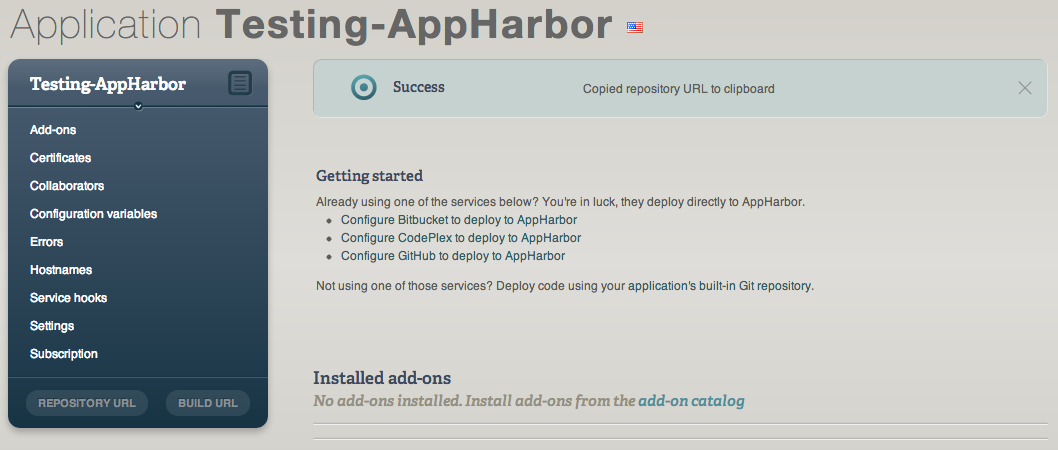
In this example it was: https://DinisCruz@appharbor.com/testing-appharbor.git
Next open an GitBash on the repository you want to push and execute:
$ git remote add appharbor_test https://DinisCruz@appharbor.com/testing-appharbor.git
$ git push appharbor_test master
After a bit (depending on your upload speed) you should get a Git push message

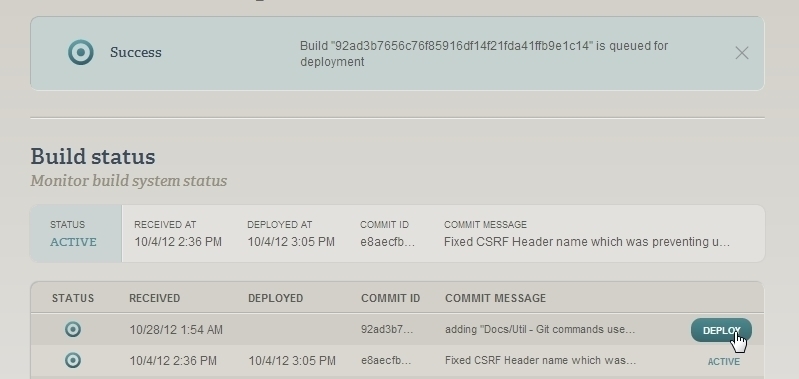
Back in the AppHarbor website, the application page should look like this:
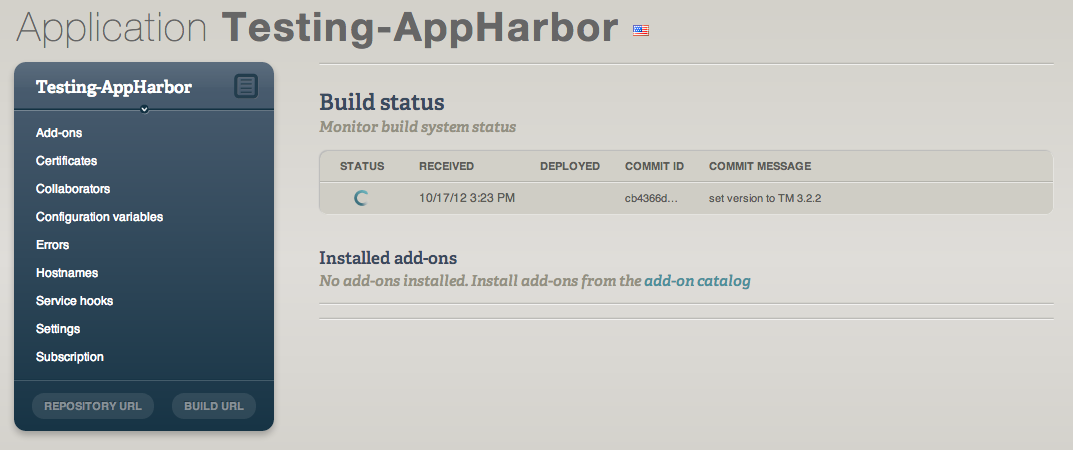
You can click on the icon under the ‘Status’ column (the one animating) to see the current status of the build (note that sometimes AppHarbor takes a couple minutes to trigger the compilation process)
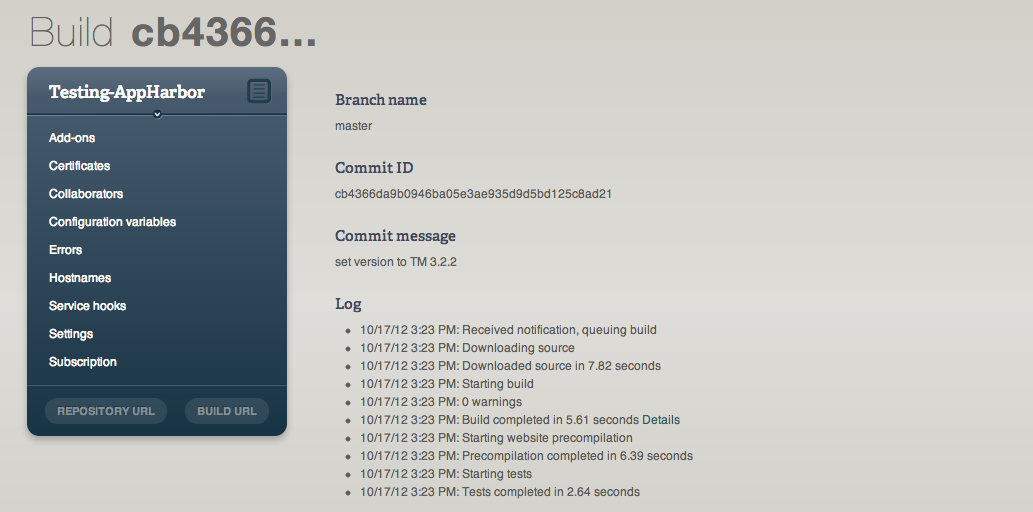
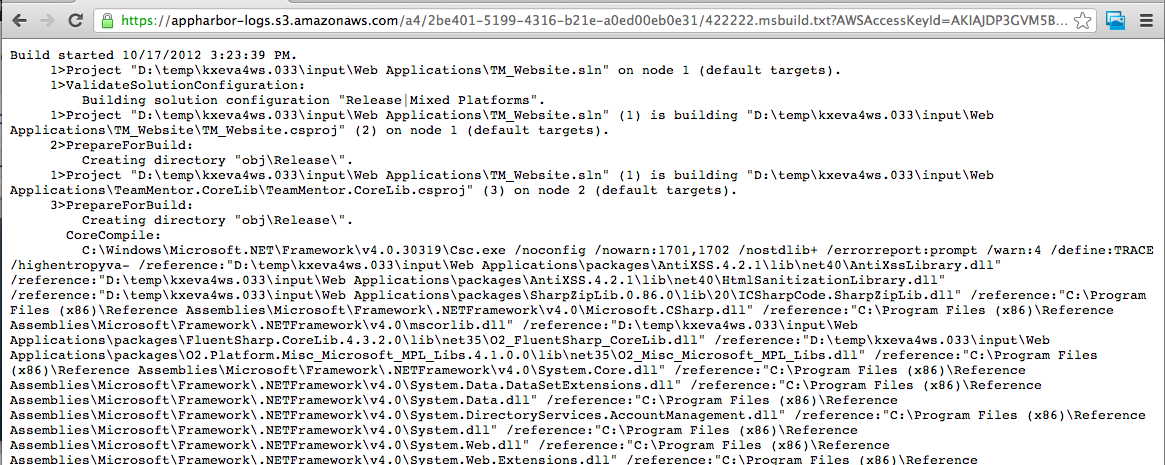
The ‘Details’ link can be used to see the MSBuild compilation log (very useful when the compilation fails)
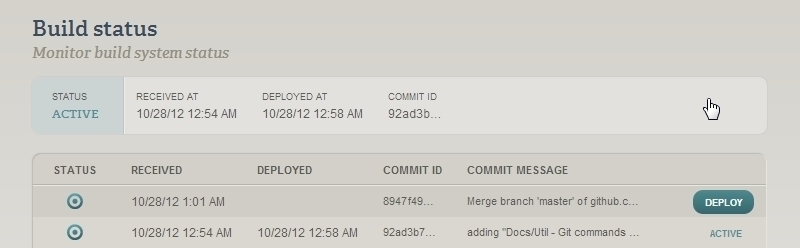
Once the build and deployment is done, if you go back to the Application page you should see that your build is now Active
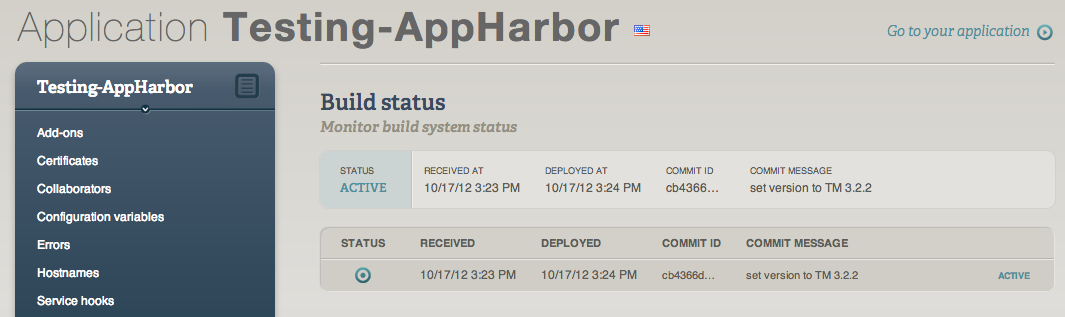
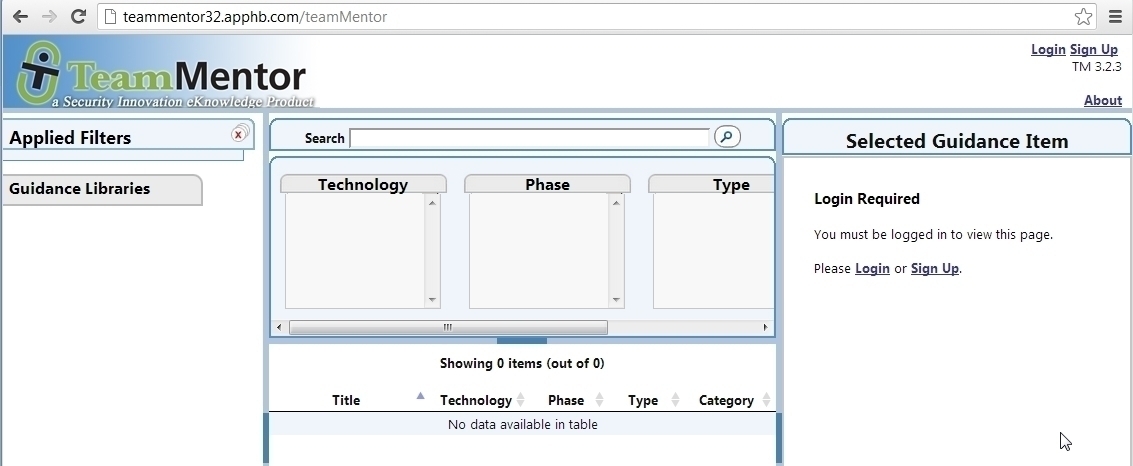
And clicking on ‘Go to your application’ will take you to the website you just created

By default there are no libraries installed from a TeamMentor/Master clone/copy, but this is easily solved by:
- logging in as Admin,
- going to the Control Panel
- choosing the **Advanced Admin Tools **option
- using the Install/Upload Libraries tool.
For example, click on the ‘Top 20 Vulnerabilities’ link to add the Library hosted at GitHub’s TeamMentor/Library_Top_Vulnerabilities (TeamMentor engine will go to that repository, download the ZIP file and install it)
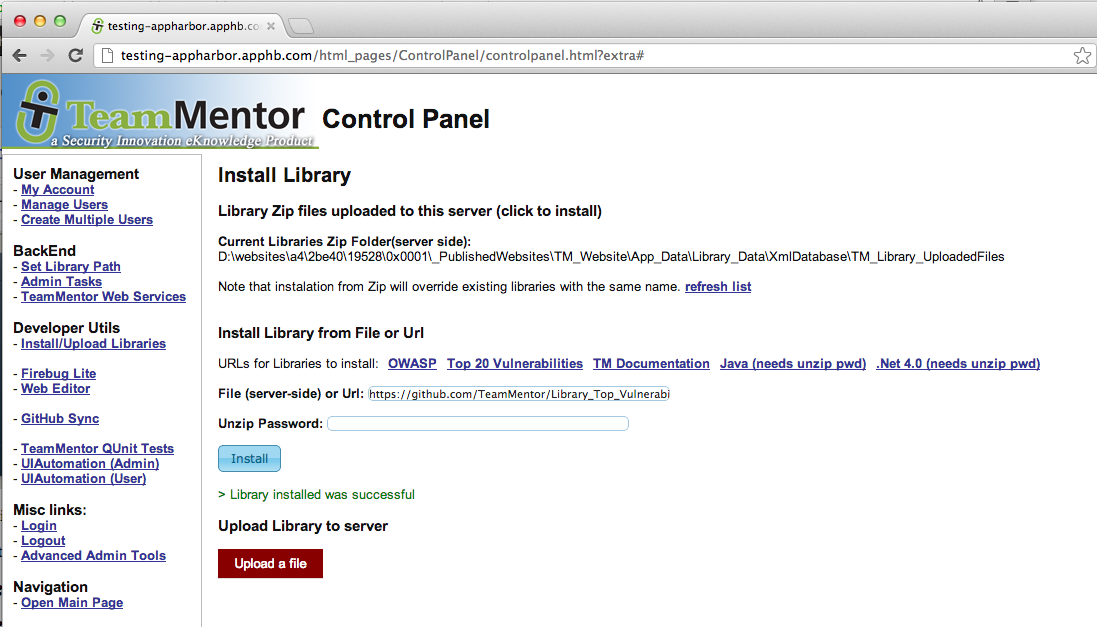
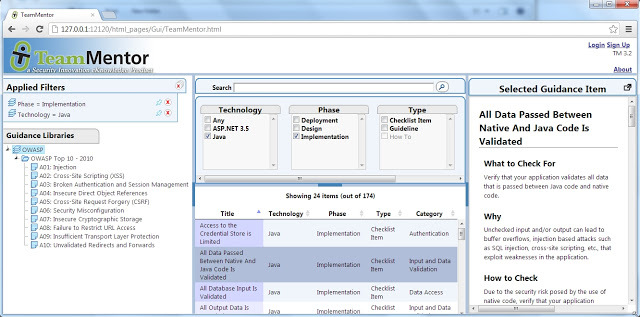
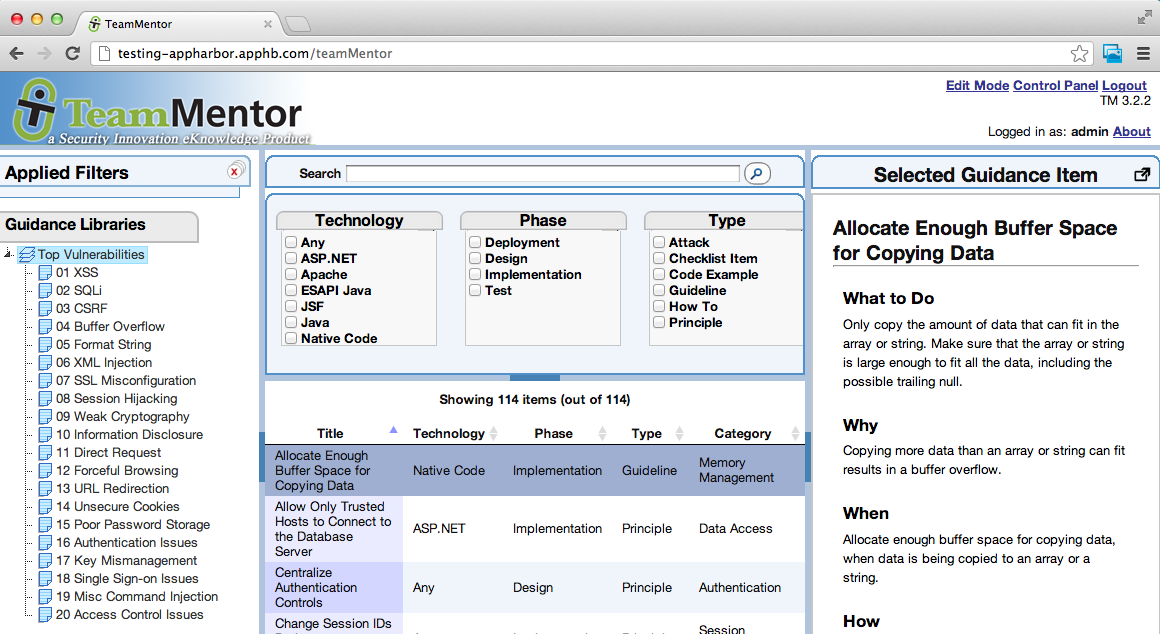
Once that is done, click on ‘Open Main Page’ to go back to the main TM Gui where the ‘Top 20 Vulnerabilities’ Library is now installed:
Auto deploy on GitHub Commit
So far we talked about how to push an git repository into AppHarbor from your local disk, but that is not the only way you can do it.
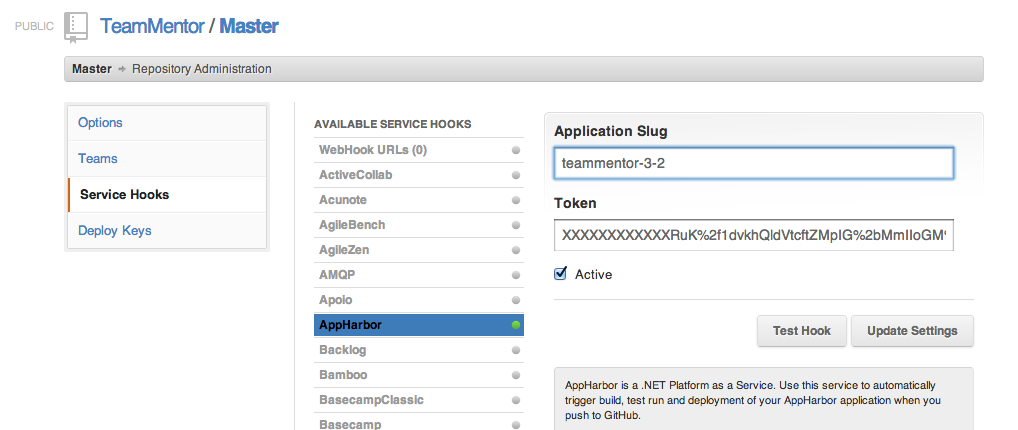
AppHarbor also supports GitHub Service Hooks which can be configured via the GitHub’s repository admin panel.
For example, here is how I use AppHarbor to create a new deployment every-time I do a Git Push into the main TeamMentor/Master repository (which is very useful for QA and Testing)
The need to create forks/clones for TeamMentor.net website
(Here is an email I sent earlier today at SI, that covers a number of interesting challenges that we’re now having with TeamMentor, and how Git/GitHub can help)
One of the scenarios/problems that is starting to happen is ‘how to manage the specific requirements for deployed sites like Teammentor.net who need custom changes?’
So here is a description of ‘the problem’:
a) there is a master version of the code: https://github.com/TeamMentor/Master
b) there is a master version of the content: https://github.com/TeamMentor/Library_SI
c) there is a master version of the code+content (which is a ‘virtual copy’ of the two above): https://github.com/TeamMentor/TeamMentor_SI_Library (think of this as a copy of the code and master repositories in a way that keeps the git connections and commit history)
d) there is a website that is based on the code + content version (i.e. http://teammentor.net) , BUT has a number of specific requirements.
- the content should not be publicly available (not TM default), ie require account creation
- specific SI requirements (see this list: https://github.com/TeamMentor/Master/issues?milestone=3&page=1&state=open)
e) how to deal with changes to http://teammentor.net , that are only relevant to that site (i.e will not be propagated to the main Code+Content repo)
- interestingly in the case of TeamMentor.net site, (at least at the moment), the only changes will be on the Code (where the content is the same as the one in https://github.com/TeamMentor/Library_SI)
- but I can see how as our content generation capabilities improves (and we start to have fresh and ‘current/recent-events’ articles) we might want to push those into teammentor.net (since they will be the best advertisement for TM that we could ever get)
f) since teammentor.net is a ‘read-only’ website, there is also an argument (from a security point of view) that that site should not have the advanced editing capabilities that TeamMentor has (this is also a feature that I can see customers wanting)
So what is the solution?
At the moment, the solution that I see is to:
- create a (private) fork of https://github.com/TeamMentor/TeamMentor_SI_Library (the Code+Content) repository at TMClients organisation (technically it will be a clone not a fork).
- apply the Code changes (specific to SI) in that fork
- use that fork as the source repository of teammentor.net
Any other ideas on how to deal with this?
Note that we have the exact same issue (or a variation of this) on:
- https://owasp.teammentor.net (which will have for example ‘Google analytics’ tracking by default and ‘SSL only’ enabled)
- https://docs.teammentor.net (used to host the tm documentations)
- https://download.teammentor.net (tm site soon to be created to host the Marketing pages (for example the current https://docs.teammentor.net/xml/Eval and https://docs.teammentor.net/xml/Customer )
- https://teammentor.teammentor.net (also called tm4tm, which is a site that will host all technical and non-tm-user documentation/info about TeamMentor (for example https://docs.teammentor.net/xsl/Table_of_Contents will move to this tm4tm site )
- a client that wants to make code changes (for example on TM GUI), most likely another security company (a Partner) or a security department inside a bigger company
Using Git Branches to deal with the multi-config variations of TeamMentor
Here is an interesting problem that affects TeamMentor (TM) and just about every other app:
“How to deal with the specialized versions of an application that are created via Config changes”
Keeping this simple, and only dealing with the config changes that can be made by modifying the TmConfig.config file, TM already (today) has the following scenarios to support:
- Default install (with default settings)
- Anonymous users cannot see the content (with a variation where anonymous users cannot see the Library View (not done via config change))
- Redirect all Http traffic to Https (i.e. SSL Redirect)
- Windows Authentication enabled/disabled
- SSO enabled/disabled
- Change location of TM Libraries
- Enforce HTML Sanitisation on Article content
- Change default admin pwd
There are also other scenarios that I’m sure TM will need to support very soon:
- Read-only version of TM
- ‘Secure / lock-down’ version(s) of TM
- OAuth integration
- Support for 3rd party data sources (like the PoC done where wikipedia, msdn and owasp content is consumed by TM natively)
I was thinking about the ways to solve this, and here are a couple options:
- Rely on user documentation and pass the responsibility to ‘apply the changes correctly’ to the customers/users (I don’t like this solution, although is what most vendors do (including SI))
- Create forks that apply the required changes only to those repositories (this is what we currently do in the forks we maintain)
- Make changes on specialized Git Branches, and use Git Checkout to enabled them (hum…..)
As you can see by my comments:
- I really don’t like option #1,
- option #2 is what we currently do on some cases (and does have the side effect of fork-explosion), and
- option #3 is an idea I have been thinking for a while, and the more I think about it, the more I like it.
Basically the idea would be to use Git Branches to track/apply those config changes.
Currently we use Git Branches to hold references to past TM versions (like we do at the moment in the ‘master TM repositories’). Note that the Git Branches used for special dev tests on Dev forks would not be affected by this.
What I really like about this idea is:
- it would put the responsibility to create those ‘variations’ in the most capable hands (i.e. the ones who know the code best)
- it would allow for a strong QA cycles and for much better support for those scenarios
- it would make life easier for customers/users
- it would provide a scalable way to support complex configuration changes (i.e. scenarios that require more than a couple ‘settings-changes’)
What do you think?
Any other ideas on how to deal with this issue?
Handling content changes made on hosted site created by Git clone (with auto Git commits and pushes)
Here is the next interesting TeamMentor (TM) and GitHub problem to solve:
“How to deal with content changes made using TM’s online editing capabilities”
Here is the ‘Problem description’:
- TM is published from a Git Repository into a Server (let’s call it from REPOSITORY A to SITE A)
- There are two deployment modes that already work well:
- Publish to cloud (Azure or AppHarbor): takes about 2 to 5 minutes
- Publish to EC2 server: takes between 10 to 30 minutes and includes custom DNS and IIS set-up/deployment
- In either mode the idea is that REPOSITORY A is the master version of the Code+Data
- This means that if we needed to rebuild that site, we could (ie. should) be able do it in minutes
- Upgrades and patches are made via a simple git pull (which gets the latest version from the REPOSITORY A) and no git merge activity should be needed
- But what happens when there is a content change on SITE A’s files?
- An automated solution is needed, since the option of ‘RDPing into the server to do the commits/push’ or ‘trying to do the commits/push via TM’s GitHub interface’, not only don’t scale but are as dangerous as replying on manual backups.
Here is what I have in mind:
- TM detects if git support exists on the deployed server (i.e git.exe is available) and:
- Git checkout (the deployed branch) into a special ‘live_server’ branch
- Auto git commit on every TM Content save (or creation) with the commit message being a mix of: Current user, its IP, the date and time and the file affected
- (if configured) auto-push the change to an GitHub repository
- This could be done by configuring an SSH key on the server, or by hardcoding the GitHub credentials into the ‘Git remote’ value
- If git.exe is not available, then these commits and pushes will need to be done manually (by zipping the whole content folder and moving it into a location with git.exe available)
- In terms of the repository to push, I think that we shouldn’t push directly to the original REPOSITORY A (the one used to create SITE A), but we should push it to a fork/clone of REPOSITORY A which could be used as a staging location (one where Pull Requests into REPOSITORY A would be made)
- Of course that we could push into REPOSITORY A directly, but that would expose an account with git push privileges to an important repository, and could create a scenario where unauthorized changes were made into one a production repositories (also note that with git push privileges, it is possible to completely remove all history and commits from a repository (in effect deleting all information)).
What I like about this solution (the auto-commit with option to auto-push) is that it will provide TeamMentor with a state-of-the-art version control solution (at article level).
Every single change would be logged, and although this will most likely make that branch completely unreadable by humans we will be able to have really powerful (and cool) per-article version history (ie. for each file, see its complete change log, including ‘who did the change’).
Note that it is possible to combine a number of commits into one (not in GitHub, but in git.exe) so I think that for cases where a number of files were changed, we might want to consolidate them into larger commits (specially when pushing those changes to ‘user consumable’ repositories)
What do you think?
Any better ideas?
Going back in time using Git’s checkout
I’m still amazed at Git’s speed in moving back and forwards in time. For example I was trying to find a particular GUI that we created for TeamMentor and was able to use git checkout to look at previous versions:
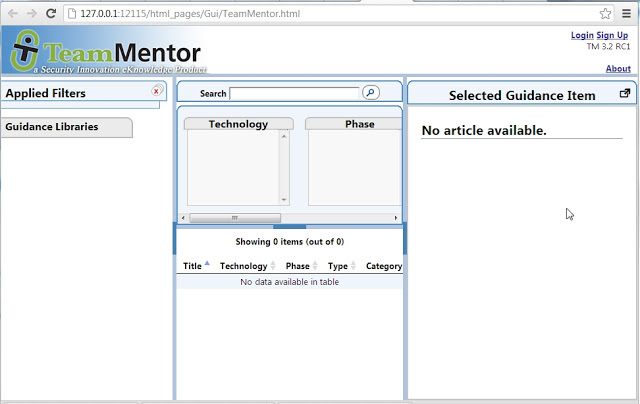
git checkout master (25 Oct 2012 TM 3.2)
git checkout dd867bfb4b9519c3b9c6ddfe2c0f9b1f6720f162 (4th Sep 2012: TM 3.2 RC1) :
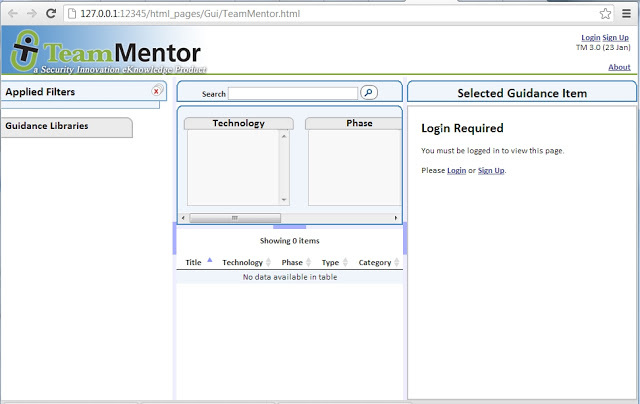
git checkout 890caa053feee04bf0b7139787e0ee6100963771 (23rd Jan 2012: TM 3.0) :
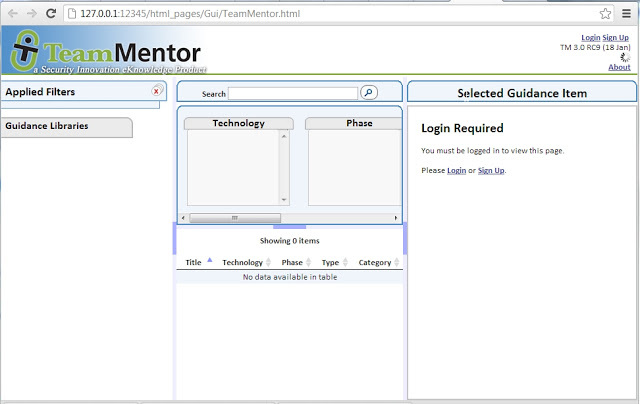
git checkout 557177691139bf2385973b45bf39508042a11621 (18th Jan 2012: TM 3.0 RC9) :
[
Looking at these images, I thought of a cool script to write (here it is in pseudocode):
 1 foreach id in avaiable_checkouts_
 2 {
 3        git checkout id
 4        {
 5           start webserver
 6            open default page in browser (if possible 'add a library if not there')
 7            take screenshot (only store unique values and if possible 'add watermark with vers\
 8 ion and date')
 9            close web server
10       }
11 }
12 create animation from screenshots taken _
It’s all doable with O2’s APIs (I just don’t have the time today) :)
Adding Tags to TeamMentor Master repository
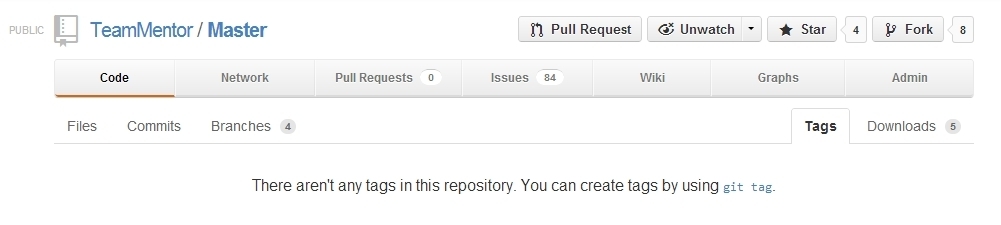
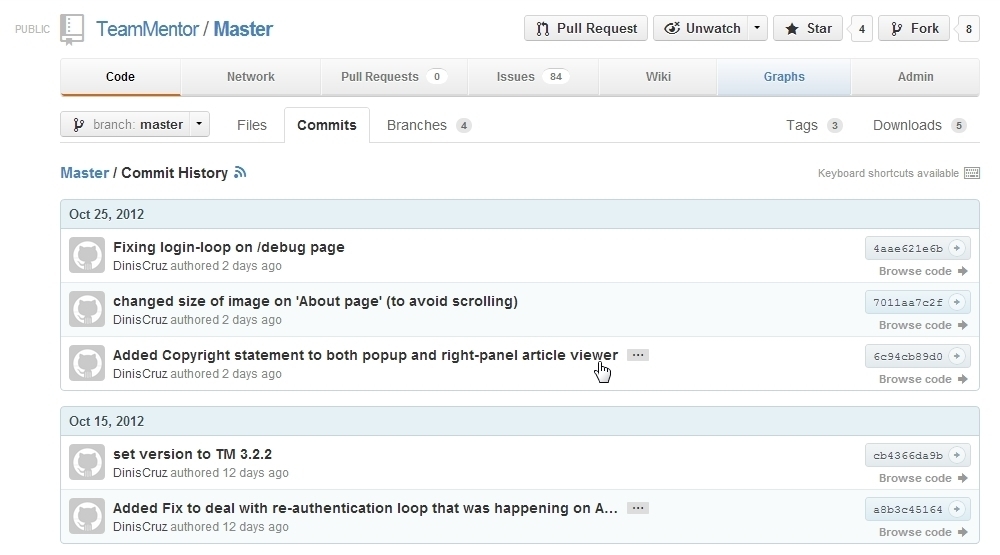
With 3.2 out, its time to add some Git Tags to the main TeamMentor/Master repository (which at the moment has none):
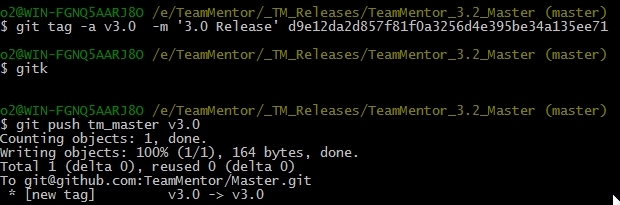
In a local Git Bash of this repository, we can create a tag using $ git tag -a v3.2 -m ‘3.2 Release’

Next we push that tag into GitHub using $ git push tm_master v3.2

And if we look back in GitHub’s Tag page, we will see that our v3.2 tag is in there:
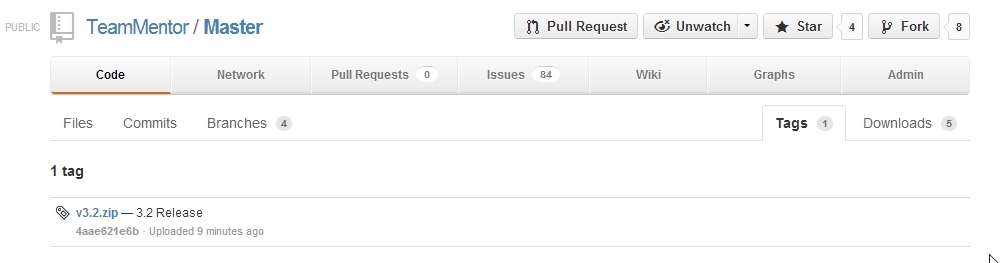
At the moment we are keeping track of the previous versions using Git Branches (but I think that tags will do a better job)
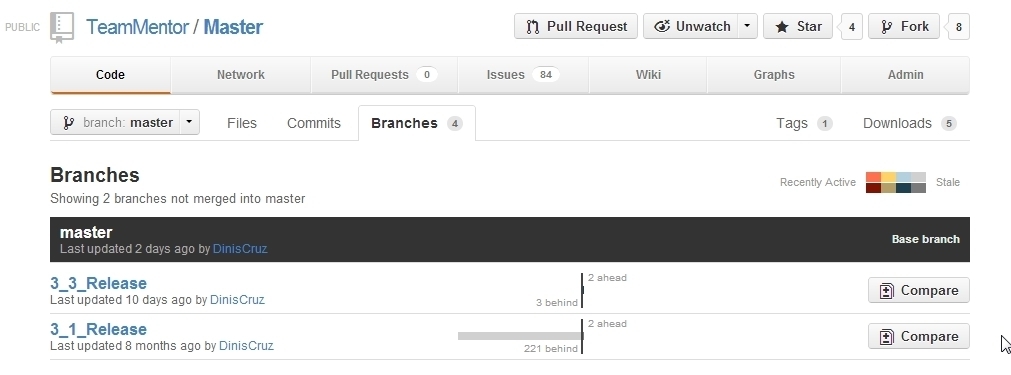
For example here is 3.1 release (with the f71b016241 id)
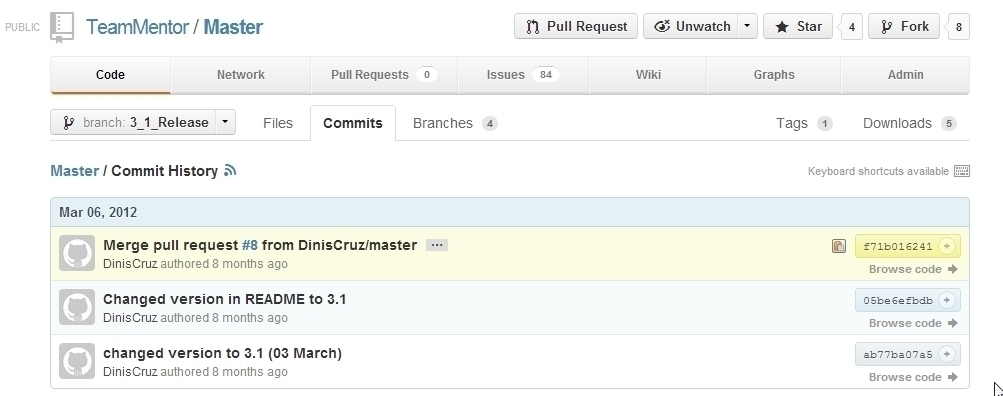
We can use this ID value to create the 3.1 tag


Use gitk to find the SHA1 ID of the 3.0 release
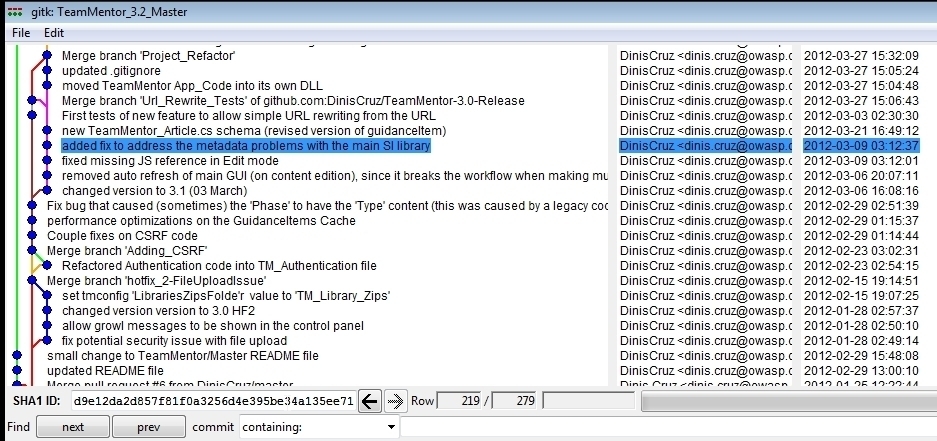
Which we use to create the 3.0 tag:
After pushing to GitHub, the Tag page looks like this:
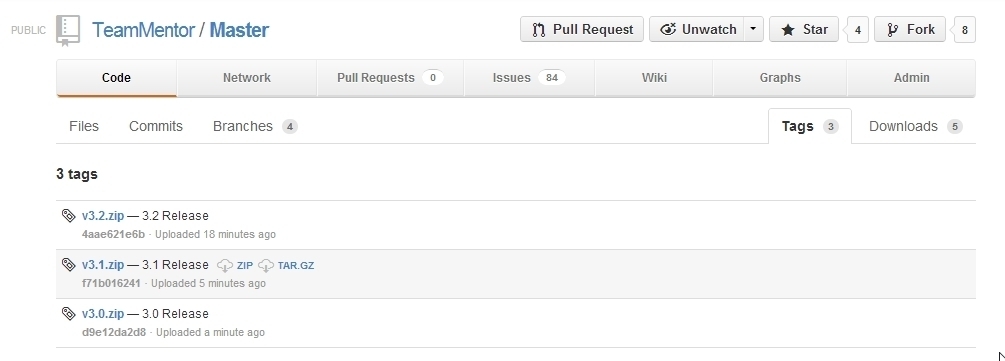
What is really cool about these Git Tags is that they also provide a nice location to download a particular release :)
Creating the final TeamMentor with SI Library repository via multiple Git pulls and pushes
This is going to be a long one, so if you are interested in seeing Git and GitHub in action in a real-world application, grab a coffee/tee/beer and read on :)
This is the scenario at the start:
- We need to create the final TeamMentor 3.2.3 package for release
- The TeamMentor_SI_Library repository is at version 3.2
- The TeamMentor/Master repository is at version 3.2.3
- The Library_SI has a couple content changes since the last pull
- We need to do a pull of both TeamMentor/Master and Library_SI into TeamMentor_SI_Library and push the final result to GitHub
For background information on the current TeamMentor git architecture, take a look at:
- Git and GitHub commands to create and deploy new version of TeamMentor (this explains the subtree merge strategy, which is the reason why the multiple git pull used below actually work)
- New GitHub structure for the multiple TeamMentor development and deployment scenarios
- The need to create forks/clones for TeamMentor.net website
It all starts with a pull request from Roman the last content changes to be added to Library_SI
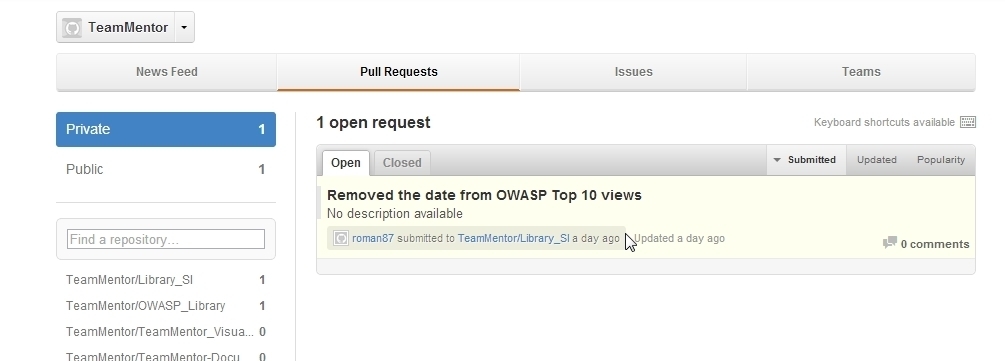
Which I opened
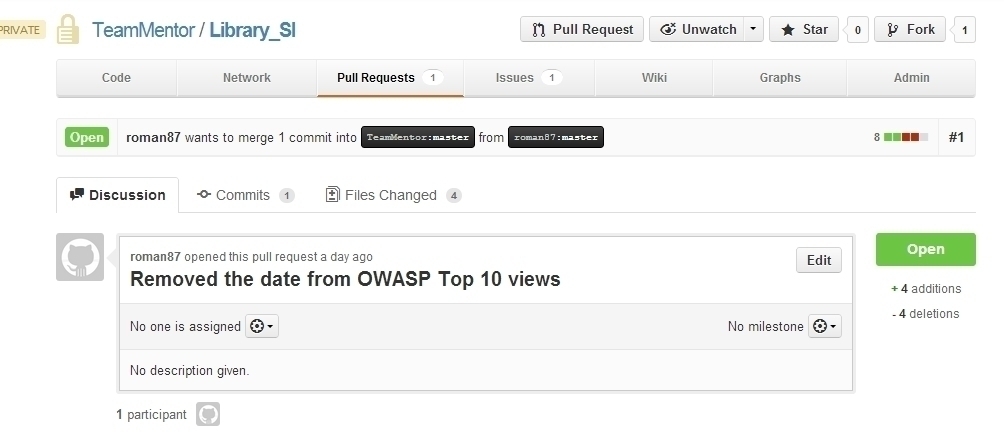
Quickly reviewed the changes
And Confirmed Merge
This will close the Pull Request
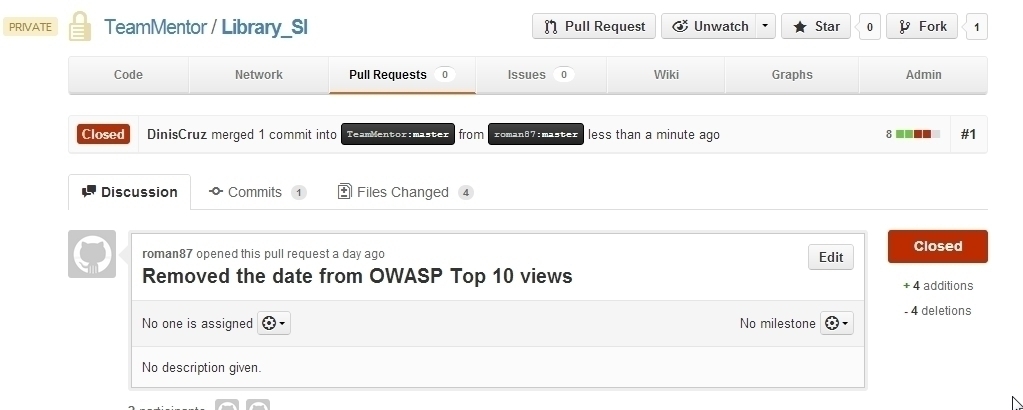
With changes now part of the main Library_SI repository

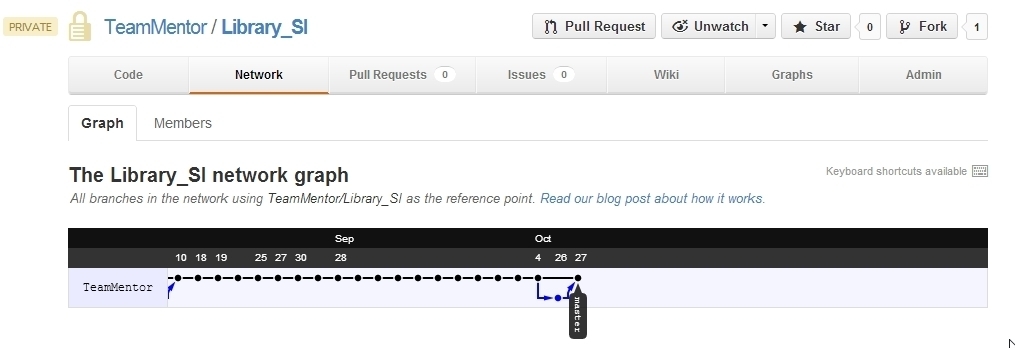
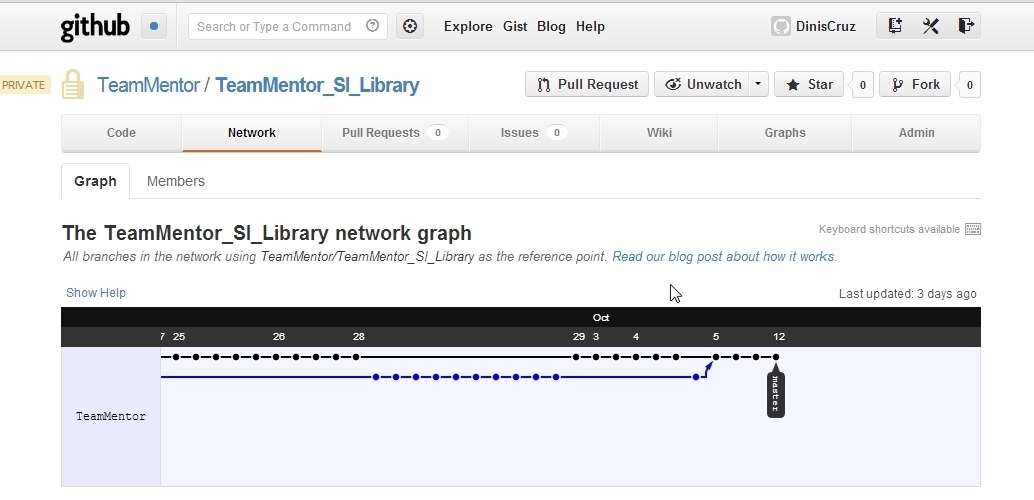
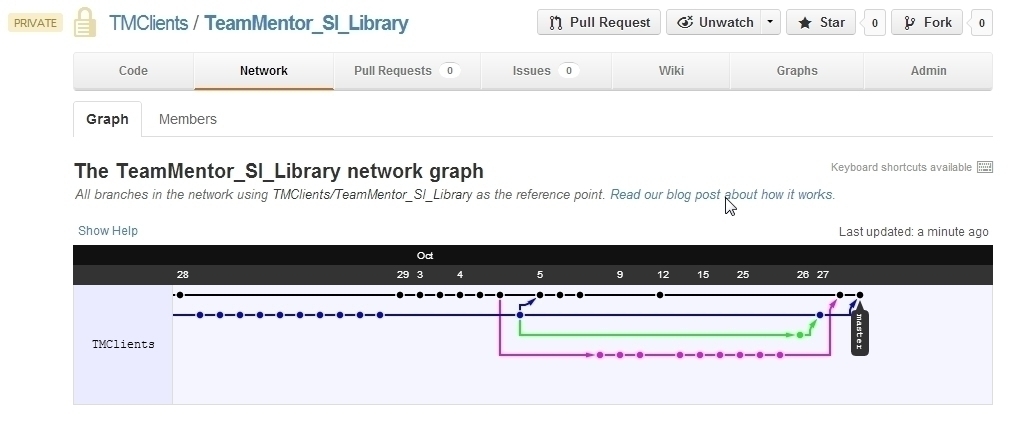
For reference here is the network graph of Library_SI
Next we move into the TeamMentor_SI_Library:
Opening the local copy of the TeamMentor_SI_Library , as the log list shows (below) we are 1 commit behind the version at GitHub:

Let’s create a new branch to do the updates (just in case)

And confirm that we are also not in sync with the TeamMentor/Master repository
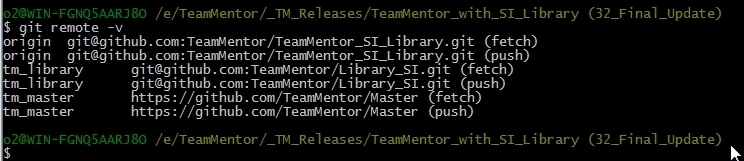
Here are the current remotes (in TeamMentor_SI_Library):
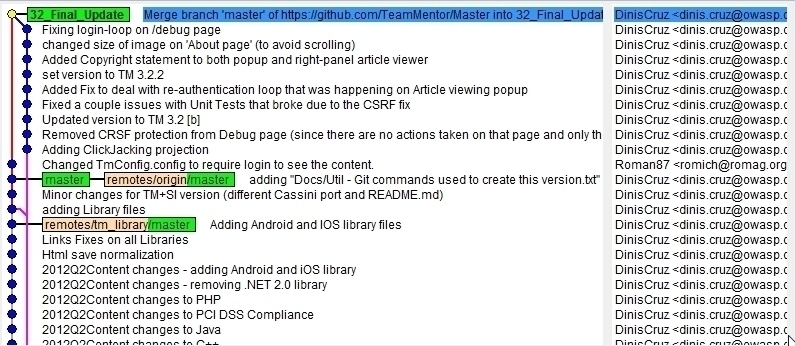
Here is gitk visualization of the TeamMentor_SI_Library commits
Here is GitHub visualization of the TeamMentor_SI_Library commits
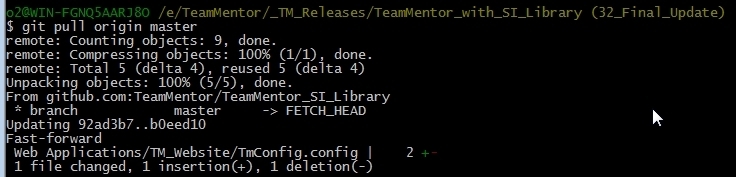
We’re now ready to do the pulls (fetch+merge), and let’s start with the TeamMentor_SI_Library (origin remote)
Next lets do the TeamMentor/Master (tm_master remote)
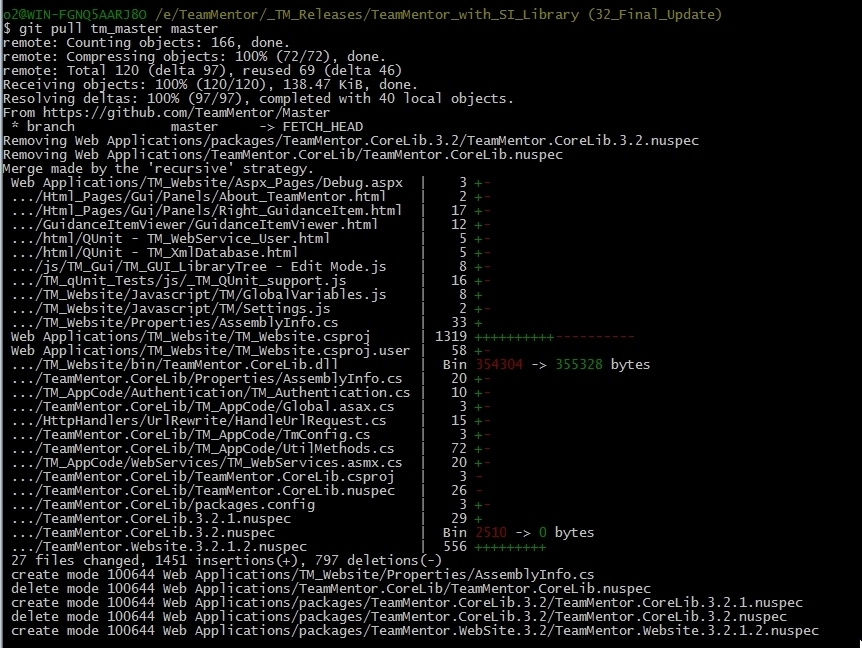
A quick look at git shows how these multiple commits are being nicely merged together
Finally lets do a git pull on the Library_SI (tm_library remote)
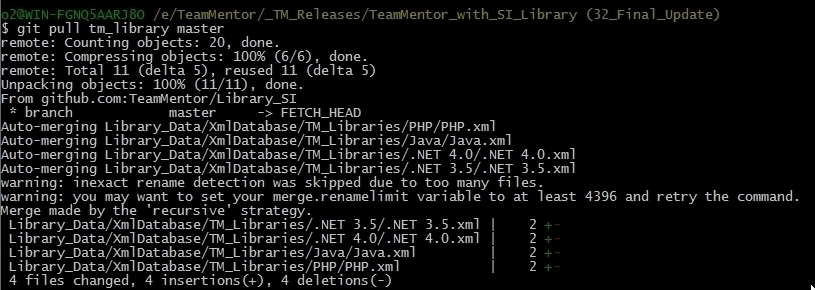
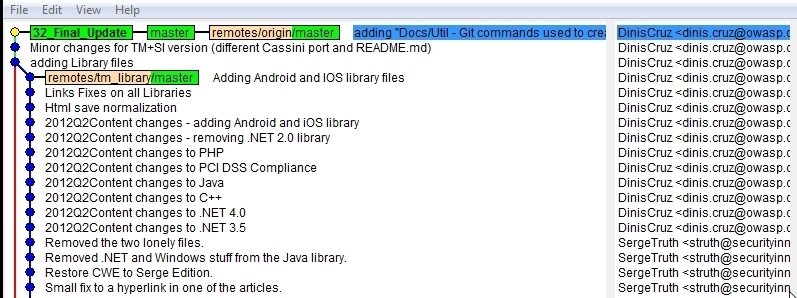
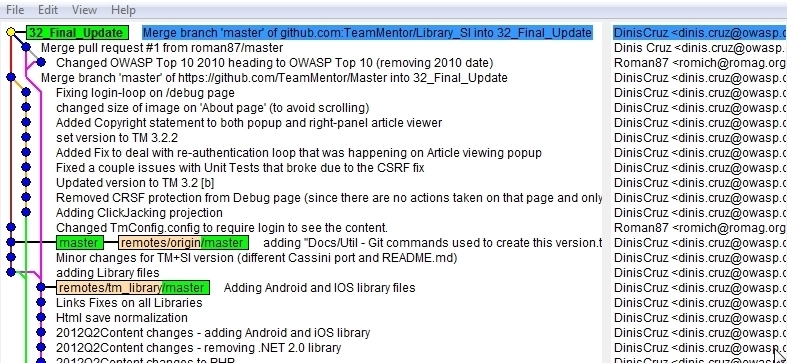
With gitk now looking like this, which is a pretty cool graph:
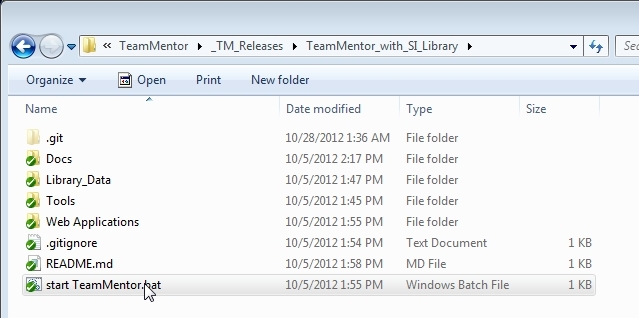
A look at the file system, shows that it looks as expected
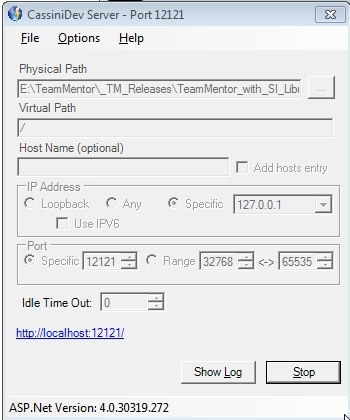
So let’s quickly start cassini to take a look (via the ‘start TeamMentor.bat’)
Hummm… on load there was a problem with the right-hand side panel
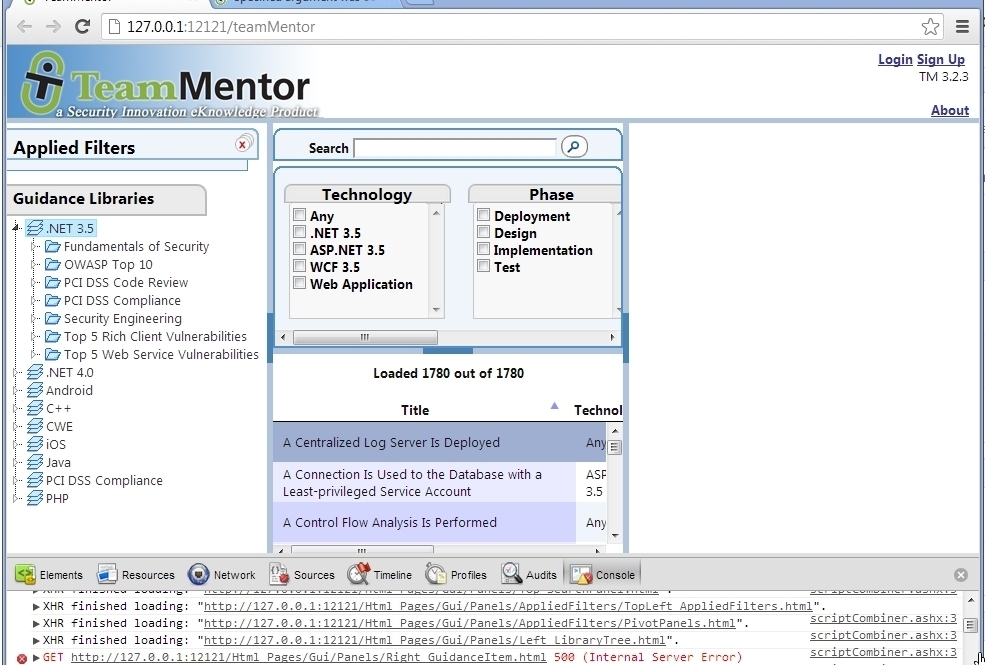
The error was this one (which is the first time I saw it)
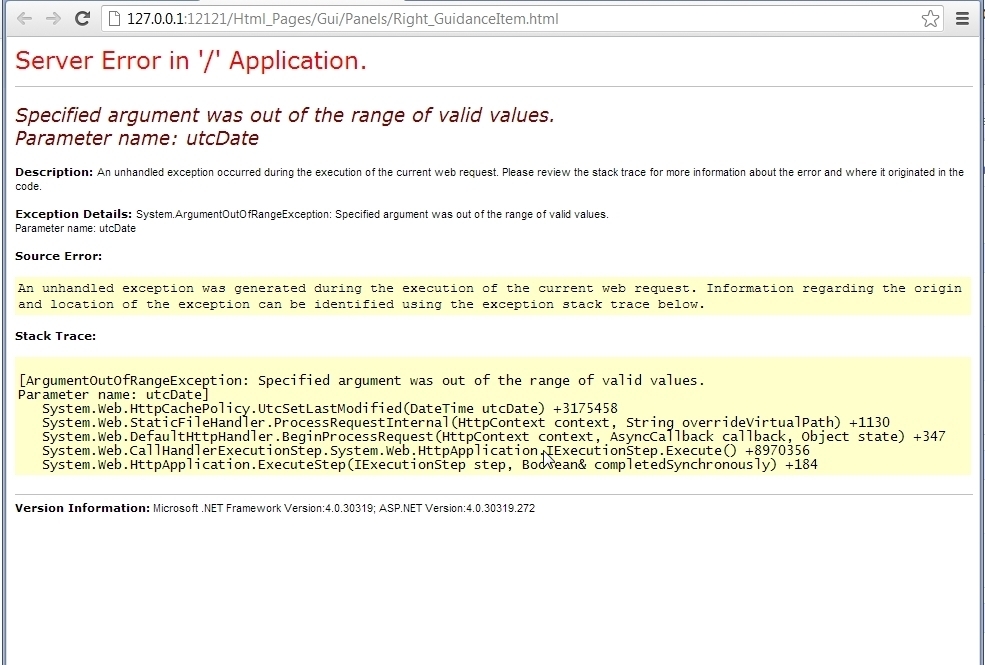
Luckily a quick google search, revealed these articles:
- http://stackoverflow.com/questions/2782329/specified-argument-was-out-of-the-range-of-valid-values-parameter-name-utcdate
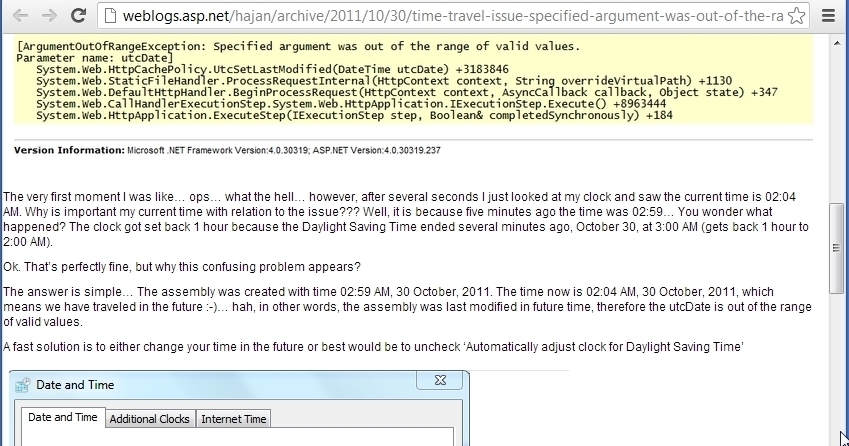
- http://weblogs.asp.net/hajan/archive/2011/10/30/time-travel-issue-specified-argument-was-out-of-the-range-of-valid-values-parameter-name-utcdate.aspx (screenshot below)
Which pointed me to the fact that I hit a weird ‘time bug’ that happens when the clock moves due to Daylight Saving Time.
Next step is to try the AppHarbor (Cloud) deployment, so I went to AppHarbor and copied the target Application Repository URL
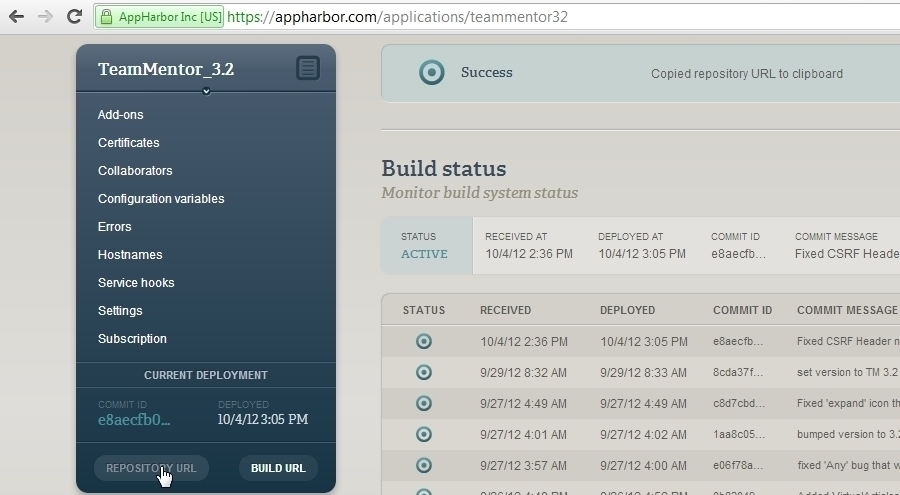
Which I added as a remote, and used to push the content

This built ok, but when I deployed it, I noticed that the site was still on version 3.2 (instead of the new 3.2.3)
Back in git, I realize that I had pushed the wrong branch, and bellow I’m pushing the 32_Final_Update branch into the AppHarbor master branch (which is automatically built)

With the correct version ready, I deployed it:
And here she is in action:
The reason why there is no content is because AppHarbor will only copy to the live servers the files it can find using the VisualStudio solution, which means that the Library files where not there.
To make the test realistic, I zipped the TM_Libraries folder
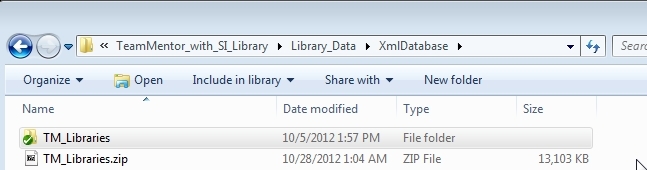
And used TeamMentor’s Control Panel to upload the file:
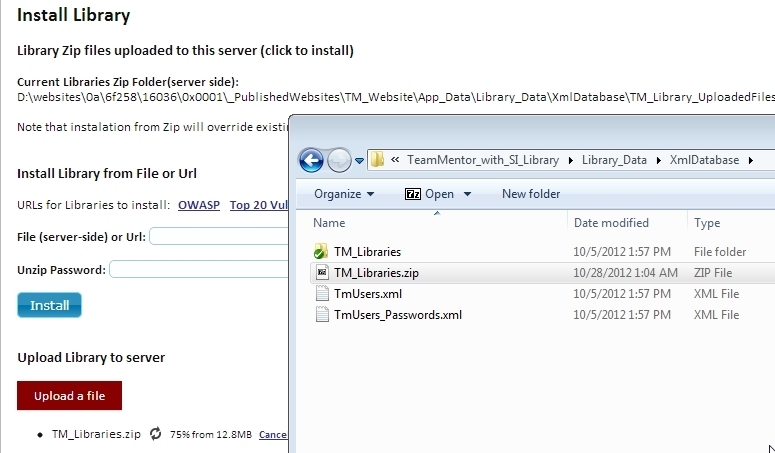
And install it:
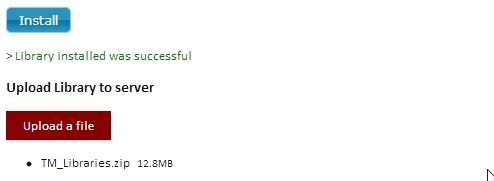
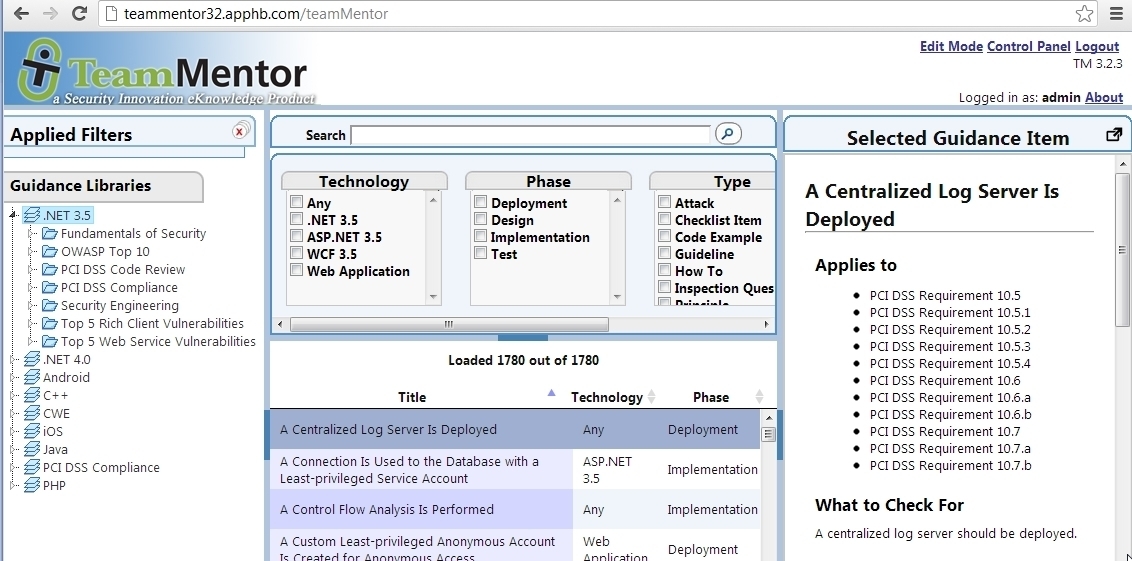
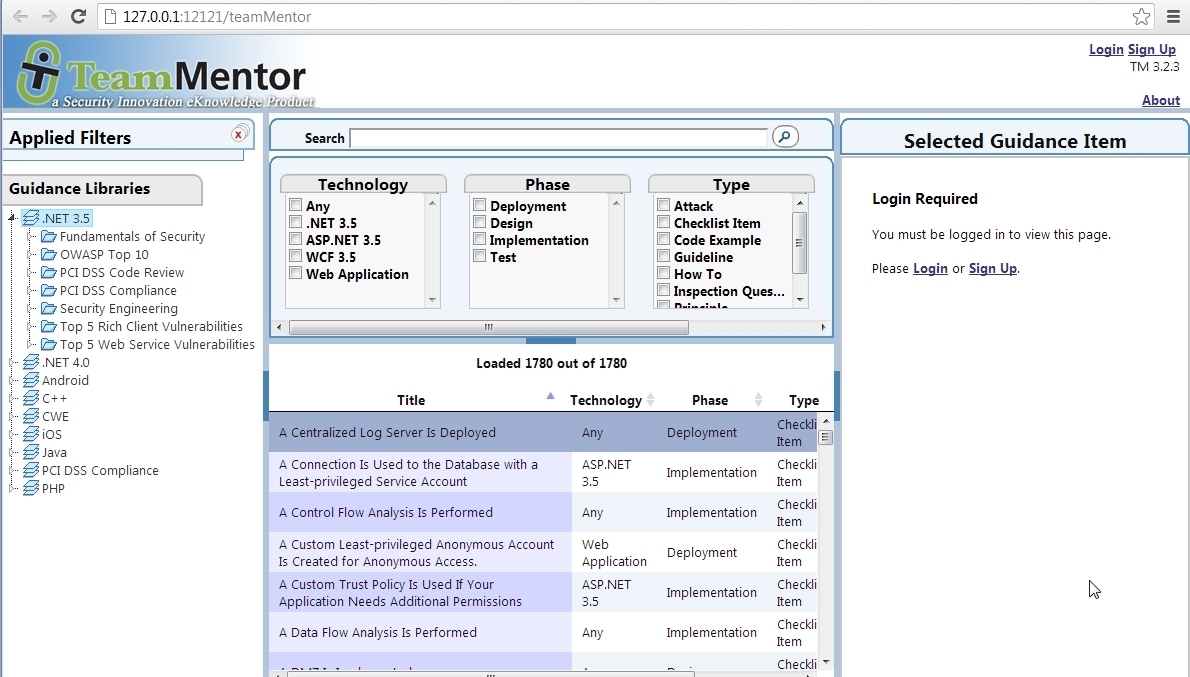
After that, the home page looks like it should:
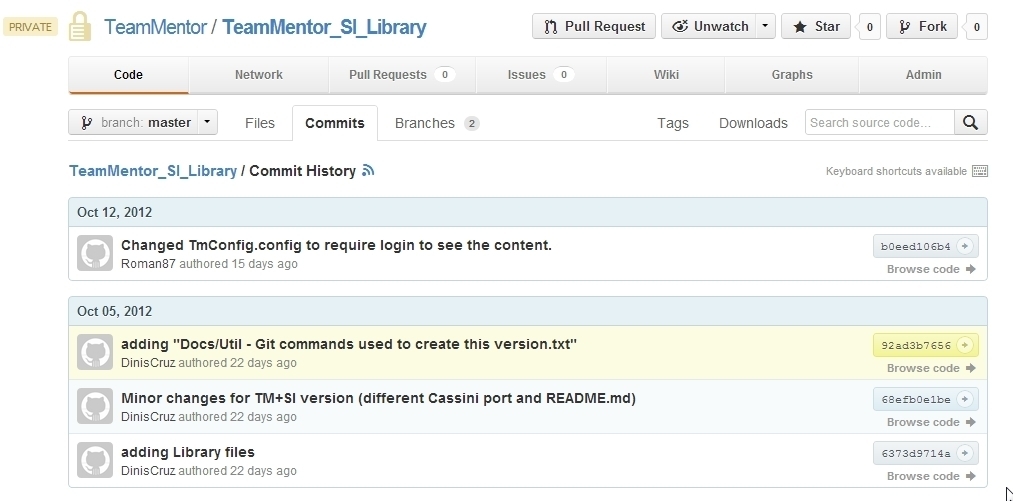
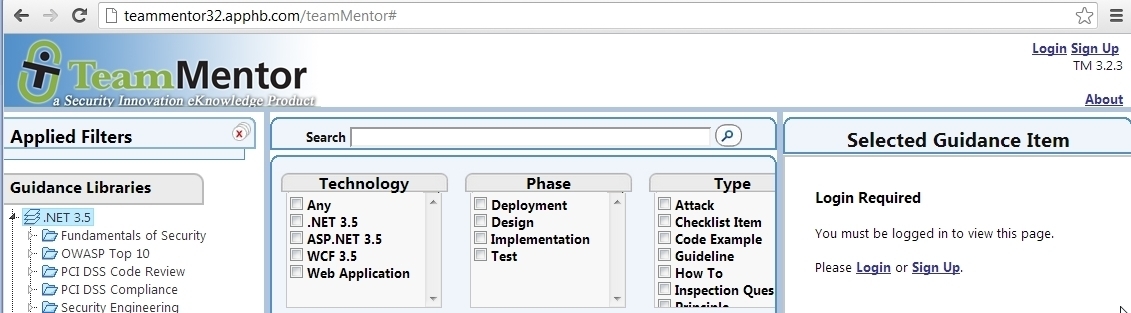
Testing the need to login to see the Article’s content:
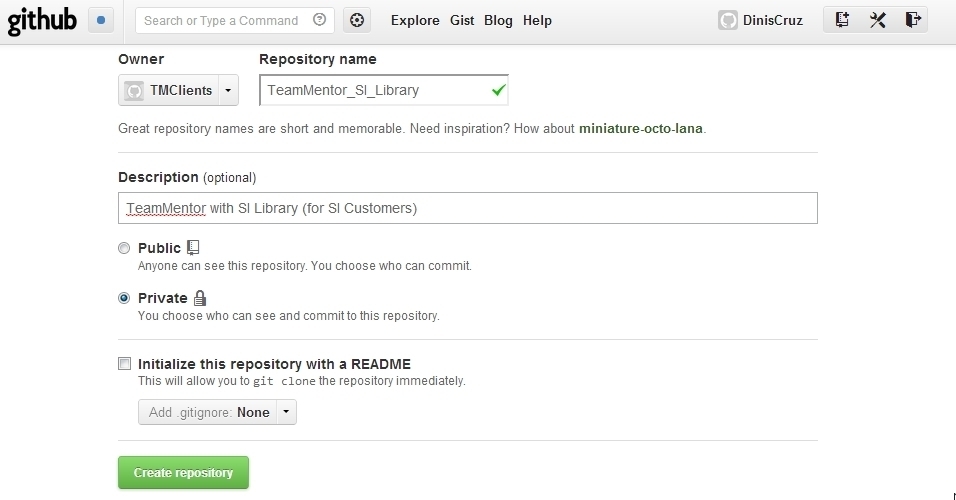
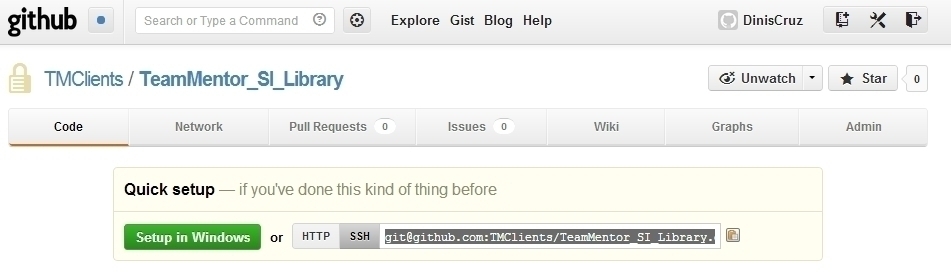
Next step is to push into the TMClients/TeamMentor_SI_Library repository this latest version
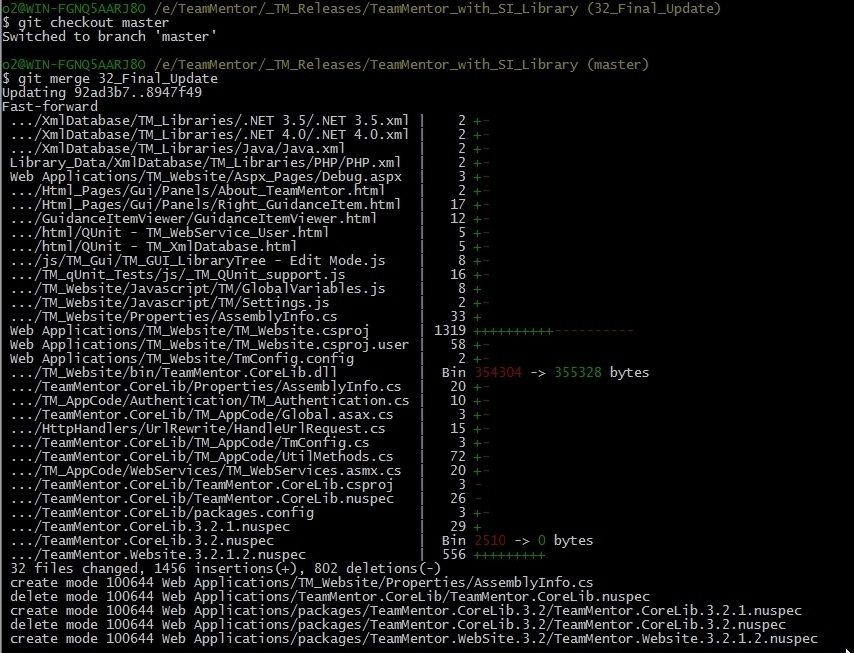
But not before we update the local master branch with the 32_Final_Update branch
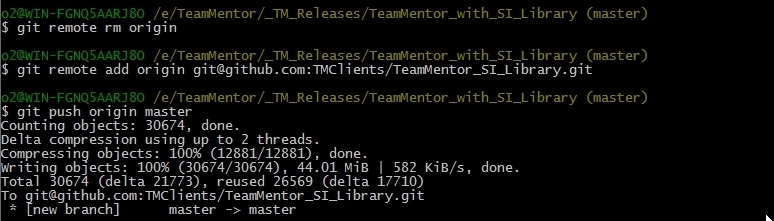
Next we replace the origin remote mapping with TMClients/TeamMentor_SI_Library and push into it:
After all these steps is good to take a look at the GitHub’s network graph and confirm that all looks as expected:
As a final confirmation, let’s download the zip file from the TMClients/TeamMentor_SI_Library and make sure it is all good (this is the file given to customers via a password protected zip file)
Once the file downloads, unzip it to a temp folder:
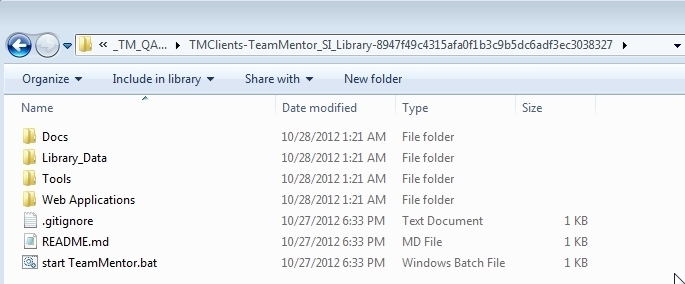
And use ‘start TeamMentor.bat’ to run it locally:
Final comment:
If you actually look at the workflow we have here, this is pretty powerful stuff!
We were able to have two complete separate activities (development and code changes) done in completely different timings, to be combined into a single package (preserving all history), that can then be delivered to customers (who don’t care about the multiple repositories).
In a way it is just like doing copy and paste of the two source repositories into a ‘release folder’, but in a way that we have the full (independent) git history (check out the graphs to see how the git commits from two separate repositories are correctly preserved) and can be easily updated/synced (it took me a LOT more time to write this post than to do the actually pushes and pulls :) )
What I also like about this workflow is that it works :). We are now doing the 2nd release using it, and it is surviving the real-world acid-test.
But aren’t there a lot of ‘manual’ steps that be automated? Yes, yes there are!
But I’m a big fan of:
- first figure out the solution for the problem (in a “let’s make it work” kinda way)
- then automate as much as possible the workflow that ‘works’
It’s a mistake to automate too soon, specially when the understanding of ‘the problem’ and all its moving parts is still not very high.
UPDATE: I just did the same process for the https://github.com/TeamMentor-OWASP/Master version (the TeamMentor Eval), and it took less than 5m to do it :)
Remotes (of my local clone)
1 origin  git@github.com:TeamMentor-OWASP/Master.git (fetch)
2 origin  git@github.com:TeamMentor-OWASP/Master.git (push)
3 tm_library      git://github.com/TeamMentor-OWASP/Library_OWASP.git (fetch)
4 tm_library      git://github.com/TeamMentor-OWASP/Library_OWASP.git (push)
5 tm_master       https://github.com/TeamMentor/Master (fetch)
6 tm_master       https://github.com/TeamMentor/Master (push)
Commands executed:
1 $ git checkout -b 32_Final_Update
2 $ git pull origin master
3 $ git pull tm_library master
4 $ git pull tm_master master
(there was a small conflict on the About.html page which is different on the eval version)
1 $ git checkout master
2 $ git merge 32_Final_Update
3 $ git push origin
Network Graph: