Table of Contents
- The Yoshidaguchi Trail
-
Preparation and Warnings
- This is Just a Personal Story, Not a Guide
- I am Not a Mountain Guide
- Only Climb Mount Fuji In The Official Climbing Season
- There is No Water and No Food in the 12 Kilometers from the Base (850m) to Fifth Station (~2300m)
- There is No Water or Food on the Descent to Fifth Station
- Wind Can Kill You
- Weather Conditions and Temperature Both Change Drastically at Different Elevations
- Extra Lithium Ion Batteries
- Make Sure You Have Trekking Poles!
- Bring a Headlamp
- Bring Cash
- Book a Spot at a Mountain Hotel In Advance
- Bears
- Official Warnings
- Maps
-
What I Packed
- What I Initially Wore
- What I Brought For The Entire Mountain & Did Use
- Electronics That I Brought & Did Use
- Clothes I Brought for the Bottom Half & Did Use
- Clothes I Brought for the Top Half & Did Use
- For Sleeping
- Things I Brought & Didn’t Use
- Food I Brought from Tokyo
- I Bought Way Too Many Sports Drinks at 7-11
- Things I Didn’t Bring & Wished I Had Brought
- Food and Drink I Bought On The Mountain
- Oxygen
- Garbage and Toilets
- What I Did, the Long Version
- He Who Climbs Twice
The Yoshidaguchi Trail
When most people climb Mount Fuji, they don’t actually climb Mount Fuji.
Instead, they climb the top half, taking a bus to something poetically named “The Fuji Subaru Line 5th Station” (elevation 2,305 meters) and starting there. From that location, it’s only 5.8 kilometers of distance and 1400 meters of elevation gain to the 3706 meter peak of the Yoshida trail.
To me, that felt a bit like cheating.
So, when I was doing my research in planning my hike, I discovered something. It turns out there is a way to climb all of Mount Fuji:
What you do is you go to the bottom, and then you walk to the top.
Now, there are a few different ways to do this, depending on which base you want to start with.
If you’re truly hardcore, you can literally go to the town of Fuji and start at sea level. This is called the Sea to Summit hike, and depending on your level of fitness it can take between two to four days to complete. There is a map and brochure here, and there’s an entertaining video to watch.
However, the historic route, and also an easier one, is the Yoshidaguchi trail.
The Yoshidaguchi trail is 19 kilometers long from its base in Fujiyoshida City to its peak, rising 2856 meters from a base of 850 meters to a peak of 3706 meters. This is almost 3 kilometers of elevation gain, and just over twice the elevation gain of starting from the Fuji Subaru Line 5th Station and hiking to the top of the Yoshida trail. Furthermore, it’s 13 kilometers longer.
When you hike the Yoshidaguchi trail, you really have climbed Mount Fuji. You start in a town at one of the Fuji Five Lakes, looking at Mount Fuji in the distance. From a 7-11, you walk to a shrine, then through the forested lower portion of Mount Fuji, then past the treeline, continuing up the face of Mount Fuji until you are at a peak.
Note, however, that the peak of the Yoshidaguchi trail is not the summit of Mount Fuji. Mount Fuji is a volcano, with a number of peaks surrounding the crater; the 3776 meter summit of Mount Fuji is on the opposite side of the crater from the peak that you arrive at when you reach the peak of the Yoshidaguchi trail. If you want to hike to the summit, the highest peak of Mount Fuji, it is a two hour return hike around the crater from the peak of the Yoshidaguchi trail.
What I Did, the Short Version
On August 15-16, 2018, I hiked the Yoshidaguchi trail of Mount Fuji.
I woke up in Tokyo just after 5 AM on the Wednesday, took trains to Mount Fuji station, got there at about 9 AM, went to the visitor center, got a map, took a cab a couple kilometers to 7-11, bought supplies, walked to a shrine, did the hike, took a bus and then trains back, and got back to Tokyo at 11 PM on the Thursday, and had delicious udon noodles and the best hot shower of my life.
I hiked the full Yoshidaguchi trail on the ascent. While I did reach the 3706 meter peak of the Yoshidaguchi trail, I did not reach the 3776 meter summit of Mount Fuji—I was short on daylight and on time, so I didn’t hike around the crater.
Due to the way that I timed my hike, I didn’t see the sunrise from the top of Mount Fuji. Heck, I haven’t seen anything from the top of Mount Fuji except the inside of a cloud! (The last good view I had from Mount Fuji was from 8th station, at 3020 meters.)
On the descent, I hiked down the descending Yoshida trail and then took the bus back from the Fuji Subaru Line 5th Station.
Why Are You Writing This?
First, because I did it, and it was—and is—personally meaningful to me.
I’m pretty cynical, but I think this is something worth doing. I hope to convince you of the same thing.
There was something really special about standing on 8th station of Mount Fuji, in the wind and rain, and looking back at Fujiyoshida City in the distance, knowing that I started walking from there the day before.
Reaching the peak of the Yoshidaguchi trail, however, was truly inspiring.
It was gusting wind (65 km/h), raining, and there was almost no visibility—I could hardly see into the crater of Mount Fuji, let alone see any other mountains.
But I had done it.
Second, I hope to write something that is informative.
While lots of people climb Mount Fuji, there is almost no English-language material on hiking the full Yoshidaguchi trail. Also, while the material that I did find was helpful, it did have some issues. So, although I did a number of things well, I also made a few mistakes.
For example, one of the better short posts is here. This was one of the posts which motivated me to hike the full Yoshidaguchi trail, so I’m grateful to its author. However, that post tells you to walk up the paved road, and doesn’t mention the nature trail. Also, it’s more of a motivational piece than a detailed description, so I still needed to piece together the how-to information.
Now, someone else wrote a much more detailed post, which I found pretty helpful in terms of getting a sense of the specifics of the hike. However, it has two huge issues.
First, it advocates something completely idiotic called “moon bouncing” down Mount Fuji. This is possibly dangerous for other people below you, as you could cause loose rocks to slide. It’s also totally against the rules: you’re supposed to stay on the trails, and there are many English-language signs which tell you exactly that. Japan is very much a society in which the rules are followed—just see all the people standing at an intersection in Tokyo waiting for a light to change, even if there are absolutely no cars around. So, for tourists to just show up and do whatever the hell they want is disrespectful, and makes things worse for future visitors.
Second, the person who wrote that post was both younger and in way better shape than I was, and his pack looked a lot lighter, so the hiking times he posted were a lot faster than what I did.
At the time of my hike, I was a 42-year-old white Canadian male in average shape, who weighed about 210 pounds—and thus was at least 10 pounds overweight. Then, when you add in all the extra water and sports drinks I was carrying (see below), I was carrying at least 20 or 30 pounds more than I could have been!
So, if you’re in better shape than me, are carrying less weight in your pack, are doing the hike in better weather, and/or you take fewer pictures, you may be able to go (a lot) faster than me. In that case, I hope that my description of what I did serves as a useful overestimate of the duration of the hike, just as that other post may serve as a useful underestimate.
So, as far as planning the specifics, I made some mistakes. But I made up with determination what I lacked in planning, fitness or skill.
In short, by writing this, I hope to motivate, inform and entertain you a bit. I hope to give you a sense of what it’s like to hike the Yoshidaguchi trail up the highest mountain in Japan—and if you do it, I hope it helps you have a more enjoyable experience.
This is a Short Book
I’ve written a number of books. Over time, as I’ve gotten older, my books have gotten shorter and more focused. My first book, Flexible Rails, was almost 600 pages. This book is under 80 pages, and that includes a number of pictures. The simple reason for this is that it’s a travel book about one hike: it doesn’t get much more focused than that.
The Photos in the Book
The photos in the book, including that on the cover, were all taken by me, on my iPhone, in 2018. In this book, the pictures are of places, not people (unless they’re selfies)—when I take pictures of people, I try to ask their permission first, but there’s a huge difference between “some tourist took my picture” and “now I’m in an ebook”. So, some of the angles are a bit wonky, or some of the crops are a bit weird, in order to crop out people who would be surprised to find their pictures in this book!
The Prices in the Book
Where relevant, I’ll try to say what something cost, in Japanese yen (JPY). I will sometimes convert this price to what the US dollar (USD) was in 2018. I’m Canadian, but many more people have an intuitive sense of what a US dollar is worth than a Canadian dollar (CAD). In late summer 2018, 1 JPY was about 0.0090 USD, meaning that 1 USD was about 110 JPY.
Preparation and Warnings
This is Just a Personal Story, Not a Guide
This is not “a complete guide to climbing Mount Fuji”. Instead, it’s a recounting of my own experience climbing the Yoshidaguchi trail of Mount Fuji, including a discussion of what I brought, what I enjoyed and what I would have possibly done differently.
I am Not a Mountain Guide
I am not a mountain guide. I am not certified in anything. I am not qualified to charge any money to take anyone up any mountain—and despite what you may read on the internet, Mount Fuji is a mountain, not a walk in the park.
If you want a guided climb of Mount Fuji, I have read very good things about Fuji Mountain Guides. They offer 2-day Mount Fuji tours.
Only Climb Mount Fuji In The Official Climbing Season
Mount Fuji has an official climbing season which lasts for about 2 months in summer. Only climb Mount Fuji in the official climbing season.
See http://www.fujisan-climb.jp/en/season/index.html for the exact dates of the official climbing season.
Outside of the official climbing season, the weather is worse and the mountain hotels are closed.
There is No Water and No Food in the 12 Kilometers from the Base (850m) to Fifth Station (~2300m)
The only place you can get food and water is at the mountain hotels. These start after 5th station, and continue all the way to 9th station as you zigzag up the mountain toward the peak.
However, between the base of the Yoshidaguchi trail (at 850 meters) and the Fifth Station (at about 2300 meters) there are no mountain hotels, and thus no food or water.
None.
So, you need to bring enough water, sports drinks and food for a 12 kilometer hike in the forest with about 1500 meters of elevation gain.
You will probably want to have at least 6 liters to 8 liters of water and sports drinks. I’d recommend something like 2 liters of water and 6 liters of Pocari Sweat or Aquarius, to replenish electrolytes.
Now, I was paranoid about running out, so I brought too much. Specifically, as discussed later, I brought 15.2 liters of sports drinks and water. If you’re good at math, you’ll realize this weighed 15.2 kilograms, which is over 33 pounds! While this meant that I had enough for the entire ascent and descent, it was excessive.
There is No Water or Food on the Descent to Fifth Station
The mountain hotel at 9th station is the last mountain hotel where you can get food or water, so ensure you get enough for the entire descent to fifth station. (Yes, you’ll just be thinking about reaching the peak when you’re there, but think about the descent too!)
Wind Can Kill You
Even though the Yoshidaguchi trail of Mount Fuji is a proper hike which does not turn into not rock climbing (I don’t do rock climbing), wind can still be dangerous.
Wind can kill you on Mount Fuji.
(Well, technically, it would be the landing that would kill you, after the falling which was caused by the wind. But the point stands.)
This is true in any season. Wind can be very dangerous even in summer. Now, this is especially true in the off-season, which is why it’s important to only climb Mount Fuji in the official climbing season.
Wind on or near Mount Fuji can be dangerous not just for people hiking Mount Fuji—see this Reddit thread which referenced this disaster.
Weather Conditions and Temperature Both Change Drastically at Different Elevations
The weather on Mount Fuji changes dramatically as you go higher.
If you hike the Yoshidaguchi trail, you start in Fujiyoshida city (at 850 meters) and end on top of Mount Fuji (at 3705 meters or 3776 meters, depending on whether you walk around the crater).
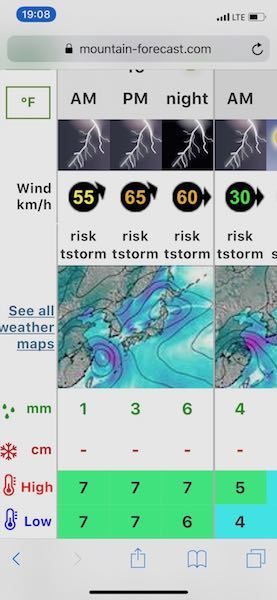
There is a great website, mountain-forecast.com which has different forecasts for Mount Fuji for various elevations:
For the temperature at the base of the Yoshidaguchi trail, see Accuweather for Fujiyoshida City.
For example, I hiked the Yoshidaguchi trail on August 15 and 16. When I started, the high temperature that day for Fujiyoshida City was 35 degrees Celsius (95 degrees Fahrenheit), and the forecasted low at the sumit according to mountain-forecast.com was 6 degrees Celsius (42.8 degrees Fahrenheit).
That’s a temperature difference of 29 degrees Celsius or 52.2 degrees Fahrenheit!
Now, it was probably a few degrees cooler since I started my hike by 10 AM, and the forecasted high temperature for the summit was 7 degrees Celsius, but even then, the temperature drop was easily more than 20 degrees Celsius.
So, bring proper cold weather hiking clothes with you, including a Gore-tex jacket, Gore-tex pants, a warm base layer, something warm for your core, and proper hiking boots. Don’t be one of those people wearing shorts, a T-shirt and a hoodie—that will just lead to you being miserable and either giving up or wishing you had.
Also, note that weather forecasts are just that—forecasts. Weather forecasts are not weather guarantees.
Pay attention to the conditions as well at different elevations. It’s nicer to hike in sunshine than in a thunderstorm, and being struck by lightning can ruin anyone’s day. To quote the Yoshida Trail map:
“If the sky shows signs of lightning, take refuge in one of the mountain huts and wait until the storm passes before continuing your hike.”
Most importantly, pay careful attention to the Wind km/h section at different elevations, especially for the summit. Exercise caution, and don’t even think about going if it’s at 70 km/h or above. When I did the climb, the summit forecast was for winds between 55 km/h and 65 km/h, and it was difficult even at that wind speed. If the wind becomes unsafe, taking refuge in a mountain hut would be a good idea.
Besides just checking mountain-forecast.com before going to Mount Fuji, you can also check it from your iPhone or Android phone when you’re on Mount Fuji—you can get cell phone reception at many places on Mount Fuji, so you absolutely should bring your phone. This way, you can check mountain-forecast.com again at the Yoshidaguchi Fifth Station, so that you can make a final go/no-go decision.
(Also, get a waterproof case for your phone, or a Ziploc bag, so that you can use your phone in the rain.)
Extra Lithium Ion Batteries
Since you will be using your phone to do important things like check weather forecasts and look at AllTrails and Google Maps, I strongly recommend buying a backup external Lithium Ion battery, and fully charging it beforehand. I bought a 10,000 mAh one from a store in Shinjuku, and it was enough to charge my iPhone at least once, as well as charging my Apple Watch a couple times. (Yes, it’s fun to absolutely demolish your daily move and exercise goals.)
Make Sure You Have Trekking Poles!
In case you did not pack trekking poles, go buy some.
If you are climbing Mount Fuji from the base, you absolutely need trekking poles. Not want. Need.
Yes, many people who start halfway up get a souvenir wooden pole when climbing Mount Fuji, and get stamps burned into it at various stations. However, it’s much better to finish the climb, and that means trekking efficiently—especially if you’re starting from the base of the Yoshidaguchi trail.
Also, even if you think trekking poles are self-explanatory, you need to watch this video on how to use trekking poles correctly. I watched this video before climbing Mount Fuji, and I realized I had both been holding my poles wrong, and using them wrong.
I would not have finished this hike without trekking poles.
Get aluminum trekking poles, not carbon fiber ones. Carbon fiber poles can snap: I’ve snapped a cheap Costco one back at home, catching it in some rock on the descent of Mount Finlayson near Victoria, Canada. It’s bad enough when something like that happens, just as when carbon fiber sticks shatter in hockey. However, halfway up Mount Fuji it’s a lot harder to get a new stick!
In Tokyo, there’s a store called L Breath in Shinjuku which has a good selection. I bought an amazing pair of Black Diamond FLZ aluminum poles there. I highly recommend these poles: they worked perfectly for me on Mount Fuji. Again, I chose aluminum, since carbon fiber poles can snap, and I absolutely did not want that to happen halfway up Mount Fuji.
Make sure the trekking poles fit your height! I’m 6’3“, and in Japan it’s reasonably difficult to get trekking poles which are long enough. Most of the poles, even in L Breath, were a maximum of 120 cm. These poles went from 120 cm to 140 cm in length, which was perfect for my height: it was very helpful to shorten them to below 125 cm on parts of the ascent, and then to have them above 135 cm on parts of the descent.
(Yes, I bought trekking poles in Japan: I had been travelling with some cheap carbon fiber ones which I bought at Costco in Canada, but I actually forgot them on a train near Izumo. They weren’t super collapsible, and I’d put them above the seat by themselves but kept my backpack with me. Then when I got off the train, I took my backpack but forgot to look up and get them. So, I bought the Black Diamond ones when I got back to Tokyo. They are amazing poles, and they served me very well on Mount Fuji. For all I know, it could be lucky that I lost the Costco poles: since they were carbon fiber, snapping halfway through the climb would have ruined everything. Also, since the Black Diamond ones are more collapsible, I can more easily fit them inside my backpack, meaning I won’t be forgetting them on any trains!)
Bring a Headlamp
Since you will be using trekking poles, you can’t use a flashlight while also using two trekking poles—unless that flashlight is strapped to your head. It turns out that this is a thing, called a headlamp.
I used my headlamp for only 5 minutes, since I decided that walking in the dark was not for me. (I ate dinner at the first mountain hotel I found, and I stopped for the night at the second one.)
It’s absolutely essential to bring a headlamp. Walking in the dark on a mountain is dangerous, but doing so without light is suicidal. And even if you plan to only hike in daylight, it gets dark fast. (When I stopped for dinner it was light; when I finished my dinner it was dark—and I ate Cup Noodles, since the proper kitchen had just closed.)
Bring Cash
The mountain hotels only take cash. So, if you want anything to eat or drink, or anywhere to sleep, bring cash. You should bring about 30,000 yen in cash, preferably in 1000 yen notes. The mountain hotels cost about 5000 or 6000 yen per night, and you’ll be forking out lots of yen in 300-600 yen amounts whenever you want to eat or drink anything. Also, bring about 1000 yen in 100 yen coins. (The toilets cost 200 yen donations each. You’ll probably accumulate lots of 100 yen coins when spending your cash, but it would be shitty to run out!)
Book a Spot at a Mountain Hotel In Advance
If you know you are definitely fit enough to make the full hike and you have a good idea of how far you will go, I recommend phoning ahead and booking a spot at one of the mountain hotels. You don’t want to be stuck without a place to sleep! (As I discuss later, I wasn’t sure how far I would get on the first day, or whether I was fit enough to do the full hike, so I didn’t actually do this. Hopefully this book helps you make an informed decision about whether, and where, to book.)
Bears
There are signs warning about bears on the bottom half of the Yoshidaguchi trail. It’s not a good idea to startle bears, so take appropriate precautions. Also, the bottom half of the Yoshidaguchi trail is almost completely deserted. So, if you are hiking alone and get attacked by one of the bears that the signs warn you about, no one may find you (or your body) for several hours.
Official Warnings
The Yoshida Trail map also includes a number of warnings which I will quote here:
Altitude Sickness
“Do not continue hiking if you feel any symptoms of altitude sickness (such as headaches or nausea).”
Rest Areas
“Only rest in areas that are safe. Do not rest where there are ‘caution for falling rocks’ warnings or in areas where the path is narrow.”
Mount Fuji is an Active Volcano
“Mt. Fuji is an active volcano. If the eruption alert level is raised while you are going up or down the mountain, start your descent at once. If by any chance an eruption occurs, immediately find refuge in places such as a nearby mountain hut or hiding place and act according to the instructions of officials.”
Helmets
“Let’s wear a helmet in case of falls, falling rocks and sudden eruptions.”
Maps
Download the Map from the Website
There is an amazingly helpful map of the Yoshida trail on this website. (As the co-founder of Leanpub I respect copyright, so I won’t paste this map in here. What I will do, however, is show a screenshot of the website:
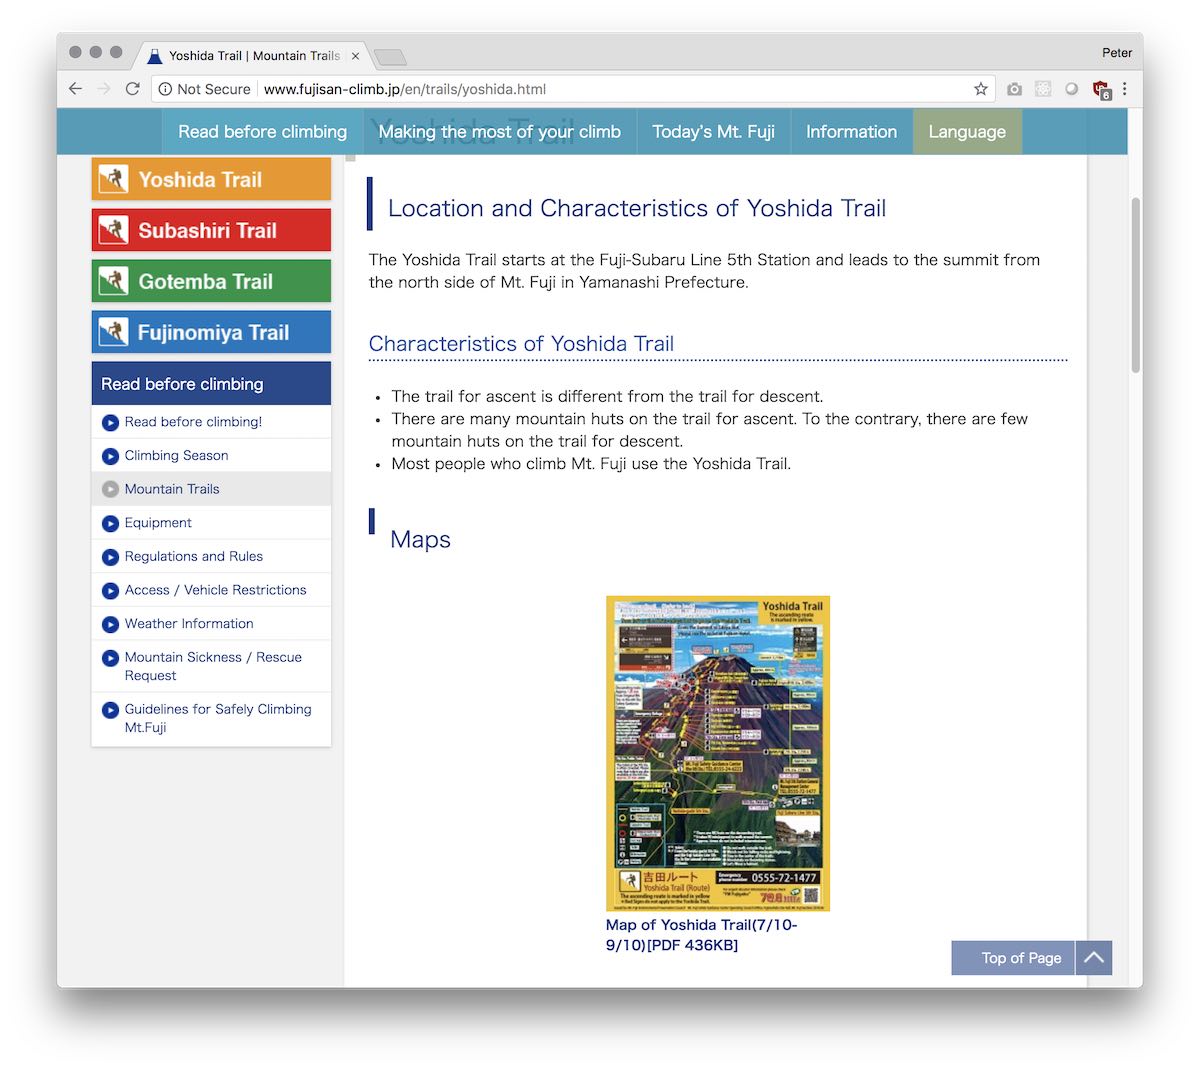
So, I will just strongly recommend that you download it from the official website. Save it on your phone, and print a couple copies of it. This is different than the paper map you will get from the visitor center if you ask for the map of the Yoshidaguchi trail.
This map clearly shows all the mountain hotels, so if you are booking a spot in advance, this is really helpful information. The map also clearly shows the different ascending and descending trails of the Yoshida trail. It also shows the Yoshidaguchi 5th Station, which is roughly at the same altitude as the Fuji Subaru Line 5th Station.
They have lots of printed copies of this map at the information center at the Fuji Subaru Line 5th Station, however—but that’s not going to be very useful to you if you hike the Yoshidaguchi trail, since the first time you will go there is at the end of your hike if you’re taking the bus the rest of the way down, like I did! (Hiking to and from the Fuji Subaru Line 5th Station from the Yoshidaguchi trail would add a couple hours to your hike, just to walk sideways on the mountain for no reason.)
Now, it could be that the visitor center by Mount Fuji station also has a copy of this map if you ask for a map of the Yoshida trail as well as the Yoshidaguchi trail. Frankly, I don’t know.
Get the Paper Map from the Visitor Center
Besides this map, there is a paper map from the Visitor Center right outside Mount Fuji station. Here’s a picture of what it looks like; stop in and pick up a physical copy when you get to Mount Fuji station.
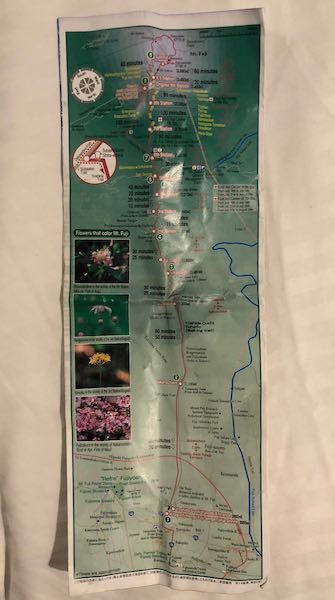
The map from the website discussed above is better for the top half of Mount Fuji, but this map is good for the entire mountain.
Google Maps
As I discuss in Your First Trip to Japan, Google Maps is an essential tool in Japan.
For Mount Fuji, it can help you get to Mount Fuji station, getting the correct trains, etc. Once you’re at Mount Fuji station, it can also help you get to the 7-11 before the shrine, regardless of whether you take a cab or walk. From the 7-11, it can help you find your way to the shrine, although the way gets reasonably well signposted once you are on it.
Once you’re on the actual trail, however, I preferred AllTrails to Google Maps.
AllTrails
The AllTrails iPhone app is really useful for knowing where you are during your hike. It is purpose-built for hiking, and the Pro version has offline map download, which is comforting. There’s reasonably good cell phone reception on Mount Fuji, however, so even the free version of AllTrails can be almost as good on Mount Fuji.
I bought the “lifetime Pro” in-app purchase (it’s $99 USD in the US App Store, and about $140 CAD in the Canadian App Store) of AllTrails before the hike, and I probably could have gotten away with not doing so. However, just the comfort of seeing where I was on the AllTrails contour map and their other map modes, and knowing that I would have this even if I lost cell phone reception, meant that the price was worth it to me. In either the free version or the paid version, AllTrails really turns your iPhone into an amazing hiking tool.
AllTrails can also record what you did for posterity. However, to ensure that things like times and distances are accurate, I think it’s essential to pause the AllTrails recording when you are stopped. (AllTrails even has an Apple Watch app, whose only feature is to start and stop your recording.)
Now, I didn’t do this, since I wanted my times to be completely accurate, including all the rest breaks I took. However, my recording has a number of GPS glitches, which means that the distance measurements are totally useless. The worst one of these was my fault, since I left it on when I went into the first mountain hotel for dinner. However, there were also a number of smaller glitches which happened when I was completely outdoors. I think that they roughly correlate with when I had stopped for a rest break. So, if I had paused the recording when resting, and restarted when walking, I would have had way more useful recordings to show. Sorry about that.
Now, with AllTrails, you can easily shorten the endpoint of each hike, just by dragging a dot. This helped me get rid of the GPS glitches at the end of the Day 1 hike, and it also helped me get rid of the extra bit at the end of the Day 2 hike—I forgot to stop the recording when I got to the Fuji Subaru Line 5th Station, and I only remembered once the bus had gone a couple kilometers.
So, the recordings of the ends of both my Day 1 and Day 2 hikes have been shortened, to get rid of the mistakes at the end. However, I have not edited anything inside either recording. This way, you’ll see exactly what was recorded, including the places where AllTrails shows my GPS going completely nuts.
I was tempted to export the maps as PDF, and show the glitches as a screenshot. However, due to copyright uncertainty (both with the AllTrails graphics, and with the data from Mapbox and OpenStreetMap), I’m not going to do either thing. Instead, I will just link to both days of my hike, which I have made public:
What I Packed
Here’s the detailed version of what I wore, brought and bought. This isn’t a shopping list, of course, but I hope that it convinces you to not be one of those people in running shoes, shorts and a t-shirt, freezing their ass off before giving up at 8th station…
What I Initially Wore
- Lowa Arco GTX Mid trekking boots (amazing!)
- Superfeet blue insoles
- Smartwool hiking socks
- KOWA Vantelin knee supports (I can’t praise these enough)
- Shorts (Lululemon T.H.E. Short with Luxtreme liner)
- Uniqlo T-shirt
- Nike Dri-FIT running hat
What I Brought For The Entire Mountain & Did Use
- Osprey rain cover
- Maui Jim prescription sunglasses
- My everyday Silhouette prescription glasses
- A couple extra pairs of Smartwool hiking socks
- Extra pair of KOWA Vantelin knee supports
- A couple handkerchiefs
- A small bottle of liquid soap from Hotel Okura
- Lip balm
- Outdoor Research wide brim hat (hiking sombrero)
- Headlamp
- Bellroy Passport Wallet
- Black Diamond Distance FLZ aluminum trekking poles with the carbide tips
Electronics That I Brought & Did Use
- Extra Lithium Ion 10,000 mAh rechargeable battery to charge my iPhone and Apple Watch
- My iPhone X, for Google Maps, AllTrails, taking photos and actually making phone calls
- Apple Watch (Series 2)
- Apple Lightning to USB cable for iPhone
- Apple 12W USB Power Adapter
- Apple Watch USB charger cable
- USB charger cable to charge Lithium Ion rechargeable battery (plugged into Apple 12W USB Power Adapter)
As an aside, for stuff like this, the big IKEA plastic bags are fantastic and highly reusable. It’s a shame they were discontinued, since, unlike me, IKEA considered them single-use plastics.
Clothes I Brought for the Bottom Half & Did Use
Besides the clothes I was wearing, these are the extra clothes I brought for the bottom half of the hike that I actually did use.
- Two extra Uniqlo t-shirts (a luxury, since I expected to sweat through them, which I did)
- An extra pair of Lululemon T.H.E. Short with Luxtreme liner
Clothes I Brought for the Top Half & Did Use
Packing for Mount Fuji was a tale of two hikes—the reasonably warm lower half, and the colder upper half. These are the clothes I brought for the top half of the hike that I actually did use.
- Arc’teryx Gore-Tex Beta AR pants
- Arc’teryx Gore-Tex Beta AR jacket
- Arc’teryx softshell hoodie
- Lightweight running gloves
- Heavier neoprene “US Divers” gloves (these were from snorkeling in Hawaii, and they work well for hiking since they are warm when wet, and have good grip)
- Uniqlo Airism athletic tights (top & bottom) for base layer
- Balaclava
For Sleeping
- Foam ear plugs
Things I Brought & Didn’t Use
I also brought a number of things which I didn’t use.
- Bandaids (my hiking boots were great and I got no blisters)
- Elbow tensor bandages (no injuries)
- Ankle tensor bandage (no injuries)
- Immodium (no issues)
- Sunscreen (I was mostly covered)
- Uniqlo down puffy vest (between the Arc’teryx hoodie and Beta AR jacket I was fine)
- Toque (I didn’t need this, the balaclava was more than enough)
- My extra pair of outdated backup glasses
Now, I still recommend bringing bandaids, immodium and sunscreen, however. Blisters, a sunburn or diarrhea could ruin your hike.
Food I Brought from Tokyo
The night before, I went to the Family Mart and the 7-11 near my hotel and got food and energy jelly for the hike:
- 7x “Energy in” energy jelly packs (I ate 7 packs: 3 on the first day, 4 on the second day)
- 3x “Protein in” energy jelly packs (I ate 3 packs: 1 on the first day, 2 on the second day)
- 3x “Mineral in” energy jelly packs (I ate 2 of 3 packs: 1 on the first day, 1 on the second day)
- 10x Calorie mate bars (I ate 3 on the first day, 5 on the second day)
- 2x small bags of mixed nuts
I probably could have gotten all of these at the 7-11 near the shrine at the base of the trail, but I didn’t want to leave that to chance.
These various varieties of “in” jelly packs worked really well for me. I love that the description is “a special jelly drink designed to supply carbohydrates equivalent to one rice ball”–I have never encountered a more intuitive unit of measurement, and because of this, I bought an almost perfectly correct amount for the hike. I wish these were easily available in Canada.
I Bought Way Too Many Sports Drinks at 7-11
I started the hike at “station 7-11”, near the shrine at the start of the trail. This is where I bought (too much) water and sports drinks. Here’s what I bought:
- 6 liters of Aquarius (I drank none on first day, almost 4 liters on the second day)
- 2 liters of water (I drank all of it, split between both days)
- 5x 900ml (4.5 liters total) Pocari Sweat Ion Water (I drank all 5 bottles: 4 on the first day, 1 on the second day)
- 3x 900ml (2.7 liters total) Pocari Sweat (I drank all 3 bottles: 2 on the first day, 1 on the second day)
I had a good balance between high calorie sports drinks (Aquarius & Pocari Sweat), lower calorie sports drinks (Pocari Sweat Ion Water) and water. I wanted to ensure I was not dehydrated.
However…
I bought way too many sports drinks. I should have bought about 8-10 liters of sports drinks and water. I could have gotten away with 6 liters, and just bought the rest on the mountain. There are ample stops going up, starting at 5th station. However, between the base and 5th station there’s nothing. If I was being cheap, I could have brought 8 or 10 liters, to save money. (Drinks cost 500 yen for a 500 ml bottle.)
Instead, I was paranoid because of my experience climbing Mount Misen, where I drunk 6x 900ml (5.4 liters) of Pocari Sweat and Pocari Sweat Ion Water—and it was only a 550 meter elevation gain. The heat on Mount Misen, however, was in the high 30s (Celsius). The high for Fujiyoshida City that day was 35 degrees Celsius, but when I started the hike it felt like high 20s / low 30s (Celsius). At any rate, it was cooler than Mount Misen had been.
However, while I knew this, I really had no clue how much I would need to drink, and I knew there were no stations until 5th station and a lot of elevation gain. So, I overcompensated, and I bought a 15.2 combined liters of water and sports drinks. This weighed over 15.2 kilograms (since, for water, 1 liter = 1 kilogram), which is over 33 pounds–and that doesn’t include the weight of the plastic bottles.
Yes, I literally carried 33 pounds of liquid in my pack at the start of my hike. If you add in the weight of the pack itself (4 pounds and 8 ounces) and a few pounds of clothes and stuff, I was carrying about 40 pounds when I started my hike. Worse, if you couple that with the fact that I was at least 10 pounds overweight, I was carrying an extra 50 pounds!
This is bad enough, but over 19 kilometers of ascent with almost 3 kilometers of elevation gain, it really adds up. If you wonder why I’m so emphatic about the KOWA Vantelin knee supports and the trekking poles, now you know—I literally couldn’t have done the hike without both.
Now, if I had packed light and only bought 6 liters of sports drinks, I would have been carrying about 13 pounds of liquid, which when you add the pack weight and clothes would have been 20 pounds. Now, I would have drunk the 6 liters in the first day, meaning that in the second day I would have needed to buy all my drinks, at 500 yen for 500 ml. So, since I drunk about 6 liters on the second day, this would have been about 12 bottles at 500 yen each, which would have been 6000 yen. Instead, 6 liters of sports drinks, bought as three 2 liter bottles of Aquarius for about 250 yen each, was only about 750 yen. So, I saved about 5250 yen, which is about $46 USD. Whether that savings was worth the effort is debatable.
A happy medium would have been to buy 8 liters of Aquarius or Pocari sweat, and 2 liters of water. This would have lasted the entire first day and much of the second day. It would have saved some money, but also been 5.2 kg (i.e. 11.4 pounds) lighter than what I carried. Not carrying 11 extra pounds would have been very nice.
Anyway, regardless of what I could have optimized for, be it pack weight or money spent, I brought too much. When I got back to my hotel in Tokyo, I still had an unopened 2 liter bottle of Aquarius, and about 500 ml more Aquarius (which I had poured into a 900 ml Pocari sweat bottle for easier access) still not drunk. So, combined, that’s about 2.5 kg of weight, which is just over 5 pounds. So, even if I was trying to optimize for saving money, I literally carried 5 extra pounds with me for the entire hike.
Things I Didn’t Bring & Wished I Had Brought
Now, while I brought too many sports drinks, I could have done with a bit more food. Specifically, the following would have been nice, and not very heavy:
- 3 or 4 Snickers bars. (These were sold at the mountain hotels and were a welcome change from Calorie Mate and energy jelly! However, they would have been cheaper at 7-11.)
- Actual rice triangles for the first break a couple hours in, instead of the “Energy in” equivalent.
- Some tasty treats such as red bean paste donuts from 7-11. Calorie Mate and nuts get old quickly. Ironically, when I was at one of the first populated stations (I think it was 6th station), a friendly Japanese man and his young son were there, and they gave me an absolutely delicious red bean paste donut from 7-11. (I think they saw me unenthusiastically eating a Calorie Mate bar and felt sorry for me!)
- A waterproof dry sac containing an extra pair of warm clothes for a third day. I brought enough clothes for two warm days and one cool day, but I should have brought clothes for two cool days, in case the need arose.
- A Heatsheets survival blanket, in case I had decided to make the hike a 3 day affair, and hike up to the summit starting before dawn on the third day. (It can get cold at the peak.)
Food and Drink I Bought On The Mountain
For dinner the first night:
- 2 cups of Cup Noodle
- One black iced coffee
- One iced green tea
At various hotels on the second day:
- 2 or 3 iced coffees
- Curry rice
- 2 or 3 Snickers bars
- 2 cups of Cup Noodle
Again, that list of what I bought on the second day could have included a lot of more expensive Pocari Sweat bottles, had I prioritized my knees and hip over my wallet!
Oxygen
On the mountain, at 7th station (I think), I bought an oxygen cannister in case I got altitude sickness. (I had seen the remnants of vomited up Cup Noodle on the path, and didn’t want to be that guy!) However, I did not use the cannister at all. I assume that spending the night at a mountain hotel between 5th and 6th station helped me acclimatize.
Garbage and Toilets
Garbage
You have to take all your garbage with you. This includes when you check out of a mountain hotel: there are no garbage facilities on Mount Fuji.
I bought food and/or used the toilet at a number of the mountain hotels up to the peak, and none of them had garbage facilities.
Now, there was one exception to this: the place I ate dinner the first night let me recycle the six Pocari Sweat bottles that I had with me. However, that was an exception, not the rule. Also, chances are I shouldn’t even have asked. In retrospect, I feel bad about this—at the time I didn’t realize what the norms were, and the request was probably really awkward for them.
Thankfully I had a plastic bag with me from 7-11 for my garbage from my food, and for my plastic bottles. So, when I finished one of the bottles, I would just collapse it, put the cap back on it to keep it collapsed, and put it in my garbage bag.)
Toilets
Now, while you can’t throw out any garbage on Mount Fuji, starting at fifth station there is one thing you can, and must, throw into a garbage bin:
Toilet paper.
I’m actually 100% serious. At every toilet from 5th station to the summit, there is some form of notice requesting that you throw used paper in the bin, not the toilet. (This is not the case at the portable toilet at Umagaeshi. At the time, I didn’t really appreciate being able to drop toilet paper into the toilet.)
The first time I saw a sign like that couldn’t really believe it. It was worded a bit ambiguously, and I just assumed it meant used sanitary napkins for women, not toilet paper.
However, further up the mountain, at the second toilet I stopped at, it was spelled out pretty clearly, with cartoon pictures:
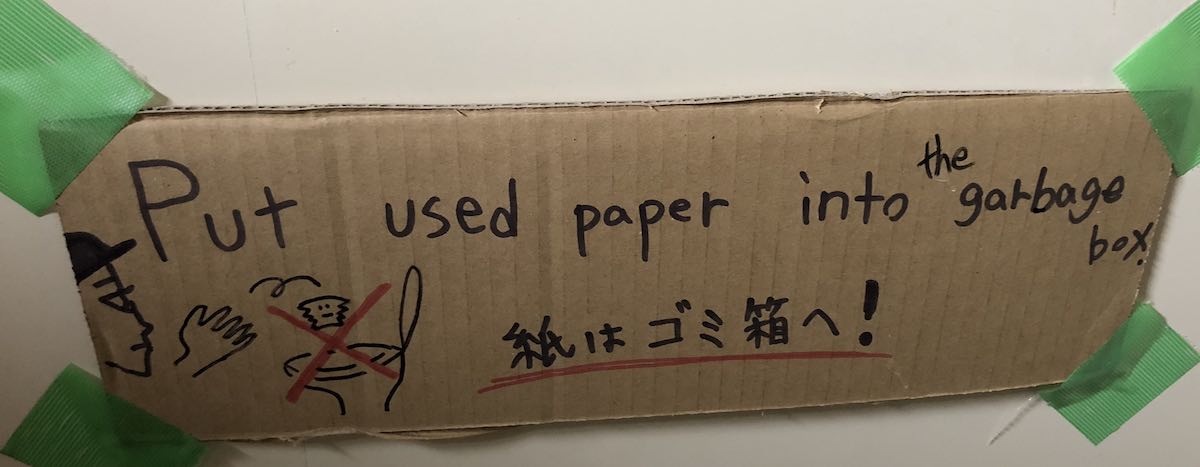
If you think that a small garbage box full of used toilet paper would smell bad:
Yes.
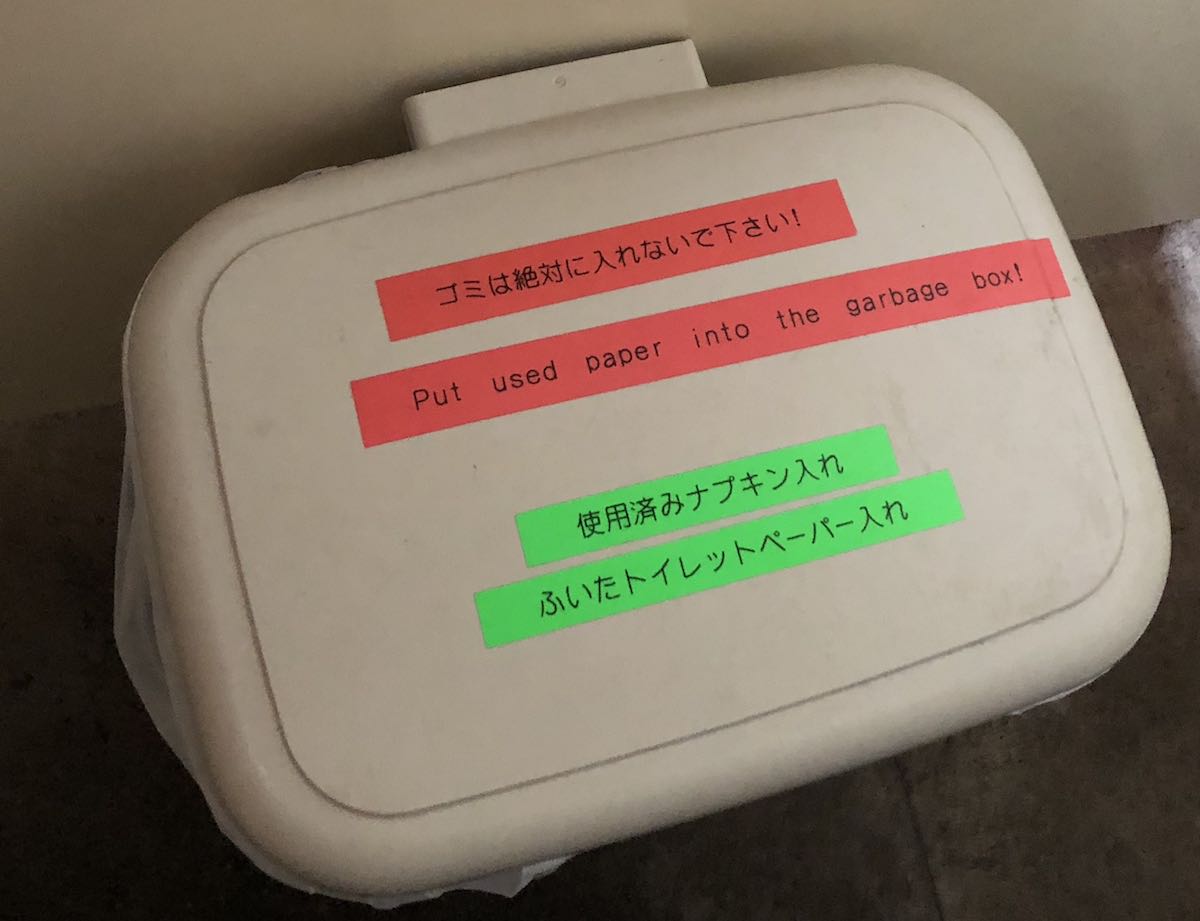
So, if you ever have a bad day at work and complain about your shitty job, remember this:
All those bags from all those bins need to be carried down the mountain.
It is at least one human being’s job to take the bag of shit from that bin, and all the other bags of shit from the other bins, and get them down Mount Fuji somehow.
So, there is definitely more than one person on this planet with a shittier job than you!
One final note: each of these toilets costs 200 yen to use. You put your coins in a box outside the bathroom building, which, in all cases, is separate from the actual mountain hotel in question. This is why I recommended bringing at least 1000 yen in 100 yen coins. You will always want to have at least 200 yen in coin on you at all times. (If you need more coins, just buy a drink or some food.)
Normally I would complain about paying 200 yen to go to the bathroom, but when you think about what is involved here, this is a small price to pay. The bathroom attendants earn their money.
What I Did, the Long Version
On August 15-16, 2018, I hiked the Yoshidaguchi trail of Mount Fuji. The Yoshidaguchi trail is 19 kilometers long from the base to the peak, rising 2856 meters from a base of 850 meters to a peak of 3706 meters.
Day One
Getting to Mount Fuji Station, 7-11 and the Shrine
I woke up in Tokyo just after 5 AM on the Wednesday. I got dressed, packed the food from my bar fridge into my backpack, and walked to the Asakusabashi station from my hotel.
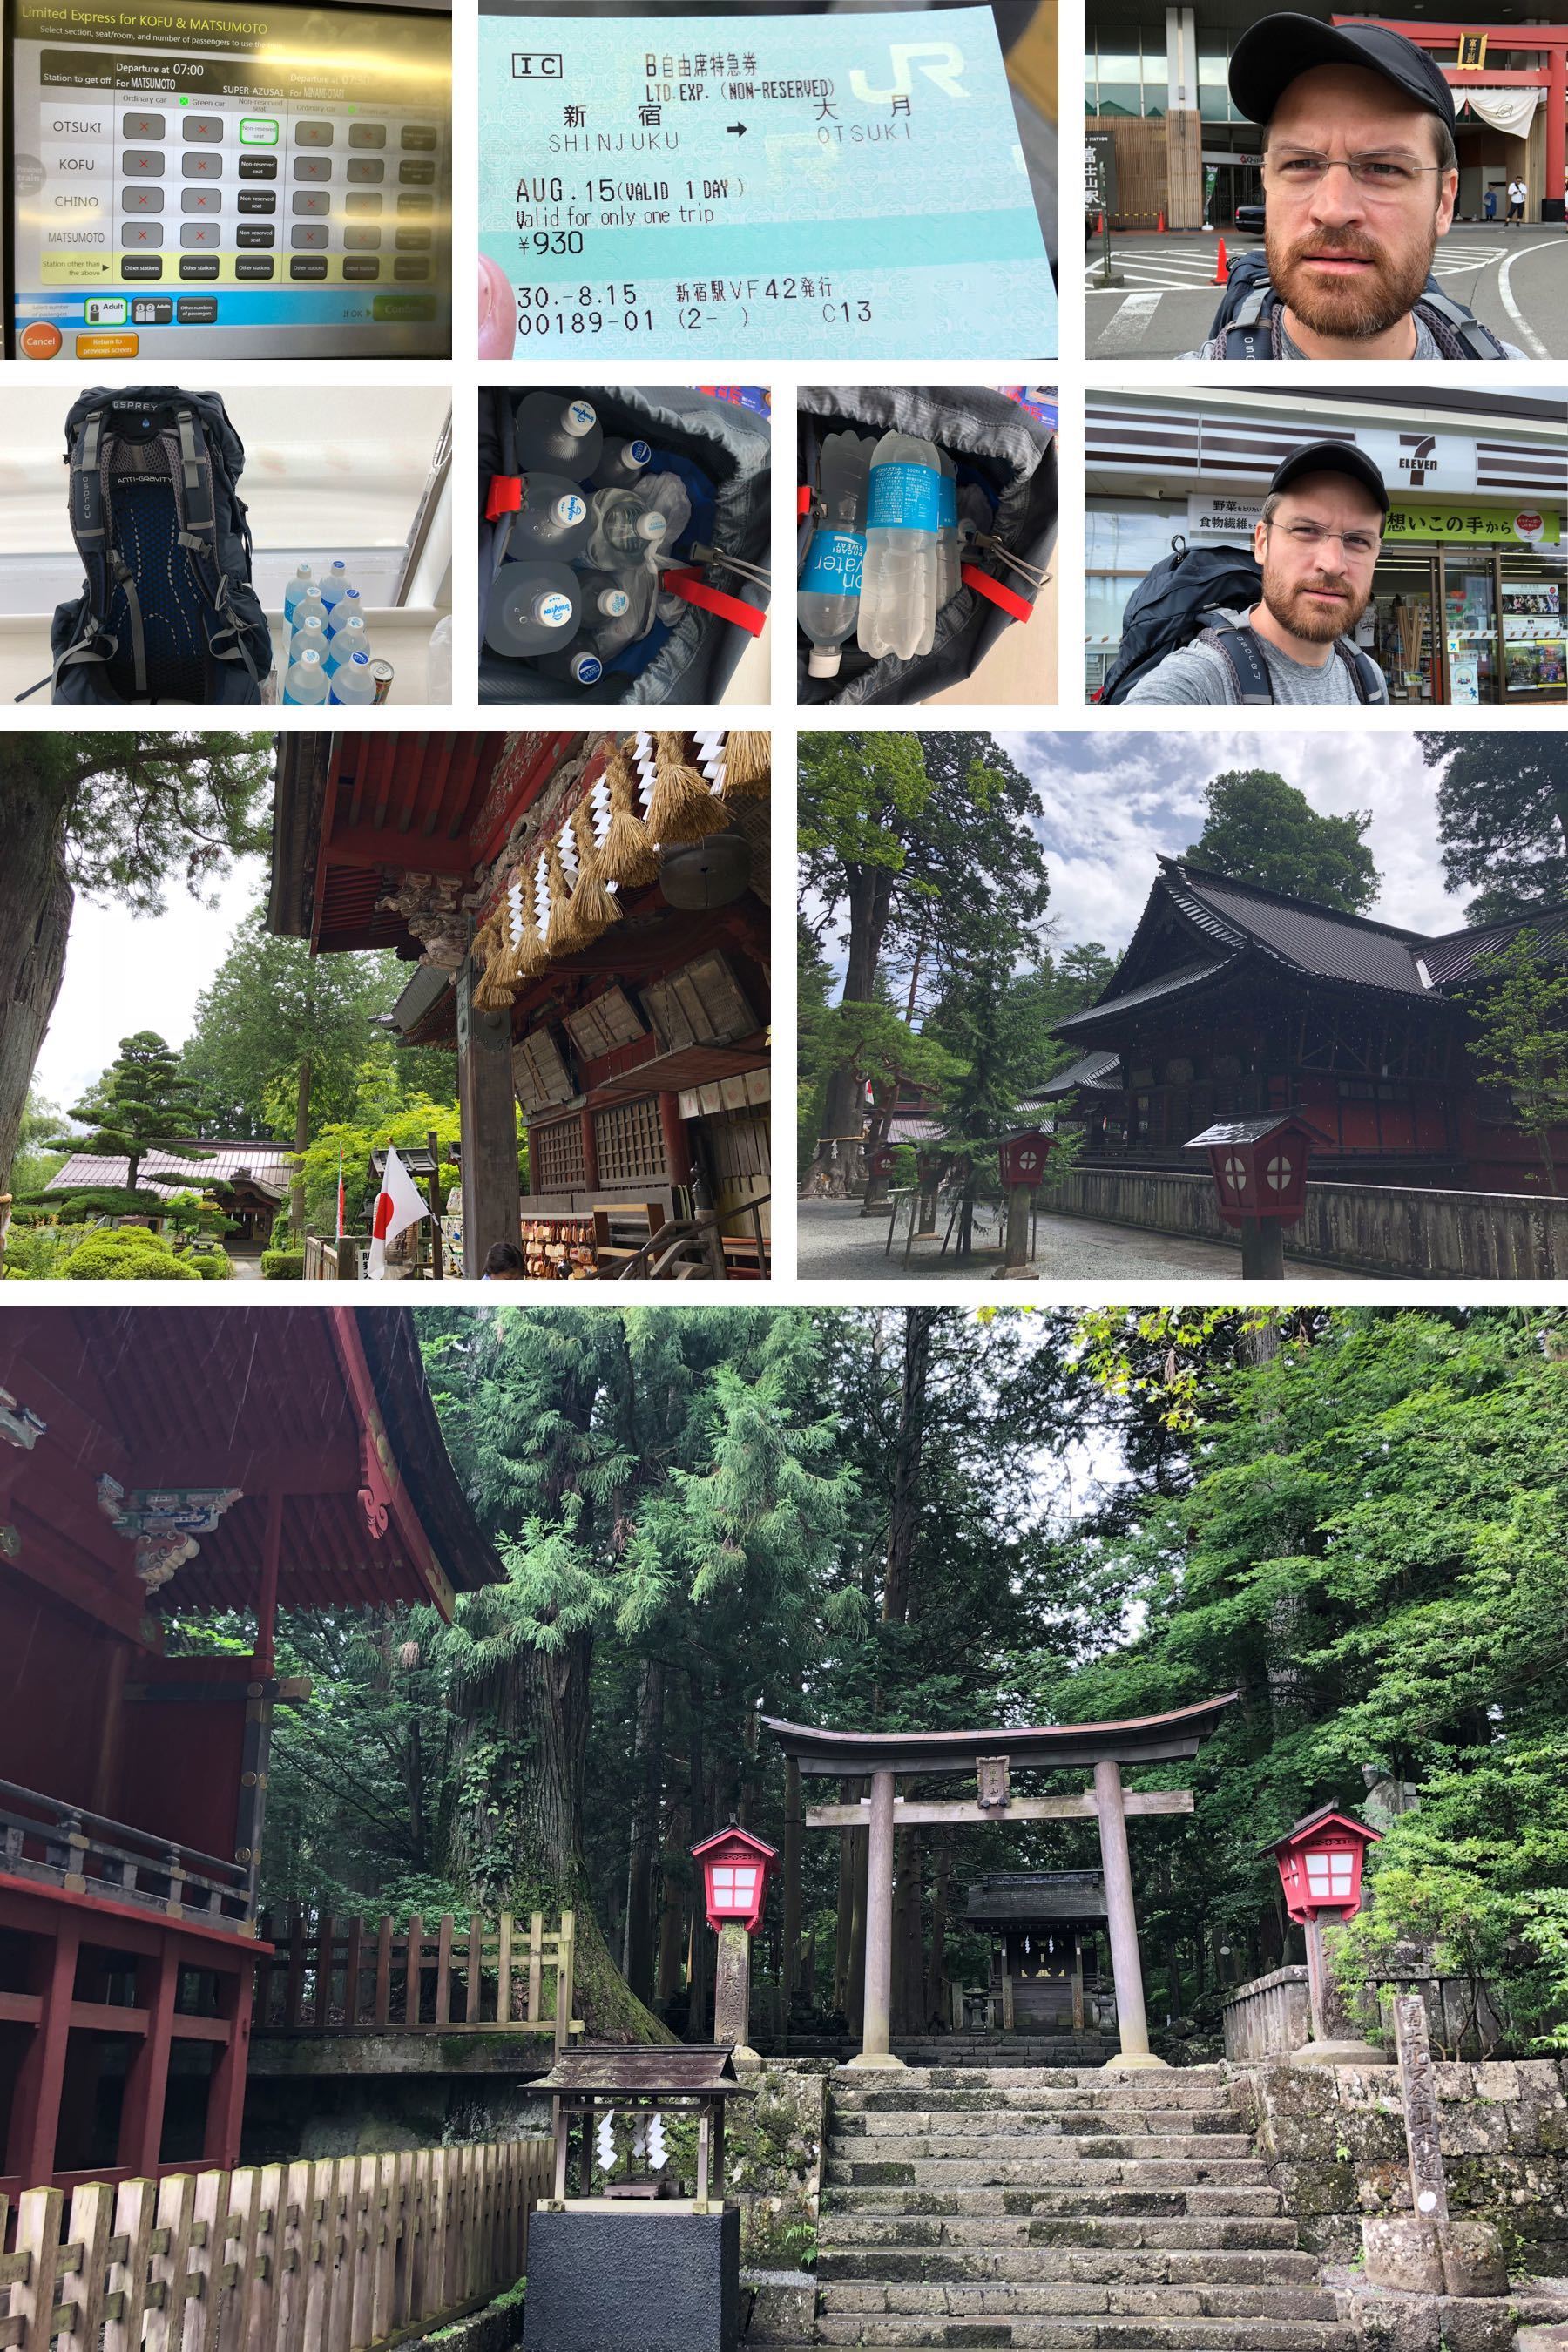
I took the train from Asakusabashi station to Shinjuku station, and then bought a limited express train ticket from Shinjuku to Otsuki using my Suica card. (For a longer distance like this, I think you need to get an advance ticket, not just swipe your Suica card.)
The train was a Super Azusa to Matsumoto; the Otsuki station was the first stop along the way. I bought a non-reserved seat ticket for 930 yen. There are photos of the ticket machine and my ticket later.
From Otsuki, I got the Fujisan Otsuki line train to Mount Fuji station. This is operated by a separate (non-JR) railway company called Fujikyu Railway, but your Suica card works to pay for it as well. Just swipe at the IC machine at the gate.

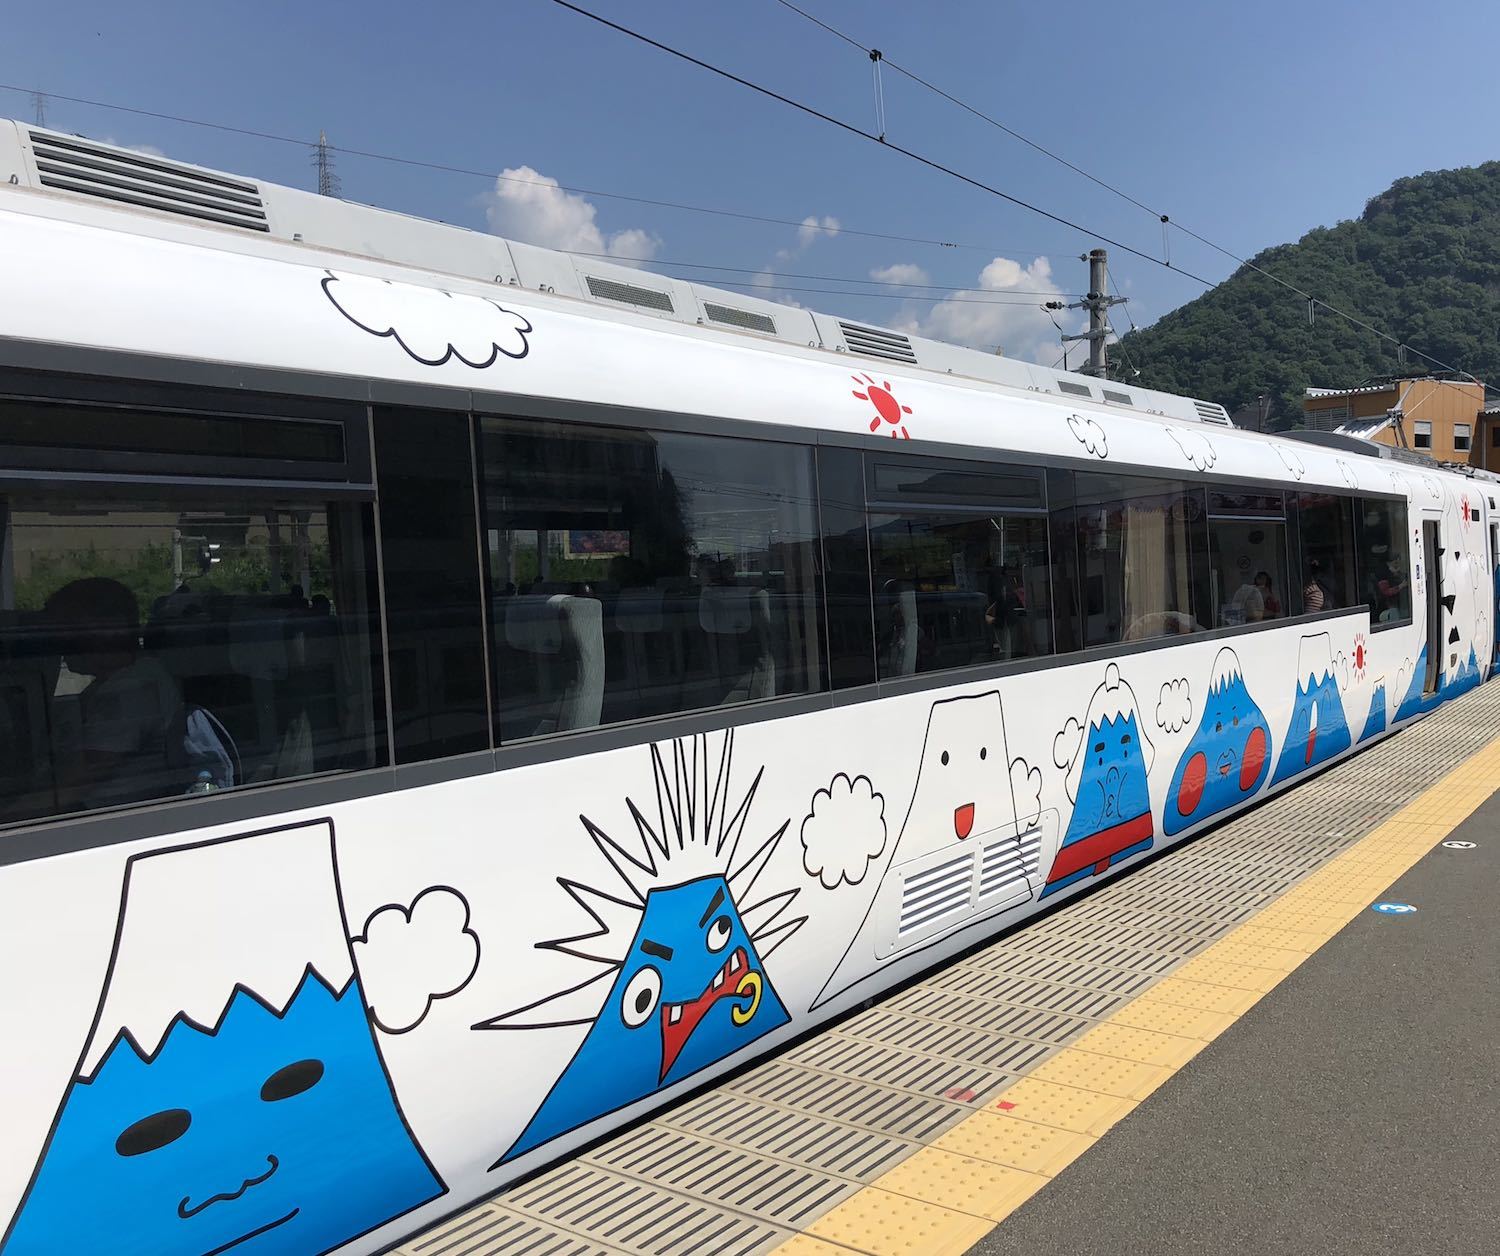
There are some fancier trains with cute cartoons of Mount Fuji on it, and there are some normal trains as well. I had previously taken one of the fancy ones with my wife and son when we stayed at Guesthouse Sakuya after our trip to Matsumoto; in this case, I just got a normal one, since it was the next available train. (The fancy ones need an extra ticket, which can also be bought from the agent at the gate using your Suica card.)
I arrived at Mount Fuji station (FJ 16) at about 9 AM. I walked across the street to the visitor center, and got a paper map of the Yoshidaguchi trail. The agent cheerfully but quizzically confirmed “Yoshidaguchi?” to me, differentiating it from just the Yoshida trail which starts at fifth station.
To be honest, it was a bit intimidating, but it made me feel like I was about to embark on an adventure—and in modern life there typically aren’t that many opportunities for adventure. Besides the free paper map, she also gave me a postcard of Mount Fuji, which made the reality of what I was going to attempt sink in.
From the visitor center, I walked back to the train station, and took a cab to the 7-11 near the Kitaguchi-hongu Fuji Sengen Shrine. This is where I stocked up on all those sports drinks and water. From there, I made the 10-15 minute 700m walk to the shrine.
Hiking to Umagaeshi
I went to the Kitaguchi-hongu Fuji Sengen Shrine first, and I recommend it.
If you have a Goshuincho, you can bring it and receive Goshuin at the shrine. Goshuin feature beautiful calligraphy and are received at Buddhist temples and Shinto shrines. (There is also a shrine near 8th station, and you can receive a Goshuin there as well.
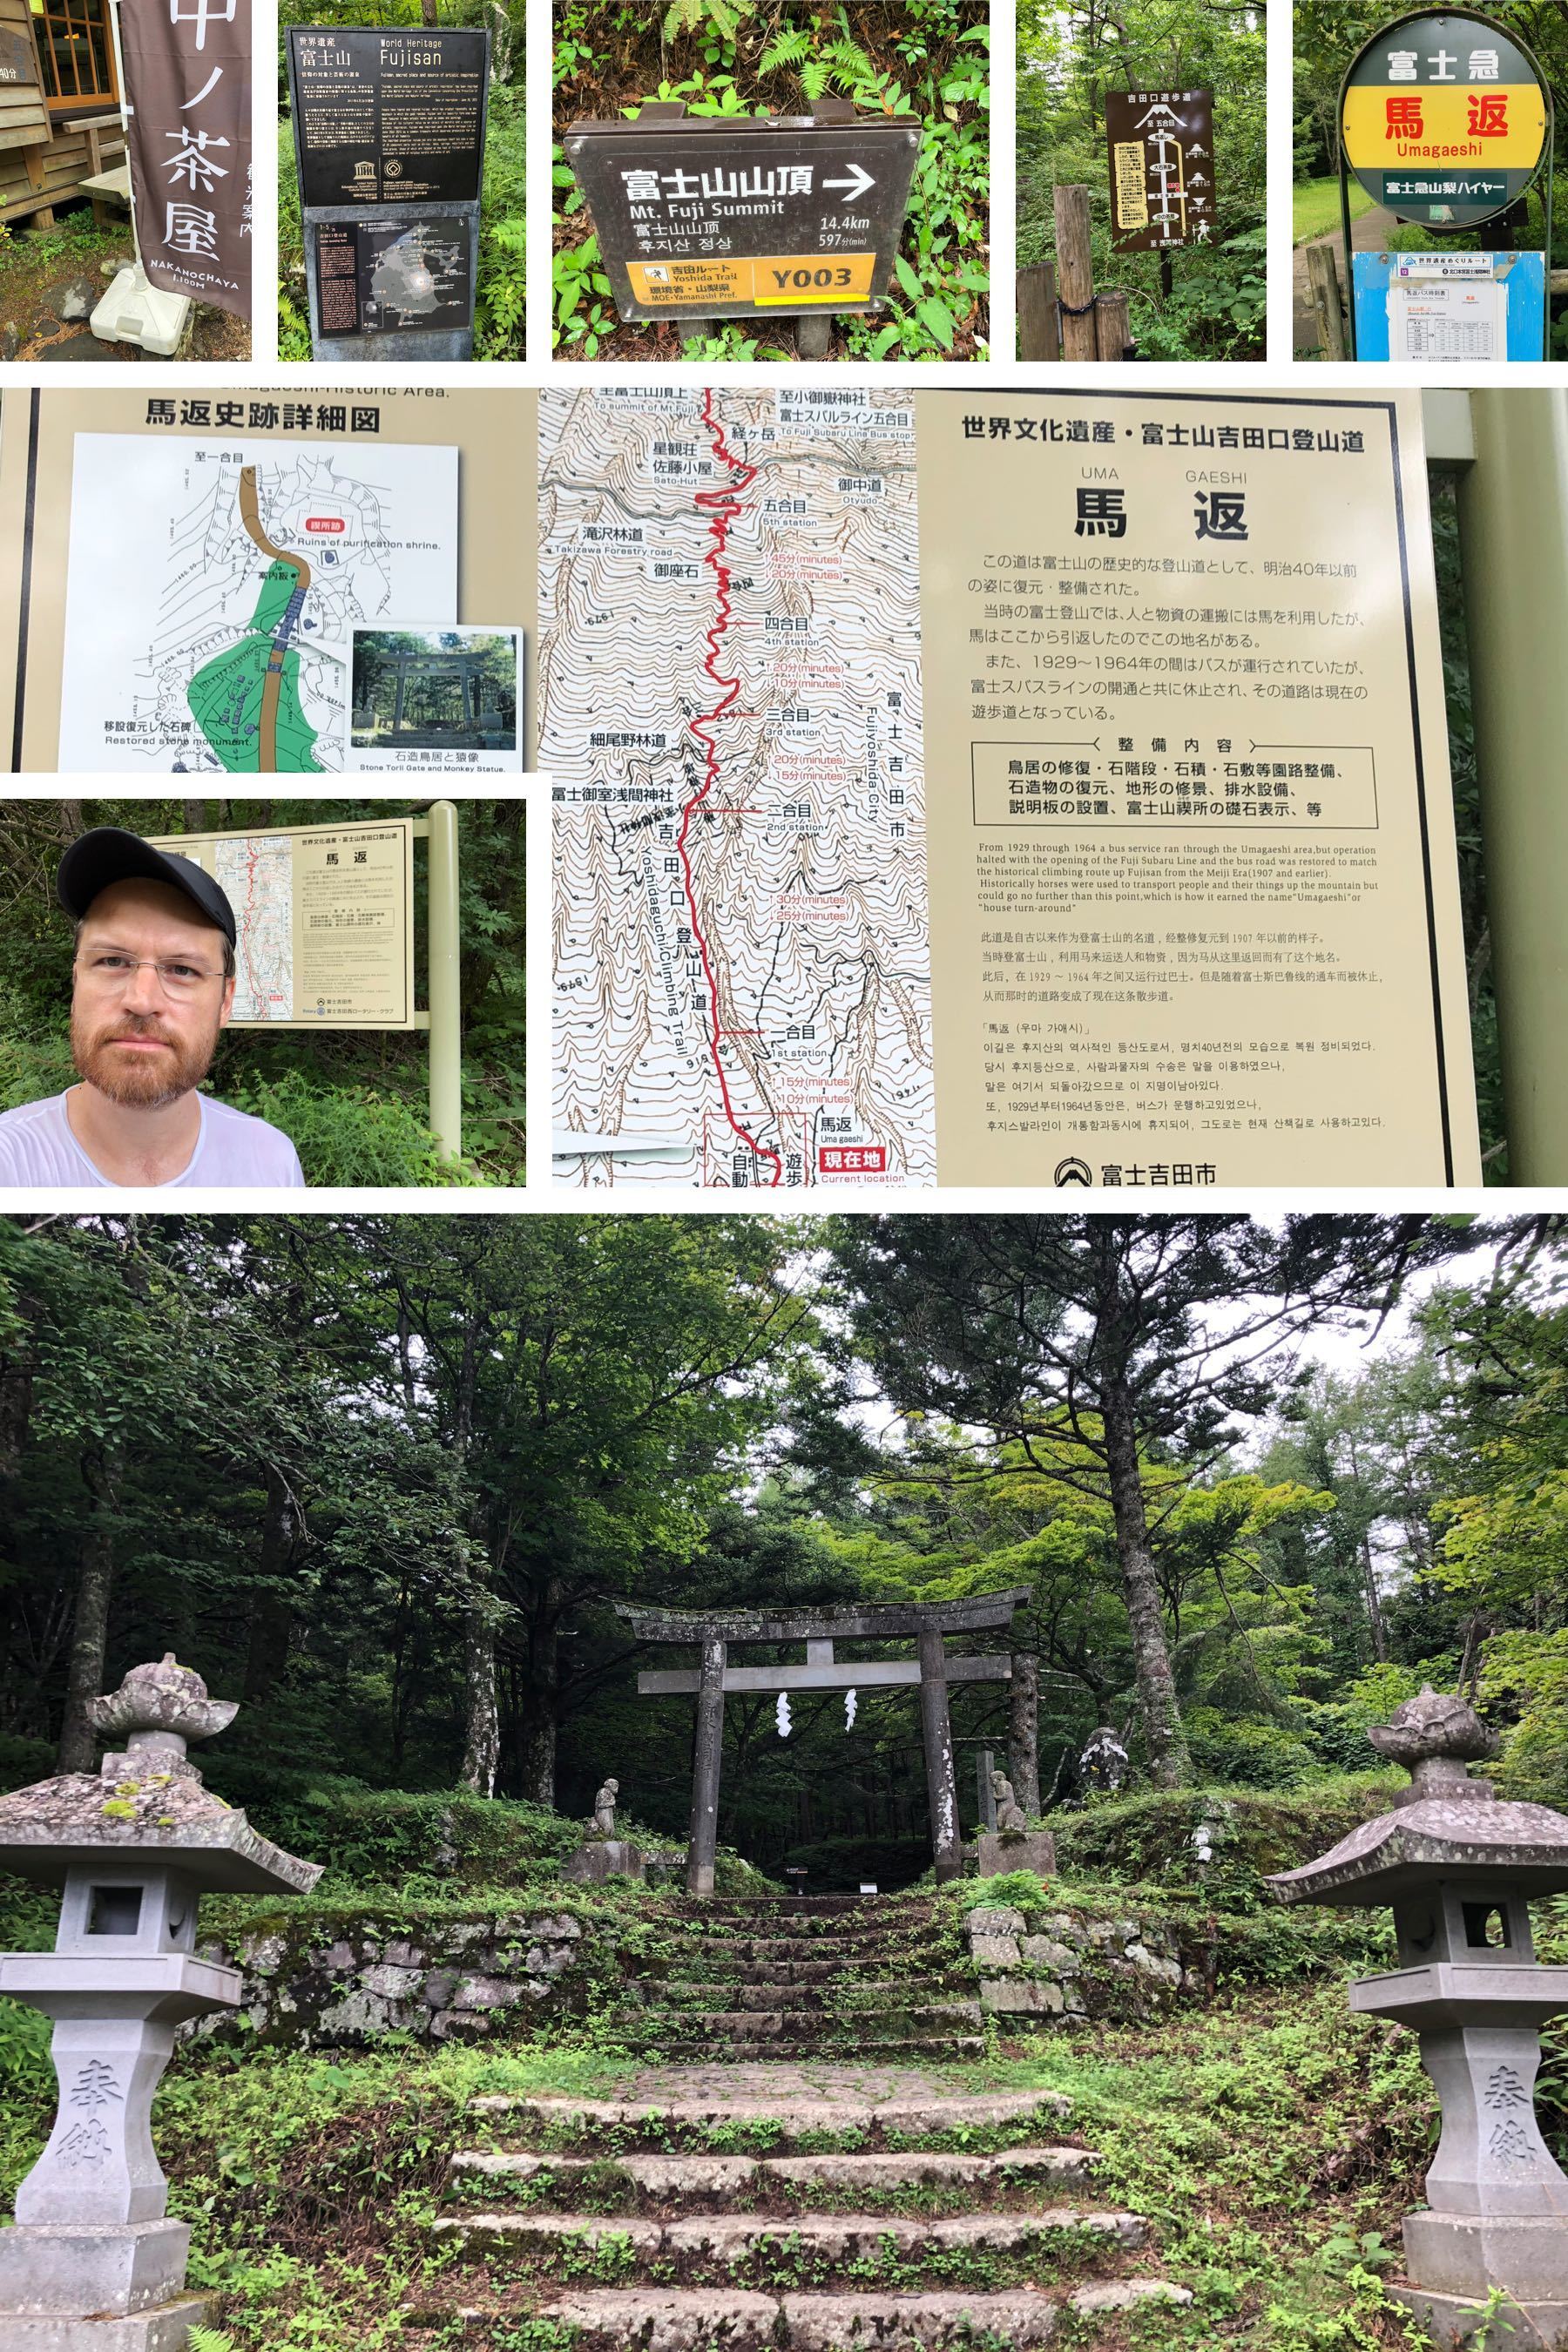
From the shrine, I walked down the road a little bit, and cut over into the woods where there is something that looked like a path. If you think that sounds vague: it is. I missed it the first time, and walked back and forth a little bit. Trust your instincts here. When I had done the right thing, I saw a sign for the Yoshida Recreational Footpath (photo on the next page). It encouraged me to “Please enjoy nature walking to Umagaeshi”. Looking at the sign, Umagaeshi was something that looked about halfway between where I was, and where the peak of the Yoshidaguchi trail was. That was about accurate in distance, but not elevation gain or time.
So, I had been to “station 7-11”, been to the shrine, and found the start of the Yoshidaguchi trail!
It started to rain. I put my old Arc’teryx Beta AR Gore-Tex jacket on, and quickly realized that I had not restored the water repellency of it as well as I had thought I had. Oh well.
I also forgot to put my rain cover on my Osprey Atmos 65 at first. However, the first time I stopped for a break and a snack of “Energy in” plus a Pocari Sweat Ion Water, I corrected this.
The Yoshida Recreational Footpath hike was very gentle in terms of elevation gain at this phase, which was good given the 33 pounds of liquid I was carrying. I took my jacket off and plodded onward under the weight. Soon, my shirt was wet more with sweat than with rain.
There were signs warning about the presence of a bear in the area. I’m Canadian, so I’m a lot less concerned about bears than I am about snakes—thankfully there were no signs warning me of the presence of Mamushi (a pit viper, not some kind of Pokémon) like there were on Mount Misen!
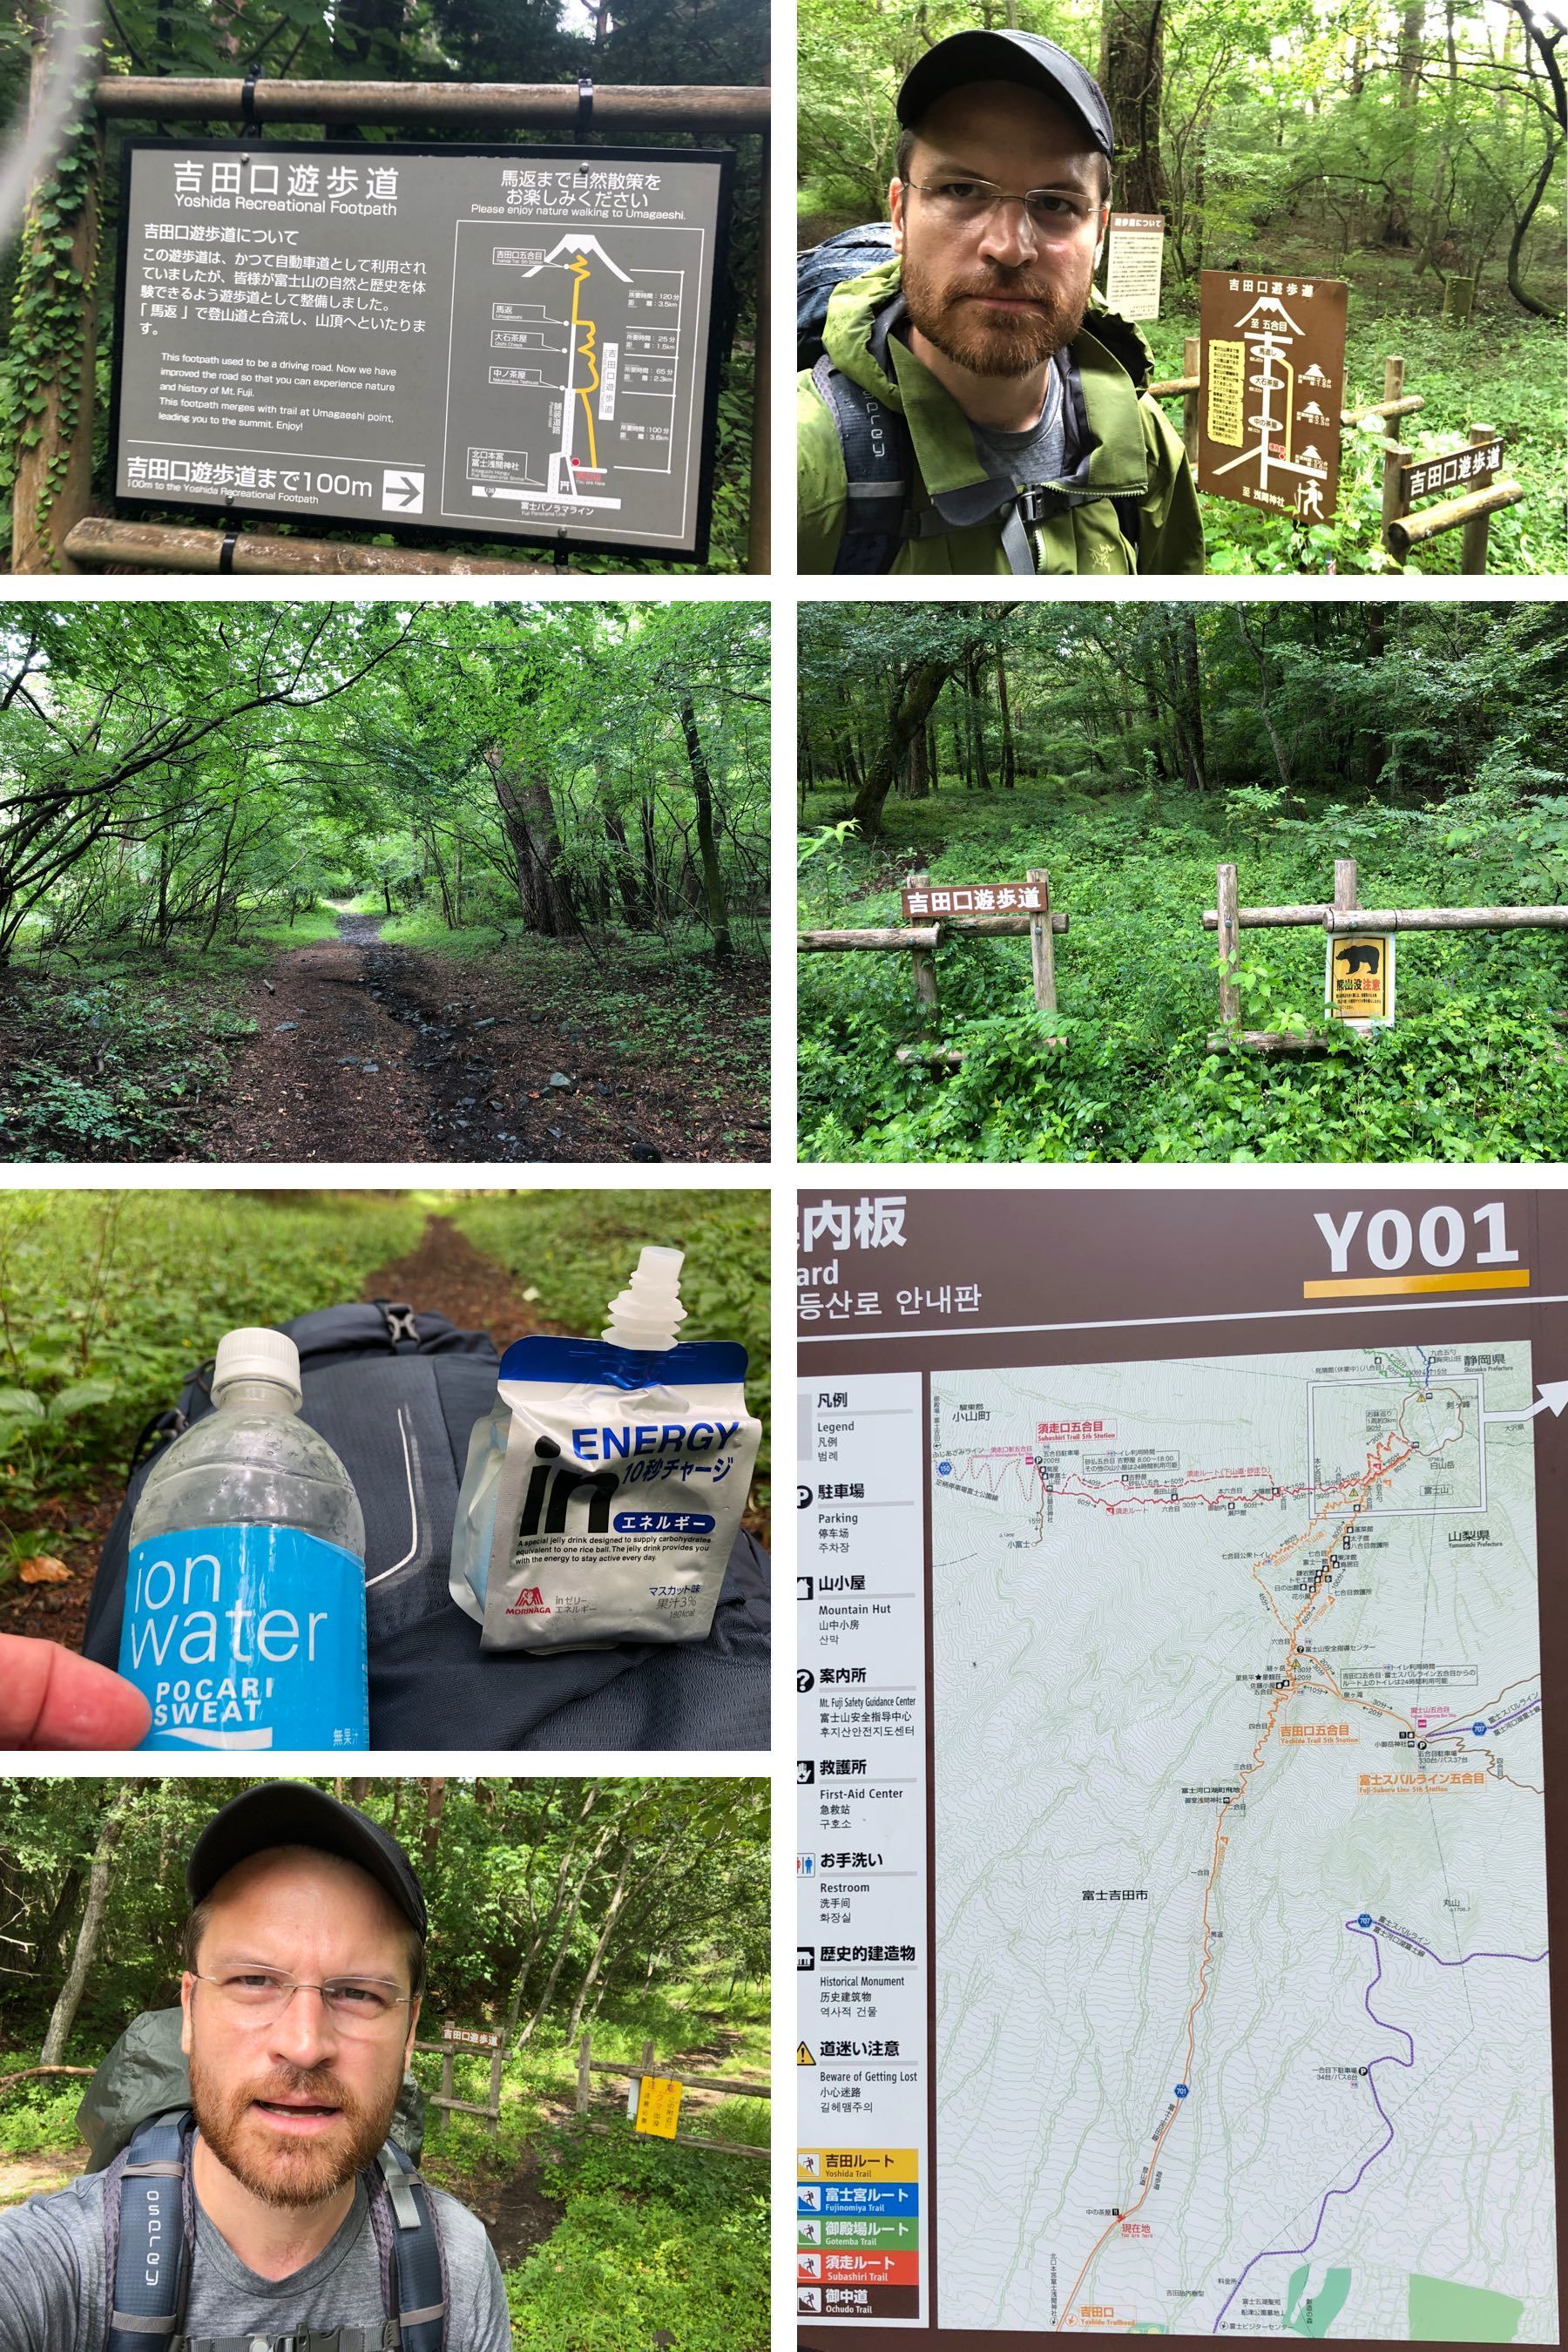
I trekked on toward Umagaeshi. It was a bit daunting to get to the Y001 board (shown on the previous page), and see the little red dot showing where the “You Are Here” location was. In case you missed that on the bottom of the previous page, let me show you the closer photo I took of the bottom of that board:
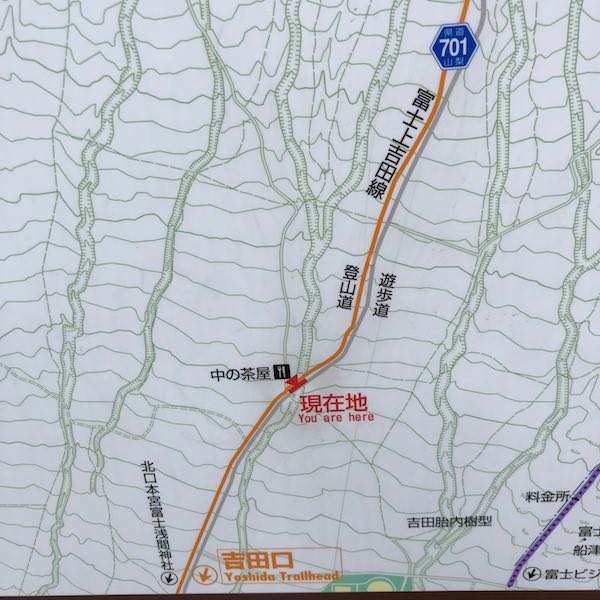
I trekked on, passed the (closed) Nakanochaya tea house at 1100m elevation, and I finally got to Umagaeshi.
As the very helpful sign at Umagaeshi says, Umagaeshi is where the horses used to stop: uma is horse; gaeshi is turn-around. (The irony is that up to Umagaeshi, I was carrying so much extra water and energy drinks that I felt like a pack horse! In the last couple kilometers up to Umagaeshi, I had sweated through my shirt, and my right hip was starting to hurt.)
In the past, hikers took horses to this point. Then, they took a bus to this point. Now, they take a bus a lot farther than this point, to Fuji Subaru Line 5th Station, so almost no one comes here.
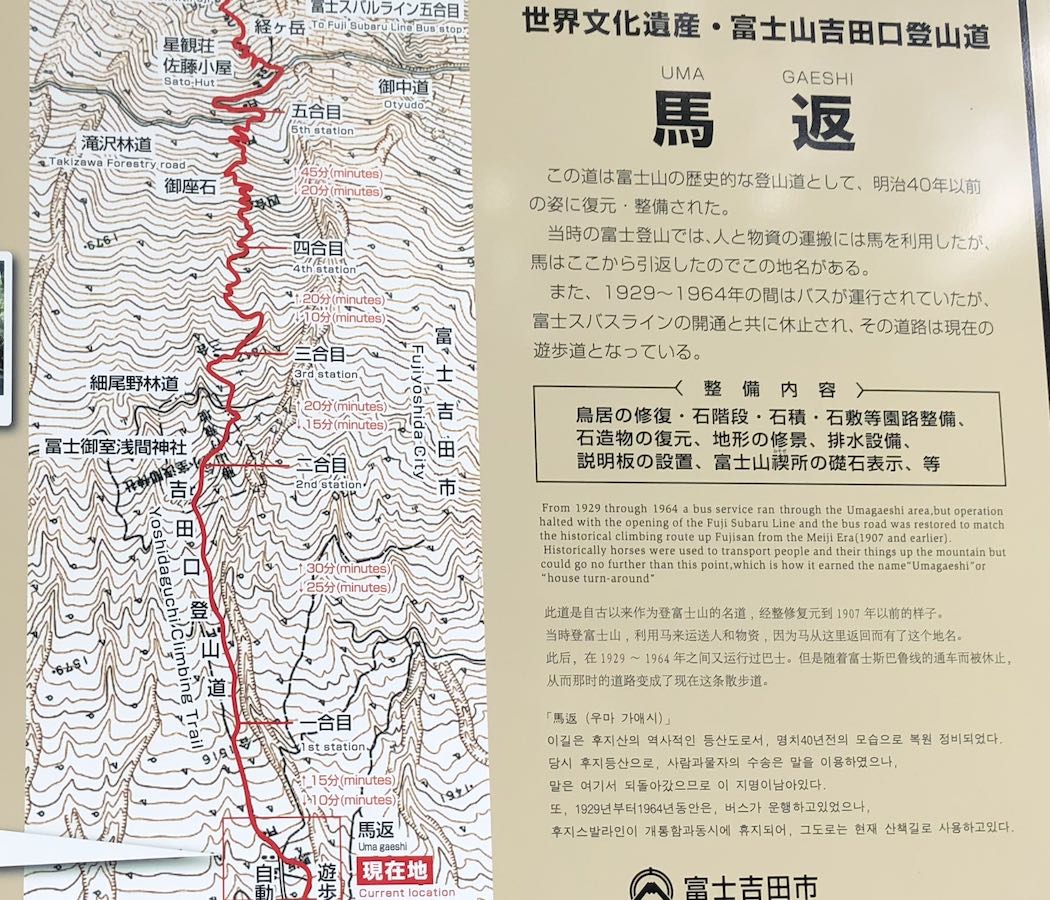
One of the really neat things about the Umagaeshi sign shown above is that you see the next five stations, presented on a contour map. You also see the path to the Fuji Subaru Line 5th Station bus stop going off to the right after the Yoshidaguchi 5th station.
Speaking of bus stops, there is still a bus stop at Umagaeshi, so if you want to give up at this point, you can take the bus from it back to Mount Fuji station. (At the time I looked at the sign, the first bus left Umagaeshi at 9:45 and the last bus left at 15:35, but the times vary with the season.) There’s also a phone number for a taxi on the bus stop sign, in case you have missed the last bus.
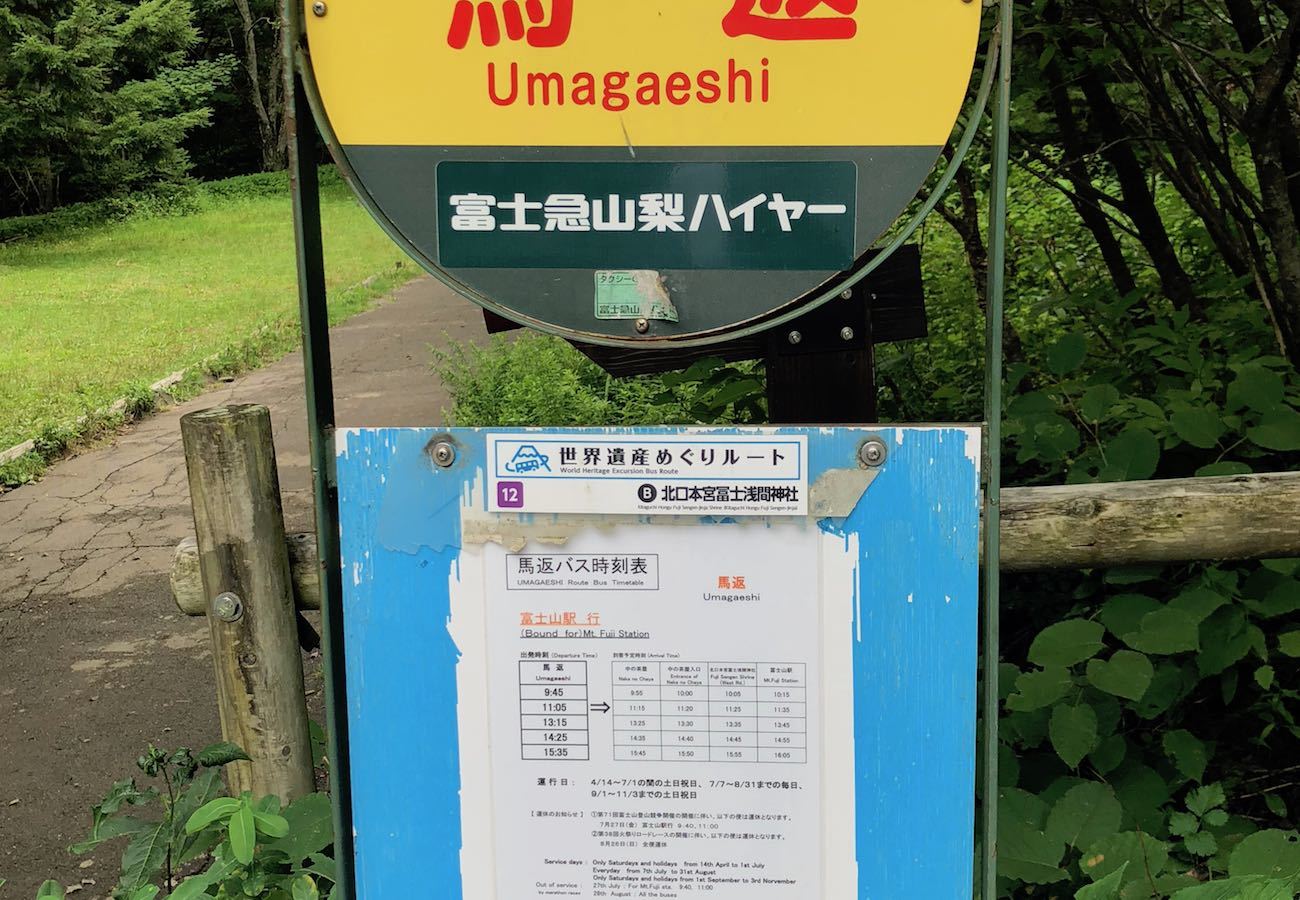
By the time I reached Umagaeshi, I had drunk three of my 900ml bottles of Pocari sweat and eaten a couple of my energy jelly packs, which made the load about 5 or 6 pounds lighter. This weight difference mattered.
(Thankfully, there was also a proper portable flush toilet at Umagaeshi, which flushed with a foot pedal. I’ll talk more about toilets later.)
So, after Umagaeshi, I started to feel a bit less like a pack horse and a bit more like a hiker.
The proper hiking path lay ahead, through a stone Torii gate, framed by two stone lanterns.
From this point, it was 10.6 km to the peak of the Yoshidaguchi trail of Mount Fuji. I had completed the first 8.4 km of the hike, and I had done so carrying way too much pack weight.
However, standing under the stone Torii gate, my pack was now lighter, my hip wasn’t getting any worse, and I was in good spirits.
The Hike to Yoshidaguchi Station 5
Having trotted through the Torii gate, I was thankful my pack was lighter, since the trekking got harder. The elevation gain became steeper.
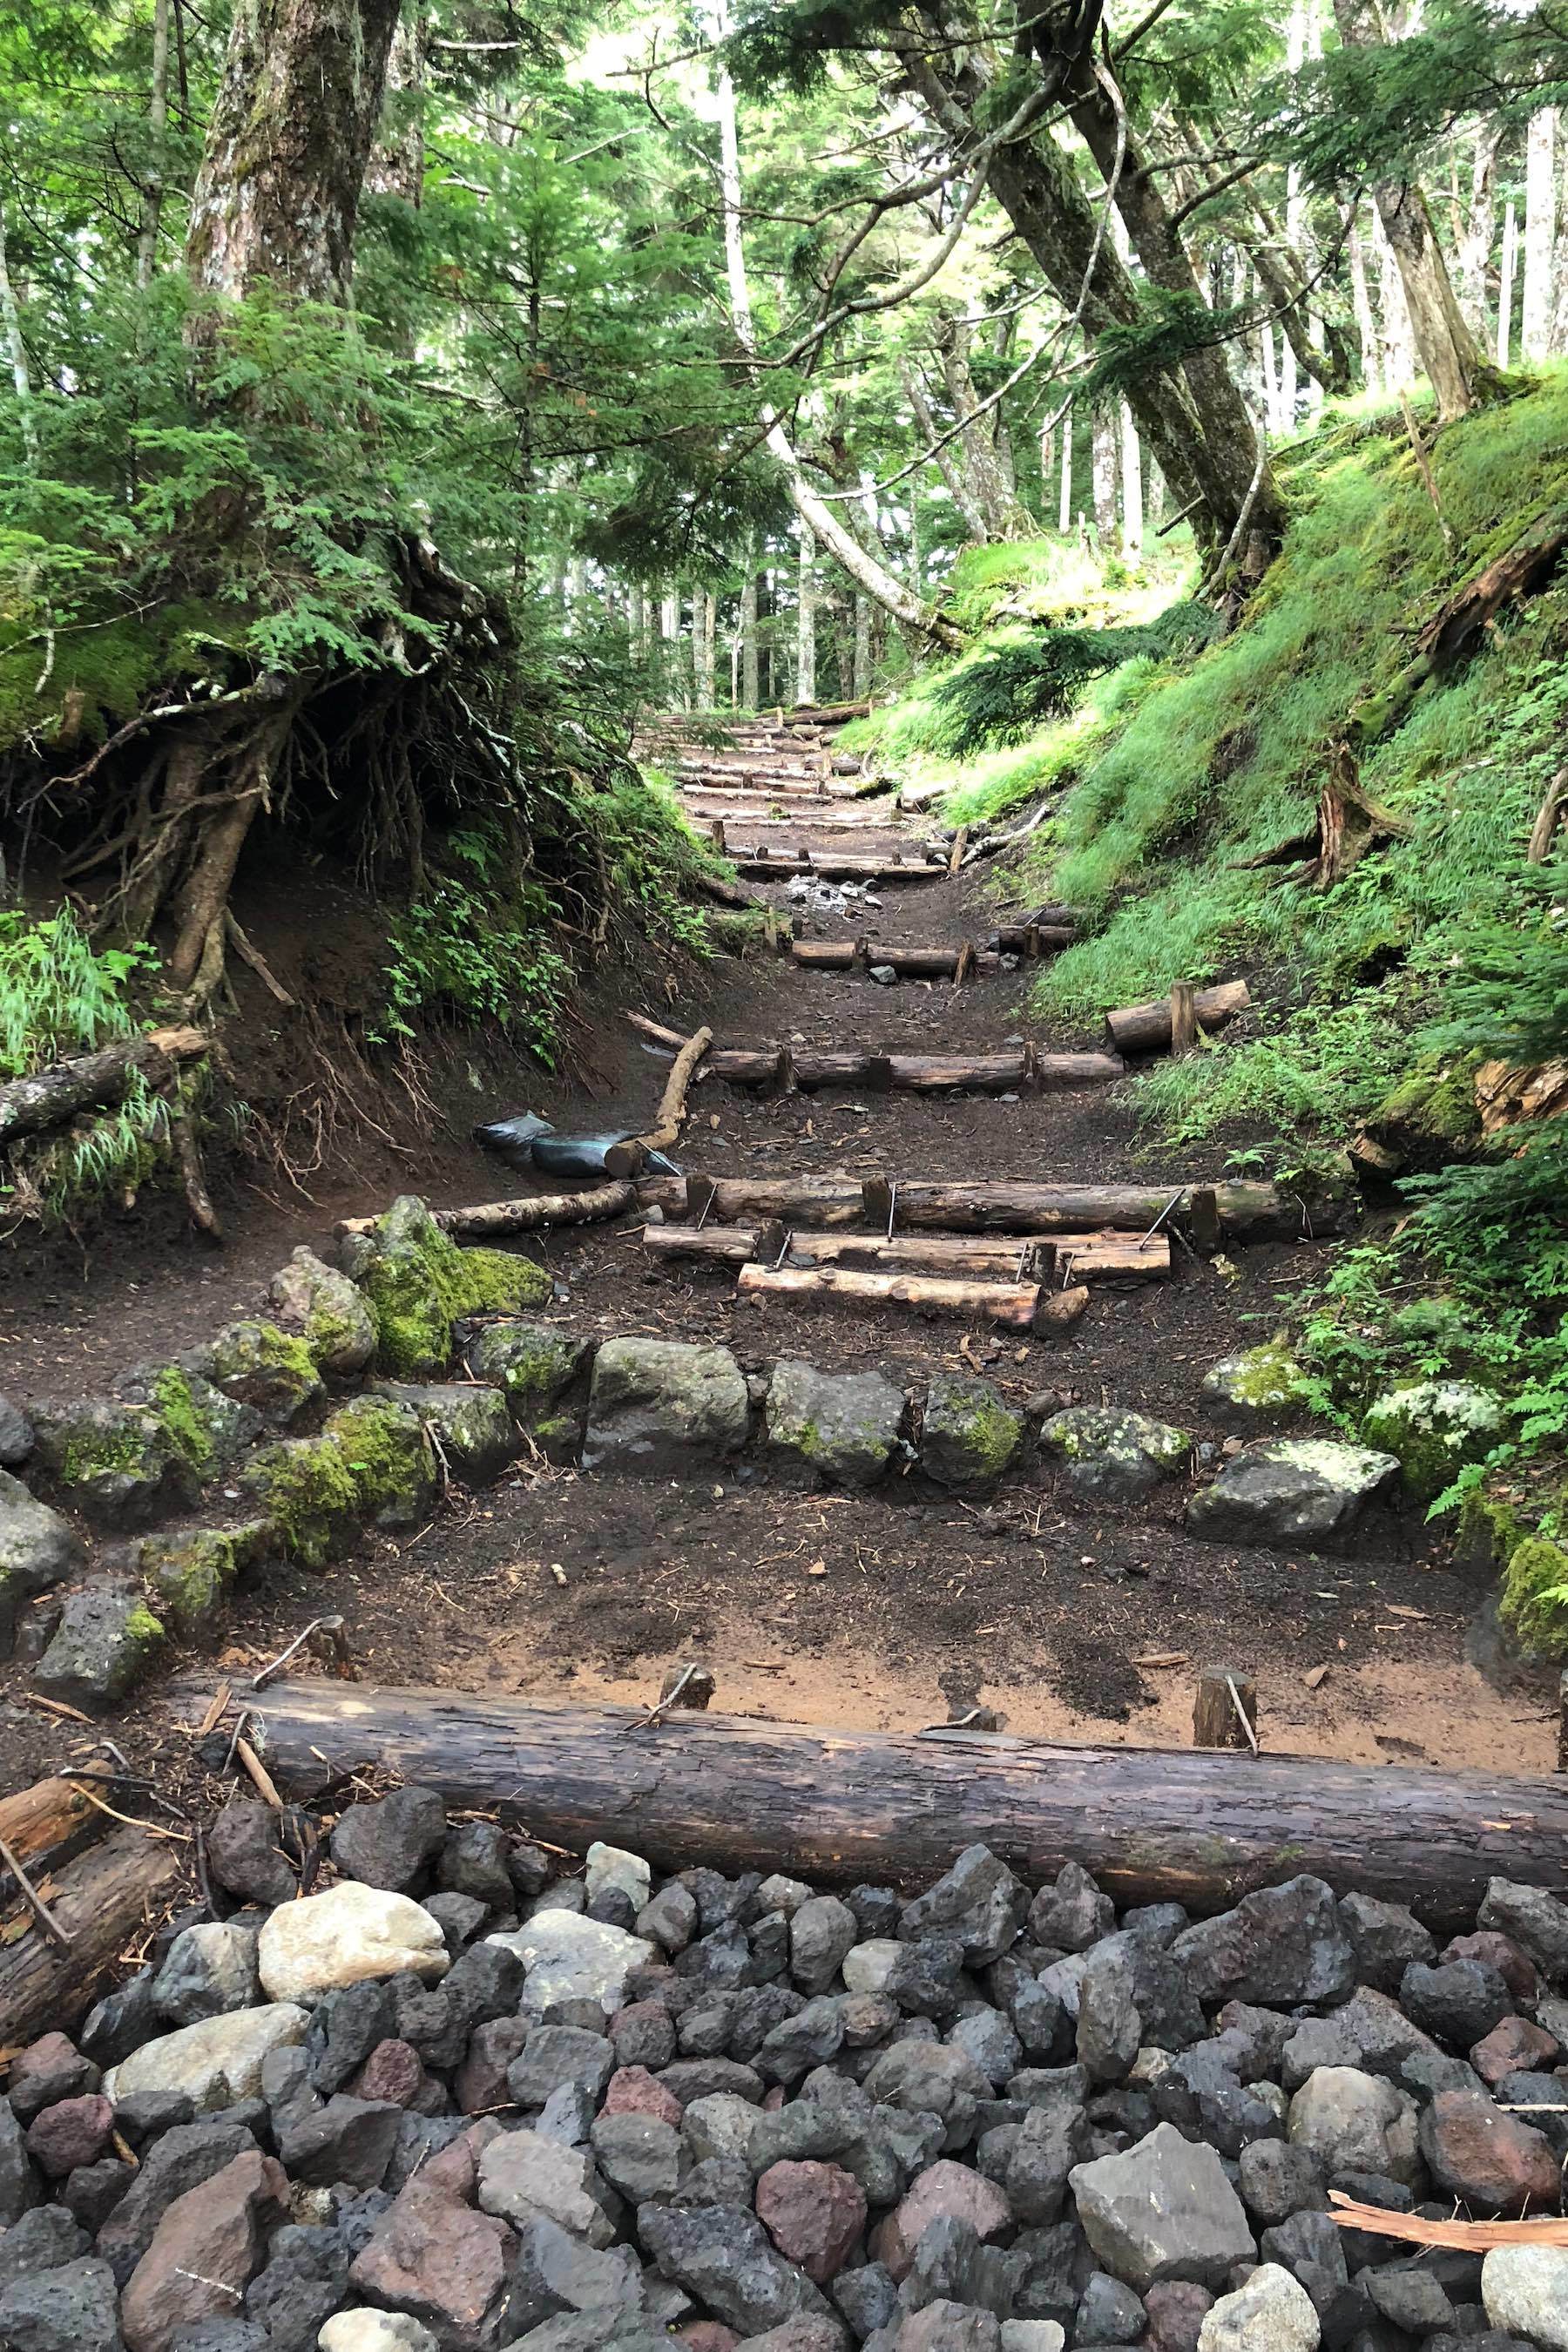
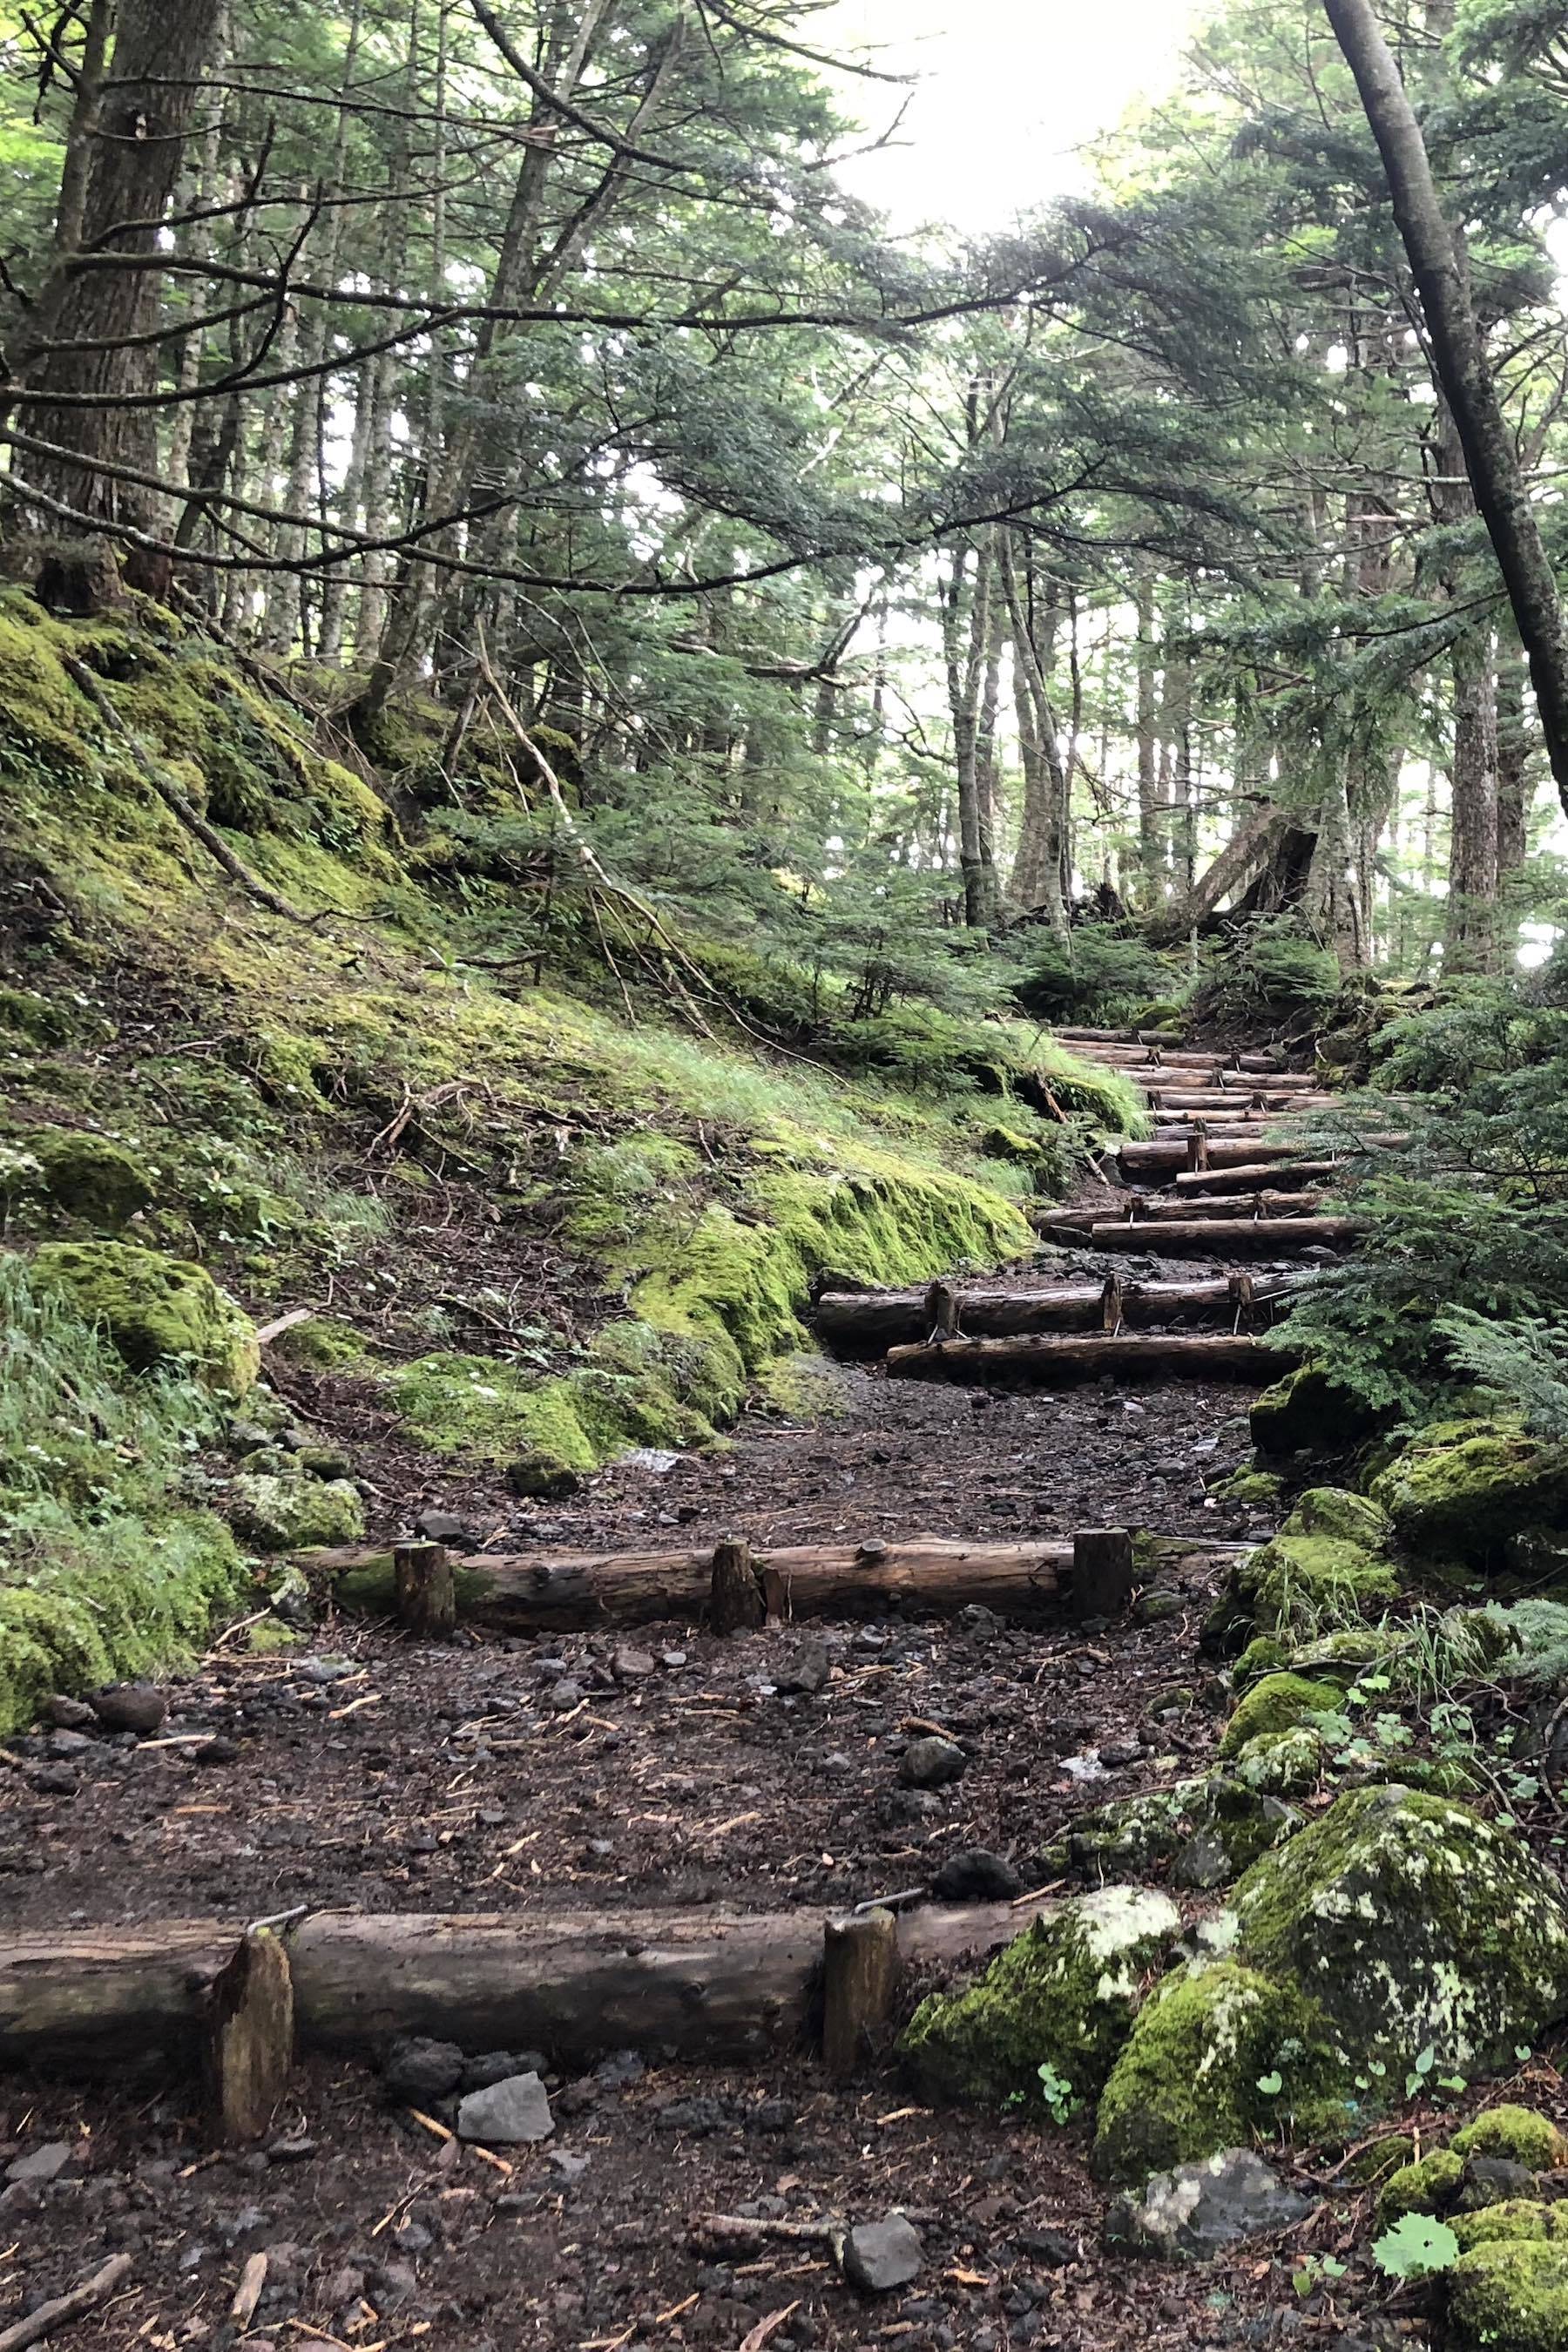
It was still a hike in a forest, but there were parts where the forest floor was broken into stairs. There was also the occasional pit of rocks, to ensure that no one could drive a vehicle or ride a bicycle (or horse!) in the path.
The path continued this way from Umagaeshi to about fourth station. One really cool thing is that the first station came relatively quickly, especially compared to the seemingly forever hike to Umagaeshi. (The fact that my pack was somewhat lighter also helped!)
From first station, the second, third and fourth stations also came by pretty fast. However, the forest path stairs did get a bit tiresome. Thankfully, there were rewards. For example, near third station, you get your first view of Lake Kawaguchiko through the trees.
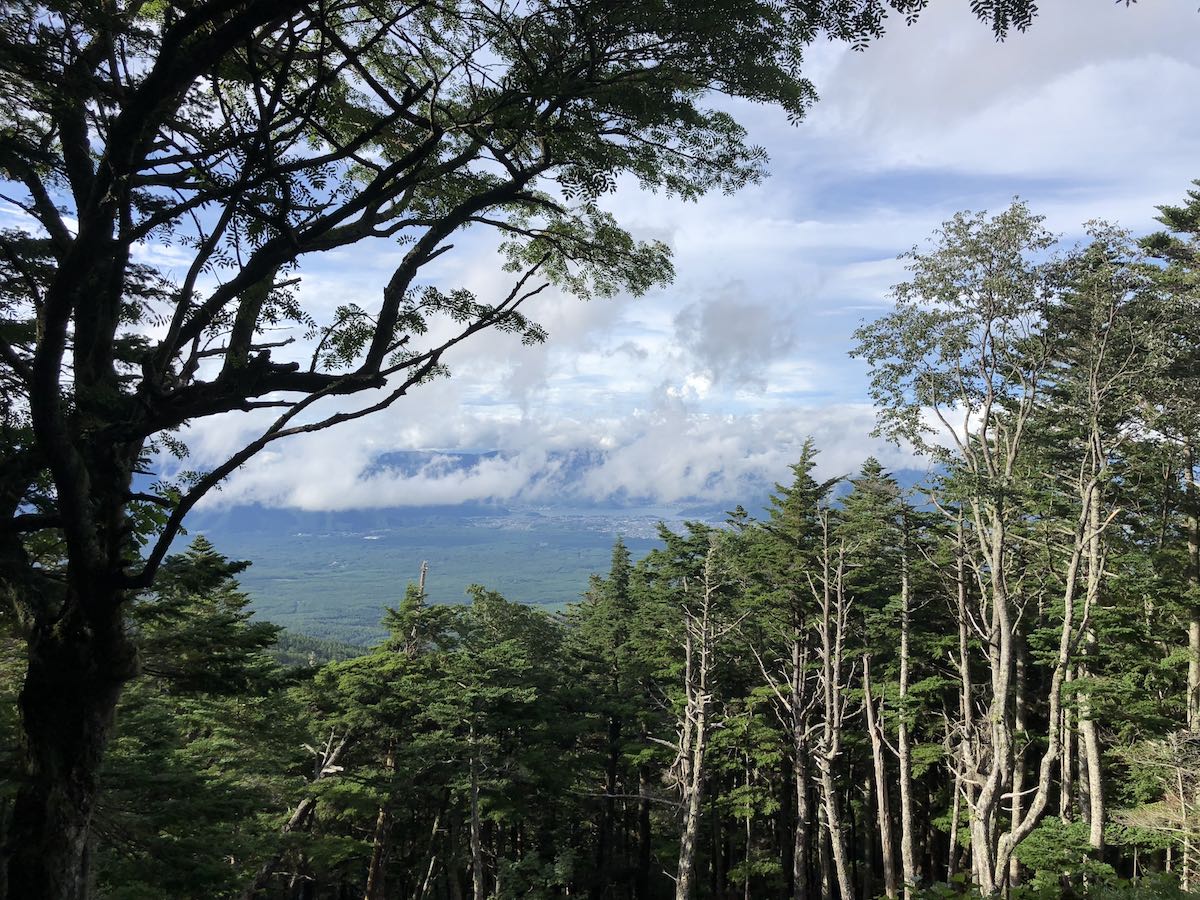
This is when it really starts to hit you how far you’ve walked. Then you keep walking.
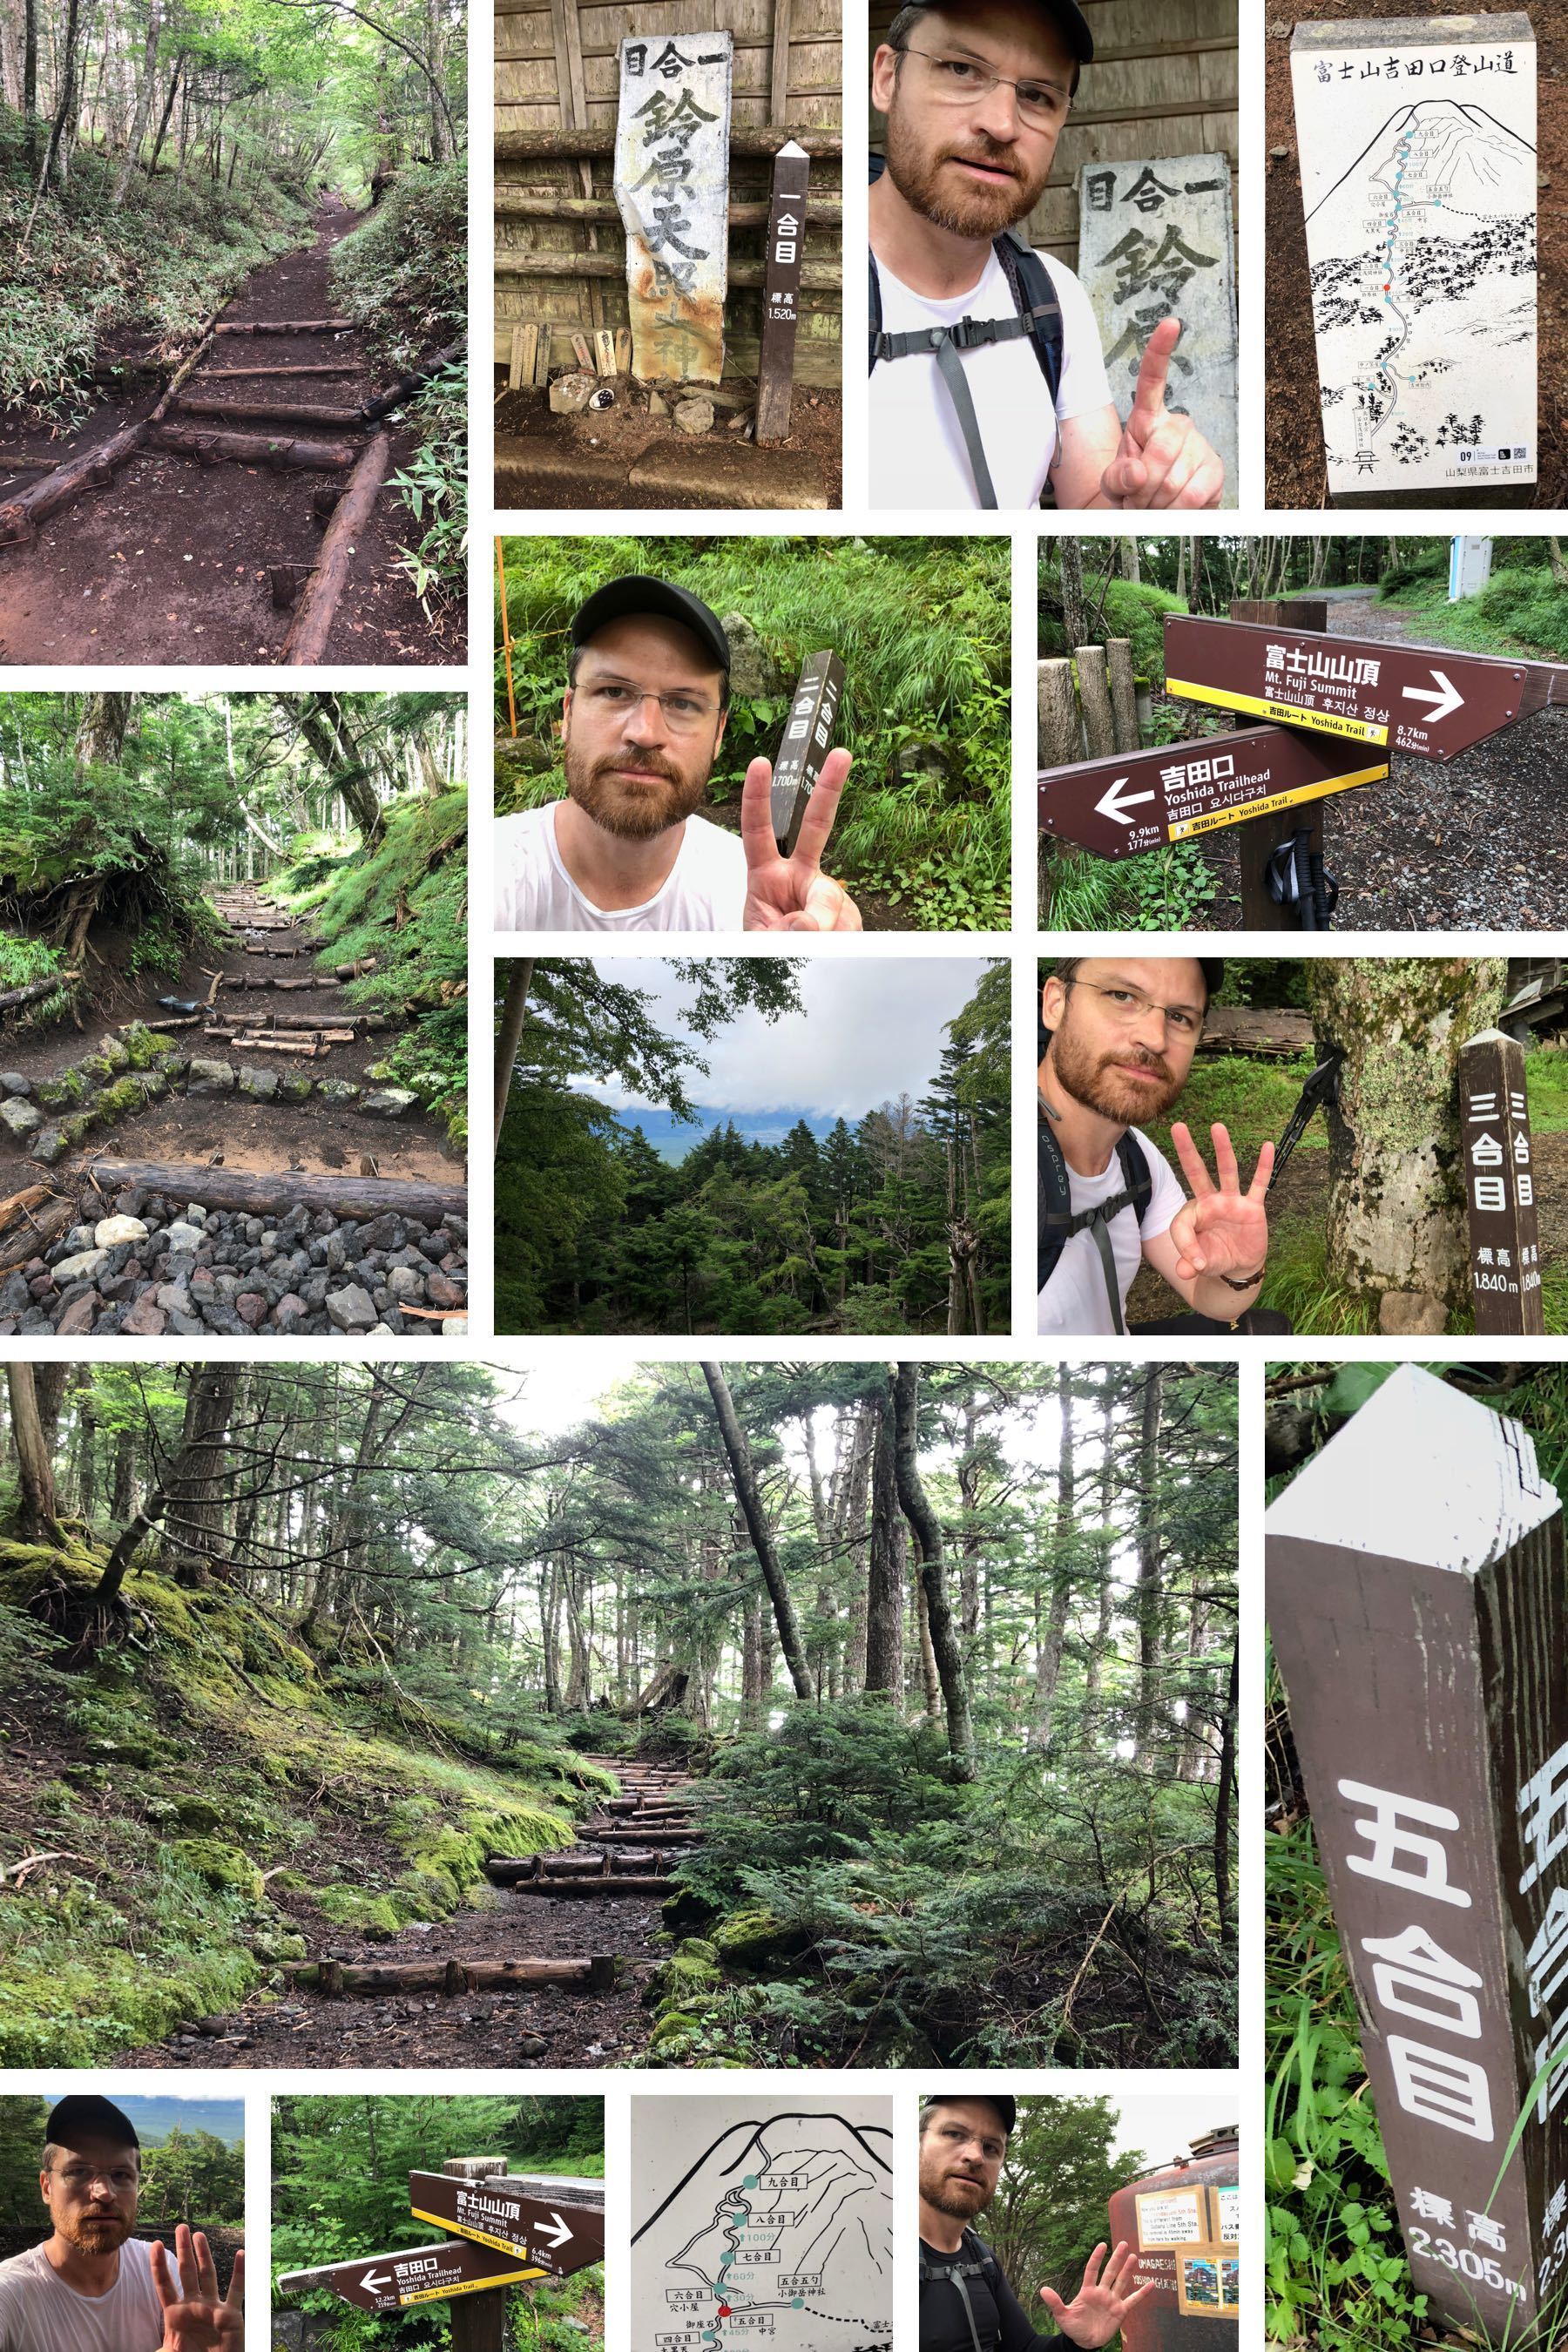
The Yoshidaguchi Fifth Station is at roughly 2300 meters elevation. When I got near there, it was starting to get cooler, so I had thankfully changed out of the second shirt I had sweated through, and into an excellent long sleeve Airism shirt from Uniqlo. Looking at the sign, there were over 12.2 kilometers behind me, and only 6.4 kilometers left to go. However, the distance estimates were another thing: they estimated that the hike had only taken 219 minutes so far, and that there were another 396 minutes to go.
Now, 219 minutes is just over 3.5 hours, and it had taken me about 6 or 7 hours to get to this point. Even if you blame an hour of it on the pack weight, and half an hour on extra rest breaks and stopping to take photos, I was behind the pace. So, 396 minutes is just over 6 and a half hours. If you assume that time is a similar underestimate, I had at least 8 hours to go to the summit, and it was about 5:30 PM.
Dinner and a Decision
So, it was decision time. I walked forward, and stopped at the first mountain hotel I found, to have some dinner, and think things over.
I got to the hotel shortly after 6 PM. The kitchen had just closed, but they let me in and sold me Cup Noodle, iced tea and iced coffee. They also were gracious enough to let me recycle my six empty Pocari Sweat / Pocari Sweat Ion Water 900ml bottles. This meant I had less garbage to carry with me in my pack.
I had dinner, and a good conversation with a hiker from Finland who came in shortly after me. He spoke reasonably good English, and I gathered he had just made his descent from the summit, having done it successfully. He was in a T-shirt and shorts, and he had been very, very cold at the summit. He was also fairly sleep-deprived by this point, having been awake for somewhere between 24 and 30 hours. The combination seemed pretty traumatic.
When I finished my dinner break, it was about 7 PM, and it had gotten completely dark.
Now, I had deliberately not booked any accommodation at any of the mountain hotels. The reason why is that frankly, I wasn’t sure if I would make it to, or past, 5th station, and it’s very rude to book a night at a mountain hotel and not show up. Space is limited, and I didn’t want to cost someone else a place to sleep. Also, you pay with cash at the mountain hotel, so you need to show up in order to pay. Finally, even if I did make it, I had no clue which mountain hotel I would want to stop at—there are a number to choose from, at very different elevations.
So, my plan had been to hike to the Yoshidaguchi 5th station, and then make the decision about whether to continue or whether to bail.
So, when I got there at around 5:30 PM, there were actually 3 options:
- Eat dinner, put my headlamp on and continue hiking up Mount Fuji in the dark. Either hike all night or stop at a mountain hotel for a couple hours to get some rest before continuing to the summit before sunrise.
- Eat dinner, find the first mountain hotel (if any) with a room, sleep through the night, and do the hike to the summit the next day in daylight.
- Skip dinner, hike over to the Fuji Subaru Line 5th Station, and take the bus down the mountain and the train back to Tokyo.
Given that it takes 45 minutes to get from Yoshidaguchi 5th Station to Fuji Subaru Line 5th Station, if I was going to choose option 3, I would have hiked directly there instead of stopping for dinner. The last bus that would get me to a train with enough time to get back to Tokyo comfortably was shortly after 7 PM.
I hadn’t checked out from my cheap Tokyo hotel room; I was in the middle of a prepaid 10-night stay I had booked via Hotwire. Because the weather forecast was so variable and there was the threat of typhoons, this was the simplest and safest thing to do. This way, I could pick the days to go to Mount Fuji based solely on the weather at the time, not when I had booked a gap in hotel stays in advance. Also, it was simpler, as I didn’t have to check out, segment my stuff and find a locker for part of it, etc. Also, it meant I had somewhere to return to late at night if I bailed on the hike.
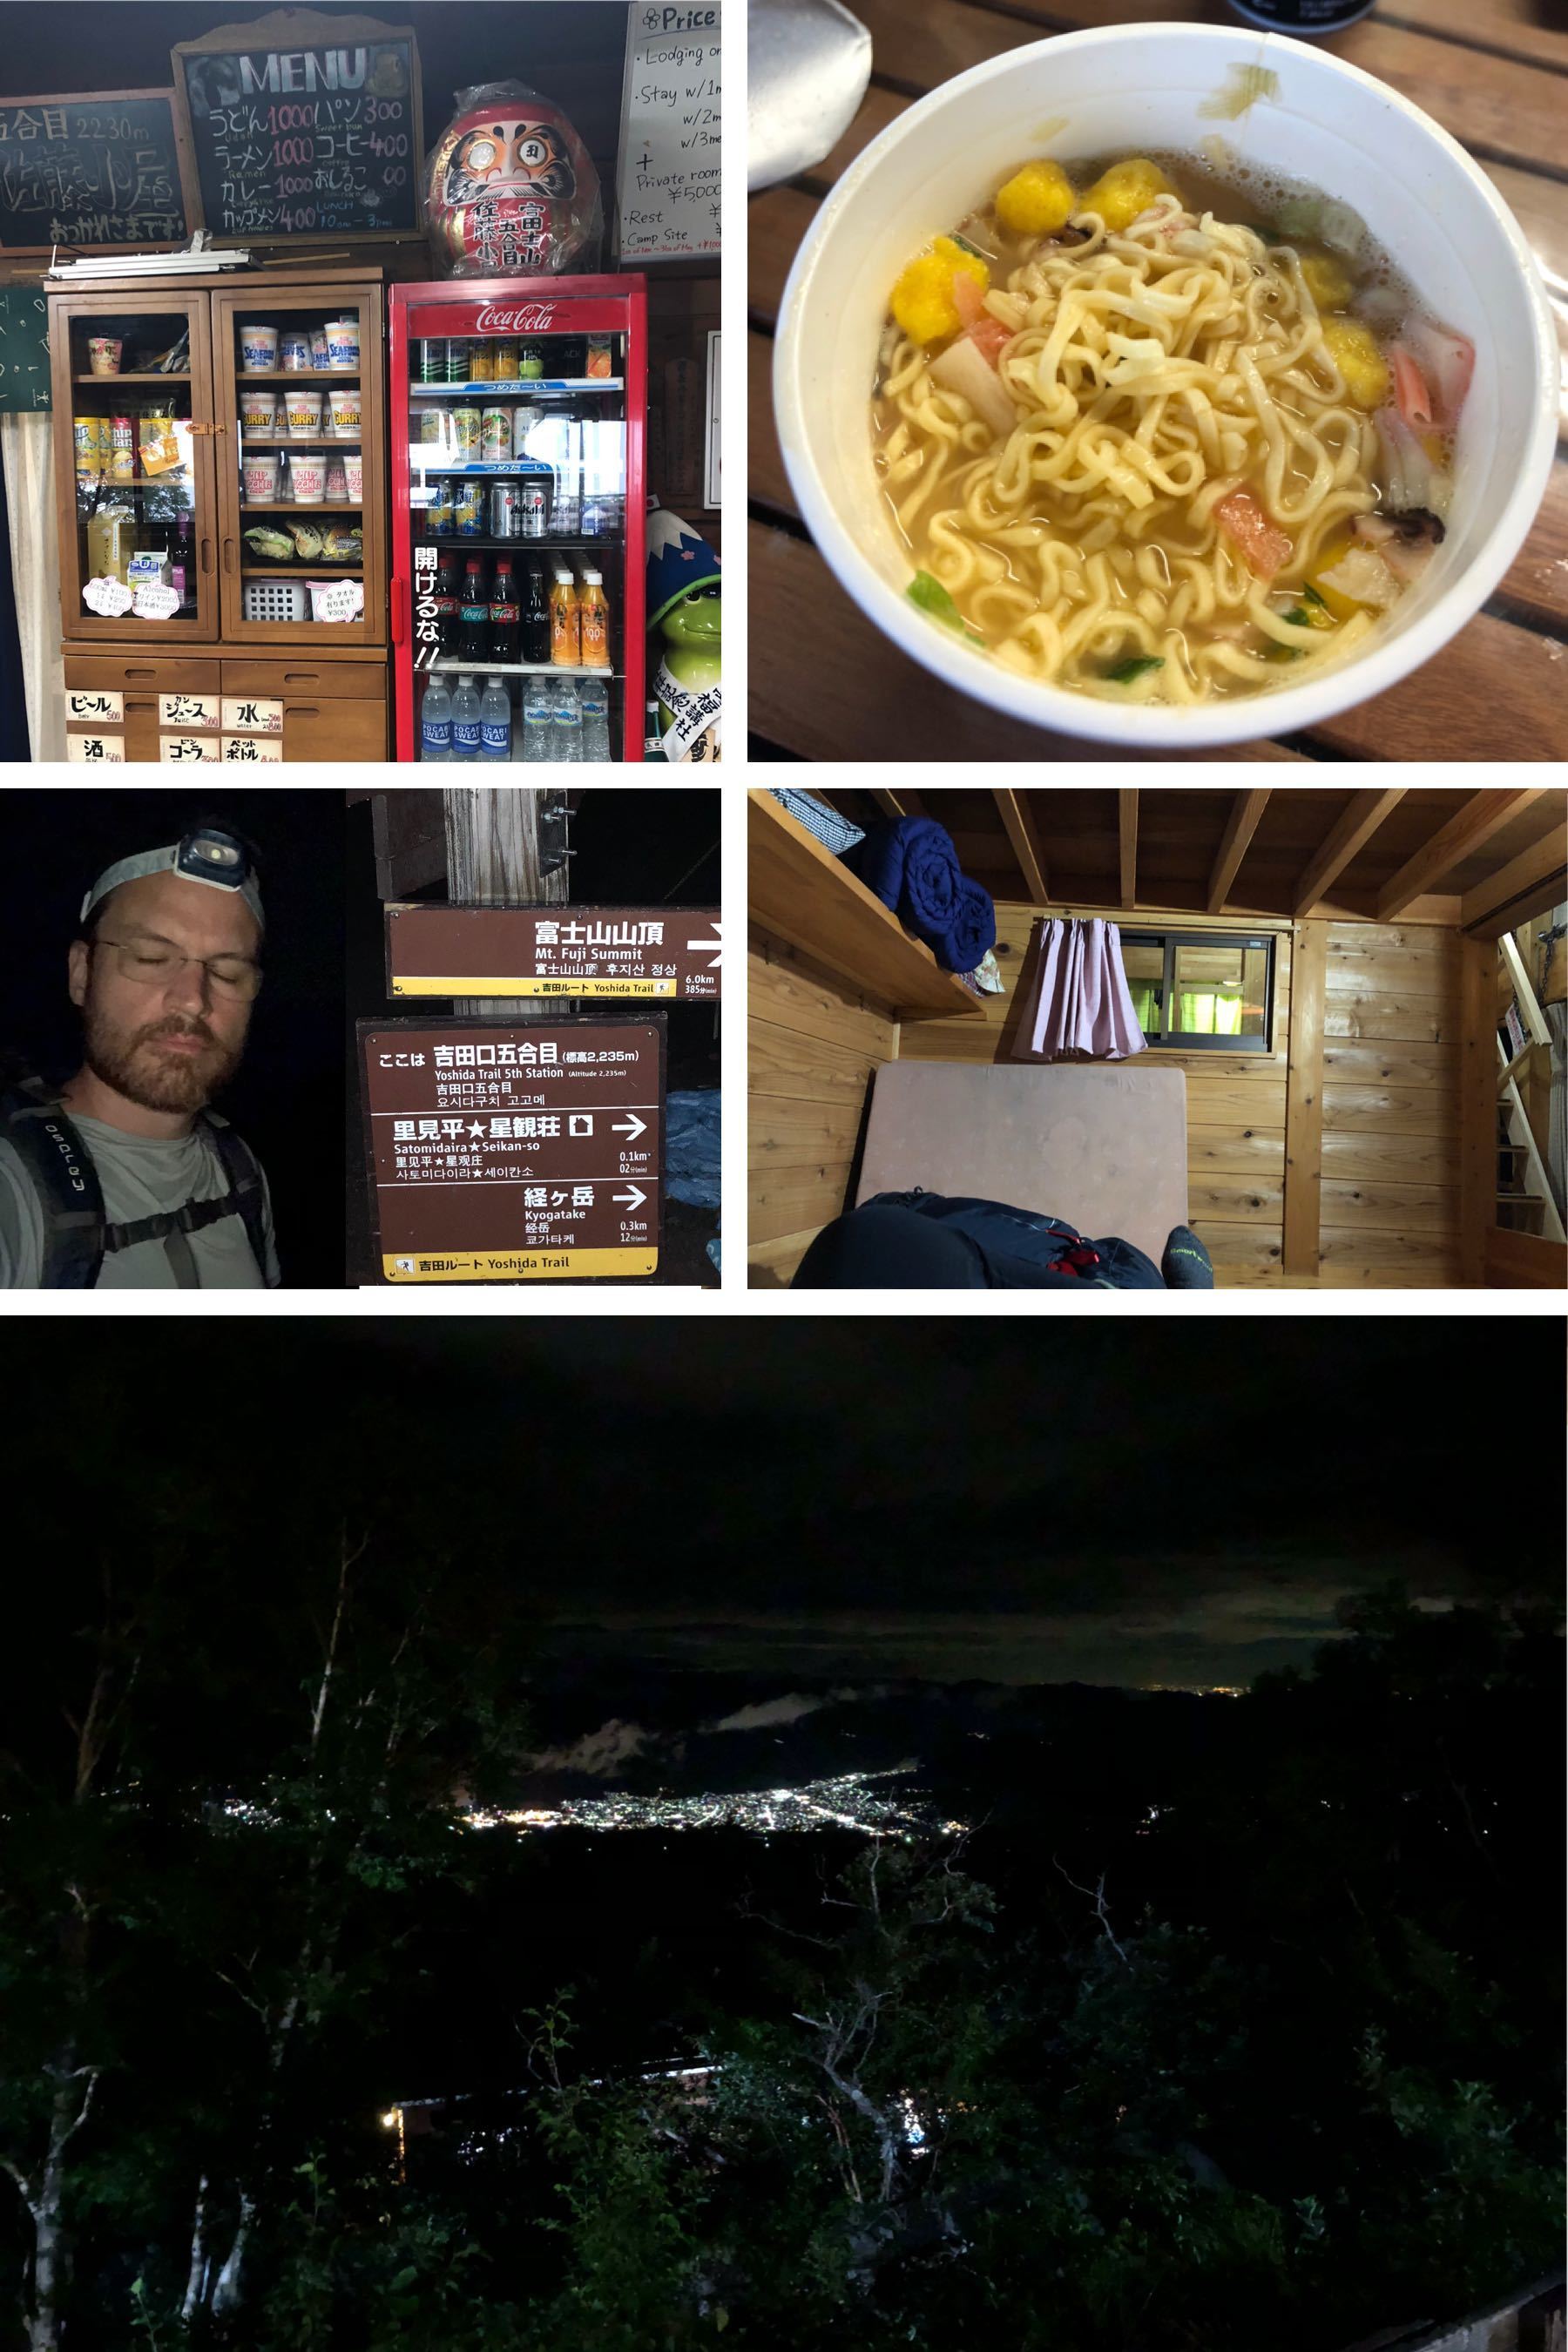
When I finished dinner, I had energy, and I thought I could probably hike for at least a couple hours more. So, I checked mountain-forecast.com one last time, and made my decision to proceed. I put my headlamp on, took a photo of the sign showing 6 km to Mt. Fuji summit, and kept going. In the distance, I could see the glow of headlamps going up Mount Fuji. Behind me, I could see the lights of Fujiyoshida City, where I had started that morning.
However, I couldn’t see much else.
Seriously, it was really, really dark!
I left the mountain hotel where I had eaten dinner, and hiked about 100 meters and passed another of the mountain hotels (Hotel Seikanso). I kept going for maybe 30 or 50 more meters, and found it really confusing to figure out what was and was not the path. Even if it would get better when I was surrounded by the other hikers farther up the mountain, I decided that night hiking was definitely not for me on this trip.
So, I turned around and went back to Hotel Seikanso. One of the women who was working there let me in, and fortunately they had plenty of rooms available for the night.
The rooms were kind of a wooden combination of a hotel room and a capsule hotel: they were half-height, there was another one above me, and there was a curtain you pulled shut (much like a capsule hotel); but on the flip side, they were about three times as big as a capsule hotel, and you set your futon up in it (much like a hotel room). Whatever it was, it was friendly, quiet, dark, warm and dry.
So, I checked in, set up my futon, and took some pictures of my capsule-style room and the lights of Fujiyoshida City in the distance. Shortly afterward, just before 9 PM, I went to sleep. Thankfully I had my earplugs and my face mask, and I only woke up briefly a couple times in the night.
I had charged my iPhone, and set my iPhone alarm for 6 AM, but told myself to wake up by 5 AM if possible. Given how long the rest of the hike seemed from the signs, and given the wind forecast, I wanted to have as much time as possible to complete it.
Day Two
The Climb to the Peak
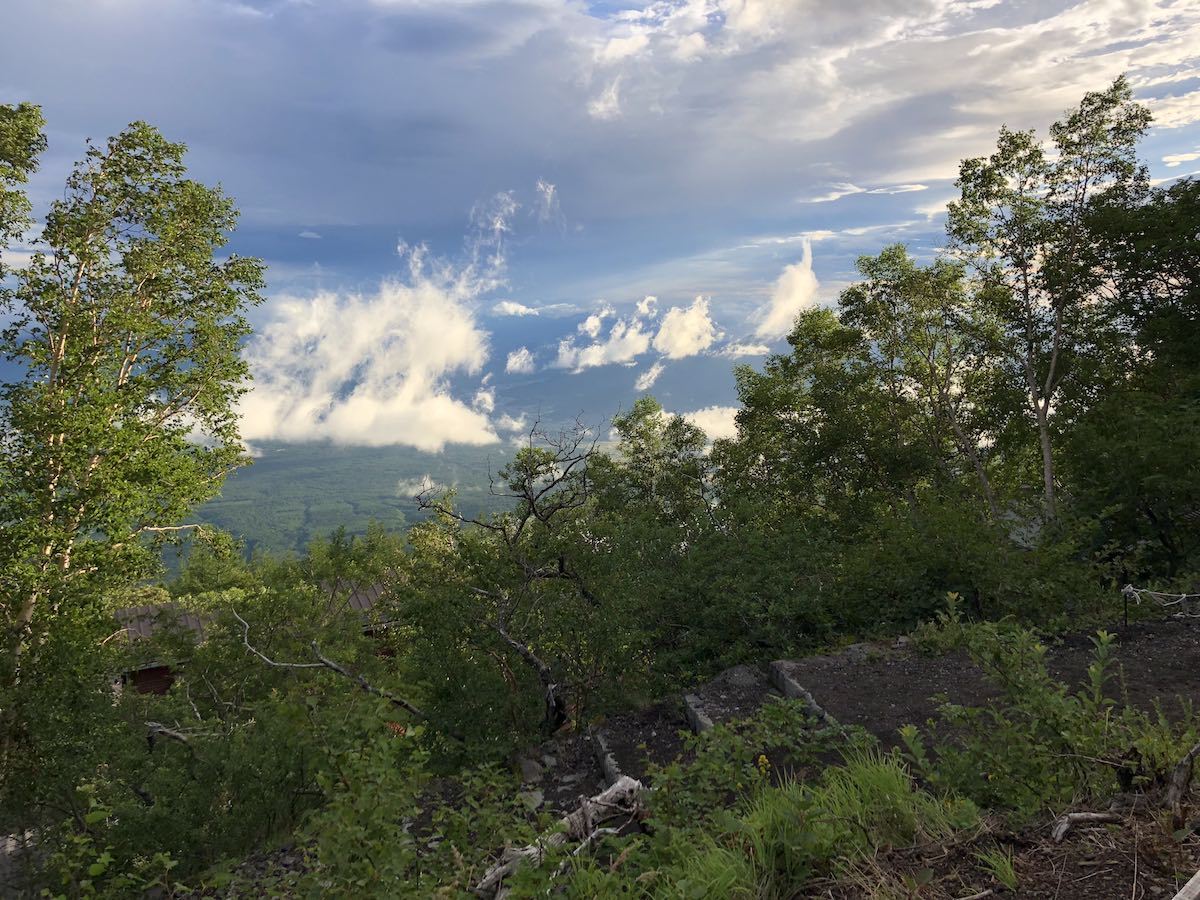
I did wake up naturally with the sunrise, just after 5 AM. I was very well-rested. The kitchen at Hotel Seikanso didn’t open until around 11 AM, so I just checked out and was on my way before 6 AM. What a difference daylight makes: what was a confusing path at night was totally obvious in the daytime. And instead of no view, there was a great view.
After checking out, I continued trekking up Mount Fuji. Fairly shortly after leaving Hotel Seikanso, the Yoshidaguchi trail joins with the trail from Fuji Subaru Line 5th Station. From this point, you are on the same Yoshida trail to the summit as everybody else. (So, I don’t have to go into too much detail in this section, since whenever you read an account of someone’s climb of Mount Fuji, chances are they also did this trail.)
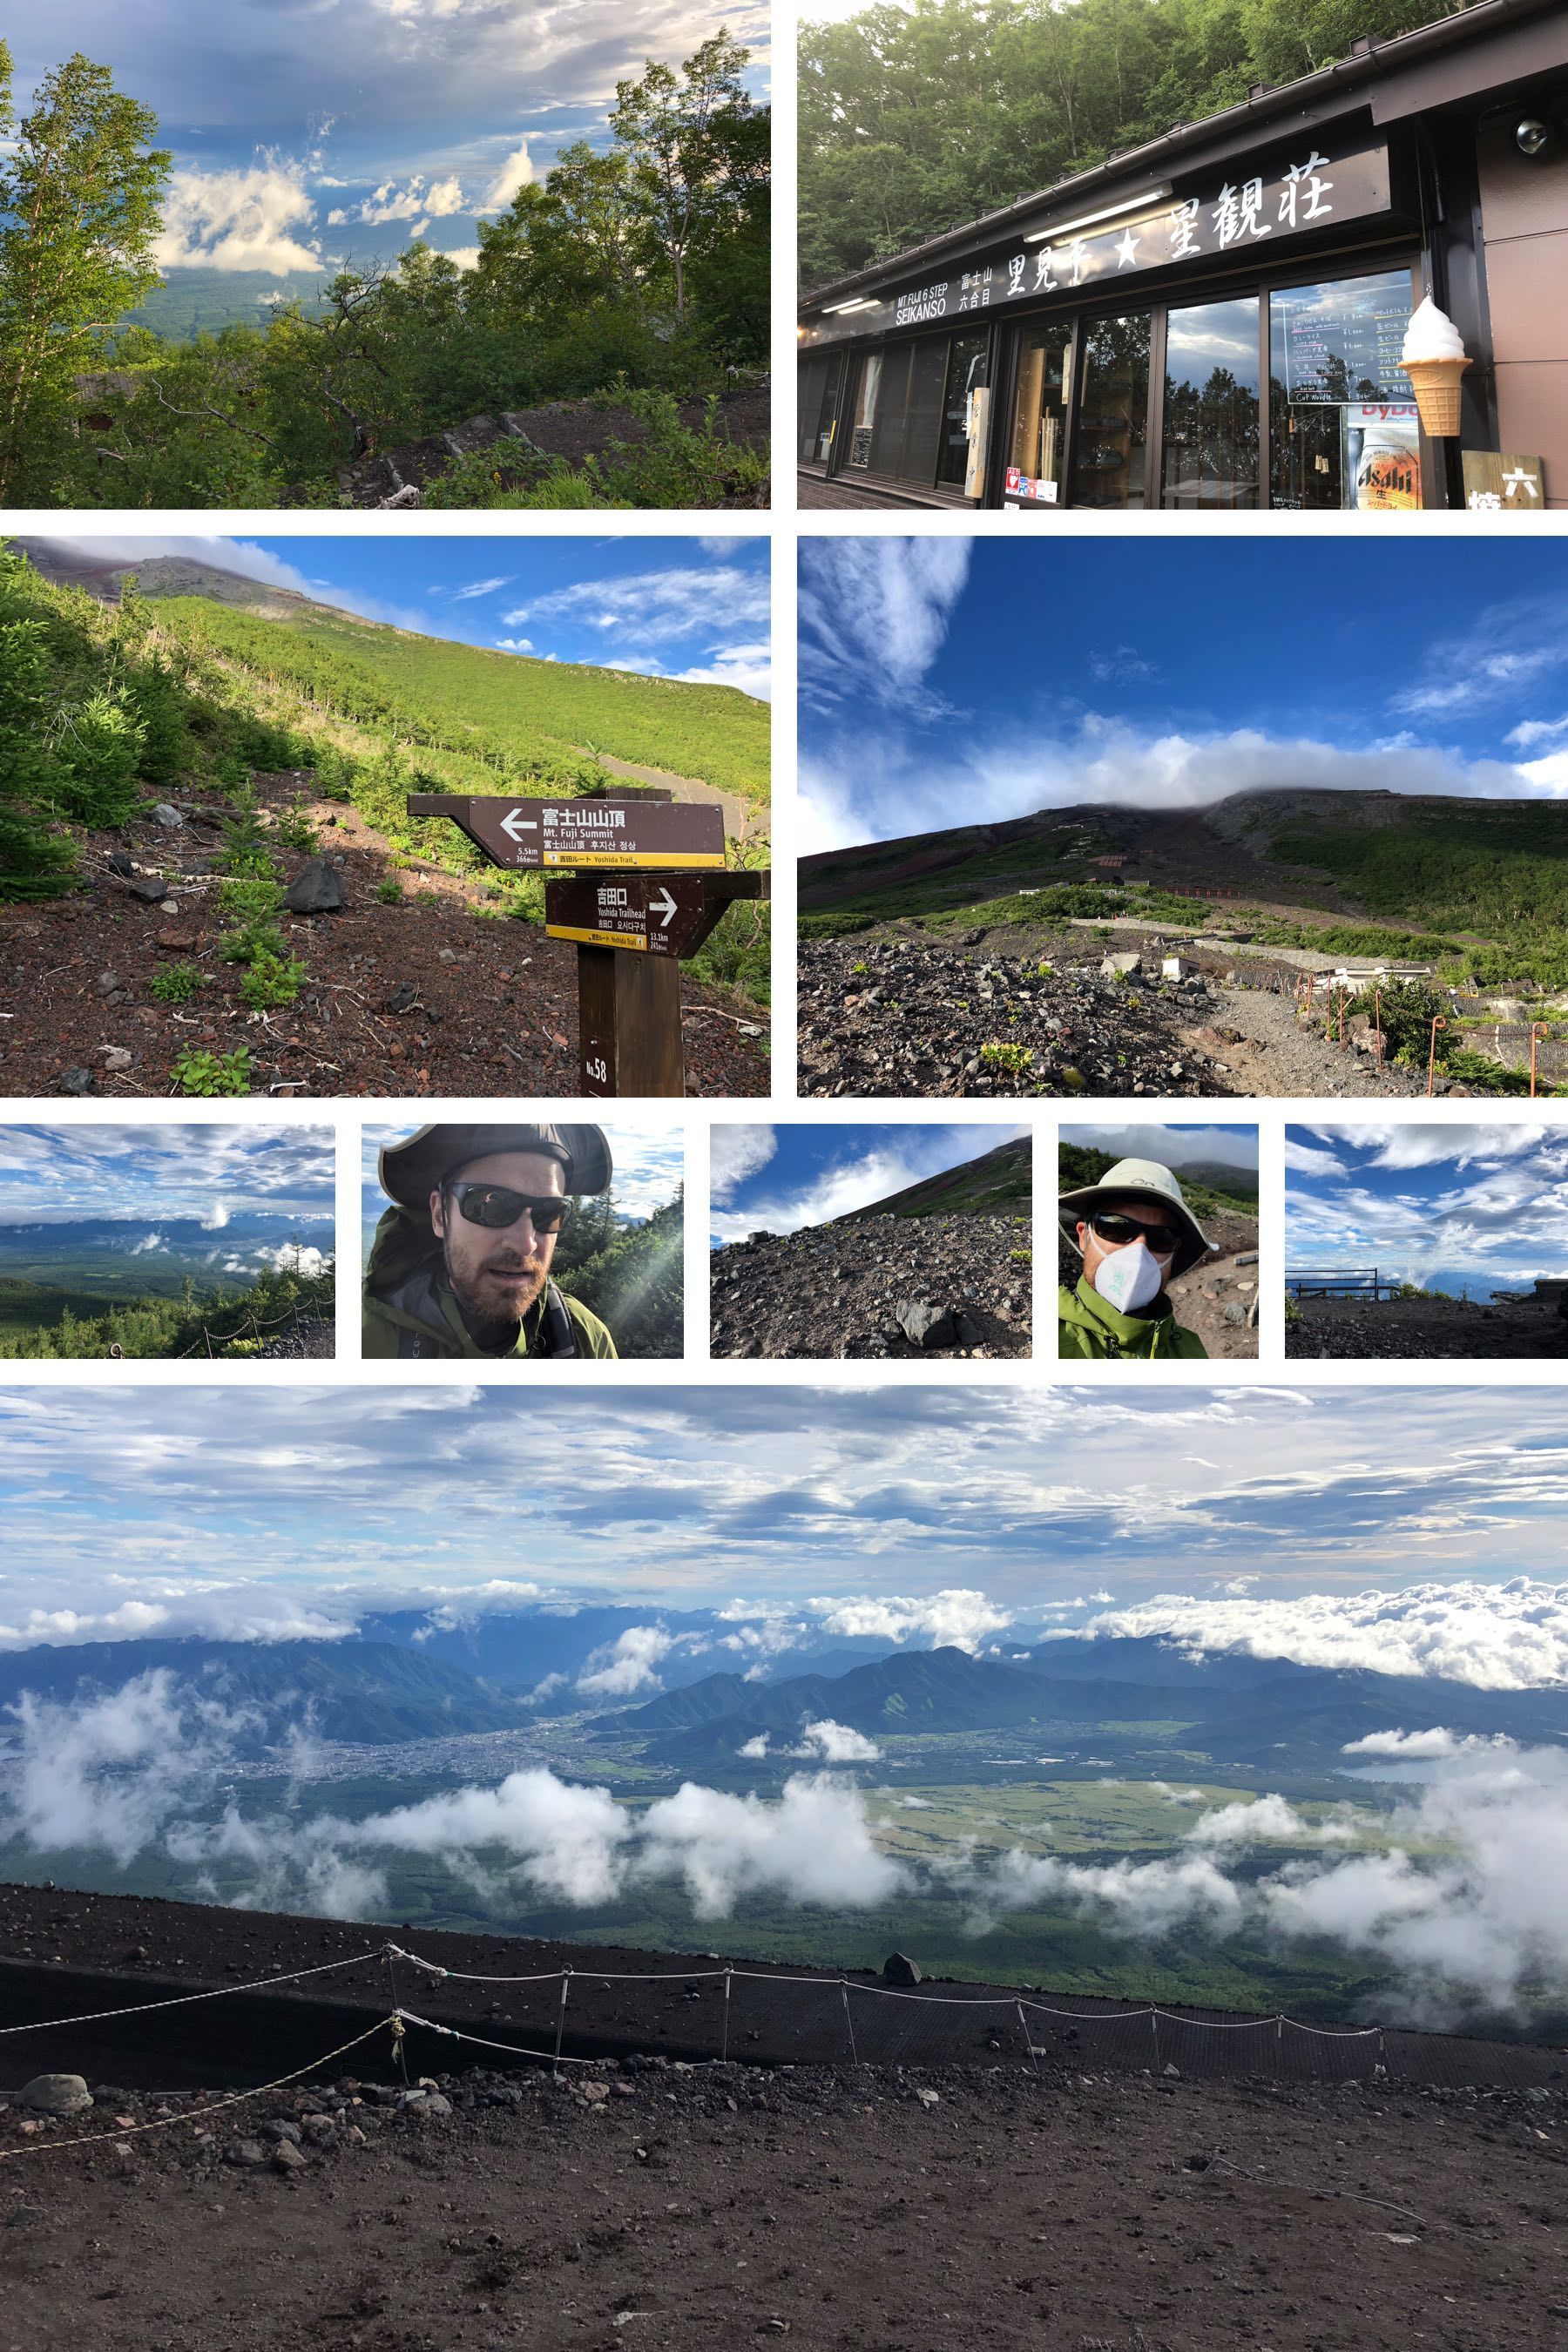
So, instead of solitude, there are other people. And instead of being in a forest, you’re on Mars. Seriously, I get the whole “don’t put all your eggs in one basket” thing, but I have no idea why Elon Musk wants to go to Mars so much. All he would need to do is hike the upper portion of the Yoshida trail of Mount Fuji!
The air is dusty from the wind, and from dirt kicked up by other hikers, so I put on my face mask for a while, before switching to my balaclava, as its neck tube was nicer than the face mask. Also, this is when the wind really picked up. The forecast had been for 65 km/h wind, and it felt like it. There were times when I had to duck down and brace myself with my poles, before continuing up the trail.
Thankfully, since I had gone on a weekday, and a windy one at that, the trail was actually not very crowded at all. There were probably only about 30 people making the ascent at a similar time as I was. Frankly, I was glad they were there. I’m not sure if I would have made it to the peak if it had been completely deserted; the camaraderie was nice.
Also, there was a young French couple a tiny bit ahead of me, wearing shorts, t-shirts and hoodies, and looking woefully unprepared for the rain, wind and cold. I try not to be a petty person, but there was absolutely no way that I would give up before them.
They gave up somewhere between 7th station and 8th station. I was continuing uphill as they I saw them walking downhill, the woman looking pretty pissed and the man looking very sheepish.
There were people from all over. For a little bit, I hiked with a few people from Brazil and Chile, who were very friendly and seasoned hikers. They seemed like they would make it to the summit with no problem.
I also saw one group of three women in their 30s and 40s, wearing track suits and carrying light backpacks, who looked like they were taking it all in stride. The oldest of the three was wearing a parka, and using an umbrella as a walking stick. I had expected them to give up soon after the French couple, but they were continuing on, and doing better than I was. I was genuinely impressed.
I asked “Where are you from?” to the oldest of the three.
Nepal.
At that point, I realized this was just a walk in the park for them, so why not bring an umbrella?
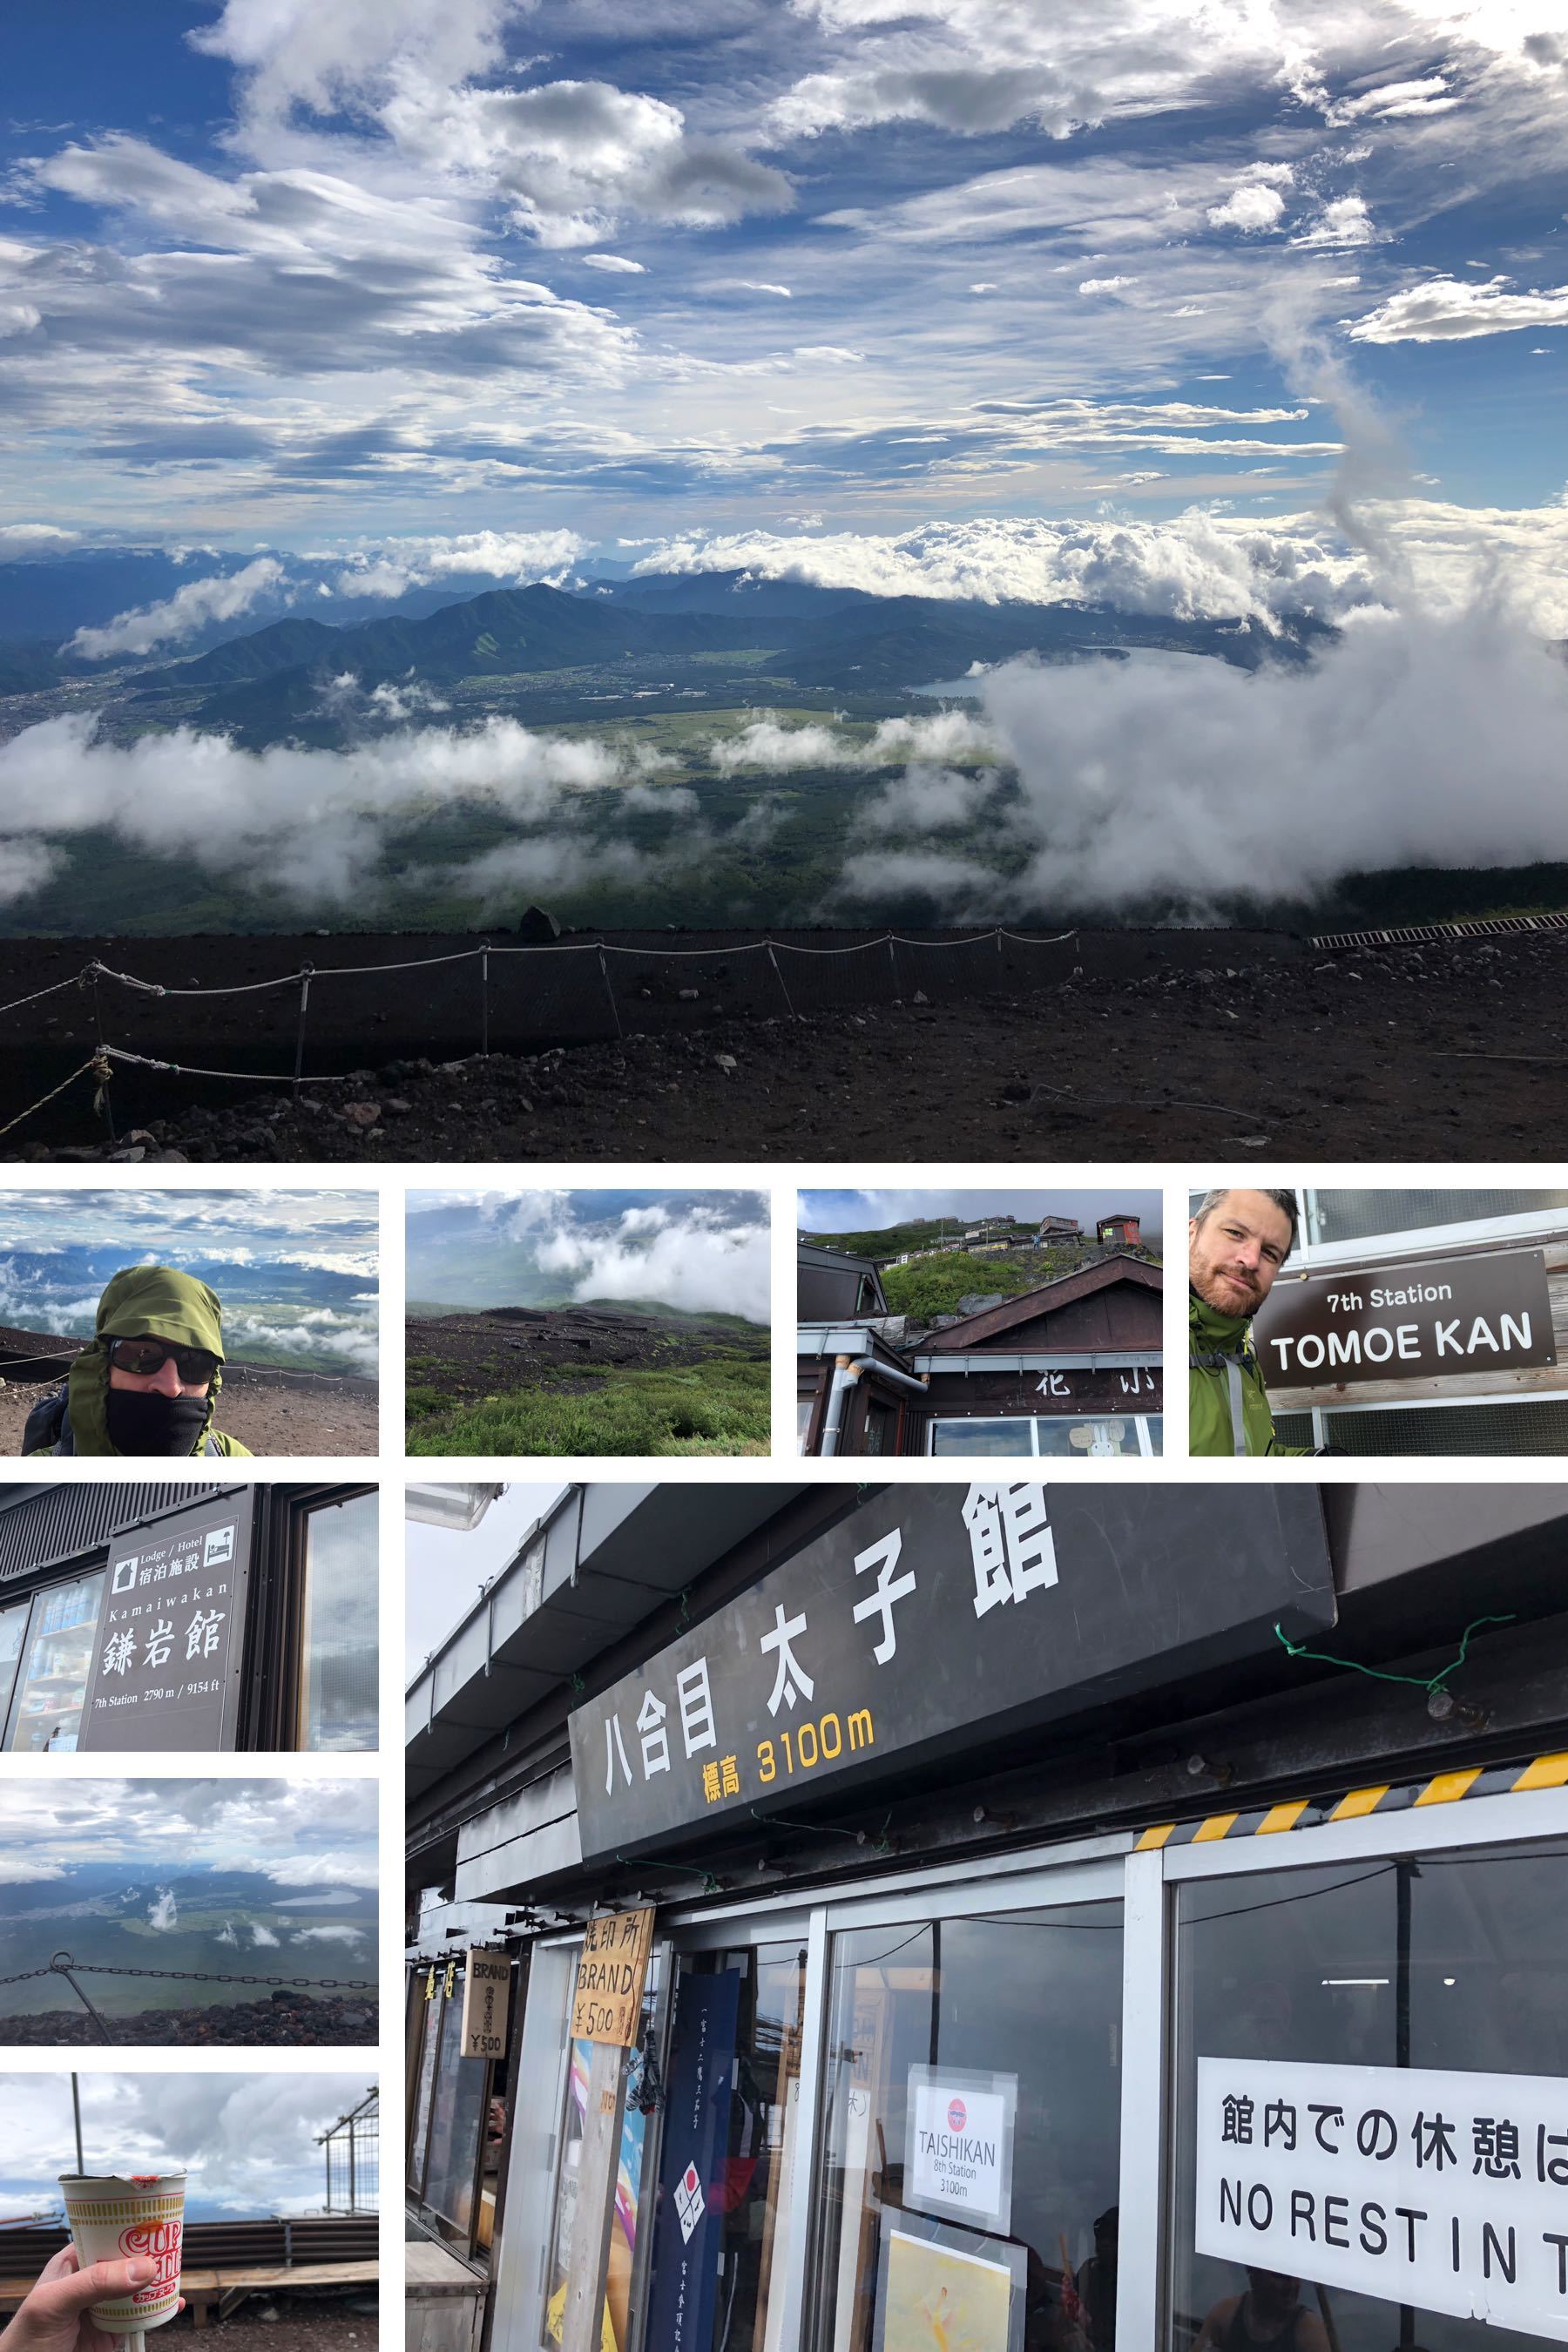
I stopped at all the mountain hotels, either to go to the toilet, buy iced coffee, Snickers bars or Cup Noodle. When you stop at the stations, you typically can’t actually go inside, however. That privilege is for the guests who are spending the night. You will see signs indicating that there is no rest inside the hotels, except for hotel guests.
You will also see various signs at the upper mountain hotels indicating that the penalty for sleeping in the toilets is about 6000 yen, which is the price of a room in the hotel for the night. That would be a truly shitty hotel room.
At around 1:15 PM, I stopped at one of the topmost hotels (I think it was 8.5 station) for lunch. I ordered a big lunch of curry rice, a Snickers bar and coffee, and they let me eat inside in a narrow bench right by the door. I asked if I could eat inside before ordering it.
While I wanted the curry rice, mostly for the novelty of eating actual food, what I was really paying for was a 10-20 minute respite from the wind and rain, before pushing forward to the peak.
The wind was really, really hard at this point, and I still wasn’t sure whether I would continue. I needed a break to get the mental strength as much as anything.
Also, as an added bonus, there was cell phone reception at that hotel, and while I was waiting for my curry rice I even managed to call my wife to say hi.
When I was eating my curry rice, a French man and his teenage son came in, looking thoroughly soaked. I asked if they were coming back from the summit. The man said yes. I asked how the hike was. He emphatically said “Horrible!”, in a delightful accent, explaining how there had been not just rain but hail, and that they hadn’t seen anything. They seemed even happier to be indoors than I was. He asked if I was going to the summit. I said yes. He looked at his watch and said good luck.
I think they also had the curry rice.
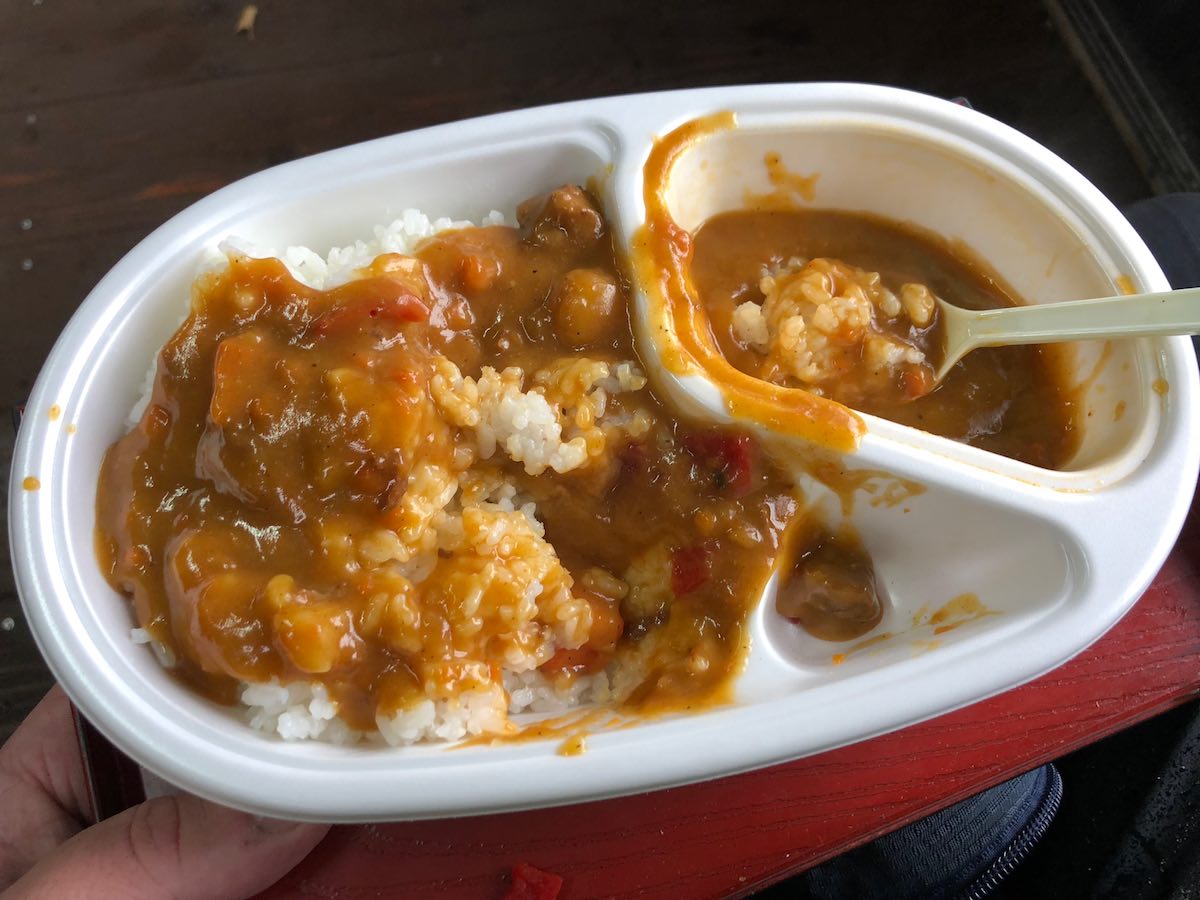
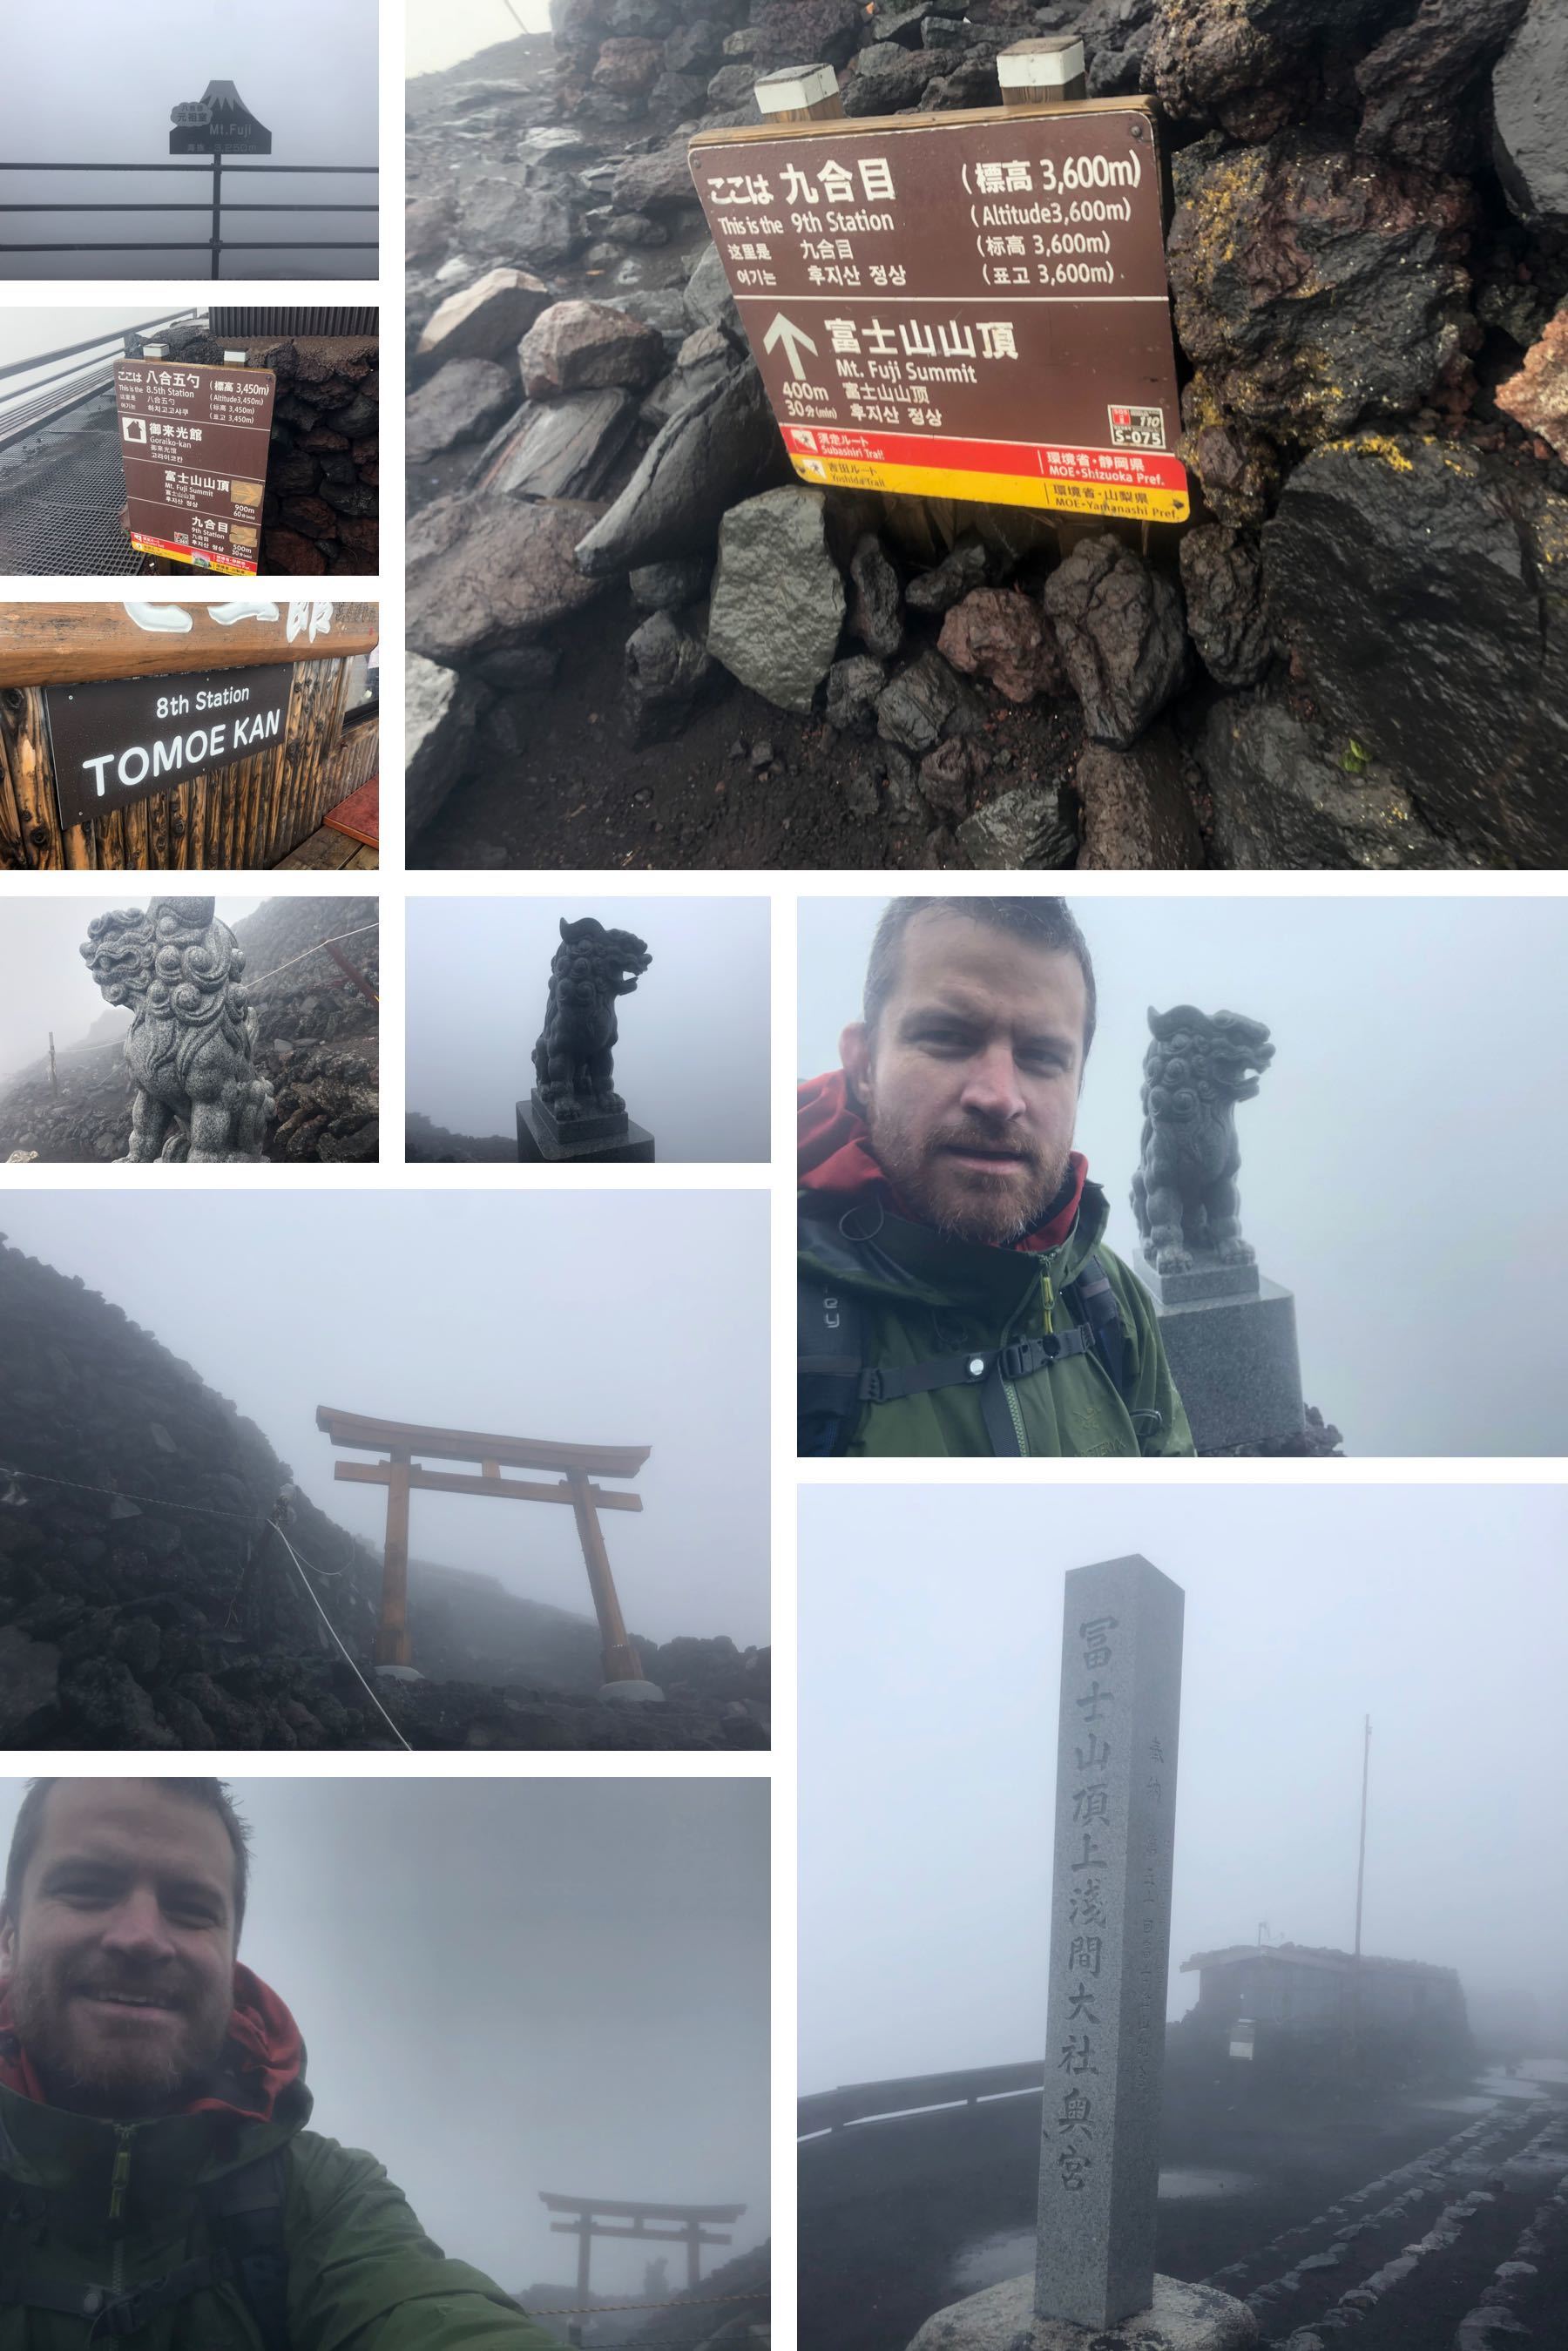
After the curry rice and the Snickers bar, I pushed on, and after a brief stop at 9th station, I made it to the peak of the Yoshidaguchi trail. It was a truly amazing feeling, and worth all the effort to get there.
I wandered around for a few minutes, looking around and trying to see inside the crater through the cloud. I looked at the sign showing all the various peaks at the top of Mount Fuji, and looked at the path to the summit trail.
I chatted briefly with a couple of hikers from Hokkaido, who had also just climbed Mount Fuji for their first time.
After about five minutes, I decided not to hike to the summit, for reasons I explain below.
The Descent and Trip Back
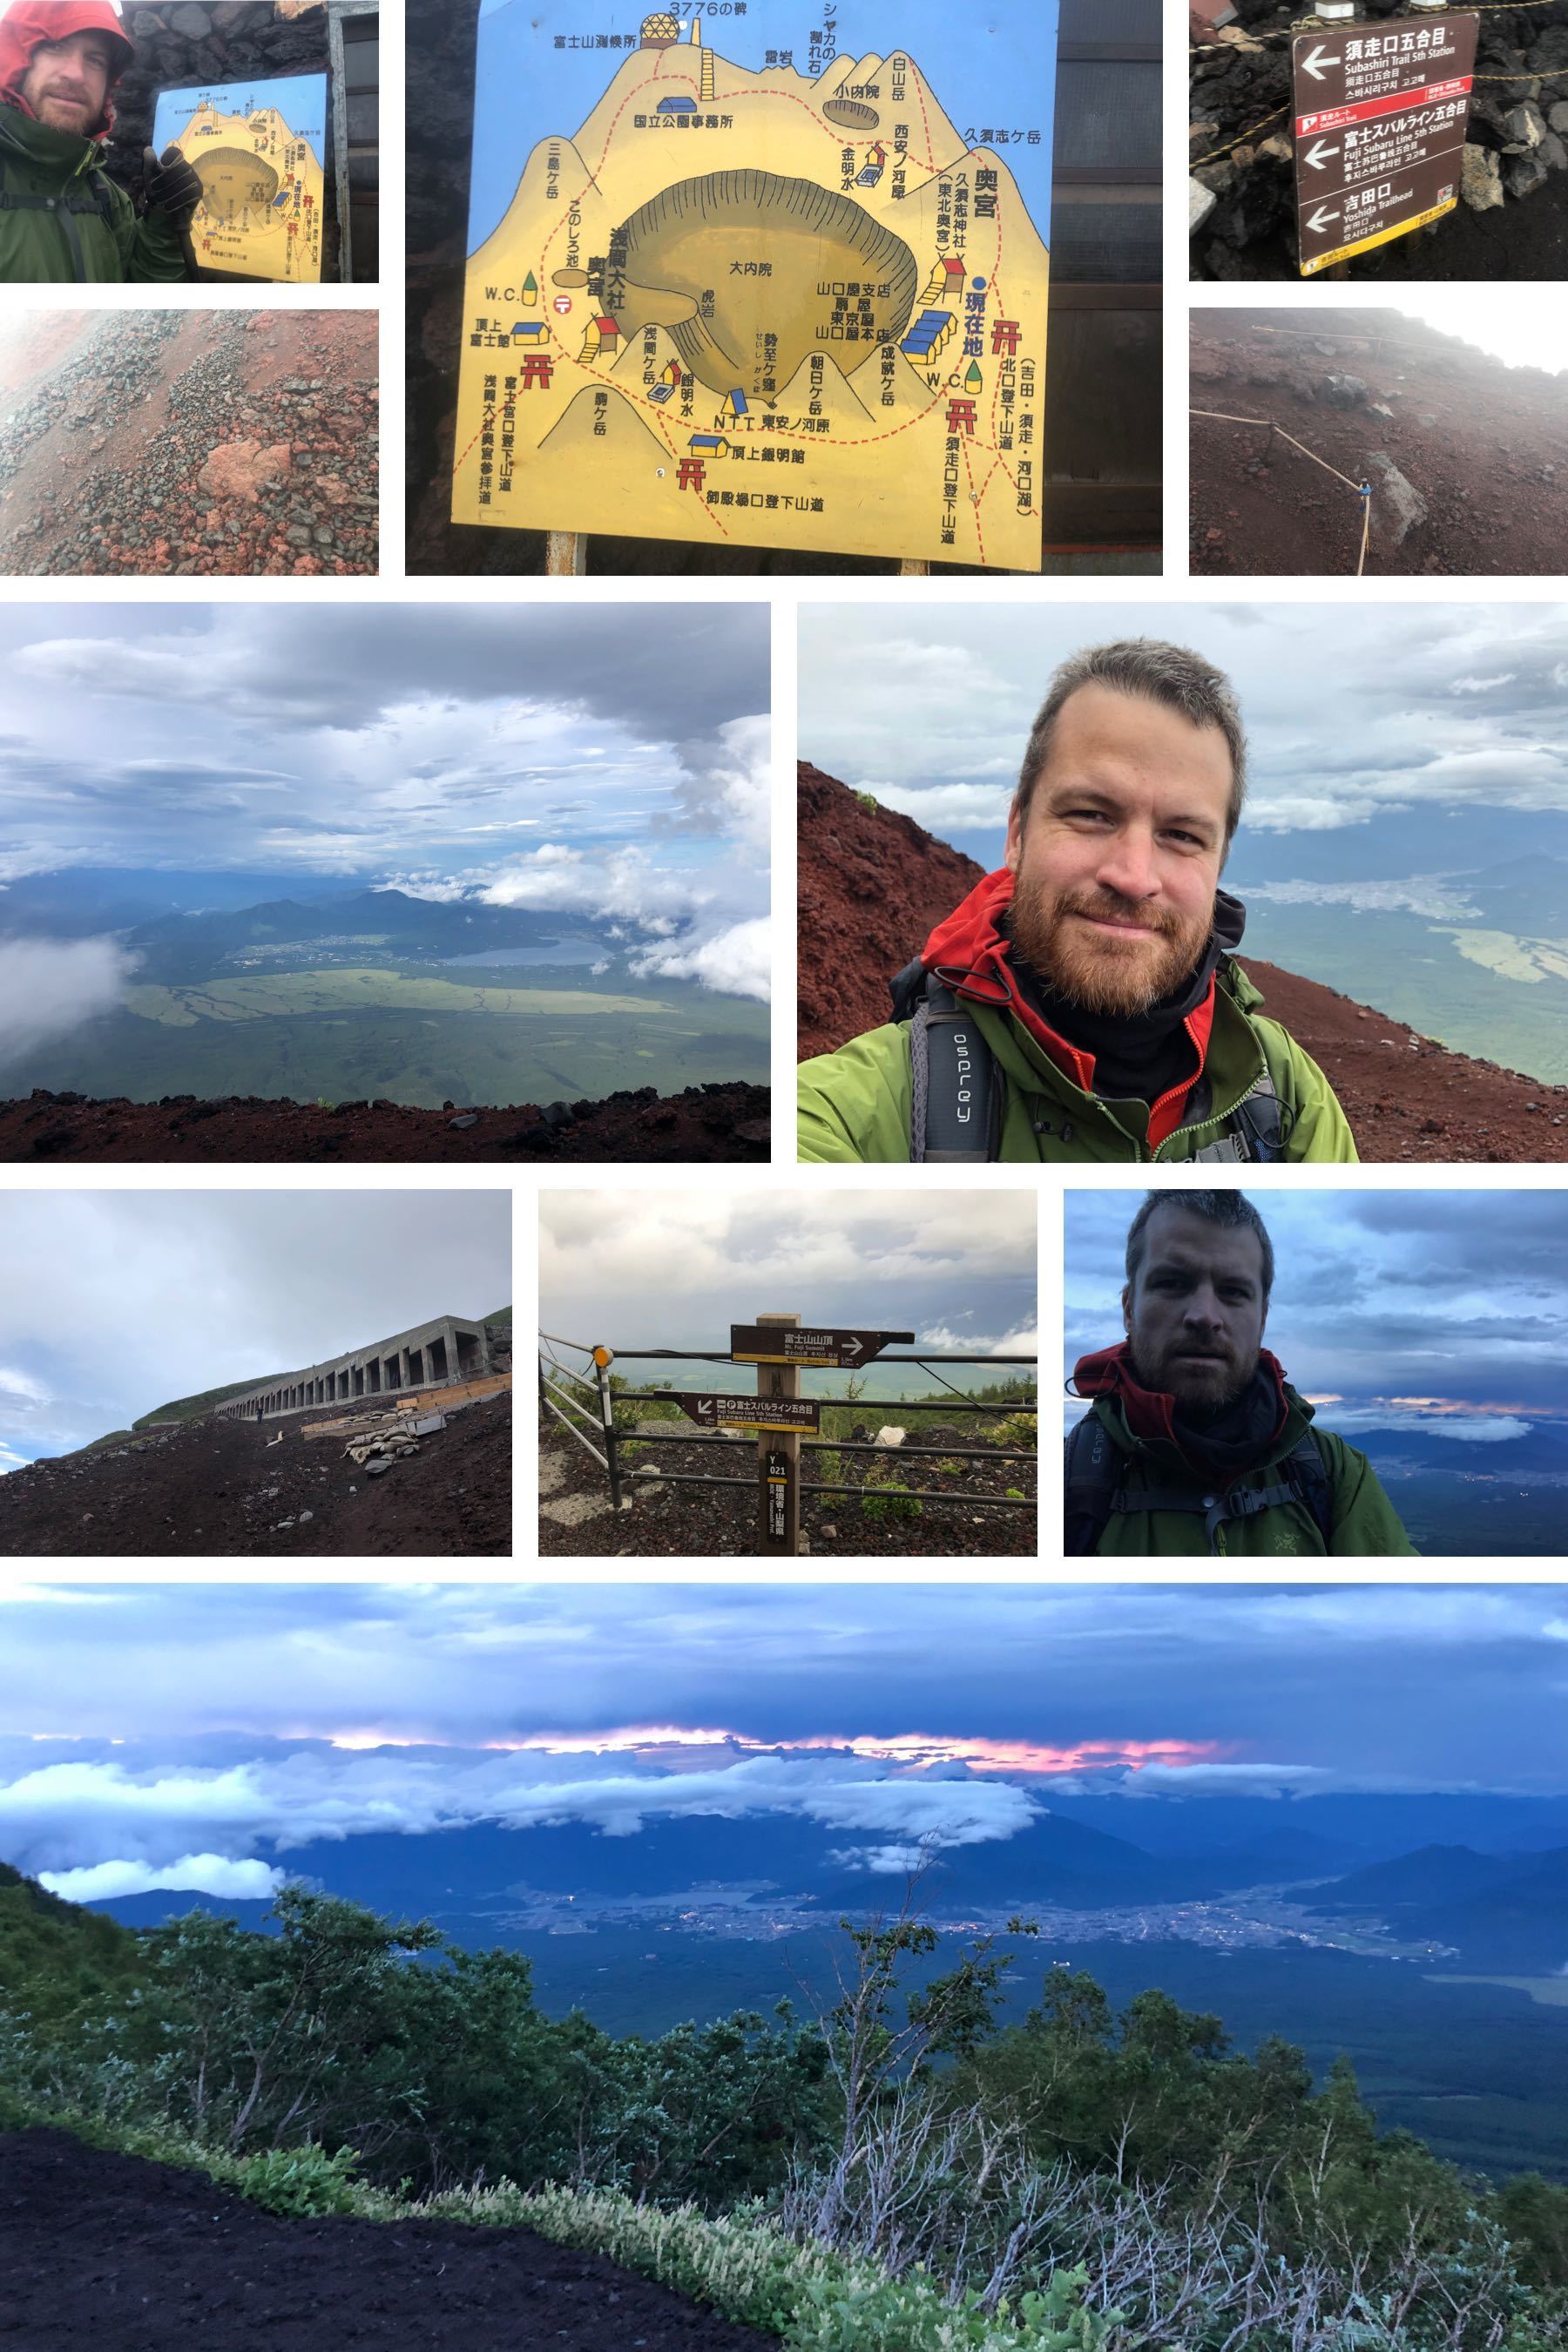
I hiked down the descending Yoshida trail to the Fuji Subaru Line 5th Station. Yes, there is a completely separate trail for descending the Yoshida trail. This is presumably because the ascending Yoshida trail can get crowded. These trails are actually reasonably far apart (see the two different yellow lines on the map). You cut over to rejoin the ascending Yoshida trail at 6th station.
Note, however, that on the descending Yoshida trail there are no mountain hotels to sell you drinks, curry rice or Cup Noodle. (So, you need to ensure you have enough liquid for the descent once you leave 9th station to make your ascent to the peak.)
Now, while there were no mountain hotels, there were one or two toilets along the way. There were also two or three concrete tunnel-like structures that you could walk inside, with signs indicating that they were for protection from falling rocks caused by hikers above you. Presumably these are also useful for emergency refuge.
I got to Fuji Subaru Line 5th station shortly before 7 PM, just as the sun was setting. I was on a bus about 20 minutes later, and I got to Lake Kawaguchiko at around 8 PM.
From Lake Kawaguchiko, there was a highway bus directly back to Shinjuku station in Tokyo. However, it was sold out, so I took the Fujikyu train back to Otskui, and a JR train back to Tokyo. After one transfer, I arrived at Asakusabashi station at around 11 PM.
Walking back to my hotel, I stopped in at a small noodle bar about a block from the train station and ordered udon noodles. It was just me and about 10 salarymen, all slurping away. They were actually really good noodles by any standard, but after the previous two days, I couldn’t remember having eaten better.
I then went back to my hotel room, had an amazing hot shower and a long, perfect sleep.
Don’t You Wish You’d Hiked to the Summit?
Of course!
The summit is the highest peak of a mountain. Obviously, if you climb one peak of a mountain, you also want to reach the summit. Anyone who says otherwise is lying to themselves or to you.
In my ideal world, two things would have happened differently during this hike:
- I would have reached the 3776 meter summit of Mount Fuji, not “just” the 3706 meter peak of the Yoshidaguchi trail.
- I would have seen the view from the summit of Mount Fuji.
Now, since the top 700 meters of Mount Fuji were completely covered in cloud, I knew from 8th station that the whole “view from the summit” thing wasn’t happening.
Worse, when I reached the peak of the Yoshidaguchi trail, it was 3 PM. If I did the hike to the summit, it would have been about 5 PM when I got back to the peak of the Yoshidaguchi trail. I would then only have two hours to descend before it got dark. (I had a headlamp, but descending Mount Fuji in 65 km/h wind in the dark was not something I wanted to do.)
Also, if I was going to get a bus back to the train station in time to catch the trains for Tokyo, I would only have about 2 or 3 hours to get to that bus—and the descent to the fifth station was about a 4 hour hike.
So, I had 2 options:
- Hike to the summit on the other side of the crater, and then hike 1-2 hours of the descent (down the ascending trail) before sleeping in one of the mountain hotels (near 8th or 7th station) on Mount Fuji, and complete the descent (either to fifth station and then taking the bus, or all the way down the Yoshidaguchi trail to the base) the following day.
- Skip the summit, hike down the proper descending trail of the Yoshida trail (it’s a different trail, and there are no mountain hotels on the descending trail) and then walk a couple kilometers over to the Fuji Subaru Line 5th Station. From there, I could get one of the last buses down to Lake Kawaguchiko, before taking one of the last trains back to Tokyo.
I chose option two, for the following reasons:
First, since Mount Fuji was completely covered in cloud by that point, there was literally no view to see. I would be making that hike around the crater to the summit, essentially just to say “achievement unlocked”. Standing where I was standing, and having started where I had started, I already had an enormous sense of accomplishment. Going from the peak of the Yoshidaguchi trail to the summit felt like a technicality at that point.
Second, I had no dry clothes left in my backpack. My backpack was pretty wet, as I had deliberately removed the rain cover. (It was so windy near the peak that I was afraid that the rain cover would be caught by a wind gust, and act like a parachute!) So, during the very wet and windy climb from 8th station to the peak, I deliberately stored my rain cover inside my backpack, and just let my backpack get soaked. (Also, I had only brought cold weather clothes for one day, not two.)
When you plan a hike up Mount Fuji, one quote you will encounter a lot of versions of is the Japanese proverb “A wise man climbs Mount Fuji once, only a fool climbs it twice.”
Standing at the peak of the Yoshidaguchi trail, I realized that at heart, I’m a fool.
I decided at that moment that someday I would return and hike Mount Fuji again, both to enjoy the hike and the view from the summit—and I would time the hike in a way that I would see the sunrise from the summit like everyone recommends.
Because of this commitment, I decided there was no need to spend a night sleeping in wet clothes and an extra day hiking down the full trail, just to check something off that I planned to do again.
I would save it for later.
This sounds like a lot of thinking, but it took about 5 minutes.
So, decision made, I hauled ass down the descending trail. My knees have my trekking poles to thank!
The next day, I woke up in my hotel bed in Tokyo, did some shopping and watched the third act of a kabuki performance.
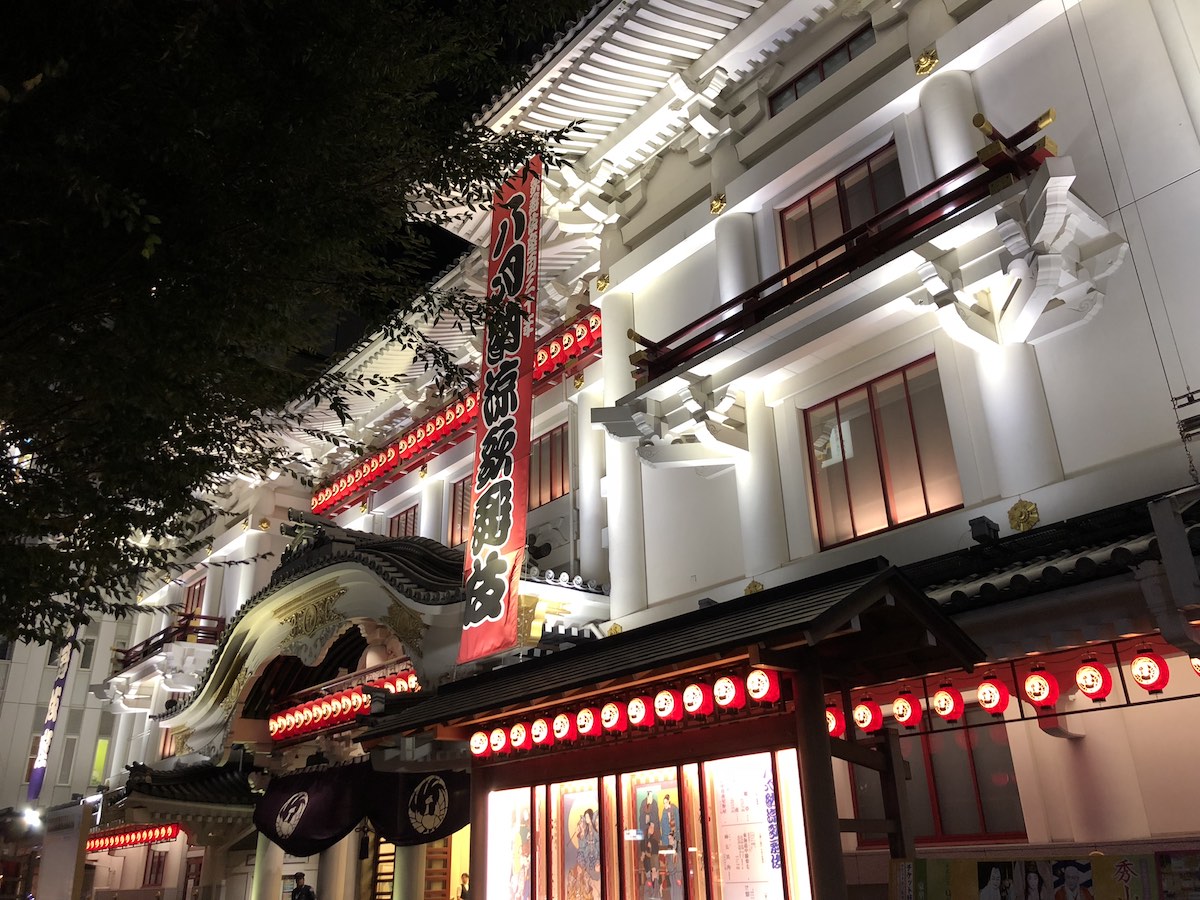
I flew home to Canada the following evening.
He Who Climbs Twice
Someday, I will climb Mount Fuji a second time. My current plan is to climb the full Yoshidaguchi trail, both the ascent and the descent. I will also see the sunrise from the summit, on a clear morning.
I expect that doing all this will take three days, not two days.
Here’s my rough idea of how I would do this, starting from Tokyo:
- Day 1: Wake up at 5 AM in Tokyo. Take the train to Mount Fuji station. Stop in at the visitor center and get another map and postcard. Take a cab to 7-11 by the shrine, arriving at roughly at 9 AM. Get 6 liters of sports drinks and 2 liters of water. Walk to the shrine, then walk to Hotel Seikanso, between 5th station and 6th station, and get there before the kitchen closes. Eat dinner and sleep.
- Day 2: Wake up between 5 AM and 7 AM. Climb to about 8.5 station, stopping either at Hotel Tomoe-kan or Goraikou-kan. Eat dinner and sleep.
- Day 3: Wake up at around 3 AM, and climb the last little bit of the ascent in darkness (with a better headlamp), to see the sunrise from the peak of the Yoshidaguchi trail at around 5 AM. Then hike to the actual 3776 meter summit of Mount Fuji, arriving between 6 and 7 AM. Start the descending hike at 9 AM, and descend the full Yoshidaguchi trail. Arrive at Mount Fuji train station by 7 PM, and take the trains back to Tokyo, to arrive at around 11 PM.
I could also do this same hiking itinerary, but starting from Lake Kawaguchiko. While a hot shower was amazing at the end of the hike, a soak in the onsen at Guesthouse Sakuya would be perfection. On Day 1. I’d wake up at roughly 7 AM at Guesthouse Sakuya, and on Day 3, I’d arrive back at Guesthouse Sakuya in time for dinner and the onsen.
Now, chances are if I was doing this version of that itinerary, my wife would be there as well—having a very relaxing three days at Guesthouse Sakuya, and admiring Mount Fuji from afar. (I’m not a wise man, but she’s no fool!)
