Configuration
Using Bintray JCenter as Repository
Bintray JCenter is the next generation (Maven) repository. The repository is already a superset of Maven Central, so it can be used as a drop-in replacement for Maven Central. To use Bintray JCenter we only use jcenter() in our repositories configuration block in BuildConfig.groovy. This is the same as we would use in a Gradle build.
We can also set the update and checksum policies by applying a configuration closure to the jcenter method:
Code written with Grails 2.4.2.
Original blog post written on August 05, 2014.
Add Banner to Grails Application
Grails 3 is based on Spring Boot. This means we get a lot of the functionality of Spring Boot into our Grails applications. A Spring Boot application has by default a banner that is shown when the application starts. The default Grails application overrides Spring Boot’s behavior and disables the display of a banner. To add a banner again to our Grails application we have different options.
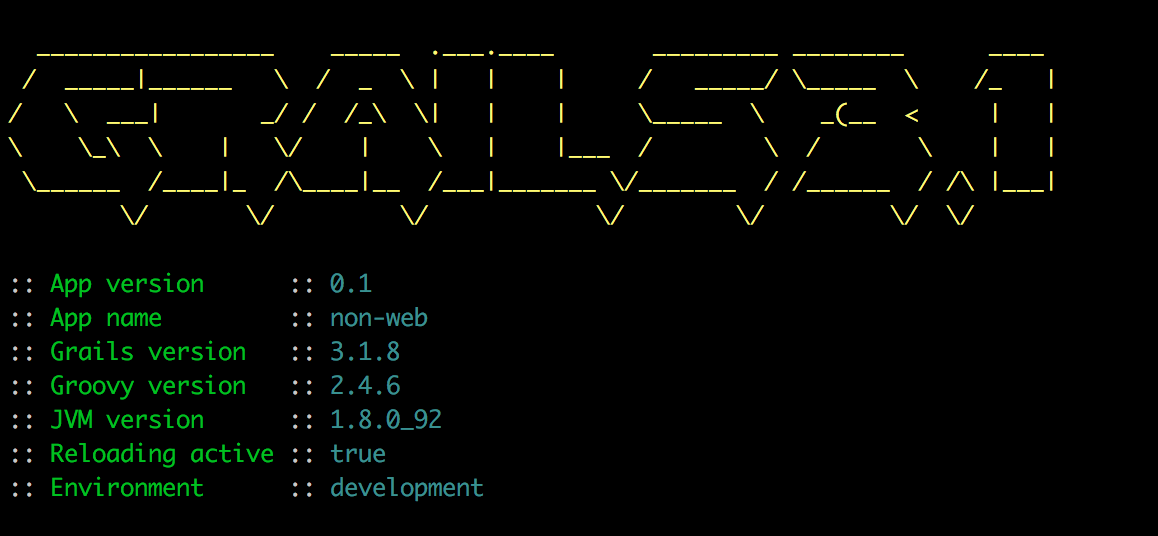
First we can add a file banner.txt to our classpath. If Grails finds the file it will display the contents when we start the application. Let’s add a simple banner with Grails3 in Ascii art in the file src/main/resources/banner.txt. By placing the file in src/main/resources we can assure it is in the classpath as classpath:/banner.txt:
Let’s run our application with the bootRun task:
To have more information in the banner we can implement the org.springframework.boot.Banner interface. This interface has a printBanner method in which we can write the implementation for the banner. To use it we must create an instance of the GrailsApp class and set the banner property:
Now we run the bootRun task again:
Written with Grails 3.0.1.
Ascii art is generated with this website.
Original blog post written on April 15, 2015.
Add Banner To Grails 3.1 Application
In a previous post we learned how to add a banner to a Grails 3.0 application. We used the Spring Boot support in Grails to show a banner on startup. The solution we used doesn’t work for a Grails 3.1 application. We need to implement a different solution to show a banner on startup.
First of all we create a new class that implements the org.springframework.boot.Banner interface. We implement the single method printBanner and logic to display a banner, including colors:
Next we must override the GrailsApp class. We override the printBanner method, which has no implementation in the GrailsApp class. In our printBanner method we use GrailsBanner:
Finally in the Application class we use BannerGrailsApp instead of the default GrailsApp object:
When we start our Grails application on a console with color support we see the following banner:
Written with Grails 3.1.8.
Original blog post written on June 20, 2016.
Set Log Level for Grails Artifacts
A good thing in Grails is that in Grails artifacts like controllers and services we have a log property to add log statements in our code. If we want to have the output of these log statements we must use a special naming convention for the log names. Each logger is prefixed with grails.app followed by the Grails artifact. Valid artifact values are controllers, services, domain, filters, conf and taglib. This is followed by the actual class name. So for example we have a controller SampleController in the package mrhaki.grails then the complete logger name is grails.app.controllers.mrhaki.grails.SampleContoller.
The following sample configuration is for pre-Grails 3:
In Grails 3 we can use a common Logback configuration file. In the following part of the configuration we set the log levels:
Written with Grails 2.5.0 and 3.0.1.
Original blog post written on April 15, 2015.
Add Some Color to Our Logging
Grails 3 is based on Spring Boot. This means we can use a lot of the stuff that is available in Spring Boot now in our Grails application. If we look at the logging of a plain Spring Boot application we notice the logging has colors by default if our console supports ANSI. We can also configure our Grails logging so that we get colors.
First we need to change our logging configuration in the file grails-app/conf/logback.groovy:
Normally when we would run our application Grails should check if the console support ANSI colors. If the console supports it the color logging is enabled, otherwise we still get non-colored logging. On my Mac OSX the check doesn’t work correctly, but we can set an environment property spring.output.ansi.enabled to the value always to force colors in our logging output. The default value is detect to auto detect the support for colors. We can set this property in different ways. For example we could add it to our application configuration or we could add it as a Java system property to the JVM arguments of the bootRun task. In the following build file we use the JVM arguments for the bootRun task:
When we run the Grails application using bootRun we get for example the following output:
Written with Grails 3.0.1.
Original blog post written on April 16, 2015.
Save Application PID in File
Since Grails 3 we can borrow a lot of the Spring Boot features in our applications. If we look in our Application.groovy file that is created when we create a new Grails application we see the class GrailsApp. This class extends SpringApplication so we can use all the methods and properties of SpringApplication in our Grails application. Spring Boot and Grails comes with the class ApplicationPidFileWriter in the package org.springframework.boot.actuate.system. This class saves the application PID (Process ID) in a file application.pid when the application starts.
In the following example Application.groovy we create an instance of ApplicationPidFileWriter and register it with the GrailsApp:
So when we run our application a new file application.pid is created in the current directory and contains the PID:
From another console we read the contents of the file with the PID:
The default file name is application.pid, but we can use another name if we want to. We can use another constructor for the ApplicationPidFileWriter where we specify the file name. Or we can use a system property or environment variable with the name PIDFILE. But we can also set it with the configuration property spring.pidfile. We use the latest option in our Grails application. In the next example application.yml we set this property:
When we start our Grails application we get the file sample-app.pid with the application PID as contents.
Written with Grails 3.0.1.
Original blog post written on April 22, 2015.
Saving Server Port In A File
In a previous post we learned how to save the application PID in a file when we start our Grails application. We can also save the port number the application uses in a file when we run our Grails application. We must use the class EmbeddedServerPortFileWriter and add it as a listener to the GrailsApp instance. By default the server port is saved in a file application.port. But we can pass a custom file name or File object to the constructor of the EmbeddedServerPortFileWriter class.
In the following example we use the file name application.server.port to store the port number:
When the application is started we can find the file application.server.port in the directory from where the application is started. When we open it we see the port number:
Written with Grails 3.1.
Original blog post written on February 05, 2016.
Log Startup Info
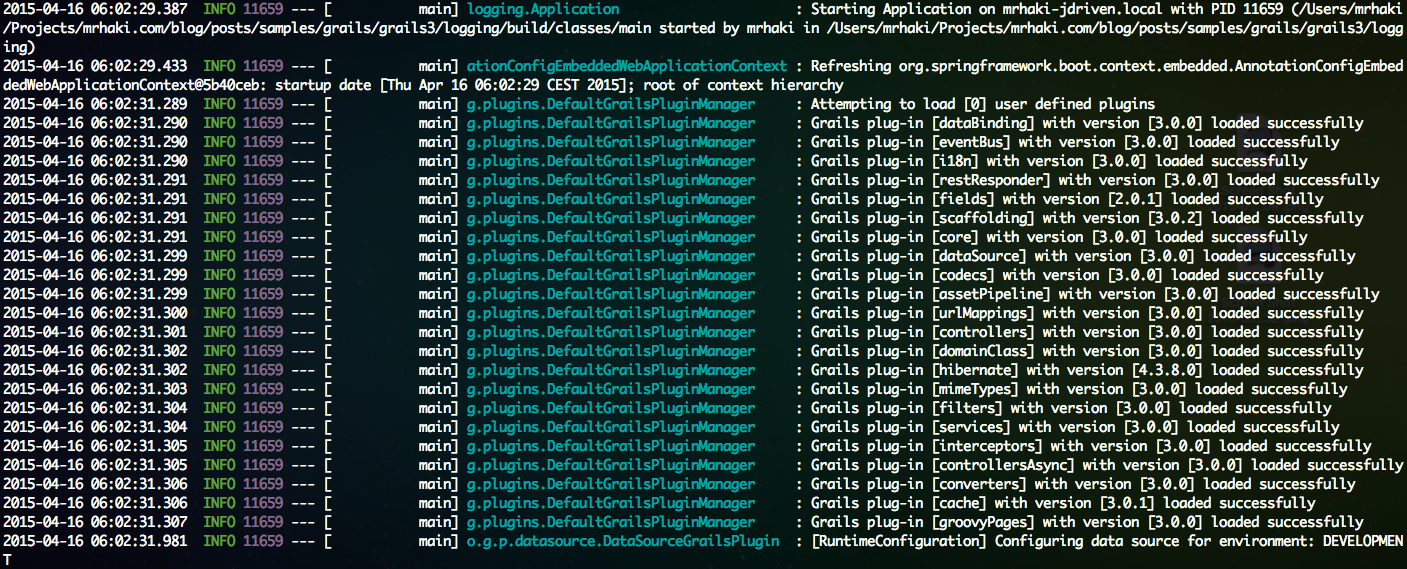
We can let Grails log some extra information when the application starts. Like the process ID (PID) of the application and on which machine the application starts. And the time needed to start the application. The GrailsApp class has a property logStartupInfo which is true by default. If the property is true than some extra lines are logged at INFO and DEBUG level of the logger of our Application class.
So in order to see this information we must configure our logging in the logback.groovy file. Suppose our Application class is in the package mrhaki.grails.sample.Application then we add the following line to see the output of the startup logging on the console:
When we run our Grails application we see the following in our console:
If we want to add some extra logging we can override the logStartupInfo method:
If we run the application we see in the console:
Written with Grails 3.0.1.
Original blog post written on April 23, 2015.
Changing Gradle Version
Since Grails 3 Gradle is used as the build tool. The Grails shell and commands use Gradle to execute tasks. When we create a new Grails 3 application a Gradle wrapper is added to our project. The Gradle wrapper is used to download and use a specific Gradle version for a project. This version is also used by the Grails shell and commands. The default version (for Grails 3.0.12) is Gradle 2.3, which is also part of the Grails distribution. At the time of writing this blog post the latest Gradle version is 2.10. Sometimes we use Gradle plugins in our project that need a higher Gradle version, or we just want to use the latest version because of improvements in Gradle. We can change the Gradle version that needs to be used by Grails in different ways.
Grails will first look for an environment variable GRAILS_GRADLE_HOME. It must be set to the location of a Gradle installation. If it is present is used as the Gradle version by Grails. In the following example we use this environment variable to force Grails to use Gradle 2.10:
Another way to set the Gradle version is by change the Gradle wrapper version. In our build.gradle file there is a task wrapper. This creates a Gradle wrapper for our project with the version that is specified in the file gradle.properties with the property gradleWrapperVersion. Let’s change the value of gradleWrapperVersion to 2.10 and execute the wrapper task. We can change the value in the grade.properties file, the build.gradle file or pass it via the command line:
It could be that we get an org/gradle/mvn3/org/apache/maven/model/building/ModelBuildingException exception after upgrading to a newer version. This is because the io.spring.dependency-management plugin is set to a version not supported by the newer Gradle version. If we change the version of the plugin to the latest version (0.5.4.RELEASE at the time of writing this blog post) the error is solved.
It also important to notice that Grails will look for Gradle wrapper defined for the base project if we use our Grails project in a multi-module project. So the directory that contains the settings.gradle file is then used to look for a Gradle wrapper. If it is not found the default Gradle version that is defined by the Grails distribution is used.
Written with Grails 3.0.12.
Original blog post written on January 27, 2016.
Adding Health Check Indicators
With Grails 3 we also get Spring Boot Actuator. We can use Spring Boot Actuator to add some production-ready features for monitoring and managing our Grails application. One of the features is the addition of some endpoints with information about our application. By default we already have a /health endpoint when we start a Grails (3+) application. It gives back a JSON response with status UP. Let’s expand this endpoint and add a disk space, database and url health check indicator.
We can set the application property endpoints.health.sensitive to false (securing these endpoints will be another blog post) and we automatically get a disk space health indicator. The default threshold is set to 10MB, so when the disk space is lower than 10MB the status is set to DOWN. The following snippet shows the change in the grails-app/conf/application.yml to set the property:
If we invoke the /health endpoint we get the following output:
If we want to change the threshold we can create a Spring bean of type DiskSpaceHealthIndicatorProperties and name diskSpaceHealthIndicatorProperties to override the default bean. Since Grails 3 we can override doWithSpring method in the Application class to define Spring beans:
Spring Boot Actuator already contains implementations for checking SQL databases, Mongo, Redis, Solr and RabbitMQ. We can activate those when we add them as Spring beans to our application context. Then they are automatically picked up and added to the results of the /health endpoint. In the following example we create a Spring bean databaseHealth of type DataSourceHealthIndicator:
To create our own health indicator class we must implement the HealthIndicator interface. The easiest way is to extend the AbstractHealthIndicator class and override the method doHealthCheck. It might be nice to have a health indicator that can check if a URL is reachable. For example if we need to access a REST API reachable through HTTP in our application we can check if it is available.
In our Application class we create a Spring bean for this health indicator so it is picked up by the Spring Boot Actuator code:
Now when we run our Grails application and access the /health endpoint we get the following JSON:
Notice that the URL health check fails so the complete status is set to DOWN.
Written with Grails 3.0.1.
Original blog post written on April 24, 2015.
Add Git Commit Information To Info Endpoint
We know Grails 3 is based on Spring Boot. This means we can use Spring Boot features in our Grails application. For example a default Grails application has a dependency on Spring Boot Actuator, which means we have a /info endpoint when we start the application. We add the Git commit id and branch to the /info endpoint so we can see which Git commit was used to create the running application.
First we must add the Gradle Git properties plugin to our build.gradle file. This plugin create a git.properties file that is picked up by Spring Boot Actuator so it can be shown to the user:
And that is everything we need to do. We can start our application and open the /info endpoint and we see our Git commit information:
Written with Grails 3.1.8.
Original blog post written on June 17, 2016.
Adding Custom Info To Info Endpoint
In a previous post we learned how to add Git commit information to the /info endpoint in our Grails application. We can add our own custom information to this endpoint by defining application properties that start with info..
Let’s add the Grails environment the application runs in to the /info endpoint. We create the file grails-app/conf/application.groovy. To get the value we must have a piece of code that is executed so using the application.groovy makes this possible instead of a static configuration file like application.yml:
We also want to have information available at build time to be included. Therefore we write a new Gradle task in our build.gradle that create an application.properties file in the build directory. The contents is created when we run or build our Grails application. We just have to make sure the properties stored in application.properties start with info.:
Let’s run our Grails application:
And we look at the output of the /info endpoint:
Written with Grails 3.1.8.
Original blog post written on June 17, 2016.
Passing System Properties With Gradle
In a other post we learned how to pass Java system properties from the command-line to a Java process defined in a Gradle build file. Because Grails 3 uses Gradle as the build tool we can apply the same mechanism in our Grails application. We need to reconfigure the run task. This task is of type JavaExec and we can use the method systemProperties to assign the system properties we define on the command-line when we invoke the run task.
We have a simple Grails 3 application with the following controller that tries to access the Java system property sample.message:
Next we configure the run and bootRun tasks and use System.properties with the Java system properties from the command-line as argument for the systemProperties method:
Now we can invoke the run or bootRun tasks with Gradle:
Or we can execute the run-app command with the grails command:
Written with Grails 3.0.7.
Original blog post written on September 22, 2015.
Update Application With Newer Grails Version
In this blog post we see how to update the Grails version of our application for a Grails 3 application. In previous Grails versions there was a special command to upgrade, but with Grails 3 it is much simpler. To update an application to a newer version in the Grails 3.0.x range we only have to change the value of the property grailsVersion in the file gradle.properties.
After we have changed the value we run the clean and compile tasks so all dependencies are up-to-date.
Written with Grails 3.0.8.
Original blog post written on September 28, 2015.
Access Grails Application in BootStrap
Accessing the Grails application object in BootStrap.groovy is easy. We only have to define a variable named grailsApplication and Spring’s name based injection takes care of everything.
Code written with Grails 1.1.2.
Original blog post written on January 14, 2010.
Using Spring Cloud Config Server
The Spring Cloud project has several sub projects. One of them is the Spring Cloud Config Server. With the Config Server we have a central place to manage external properties for applications with support for different environments. Configuration files in several formats like YAML or properties are added to a Git repository. The server provides an REST API to get configuration values. But there is also a good integration for client applications written with Spring Boot. And because Grails (3) depends on Spring Boot we can leverage the same integration support. Because of the Spring Boot auto configuration we only have to add a dependency to our build file and add some configuration.
Before we look at how to use a Spring Cloud Config server in our Grails application we start our own server for testing. We use a local Git repository as backend for the configuration. And we use the Spring Boot CLI to start the server. We have the following Groovy source file to enable the configuration server:
Next we create a new local Git repository with $ git init /Users/mrhaki/config-repo. We use the Spring Boot CLI and our Groovy script to start a sample Spring Cloud Config Server:
Next we create a YAML configuration file with a configuration property app.message. The name of the configuration file must start with the application name that want to use the configuration. It is best to not use hyphens in the name. Optionally we can use a Spring profile name to override configuration properties for a specific profile. The profile maps to the Grails environment names so we can use the pattern also for our Grails configuration. To learn about even more possibilities we must read the Spring Cloud Config documentation.
Here are two configuration files with a default value and a override property for the development environment:
We add and commit both files in our local Git repository.
Let’s configure our Grails application so it uses the configuration from our Spring Cloud Config Server. First we change build.gradle and add a dependency on spring-cloud-starter-config. We also add an extra BOM for the Spring Cloud dependencies so the correct version is automatically used.
Next we need to define the URL for our configuration server. We can set the system property spring.cloud.config.uri when we start our Grails application or we can add the file grails-app/conf/bootstrap.yml with the following contents:
Finally we set our application name to grails_cloud_config which is used to get the configuration properties from the Config server:
That is it, we can now use properties defined in the configuration server in our Grails application. Let’s add a controller which reads the configuration property app.message:
When we start our application with the development environment we get the following message:
And when in production mode we get:
Written with Grails 3.0.11
Original blog post written on January 13, 2016.
Multiple BootStraps
In Grails we can execute code when the application starts and stops. We just have to write our code in grails-app/conf/BootStrap.groovy. Code that needs to be executed at startup must be written in the closure init. In the destroy closure we can write code that needs be executed when the application stops. But we are not limited to one BootStrap class. We can create multiple BootStrap classes as long as it is placed in the grails-app/conf directory and the name ends with BootStrap.
And we can create another bootstrap class:
Code written with Grails 2.3.7.
Original blog post written on March 26, 2014.
Cleaning Up Before WAR Creation
Grails provides a mechanism where we can execute a closure to do stuff before we create a WAR file. Technically speaking we can change the contents of the staging directory. So when we run the application as an exploded WAR file or we create a WAR file in both cases the closure is executed.
The closure is very useful to delete files we don’t want to be in the final WAR file, but are copied by default. We define the closure in conf/BuildConfig.groovy and it must be named grails.war.resources. The closure has a parameter which is the staging directory. The context of the closure is AntBuilder, so all methods we define in the closure are executed for an AntBuilder object. For example if we normally would use the following statement: ant.echo(message: 'Hello'), we must now use echo(message: 'Hello'). The ant object is implicit for the context of the closure.
In the following sample we want to delete the Thumbs.db files Windows generates from the application:
Code written with Grails 1.1.2.
Original blog post written on December 16, 2009.
Logging Service Method Calls with Dynamic Groovy
Because Grails is a Groovy web application framework we can use all the nice features of Groovy, like dynamic programming. Suppose we want to log all method invocation of Grails services. We have to look up the Grails services and override the invokeMethod() for the classes. Here we invoke the original method, but also add logging code so we can log when we enter and exit the method.
The best place to put our code is in grails-app/conf/BootStrap.groovy of our Grails application. Here we use the init closure to first look up the Grails service classes. Next we override the invokeMethod().
Code written with Grails 1.2.
Original blog post written on January 18, 2010.
Multiple Environments
Grails supports different environments for configuring properties. Default we get a development, test and production environment, but we are free to add our own environments. We can define the new environment in for example grails-app/conf/Config.groovy. Next we can use the environment from the command line with the -Dgrails.env= option. Here we must use our newly created environment.
To create a new WAR file with the settings for the testserver2 environment we type the following command:
Code written with Grails 1.2.
Original blog post written on January 23, 2010.
Execute Code for Current Environment
In Grails we can use the Environment class to execute code for specific environments. The method executeForCurrentEnvironment() takes a closure with the different environments and the code to be executed. This provides an elegant way to execute different blocks of code depending on the current environment.
The following sample is a simple controller where we set the value of the result variable depending on the environment. Besides the default environments - development, test, production - we can define our own custom environments. In the controller we provide the custom environment myenv.
We we run the Grails application with $ grails run-app and go to the URL http://localhost:8080/app/execute, we get the following output: Running in DEV mode.. When we run $ grails -Dgrails.env=myenv run-app we get the following output in our browser: Running in custom "myenv" mode..
Code written with Grails 1.2.2.
Original blog post written on May 25, 2010.
Use Different External Configuration Files
A Grails 3 application uses the same mechanism to load external configuration files as a Spring Boot application. This means the default locations are the root directory or config/ directory in the class path and on the file system. If we want to specify a new directory to search for configuration files or specify the configuration files explicitly we can use the Java system property spring.config.location.
In the following example we have a configuration application.yml in the settings directory. The default base name for a configuration file is application, so we use that base name in our example. In this sample we use a YAML configuration file where we override the property sample.config for the Grails production environment.
Next we need to reconfigure the run and bootRun tasks, both of type JavaExcec, to pass on Java system properties we use from the command line when we use the Grails commands:
Now we can start our Grails application with the Java system property spring.config.location. We add the settings directory as a search location for configuration files. We add both the directory as a local directory as well as a root package name in the class path:
In the following example we have a configuration config.yml in the root of our project:
Now we start Grails and use the explicit file name as a value for the Java system property spring.config.location:
We could specify multiple files separated by comma’s. Or even combine it with directories like we used in the first example.
Written with Grails 3.0.8.
Original blog post written on September 28, 2015.
Using External Configuration Files Per Environment
Grails 3 is build on top of Spring Boot and this adds a lot of the Spring Boot features to our Grails application. For example in Spring Boot we can store configuration properties in an external file. A default Grails application already adds application.yml in the grails-app/conf directory. If we want to specify different values for a configuration property for each environment (like development, test and production) we can use environment section in application.yml. We know this from previous Grails versions with a Groovy configuration file Config.groovy. But we can also create different configuration files per environment and set the value for the configuration property in each file. We can use the following naming pattern for the file: application-{env}.yml or application-{env}.properties. These files need be in:
- a
configdirectory in the directory the application is running from - the root of the directory the application is running from
- in a
/configpackage on the classpath - in the root of the classpath
The order is important, because properties defined in the first locations override the properties in the last locations. When we place the files in grails-app/conf they get on the root of the classpath. We could also use for example src/main/resources/config to place extra configuration files on the classpath.
Let’s see this in action with a simple Grails application. We write an implementation of the CommandLineRunner interface to show the value of the sample.conf configuration property when the application starts:
We define the configuration property in grails-app/conf/application.yml:
Next we create a file grails-app/conf/application-development.yml which should be used when we run our Grails application in development mode:
Besides YAML format we can also use the plain old properties format files. We create grails-app/conf/application-production.properties with a value for sample.config used when Grails runs in production mode:
Finally we add a configuration file for a custom Grails environment:
Now let’s run the Grails application with different environments and see what value the sample.config property has:
Written with Grails 3.0.7.
Original blog post written on September 24, 2015.
Change Base Name For External Configuration Files
With Grails 3 we get the Spring Boot mechanism for loading external configuration files. The default base name for configuration files is application. Grails creates for example the file grails-app/conf/application.yml to store configuration values if we use the create-app command. To change the base name from application to something else we must specify a value for the Java system property spring.config.name.
In the following example we start Grails with the value config for the Java system property spring.config.name. So now Grails looks for file names like config.yml, config.properties, config-{env}.properties and config-{env}.yml in the default locations config directory, root directory on the filesystem and in the class path.
To pass the system properties when we use Grails commands we must change our build.gradle and reconfigure the run tasks so any Java system property from the command line are passed on to Grails:
Remember that if we use this system property the default grails-app/conf/application.yml is no longer used.
Written with Grails 3.0.8.
Original blog post written on September 28, 2015.
Using Random Values For Configuration Properties
Since Grails 3 we can use a random value for a configuration property. This is because Grails now uses Spring Boot and this adds the RandomValuePropertySource class to our application. We can use it to produce random string, integer or lang values. In our configuration we only have to use ${random.<type>} as a value for a configuration property. If the type is int or long we get a Integer or Long value. We can also define a range of Integer or Long values that the generated random value must be part of. The syntax is ${random.int[<start>]} or ${random.int[<start>,<end>}. For a Long value we replace int with long. It is also very important when we define an end value that there cannot be any spaces in the definition. Also the end value is exclusive for the range.
If the type is something else then int or long a random string value is generated. So we could use any value after the dot (.) in ${random.<type>} to get a random string value.
In the following example configuration file we use a random value for the configuration properties sample.random.password, sample.random.longNumber and sample.random.number:
Next we have this simple class that used the generated random values and displays them on the console when the application starts:
When we run our Grails application we can see the generated values:
Written with Grails 3.0.8.
Original blog post written on September 28, 2015.
Pass Configuration Values Via Environment Variables
Since Grails 3 is based on Spring Boot we can re-use many of the Spring Boot features in our Grails application. For example in a Spring Boot application we can use environment variables to give configuration properties a value. We simply need to follow some naming rules: the name of the configuration property must be in uppercase and dots are replaced with underscores. For example a configuration property feature.enabled is represented by the environment variable FEATURE_ENABLED.
We create the following controller in a Grails 3 application with a message property. The value is set with the @Value annotation of the underlying Spring framework. With this annotation we tell the application to look for an (external) configuration property sample.message and assign it’s value to the message property. If it cannot be set via a configuration property the default value is “gr8”.
If we run the application with grails run-app or gradle run the result of opening http://localhost:8080/sample is Grails is gr8!.
Now we use the environment variable SAMPLE_MESSAGE to assign a new value to the message property:
Now when we access http://localhost:8080/sample we get Grails is great!. If we use Gradle to start our Grails application we can use $ SAMPLE_MESSAGE=great gradle run.
Written with Grails 3.0.7.
Original blog post written on September 22, 2015.
Pass JSON Configuration Via Command Line
We can use the environment variable SPRING_APPLICATION_JSON with a JSON value as configuration source for our Grails 3 application. The JSON value is parsed and merged with the configuration. Instead of the environment variable we can also use the Java system property spring.application.json.
Let’s create a simple controller that reads the configuration property app.message:
Next we start Grails and set the environment variable SPRING_APPLICATION_JSON with a value for app.message:
When we request the sample endpoint we see the value of app.message:
If we want to use the Java system property spring.application.json with the Grails command we must first configure the bootRun task so all system properties are passed along:
With the following command we pass the configuration as inline JSON:
Written with Grails 3.1.8.
Original blog post written on June 27, 2016.
One WAR to Rule Them All
If we work on a Grails project and we want to deploy our application as Web Application Archive (WAR) it is easy to create the file. To create a WAR file of our Grails application we simply invoke the command: $ grails war. Suppose we want to put our WAR file first on a system test application server, then a user acceptance test application server and finally the production server. We want this WAR file to be self contained and all code and configuration must be in the WAR file. We don’t want to generate a WAR file for each environment separately, but a single WAR must be passed through the different environments. In this post we see how we can do this.
Suppose we have a Grails application and we define a systemTest and userAcceptanceTest environment next to the default development, test and production environments. We add these new environments to the environments block in grails-app/conf/Config.groovy and set a simple property runningMode with a different value for each environment.
Next we are going to change our grails-app/views/index.gsp and add a little code to show the value of the property runningMode. This way we can show which environment is used by the running WAR.
Let’s package the application in a WAR file:
Next we can deploy the WAR file to our application servers. But how can we set the environment for our application, so we can see the right value of our configuration property runningMode? Answer: We need to set the system property grails.env with the correct value before we start the application server. The Grails application determines in which environment the application is running by looking at the system property grails.env.
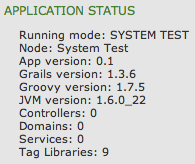
Suppose we use Tomcat as our servlet container for the Grails application. We defined separate Tomcat instances for each environment (system test, user acceptance test and production). Before we start an instance we can use the environment variable CATALINA_OPTS to set the system property grails.env. For example for the system test Tomcat intance we define CATALINA_OPTS as:
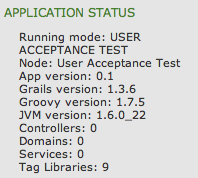
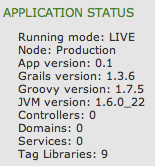
After we have defined the correct value we can install our single WAR file to the three Tomcat instances and start them. If we then open the index page of our application we can see in the left column the value or our configuration property runningMode:
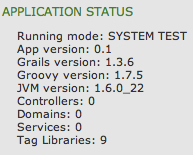
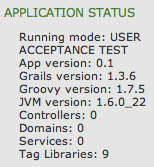
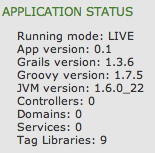
And we see the different values for the different servers. So it is very easy to create a single WAR file, but with different configuration settings for different environments, because of the environments support in Grails. We only have to tell the application server via system property grails.env which environment settings need to be used.
All configuration settings are part of the application code and if we want to change a value we must rebuild the WAR file again. But what if we want to set configuration options for different environments outside of the application code? So if we want to set a configuration property for a specific environment we don’t have to rebuild the WAR file? In this post we learn how to achieve this for a Grails application.
In Grails we can add extra configuration files by setting the grails.config.locations property in grails-app/conf/Config.groovy. We can assign a list of files available in the classpath or file system. Besides Groovy configuration scripts we can also define plain old Java property files. If we start with a new fresh Grails application we can see at the top of grails-app/conf/Config.groovy the code for this functionality in a comment block. To define the location of our environment specific configuration file per application server we read in the file location from a system property value. So we leave the placement of the configuration file up to the administrators of the application server, because we don’t want to hard-code the file location in our application code. At the top of the grails-app/conf/Config.groovy file we set the value of grails.config.locations:
We change our index view and add extra code to show the value of a new configuration property: nodeName. The value for this property needs to be defined in the configuration file we assign via the system property sample.app.config.location.
Our application code changes are done and we can package the application as WAR file:
Next we create a Groovy script which sets the property nodeName. For each application server or environment we create a file. For example we create a file sample-config.groovy for the system test Tomcat instance of our previous post:
Before we start our application servers we must set the system property sample.app.config.file. We must reference our Groovy script which set the nodeName property.
After we have defined the correct value we can install our single WAR file to the three Tomcat instances and start them. If we then open the index page of our application we can see in the left column the value or our configuration property nodeName:
We see the correct value for each environment. Grails has built-in support for adding external configuration files to the application configuration. This makes it very easy to set configuration properties for separate environments and their values can be changed without building a new WAR file.
The goal is to have a single WAR file that can be deployed to several environments and still contains configuration properties per environment. We use $ grails war to create the WAR file and if we deploy this WAR file to for example Tomcat we see the display name of our Grails application is set to /sample-production-0.1:
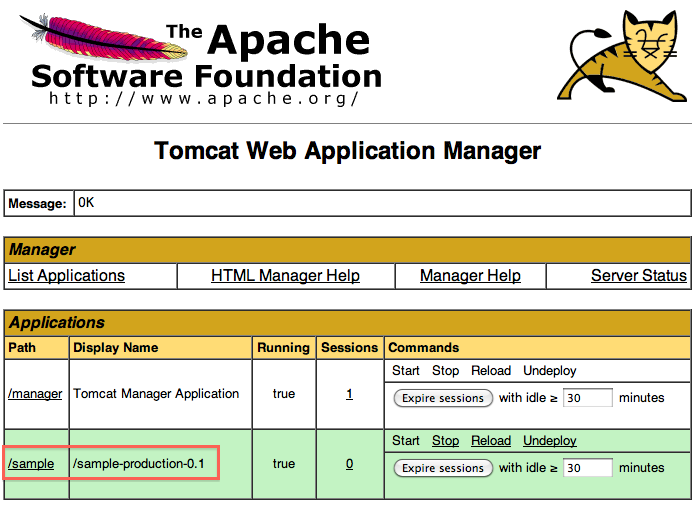
The name consists of our application name, environment used to create the WAR file (by default Grails uses production when creating a WAR file) and the application version. Grails automatically sets this value when we package the application as WAR file. It can be confusing to see the environment production in the display name, so we set the value of the display name to a another value.
We first get the template web.xml Grails uses and set the value of display-name to a new value.
We open src/templates/war/web.xml and look for the display-name element. The value is /@grails.project.key@. Grails uses the ANT replace task when building the WAR file to replace @grails.project.key@ with application name, environment and application version. We want a custom value so we change the display-name:
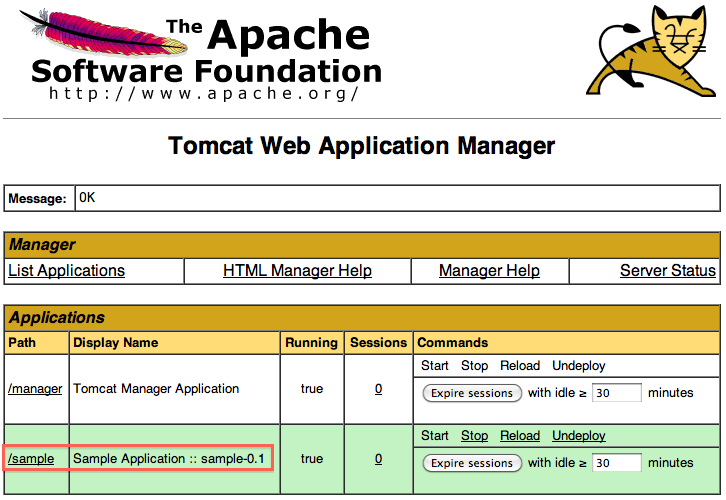
We use the @…@ syntax, because we will use the ANT replace task, to add the application name and version to the generated web.xml. Next we create scripts/_Events.groovy and listen to the WebXmlStart event. Here we get a hold on the web.xml and use the ANT replace task to inject the application name and version.
We are ready to create the WAR file ($ grails war) and deploy it to our Tomcat instance. If we look at the display name we see our custom display name Sample Application:: sample-0.1:
Original blog post written on February 04, 2011. Original blog post written on February 04, 2011. Original blog post written on February 04, 2011.
Customize the URL Format
Starting from Grails 2.0 we can change the URL format in our application. Default a camel case convention is used for the URLs. For example a controller SampleAppController with an action showSamplePage results in the following URL /sampleApp/showSamplePage.
We can change this convention by creating a new class that implements the grails.web.UrlConverter interface. Grails already provides the custom UrlConverter grails.web.HyphenatedUrlConverter. This converter will add hyphens to the URL where there are uppercase characters and the uppercase character is converted to lowercase. Our sample controller and action result in the following URL with the HyphenatedUrlConverter: /sample-app/show-sample-page.
Because Grails already provides this UrlConverter it is very easy to configure. We only need to change our configuration in grails-app/conf/Config.groovy. We add the key grails.web.url.converter with the value hyphenated:
But we can implement our own class with the grails.web.UrlConverter interface to define our own URL format to be used in the Grails application. The interface only has one method String toUrlElement(String) we need to implement. The input argument is the name of the controller or action that needs to be converted. We cannot see if the value is a controller or action value, the conversion rules will be applied to both controller and action values. The following class is a sample implementation. The controller or action name is first converted to lowercase. Next we add the extension -grails to the controller or action. We make sure the conversion is not already done by checking if the extension is not already in place. This check is necessary because Grails will invoke our UrlConverter several times to map it to the correct controller and action names. And without the check the extension would be added again and again and again, resulting in a 404 page not found error.
We have our custom UrlConverter. Now we need to configure our Grails application to use it. This time we don’t change the configuration grails-app/conf/Config.groovy, but we add our custom implementation to the Spring configuration in grails-app/conf/spring/resources.groovy. If we use the name with the value of the constant grails.web.UrlConverter.BEAN_NAME for our implementation then Grails will use our custom UrlConverter. We can remove any grails.web.url.converter from Config.groovy, because it will not be used.
We are done. If we start our application then we use the URL /sampleapp-grails/showsamplepage-grails to access the controller SampleAppController and the method showSamplePage() in the controller.
Code written with Grails 2.0.
Original blog post written on December 27, 2011.
Add Additional Web Application to Tomcat
In this post we learn how to add an additional WAR file to the Tomcat context when we use $ grails run-app. Recently I was working on a Alfresco Web Quick Start integration with Grails (current progress on GitHub). Alfresco offers inline editing of the web content with the help of an extra Java web application. This web application needs to be accessible from the Grails application, so at development time I want to deploy this web application when I use $ grails run-app at web context /awe. But this scenario is also applicable if for example we use SoapUI to create a WAR file with mocked web services and we want to access it from our Grails application.
I found two sources via Google: Grails, Tomcat and additional contexts and Run a Java web application within grails. It turns out Grails fires a configureTomcat event when we use $ grails run-app, with a Tomcat instance as argument. We can configure this Tomcat instance with additional information. With the addWebapp() method we can add an additional context to Tomcat. We can use a directory or WAR file and we must define the context name we want to use. And furthermore we can add extra directories that are added to the classpath of the additional web application. We must create a WebappLoader instance from Tomcat’s classloader and then we can use the addRepository() method to add directories to the classpath.
For my use case I had a web application packaged as a WAR file: awe.war and it must be deployed with the context /awe. Furthermore extra configuration for the web application is done with a XML file found in the classpath, so we add an extra directory to the classpath of the web application.
We start our development Grails environment with $ grails run-app and the web application is available at http://localhost:8080/awe/, next to the Grails’ application path.
Code written with Grails 1.3.7.
Original blog post written on April 05, 2011.
Use a Different jQuery UI Theme with Resources Plugin
The resources plugin is a great way to manage resources in our Grails application. We define our resources like Javascript and CSS files with a simple DSL. The plugin will package the resources in the most efficient way for us in the final application.
The jQuery UI library has support for theming. We can use the default theme(s), but we can also create our own custom theme with for example the jQuery UI ThemeRoller site.
If we use the jQuery UI plugin and want to use a different than the default theme we must change our configuration for the resources plugin. We override the theme that is set by default and point it to our new custom theme. We can change grails-app/conf/Config.groovy or a separate resources artifact file. We add an overrides section and use the same id attribute value as set by the jQuery UI plugin. The url attribute points to the location of the custom jQuery UI ThemeRoller CSS file.
Code written with Grails 1.3.7.
Original blog post written on October 25, 2011.
Use A Different Logging Configuration File
Since Grails 3 the logging configuration is in a separate file. Before Grails 3 we could specify the logging configuration in grails-app/conf/Config.groovy, since Grails 3 it is in the file grails-app/conf/logback.groovy. We also notice that since Grails 3 the default logging framework implementation is Logback. We can define a different Logback configuration file with the environment configuration property logging.config. We can set this property in grails-app/conf/application.yml, as Java system property (-Dlogging.config=<location>) or environment variable (LOGGING_CONFIG). Actually all rules for external configuration of Spring Boot apply for the configuration property logging.config.
In the following example configuration file we have a different way of logging in our Grails application. We save it as grails-app/conf/logback-grails.groovy:
We use this configuration file with the following command:
Written with Grails 3.0.8.
Original blog post written on September 28, 2015.
Add a DailyRollingFileAppender to Grails Logging
In Grails we can add new Log4J appenders to our configuration. We must add the new appender definition in the log4j closure in conf/Config.groovy. We define new appenders with the appenders() method. We pass in a closure where we define our appenders. The name of the appender is an identifier we can use when we want to define the log level and packages that need to be logged by the appender.
In the following sample configuration we create a DailyRollingFileAppender so each day a new log file is created and old log files are renamed with the date in the filename. Then we use the root() method to pass a closure telling we want to log all messages at level INFO to the appender.
Code written with Grails 1.1.2.
Original blog post written on December 13, 2009.
Use Log4j Extras Companion RollingFileAppender
Apache Extras Companion for Log4j contains a RollingFileAppender, which can be configured to automatically compress old log files. We can even save the old, archived log files to another directory than the active log file. In this post we learn how we can add and configure the RollingFileAppender in our Grails application.
First we must define our dependency on the Log4j Extras Companion libary.
We open BuildConfig.groovy in the directory grails-app/conf/ and add to the dependencies section the following code:
Next we can configure the appender in grails-app/conf/Config.groovy:
We use TimeBasedRollingPolicy, which is quite powerful. We can configure the rollover period using a date/time pattern. If the fileNamePattern ends with .gz the contents of the log file is compressed. Finally we decouple the active log file name from the location where the archived log files are saved with the property activeFileName.
Code written with Grails 1.3.6.
Original blog post written on February 17, 2011.
Use TimeAndSizeRollingAppender for Logging
In a previous post we learned how to use the Log4j Extras Companion RollingFileAppender. In this post we learn how to use TimeAndSizeRollingAppender. This appender has a lot of nice features among rolling over the log file at a time interval and we can limit the number of rolled over log files. With this combination we can keep a history of log files, but limit how many log files are saved.
First we must download the JAR file with the appender and save it in the lib directory of our Grails application. Next we can configure the appender in grails-app/conf/Conf.groovy:
We configured the appender to rollover daily, compress the contents of the archived log files after 2 rollovers, and only save 7 archived log files.
Code written with Grails 1.3.6.
Original blog post written on February 17, 2011.
Change Context Path of a Grails Application for Jetty
By default a Grails application context path is set to the application name. The context path is the bold part in the following URL: http://localhost:8888/appname/index. We can change the context path with properties for when we use $ grails run-app to run the application. We can run $ grails -Dapp.context=/app run-app to change the context path to /app. Or we can set the property app.context = /app in application.properties. Or we can add grails.app.context = '/app' to our conf/Config.groovy configuration file. These properties will all affect the context path when we run $ grails run-app.
But what if we want to deploy our application to Jetty on a production server and use a custom context path? We have to add an extra file to web-app/WEB-INF with the name jetty-web.xml. Here we can configure Jetty specific settings for the application and one of the settings is the context path. If the application is deployed to Jetty or we run the application with $ grails run-app the context path is used that we set in jetty-web.xml.
Code written with Grails 1.1.2.
Original blog post written on December 14, 2009.
Change Version For Dependency Defined By BOM
Since Grails 3 we use Gradle as the build system. This means we also use Gradle to define dependencies we need. The default Gradle build file that is created when we create a new Grails application contains the Gradle dependency management plugin via the Gradle Grails plugin. With the dependency management plugin we can import a Maven Bill Of Materials (BOM) file. And that is exactly what Grails does by importing a BOM with Grails dependencies. A lot of the versions of these dependencies can be overridden via Gradle project properties.
To get the list of version properties we write a simple Gradle task to print out the values:
When we run the task we get an overview of the properties:
For example if we want to change the version of the PostgreSQL JDBC driver that is provided by the BOM we only have to set the Gradle project property postgresql.version either in our build file or in the properties file gradle.properties:
Another way to change the version for a dependency defined in the BOM is to include a dependency definition in the dependencyManagement configuration block. Let’s see what it looks like for our example:
To see the actual version that is used we can run the task dependencyInsight:
This is just another nice example of the good choice of the Grails team to use Gradle as the build system.
Written with Grails 3.1.6
Original blog post written on May 11, 2016.