Table of Contents
- Chapter 1 | Hello Visual World
- Learn React VR (Chapter 2 | Panoramic Road Trip)
- Learn React VR (Chapter 3 | Outdoor Movie Theater)
- Learn React VR (Chapter 4 | Transitions and Animations)
- Learn React VR (Chapter 5 | Star Wars Modeling)
- Learn React VR (Chapter 6 | Vector Graphic Exploration)
- Learn React VR (Chapter 7 | UI/UX Principles for VR Design)
- Learn React VR (Chapter 8 | Building a VR Video App)
- Learn React VR (Chapter 9 | Reacting to Our Exploration)
Chapter 1 | Hello Visual World
Prerequisites
Understand the basics of React and ES6 as I will be assuming this in all of my chapters.
If you wish to learn the basics of React, I have created an ebook that serves that purpose.
What is This All About?
Before we dive into React VR, I want to explain what Learn React VR is all about.
I recently released an ebook called React.js for the Visual Learner. The creation of that book followed a recent trend of mine, to be a crash test dummy of designer/developer hybrids.
I’m addicted to the thrill of being able to learn something new in design-focused development, go through all the hoops and hurdles, and create content that teaches people what I’ve learned in the most practical way possible.
So far in 2017, I’ve created content to teach about pure CSS images, SVGs, animation libraries, vector graphic design, Vue.js, and most recently React. All of this content has been created as I learn and not after I learn. I love this methodology because:
- It forces me to sit down and learn something without getting distracted.
- Naturally, the content is very practical, clear, and didactic.
- I get to create content that I can sell to make revenue.
- You get to learn something in a structured fashion.
- You get to avoid the frustrations that I had to encounter when learning on my own.
All of this to say is that I am writing an ebook on React VR. Like my previous ebook on React, I will be writing each chapter as an individual post on Medium and putting it all together as an official ebook at the end.
Really quickly, I want to mention a few things.
- I will go into great detail to explain things, even when things that might seem trivial to you. I do this because I rather explain too much than too little.
- If I err, it is because I write in a way that may not be technical enough. This may happen as I am often trying to avoid coming off like I am throwing around any buzz words and assuming their meaning. I like to explain concepts using stories, analogies, visual examples, and “this right here is essentially saying…” statements.
- React VR is new technology and a territory with a lot of exploration left to do. I will have no experience (other than React) going into the writing process of this ebook.
- You will learn much faster if you slow down. I know that sounds backward but I guarantee that if you concentrate on one topic/skill at a time, you will learn at a faster rate than if you try to rush through your huge backlog too rapidly. Concentrate on this book and don’t skim through.
With that said, let’s say hello to the wonderful virtual world that we can explore using React.
Introduction to React VR
In the rest of this chapter, I will provide an introduction to React VR. We will be discussing what it is, how it works, and how to get started with a “Hello Virtual World” example.
What is React VR?
React VR is a framework for building VR apps using JavaScript. It makes use of the same design as React.
Meaning, all the same concepts, features, and benefits of React can now be applied to the creation of VR apps. Awesome!
To provide a refresher, what are the distinct concepts, features, and benefits of React?
React is used for creating single page applications.
With React, we can create single page applications. Instead of going to the server to fetch a new page for a new view (i.e. login page, signup page, pricing page, etc.), all the views are within a single page. We can dynamically toggle on and off the views depending on the state via routing (i.e. show the home page by default and switch to a login view on the click of a link).
This is like toggling between games that are already downloaded onto a PS4 as opposed to having to grab a new cartridge to switch games like you have to with an N64.
This means that we can create applications that are fast.
React is component-based.
Let’s say I told you to make a koala vector graphic like this:

For many people, they might be puzzled on how to go about doing this. It could seem overwhelming.
However, a good artist knows to break things down into smaller components to make things underwhelming and complete each step piece by piece.
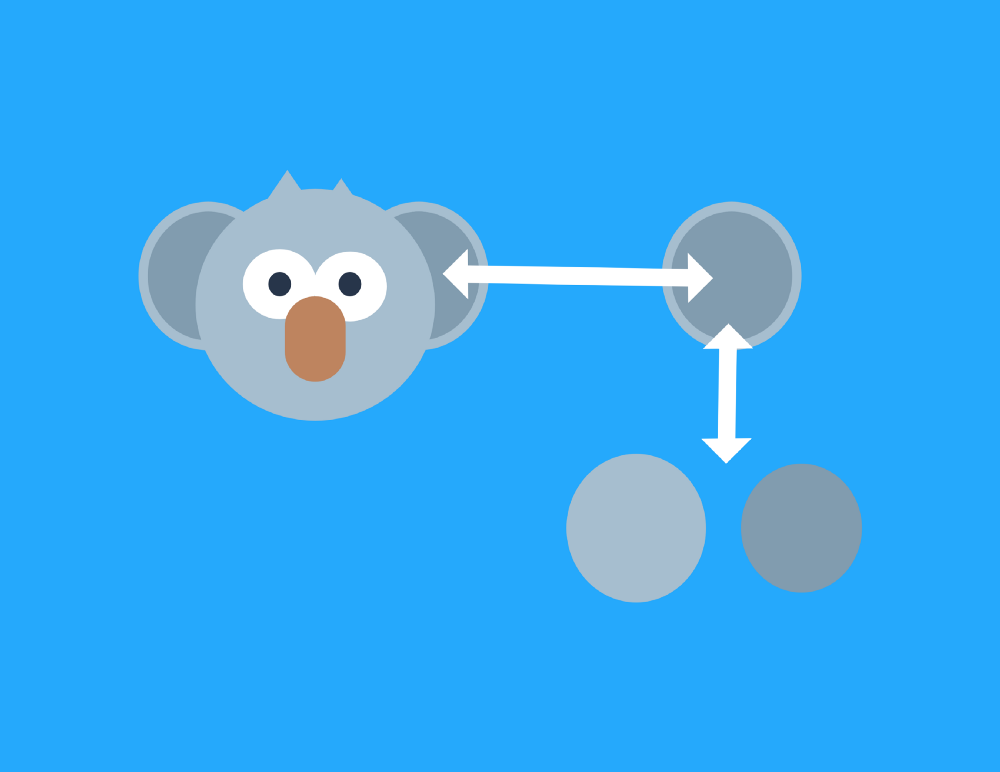
React understands this and makes us create user interfaces out of components. We can compose all of the components to create a complex user interface in a manageable fashion.
These components can encapsulate data, methods, lifecycle hooks, and JSX that control what we want to render to the DOM and it can be dynamically updated. Putting all of these components together forms an interactive user interface.
React has declarative syntax.
The syntax for React code expresses what we want to be done as opposed to expressing all the steps to get there. This makes the code more predictable and easier to debug.
React can be used for development across all devices.
Nowadays, desktop applications, VR applications, web applications, and mobile (native) applications can be created using React.
Companies are realizing that it is a better business decision to be able to hire developers who can develop for all devices. They can now hire just one React developer who theoretically could handle VR, desktop, mobile, and web applications without learning separate languages and technologies. This can potentially save a business money from having to find a developer for each specific platform.
This also makes things easier and more exciting for developers. Particularly with React VR, we can dive into creating VR applications without having to reinvent the wheel. This saves time, removes confusion between work and personal projects, and allows developers to test the waters with what might be a skill that they want to focus on.
So, those are the concepts and benefits of React.
React VR builds off of these concepts and benefits but is particularly a framework for creating VR applications.
React VR applications can be used to make VR websites, interactive 360 experiences, and game development.
How React VR Works
React VR makes use of Three.js under the hood.
Three.js is a JavaScript 3D library.
Three.js supports WebGL (Web Graphics Library) which is a JavaScript API that allows us to render 3D graphics in web browsers without plug-ins.
Three.js also supports WebVR which bridges the gap between web browsers and compatible VR headsets. Meaning, we can view what’s in a web browser with devices like the Samsung Gear VR, Oculus Rift, HTC Vive, etc.
React VR also builds off of React Native, a framework for building mobile applications using React’s design.
React Native makes use of the Flexbox Layout which is an alternative to a Grid Layout for positioning elements within a user interface.
The main idea behind the flex layout is to give the container the ability to alter its items’ width/height (and order) to best fill the available space (mostly to accommodate to all kind of display devices and screen sizes). A flex container expands items to fill available free space, or shrinks them to prevent overflow. — Coyier, Chris. “A Complete Guide to Flexbox.” CSS-Tricks. N.p., 21 Mar. 2017. Web. 07 June 2017.
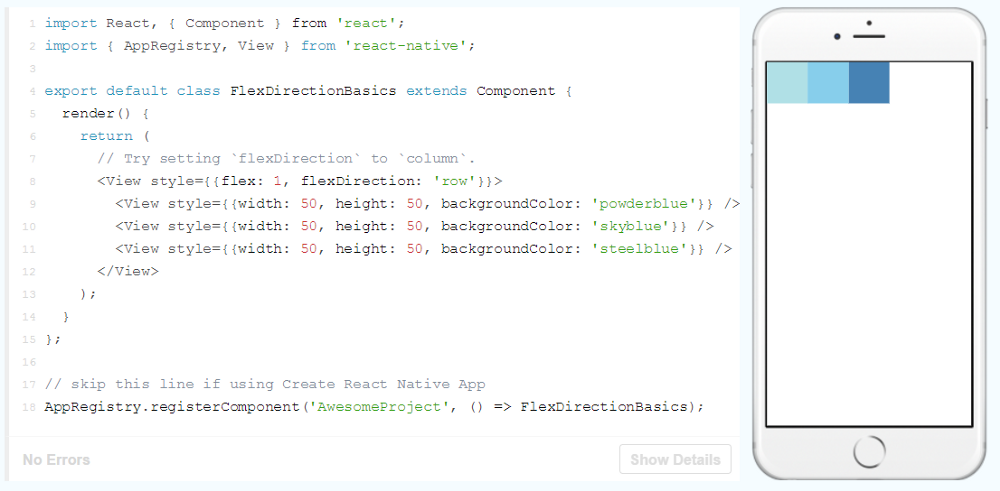
React Native Flexbox Layout Example
In addition to supporting the Flexbox Layout, React Native extends the core React library by possessing predefined core components. *Namely, *View, Image, and Text.
View defines the layout (that is supported by Flexbox) and allows us to define styles.
In normal HTML, it’d be like doing something like this:
<div class="container" style="width: 50%; height: 50% ..."></div>In JSX, it would be like doing the following:
<div className="container" style={{background: "#FFFFFF"}}></div>A View component looks like this:
<View style={{backgroundColor: 'blue', flex: 0.3}} />The reason that there is a View component instead of a div element is because the React Native code needs to map to the view of whatever platform is running the code. Depending on the device, the platform for viewing will be different. Essentially, the View component does the following logic for us: “Alright! Looks like they want to layout some elements to the view. Well, let me check what platform we are on. Oh! We are on an Android. This is will need to be android.view and not <div>, UIView, etc.”
The Image core component is used to display different types of images.
Again, it is needed to display images for whatever platform is being used. Here’s an example of the component in use:
<Image source={require('./my-icon.png')} />Like the Image component, the Text component in React Native is also straightforward.
The Text component is used to display text on whatever platform is running the code.
Here’s a basic example:
<Text>Hello World!</Text>Those 3 core components (View, Image, and Text) are also used in React VR.
React VR also adds a lot of other components:
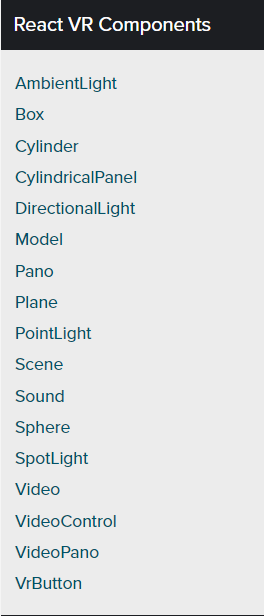
We will discuss these components throughout this book. For this chapter, let’s just get an introduction to the Pano component.
The Pano component is used for displaying 360-degree panoramic photos.
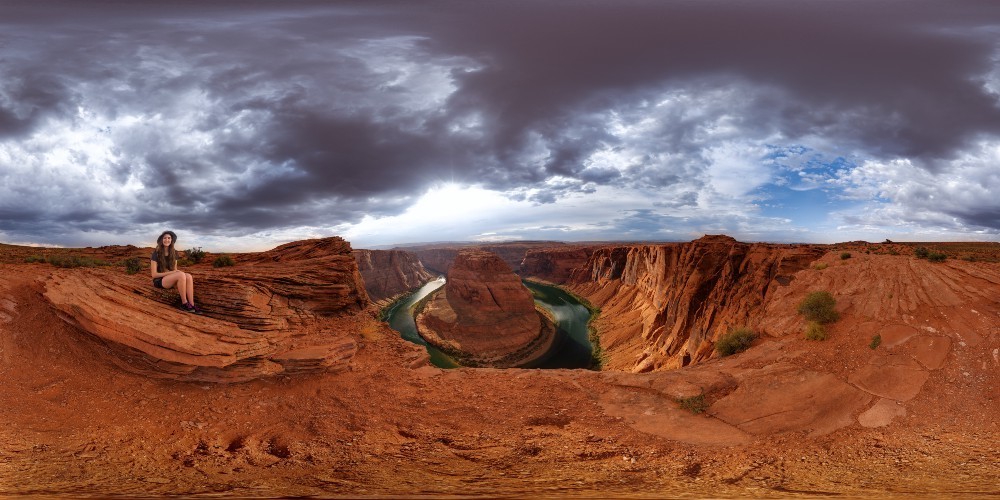
In VR applications, this photo can be seen from every angle in 360-degrees. For instance, here is one angle that we could see:
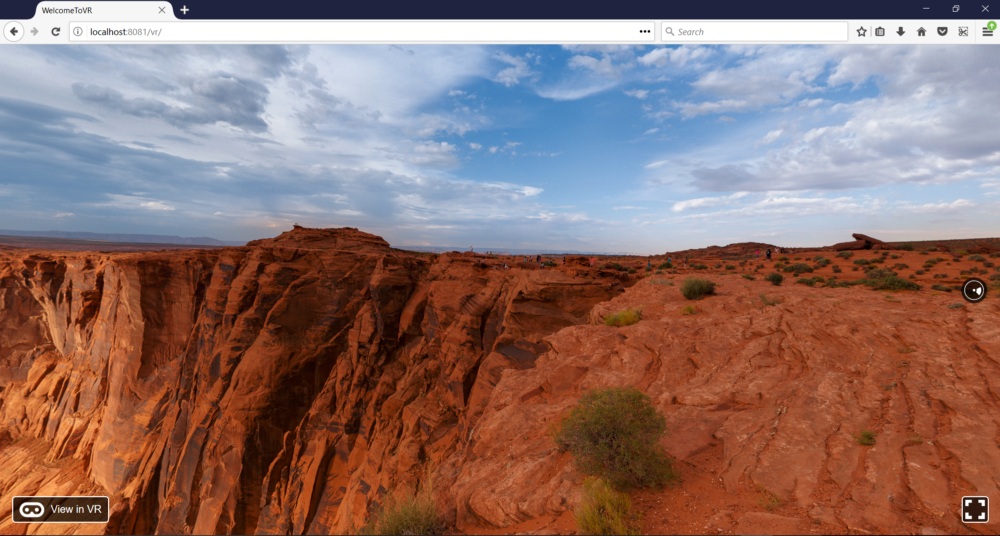
We could click and drag and see this panoramic photo from another angle:
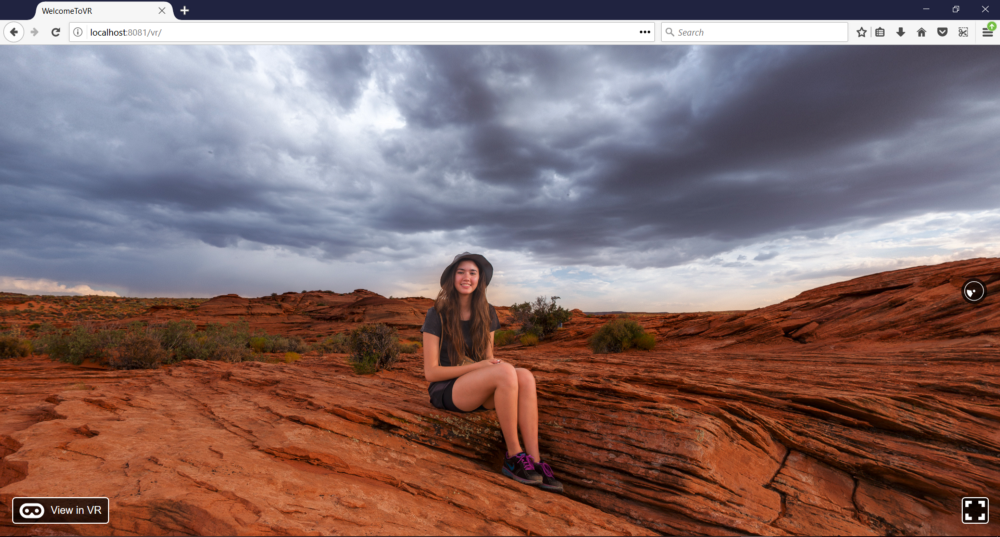
Incredible! We will get to play around with this at the end of the chapter. For now, let’s carry on.
Requirements
First off, let’s discuss the requirements.
- A Windows machine (physical or virtual)
- Firefox Nightly
- The latest version of Node.js
- Atom (or any other text editor)
Note that we do not need any VR devices to create and view React VR applications.
To see the devices and browsers that are compatible with WebVR (the bridge between our app and VR devices), you can look at their site.
Firefox Nightly has the best browser support for VR applications in general. Oculus Rift and HTC Vive are both compatible with Firefox Nightly.
Once you have taken care of the requirements, let’s move along.
Hello Virtual World Example

Project Installation
To create a React VR project, we can use React VR CLI (command line interface). This will allow us to great a React VR project through command line.
In order to use it, we have to install it globally using npm:
npm install -g react-vr-cliNote: you may need to run this as administrator.
Once this has completed, we can initialize a new project (which we will call HelloVirtualWorld) like so:
react-vr init HelloVirtualWorldWhile we still have our command line open, let’s get into our new project folder:
cd HelloVirtualWorldProject Configuration
Next, let’s open the project folder in Atom.
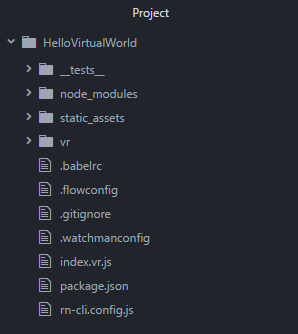
There are a few things going on here which we will cover on a high level.
First off, we have a node_modules folder with our packages, a package.json file with information about our app, and a static_assets folder that will contain things like static panoramic photos. Nothing too new is going on here.
In normal React, index.js is used to specify the top/entry level of our React application that contains all of the different views within the application (those views contain all of the components that make up the user interface).
In this file, we can see the React VR code:
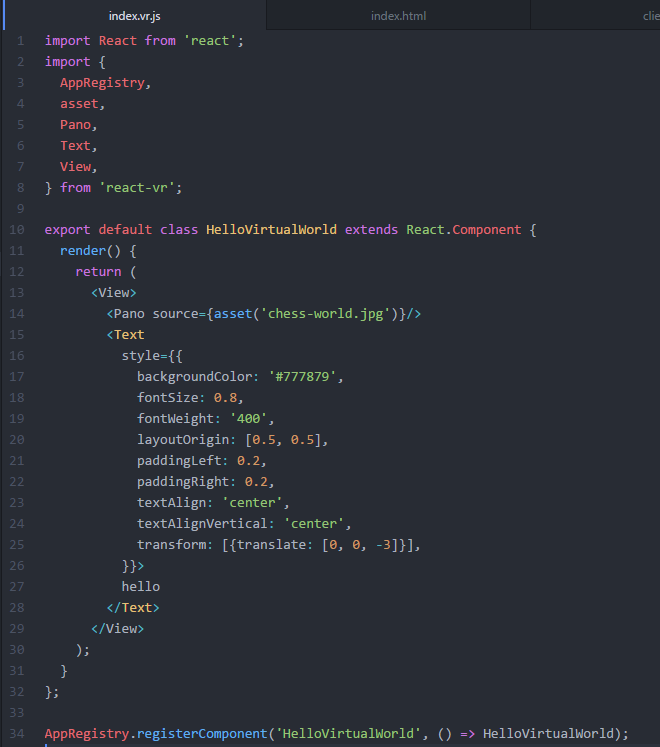
Here, we can see the use of the View, Pano, and Text components we mentioned earlier. Notice that an ES6 class is being used to define this component so our project is prepackaged with Babel.
If we look at .babelrc, we can see the presets for Babel:
1     {
2       "presets": ["react-native"]
3     }
React VR has its code preprocessed by the React Native package. Recall, React VR code is built off of React Native. Essentially, this is just saying “Hey! We are going to make use of ES6. Babel, could you make this compatible for browsers for us? By the way, our code is going to be built on React Native so you don’t get confused.”
Going back to our index.vr.js file, the following line takes our root component and bunldes it:
AppRegistry.registerComponent('HelloVirtualWorld', () => HelloVirtualWorld);We do not need to use ReactDOM like standard React.
Now, let’s take a look at the vr folder. This folder contains client.js and index.html.
client.js contains code that initializes (fires up) our application. Specifically, it has a function called init which initializes the React VR application to the browser when called.
This function is called from index.html. The bundled code (the final code after Babel and other preprocessing stuff are applied to the index.vr.js code) is passed to the init function. The React VR app that is initialized is then in injected into the body of the DOM:
 1     <script>
 2       // Initialize the React VR application
 3       ReactVR.init(
 4         // your compiled index.bundle.js
 5
 6         '../index.vr.bundle?platform=vr&dev=true',
 7
 8         // Attach it to the body tag
 9
10         document.body
11       );
12     </script>
Running Our Application
Enough with the explanation, I bet you just want to see what it looks like already!
In command line, go ahead and run the following:
npm startIn Firefox Nightly, you can then navigate here:
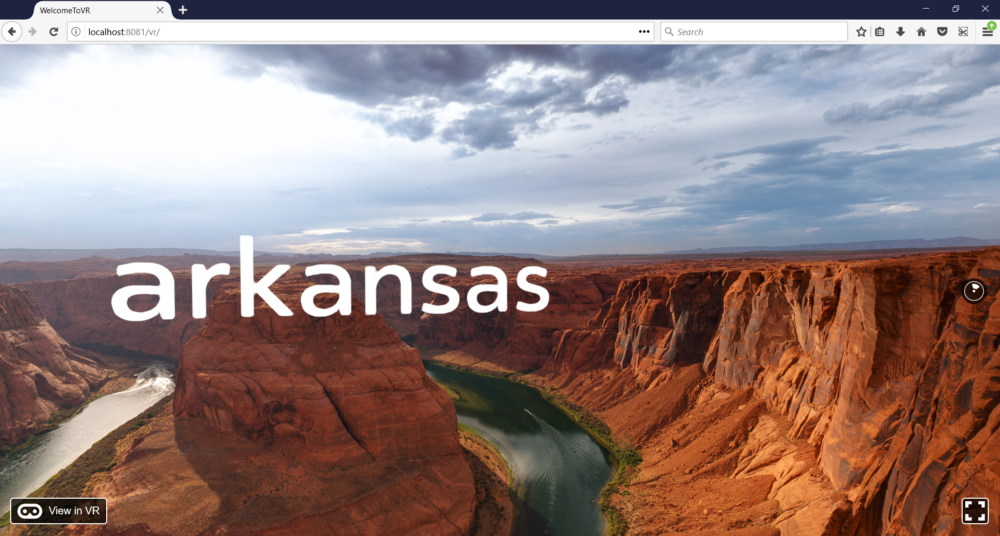
We should see the following:
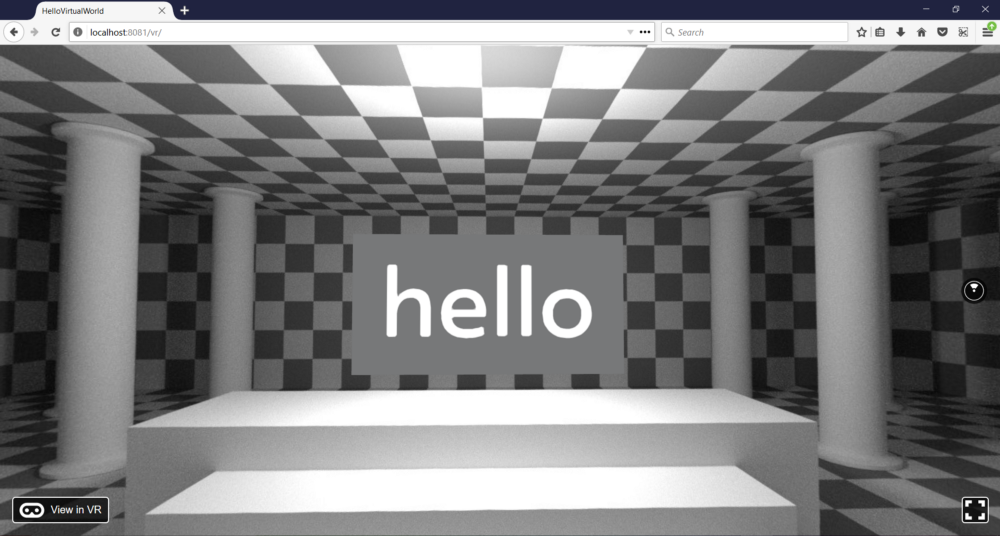
Now, click and drag to explore every angle.
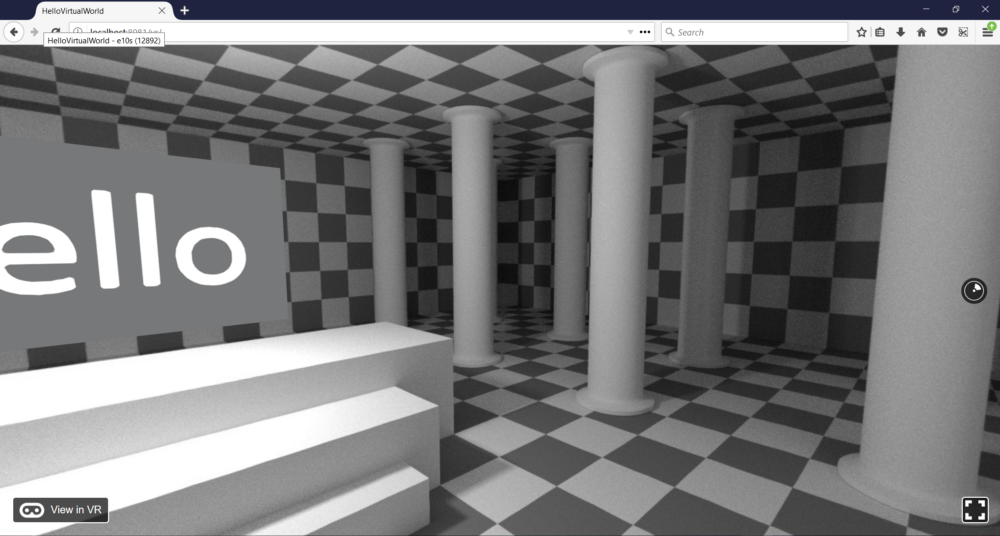
Woah!
Let’s go back to our React VR code found in index.vr.js to see how this was rendered.
The entire room is just a static image specified in the Pano component:
<Pano source={asset('chess-world.jpg')}/>This selects the source of our panoramic image as chess-world.jpg which is in our static_assets folder.
If you open chess-world.jpg from Atom and adjust the zoom to 40%, you will see the following:
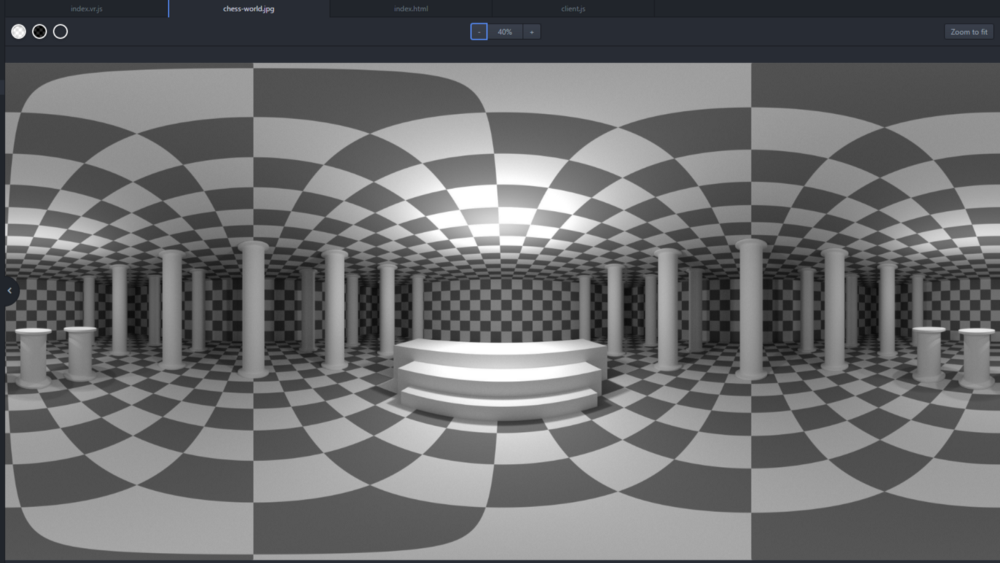
This is the static photo that is rendered in 360-degrees in our application. This is one of 2 types of panoramic images that we can use. It is called Equirectangular panoramic. These images can be taken by special 360 degree cameras.
While we’re at it, let’s replace this with a different photo.
After some Googling, I found that a great resource for these types of photos is Flickr. Go Flickr and search “equirectangular”.
This will pull up a whole host of compatible panoramic photos that we can use:
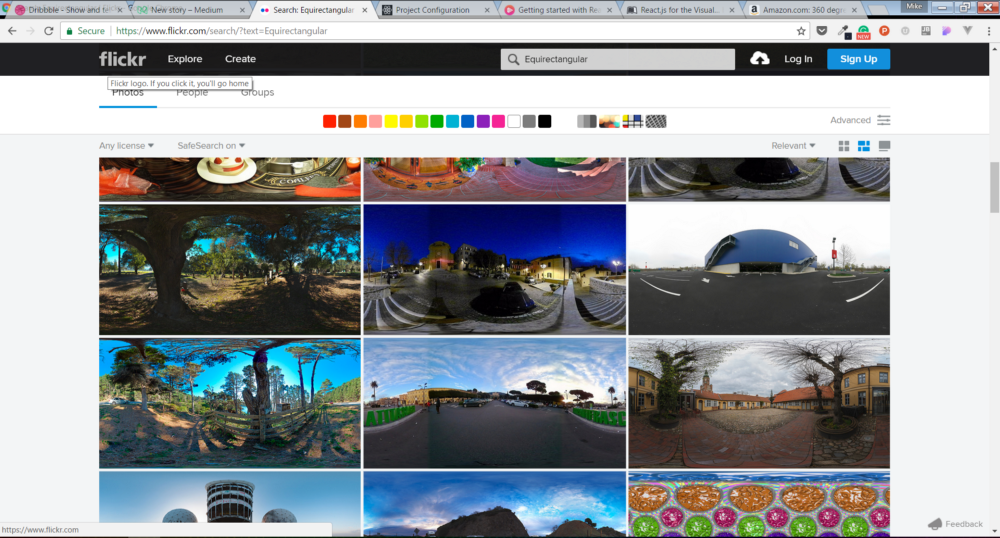
There’s one photo that I found that was amazing. Let’s go ahead and use it. You can grab it here.
Download the photo at the highest resolution, rename it to horseshoe-bend.jpeg, and add it to the static_assets folder.
Next, we will update the Pano component like so:
<Pano source={asset('horseshoe-bend.jpg')}/>Cool!
Now, let’s examine the Text component:
 1     <Text
 2       style={{
 3         backgroundColor: '#777879',
 4         fontSize: 0.8,
 5         fontWeight: '400',
 6         layoutOrigin: [0.5, 0.5],
 7         paddingLeft: 0.2,
 8         paddingRight: 0.2,
 9         textAlign: 'center',
10         textAlignVertical: 'center',
11         transform: [{translate: [0, 0, -3]}],
12       }}>
13     hello
14     </Text>
Here, we are saying that we want to render hello with the inline styling options. Everything should be straightforward with exception to the transform and layoutOrigin. layoutOrigin specifies the top and left values of our text box in relation to the world. 0.5 and 0.5 specify that we want it centered horizontally and vertically within the world like so:

The transform is an array containing a translate object that has an array of three values: X, Y, and Z. By putting a negative Z value, we are controlling the depth of our text. The larger the negative value, the farther away the text will appear.
If we updated our transform, then the text would appear further away.
Update your transform like so:
1     transform: [{translate: [0, 0, -5]}],
2
3     //will appear farther away than to -3
Leave the transform as is for now. However, update the value of our text from hello to Hello Visual World.
Lastly, we have a View component wrapped around our Pano and Text Component. Again, we can think of this like the outer <div> tags in standard React.
Now, let’s see the updated text and panoramic image.
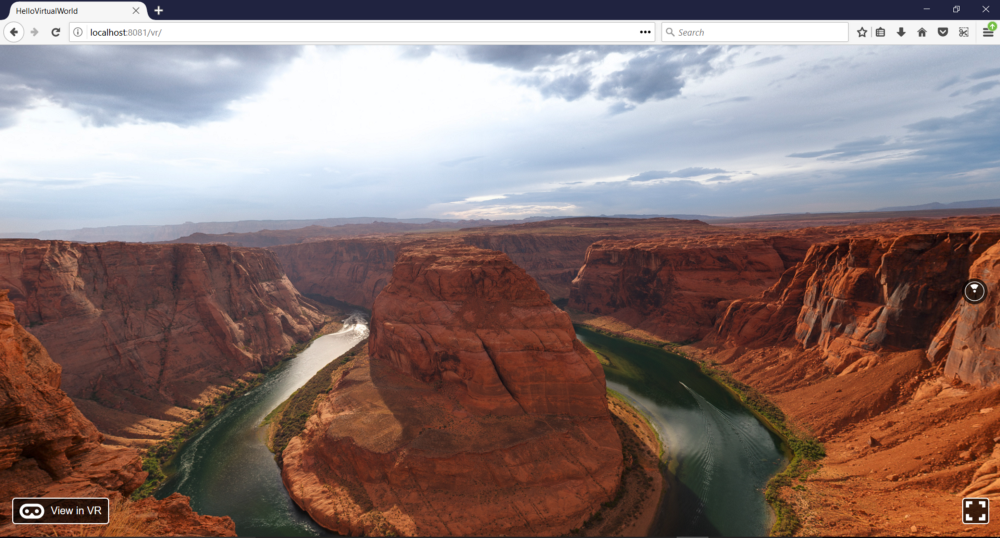
You should be able to go back to Firefox Nightly and refresh the page to see the updates:
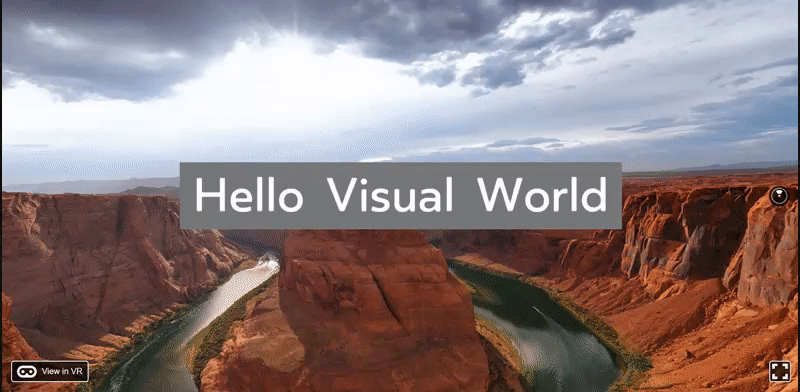
Awesome! You have now been introduced into the React Visual World!
Final Code
Concluding Thoughts
Learning React VR is incredibly thrilling. Since it is new technology, there’s a rush to want to explore and discover the potential. Fortunately, I will be continually writing more chapters so you can do that in a structured manner.
In our next chapter, we are going to tackle making an interactive web experience using components with encapsulated static panoramic photos.
Learn React VR (Chapter 2 | Panoramic Road Trip)
Scope of This Chapter
In the previous chapter, we were able to get an introduction to React VR and display a beautiful panoramic photo of the Horseshoe Bend.
In this chapter, we will be going over features of React components in React VR. We will see what is the same and what is different. Specifically, we will be looking into using Flexbox to control our layout.
At the end of this chapter, we will create an interactive VR app called Panoramic Road Trip. This app will allow us to select a destination from a menu and visit that destination in a 360-degree experience.
I hope you’re as excited as I am. Let’s get started.
Encapsulating Data
Just like standard React, React VR allows us to encapsulate data in a component either with props *or *state. We will go through an example of each just to see this in action.
Props
props are used for data that is read-only. In other words, it’s used for data that will not be changed. Currently, our HelloVirtualWorld component in our index.vr.js file contains read-only text:
<Text> Hello Virtual World </Text>Let’s replace this using props.
First, let’s create a new component called NestedMessage:
1     class NestedMessage extends React.Component {
2
3     render() {
4         return (
5
6         );
7       }
8     };
After that, go ahead and cut the Text component in HelloVirtualWorld and paste it in the return of NestedMessage:
 1     class NestedMessage extends React.Component {
 2
 3     render() {
 4         return (
 5           <Text
 6             style={{
 7               backgroundColor: '#777879',
 8               fontSize: 0.8,
 9               fontWeight: '400',
10               layoutOrigin: [0.5, 0.5],
11               paddingLeft: 0.2,
12               paddingRight: 0.2,
13               textAlign: 'center',
14               textAlignVertical: 'center',
15               transform: [{translate: [0, 0, -5]}],
16             }}>
17             Hello Virtual World
18           </Text>
19         );
20       }
21     };
Now, let’s nest NestedMessage and pass down a prop within the HelloVirtualWorld component:
 1     export default class HelloVirtualWorld extends React.Component {
 2
 3     render() {
 4         return (
 5           <View>
 6             <Pano source={asset('horseshoe-bend.jpg')}/>
 7             <NestedMessage message={"Hello Nested Message"}/>
 8           </View>
 9         );
10       }
11     };
Next, we can use this message prop as our text:
<Text style={{...}}>{this.props.message}</Text>If you have taken a break in between chapters, open our project in command line and run:
npm startWe should now see the message prop displayed as the text:
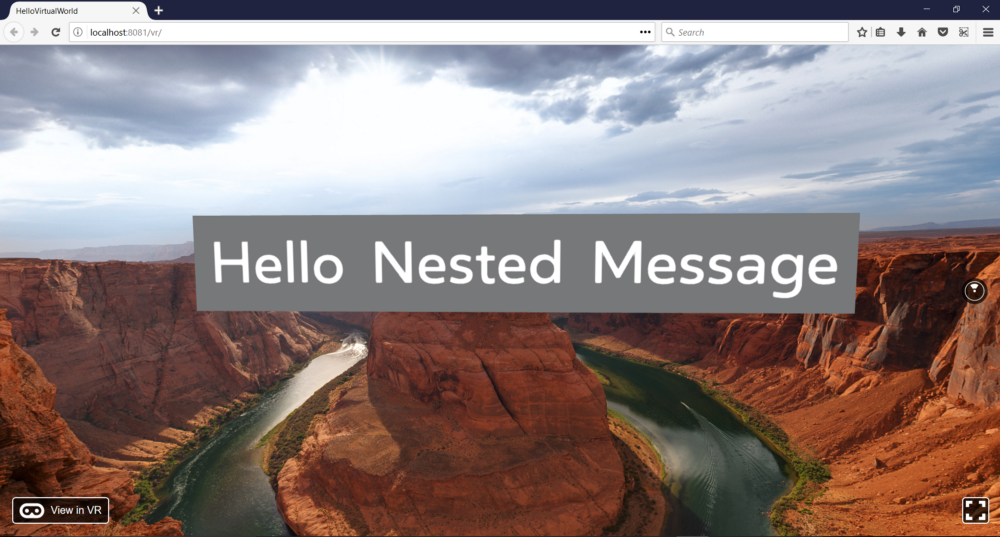
Perfect! That was easy.
State
state is used whenever we have data that will be updated.
Let’s have our text in NestedMessage be controlled by the local state instead of using props. Then, we will test out updating the state so we can change the text.
First things first, you can remove the message prop:
<NestedMessage/>Then, let’s add a constructor with this.state defined in our NestedMessage component:
1     class NestedMessage extends React.Component {
2       constructor() {
3         super();
4         this.state = {};
5       }
6
7       //render function here
8     };
Next, we can add a property in our state called message:
1 this.state = {message: "Hello State Message"};
Finally, we will change this.props.message to this.state.message:
{this.state.message}As we’d expect, we can now see our message which is controlled by the local state:
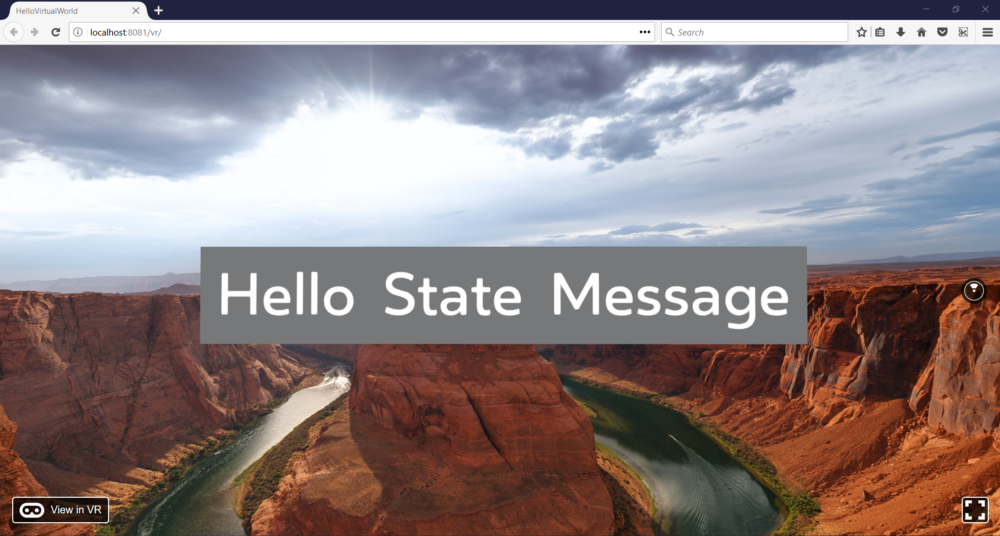
Sweet! Now, let’s try to update the message.
To update the message, we will add a setTimeout in our constructor that will set a new state with an updated message after 5 seconds:
 1     class NestedMessage extends React.Component {
 2       constructor() {
 3         super();
 4         this.state = {message: "Hello State Message"};
 5         setInterval(() => {
 6           this.setState({ message: "Hello Updated Message" });
 7         }, 5000);
 8       }
 9
10       //render function here
11     };
Refresh the localhost and we should see this works as expected:
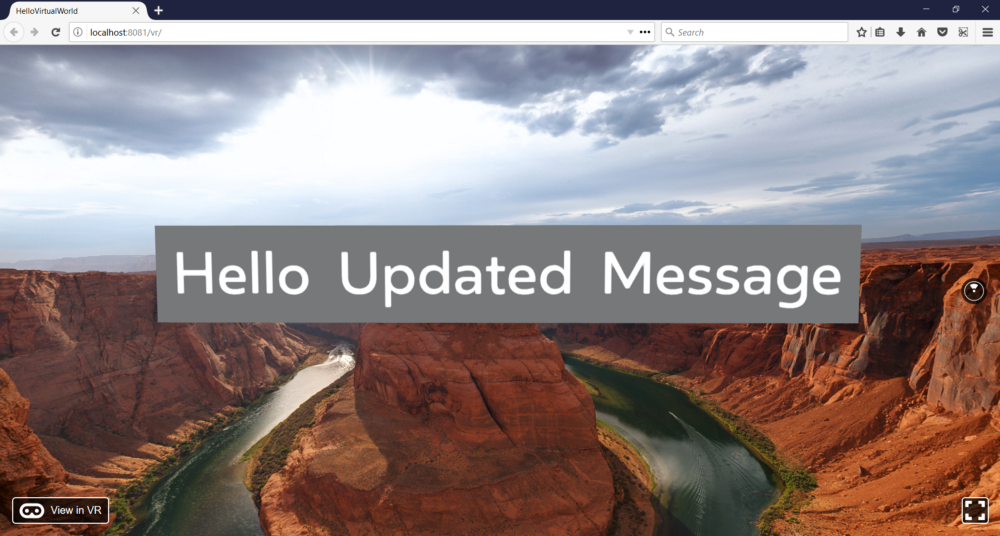
Cool beans! Before we continue, make sure to remove the setTimeout in our constructor.
Event Handling

props and state were just like what we are used to in standard React.
Event handling also works similar but there’s going to be new concepts to cover.
First off, what types of events are available?
To answer this, we can click on a component that we want to apply event handling to from the menu in the official React VR docs.
Let’s check some possible events that we can handle for the Text component we have been playing around with.
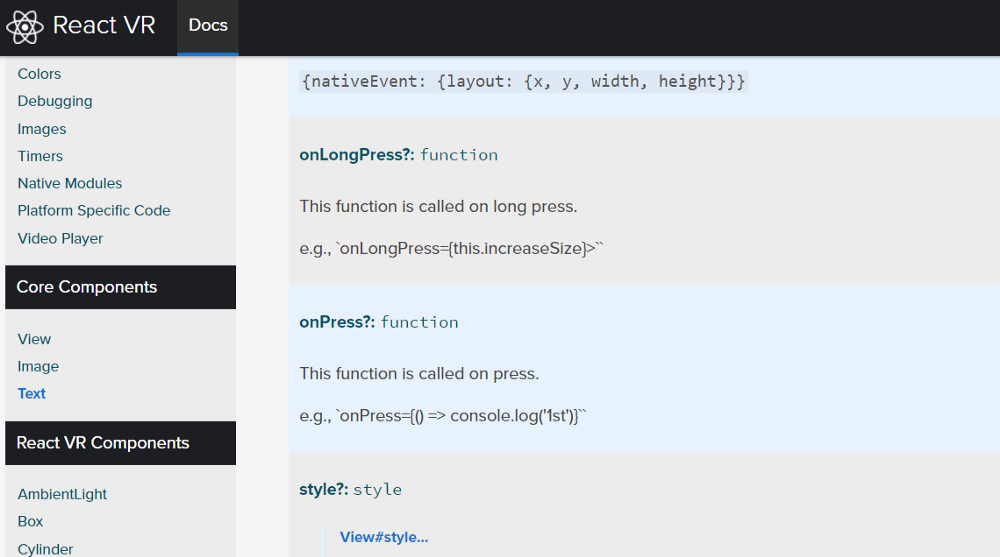
In the documentation above, you’ll see to events that we can handle: onLongPress and onPress.
Press refers to a touch screen event. I don’t have a touch screen computer so we need to find a way around this.
React VR has component called VrButton. Unlike an HTML button, it has no appearance by default and is to be wrapped around another component when we want to capture button-like events.
For example, our Text component only has press events. If we wrapped VrButton around it, we could have the effect of clicking on our text and triggering an event handler even though the event was technically captured in VrButton.
This is hard to visualize without seeing the code so let’s get to it.
Let’s test this out in our NestedMessage component.
First, we import VrButton:
1     import {
2       AppRegistry,
3       asset,
4       Pano,
5       Text,
6       View,
7       VrButton
8     } from 'react-vr';
Then, let’s wrap a VrButton component around our current Text component:
1     <VrButton>
2       <Text style={{...}}>
3       {this.state.message}
4       </Text>
5     </VrButton>
In addition, we now have a Text component and a VrButton component within our NestedComponent render function. Therefore, we need to wrap these around an outermost <View> component like we would wrap an outermost <div> element in standard React:
1     <View>
2       <VrButton>
3         <Text style={{...}}>
4         {this.state.message}
5         </Text>
6       </VrButton>
7     </View>
Next, we will add the method that will handle the onClick event. In this method, we want to update the local state with a new message:
1     //constructor here
2     handleClick () {
3       this.setState({ message: "Updated Message" });
4     }
Now, we want to setup the event trigger in the opening tag of our VrButton component:
1     <VrButton
2       onClick={this.handleClick.bind(this)}
3     >
4       <Text>Click me!</Text>
5     </VrButton>
Note that we bind this so we can call our event handling methods using this.handleClick.
Save your changes and refresh the localhost.
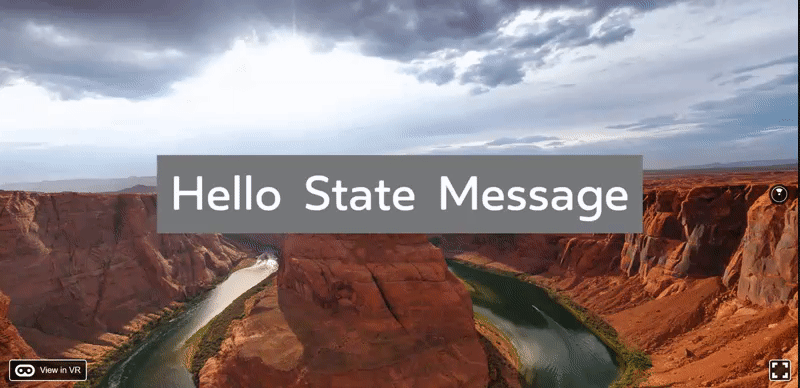
Woohoo! We’ve handled our first event in React VR!
Now, we need to cover 3 more component features before we process. Those features being lifecycle hooks, conditional rendering, and layout.
Lifecycle Hooks
This step is really easy. Let’s just test using a React lifecycle to update our message:
1     //constructor here
2     componentDidMount () {
3       this.setState({ message: "Mounted" });
4     }
We should see this working with no issues:
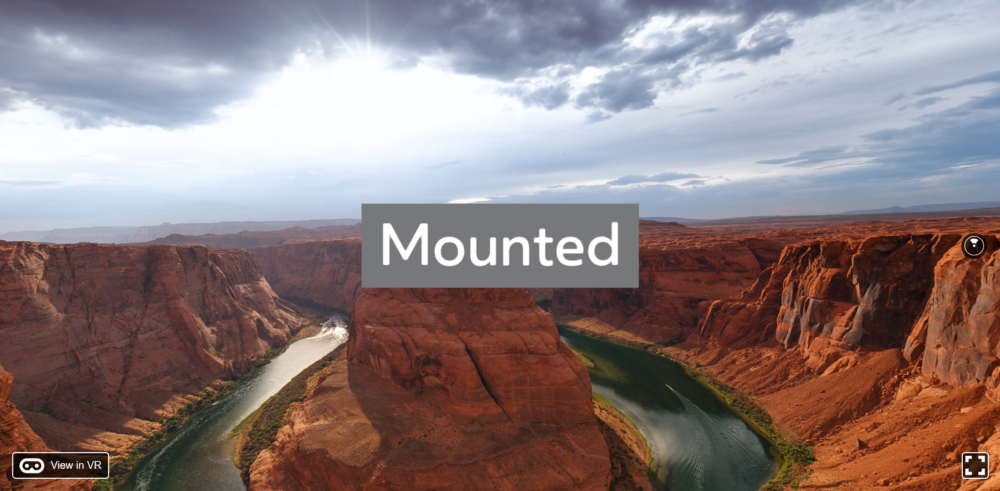
No changes here so let’s move on.
Conditional Rendering
Let’s also test conditional rendering in React VR.
First, let’s add a boolean flag to our state called showMessage and set it to true by default:
1 this.state = {message: "Hello State Message", showMessage: true};
Next, let’s store this in a variable in our render function:
1     render() {
2       const showMessage = this.state.showMessage;
3       //return here
4     }
Then, let’s return our message display if showMessage is true and return an empty Text component (show nothing) if showMessage is false:
 1     return (
 2       <View>
 3         {showMessage ? (
 4           <VrButton onClick={this.handleClick.bind(this)}>
 5             <Text
 6               style={{
 7                 backgroundColor: '#777879',
 8                 fontSize: 0.8,
 9                 fontWeight: '400',
10                 layoutOrigin: [0.5, 0.5],
11                 paddingLeft: 0.2,
12                 paddingRight: 0.2,
13                 textAlign: 'center',
14                 textAlignVertical: 'center',
15                 transform: [{translate: [0, 0, -5]}],
16               }}
17             >
18             {this.state.message}
19             </Text>
20           </VrButton>
21         ) : (
22           <Text></Text>
23         )}
24       </View>
25     );
Finally, let’s update showMessage to false in the lifecycle we just created:
1     componentDidMount () {
2       this.setState({ showMessage: false });
3     }
Now, we should see that the message does not appear after our component mounts:
Flexbox Layout
Creating any user interface requires organization of the layout. With a grid system, like react-grid-system which I describe here, you organize the user interface into rows and columns.
For example, let’s say we want to display the following section:
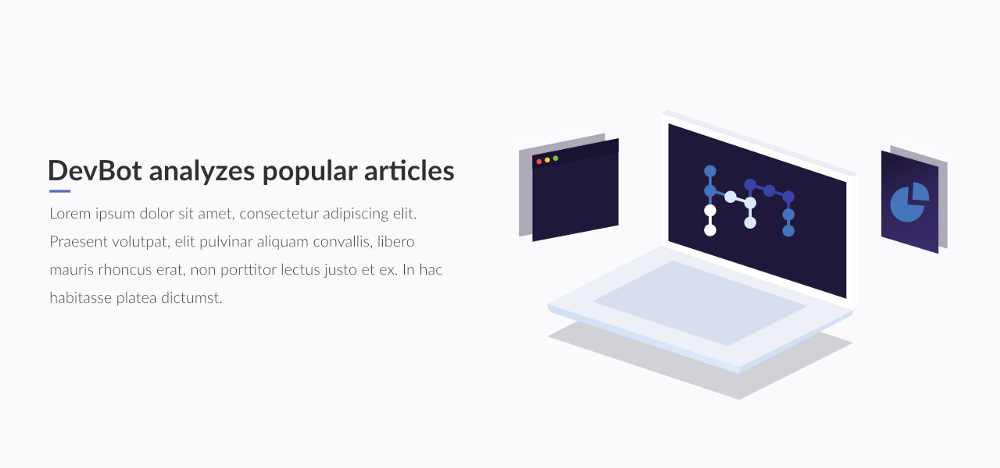
In terms of rows and columns, this section would be 1 row and 2 columns:
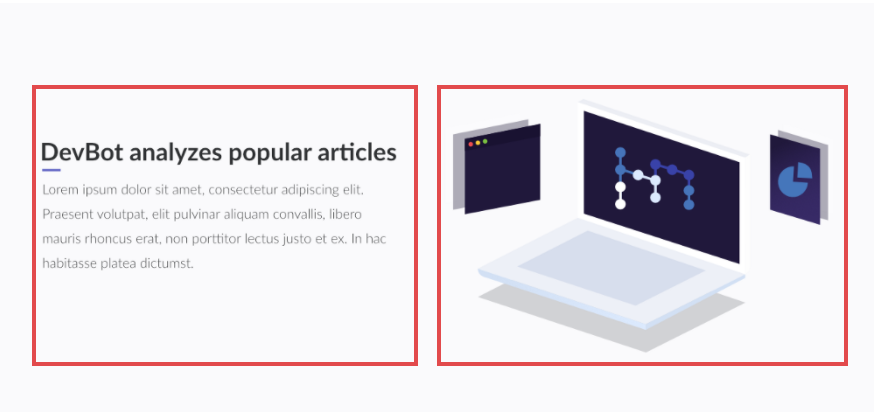
In a complete user interface with React, each section will be a component that defines the layout in terms of rows and columns.
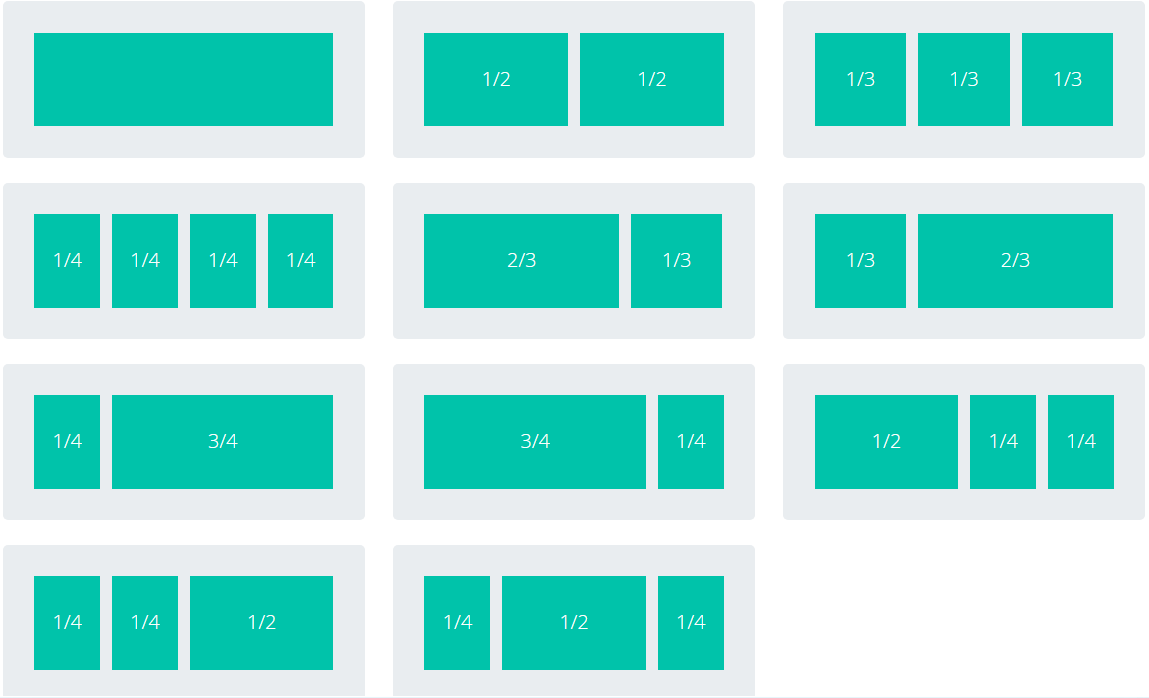
With a grid system, you have to define the width of each column.
For instance, Bootstrap’s grid system allows you to define the width of columns in a way that gives you all of the following options for a row:
Understanding Flexbox Basics
Flexbox layout in React VR works a bit differently as it is meant to make the layout more flexible.
Let’s explain these concepts behind Flexbox using some nice visual aids.
With Flexbox, we start off with a container with a specified width:
Then, we would specify the direction of our container (if we want the container to be a row or column).
Here’s an example of a row direction:
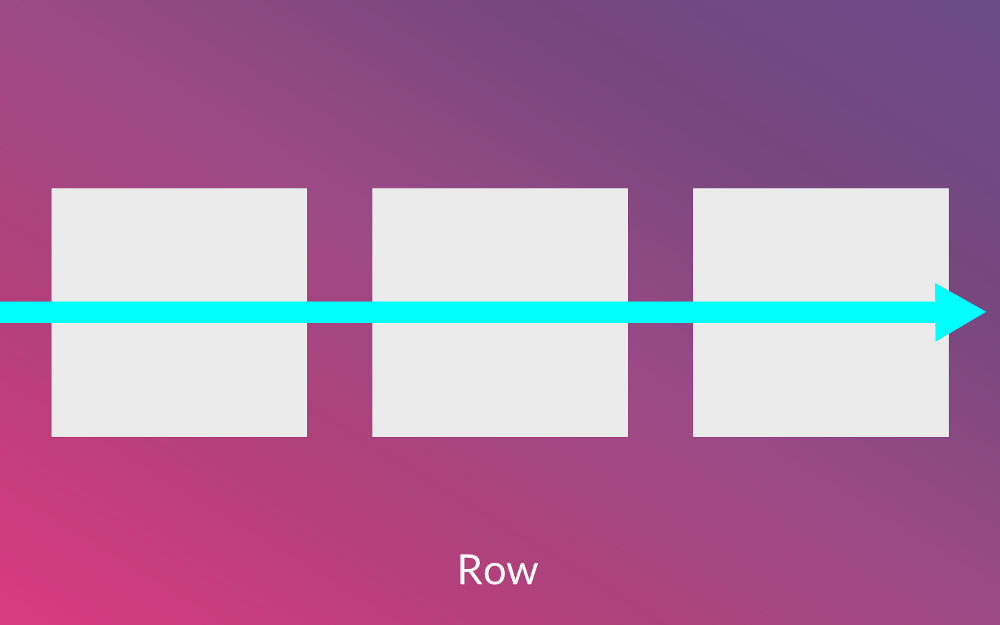
Here’s an example of a column direction:

Let’s say we specified a row, Flexbox invisibly draws a horizontal main axis line like so:
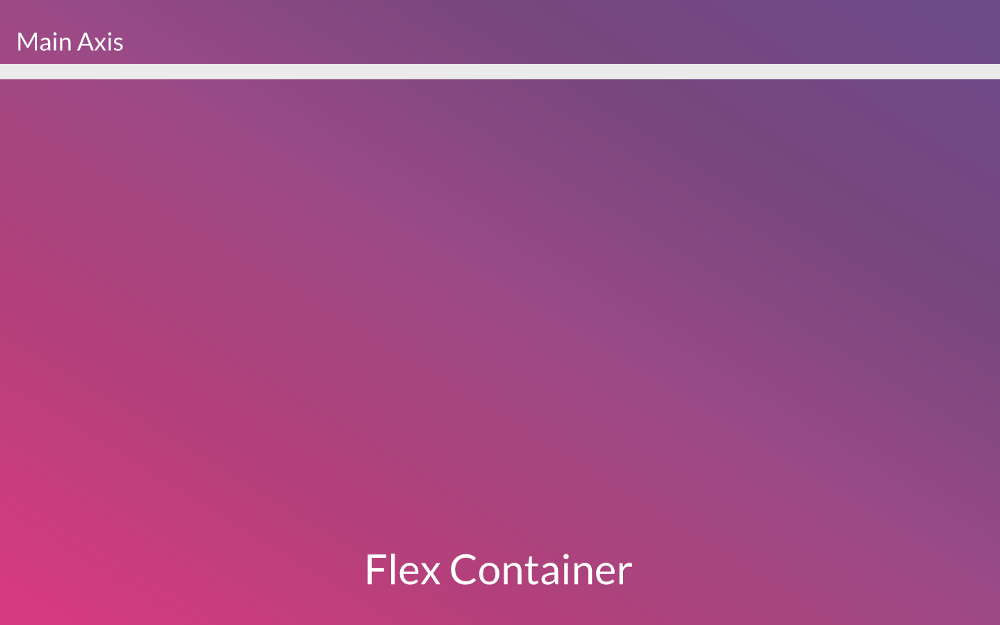
As we add items in our container, the items will be added in the direction of this main axis. In the case of a row, items are added horizontally. In the case of a column, items are added vertically.
Continuing with our row example, let’s add 3 items:
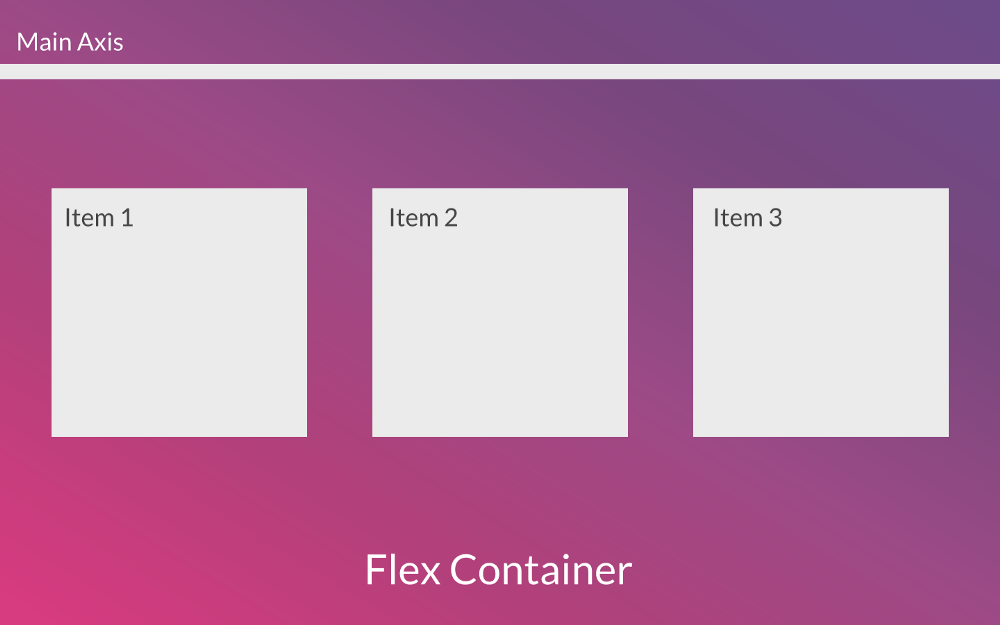
By default, Flexbox will fit all the items in one line of the container. Therefore, if we wanted to add another box to our container shown above, all the boxes would shrink so they all fit:
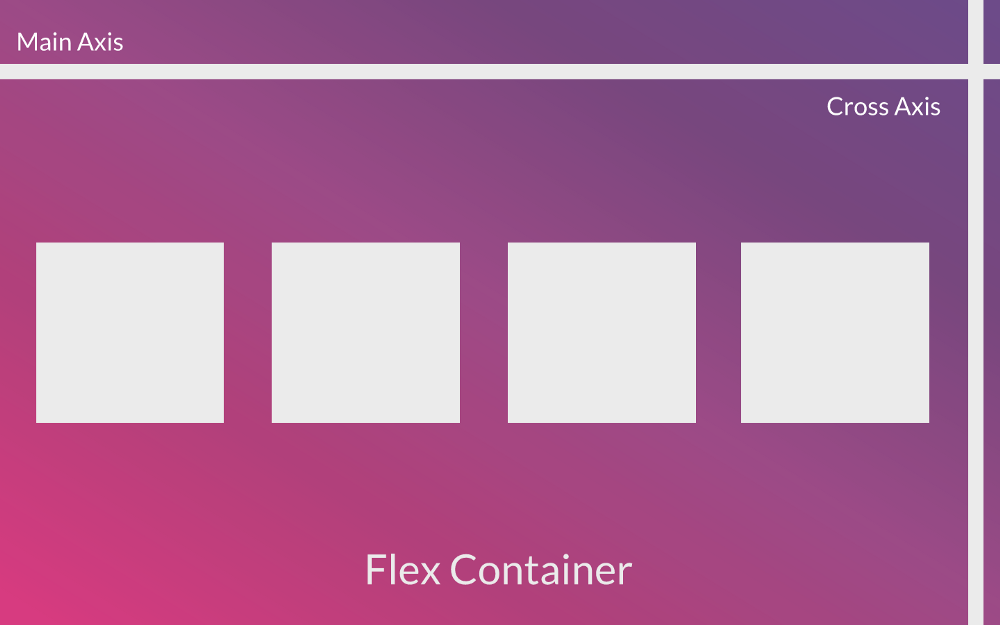
When the main axis is drawn by Flexbox, there is a cross axis that runs perpendicular to the main axis:
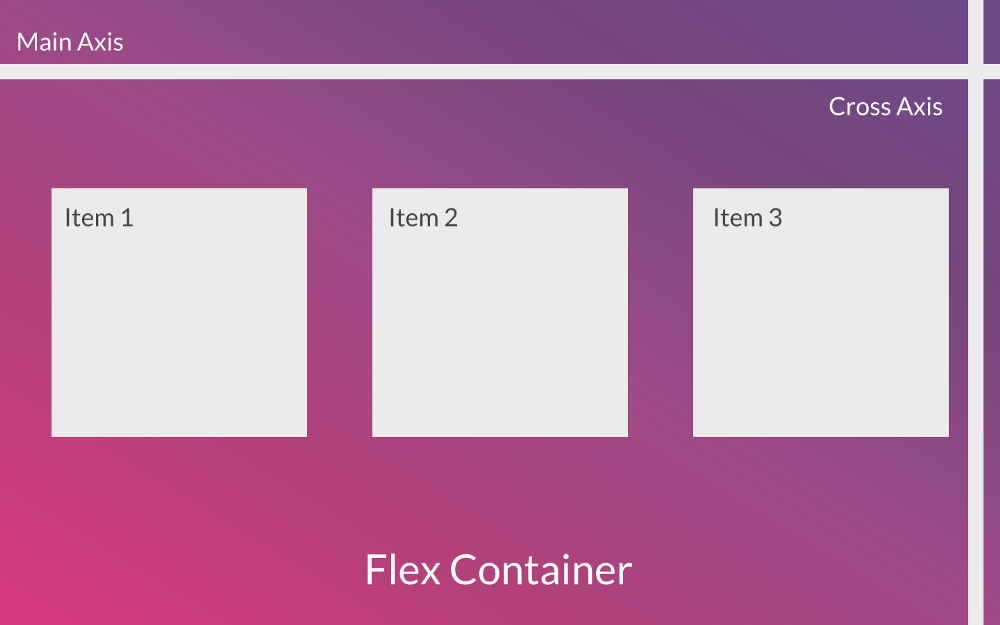
If we specified a column direction, the main axis would be running vertically and the cross axis would be running horizontally.
Putting it all together, here’s the final visualization of our row:
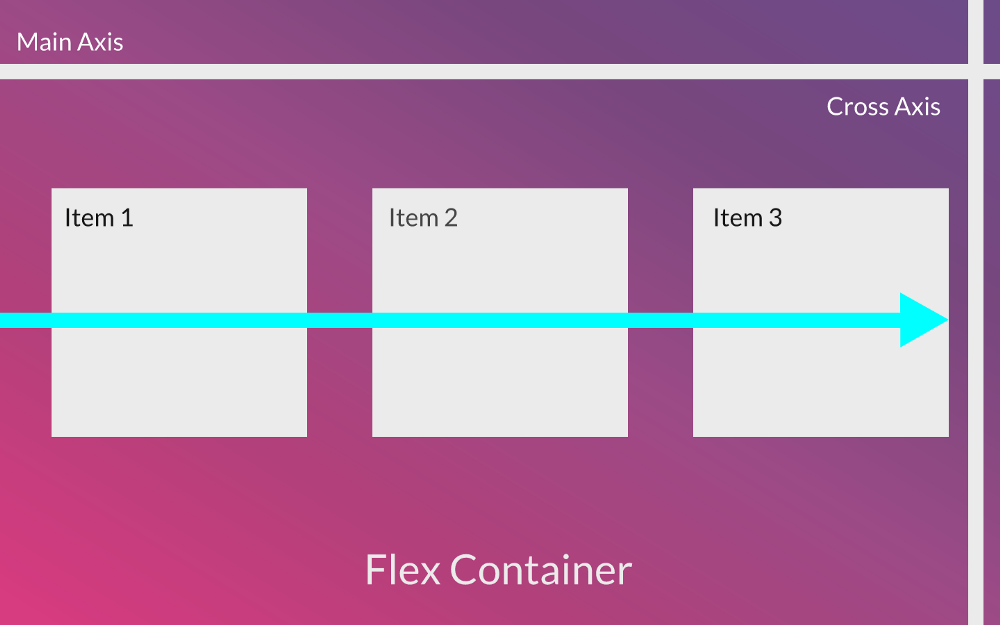
This concludes the basic principles behind Flexbox. However, there’s still a bit more to cover.
Let’s discuss it more as we use Flexbox layout to display 5 Text components in a column in our virtual world.
Creating a New Project
We will create a new project for the VR app we want to create by the end of this chapter called Panoramic Road Trip.
In this new project, we will start off by adding our 5 Text components in a column using Flexbox layout.
Change directories in command line to where you want the new project folder created.
Then, run the following:
react-vr init PanoramicRoadTripOnce that is finished, add the project folder to Atom and open index.vr.js.
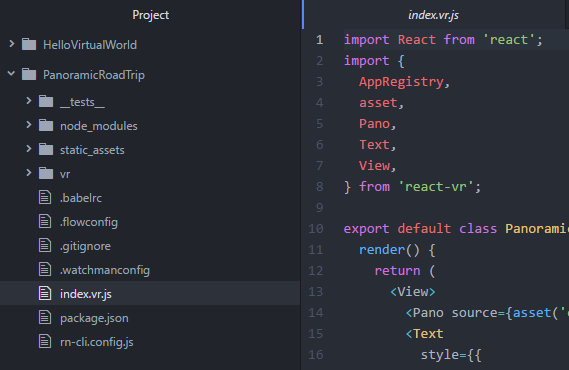
Implementing Flexbox Layout
Let’s start by removing the default Text component so we just have:
1     <View>
2       <Pano source={asset('chess-world.jpg')}/>
3     </View>
Then, copy horseshoe-bend.jpg *from the *static_assets folder in HelloVirtualWorld *to the *static_assets folder in our new project.
After that, update the Pano component’s source:
<Pano source={asset('horseshoe-bend.jpg')}/>Now, we are ready to start working with Flexbox.
Underneath our Pano component, we need to add an outermost View component that will be the Flex container for all of our Text components:
1     <View>
2       <Pano source={asset('horseshoe-bend.jpg')}/>
3       <View>
4       </View>
5     </View>
Next, let’s specify the width of our View component:
1     <View
2       style={{
3         width: 2
4       }}
5     >
6     </View>
The units in React VR styling is in meters. We are specifying our Flex container to have a width of 2 meters.
We want to make this container a column, so we can add a flexDirection value:
1     <View
2       style={{
3         width: 2,
4         flexDirection: 'column'
5       }}
6     >
7     </View>
At this point, our View container looks like this under the hood:
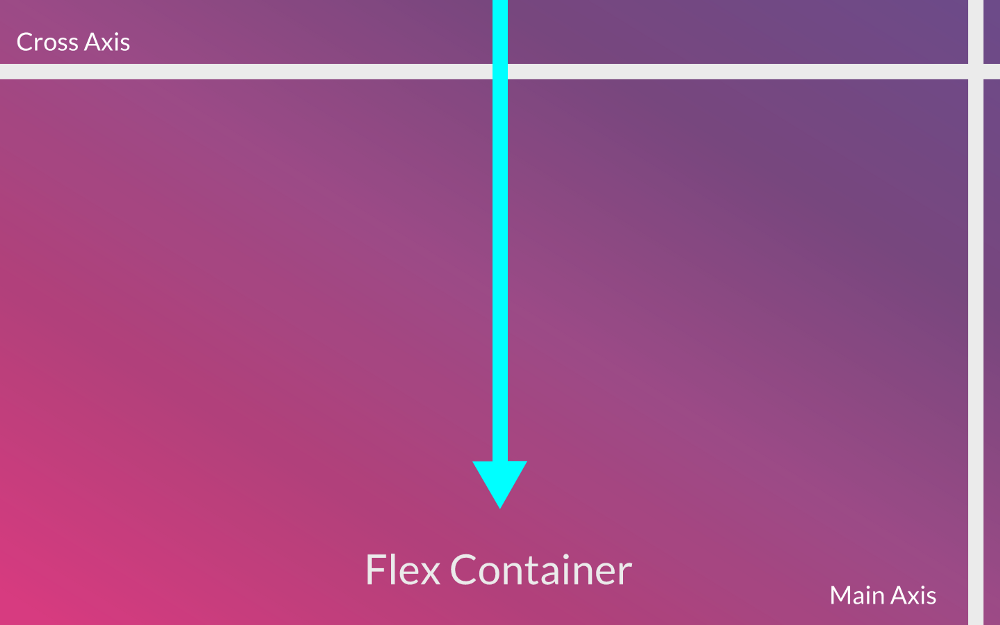
Next, we want to specify how we want to align and justify our items within this column container. This is where we will have to expand beyond the basics of Flexbox that we covered earlier.
The property to align our items is itemAlign.
itemAlign refers to how items will be laid out across the cross axis.
There are 4 possible values to align our items with Flexbox in React VR: stretch, flex-start, center or flex-end .
stretch means that the items will stretch to fill the container along the cross axis.
For example, items within a column container would stretch like this:
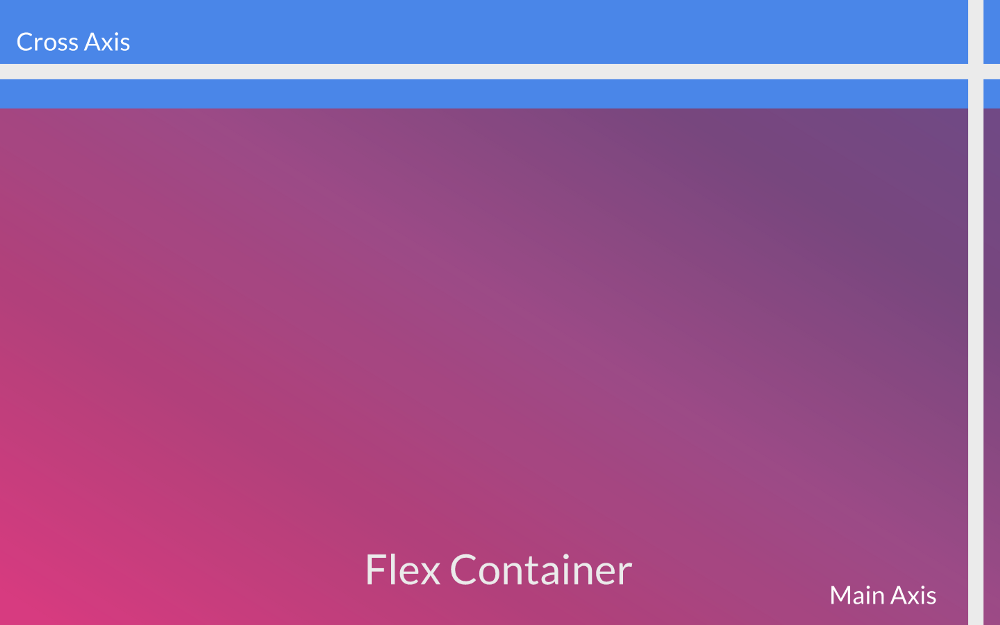
Note the height of this item would be specified manually. Also, stretch is the default value in Flexbox.
flex-start means that items would be laid out at the start of the cross axis. This will be the very left point for a column and the very top point for a row.
Let’s say we had specified a manual width for an item that was 50% of a column container. The item could be laid out like this:
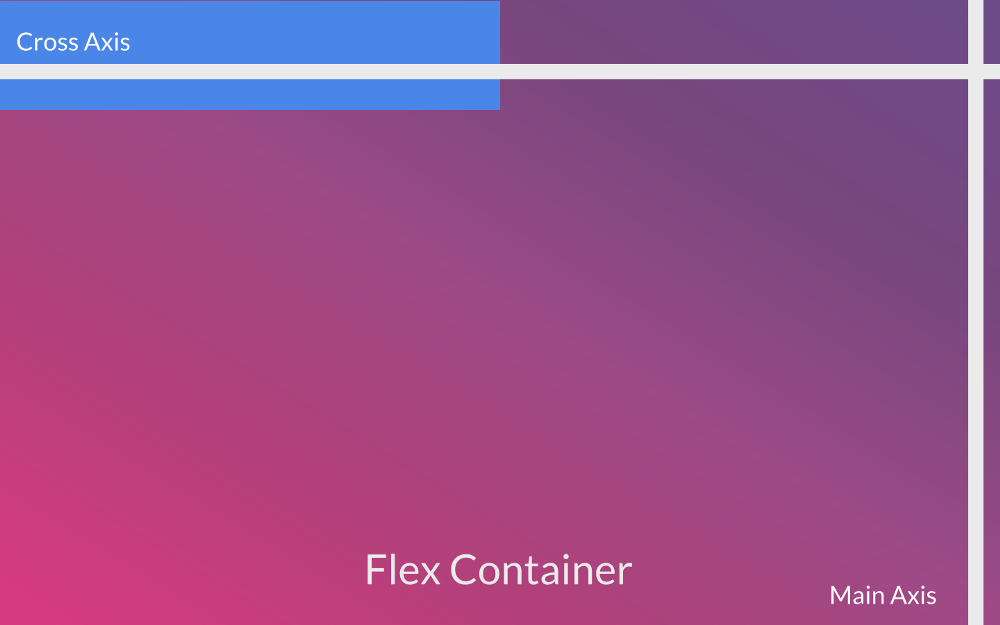
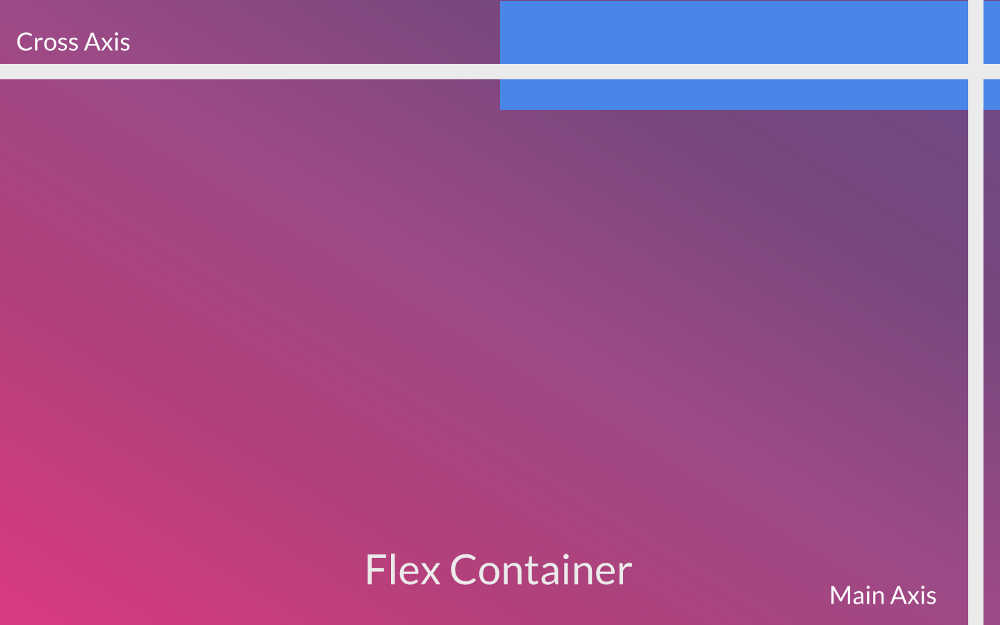
flex-end would lay out the items at the end of the cross axis:
center will have items centered on the cross axis:
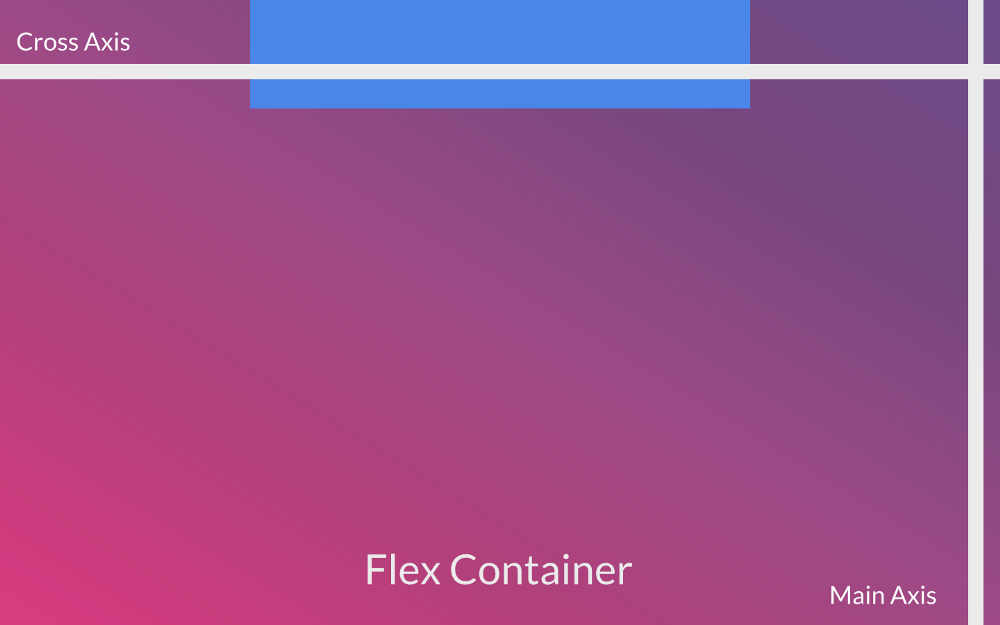
How an item is laid out across the main axis is specified by the property called justify-content.
In React VR, this can have 3 possible values: flex-start, space-around or space-between .
flex-start means that the items will be laid out starting at the top of the main axis.
In a column container, if the item was aligned on the center of the cross axis and justified using flex-start, we would see the following:

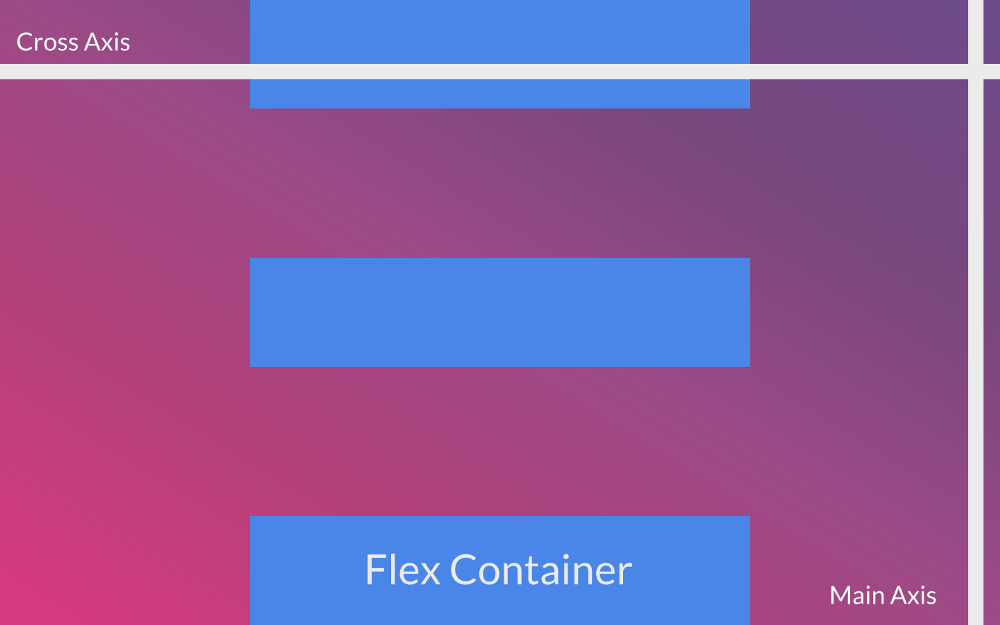
space-between means that the items would be justified evenly across the main axis with the first item on the start and the last item on the end:
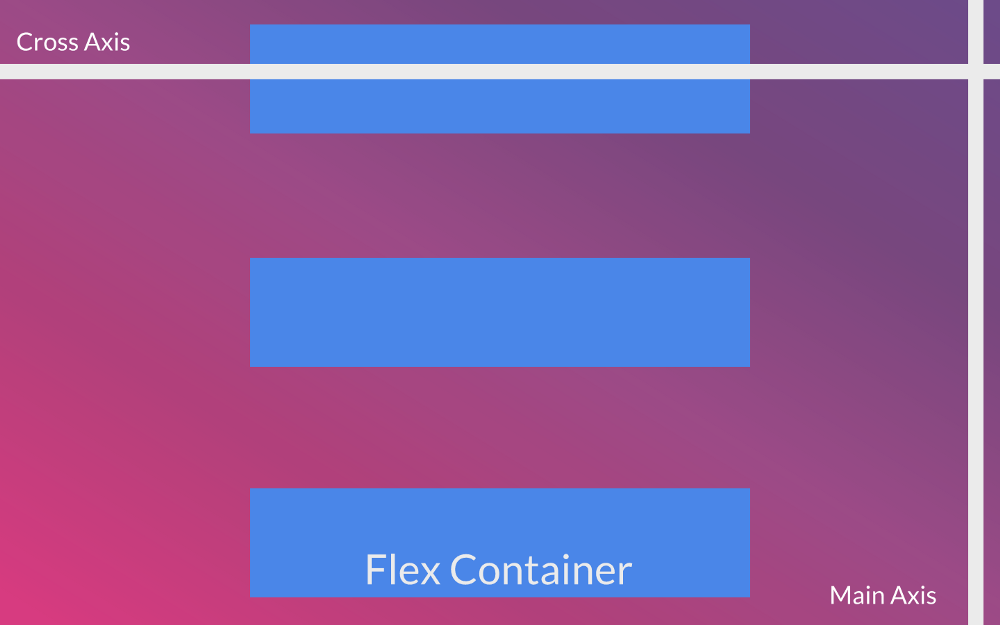
space-around means that the items would be justified evenly across the main axis and equal space around the start and end:
With the discussion of aligning and justifying items out of the way, let’s return to our code which looks like this at the moment:

First, let’s specify that we want our View component to have a stretch alignment:
1     <View
2       style={{
3         width: 2,
4         flexDirection: 'column',
5         alignItems: 'stretch'
6       }}
7     >
8     </View>
Next, let’s justify our content using flex-start:
1     <View
2       style={{
3         width: 2,
4         flexDirection: 'column',
5         alignItems: 'stretch',
6         justifyContent: 'flex-start'
7       }}
8     >
9     </View>
Then, add a transform with a negative Z value that will have our column appear 5 meters away:
 1     <View
 2       style={{
 3         width: 2,
 4         flexDirection: 'column',
 5         alignItems: 'stretch',
 6         justifyContent: 'flex-start',
 7         transform: [{translate: [0, 0, -5]}]
 8       }}
 9     >
10     </View>
Finally, we can finish off the styling for our View component by putting a layout origin that will position this container in the vertical and horizontal center of our virtual world:
 1     <View
 2       style={{
 3         width: 2,
 4         flexDirection: 'column',
 5         alignItems: 'stretch',
 6         justifyContent: 'flex-start',
 7         transform: [{translate: [0, 0, -5]}],
 8         layoutOrigin: [0.5,0.5]
 9       }}
10     >
11     </View>
With that out of the way, let’s add 5 Text components. We will need to wrap these Text components around View components. We can think of it as defining a text box and then injecting the actual text.
We are going to have Text components for 5 states:
Arizona
New Hampshire
California
Hawaii
Texas
Here’s the code:
 1    <View
 2       style={{
 3         flex: 1,
 4         width: 2,
 5         flexDirection: 'column',
 6         alignItems: 'stretch',
 7         layoutOrigin: [0.5, 0.5],
 8         transform: [{translate: [0, 0, -5]}]
 9       }}
10     >
11       <View style={{ margin: 0.1, height: 0.3, backgroundColor: '#CF3C7E'}}>
12         <Text style={{fontSize: 0.2, textAlign: 'center'}}>Arizona</Text>
13       </View>
14       <View style={{ margin: 0.1, height: 0.3, backgroundColor: '#CF3C7E'}}>
15         <Text style={{fontSize: 0.2, textAlign: 'center'}}>New Hampshire</Text>
16       </View>
17       <View style={{ margin: 0.1, height: 0.3, backgroundColor: '#CF3C7E'}}>
18         <Text style={{fontSize: 0.2, textAlign: 'center'}}>California</Text>
19       </View>
20       <View style={{ margin: 0.1, height: 0.3, backgroundColor: '#CF3C7E'}}>
21         <Text style={{fontSize: 0.2, textAlign: 'center'}}>Hawaii</Text>
22       </View>
23       <View style={{ margin: 0.1, height: 0.3, backgroundColor: '#CF3C7E'}}>
24         <Text style={{fontSize: 0.2, textAlign: 'center'}}>Texas</Text>
25       </View>
26     </View>
In the code above, we include some simple styling for our text boxes (View components with a nested Text component) and our text (Text components).
If we go to our local host and refresh, we can see this is now rendering as:
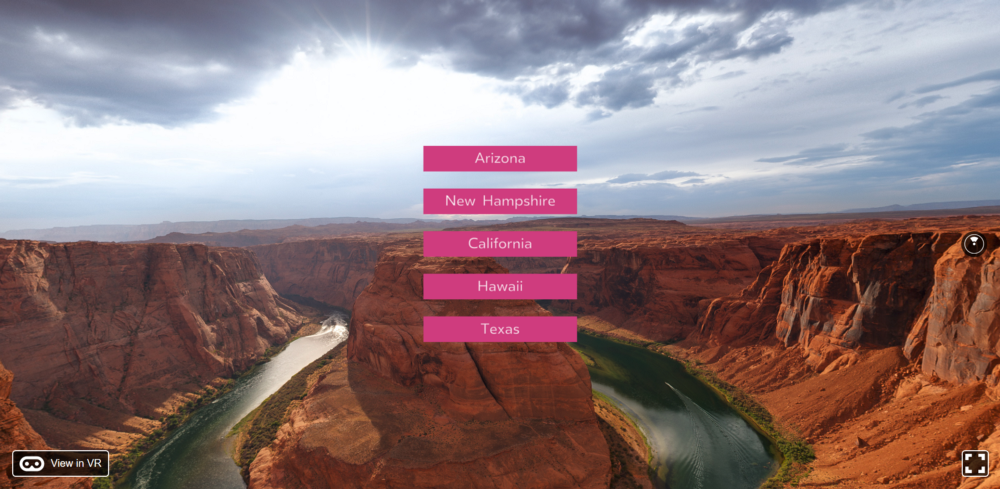
Awesome!
So, how is this working according to Flexbox again?
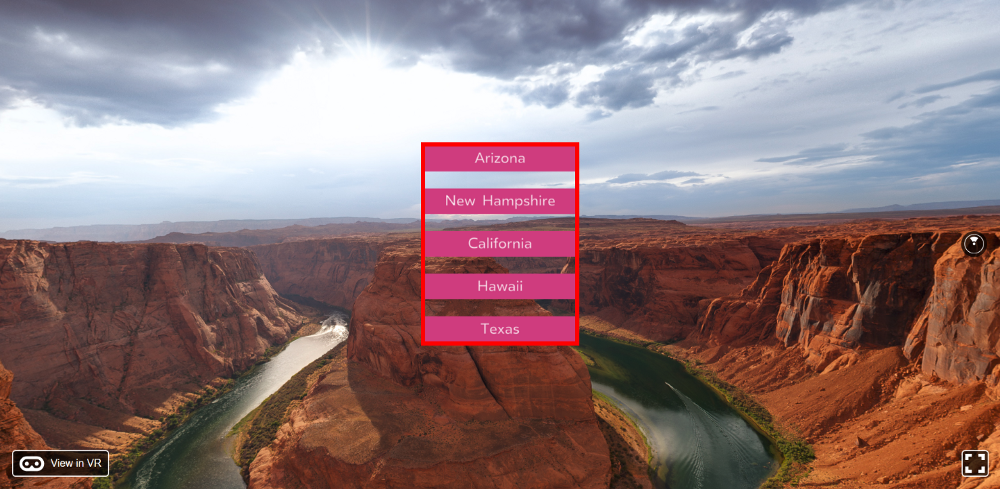
Well, we defined a column so the main axis direction is flowing down:

The cross axis runs horizontally.
The item alignment was specified as stretch so our items expand to the full width of the container which was 2 meters (the cross axis).
Our content was justified using flex-end so our items were laid out starting at the top of the main axis.
Here’s a visualization of the text boxes in relation to our column:
Pretty cool, huh? The last thing to do is to have these text boxes be there own component.
Let’s add the shell of this new component in our index.vr.js:
1     class TextBoxes extends React.Component {
2       render() {
3         return (
4           <View>
5
6           </View>
7         )
8       }
9     }
Then, we can copy the text boxes with their nested text within the outermost View component shown above:
 1     class TextBoxes extends React.Component {
 2       render() {
 3         return (
 4           <View>
 5             <View style={{ margin: 0.1, height: 0.3, backgroundColor: '#CF3C7E'}\
 6 }>
 7               <Text style={{fontSize: 0.2, textAlign: 'center'}}>Arizona</Text>
 8             </View>
 9             <View style={{ margin: 0.1, height: 0.3, backgroundColor: '#CF3C7E'}\
10 }>
11               <Text style={{fontSize: 0.2, textAlign: 'center'}}>New Hampshire</\
12 Text>
13             </View>
14             <View style={{ margin: 0.1, height: 0.3, backgroundColor: '#CF3C7E'}\
15 }>
16               <Text style={{fontSize: 0.2, textAlign: 'center'}}>California</Tex\
17 t>
18             </View>
19             <View style={{ margin: 0.1, height: 0.3, backgroundColor: '#CF3C7E'}\
20 }>
21               <Text style={{fontSize: 0.2, textAlign: 'center'}}>Hawaii</Text>
22             </View>
23             <View style={{ margin: 0.1, height: 0.3, backgroundColor: '#CF3C7E'}\
24 }>
25               <Text style={{fontSize: 0.2, textAlign: 'center'}}>Texas</Text>
26             </View>
27           </View>
28         )
29       }
30     }
Finally, let’s nest this new TextBoxes component into our PanoramicRoadTrip component:
 1     export default class PanoramicRoadTrip extends React.Component {
 2       render() {
 3         return (
 4           <View>
 5             <Pano source={asset('Arizona.jpg')}/>
 6             <View
 7               style={{
 8                 flex: 1,
 9                 width: 2,
10                 flexDirection: 'column',
11                 alignItems: 'stretch',
12                 layoutOrigin: [0.5, 0.5],
13                 transform: [{translate: [0, 0, -5]}]
14               }}
15             >
16               <TextBoxes/>
17             </View>
18           </View>
19         );
20       }
21     };
With this aside, let’s finish out our Panoramic Road Trip app.
Finishing Our Panoramic Road Trip
So far, we have a single static panoramic photo that renders along with our newly added text boxes.

We want to be able to render different panoramic photos depending on the current state. When the component mounts, a random state will be selected. Depending on the selected state, we will have to render the proper panoramic photo. We will also include a title Text component above these text boxes that updates to the name of the current state in reaction to our clicks.
Let’s get to it.
Passing Down Props
First off, let’s have the text for our states be controlled by props since they are read-only data.
To do this, we can start by creating an object in the render function of the PanoramicRoadTrip component:
 1     export default class PanoramicRoadTrip extends React.Component {
 2       render() {
 3         const states = {
 4           Arizona: "Arizona",
 5           NewHampshire: "New Hampshire",
 6           California: "California",
 7           Hawaii: "Hawaii",
 8           Texas: "Texas"
 9        }
10       //return here
11     }
Then, we can pass down this object to the TextBoxes component so all the states will be available as props:
<TextBoxes states={states}/>Now, we can use these props to inject the text for our states:
 1     class TextBoxes extends React.Component {
 2       render() {
 3         return (
 4           <View>
 5             <View style={{ margin: 0.1, height: 0.3, backgroundColor: '#CF3C7E'}\
 6 }>
 7               <Text style={{fontSize: 0.2, textAlign: 'center'}}>{this.props.sta\
 8 tes.Arizona}</Text>
 9             </View>
10             <View style={{ margin: 0.1, height: 0.3, backgroundColor: '#CF3C7E'}\
11 }>
12               <Text style={{fontSize: 0.2, textAlign: 'center'}}>{this.props.sta\
13 tes.NewHampshire}</Text>
14             </View>
15             <View style={{ margin: 0.1, height: 0.3, backgroundColor: '#CF3C7E'}\
16 }>
17               <Text style={{fontSize: 0.2, textAlign: 'center'}}>{this.props.sta\
18 tes.California}</Text>
19             </View>
20             <View style={{ margin: 0.1, height: 0.3, backgroundColor: '#CF3C7E'}\
21 }>
22               <Text style={{fontSize: 0.2, textAlign: 'center'}}>{this.props.sta\
23 tes.Hawaii}</Text>
24             </View>
25             <View style={{ margin: 0.1, height: 0.3, backgroundColor: '#CF3C7E'}\
26 }>
27               <Text style={{fontSize: 0.2, textAlign: 'center'}}>{this.props.sta\
28 tes.Texas}</Text>
29             </View>
30           </View>
31         )
32       }
33     }
Adding a Title
Now, let’s create a new component called Title which we will nest into the same column container as these text boxes.
First, we can add the shell for the new component:
1     class Title extends React.Component {
2       render() {
3         return (
4           <View>
5
6           </View>
7         )
8       }
9     }
Then, let’s add a Text component that will display the title:
 1     <View>
 2       <Text
 3         style={{
 4           fontSize: 0.2,
 5           textAlign: 'center',
 6           color: "#CF3C7E"
 7         }}
 8       >
 9
10       </Text>
11     </View>
Since we want to have the value of our title update, we need to create a local state that defines the value of the title:
1     class Title extends React.Component {
2       constructor() {
3         super();
4         this.state = {title: "Panoramic Road Trip"};
5       }
6       //render function
7     }
Finally, let’s inject title as defined in out state in the Text component:
1     <Text style={{fontSize: 0.2, textAlign: 'center', color: "#CF3C7E"}}>
2     {this.state.title}
3     </Text>
Now that our Title component is defined, let’s nest it right above our TextBoxes *component in our *PanoramicRoadTrip component:
1     <Title/>
2     <TextBoxes states={states}/>
If we check our local host and refresh, we should now see the following:
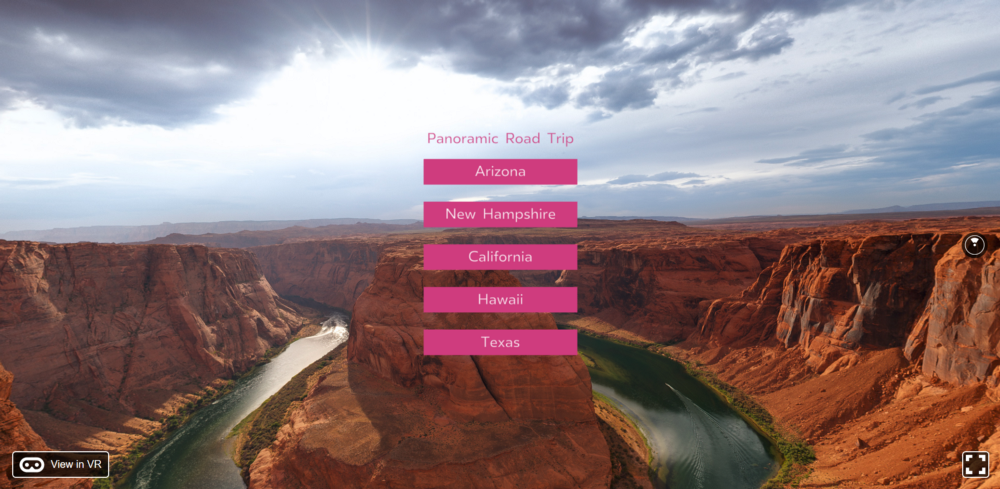
Random Selection of a Panoramic
In this step, we want to add a lifecycle hook for when our component mounts. In this lifecycle hook, we will choose a random number between 1 and 5. Depending on the result, a state (i.e. California) will be selected and the appropriate panoramic photo will be rendered.
This means we have to add a local state that controls defines the selected state and the source for panoramic photo we want to render.
First things first, go ahead and download all the photos and add them to the static_assets folder of our Panoramic Road Trip project.
You will notice that the photo files are named after the states.
Next, let’s add the following constructor to our PanoramicRoadTrip component:
1     constructor() {
2       super();
3       this.state = {selectedState: ""};
4     }
selectedState will be Arizona, New Hampshire, California, Hawaii, or Texas.
This will be updated in a lifecycle hook where we pick a random state to be selected.
Let’s add that lifecycle hook now:
 1     //in PanoramicRoadTrip component
 2
 3     componentDidMount() {
 4         const random = Math.floor((Math.random() * 5) + 1);
 5         let randState;
 6         switch(random) {
 7           case 1:
 8             randState = "Arizona";
 9             break;
10           case 2:
11             randState = "New Hampshire";
12             break;
13           case 3:
14             randState = "California";
15             break;
16           case 4:
17             randState = "Hawaii";
18             break;
19           case 5:
20             randState = "Texas";
21             break;
22         }
23         this.setState({ selectedState: randState});
24     }
In this code, we are saying: “Hey! When our app mounts, let’s get a random number between 1 and 5. Depending on that random number, let’s update our selectedState.”
Next, we can use that selected state as to choose our panoramic photo since they possess the same naming. We will just have to append the “.jpg” like so:
<Pano source={asset(this.state.selectedState + '.jpg')}/>Save your code and try refreshing the local host. We should get a random panoramic each time:
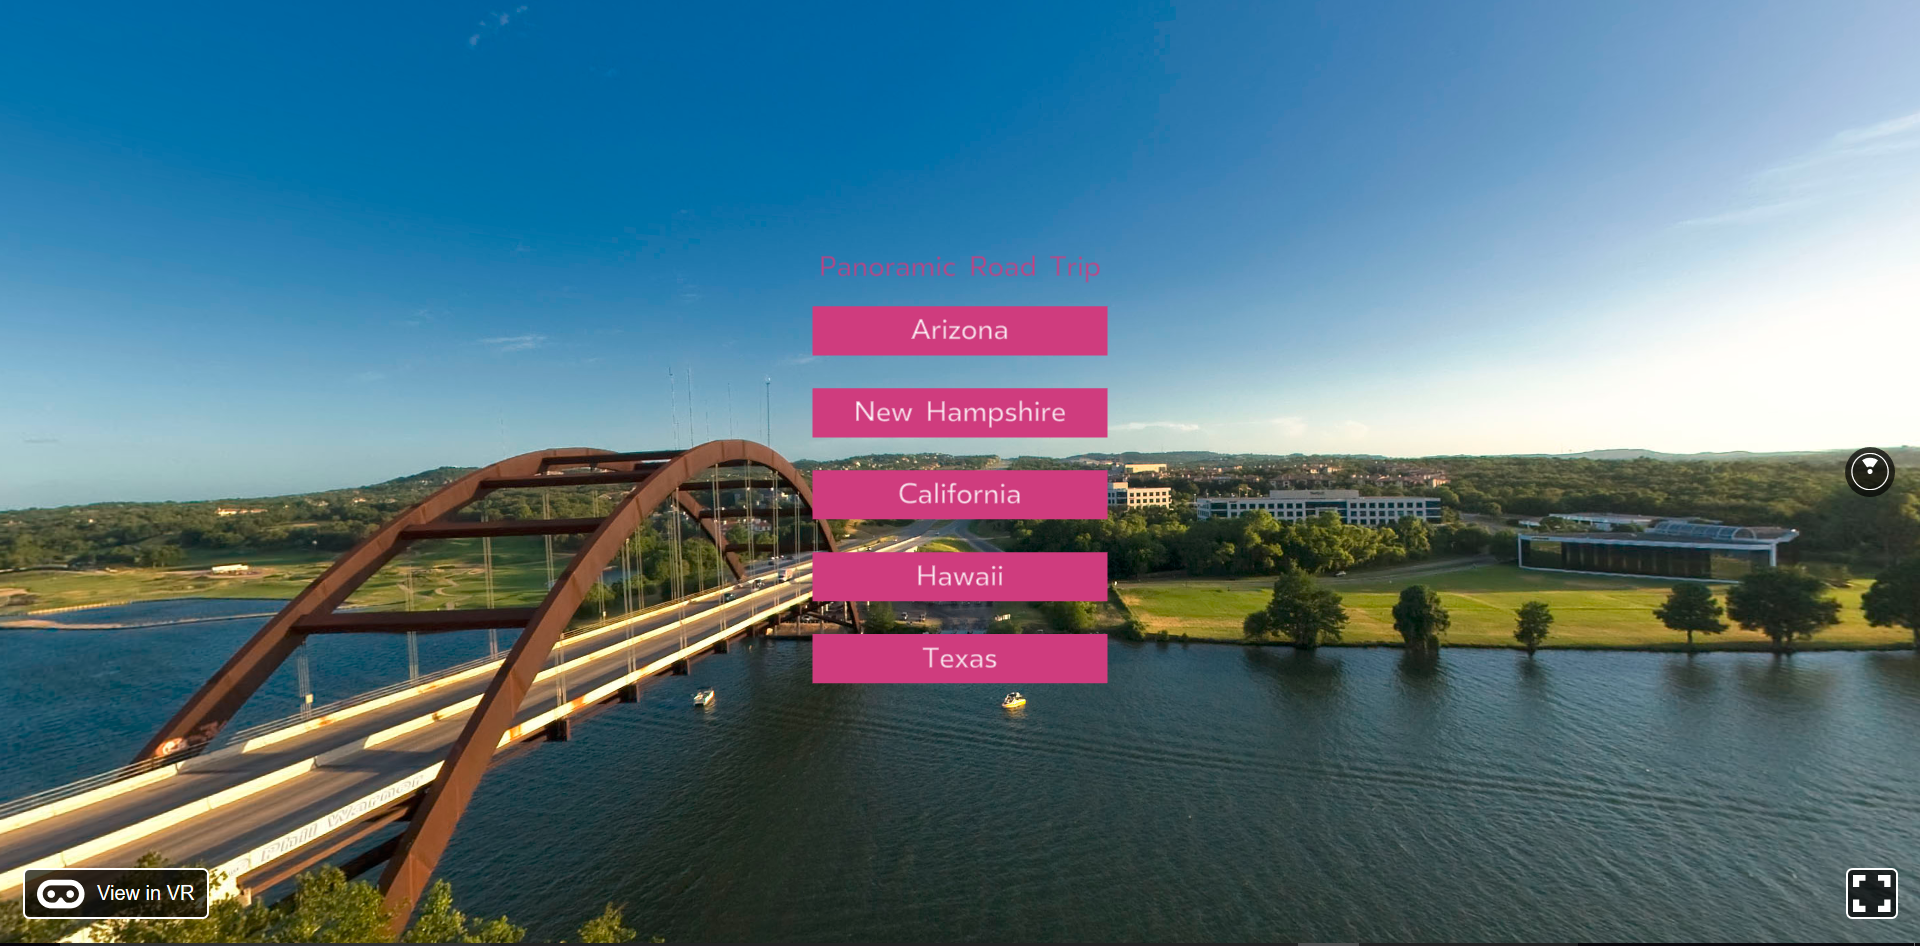
Adding Our Event Handler
The next step is going to be to add our event handler which will ultimately update the panoramic photo.
We need to have a function that is called on the click of our text boxes in our TextBoxes component which then updates the selectedState property in our PanoramicRoadTrip component.
Recall, we earlier wrapped a VrButton component around a Text component in order to have an onClick event captured. In our case, we need an onClick event captured on the click of a View component (our text boxes). We will need to use VrButton once again.
First, let’s add the VrButton to our import:
1     import {
2       AppRegistry,
3       asset,
4       Pano,
5       Text,
6       View,
7       VrButton
8     } from 'react-vr';
Then, in our TextBoxes component, let’s wrap a VrButton components around the text boxes.
This code snippet is a bit long so you can view it here as it has better formatting.
Here’s an example of one:
1     <VrButton>
2       <View style={{ margin: 0.1, height: 0.3, backgroundColor: '#CF3C7E'}}>
3         <Text style={{fontSize: 0.2, textAlign: 'center'}}>{this.props.states.Ar\
4 izona}
5         </Text>
6       </View>
7     </VrButton>
Next, we have the code to capture and onClick event and call a function.
Let’s think through this logic.
We want to change the panoramic photo on a click of one of the text boxes.
The panoramic photo that is active is controlled by the local state property selectedState in the PanoramicRoadTrip component.
However, the VrButton that we want to capture the onClick event is in a different component called TextBoxes.
So, how can we update selectedState if it’s controlled by a state that’s in a different component than where we are capturing the event?
First, we need to write a function in PanoramicRoadTrip that will update selectedState when called:
 1     export default class PanoramicRoadTrip extends React.Component {
 2       constructor() {
 3         super();
 4         this.state = {selectedState: ""};
 5       }
 6
 7       stateClicked () {
 8         //add code here
 9       }
10
11       //more stuff here
12     }
In this function, we want to update selectedState depending on which button is clicked.
Therefore, we will pass in a parameter when we call this function that will tell us which VrButton was clicked and we can act accordingly:
1     stateClicked (selection) {
2       //add more code here
3     }
The selection parameter that is passed in will be a number between 1 and 5. That number will identify which text box (with the name of a state) was clicked.
Therefore, we can use a switch statement to update the selectedState according to the value of the selection parameter:
 1     stateClicked (selection) {
 2         let newState;
 3         switch(selection) {
 4           case 1:
 5             newState = "Arizona";
 6             break;
 7           case 2:
 8             newState = "New Hampshire";
 9             break;
10           case 3:
11             newState = "California";
12             break;
13           case 4:
14             newState = "Hawaii";
15             break;
16           case 5:
17             newState = "Texas";
18             break;
19         }
20         console.log(newState); //log the result
21         this.setState({ selectedState: newState});
22     }
Cool! Now, in order to be able to call this function on the click of our VrButtons in the TextBoxes component, we pass it down to the TextBoxes component as a prop:
1     //in PanoramicRoadTrip component
2
3     <TextBoxes
4       stateClicked={this.stateClicked.bind(this)}
5       states={states}
6     />
Now, our VrButtons can call this function by doing:
1     //in TextBoxes component
2
3     <VrButton onClick={this.props.stateClicked}>
We need to make a slight change to this. We want to pass in a parameter as stateClicked will update the selectedState depending on what’s passed in.
To pass a parameter, we can do this for all of our VrButtons:
1     <VrButton onClick={() => this.props.stateClicked(1)}>
2     //...
3     <VrButton onClick={() => this.props.stateClicked(2)}>
4     //...
5     <VrButton onClick={() => this.props.stateClicked(3)}>
6     //...
7     <VrButton onClick={() => this.props.stateClicked(4)}>
8     //...
9     <VrButton onClick={() => this.props.stateClicked(5)}>
To recap:
We have written a function called stateClicked that updates the selectedState property of the local state in the PanoramicRoadTrip component based on an incoming parameter.
selectedState controls what panoramic is being displayed in our app.
The stateClicked function has to be in the PanoramicRoadTrip component in order to update the selectedState since it is a property in the local state of PanoramicRoadTrip.
We want to call the stateClicked function from our TextBoxes component that contains VrButtons that can capture when the text boxes (containing the names of different states) are clicked.
To make this possible, we pass down the stateClicked function as a prop.
The text boxes in the TextBoxes component call the stateClicked *function and passes a number so that the *selectedState can be updated accordingly.
Now, the click of our text boxes should change the selectedState property of the local state of PanoramicRoadTrip which will ultimately change the panoramic photo that is displayed.
Let’s go to our local host, refresh, and test this out.
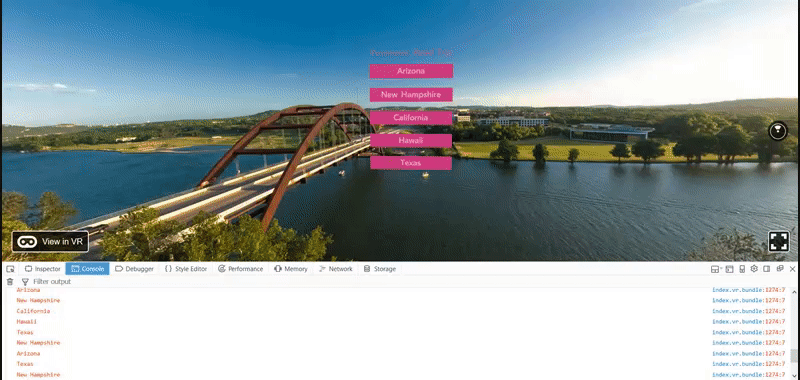
Recall, the initial panoramic photo is randomly selected by our componentDidMount lifecycle hook.
As we click the text boxes, we can see that the code is working as our selections are being logged in the console and our panoramic photos are being updated.
Occasionally, I got the following errors:
> Error: WebGL warning: drawArrays: This operation requires zeroing texture data. This is slow.> Error: WebGL warning: drawArrays: Active texture 0 for target 0x0de1 is ‘incomplete’, and will be rendered as RGBA(0,0,0,1), as per the GLES 2.0.24 $3.8.2: The dimensions of
level_base are not all positive.Essentially, it sometimes WebGL fails to process the updated panoramic. In most cases, however, it works just fine. We won’t go into detail on resolving this at the moment.
Final Code
Code for this chapter is available on GitHub.
Concluding Thoughts
In this chapter, there may have been some parts that seemed trivial to go over since they work exactly like standard React. However, that is the beauty of working with React VR. We are able to make VR applications without reinventing the wheel.
The main differences for the use of components in React VR (as opposed to standard React) are that we have to implement the layout using Flexbox and make use of React VR predefined components (like VrButton) in order to handle events.
All in all, I hope this was an exciting way to explore more of React VR. In the chapters that follow, we will begin to explore even further and do some projects together that can have a major impact in the real world.
Learn React VR (Chapter 3 | Outdoor Movie Theater)
Scope of This Chapter
In the previous chapter, we were able to create a mini VR app called Panoramic Road Trip that allowed us to test the major features of React and see what was different when working with React VR. Overall, this was effective for learning but a bit simplistic in comparison to what we are capable of achieving with React VR.
In this chapter, we are going to have some fun making another VR app called Outdoor Movie Theater. As we make this app, we are going to learn how to work with sound and video in React VR. Additionally, we are going to look into how to better organize our project.
Creating a New Project
Let’s create a new project called Outdoor Movie Theater.
Change directories in command line to where you want the new project folder created.
Then, run the following:
react-vr init OutdoorMovieTheaterOnce that is finished, add the project folder to Atom and open index.vr.js.
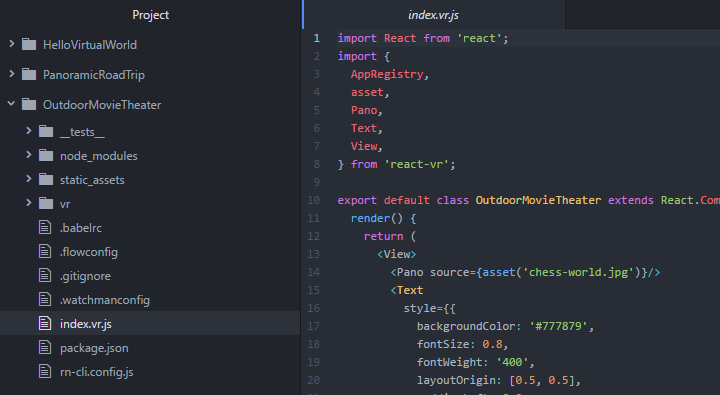
Organizing Our Project
Before we write code, it’s important to address how to better organize our React VR projects as we will be adding more complexity.
In order to organize our project, we are going to look into organizing our project directory and implementing a module system.
Organizing Our Project Directory
So far, we have just been writing all of our React components in the index.vr.js file. While this is fine for a simple app, we ideally want to divide our components into separate folders and files.
How you organize a React VR project’s components is completely personal preference. It also depends on the complexity of the app.
For I smaller-scale project like ours, I organize components into the following folders:
1     + [Project Root]
2       + Components
3         + Scenes
4           + Layouts
5             + Elements
Within these folders, there will be files that each define a single React component.
Let’s go through mockups of our Outdoor Movie Theater app to understand why I prefer to organize my components in this fashion.
In this app, we are going to have various scenes.
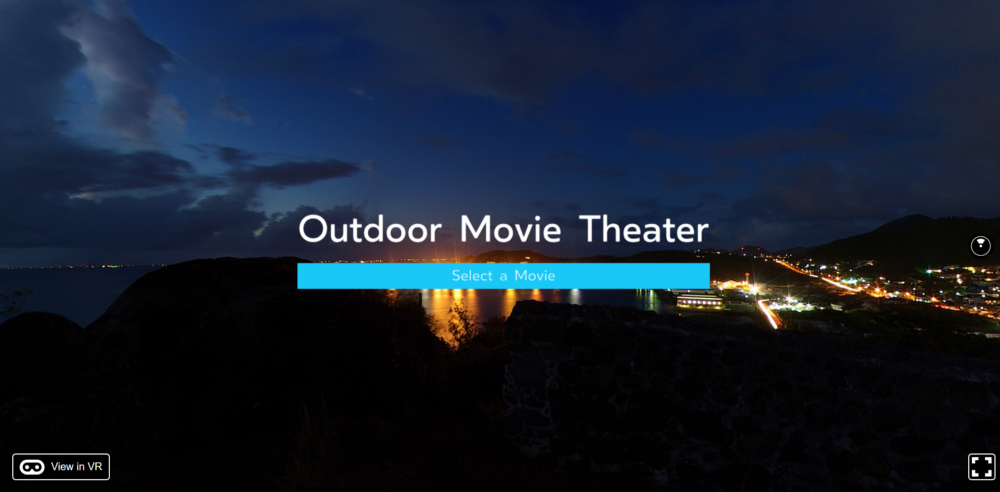
For example, we will have a Main Menu scene:
We will also have a MovieTheater scene for watching the outdoor movie (and some others as well):
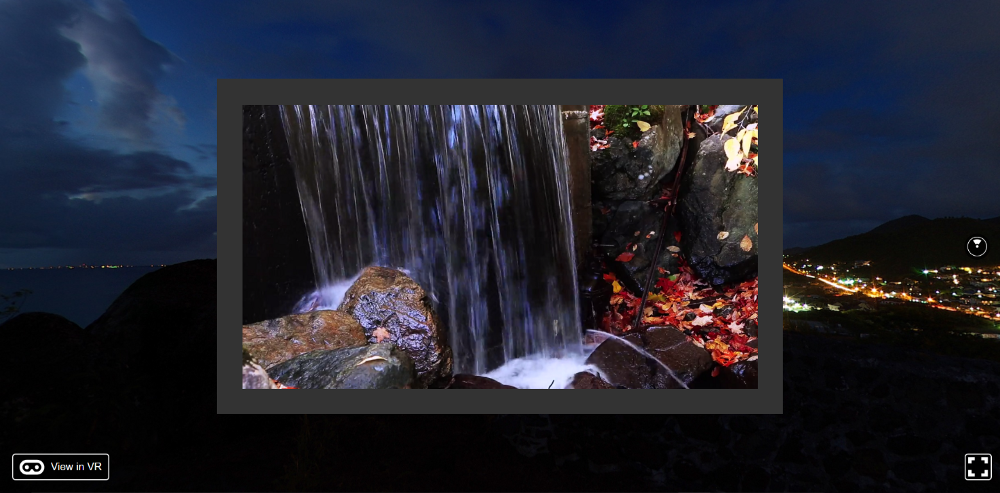
Each scene is composed of elements which are contained in a flexbox layout.
Going back to the Main Menu scene, this scene is composed of 2 elements (a Title and Button) that are within a layout:

Therefore, we will have scenes, layouts, and elements within our VR app. Each of these can be broken down into their own components and organized hierarchically.
The elements components will be nested into a layout component which will then be nested into a scene component. Each of these will be separate folders and files to help organize and keep track of this hierarchy.
We will then have an app component in our index.vr.js which will contain the panoramic photo and multiple scenes. It will always be named after our project. We can use conditional rendering to control which scene displays.
The app component is the top of our component hierarchy which will ultimately get injected into our index.html file and then rendered to the browser.
If this all seems a bit fuzzy when trying to visualize, don’t fret! We are know going to create our Main Menu scene and make note of the application of what we just discussed.
Before we do that, let’s add our component folders to our project:
1     + [Project Root]
2       + Components
3         + Scenes
4           + Layouts
5             + Elements
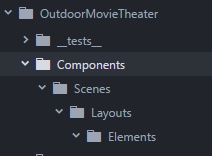
Implementing a Module System
If you are not familiar with a module system, in short, a module system allows us to write code to make the components exportable so that they can be imported elsewhere (i.e. making an element component exportable so it can be imported and nested in a layout component).
In other words, we can define our components in separate files and then use them elsewhere. We will write our module system using ES6.
Let’s start by updating the shell of our app component in index.vr.js:
1     export default class OutdoorMovieTheater extends React.Component {
2       render() {
3         return (
4           <View>
5             <Pano source={asset('fort-night.jpg')}/>
6           </View>
7         );
8       }
9     };
Here’s the link to download the fort-night.jpg. Make sure to move it into the static_assets folder.
Within the OutdoorMovieTheater component, we will nest all of our scene components.
Let’s go ahead and create the MainMenu scene component in a file called MainMenu.js which will be contained within the Scenes folder:
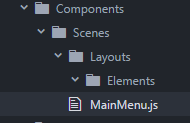
First, we need to import react and react-vr predefined components that were installed automatically installed for us via npm when we initialized our project the React VR command line interface:
1     import React from 'react';
2     import {
3       Text,
4       View,
5     } from 'react-vr';
Then, we need to the shell of the MainMenu component:
1     //imports here
2     class MainMenu extends React.Component {
3       render() {
4         return (
5
6         )
7       }
8     }
Our MainMenu scene is only going to contain a nested component called MainMenuContainer. The MainMenuContainer *will be a *layout component that will contain our Title and Button element components like so:

Therefore, we can finish off our MainMenu scene component by adding the following:
1     class MainMenu extends React.Component {
2       render() {
3         return (
4           <MainMenuContainer/>
5         )
6       }
7     }
Cool! We’ve created our first component in a separate file. Now, how can we make it exportable so we can import and nest this scene *component in our *app component?
It’s really easy, we add at the bottom:
1     //imports here
2     //class here
3     module.exports = MainMenu;
The syntax is simply this:
module.exports = [insert name of class]Now that our MainMenu component is exportable, let’s import it into our index.vr.js file and nest it in our app component which again is called OutdoorMovieTheater.
First, we add the following import:
1     //other imports
2     import MainMenu from './Components/Scenes/MainMenu.js';
Note that the from path is the relative path from the file importing it.
Next, we can nest our MainMenu component in OutdoorMovieTheater:
 1     export default class OutdoorMovieTheater extends React.Component {
 2       render() {
 3         return (
 4           <View>
 5             <Pano source={asset('fort-night.jpg')}/>
 6             <MainMenu/>
 7           </View>
 8         );
 9       }
10     };
Awesome!
Let’s finish things off by creating our MainMenuContainer component and our Title and Button components using the same process.
Create a file called MainMenuContainer.js within the Layouts folder.
We want to add the import, class, and export code like so:
 1     import React from 'react';
 2     import {
 3       Text,
 4       View,
 5     } from 'react-vr';
 6
 7     //Layout
 8     class MainMenuContainer extends React.Component {
 9       render() {
10         return (
11           <View style={{
12             flex: 1,
13             width: 5,
14             flexDirection: 'column',
15             alignItems: 'stretch',
16             layoutOrigin: [0.5, 0.5],
17             transform: [{translate: [0, 0, -5]}]
18           }}>
19             <Title/>
20             <Button/>
21           </View>
22         )
23       }
24     }
25
26     module.exports = MainMenuContainer;
In the render function, we are returning a View component that is styled to have a Flexbox layout. Within the Flexbox layout, we will nest our Title and Button elements. Again, we make this component exportable.
Next, let’s import this into our MainMenu.js file since MainMenuContainer is already nested there:
1     //other imports
2     import MainMenuContainer from './Layouts/MainMenuContainer.js';
Now, let’s create the files for the Title and Button element components which are nested within MainMenuContainer.
First, create a new file called Title.js within the elements folder and add the following code:
 1     import React from 'react';
 2     import {
 3       Text,
 4       View,
 5     } from 'react-vr';
 6
 7     //Element
 8     class Title extends React.Component {
 9       render() {
10         return (
11           <View style={{ margin: 0.1, height: 0.5}}>
12             <Text
13               style={{
14                 fontSize: 0.5,
15                 fontWeight: '400',
16                 textAlign: 'center',
17                 textAlignVertical: 'center'
18               }}>
19               Outdoor Movie Theater
20             </Text>
21           </View>
22         )
23       }
24     }
25
26     module.exports = Title;
The code above adds a Flexbox item which contains text that will display: “Outdoor Movie Theater”.
Then, create another file called Button.js within the elements folder and add the following code:
 1     import React from 'react';
 2     import {
 3       Text,
 4       View,
 5       VrButton
 6     } from 'react-vr';
 7
 8     //Element
 9     class Button extends React.Component {
10       render() {
11         return (
12           <View style={{ margin: 0.1, height: 0.3, backgroundColor: '#1AC8F7'}}>
13             <VrButton>
14               <Text style={{fontSize: 0.2, textAlign: 'center'}}>
15               Select a Movie
16               </Text>
17             </VrButton>
18           </View>
19         )
20       }
21     }
22
23     module.exports = Button;
In this code, we add another Flexbox item that contains a VrButton with the following text: “Select a Movie”.
Note that we had to import the VrButton predefined component in this file like so:
1     import {
2       Text,
3       View,
4       VrButton
5     } from 'react-vr';
To finish off our first scene using a module system, we need to import the Title and Button elements into our MainMenuContainer.js file like so:
1     //other imports
2     import Title from './Elements/Title.js';
3     import Button from './Elements/Button.js';
If you save your files, run npm start (if you haven’t already), and go to the local host, we can now see our Main Menu scene displaying:
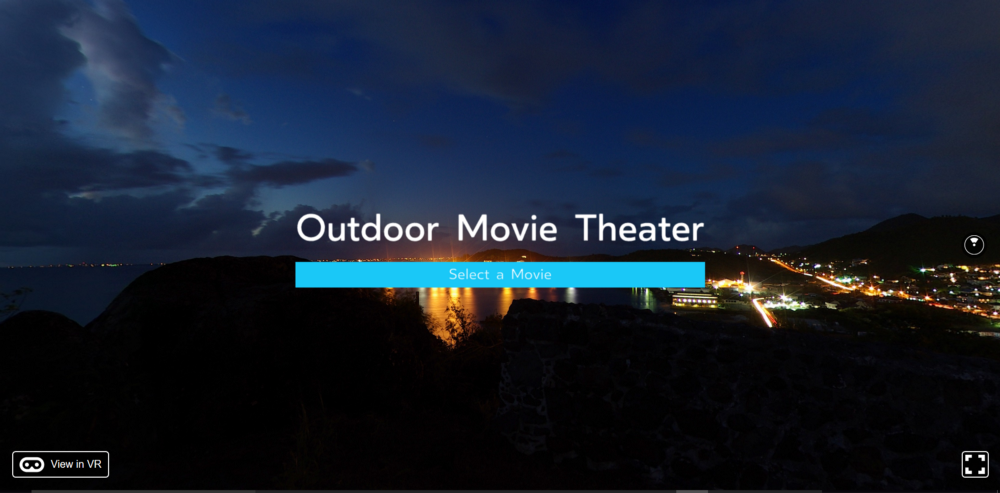
Woohoo!
Our index.vr.js is now much more clean:
 1     import React from 'react';
 2     import {
 3       AppRegistry,
 4       asset,
 5       Pano,
 6       Text,
 7       View,
 8     } from 'react-vr';
 9     import MainMenu from './Components/Scenes/MainMenu.js';
10
11     export default class OutdoorMovieTheater extends React.Component {
12       render() {
13         return (
14           <View>
15             <Pano source={asset('fort-night.jpg')}/>
16             <MainMenu/>
17           </View>
18         );
19       }
20     };
21
22     AppRegistry.registerComponent('OutdoorMovieTheater', () => OutdoorMovieTheat\
23 er);
We have now successfully organized our project. If you get confused with the hierarchy of importing and exporting, remember that our project structure provides a visual representation:

Enhancing Our Experience with Sound

When it comes to virtual reality, it isn’t too hard to understand the concept of 3D imaging as we have seen with our panoramic photos. We click to look around in 360 degrees and see different angles of the panoramic photo.
When it comes to sound in virtual reality, we can make use of 3D audio.
Essentially, we can concentrate different sounds in our 360-degree virtual world.
For example, we can have a concentration of a sound at the front of our virtual world:
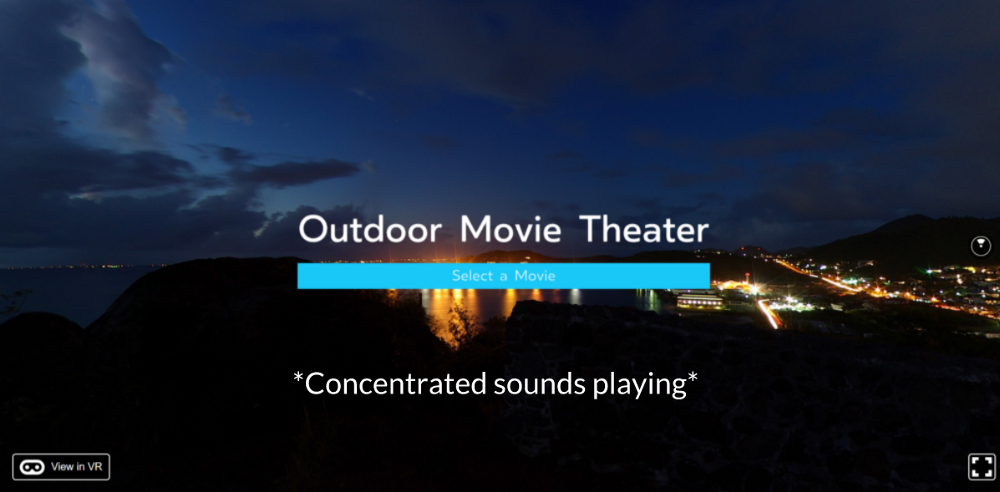
Then, if we spun around 180 degrees, we could have another concentrated sound:
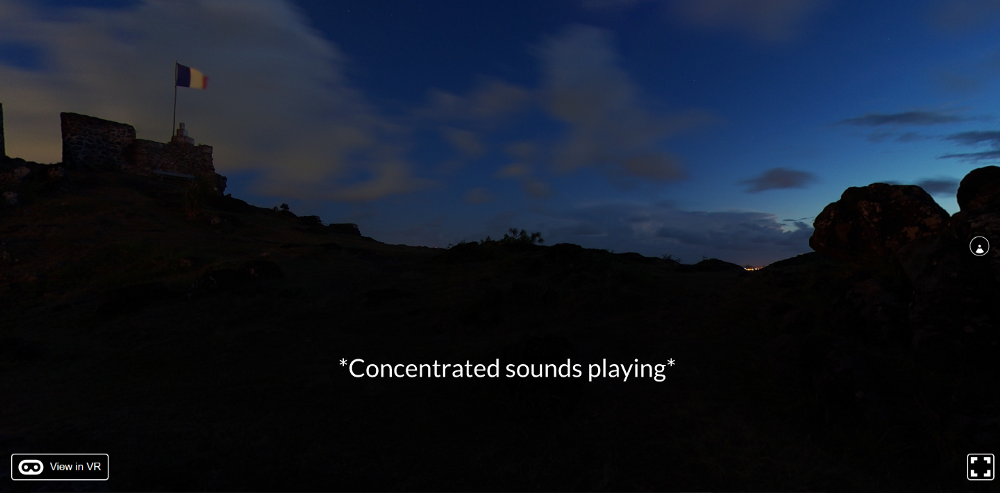
In the front of our app, we are going to have one ambient sound. In the back of our app, we will have another ambient sound.
This won’t necessarily require separate audio files since the L/R stereo balancing of each channel within a sound is what controls the concentration of sound in the 360-degree world.
Pretty awesome! Before we start implementing this in our Outdoor Movie Theater app, I want to show you how to I generate ambient sounds.
Generating Our First Ambient Sound
I am going to be using a tool called Ambient Mixer. This will allows us to create an atmosphere of sounds.
Here’s the link that will take you to the atmosphere creator.
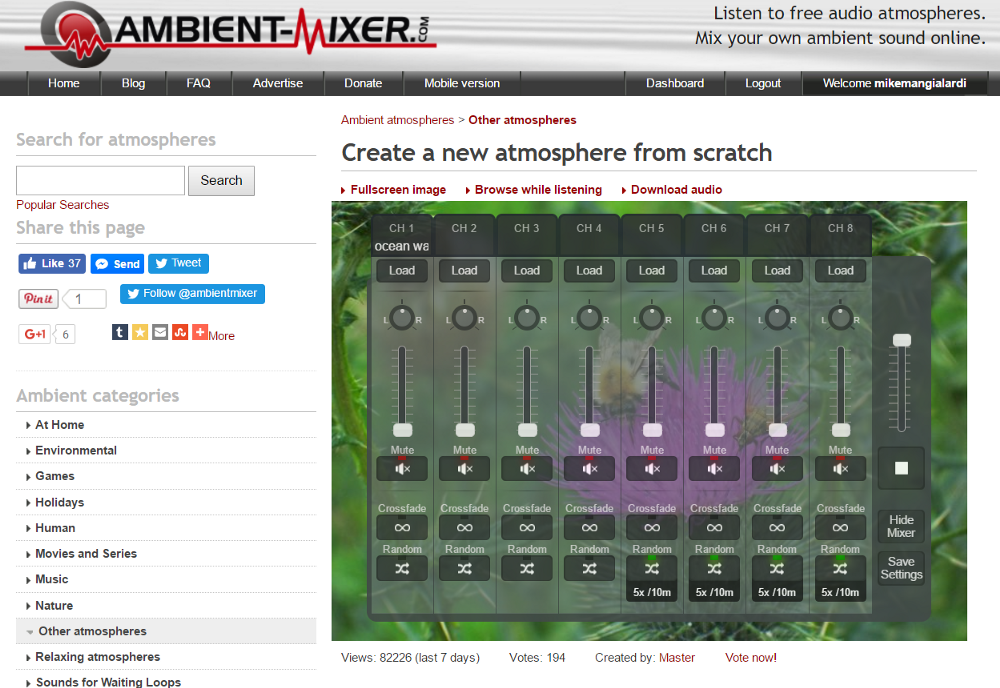
As you can see, we can load different ambient sounds into our atmosphere in different channels.
Let’s start by clicking Load in channel 1:
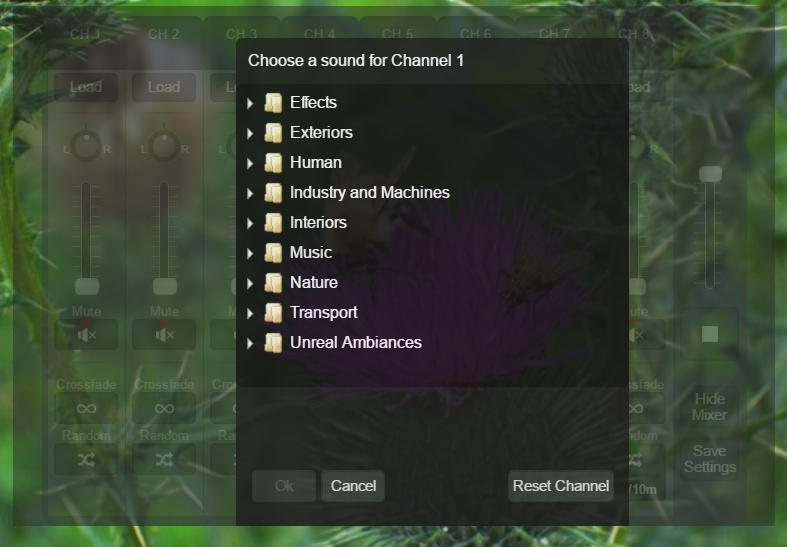
There are a handful of predefined sounds that we can choose from.
Let’s add some ocean wave sounds found under Nature/Water/Lakes & Oceans/ocean waves.
You’ll notice that the front of our VR app looks out into an ocean.

Therefore, let’s adjust our channel so the ocean waves sound is subtle:
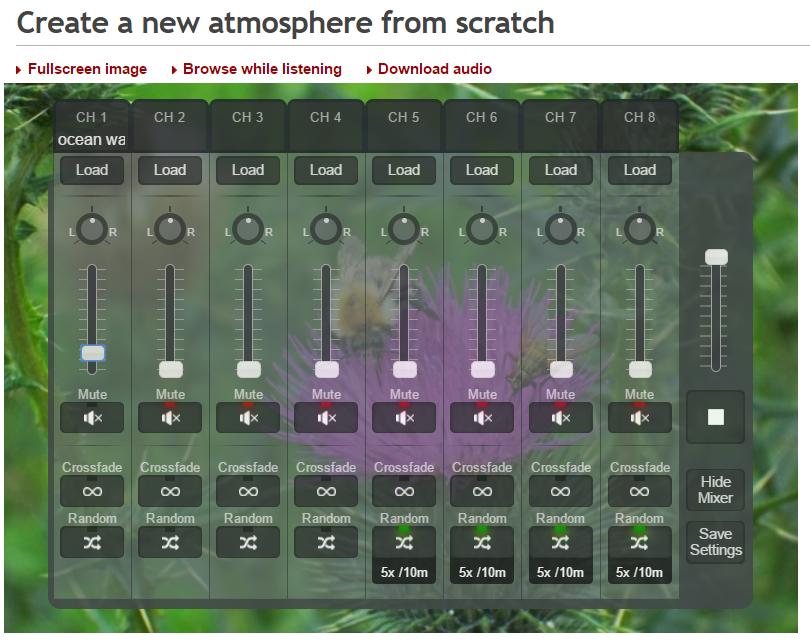
You’ll notice that the L/R stereo knob on each channel is a good visualization of the concept of 360-degree sound.
Since we want the ocean waves sound to be concentrated at the front of our app, let’s keep the knob pointing north.
Next, let’s load a sound called light breeze which can be found under Nature/Weather/Wind/light breeze:
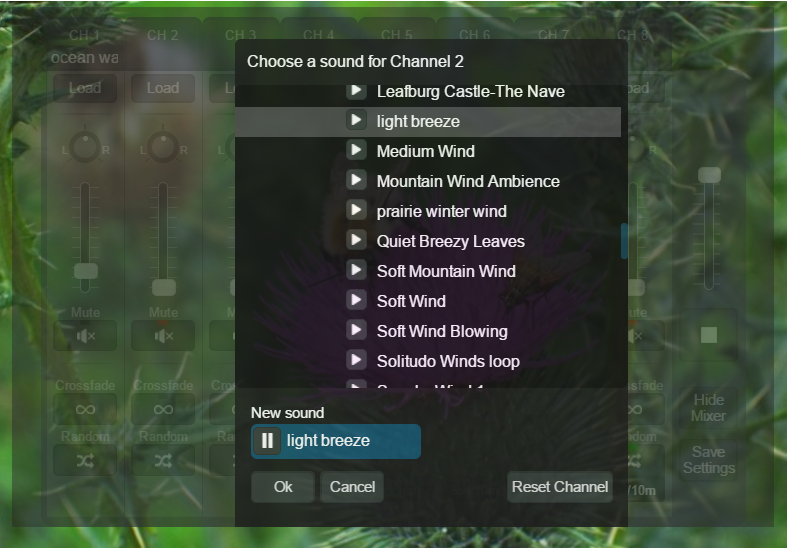
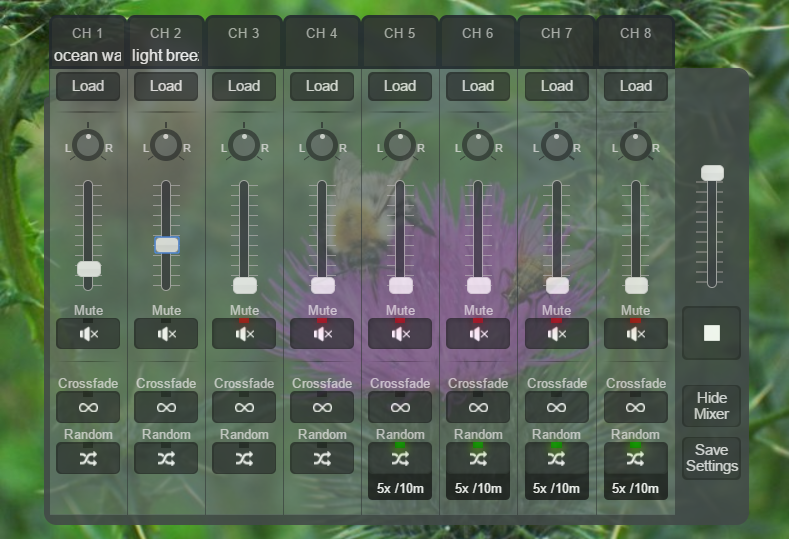
Let’s make this sound a bit louder than our waves and also have it pointing north:
For the back of our app, let’s play some moon/night sounds in channel 3. There’s actually a really cool predefined ambient sound that can be loaded from Nature/Other/ambiences/Moon and forest night sounds:
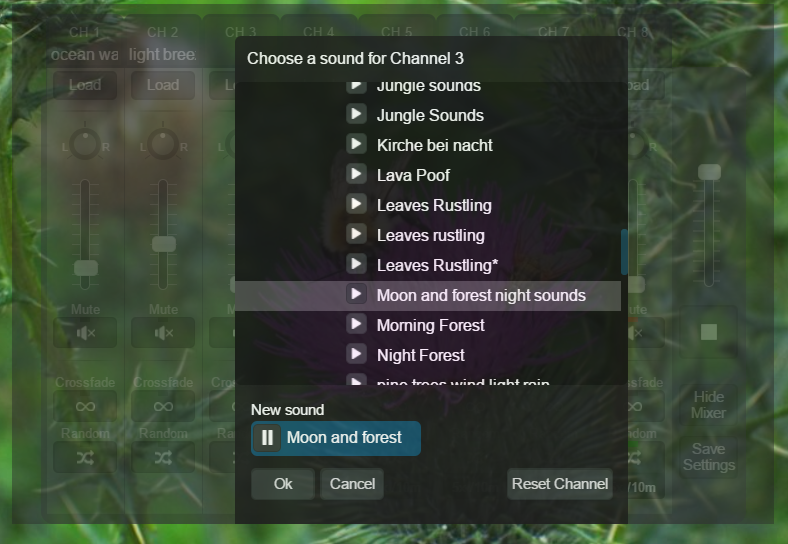
Let’s also add this to channel 4 so concentrate this in the back left and back right of our atmosphere:
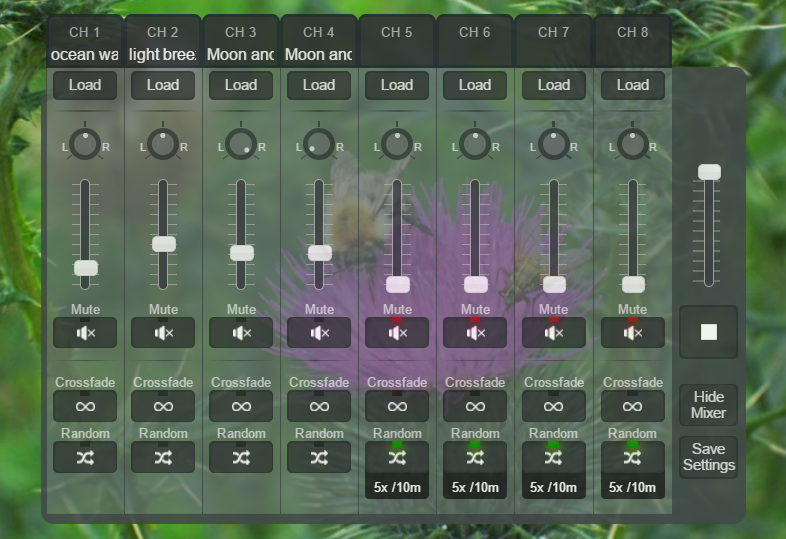
Make sure to adjust the knobs and volume as seen above.
Alright! This completes our audio. Let’s go ahead and click Download Audio.
Edit: As you all know, I am creating this ebook as I learn and experiment. My plan was to buy the audio and share it via Evernote as the website indicated that created atmospheres could be distributed for business purposes. Unfortunately, the audio that I bought did not play any sound and I had to send an email asking for a refund.
Nevertheless, using the interface to create the atmosphere provided us with a good illustration of how to create ambient noises and control the concentration of the sound using L/R stereo. Therefore, I will keep the previous segment in this chapter.
We will use another method to create the ambient noises.
Since the Ambient Mixer didn’t work out, we will create the ambient sounds ourselves.
I am going to be getting the individual sounds from Open Game Art and creating the atmosphere using an open-source audio software called Audacity.
If you want, you will need to install Audacity.
We also need to install Lame for Audacity so we can export audio as an MP3.
Then, you can grab the sound files that I have already extracted for you here.
Let’s open Audacity and go to File → Import → Audio and select all the downloaded sound files.
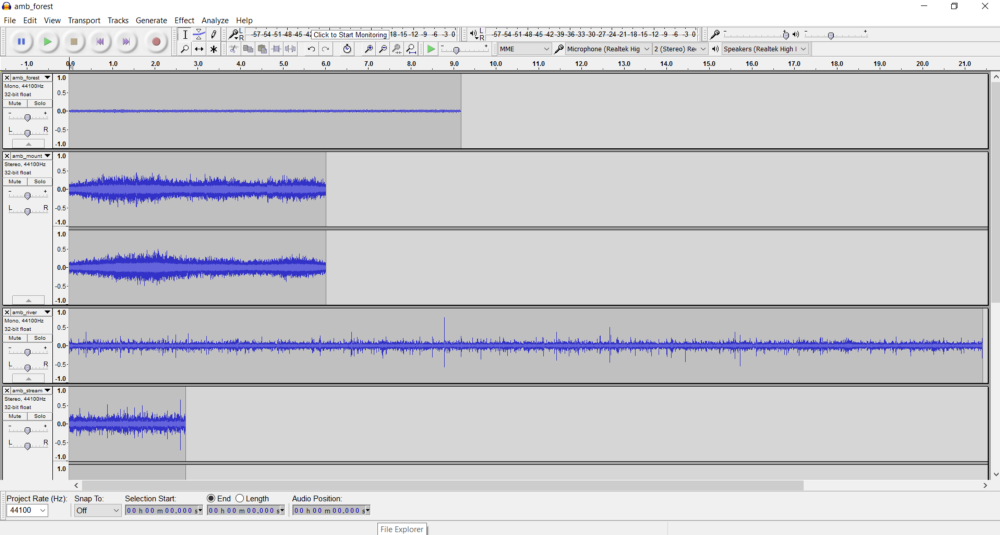
Each row is equivalent to a channel in the Ambient Mixer. We will be able to control the L/R stereo for each channel.
As you can see, the files are not the same length. Therefore, we have to trim them accordingly.
Here’s an example of me doing a trim:
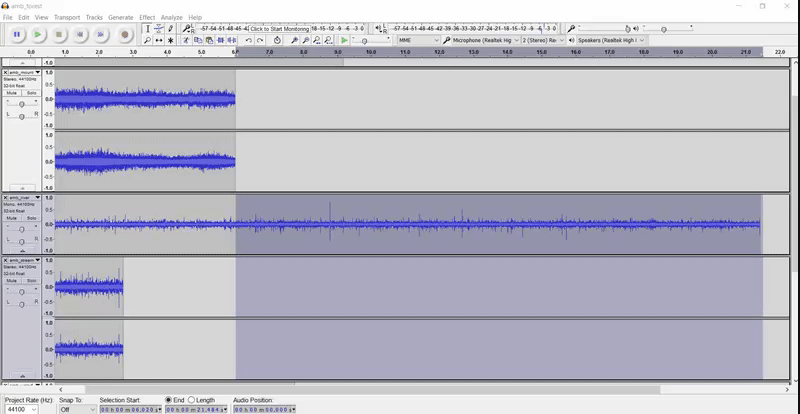
You simply have to click and drag to highlight part of a channel before cutting.
Once we have trimmed them to the same length, it should look like this:
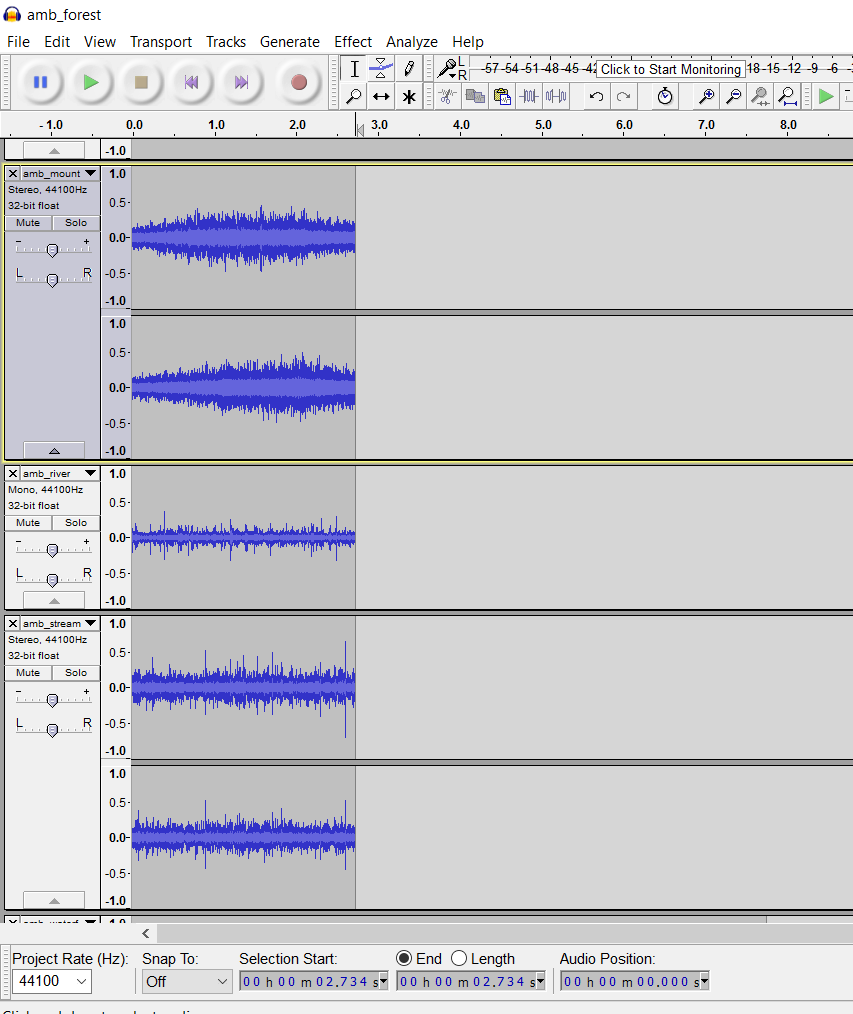
Now, we there’s some sounds we don’t need. Click the X next to each channel except for amb_forest, amb_stream, and amb_wind.
Then, double click the cursor on the minus and plus bar for amb_forest:
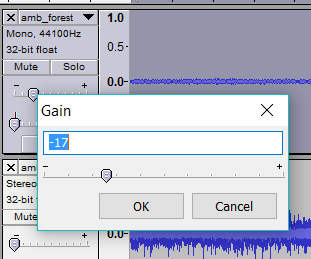
This will allow us to adjust the Gain. Change the Gain for the amb_forest to -17.
Next, change the gain for the amb-stream to -36 and the amb_wind to -30.
To wrap up our atmosphere, let’s adjust the L/R stereo (Pan).
We can also do this by double-clicking the cursor on the bar:
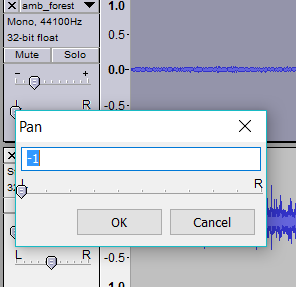
Set the Pan of amb_forest to -1, amb_stream to 0, and amb-wind to 0.
amb-forest will be equivalent to turning an L/R knob all the way to the left. This will concentrate the sound to the back left of our app.
We also want to concentrate the amb_forest sound to the back right of our app so let’s duplicate this channel.
You can do this by double clicking the amb_forest channel and going to Edit → Duplicate.
Then, slide the Pan all the way to the right or double click the cursor and set it to 1.
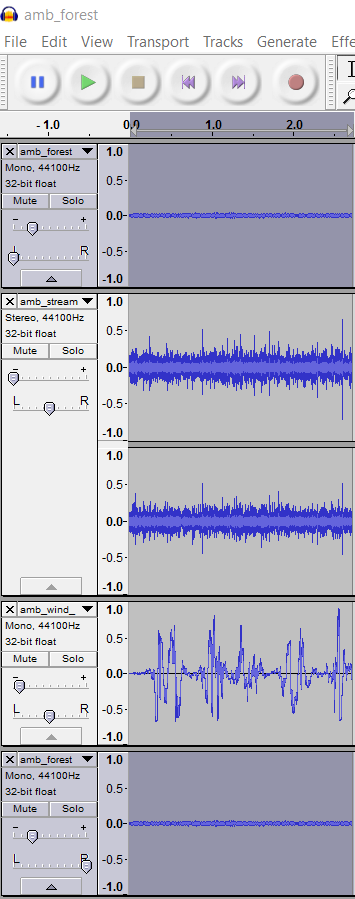
We should now have the following:
One last step. Select all of the channels and go to Effect → Change Speed:
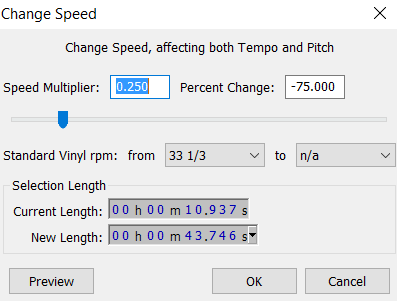
Change the speed to 0.25 and hit Ok.
We are now ready to export our atmosphere.
Go to File → Export Audio and save the file as fort-night-atmosphere within the static_assets folder of our project. Make sure to save it as a .mp3 type.
Hit Ok through the dialog.
Audacity will eventually bring up the following popup:

Click Browse and the .dll file can be found at the following path:
C:\Program Files (x86)\Lame For Audacity\lame_enc.dllNow, the audio will export as an MP3.
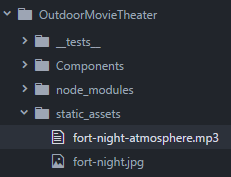
If you were not following along, you can download the sound file here.
Implementing the Sound Component
We are going to add a predefined* Sound* component into our OutdoorMovieTheater component.
The important concept to understand is that Sound components need to be nested within another component. For example:
1     <Image source={...}>
2       <Sound source={{ mp3: asset('waterfall.mp3') }}>
3     </Image>
Also, note that we inject the source of our sound file like so:
source={{ filetype: asset('name of file in static_assets') }}Before we nest a Sound component ourselves, we need to import the Sound component into our index.vr.js file like so:
1     import {
2       //other stuff here
3       Sound
4     } from 'react-vr';
5     import MainMenu from './Components/Scenes/MainMenu.js';
Note that you would also have to be careful to import asset if you were working with an empty component file.
Then, we can finally nest our fort-night-atmosphere.mp3 file in the Pano component in our OutdoorMovieTheater component:
1     <Pano source={asset('fort-night.jpg')}>
2       <Sound
3         volume={0.8}
4         loop = {true}
5         source={{mp3: asset('fort-night-atmosphere.mp3')}}
6       />
7     </Pano>
Notice, I also added a value for loop and volume. Setting loop to true will override the default setting to not loop over background audio.
Volume can be set to a value between 0 and 1. By default, it is set to 1. We are going to make it play a bit softer.
For a full list of options for our Sound components, you can check the official documentation.
Save and refresh the local host. You should now be able to hear the faint background sounds.
Try facing the back of the app and you will notice the forest sounds are more concentrated:
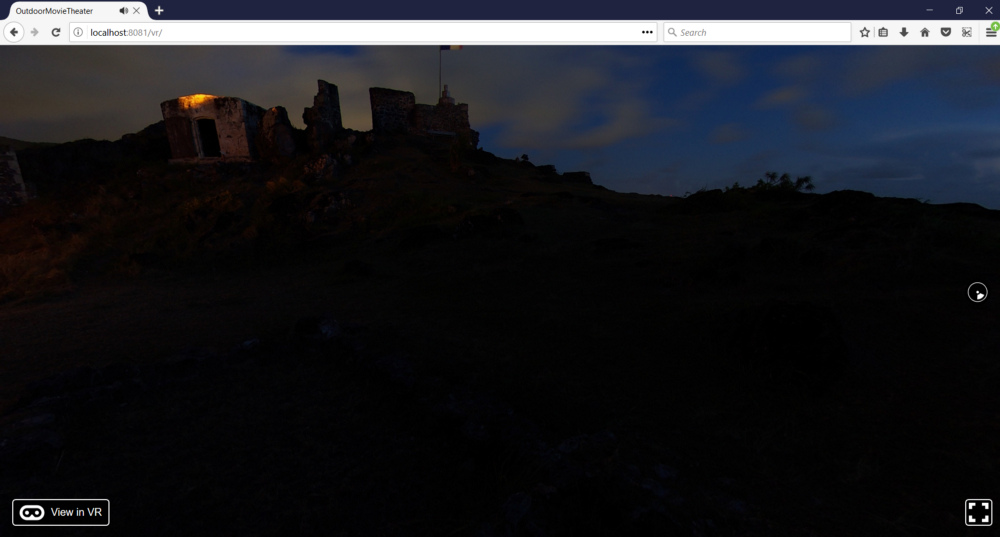
Amazing!
The final thing to note was that we simply nested the Sound component within the Pano component and the 360-degree sound experience came to life.
This is going to be fine for our example. However, you could have a panoramic background sound and play another audio somewhere else in the virtual world like an image:
1     <Image source={...}>
2       <Sound source={{ mp3: asset('waterfall.mp3') }}>
3     </Image>
Like a lot of things in React VR, there is room for exploration and experimentation after we grasp the basic concepts.
As of know, we have covered the basic concepts of sound in React VR. It’s time to move on to video.
Enhancing Our Experience with Video
Ultimately, we are going have a MovieTheater scene where we can watch movies from a hovering projector like so:

For this, we are just going to place a 2D video somewhere in our virtual world.
Before we get to that, however, I want to discuss the very cool VideoPano component.
Exploring VideoPano
Just like 360-degree panoramic photos, there are 360-degree videos that can be taken by special cameras.
These are harder to come by and a bit more challenging of a workflow to create.
I do not have the equipment to be able to discuss the workflow for creating 360 videos. However, Vimeo does have a 360 starter kit and lessons if you are interested.
If you would just like to see what people are doing with 360 videos, you can follow follow the 360 Vimeo channel.
To explore 360-degree panoramic videos in React VR, we are just going to work with an existing video that you can download here. Make sure to download it at the highest resolution, put it in the static_assets folder, and rename it video-pano-test.mp4.
The best place for finding 360 videos at the moment (and where I found the one for this example) is from Vimeo users who include a download link:
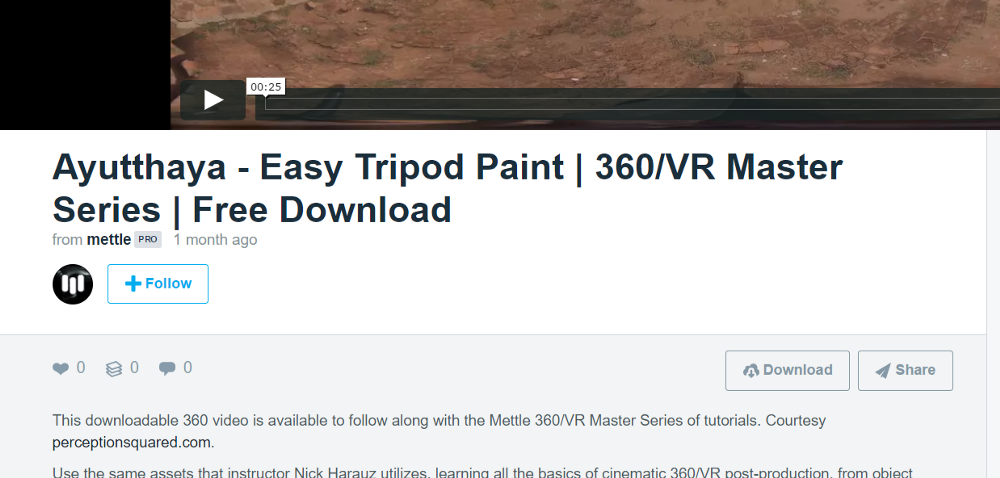
Now, let’s import VideoPano in our index.vr.js file:
1     import {
2       //other stuff here
3       VideoPano
4     } from 'react-vr';
Next, we can use this VideoPano component like so:
 1     <View>
 2       <VideoPano
 3         source={
 4           asset('video-pano-test.mp4',
 5             {format: 'mp4', layout: 'SPHERE'}
 6           )
 7         }
 8       >
 9         <Sound
10           volume={0.8}
11           loop = {true}
12           source={{mp3: asset('fort-night-atmosphere.mp3')}}
13         />
14      </VideoPano>
15      <MainMenu/>
16     </View>
In the code above, we had to specify to asset, format, and layout. The layout specifies that we want this video as a sphere so we can explore it in 360 degrees:
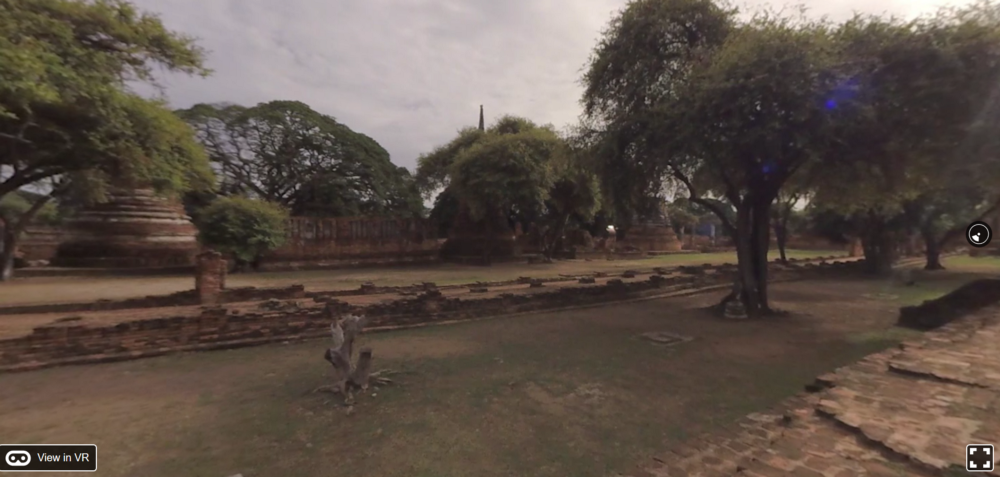
If you go to your local host and refresh, we can test this code out:
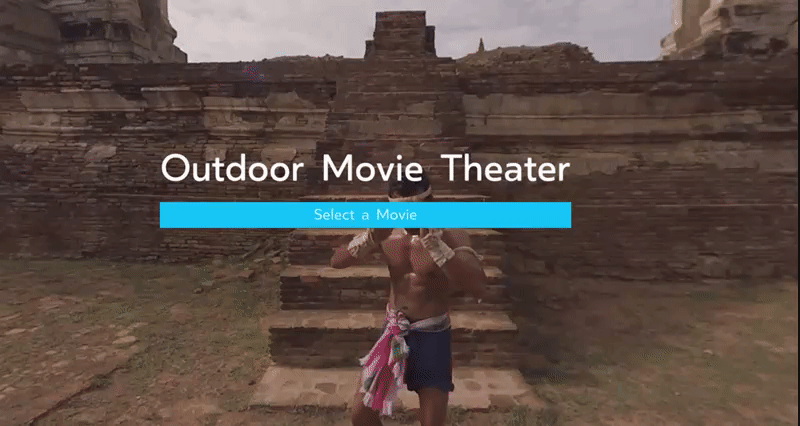
Super cool!
We will end the VideoPano exploration here. If you are curious about the other options for VideoPano components, you can check the official documentation.
Before we continue, revert back to our original Pano component:
1     <Pano source={asset('fort-night.jpg')}>
2       //sound component here
3     </Pano>
Implementing Video
To finish out this chapter, we are going to implement our MovieTheater scene component:

This scene is going to contain a layout component called MovieProjector. This will be the container for an element component called Movie.
Let’s start by creating a new file called MovieTheater.js within the Scene folder and update it with the following code:
 1     import React from 'react';
 2     import {
 3       View,
 4       Video
 5     } from 'react-vr';
 6     import MovieProjector from './Layouts/MovieProjector.js';
 7
 8     //Scene
 9     class MovieTheater extends React.Component {
10       render() {
11         return (
12           <MovieProjector/>
13         )
14       }
15     }
16
17     module.exports = MovieTheater;
Next, let’s create MovieProjector.js within the Layouts folder and update it with the following code:
 1     import React from 'react';
 2     import {
 3       Video,
 4       View
 5     } from 'react-vr';
 6     import Movie from './Elements/Movie.js';
 7
 8     //Layout
 9     class MovieProjector extends React.Component {
10       render() {
11         return (
12           <View style={{
13             flex: 1,
14             width: 5,
15             flexDirection: 'column',
16             alignItems: 'stretch',
17             backgroundColor: '#333333',
18             layoutOrigin: [0.5, 0.5],
19             transform: [{translate: [0, 0, -5]}]
20           }}>
21             <Movie/>
22           </View>
23         )
24       }
25     }
26
27     module.exports = MovieProjector;
This is the same Flexbox layout used in MainMenuContainer except we are giving the container a background color of #333333.
Finally, let’s create a file called Movie.js within the Elements folder.
Let’s start by adding the following:
 1     import React from 'react';
 2     import {
 3       Video,
 4       View,
 5       asset
 6     } from 'react-vr';
 7
 8     //Element
 9     class Movie extends React.Component {
10       render() {
11         return (
12           <View style={{ margin: 0.1, height: 2}}>
13
14           </View>
15         )
16       }
17     }
18
19     module.exports = Movie;
Notice, we have imported the Video component and asset.
We have assigned a Flexbox item with a height of 2 meters. Since we are using a Flexbox layout that stretches, the width of the video will be handled automatically. Our video will take up the full length of this Flexbox item.
Before we use the Video component, we need to add the video we want to display to the static_assets folder. You can download it here and rename it to fireplace.mp4.
Finally, we can add out Video component like so:
1     <View style={{ margin: 0.1, height: 2}}>
2       <Video style={{height:2}} source={asset('fireplace.mp4')} />
3     </View>
We have used asset to get the source and defined a height of 2 meters so our video is the full length of the Flexbox item.
The last piece of the puzzle is to import our MovieTheater scene in index.vr.js and nest it within our app component.
 1     //other imports here
 2     import MovieTheater from './Components/Scenes/MovieTheater.js';
 3
 4     export default class OutdoorMovieTheater extends React.Component {
 5       render() {
 6         return (
 7           <View>
 8             <Pano source={asset('fort-night.jpg')}>
 9               <Sound
10                 volume={0.8}
11                 loop = {true}
12                 source={{mp3: asset('fort-night-atmosphere.mp3')}}
13               />
14             </Pano>
15             <MovieTheater/>
16           </View>
17         );
18       }
19     };
20
21     //AppRegistry here
Notice that I have imported MovieTheater and replaced the MainMenu scene. We just want the MovieTheater scene to display for now. We will finish the logic to switch between scenes in our next chapter.
Make sure everything is saved, refresh your local host, and let’s see what happens:
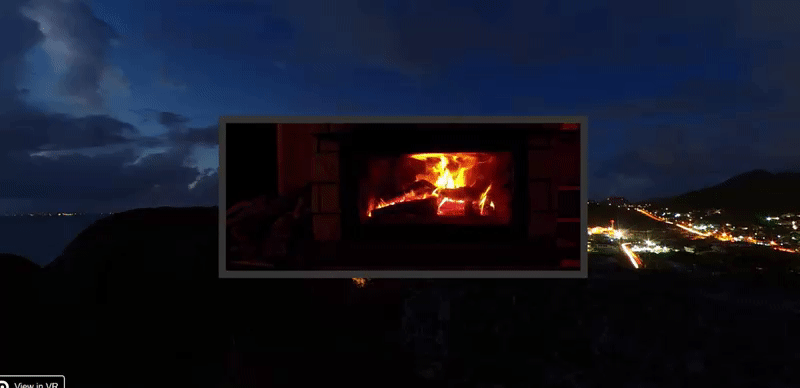
Cool beans! Note that this video does not have sound. We could control the volume just like we did with our Sound component. For full options of what you can do with Video, check out the official documentation.
Final Code
Concluding Thoughts
Hopefully, this was a fun chapter that taught you some new concepts when it comes to implementing video and sound in React VR. We also were able to go over the project organization. While that part may have been less exciting, it gives you some practical knowledge for future work.
In the next chapter, we are going to tighten up this VR app by adding transitions, animations, and some better styling.
Learn React VR (Chapter 4 | Transitions and Animations)
Prerequisites
I am going to assume knowledge of basic CSS animations. If you do not already know this, here’s an introduction video I created.
Scope of This Chapter
In the previous chapter, we were able to create a mini VR app called Outdoor Movie Theater that allowed us to how to work with 360-degree sound and video in React VR.
We had created a Main Menu scene and a Movie Theater scene. In this chapter, we are going to start off by adding a Scene Select scene. We will then have 3 scenes and each scene should lead to another (Main Menu → Scene Select → Movie Theater). We will be adding the logic to transition between each scene. After that, we are going to explore in detail how animation works in React VR. Finally, we will add animation to our Outdoor Movie Theater app to finish it off.
Scene Transitions
Adding Scene Select
First, let’s add a scene component called SceneSelect. In this component, we ultimately want to render a list of movie scenes that a user could select as well as a title. In our case, we will keep it simple and have a button for the fireplace movie scene that we got up and running in the previous chapter:
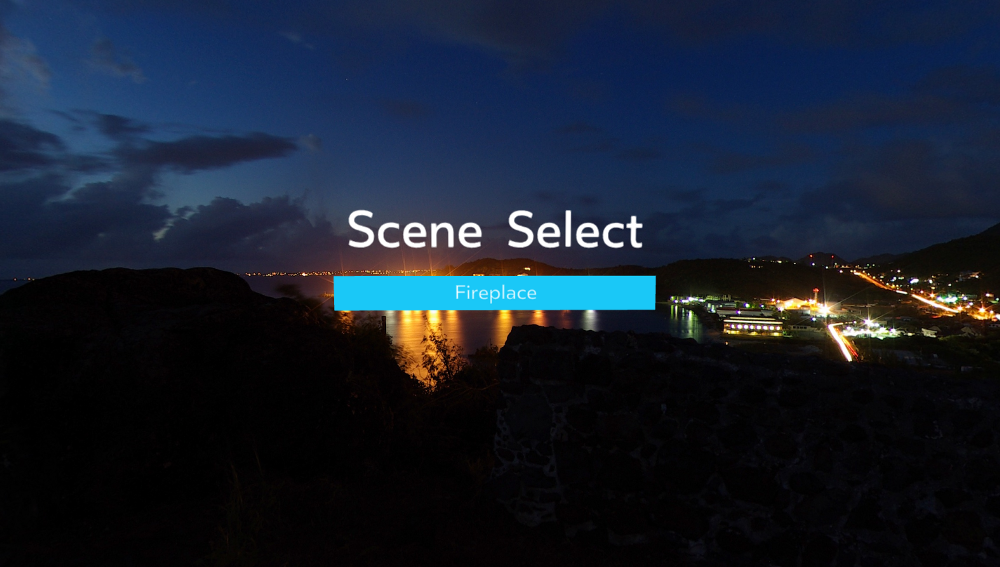
Within the Scenes folder, go ahead and create a new file called SceneSelect.js.
Next, we can add the following code:
 1     import React from 'react';
 2     import {
 3       View,
 4       Text,
 5       VrButton
 6     } from 'react-vr';
 7     import SceneSelectMenu from './Layouts/SceneSelectMenu.js';
 8
 9     //Scene
10     class SceneSelect extends React.Component {
11       render() {
12         return (
13           <SceneSelectMenu/>
14         )
15       }
16     }
17
18     module.exports = SceneSelect;
Here, we are nesting a component that we will make next called SceneSelectMenu. This will be a layout component that has the Flexbox layout for the Title and Button elements within the scene.
Let’s make another file for this layout component within the Layouts folder called SceneSelectMenu.js.
For now, let’s add the following code:
 1     import React from 'react';
 2     import {
 3       View,
 4       Text,
 5       VrButton
 6     } from 'react-vr';
 7
 8
 9     //Layout
10     class SceneSelectMenu extends React.Component {
11       render() {
12         return (
13           <View
14             style={{
15               flex: 1,
16               width: 3,
17               flexDirection: 'column',
18               alignItems: 'stretch',
19               layoutOrigin: [0.5, 0.5],
20               transform: [{translate: [0, 0, -5]}]
21             }}
22           >
23
24           </View>
25         )
26       }
27     }
28
29     module.exports = SceneSelectMenu;
Here, we have added the Flexbox layout that we alluded to earlier. However, we have nothing nested within this layout.
What should be nested?
We want to nest a Title and Button component so we get the following:

In order to do this, we want to write as little code as possible. If our Main Menu scene is using a Title and Button component, we want to be able to reuse that for this Scene Select scene.
In order to reuse our Title and Button, we need the text for both of those components to be dynamic and not static like we currently have:
1     //Button.js
2     <Text style={{fontSize: 0.2, textAlign: 'center'}}>
3     Select a Movie
4     </Text>
5
6     //Title.js
7     <Text style={{...}}>
8     Outdoor Movie Theater
9     </Text>
We want our button component to have a text of “Fireplace” in our Scene Select scene and a text of “Select a Movie” in our Main Menu scene.
We want our Title component to have a text of “Scene Select” in our Scene Select scene and a text of “Outdoor Movie Theater” in our Main Menu scene.
To resolve this, we will pass down the texts for the Title and Button components as props from each scene component. The values for these props will be different for each scene.
Let’s get started with this by first opening index.vr.js.
Here, we are going to add the nesting of our SceneSelect component:
 1     <View>
 2       <Pano source={asset('fort-night.jpg')}>
 3         <Sound
 4           volume={0.8}
 5           loop = {true}
 6           source={{mp3: asset('fort-night-atmosphere.mp3')}}
 7         />
 8       </Pano>
 9       <MovieTheater/>
10       <SceneSelect/>
11     </View>
Eventually, we will be adding conditional rendering since we can’t display these scenes at the same time. Let’s ignore that for now and pass down the props for the Title and Button components:
1     <MainMenu text={"Outdoor Movie Theater"} buttonText={"Select a Movie"}/>
2     <SceneSelect text={"Scene Select"} buttonText={"Fireplace"}/>
In the code above, we are passing down a prop called text for the Title and buttonText for the Button. Notice that the values are different for each scene.
Next, we can work our way down until these props are passed down to the Title and Button components.
We pass the props down to the layout components:
SceneSelect.js
<SceneSelectMenu text={this.props.text} buttonText={this.props.buttonText} />MainMenu.js
<MainMenuContainer text={this.props.text} buttonText={this.props.buttonText} />Then, we pass them down to the Title and Button elements:
SceneSelectMain.js
 1     import React from 'react';
 2     import {
 3       View,
 4       Text,
 5       VrButton
 6     } from 'react-vr';
 7     import Title from './Elements/Title.js';
 8     import Button from './Elements/Button.js';
 9
10     //Layout
11     class SceneSelectMenu extends React.Component {
12       render() {
13         return (
14           <View
15             style={{
16               flex: 1,
17               width: 3,
18               flexDirection: 'column',
19               alignItems: 'stretch',
20               layoutOrigin: [0.5, 0.5],
21               transform: [{translate: [0, 0, -5]}]
22             }}
23           >
24             <Title text={this.props.text}/>
25             <Button buttonText={this.props.buttonText}/>
26           </View>
27         )
28       }
29     }
30
31     module.exports = SceneSelectMenu;
MainMenuContainer.js
 1     import React from 'react';
 2     import {
 3       Text,
 4       View,
 5     } from 'react-vr';
 6     import Title from './Elements/Title.js';
 7     import Button from './Elements/Button.js';
 8
 9     //Layout
10     class MainMenuContainer extends React.Component {
11       render() {
12         return (
13           <View style={{
14             flex: 1,
15             width: 5,
16             flexDirection: 'column',
17             alignItems: 'stretch',
18             layoutOrigin: [0.5, 0.5],
19             transform: [{translate: [0, 0, -5]}]
20           }}>
21             <Title text={this.props.text}/>
22             <Button buttonText={this.props.buttonText}/>
23           </View>
24         )
25       }
26     }
27
28     module.exports = MainMenuContainer;
Finally, we can replace the static text and inject the props that were passed down:
Button.js
1     //in return
2     <View style={{ margin: 0.1, height: 0.3, backgroundColor: '#1AC8F7'}}>
3       <VrButton>
4         <Text style={{fontSize: 0.2, textAlign: 'center'}}>
5         {this.props.buttonText}
6         </Text>
7       </VrButton>
8     </View>
Title.js
 1     <View style={{ margin: 0.1, height: 0.5}}>
 2       <Text
 3         style={{
 4           fontSize: 0.5,
 5           fontWeight: '400',
 6           textAlign: 'center',
 7           textAlignVertical: 'center'
 8         }}>
 9       {this.props.text}
10       </Text>
11     </View>
Setting Up Conditional Rendering
Sweet! We were able to add our Scene Select scene and write the logic to reuse the Title and Button components.
Now, we need to setup conditional rendering so we can control what scene is being rendered depending on values in a local state.
First, we need to add a local state to our outermost app component in index.vr.js:
1     constructor(){
2       super();
3       this.state={mainMenu: true, sceneSelect: false};
4     }
5
6     //render function here
In this local state, we are going to have 2 boolean flags.
If mainMenu is true, we will render our MainMenu component.
If sceneSelect is true and mainMenu is false, we will render our SceneSelect component.
If mainMenu *and *sceneSelect are false, we will render our MovieTheater component.
In our render function, let’s store the value of these properties into variables:
1     render() {
2         const mainMenu = this.state.mainMenu;
3         const sceneSelect = this.state.sceneSelect;
4         //return here
5     }
Then, let’s replace the current nesting of our MainMenu and SceneSelect components with the following:
1     {
2       mainMenu ? (
3         <MainMenu text={"Outdoor Movie Theater"} buttonText={"Select a Movie"}/>
4       ) : (
5         <SceneSelect text={"Scene Select"} buttonText={"Fireplace"}/>
6       )
7     }
This code can be read as: “If mainMenu is true, render MainMenu. Else, render SceneSelect”. This is using ES6 syntax if you are not already familiar.
Let’s add a bit more so our code essentially says: “If mainMenu is true, render MainMenu. Else, render SceneSelect if sceneSelect is true or render MovieTheater if sceneSelect is false.”
 1     {
 2       mainMenu ? (
 3         <MainMenu text={"Outdoor Movie Theater"} buttonText={"Select a Movie"}/>
 4       ) : (
 5       sceneSelect ? (
 6         <SceneSelect text={"Scene Select"} buttonText={"Fireplace"}/>
 7        ) : (
 8            <MovieTheater/>
 9          )
10       )
11     }
Cool! We have set up our conditional rendering.
Finalizing Transitions Between Scenes
The final step is to update the local state via event handling so we can transition between scenes.
From our Main Menu scene, we want the button to have an onClick event that will update the local state so the Select Scene scene renders.
From our Select Scene scene, we want the button to have an onClick event that will update the local state so the Select Scene scene renders.
Since the local state controlling the conditional rendering is within the app component in our index.vr.js file, we will add an event handler there for the scenarios we just mentioned:
 1     //constructor here
 2
 3     updateScene(scene) {
 4       switch(scene) {
 5         case 2:
 6           this.setState({ mainMenu: false, sceneSelect: true});
 7           break;
 8         case 3:
 9           this.setState({ mainMenu: false, sceneSelect: false});
10           break;
11       }
12     }
13
14     //render here
The Button component will call this function on a user’s click. It will be passing in the scene that should be gone to next (2 = Scene Select and 3 = Movie Theater). We can update the local state to tweak the conditional rendering so we can play the requested scene.
We must now ask the following question: “If we are using the same Button component in 2 separate scenes, how will we know which scene to request?” Additionally, we must ask: “How can we call this event handler from our button if it is in a different component?”
We will pass down the event handler and an id for the current scene as props down to our Button component. The Button component will then be able to call the event handler and request the appropriate scene depending on which scene is currently rendering the button.
First, let’s pass the props down in our index.vr.js file:
1     <MainMenu text={"Outdoor Movie Theater"} buttonText={"Select a Movie"} updat\
2 eScene={this.updateScene.bind(this)} scene={1}/>
3
4     //...
5
6     <SceneSelect text={"Scene Select"} buttonText={"Fireplace"} updateScene={thi\
7 s.updateScene.bind(this)} scene={2}/>
Note that MainMenu is scene 1 and SceneSelect is scene 2. MovieTheater will be the third scene.
We can then pass these props down to our layout components and finally the Button component:
MainMenu.js
1     <MainMenuContainer text={this.props.text} buttonText={this.props.buttonText}\
2  updateScene={this.props.updateScene} scene={this.props.scene}/>
SceneSelect.js
1     <SceneSelectMenu text={this.props.text} buttonText={this.props.buttonText} u\
2 pdateScene={this.props.updateScene} scene={this.props.scene}/>
MainMenuContainer.js
1     <Button buttonText={this.props.buttonText} updateScene={this.props.updateSce\
2 ne} scene={this.props.scene}/>
SceneSelectMenu.js
Finally, we can update Button.js with the following:
 1     class Button extends React.Component {
 2       render() {
 3         const scene = this.props.scene;
 4         return (
 5           <View>
 6             <View style={{ margin: 0.1, height: 0.3, backgroundColor: '#1AC8F7'}\
 7 }>
 8               {scene === 1 ? (
 9                 <VrButton onClick={() => this.props.updateScene(2)}>
10                   <Text style={{fontSize: 0.2, textAlign: 'center'}}>
11                   {this.props.buttonText}
12                   </Text>
13                 </VrButton>
14               ) : (
15                 <VrButton onClick={() => this.props.updateScene(3)}>
16                   <Text style={{fontSize: 0.2, textAlign: 'center'}}>
17                   {this.props.buttonText}
18                   </Text>
19                 </VrButton>
20               )}
21             </View>
22           </View>
23         )
24       }
25     }
A few things to note.
One, we stored the passed down scene prop into a variable:
const scene = this.props.scene;Then, we used this variable for conditional rendering:
1     {scene === 1 ? (
2       //render button with event that calls updateScene and requests scene 2
3     ) : (
4     //render button with event that calls updateScene and requests scene 3
5     )}
As the comments provided above indicate, we want to render a different buttons depending on the current scene. The two different buttons contain two different onClick event calls:
1     //if currently in scene 1
2     <VrButton onClick={() => this.props.updateScene(2)}>
3
4     //if currently in scene 2
5     <VrButton onClick={() => this.props.updateScene(3)}>
Note that we write the onClick just like we did in chapter 2 by using an arrow function.
Now, you can run npm start from the root of the project in command line and see that we can transition between scenes on the click of the buttons:
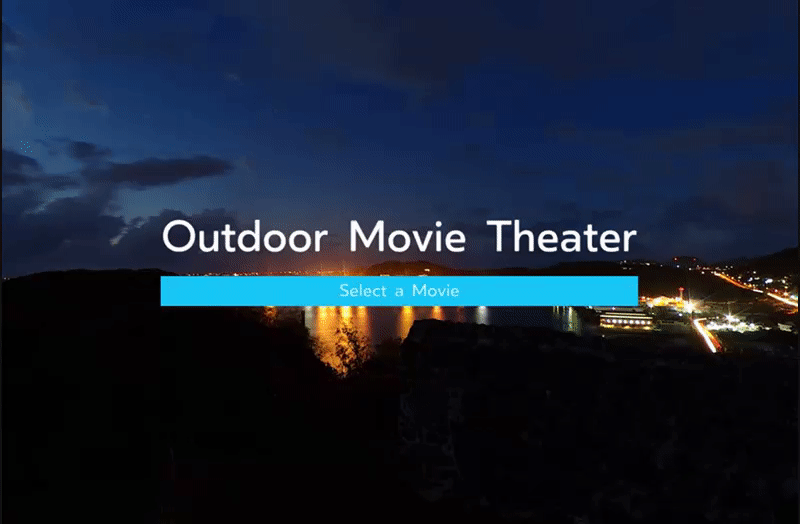
Understanding React VR Animation Basics

So far, everything in this chapter hasn’t been anything particular to React VR in comparison to standard React. However, it was necessary so we can get to the new and exciting information on how to use animations in React VR.
React VR has a built in library for animations called Animated.
Like all of React, Animated is a declarative API so we can tell React VR exactly what animations we want.
Let’s dive right into this by animating the Title component used in our Main Menu and Select Scene.
Animation Setup
Open up Title.js.
First things first, let’s import Animated:
1     import {
2       Text,
3       View,
4       Animated
5     } from 'react-vr';
We can use Animated with Image, Text, or View components. In our case, we want to add Animated to a Text component so we can do:
1     <Animated.Text style={{...}}>
2     {this.props.text}
3     </Animated.Text>
We just add Animated. in front of our Text component in both the opening and closing tag.
Next, we need to specify what we want to animate. Let’s do a transformation. The types of transformations are the same as in CSS. We want to translate our title along the Y axis for our transformation.
First, we can add a transform array and a translateY value within the style like so:
1     style={{
2       fontSize: 0.5,
3       fontWeight: '400',
4       textAlign: 'center',
5       textAlignVertical: 'center',
6       transform: [
7         {translateY: //value goes here}
8       ]
9     }}
Since translateY is going to be changed in order to perform an animation, let’s define the value within a local state:
1     constructor() {
2       super();
3       this.state = { slideValue: new Animated.Value(1.5) };
4     }
Then, let’s use this value in our scaleY definition:
1     transform: [
2       {scaleY: this.state.slideValue}
3     ]
We have set a property called slideValue to 0 and used it to define our translateY. In order to set a value for Animated, we use the following syntax:
new Animated.Value( //insert value here )Therefore, it is initially the equivalent of the following:
1     transform: [
2       {translateY: 1.5}
3     ]
In our animation which we will write shortly, we are going to slide our title down from a translated position of 1.5 to 0 (in meters). This will create the effect of our title sliding down into place.
Timing Animation
Alright! We have completed the initial setup for doing an animation in React VR. Specifically, we did a setup for a translateY transformation. We are going to apply this to a Text component, but we could also apply it to a View or Image component.
Now, we need to compose the animation. When composing an animation with Animated, there are 3 animation types:
- Spring
- Decay
- Timing
We will explain the each one separately.
Timing is the easiest to grasp so we will begin there.
Let’s add a Timing animation to our Title.
Timing animations will simply apply the transformation with options to control the timing.
First, we can add a componentDidMount lifecycle:
1     componentDidMount() {
2
3     }
4
5     //render function here
Next, we specify that we will be doing a Timing animation:
1     componentDidMount() {
2       Animated.timing(
3
4       );
5     }
Then, we specify the value that we will be changing for our animation (slideValue in our local state):
1     componentDidMount() {
2       Animated.timing(
3         this.state.slideValue
4       );
5     }
Additionally, we need to specify the options for our animation:
 1     componentDidMount() {
 2        Animated.timing(
 3          this.state.slideValue,
 4          {
 5            toValue: 0,
 6            duration: 1000,
 7            delay: 1000
 8          }
 9        );
10     }
What we have just added is the heart of React VR animations. It’s a bit different than CSS animations so let’s unpack.
In CSS animations, we specify that we want to use a defined keyframes animation and some options like so:
1     animation: pulse 5s;
2
3     //@keyframes pulse {...}
With Animated, we replace the keyframes with toValue. toValue is the equivalent of the following keyframes animation:
1     @keyframes pulse {
2       100% {
3         background-color: #FF4136;
4       }
5     }
In this keyframes animation, the background-color value goes from whatever it’s initialized as (let’s say #FFFFFF) to #FF4136 by the end of the specified duration (5s in this example).
This is what the toValue specifies. It allows Animated to take the initial value of the property we want to animate and changes it to a new value in a specified duration.
Recall, the initial value is specified in the local state:
this.state = { slideValue: new Animated.Value(1.5) };`Then, we will take slideValue to a new value as specified in Animated.timing:
1     Animated.timing(
2       this.state.slideValue,
3       {
4         toValue: 0,
5         duration: 1000,
6         delay: 1000
7       }
8     ).start();
We also specified options for duration and delay (in milliseconds).
Our Animated.timing animation will then be taking our title which starts off transformed along the Y axis to be 1.5 meters above the normal position to a new value of 0 when our component mounts. This will create the effect of our title sliding down into place.
The final piece to the puzzle is to start the animation:
 1     componentDidMount() {
 2        Animated.timing(
 3          this.state.slideValue,
 4          {
 5            toValue: 0,
 6            duration: 1000,
 7            delay: 1000
 8          }
 9        ).start();
10     }
We can now go to the local host, refresh, and see this animation in action:
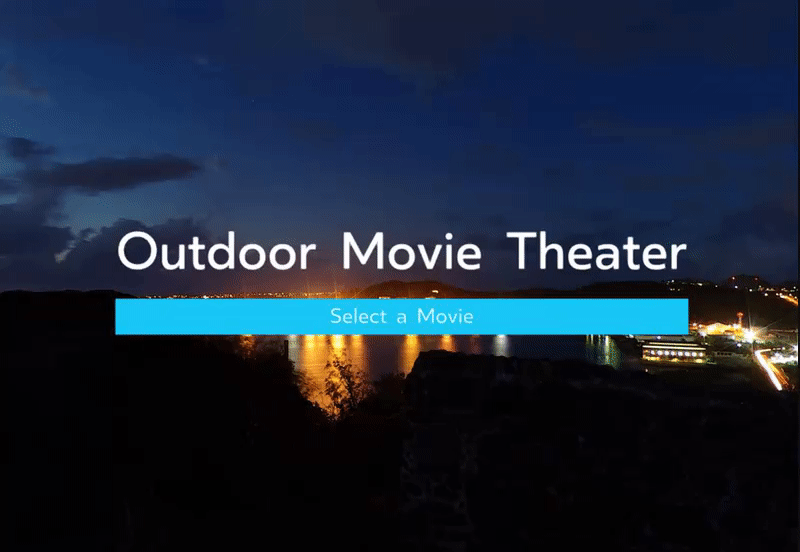
Applying Easing Functions in Animated.timing
Before we get to the other 2 animation types in React VR, I am going to dedicate an additional section on applying easing functions to Animated.timing.
I thought that this would be something I could explain in just a paragraph or two. However, I ran into some unexpected hurdles that will require some additional explanation.
In addition to duration and delay, we can also specify an easing option. Here’s an example:
 1     componentDidMount() {
 2        Animated.timing(
 3          this.state.slideValue,
 4          {
 5            toValue: 0,
 6            duration: 1000,
 7            delay: 1000,
 8            easing: Easing.bounce
 9          }
10        );
11     }
Easing is a separate API that allows us to apply predefined easing functions or custom easing functions. In the example above, bounce is a predefined easing function.
Before we dive into more details, we need to import Easing so the example in the code above will work. This will require more explanation than you may be anticipating.
As mentioned in Chapter 1, React VR is built off of React Native. There are quite a few crossovers between the two. For example, the predefined View, Text, and Image components are used in both.
Whenever there has been a crossover like this, we didn’t have to import anything from the react-native package:
1     import React from 'react';
2     import {
3       Text,
4       View,
5       Animated
6     } from 'react-vr';
7
8     //no react-native import
In the example above, Text and View are imported from react-vr even though they are also used in the react-native package.
After much frustration, it turns out that Easing has to be imported from react-native. I reached out for clarification and it turns out that while Text, View, and Image are examples of predefined components that are used in both React VR and React Native, they have their own implementation in React VR. When it comes to the Animated API, it’s using the exact same as React Native. Therefore, we can import Easing like so:
import { Easing } from 'react-native';Now, we can see if the bounce easing function is working:
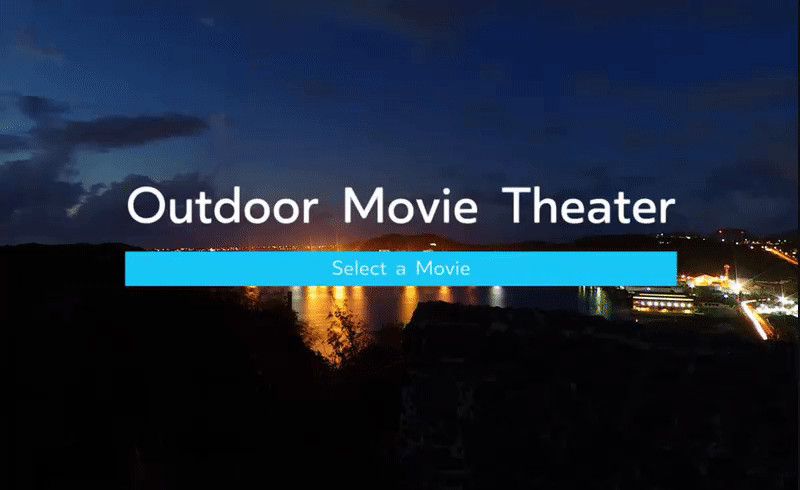
Cool!
There is official documentation for Easing on the React VR site, however, I recommend checking out the React Native documentation on it.
Here’s an overview of what we can do with the Easing API.
There are 4 predefined easing functions:
- bounce → bouncing animation
- ease → see the visualization here
- elastic → spring-like animation
- back → according to official documentation, “ a simple animation where the object goes slightly back before moving forward”
All of these can be used with the following syntax:
easing: Easing.//insert hereThere are also 3 standard easing functions (not specific to React Native) that can be used:
- linear
- quad
- cubic
The easiest way to visualize these is to use them in our Animated.timing animation and see for yourself. They can be used following the same syntax that is shown above.
Additionally, there are 4 more complex easing functions:
- bezier → must be manually specified, get values here
- circle → no custom value
- sin → no custom value
- exp → no custom value
Here’s an example of each being used:
1     //custom bezier
2     easing: Easing.bezier(.17,.67,1,.47)
3
4     //circle, sin, or exp
5     easing: //insert here
Again, you can test these out in our Animated.timing animation to get a visualization.
This completes the basics of Animated.timing.
Spring Animation
As an alternative to a timing animation which gives us control over the easing for customization, we can also use a spring animation in React VR.
Spring animation is another type of React VR animation that follows a spring-physics model. We can control the spring of the animation with 2 options:
- friction → controls bounciness
- tension → controls speed of spring
To switch our current animation to a spring animation (instead of a timing animation), we can start by updating the following:
Animated.spring(...) //used to be Animated.timingThen, let’s replace the previous options with friction and tension options:
 1     componentDidMount() {
 2        Animated.spring(
 3          this.state.slideValue,
 4          {
 5            toValue: 0,
 6            friction: 2, //default 7
 7            tension: 5 //default 40
 8          }
 9        ).start();
10     }
The higher the tension, the faster the speed. The lower the friction, the larger the spring.
Let’s take a look:

You can play around with the values if you’d like but that’s a spring animation in a nutshell.
Decay Animation
Another animation type in React VR is a decay animation.
The idea is to take an existing velocity of a moving object and apply deceleration to make it come to a stop.
velocity and deceleration are the 2 options for the decay animation (Animated.decay).
Here’s the one example in the React VR documentation:
1     Animated.decay(position, {   // coast to a stop
2         velocity: {x: gestureState.vx, y: gestureState.vy}, // velocity from ges\
3 ture release
4         deceleration: 0.997,
5     })
From my research, the React Native documentation provides the same example and explanation. Meaning, the example is meant for an example scenario on a mobile device.
This example can’t really be explained without introducing complex topics of React Native. This type of animation is also far less common and useful for the scope of this book. For these reasons, we aren’t going to explain any further but just keep in mind that it is another React VR animation type.
This concludes the basic examples of animations with React VR (animating an element from a single start and end point). We used translateY as an example but you should have all the information needed to explore doing other transformations using Animated.timing or Animated.spring.
We will look into the more advanced, yet necessary, animation concepts in the final two sections of this chapter.
Interpolation

What if we want our Title to slide down and go from an opacity of 1 to 0? How can we do this?
We could add to our local state and have a property called opacityValue:
1     this.state = { slideValue: new Animated.Value(1.5), opacityValue: new Animat\
2 ed.Value(0) };
Then, we could update our inline styling so the opacity value is bound to this new property:
 1     style={{
 2       fontSize: 0.5,
 3       opacity: this.state.opacityValue,
 4       fontWeight: '400',
 5       textAlign: 'center',
 6       textAlignVertical: 'center',
 7       transform: [
 8         {translateY: this.state.slideValue}
 9       ]
10      }}>
Finally, we could add a timing animation with a toValue of 1 (I’m also going to change the slideValue animation back to a timing animation):
 1     componentDidMount() {
 2        Animated.timing(
 3          this.state.slideValue,
 4          {
 5            toValue: 0,
 6            duration: 1000,
 7            delay: 1000,
 8            easing: Easing.ease
 9          }
10        ).start();
11
12     Animated.timing(
13          this.state.opacityValue,
14          {
15            toValue: 1,
16            duration: 1000,
17            delay: 1000,
18            easing: Easing.ease
19          }
20        ).start();
21     }
If we take a look, we should see this working:
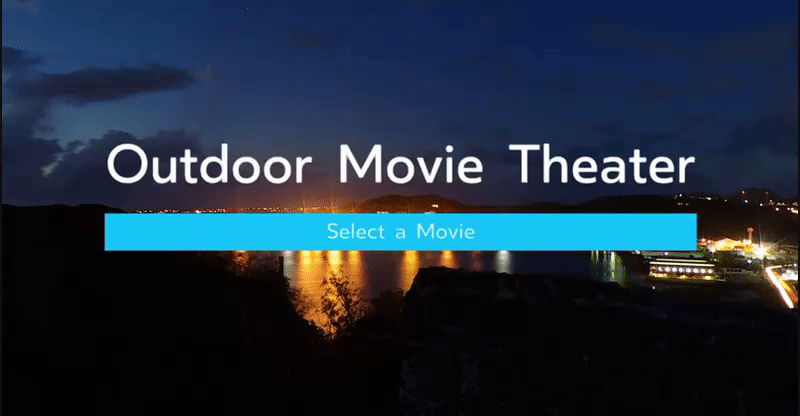
Cool…but can we do this in just one animation? We can with interpolation.
Interpolation sounds pretty intimidating, however, it’s a concept that you are already familiar with if you understand CSS animations.
Any animation has a start and end point. Let’s look at an example of going from an opacity of 0 to 1:
This can be written in a keyframes animation like so:
1     0% {
2       opacity: 0;
3     }
4
5     100% {
6       opacity: 1;
7     }
0% is the start of the animation and 100% is the end.
Even though there are only a start and end value specified, there will naturally be intermediate values as the opacity goes from 0 to 1 over the duration specified:

What if we wanted to control specific points from the start and end?
In a keyframes animation, we could do:
 1     0% {
 2       opacity: 0;
 3     }
 4
 5     50% {
 6       opacity: 0.5;
 7     }
 8
 9     100% {
10       opacity: 1;
11     }
Essentially, we are mapping specific values at specific points between the start and end of our animation using percentages.
Let’s say we wanted to translateX from 0px to 50px at these points in addition to changing the opacity. It would look like this in CSS:
 1     0% {
 2       opacity: 0;
 3       transform: translateX(0px);
 4     }
 5     50% {
 6       opacity: 0.5;
 7       transform: translateX(25px);
 8     }
 9     100% {
10       opacity: 1;
11       transform: translateX(50px);
12     }
In this example, opacity and translateX have different ranges of values that are being changed throughout the animation.
opacity goes from 0 → 0.5 → 1.
translateX goes from 0px → 25px → 50px.
We don’t have to do any additional work on our end to have the animation work even though there are two different ranges of values.
With React VR, we have to do the additional work. This is where interpolate from the Animated API comes into play.
Let’s try to have our title translateY from a value of 1.5 to 0 as we had before. Then, we are also going to have the opacity go from a value of 0 to 1.
Using interpolate, we can do this with just one Animated.Value and one timing animation.
First, let’s create have just one property in our local state called fadeSlide:
this.state = { fadeSlide: new Animated.Value(0) };We set the initial value to 0 and are going to write our timing function as if this value is only going to control our opacity to go from 0 to 1.
If we want our opacity to go from 0 to 1, our lifecycle will now look like this:
 1     componentDidMount() {
 2        Animated.timing(
 3          this.state.fadeSlide,
 4          {
 5            toValue: 1,
 6            duration: 1000,
 7            delay: 1000,
 8            easing: Easing.ease
 9          }
10        ).start();
11     }
Next, let’s update our inline styling to be assigned to this.state.fadeSlide:
 1     style={{
 2       fontSize: 0.5,
 3       opacity: this.state.fadeSlide,
 4       fontWeight: '400',
 5       textAlign: 'center',
 6       textAlignVertical: 'center',
 7       transform: [
 8         {translateY: this.state.fadeSlide}
 9       ]
10     }}>
Finally, we apply interpolation which is going to essentially say: “Hey React VR! We wrote out an animation to take our opacity from 0 to 1. However, we really don’t want to have to write out a separate animation for our translateX transformation. When our opacity goes from a value of 0 to 1, could you have our translateX go from a value of 1.5 to 0?”
 1     style={{
 2       fontSize: 0.5,
 3       opacity: this.state.fadeSlide,
 4       fontWeight: '400',
 5       textAlign: 'center',
 6       textAlignVertical: 'center',
 7       transform: [
 8         {translateY: this.state.fadeSlide.interpolate({
 9             inputRange: [0, 1],
10             outputRange: [1.5, 0]
11           })
12         }
13       ]
14     }}>
In the code above, we just added the following:
1     .interpolate({
2       inputRange: [0, 1],
3       outputRange: [1.5, 0]
4     })
You can think of this as interpreting our fadeSlide which is going from a value of 0 to 1 as going from a value of 1.5 to 0 only for our translateY.
This may seem awkward at first. Just think of the entire interpolation process as focusing on writing one animation for one property (like opacity) where one value is stored in the local state (even if you ultimately want to animate multiple properties). Once you are finished with this step, add the interpolate code to the other properties so that the value in the local state that is changing in the animation can be reinterpreted to be changing with different values for the other properties (like translateY). This allows you to animate multiple properties with just one value stored in the local state and one total animation.
When we want to compose an entire animation scene (as we will in the next section), this will become very useful.
Composing Animation Scenes
What if we want more than one animation and we want to create an entire animation scene? How do we control the timing of these animations?
To use a visual example, think of the question as: “How can we control the timing our animations like we do when using video editing software?”
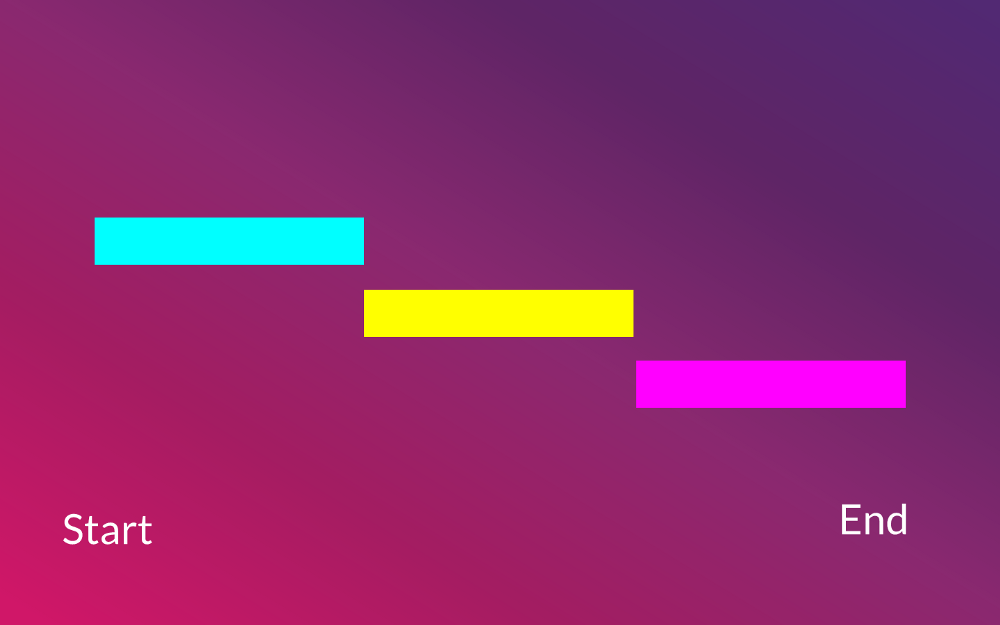
Sequence
The most important and versatile way to place animations in a timeline is to use a sequence.
A sequence contains an array of animations and by default will each animation run after the previous one completes. For example, if we had 3 animations, the animation timeline would look like this:

Let’s test this out.
First, let’s split our local state into two separate properties:
this.state = { fade: new Animated.Value(0), slide: new Animated.Value(1.5) };
Then, let’s update our inline styling to reflect this (and remove the interpolation):
 1     style={{
 2       fontSize: 0.5,
 3       opacity: this.state.fade,
 4       fontWeight: '400',
 5       textAlign: 'center',
 6       textAlignVertical: 'center',
 7       transform: [
 8         {translateY: this.state.slide}
 9       ]
10     }}
Now, we can put an Animated.sequence in the lifecycle with two separate animations:
 1     componentDidMount() {
 2         //start sequence
 3         Animated.sequence([
 4           //animation 1
 5           Animated.timing(
 6             this.state.fade,
 7             {
 8              toValue: 1,
 9              duration: 3000,
10              easing: Easing.ease
11             }
12           ),
13           //animation 2
14           Animated.timing(
15             this.state.slide,
16             {
17              toValue: 0,
18              duration: 3000,
19              easing: Easing.ease
20             }
21           )
22         ]).start();
23       }
Note that we have Animated.sequence([…]).start() being wrapped around two timing animations separated by a comma. We do not need to add a .start() after each timing animation. Each animation in the sequences will start when the previous one completes.
If you test this out, you will see the title completely fade in and then slide down:

Delay
If we have a timing animation, we can add delays like this:
1     Animated.timing(
2       this.state.slide,
3       {
4         toValue: 0,
5         duration: 3000,
6         delay: 1000,
7         easing: Easing.ease
8       }
9     )
We have already seen this so there is no need to test it out again. However, there is another way to delay animations. This method can be applied to spring and decay animations as well.
We simply can do Animated.delay(//insert delay in ms) which can be place within a sequence.
Let’s test this out by inserting a 3-second delay into our sequence:
 1     componentDidMount() {
 2       //start sequence
 3       Animated.sequence([
 4         //animation 1
 5         Animated.timing(
 6           this.state.fade,
 7           {
 8            toValue: 1,
 9            duration: 2000,
10            easing: Easing.ease
11           }
12         ),
13         //3-second delay
14         Animated.delay(300),
15         //animation 2
16         Animated.timing(
17           this.state.slide,
18           {
19            toValue: 0,
20            duration: 1000,
21            easing: Easing.ease
22           }
23         )
24       ]).start();
25     }
If you test this out, you will notice there is now a delay between the first and second animation.
Note: This adds a delay to the default position on the animation timeline which is always to run after the previous animation.
Parallel
Another way to control animation timing is to use Animated.parallel.
This goes through an array of animations and fires them at the same time.
One way to use this is on its own.
The syntax is just like a sequence so let’s just change our current Animated.sequence to Animated.parallel as well as remove the delay we just added:
Animated.parallel([...]).start(); //remove delayThis will fire our animations at the same time.
Wait a second! How did it decide on a duration?
By default, it used the duration from our first animation (2 seconds) when it fired both animations simultaneously.
Another way to use parallel is within a sequence. We could use this to fire our first animation and then fire two animations simultaneously after the first one completes. Here’s a visual:
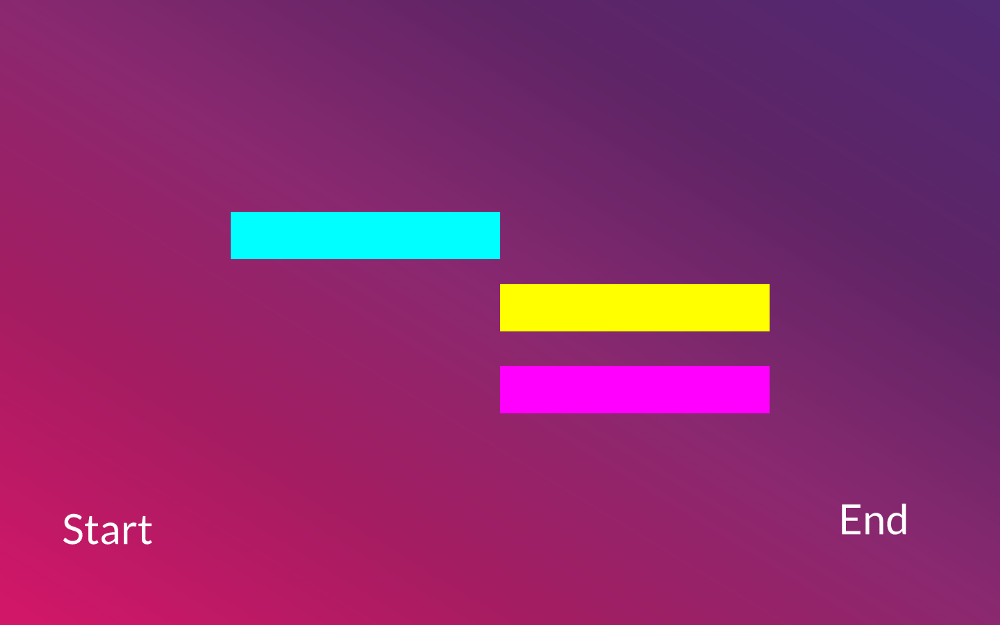
Since we only have 2 properties that are being animated, the first animation will take the opacity from 1 to 0, the second animation will take the opacity from 0 to 1, and the third animation slides the title down.
First, update the state:
this.state = { fade: new Animated.Value(1), slide: new Animated.Value(1.5) };Then, update the code for our lifecycle:
 1     componentDidMount() {
 2       Animated.sequence([
 3         //animation 1
 4         Animated.timing(
 5           this.state.fade,
 6           {
 7            toValue: 0,
 8            duration: 2000,
 9            easing: Easing.ease
10           }
11         ),
12         //fire animation 2 and 3 at same time
13         Animated.parallel([
14           //animation 2
15           Animated.timing(
16             this.state.fade,
17             {
18              toValue: 1,
19              duration: 2000,
20              easing: Easing.ease
21             }
22           ),
23           //animation 3
24           Animated.timing(
25             this.state.slide,
26             {
27              toValue: 0,
28              duration: 2000,
29              easing: Easing.ease
30             }
31           )
32         ])
33       ]).start();
34     }
If we test this out, we will see the following:
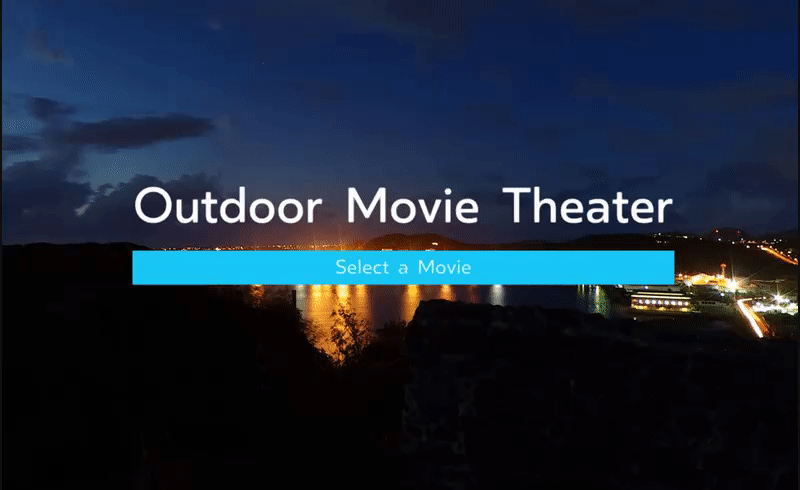
Stagger
The final option for controlling animation timing is to use stagger.
stagger goes through an array of animations and runs all of them with a single delay between each one.
Like parallel, we can run this in a sequence or on its own.
To make things easy, let’s just tweak our previous lifecycle and replace Animated.parallel with Animated.stagger. The only other thing to add is a successive delay in milliseconds before the array. Let’s add a 0.5-second delay:
 1     componentDidMount() {
 2       Animated.sequence([
 3         //animation 1
 4         Animated.timing(
 5           this.state.fade,
 6           {
 7            toValue: 0,
 8            duration: 2000,
 9            easing: Easing.ease
10           }
11         ),
12         //fire animation 2 and 3 with success delay
13         Animated.stagger(500, [
14           //animation 2
15           Animated.timing(
16             this.state.fade,
17             {
18              toValue: 1,
19              duration: 2000,
20              easing: Easing.ease
21             }
22           ),
23           //animation 3
24           Animated.timing(
25             this.state.slide,
26             {
27              toValue: 0,
28              duration: 1000,
29              easing: Easing.ease
30             }
31           )
32         ])
33       ]).start();
34     }
We should expect the title to fade out, begin to fade in, and then slide down 0.5 seconds into the fade in.
Let’s make sure this is working:
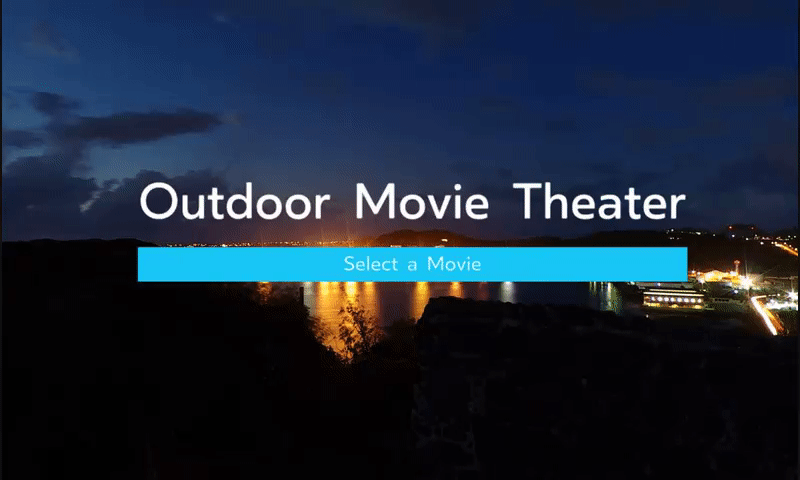
Awesome!
Updating Values
Another thing to cover in this section is how to set a new Animated.value.
This is really simple. Instead of doing this.setState, there’s an optimized way to update an Animated.value. For example, let’s change both values in the local state to 0:
this.state = { fade: new Animated.Value(0), slide: new Animated.Value(0) };Now, let’s set these to their former values at the top of our lifecycle:
1     componentDidMount() {
2       this.state.fade.setValue(1);
3       this.state.slide.setValue(1.5);
4       //sequence here
5     }
If you test this out, you will see that our animation still works fine.

This means that the values were updated correctly.
This may have some use as you work more with animations.
Final Code
Concluding Thoughts
The central aim of this chapter was to introduce the basics of animations in React VR. Animations are a big topic. I could probably write an entire book just on animations in React VR. However, I think the explanations provided are good enough for you to grasp the core concepts. Later on, we will be applying our knowledge of animations into a real-world project.
Learn React VR (Chapter 5 | Star Wars Modeling)
Scope of This Chapter
So far, we have only been rendering 2D text and buttons within our virtual world. In this chapter, we are going to cover rendering 3D models within our virtual world.
To be more specific, we are going to start off focusing on how to render pre-existing 3D models and properties that we can control.
Then, we will look into how to do animation with 3D models.
Finally, we are going to look into how you can create your own 3D models from scratch. As a heads up, 3D modeling is a big topic and could be its own separate book. Therefore, I will be writing more along the lines of pointing you in the right direction than an in-depth tutorial.
I think this chapter will be a ton of fun and of great value so let’s get right to it!
Rendering Pre-existing 3D Models
Creating a New Project
Let’s create a new project for our exploration with 3D modeling and call it StarWarsModeling.
Change directories to wherever you want to save this project and run:
react-vr init StarWarsModelingOnce this finishes, open up the project in your code editor.
Updating the Panoramic
The final thing to do before we get into the 3D modeling is to update the panoramic photo.
Download this photo at the highest resolution.
Let’s keep it simple and rename this Space.jpg.
Make sure to add this in your static_assets folder.
Finally, let’s update the Pano component in index.vr.js like so:
<Pano source={asset('Space.jpg')}/>Also, go ahead and remove the Text component.
cd into the new project from command line, run npm start , and we should see our new virtual world:
Retrieving 3D Models
If we are going to look into rendering pre-existing 3D models, then we need to look at our options for how to retrieve a 3D model to use.
The best library for free 3D models that I have found is Clara.io. Clara.io has a wide variety of 3D models and formats for exporting the 3D models.
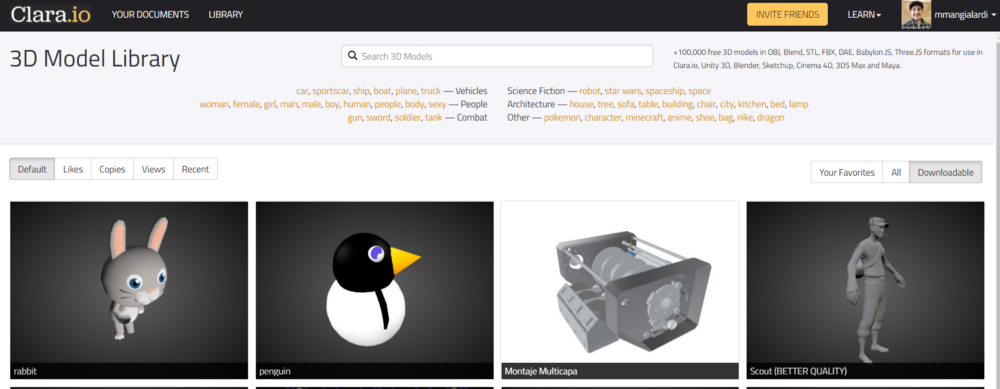
Head over there and as you can guess by the name of our project, we will be looking for Star Wars models to add to our virtual world.
Search Star Wars and let the fun begin!
Instantly, we can see some cool choices:
Let’s click on the Death Star.
Click on Download and select Wavefront OBJ (.obj):
Currently, this is the file format that React VR supports.
Clara will package a zip folder for us to download:

Go ahead and download this.
Extract this zip folder into the static_assets folder.
We can now see two new files:

The file ending in .mtl refers to the material of the model.
The file ending in .obj refers to the *object *of the model.
I like to think of .obj files as the container and .mtl as the fill.
Here’s a visualization:
Seeing the Object
Since you might be curious to see this difference even more clearly, we can actually render just the object with no material.
In index.vr.js, let’s import model:
1     import {
2       AppRegistry,
3       asset,
4       Pano,
5       Text,
6       View,
7       Model
8     } from 'react-vr';
Next, we can render the death-star.obj like so:
1     <View>
2       <Pano source={asset('Space.jpg')}/>
3       <Model
4         source={{
5           obj: asset('death-star.obj'),
6         }}
7       />
8     </View>
If you save and refresh the local host, we will see a massive death star object:
Let’s apply some inline style with a transform so it places this further in the distance:
1     <Model
2       source={{
3         obj: asset('death-star.obj'),
4       }}
5       style={{
6         transform: [{translate: [0, 0, -2]}]
7       }}
8     />
In the code above, we are placing this object 2 meters back from the starting point.
To better see the object, we can also make it a wireframe by adding the following property:
 1     <Model
 2       source={{
 3         obj: asset('death-star.obj')
 4       }}
 5       style={{
 6         transform: [
 7           {translate: [0, 0, -2]}
 8         ]
 9       }}
10       wireframe={true}
11     />
Now, we should see the following:
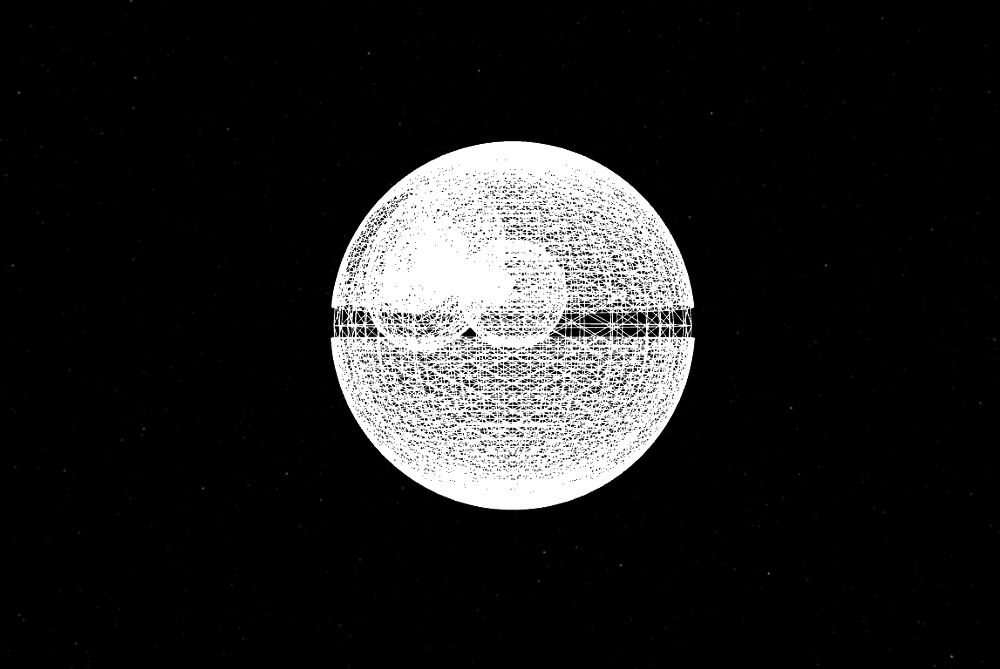
Awesome!
Now, we need to apply the material and set wireframe to false like so:
 1     <Model
 2      wireframe={false}
 3       source={{
 4         obj: asset('death-star.obj'),
 5         mtl: asset('death-star.mtl')
 6       }}
 7       style={{
 8         transform: [
 9           {translate: [0, 0, -2]}
10         ]
11       }}
12     />
Edit: The generated death-star.mtl file is supposed to be applying the screenshot texture (that is also in static_assets) to the model. Despite several efforts, I could not get this file to work. Fortunately, there is a texture property where we can specify an http address for a texture image in place of using the .mtl file.
You can update your code to the following:
 1     <Model
 2       source={{
 3         obj: asset('death-star.obj'),
 4         //mtl: asset('death-star.mtl')
 5       }}
 6       style={{
 7         transform: [
 8           {translate: [0, 0, -2]}
 9         ]
10       }}
11       texture={"https://s3-us-west-2.amazonaws.com/s.cdpn.io/827672/death-star.p\
12 ng"}
13       wireframe={false}
14     />
Refresh and we can now see the Death Star with the material applied:
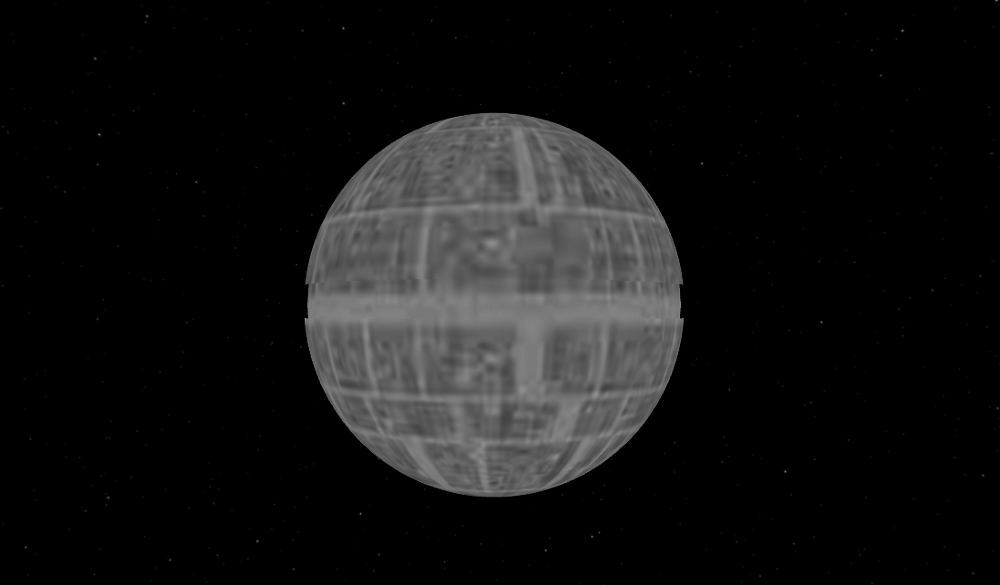
So cool!
Let’s quickly add a slight rotation along the Y axis to see the front:
1     style={{
2       transform: [
3         {translate: [0, 0, -2]},
4         {rotateY: '110deg'}
5       ]
6     }}
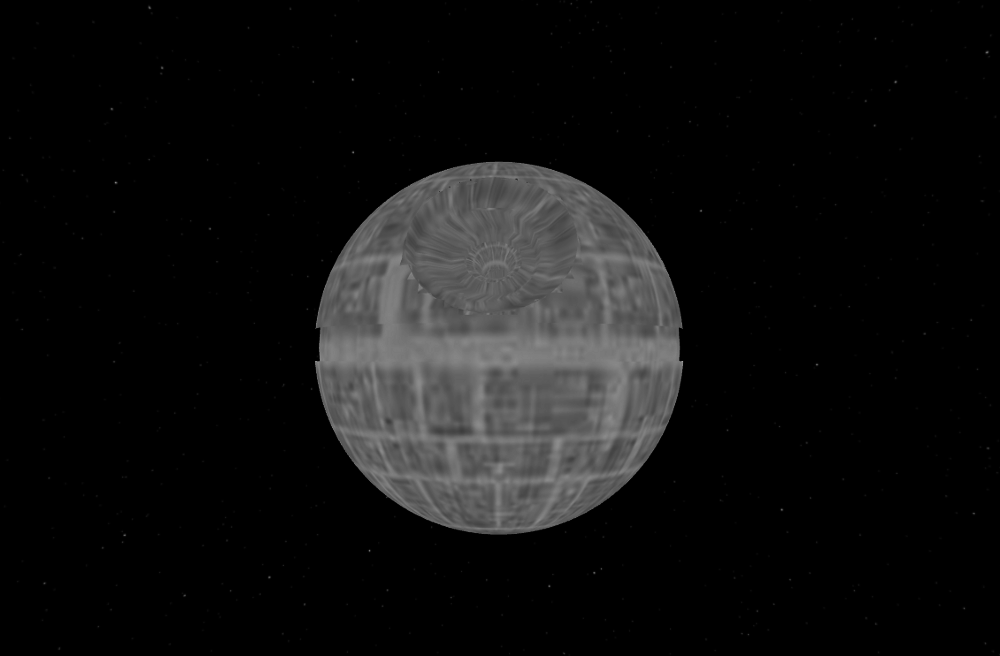
Animating 3D Models

Pretty cool, huh? You know what would make this even cooler? If we could apply some animation…like making the Death Star rotate!
Let’s give this a shot.
In order to do this, we have to import Animated (let’s also import Easing):
 1     import {
 2       AppRegistry,
 3       asset,
 4       Pano,
 5       Text,
 6       View,
 7       Model,
 8       Animated
 9     } from 'react-vr';
10
11     import { Easing } from 'react-native';
Then, let’s add a local state that will have an Animated.Value called rotation:
1     export default class StarWarsModeling extends React.Component {
2       constructor() {
3         super();
4         this.state = { spin: new Animated.Value(0) };
5       }
6       //more stuff
7     }
Next, we bind some inline styling for a rotateZ transformation to this:
1     style={{
2       transform: [
3         {translate: [0, 0, -8]},
4         {rotate: this.state.spin})
5       ]
6     }}
Additionally, we do a timing animation within a componentDidMount lifecycle so the rotation value goes from 0 to 1 in 3 seconds:
 1     componentDidMount() {
 2       Animated.timing(
 3         this.state.spin,
 4         {
 5          toValue: 1,
 6          duration: 3000,
 7          easing: Easing.ease
 8         }
 9       ).start();
10     }
Wait…that won’t work. Why?
rotate transformations have to be strings according to the React VR official documentation:

We need the change from 0 to 1 in the rotation value to be reinterpreted as a string of “0deg” to “360deg”. See if you can think of what we need here.
We can achieve this using interpolate like so:
1     style={{
2       transform: [
3         {translate: [0, 0, -8]},
4         {rotate: this.state.spin.interpolate({
5           inputRange: [0, 1],
6           outputRange: ['0deg', '360deg']
7         })
8       }]
9     }}
To make this a bit cleaner, let’s store the this.state.spin… into a variable above the return:
1     render() {
2       const spin = this.state.spin.interpolate({
3         inputRange: [0, 360],
4         outputRange: ['0deg', '360deg']
5       })
6       //return
7     }
Then, we can update the inline styling so it uses this variable:
1     style={{
2       transform: [
3         {translate: [0, 0, -8]},
4         {rotate: spin}
5       ]
6     }}
There’s one final step remaining. We need to make the model component compatible with the Animated API.
Recall, the Animated API only works with Text, View, and Image. Therefore, we were able to directly do the following in the previous chapter:
<Animated.Text>If we tried to do Animated.Model, we would break our code.
There is a solution, however. We can use createAnimatedComponent.
This can be used to turn a component into an Animated component.
First, we add the following:
 1     render() {
 2         const spin = this.state.spin.interpolate({
 3           inputRange: [0, 1],
 4           outputRange: ['0deg', '360deg']
 5         });
 6
 7         const AnimatedModel = Animated.createAnimatedComponent(Model);
 8
 9         //more stuff
10     }
Then, we use AnimatedModel in place of Model in the tag:
 1     <AnimatedModel
 2       source={{
 3         obj: asset('death-star.obj'),
 4         //mtl: asset('death-star.mtl')
 5       }}
 6       style={{
 7         transform: [
 8           {translate: [0, 0, -2]},
 9           {rotateY: spin}
10         ]
11       }}
12       texture={"https://s3-us-west-2.amazonaws.com/s.cdpn.io/827672/death-star.p\
13 ng"}
14       wireframe={false}
15     />
Refresh and let’s see if this worked!
Super cool!
Looping Animations
The Death Star rotates fully and then stops animating. We want to have it loop. We did not cover this in the previous chapter so let’s explore.
In order to loop our animation, let’s remove the animation from the lifecycle and place it in a separate function:
 1     componentDidMount() {
 2
 3     }
 4
 5     spinAnimation() {
 6       Animated.timing(
 7         this.state.spin,
 8         {
 9          toValue: 1,
10          duration: 3000,
11          easing: Easing.linear
12         }
13       ).start();
14     }
Then, we want to call this spinAnimation function from the lifecycle:
1     componentDidMount() {
2       this.spinAnimation();
3     }
Next, we will have a call back in the start function of our spin animation that will call the animation again:
.start( () => this.spinAnimation() );The final piece of the puzzle is have the Animated.Value of spin be reset at the start of the animation:
 1     spinAnimation() {
 2       this.state.spin.setValue(0);
 3       Animated.timing(
 4         this.state.spin,
 5         {
 6          toValue: 1,
 7          duration: 3000,
 8          easing: Easing.linear
 9         }
10       ).start( () => this.spinAnimation() );
11     }
I also have updated the easing function to linear for styling preference.
Let’s see if this worked:
Neat!
Creating Custom Models
As you can guess, creating 3D models is a crucial step in VR development. However, it is no small task. Exploring the depths of 3D modeling takes a lot of time and practice on top of working with React VR.
Personally, I have focused all of my illustration efforts in the 2D realm and 3D modeling seems pretty intimidating. For this reason, I am just going to put you in the right direction for further exploration.
There’s a whole host of 3D modeling tools. You can explore these options for yourself but I would start with Tinkercad and then move on to Blender.
Tinkercad is a good place to start because it requires no installations and has a really simple interface.
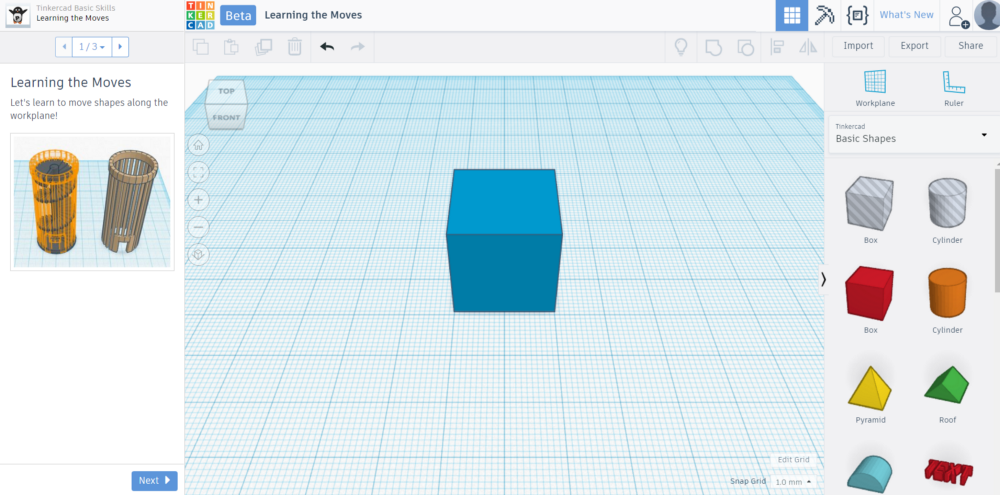
Tinkercad removes a ton of features and complexities of 3D modeling and allows you to get a taste of working with 3D shapes on a plane.
After you play around, you can export models in the .obj file format for use in React VR.
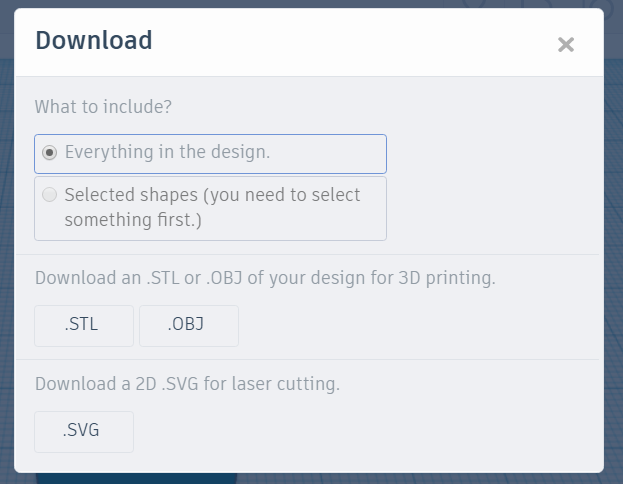
It even provides some tutorials for getting started.
While there are other options for more complex 3D modeling, I recommend moving from Tinkercad to Blender.
Blender is open-source and has a strong community behind it.
It has all the features and tools for professional use.
With that being said, the user interface is probably the most overwhelming part:

**
However, you will have no issues finding tutorials and video courses to get started with Blender as a beginner. Here’s a beginner course suggested from the Blender site.
In Blender, you will be able to export 3D models in the .obj format for use in React VR.
Final Code
Concluding Thoughts
In this chapter, we have been able to learn everything we need to know to start implementing 3D models with animation in React VR. At this point, you should have enough knowledge if you wish to do further exploration on your own. If you do so, try to also organize this project as we did in Chapter 3.
In the next chapter, we will put 3D concepts aside and look into creating useful scalable vector graphics (SVG) for use in React VR.
Learn React VR (Chapter 6 | Vector Graphic Exploration)
Scope of This Chapter
In this chapter, I’m going to teach everything you need to know to get started to create vector graphics and export them as scalable vector graphics (SVG). Then, I will go over exporting a vector graphic and importing it into React VR. Finally, we will create an awesome polygon vector graphic to use as a panoramic image in our virtual world.
Note: When I refer to vector graphics, I am referring to graphics made out of shapes and shape manipulation through a GUI (i.e. Adobe Illustrator, Affinity Designer, etc.). When I refer to SVG, I am referring to the exported vector graphic from a GUI to a .svg file. We can’t import .svg files into React VR at the moment, but we can create vector graphics, export them as .png and .jpg files, and use them.
Getting Caught to Speed with SVG
SVG (scalable vector graphics) is a buzz word tossed around a lot within the space of frontend development, however, they are not all that simple to understand and work with. In fact, I have recorded a very lengthy video course just on scalable vector graphics alone that I plan on releasing later this year. There’s a whole lot that we could discuss.
I certainly don’t have all the time to unpack the ins and outs of working with SVG. However, I’ll do my best to provide a decent overview of what they are and the workflow for creating them.
What are they?
When we think of graphics on the web, we traditionally think about taking an existing image file (.png or .jpg) and placing it somewhere.
It’s almost like we are taking a sticker and slapping it on a web page. If we need to scale it, we essentially peel away the previous sticker and slap on a smaller one.
With SVG, there’s something completely different going. Instead of taking an existing file and slapping it on a web page, we are writing instructions for the browser to render multiple shapes that form a final graphic when put together.
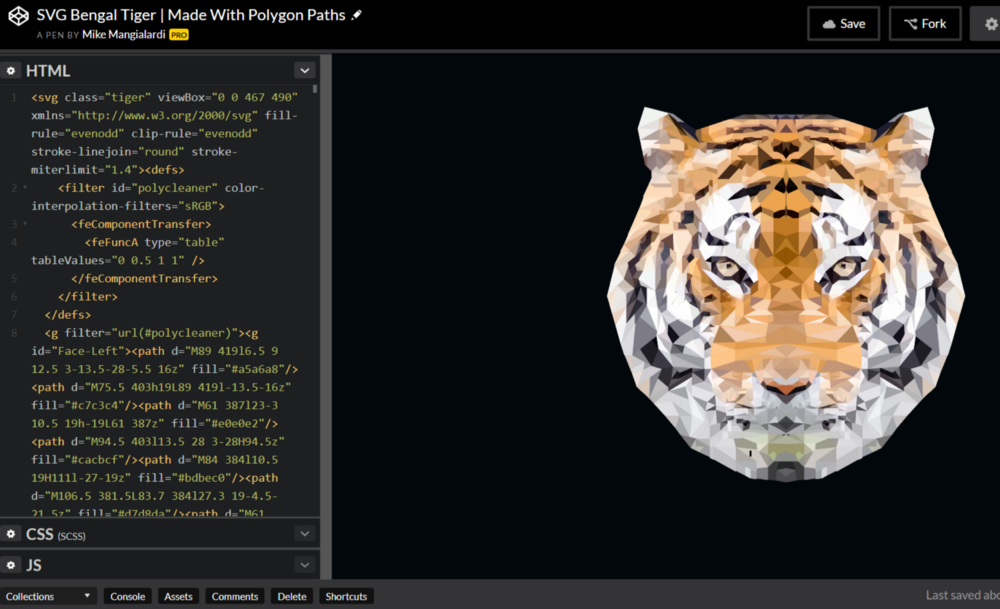
If you look at the image above, you can see some of the SVG code on the left which is rendering the tiger made out of polygons on the right.
This code looks super intimidating. However, there is no need to write out any of the SVG code because there are software tools that allow us to create vector graphics through a GUI and export the final SVG code.
The cool part about this the graphic can be styled and animated dynamically.
For example, here is a picture of koala rendered by SVG code:
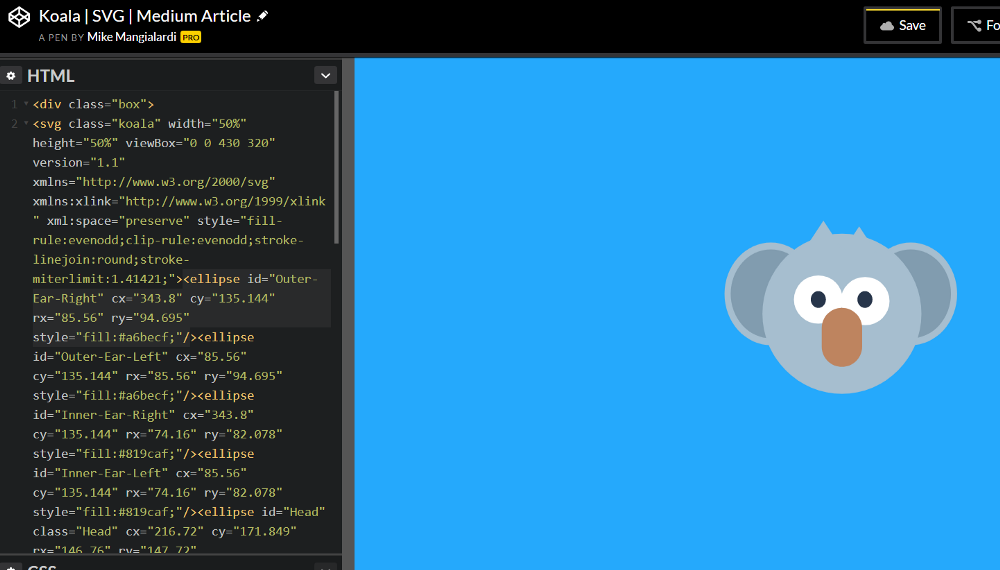
Let’s look at the code snippet that is highlighted above:
1     <ellipse id="Outer-Ear-Right" cx="343.8" cy="135.144" rx="85.56" ry="94.695"\
2  style="fill:#a6becf;"/
This is part of the coded instructions that is telling the browser to display the outer gray circle on the right ear of the koala.
If I update the fill (which is coloring in this outer circle with a gray color) to #FFFFFF then it becomes white:
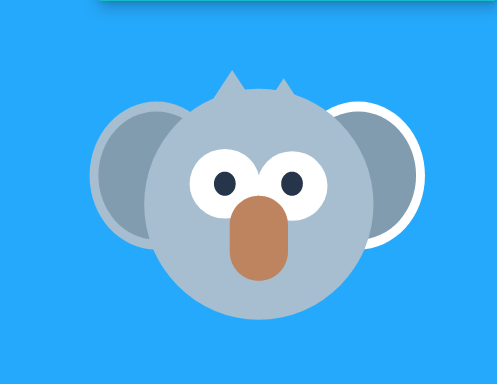
Cool! This means we can control the styling of individual shapes of a graphic without code. Using some JavaScript magic, we can do dynamic styling and SVG animations. For example, here’s an animated Codepen editor I created:

](https://cdn-images-1.medium.com/max/1000/1*sq2ctPG8G4rO8IQxRu0Xew.gif)
Awesome!
But wait…it gets even better.
The scalable part in SVG refers to the fact these graphics can automatically scale and retain the proper height/width ratio no matter how a user adjusts the screen. This is awesome for modern, responsive web design.

Awesome! Another result of this is that SVG will never be fuzzy if the image is stretched past its original dimensions.
All of this to say, SVG have a tremendous amount of use cases on the web.
They can…
- Replace traditional graphics even if static for the scaling benefits
- Render beautiful animations
- Make awesome section backgrounds of web pages
- Replace traditional icons
- & much more!
SVG in React VR
Initially, I was trying to be ambitious and get SVG to work in React VR. As I alluded to earlier, there is currently no default way or supplementary package for rendering SVG in React VR. I tried using the same methodologies for getting SVG to render in React Native with no success.
Nevertheless, I still want to include a nice tutorial on how to make vector graphics through a GUI and import them into React VR as .png and .jpg files. While we won’t have some of the cool benefits of SVG, we still can make use of nice vector graphics in a virtual web experience. Particular, we will be making a vector graphic that we can use for the Pano tag of our virtual world.
Creating Vector Graphics in a GUI
Tools of the Trade
When it comes to vector graphic software, there are really two major options: Adobe Illustrator and Affinity Designer.
I love Affinity Designer. It’s cross-platform and only a one-time fee of $50. I actually prefer it over Adobe Illustrator and not merely suggesting that it’s a decent alternative.
I highly, highly recommend the investment. I literally use it for everything (I even use it over Sketch).
Nevertheless, I can’t really demand/expect you to pick this up right this second.
Fortunately, there’s a free alternative that we can use called Gravit.
Go ahead and install this.
Vector Graphic Basics
Once you are ready, open a new file it dimensions of 1440 x 900 px right below the middle icon of the second row:
This opens a new canvas:
On this canvas, we can drag out different shapes and manipulate them. Making a good vector graphic is truly as simple as putting shapes together, making modifications to those basic shapes as needed, and applying a good color palette.
Let’s do this and explore the major features of the UI in the process (note that I’m only going to explain what’s important and not obvious).
First and foremost, the select tool (first blue icon) is used constantly to select and move shapes.
On the top toolbar, you can expand the third blue icon and see all the possible shapes:
Let’s select Rectangle and drag one out across our canvas:

Then, use the select tool to drag it into the horizontal and vertical center. You will notice that it snaps into place:
This is called snapping. You can see all the snapping options by expanding the red magnet icon:
You could also turn on a grid for a better understanding of how things can be laid out and snapped into place if you desire.
When the rectangle is selected, there are some important things appearing on the right side of the UI:

There are options to control appearance, fills, and borders. Note that the options will be different depending on the selected shape.
A few things to point out in particular:
Corner refers to the rounding down of our rectangle’s corners:
Fills refers to the color that fills in our shape. Let’s click on the circle to change the color/fill of our rectangle:
The cool thing here is that we can use hex codes. Using a tool like Coolors, you should have no issue getting good hex codes to use.
Trying pasting in the following:
#DF928EWe now see:
Cool!
Borders refer to the border that surrounds our rectangle.
Click the plus sign to add a border.
We can update the color and update the thickness like so:
This is the basic gist of making shapes. However, let’s look at some more complex use cases.
Wouldn’t it be cool if we can create our own shapes?
We can! Select the path tool which is the second blue icon:

Using this tool, you can click away on the canvas to form different nodes/ends of the custom shape and eventually close it off:
Then, you can use the subselect tool (expand the first blue icon):
This will allow you to move the nodes, curve paths between the nodes, and adjust the curves:

As we add shapes, we will see them appear on the layers panel:
The order of the layers controls the depth of the shapes.
If I moved down the ellipse, it would be placed on the bottom and therefore hidden by the larger rectangle:
You can also double-click the layers to rename them:
This will be very important when we get to the exporting process for our vector graphic.
Let’s wrap up the basics by looking at compound shapes. A compound shape is a shape created from multiple shapes.
There are 4 ways to create a compound shape. We can union, subtract, intersect, or divide multiples shapes to create a compound shape.
Draw out a rectangle if you don’t have one already and copy and paste to create another one.
Click one rectangle and overlap it with the other:
Then, go to Modify → Compound Shape → Union:

This combines the two rectangles into one:
Intersect will take the intersection between both shapes and make it the shape:
Subtract will subtract one of the shapes from the other:
Finally, difference will maintain two shapes and remove the overlap:
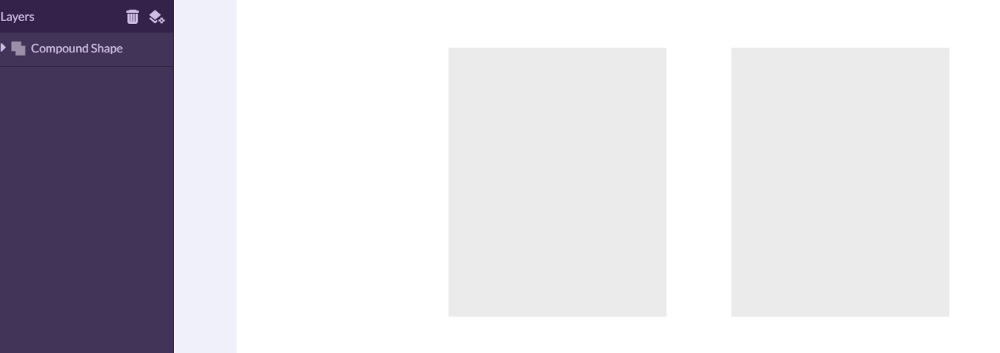
With the basics of creating vector graphics aside, it really comes down to practice in order to get better at making vector graphics. The best way to practice is to look at existing graphics on Dribbble, break the graphic into shapes and/or shapes with slight modifications, and try to recreate the graphic. Use Coolors, Dribbble, and Colorzilla for color choices. Then, start to use Dribbble as inspiration to create your own graphics. Once again, it’s all about practice, practice, and more practice.
For now, let’s create a vector graphic together.
Breaking Down Our Vector Graphic
Now, we want to create a vector graphic of a koala to use our new skills.

Before we do that, we need to break down the existing image we are seeking to replicate.
It may look complex, but it is really just a collection of simple shapes.
Let’s break this image down and then create the vector graphic.
Head
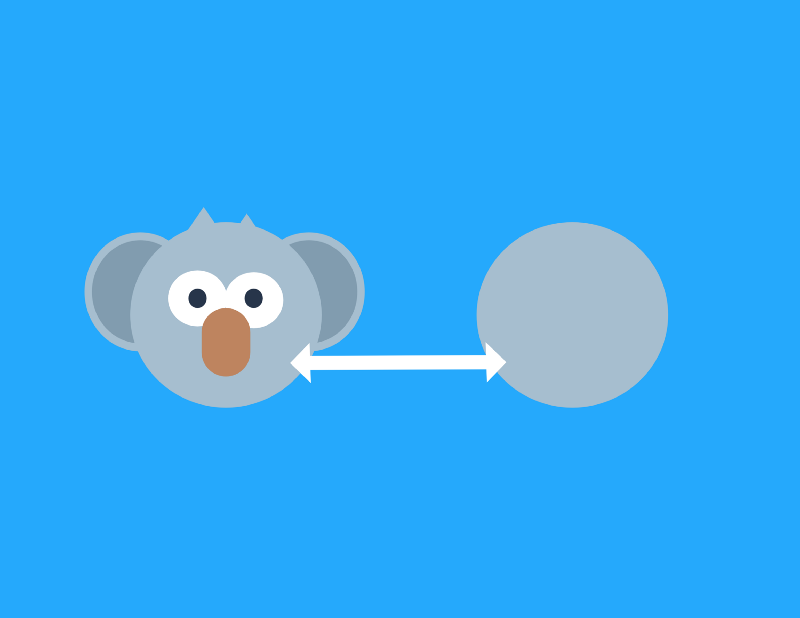
Our head will be a light-gray circle.
Ears
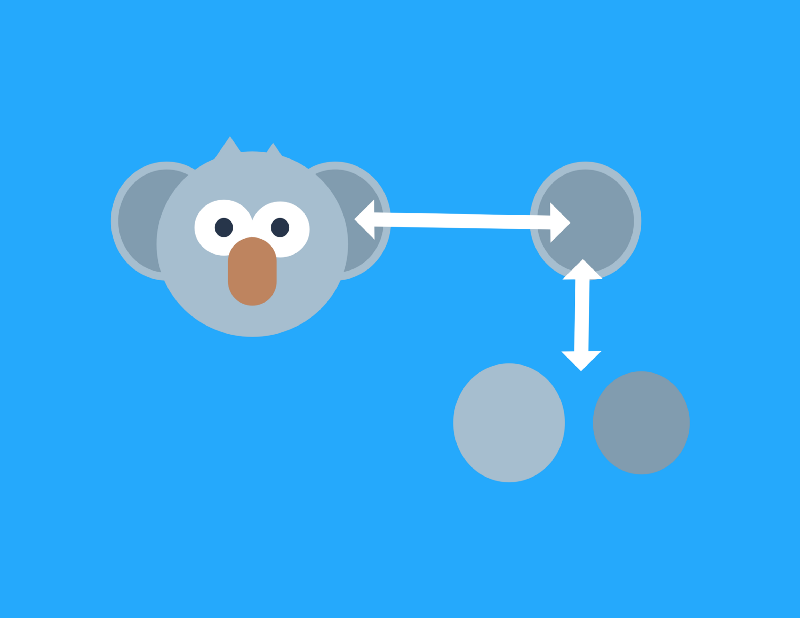
Our ears will each be two circles stacked on top of each other. We will have a larger light-gray circle on the bottom. Then, we stack a smaller dark-gray circle on top.
Also, notice that the ears are behind the head.
Eyes
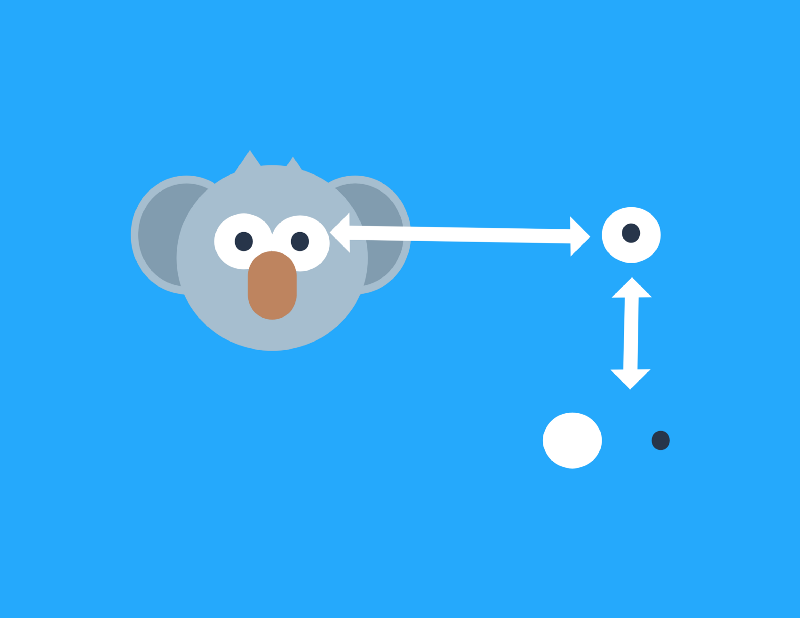
The eyes will again be two circles on top of each other. One will be a large white circle and one a small black circle. Each eye will be on top of the head.
Nose

The nose will be a brown rounded-rectangle. It will set right on top of the eyes.
Hair
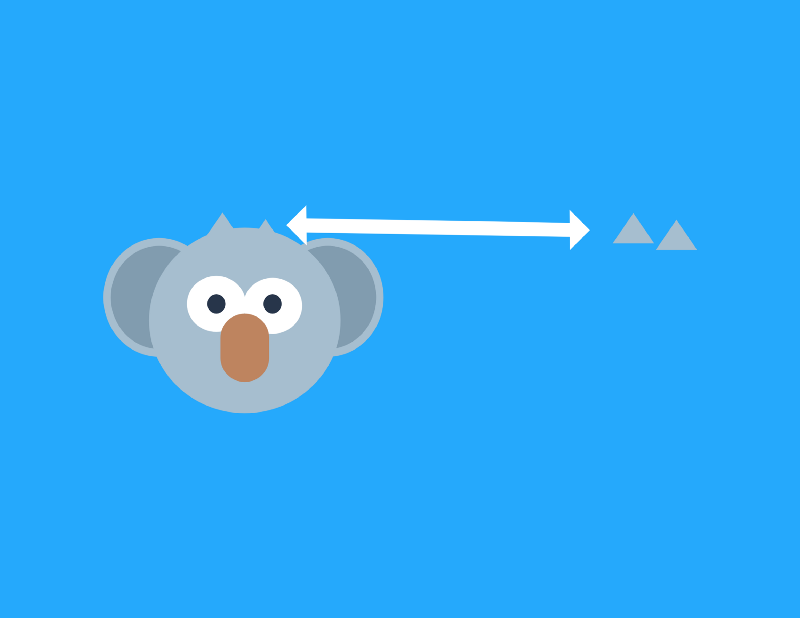
Our hair will be two light-gray triangles that sit at the top of the head.
That’s it! Pretty cool, right?
As you can tell, it is really just a few simple shapes but looks clean, cute, and bold!
Now, let’s make this vector graphic!
Creating Our First Vector Graphic
Clear your canvas in Gravit and let’s begin.
First, we drag and rectangle that covers the entire canvas. Give it the following fill:
#25A9FCThen, drag out a circle and snap it in the middle of the canvas. Use the following fill:
#D3DAE0
Next, let’s create the outer left ear which will be a dark gray circle like so:
The fill is #A6BECF.
Then, we can create a light gray circle on top of the outer left ear to form our inner left ear. You can duplicate the outer left ear using CTRL + D and then use the select tool and hold SHIFT to shrink the duplicated ellipse while maintaining the same height/width ratio. The inner left ear should be slightly smaller than the outer left ear.
Snap inner left ear in the center of the outer left ear and use the following fill:
#D3DAE0
Select the outer ear left and inner ear left and holding SHIFT and clicking both. Then, we want to group these two together since they form a completed left ear when put together. To group these shapes, you can hit CTRL + G.
You can this has been grouped by looking at the Layers panel:
Now, we can duplicate this group (CTRL + D) to form our right ear.
To get it in the right location, make sure the duplicated ear is directly over the original ear:

Then, hold SHIFT and drag it horizontally until the distance is like this:

To make sure these ears are the same distance from the center, select both of them (hold SHIFT and click each) and drag them until you see the following:
Make sure both of the ear groups and selected and drag them just below the Ellipse in the Layers panel:

We should now see the following:
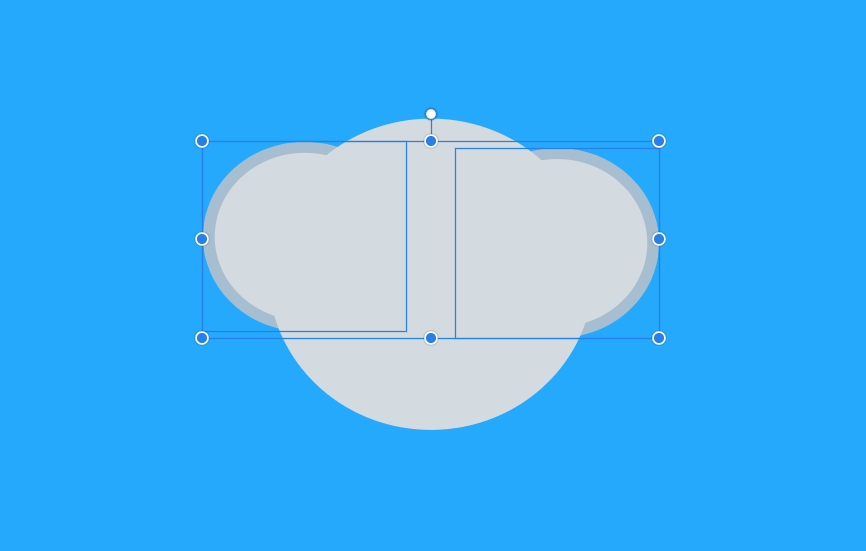
Group these ears together by clicking CTRL + G.
Deselect these ears and let’s drag out a white circle for the outer left eye:

Duplicate this ellipse and overlap the duplicated ellipse with the previous one. Select both of them and center them horizontally like so:

Then, duplicate the outer left eye and drag the duplicated ellipse while holding shift. This will form the left pupil so try to make it the quite a bit smaller than the outer left eye. Use #2A394c as the fill and center it:

Then, you can duplicate the left pupil, make sure the duplicate is directly over the original, and drag it into the center of the outer right eye:

Note that if the right pupil shows up behind the outer right eye then you will need to adjust the layering from the Layers panel.
Select the outer left eye and the pupil and group it to form the left eye. Do the same for the right eye and then group the left eye and right eye together.
Next, let’s drag out a rectangle with a fill of #BE8560 like so:

Then, select the nose and give it a Corner value of 42 in the Appearance panel:
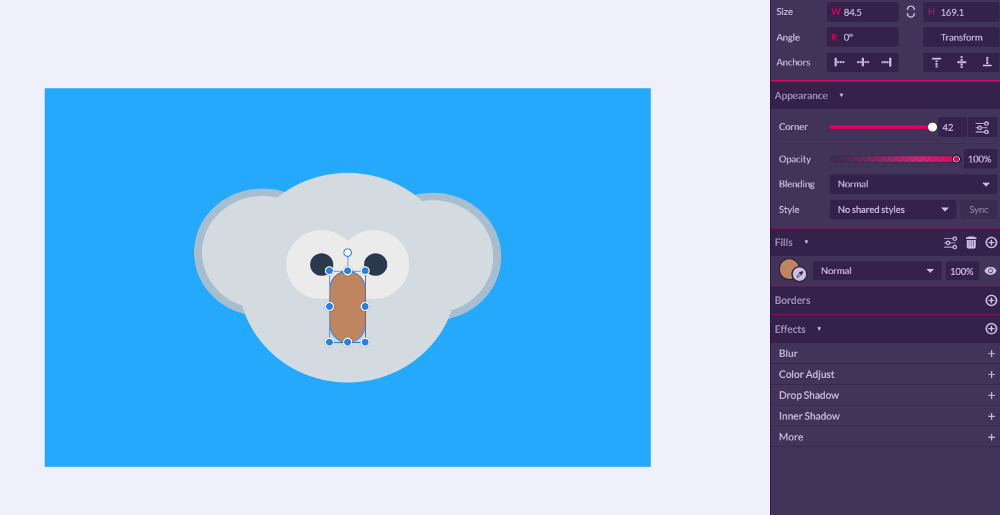
Finally, you can drag out a left and right triangle to form the left hair and right hair. The triangle tool in Gravit allows you to rotate the triangle which is annoying but you want the bottom to be flat. Use you best judgment to get the left hair and right hair to look like the following:

Group the left hair and right hair together and our koala is complete!
Note: I was using the auto-generated colors from Dribbble which weren’t exactly the same as the original graphic. We will leave it as is.
Exporting Our Vector Graphic

At this point, you should have created your very first vector graphic which is a cute koala. Now, we are going to export out koala from Gravit to SVG code. We currently can’t import .svg files to React VR, but I want to still show you the process in case that changes.
Labeling Our Layers
Let’s start by labeling all the outermost layers like so (keep the capitalization):

Going another level down in our layers, let’s have the following names:
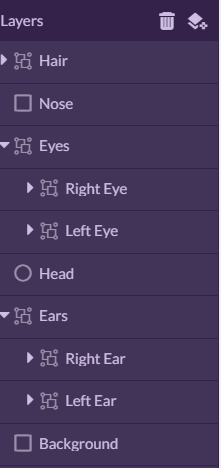
Going the next level down, let’s name the shapes that form our eyes and ears:
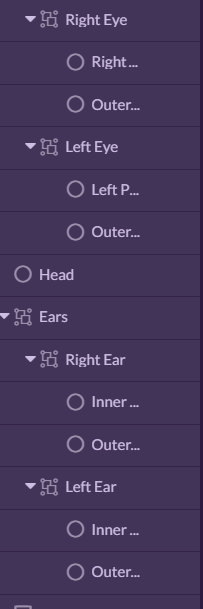
The column cuts it off but the naming convention for the eyes is [Left or Right] Pupil and Outer [Left or Right] Eye. The naming convention for the ears are Inner [Left or Right] Ear and Outer [Left or Right] Ear.
The naming of every label is a very important step when working with SVG. We will see the reason for this shortly.
Exporting as a SVG File
Now that our koala graphic is complete, go to File → Export → Canvas and hit export:
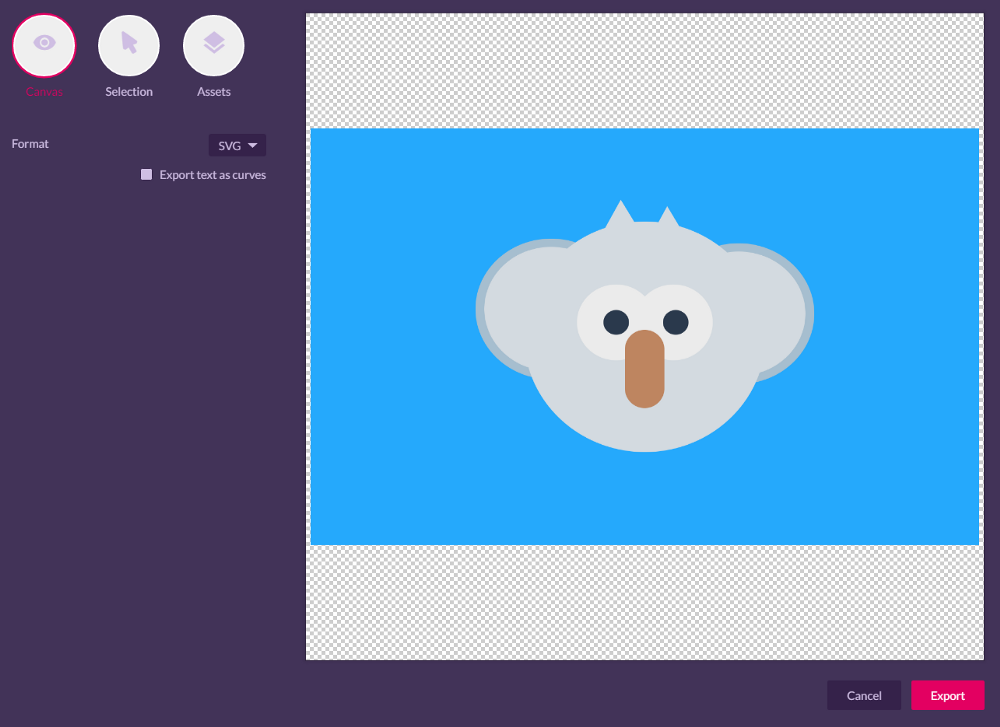
Save it locally as Koala.svg.
Extraction and Optimization
Our koala has been exported into .svg file.
Hold up…didn’t I say that SVG are all about coded instructions?
Yes, this .svg file contains code that contain the instructions.
We can use a tool called SVGOMG to see this code and optimize it.
Go to this tool and click Open SVG. Open the Koala.svg file:

This tool has taken our .svg file and optimized the file size by 51.87%. This is controlled by the Features panel which controls what unnecessary stuff is removed for optimization. Cool! Just make sure that **Clean IDs **is toggled off. Everything else can be left as the default.
Now, click on the CODE tab and we can now see the coded instructions:

Woah!
The entire svg tag contains our graphic and everything between is an individual shape:
1     <path fill="#BE8560" d="M719.5 435c23.456 0 42.5 18.92 42.5 42.225v84.55C762\
2  585.08 742.956 604 719.5 604S677 585.08 677 561.775v-84.55C677 453.92 696.044 4\
3 35 719.5 435z"/><path fill="#D3DAE0" d="M709.638 221.64l-79.052 1.642L668.69 154\
4 M809.414 236.36L730.362 238l38.105-69.282"/>
Recall, a path refers to a custom shape in the Gravit GUI. Technically, all shapes are a path but you could use a predefined tag for the shapes such as:
1     <ellipse>
2     <line>
3     <rect>
4     <polygon>
Usually, Affinity Designer retains these predefined tags for better organization but it looks like Gravit exports everything a path.
The g tags refer to the groups we formed:
<g>...</g> //example: earsImportant Note: I had us label our shapes and groups because Affinity Designer exports the shape tags with an id that is the same as the label name. For example:
<ellipse id="Left-Pupil">This is critical because it allows us to apply dynamic styling and animations to individual shapes of our graphic with code.
It looks like Gravit does not do this which is a huge bummer. Again, I recommend getting Affinity Designer but we won’t need this feature for the rest of this chapter.
We have learned how to create vector graphics in a GUI and export them as .svg files. Since we can’t do anything with SVG in React VR, we will export our koala again as a* .png* file and display it in React VR. Then, we will create an awesome panoramic vector graphic to use as the panoramic photo in our virtual world.
Taking Vector Graphics to React VR

Creating a New Project
Let’s create a new project for our exploration with SVG called VectorGraphicPanoramic.
Change directories to wherever you want to save this project and run:
react-vr init SvgExplorationOnce this finishes, open up the project in your code editor.
Exporting Our Koala
Let’s go back to Gravit and export our koala as a .png.
Go to File → Export, select canvas, and export as a .png file type:
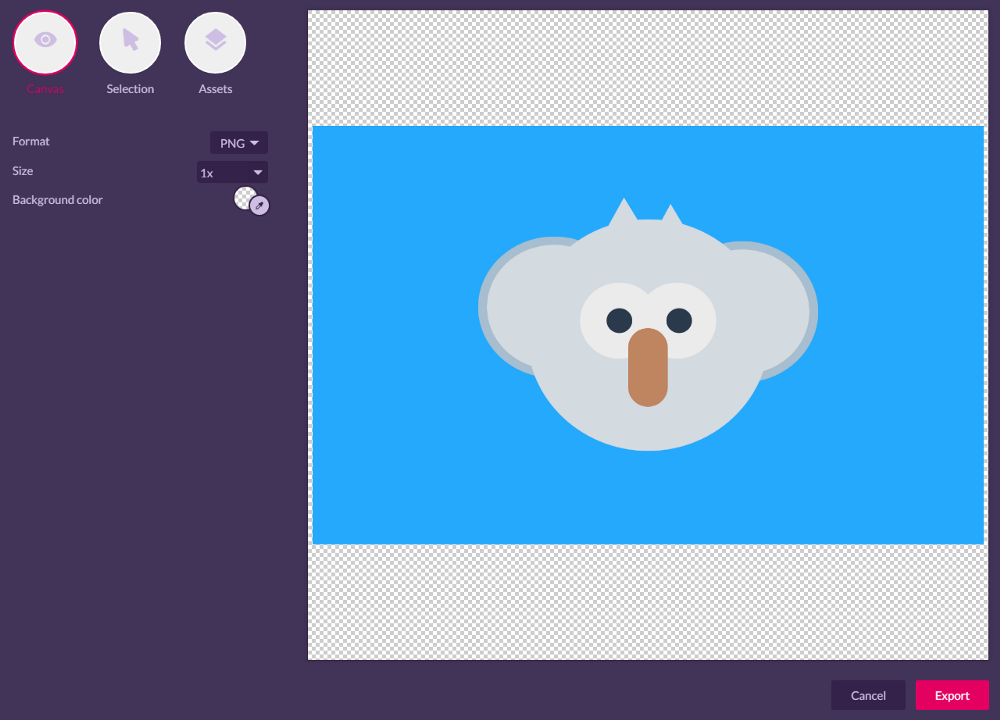
Save it in the static_assets *folder as koala.svg*.
Importing Our Koala
Open index.vr.js and remove the Text component so we just have:
1     <View>
2       <Pano source={asset('chess-world.jpg')}/>
3     </View>
Then, let’s import the Image component:
1     import {
2       AppRegistry,
3       asset,
4       Pano,
5       Text,
6       View,
7       Image
8     } from 'react-vr';
Finally, let’s render our koala graphic with some inline styling:
 1     <View>
 2       <Pano source={asset('chess-world.jpg')}/>
 3       <Image
 4         style={{
 5           height: 1,
 6           width: 1.6,
 7           layoutOrigin: [0.5, 0.5],
 8           transform: [{translate: [0, 0, -3]}]
 9         }}
10         source={asset('koala.png')}
11       />
12     </View>
Note that I set the height as 1 meter and got width by calculating the ration of our canvas in Gravit like so :
1440/900 = 1.6cd into the project root, run npm start , and go to the local host:
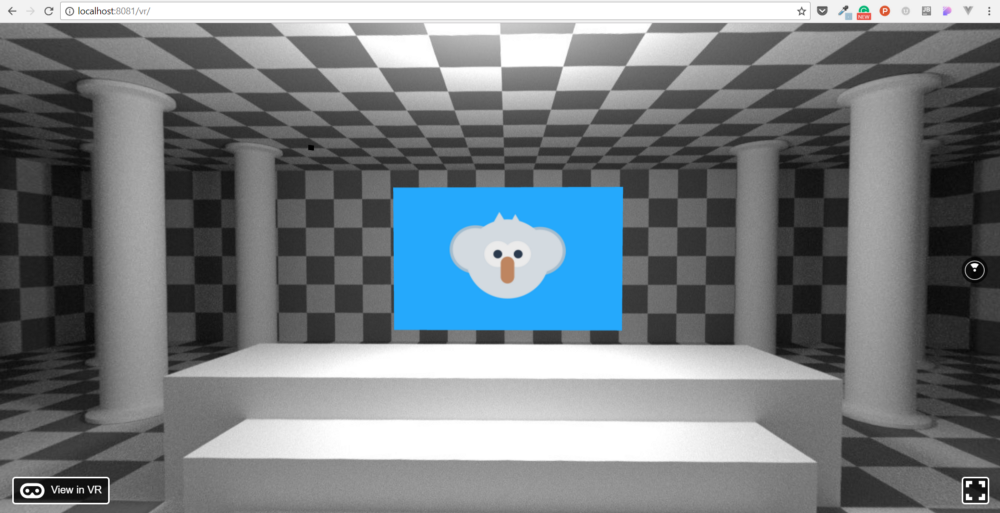
Cool! Let’s take this to a whole ‘nother level.
Panoramic Vector Graphic
Here’s the part of this chapter that I am really excited about!
So far, we have been using equirectangular photos from Flickr for the panoramic image in our virtual worlds.
While these images require special 360-degree cameras and such, it’s not difficult to use vector graphics as a panoramic (although they aren’t nearly as crisp and cool). All we need to do is make sure the graphic has a width that is 2x the height and it will work.
Instead of doing a very basic example, however, I want to do something really cool. I want to make a polygon vector graphic.
A polygon vector graphic is simply creating an image only out of different colored polygons. For example, here’s a polygon tiger (left) I created from an existing image:
Creating that vector graphic took 10 hours but the process was a lot simpler than you might anticipate.
We are going to take the following panoramic image and turn it into a polygon vector graphic which we can then use in React VR:

This will not take nearly as much time as my highly-detailed tiger.
Creating the Polygon Panoramic
Create a new file in Gravit and give a dimension of 8000 x 4000:
Next, copy this photo and paste it into the canvas:
Stretch it over the canvas like so:

Then, select the path tool and update the fill to 0% and the border to white with a thickness of 20:
Then, create a triangle like so:
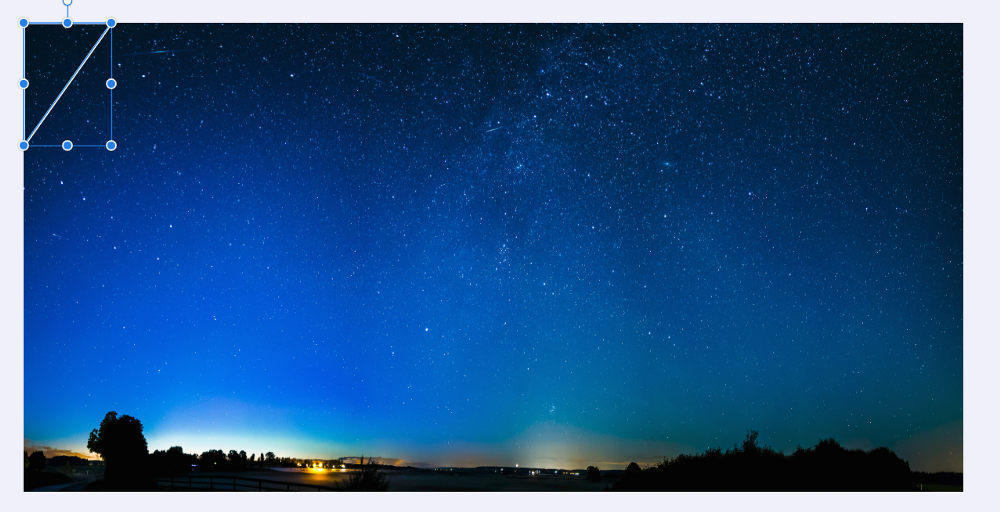
Click the select tool (v is the shortcut) and click outside of the canvas to reset the path tool.
You can continue to create triangles like this until we have filled up an entire row like so:
There is no right size or type of triangle to create. It is totally up to you. The randomness of the triangles is what makes it cool in my opinion. You can also do any polygon.
Once you have a row, select the first triangle/polygon from the left. Select the dropper icon next circle where we ordinarily select a color. This will allow us to use a color anywhere on the canvas as the fill.
Click anywhere in between the polygon with the dropper tool and you will see something like this:
Repeat this process for every polygon in the row:
Then, select every polygon (click the top and bottom path in the Layers panel while holding SHIFT):

While selected, change the border to 0% opacity and then click the trash icon:

While everything is still select, group them together.
Deselect everything and we will see this:
If we wanted to make thing really amazing, we would make much smaller triangles and do the same process. For now, we can just repeat this process until the sky is full. You can use the subselect tool to adjust nodes in order to close gaps if needed:
Once you are done, you should see something like this:
Zoom in and finish the rest with smaller polygons (reduce the thickness of the path tool if preferable):
Here’s my final product:
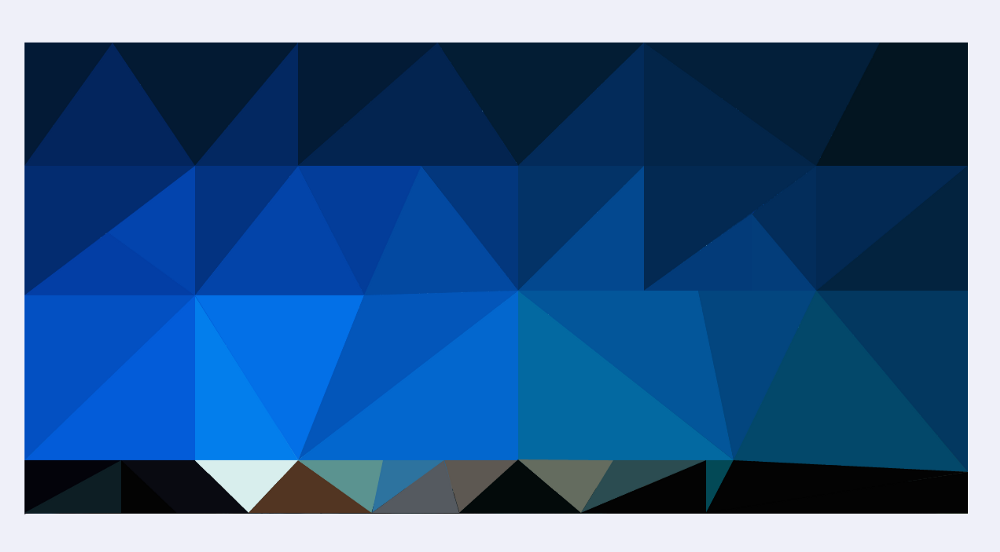
The idea is that if we were really detailed and made really small triangles, then we would have recreated the photo very realistically using polygons like my tiger. However, we made very large triangles to save time which is not very realistic. Nevertheless, it is really cool and we can use it to make a cool panoramic photo.
Group all the polygons together (not the image) and change the opacity to 51%:
Finally, let’s export the canvas as a .png file, call it poly-background.png, and save it in the static_assets folder.
To see this in React VR, update the Pano tag in index.vr.js like so:
<Pano source={asset('poly-background.png')}/>Refresh the local host and we will see the following:
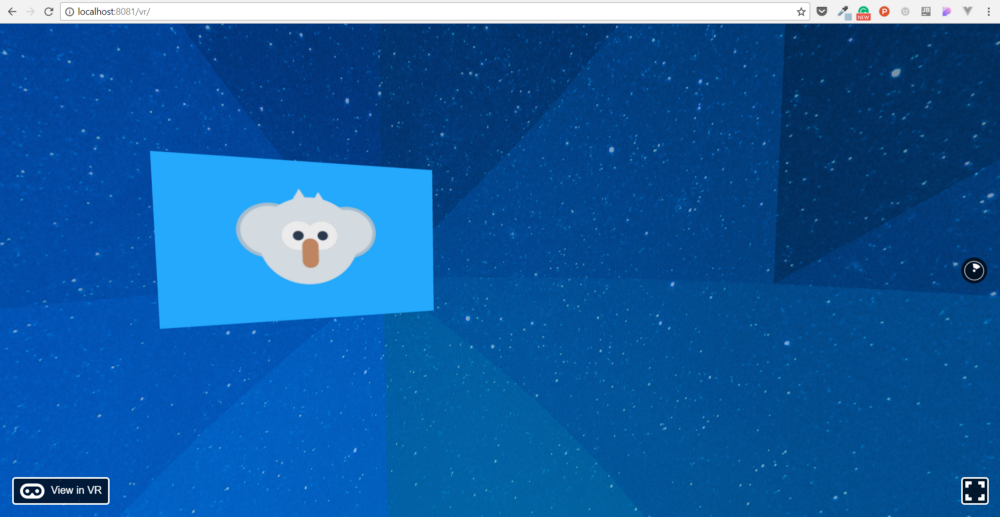
Take a look around. As you can see, it’s not nearly as clear and crisp as the equirectangular photo. However, it’s still a cool option when creating panoramic backgrounds for VR apps.
Final Code
Concluding Thoughts
Hopefully, there is improvements to React VR to allow for SVG. In the meantime, I think this chapter has still brought great value and enough knowledge for additional exploration on your own.
Learn React VR (Chapter 7 | UI/UX Principles for VR Design)

Scope of This Chapter
It’s most likely that you are learning React VR coming from a background doing development in a different sphere (i.e. web development). Because of that, there’s a strong tendency to apply the user experience from that sphere of development in VR. However, VR is quite unlike any other experience for a user.
The most important consideration to make for user experience is the fact that the user will be wearing headgear and moving their head frequently to navigate through the virtual world. This means we have to make special considerations. This is especially important as a bad UX design in VR can lead to nausea while a bad UX design in a different sphere won’t have those same consequences.
In this chapter, we will go over different user experience principles for VR design. While some advice may seem obvious, it never hurts to reiterate good design principles. This chapter will also be an easy read with no coding so you can catch your breath before we crank it up to finish this book.
Distance

When it comes to distance, there are a few considerations to make.
Avoid focus on objects of different distance
Imagine you had two objects that required your focus in a virtual world. If you had to continually alternate between focusing on an object of short distance and an object of great distance, this could an uncomfortable sensation for a user.
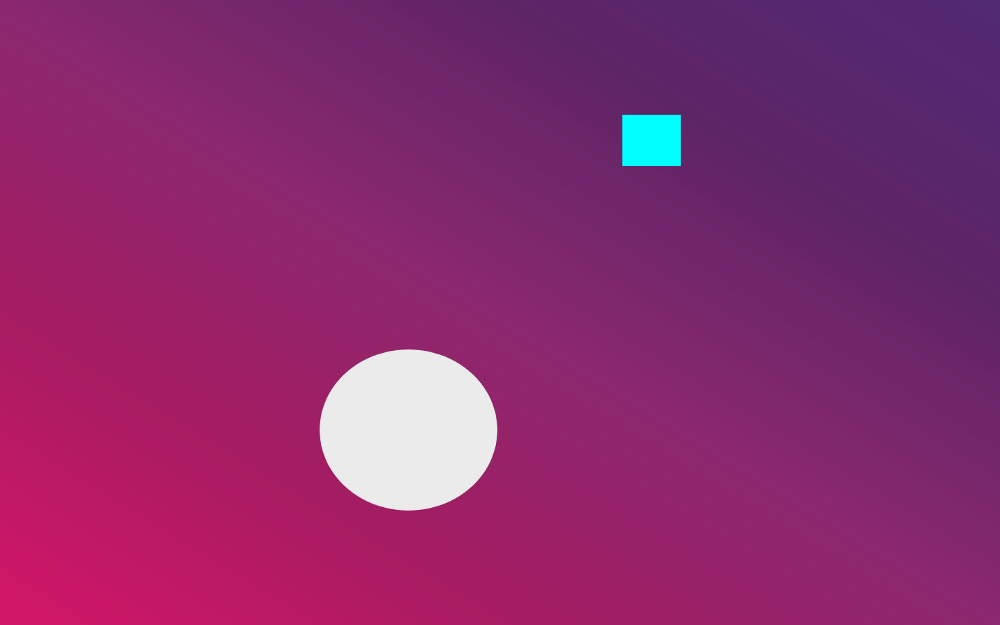
Keep a Comfortable Distance
The closer an object comes to the line of site of a user, the larger it appears even if the size is retained. Additionally, an object came become blurry and out of focus when too close to the user.
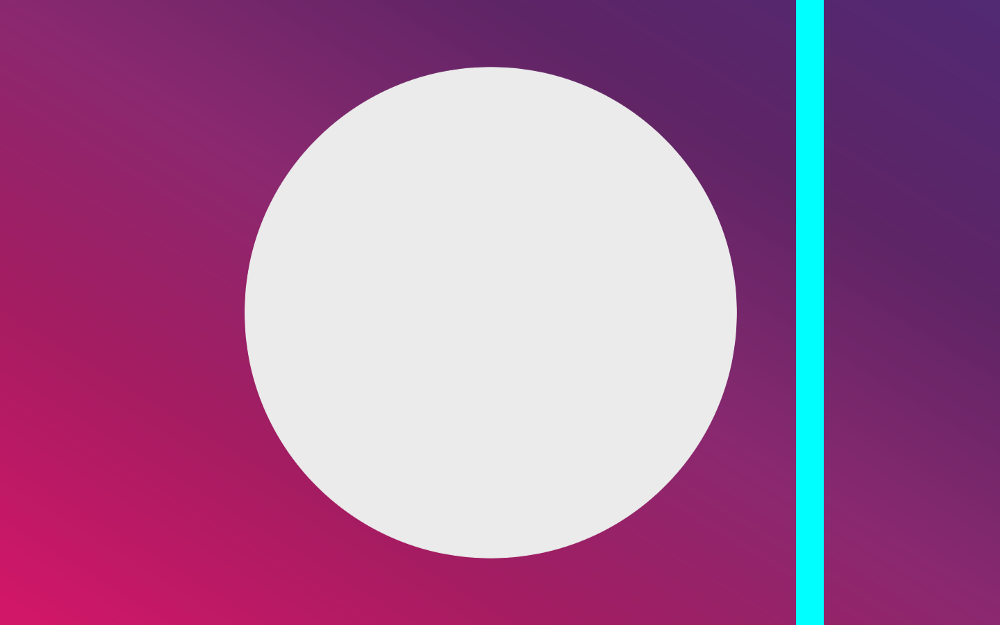
Always keep a comfortable distance for the user in your design.
Text
When it comes to text, the most important thing is to consider is to avoid forcing the user to move their head to read text.
If you’ve ever been looking at your phone or reading a book while in a car, then you have experienced the physically uncomfortable sensation that follows.
There are three points to note to assist with avoiding this sensation.
Avoid Wide Text Blocks
In VR applications, traditional text blocks are going to appear much wider.
Therefore, it is crucial to shorten the width of text so the user doesn’t have to constantly move their head left to right in order to read.
Avoid Tall Text Blocks
The opposite extreme to avoid is text blocks that are too tall.
This can be uncomfortable for a user as they have to move their head up and down.
Shrink the height of the text block so that the height is manageable.

Avoid Static Text Cues
As a general rule of thumb, replace text cues with audio cues when providing instructions to a user. In the image above, “A Shoot” could be provided as an instruction through audio.
If you really need to use text, either make sure the text is huge or is displayed with animation.

Layout
Adjust width and placement
Similar to text, a good UI layout in VR takes into account width limitations.
Video games, for example, usually have icons and maps on the corners of the screen:
Smaller components of a UI should be placed closer to the middle. In addition, the entire UI layout should be a comfortable width for the user.
Another option is to use a curved design.
Toggling Items
In order to avoid clutter and unnecessary movement for the user, you can emphasize toggle elements on and off.
Try to toggle on elements in front of a user and them toggle them off based on a user’s input.
Overall Experience
Lots of Feedback
In VR applications, it is always good to provide frequent feedback to the user (more than usual). This is important because a user can feel a bit overwhelmed in a 3D environment and there isn’t as much certainty as to how their inputs will be registered. Feedback can be provided by sound, animation, or vibration.
Don’t Force Actions in a New Environment
If you were to teleport to a new environment, what would be your first reaction?

Most likely, you would look around to become antiquated with your new surroundings. The same applies with a user experience in a VR application.
Don’t force the user to make an action until they are antiquated with their new surroundings.
Concluding Thoughts
As promised, this chapter was short and sweet as to provide a nice break from the flow of the book up to this point.
While there is a lot to discuss and explore in terms of UI/UX in VR applications, I think this chapter successfully highlights the major considerations a new VR developer should make. If you are interested in learning more about UX in VR, there is a great resource called The UX of VR. This resource provides a curated list of videos and other resources to help you consider UX design for virtual worlds.
Learn React VR (Chapter 8 | Building a VR Video App)
Scope of This Chapter
There are only going to be 2 chapters remaining in this book (including this one). In this chapter, we are going to be doing a real-world project together. with a focus on UI/UX.
We have made projects together but they were only for demoing a specific feature of React VR. In this project, we are going to build a VR video app. This will essentially be a more nuanced version of our Outdoor Movie Theater that we made earlier.

](https://cdn-images-1.medium.com/max/1100/1*89Ty3EFkSZrz96CCiyMkMg.png)
The project is going to be based on Oculus Video with some slight modifications and simplifications. From the main dashboard, we are going allow a user to play the top six videos from Twitch within an environment of their choice. As we do this, we will focus more on UI design/animation for a good user experience than we have so far. The point is to tie together what we have learned throughout this book.
Breaking Down the Project
https://cdn-images-1.medium.com/max/1100/1*oe17A6fKskKr6iRsmzP5hg.png
Let’s quickly discuss how this project will work.
Title Scene
First, there will be a title scene where a user can click to continue:
There will be both entrance and exit animation and the background will be a panoramic photo.
Dashboard Scene
Next, there will be a dashboard scene where a user will be able to select a Twitch video and the environment:
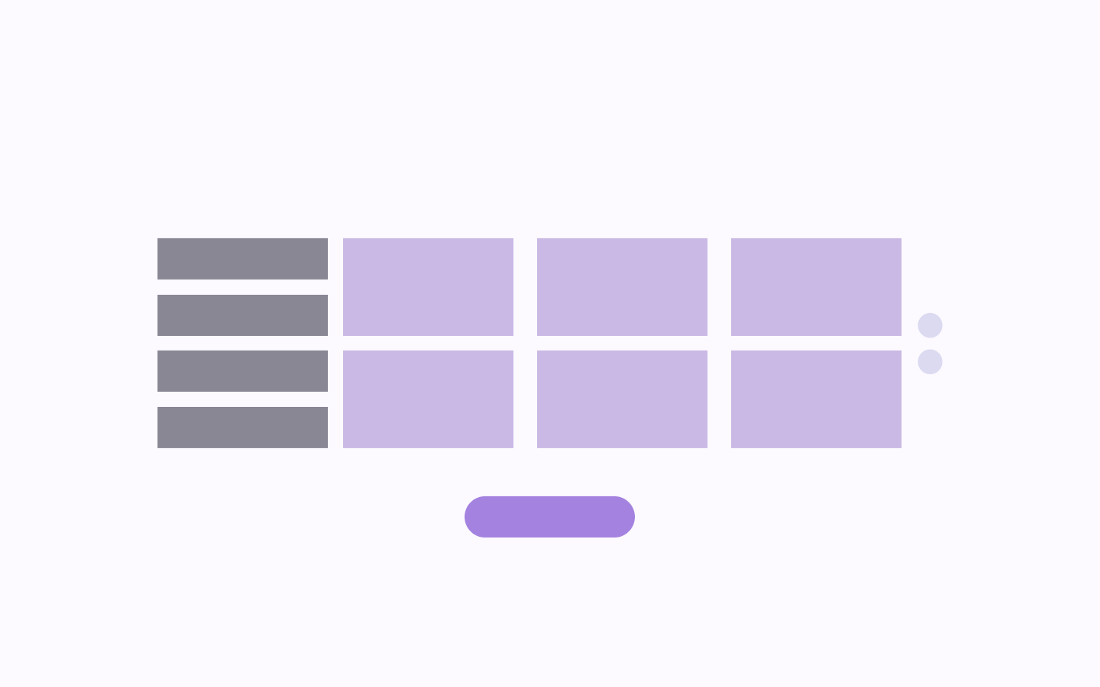
The gray menu buttons will be options for sources of videos. We will just have Twitch but we will implement three additional menu buttons anyways.
The purple tiles will be the videos and environment options. The tiles will initially be the videos and then they will dynamically update to the environment options on the click of the purple button.
When a user clicks the button to confirm the selected environment, then the next scene will appear.
The purple circles on the right will keep track of the progress of this scene (selecting a video or selecting an environment).
Like the previous scene, there will be a panoramic photo as a background and animations.
Video Player Scene
Finally, there will be a video player scene where the user will be able to watch the 2D video on a screen in the front of the world and click a button to return to the dashboard in the back of the app:

Creating the Project
Let’s go ahead and create this project and set up the project directory in using our Scenes/Layouts/Elements component hierarchy.
First, run the following to initialize our app:
react-vr init VrVideoAppOpen the project folder in a code editor.
Update the project directory to reflect this:
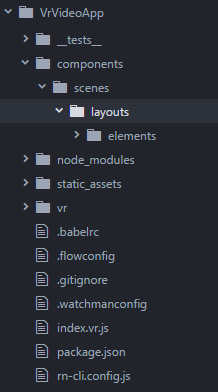
https://cdn-images-1.medium.com/max/1100/1*SwpHfA8qkTojFitkLXsTCQ.png
Creating the Title Scene Components

Static Title Scene Components
First things first, we need to create a file called TitleScene.js within the scenes folder.
This will simply nest our layout component. For now, we can just add the shell for this file:
 1     import React from 'react';
 2     import {
 3       Text,
 4       View,
 5       VrButton
 6     } from 'react-vr';
 7
 8     //Scene
 9     class TitleScene extends React.Component {
10       render() {
11         return (
12           //insert layout component
13         )
14       }
15     }
16
17     module.exports = TitleScene;
Let’s move on to the layout component file for our title scene which we can name TitleLayout.js (make sure it is within the layouts folder).
Then, we can start with the shell of our code:
 1     import React from 'react';
 2     import {
 3       Text,
 4       View,
 5       VrButton
 6     } from 'react-vr';
 7
 8     //Layout
 9     class TitleLayout extends React.Component {
10       render() {
11         return (
12           //insert elements
13         )
14       }
15     }
16
17     module.exports = TitleLayout;
Before we advance, we will also add a Pano component in the scene component. Reason being, each scene will have a different panoramic photo. Therefore, we want the scene components to control the panoramic photo being rendered.
Download this image at the high resolution and save it as title-background.jpg in the static_assets folder.
For now, let’s just add a Pano component with the title-background image (we also need to import asset and Pano):
 1     import React from 'react';
 2     import {
 3       Text,
 4       View,
 5       VrButton,
 6       asset,
 7       Pano
 8     } from 'react-vr';
 9
10     //Scene
11     class TitleScene extends React.Component {
12       render() {
13         return (
14           <Pano source={asset('title-background.jpg')}/>
15           //insert layout component
16         )
17       }
18     }
You can also update our app component class in index.vr.js to the following:
1     export default class VrVideoApp extends React.Component {
2       render() {
3         return (
4           <View>
5
6           </View>
7         );
8       }
9     };
Now, we need to add the Flexbox container using Flexbox for our title scene:

The container will have a column direction and be centered (both vertically and horizontally). Therefore, we add the following to our render:
 1     <View
 2       style={{
 3             width: 2,
 4             flexDirection: 'column',
 5             alignItems: 'stretch',
 6             justifyContent: 'center',
 7             layoutOrigin: [0.5, 0.5],
 8             transform: [{translate: [0, 0, -3]}]
 9       }}
10     >
11       //insert elements
12     </View>
We can now move on to creating our elements.
Our elements will be the 2 Flexbox items added to our column:
The two elements will be a title and button.
The title component will not be reused.
The button component will be reused so we will have to pass it props in order to control the text.
Let’s start with our title component.
Create a new file called Title.js within the Elements folder.
Let’s start with the shell of the code:
 1     import React from 'react';
 2     import {
 3       Text,
 4       View
 5     } from 'react-vr';
 6
 7     //Element
 8     class Title extends React.Component {
 9       render() {
10         return (
11           <View style={{ margin: 0.1, height: 1}}>
12
13           </View>
14         )
15       }
16     }
17
18     module.exports = Title;
The View component will contain the styling needed to be added as a Flexbox item. This component is already being used in the render function.
Let’s add the Text component:
1     <View style={{ margin: 0.1}}>
2       <Text style={{fontSize: 0.25, textAlign: 'center', color: "#FFFFFF"}}>
3       VR VIDEO APP
4       </Text>
5     </View>
Next, let’s create a file called Button.js for the button element within the Elements folder.
First, we can add the shell of the code which included the View component that styles this button as a Flexbox item:
 1     import React from 'react';
 2     import {
 3       Text,
 4       View,
 5       VrButton
 6     } from 'react-vr';
 7
 8     //Element
 9     class Button extends React.Component {
10       render() {
11         return (
12           <View style={{ margin: 0.1, height: 0.3, backgroundColor: '#A482DF'}}>
13
14           </View>
15         )
16       }
17     }
18
19     module.exports = Button;
Then, we can add the VrButton component so we can add event handling to this button later on as well as the button text (which we will be passing down as a prop called text):
1     <View style={{ margin: 0.1, height: 0.3, backgroundColor: '#A482DF', borderR\
2 adius: 0.1}}>
3       <VrButton>
4         <Text style={{fontSize: 0.2, textAlign: 'center', color: "#FFFFFF"}}>
5         {this.props.text}
6         </Text>
7       </VrButton>
8     </View>
Nesting Our Components
All the components for our Title scene have been completed individually. Now, we need to connect them.
Let’s nest the TitleLayout component in TitleScene.js.
To do this, we begin by importing the TitleLayout component:
import TitleLayout from './layouts/TitleLayout.js';Then, we can use the component and wrap a View component:
1     <View>
2       <Pano source={asset('title-background.jpg')}/>
3       <TitleLayout/>
4     </View>
In addition, a text prop (which we will later define in index.vr.js) that control the button’s text will be passed to the TitleLayout component:
<TitleLayout text={this.props.text}/>Let’s move onto the TitleLayout component found in TitleLayout.js.
First, we can import the Title and Button components:
1     import Title from './elements/Title.js';
2     import Button from './elements/Button.js';
Then, we can nest them and pass down the text prop to the button:
 1     <View
 2       style={{
 3             width: 2,
 4             flexDirection: 'column',
 5             alignItems: 'stretch',
 6             justifyContent: 'center',
 7             layoutOrigin: [0.5, 0.5],
 8             transform: [{translate: [0, 0, -3]}]
 9       }}
10     >
11       <Title/>
12       <Button text={this.props.text}/>
13     </View>
Finally, let’s import and nest the entire TitleScene component into the app component found in index.vr.js.
 1     //other import
 2
 3     import TitleScene from './components/scenes/TitleScene.js';
 4
 5     export default class VrVideoApp extends React.Component {
 6       render() {
 7         return (
 8           <View>
 9             <TitleScene text={"Watch a Video"}/>
10           </View>
11         );
12       }
13     };
14
15     //AppRegistry
Note that we also defined the text prop which was being passed down to the button.
Testing Our Scene
Let’s test our scene out.
cd into the project root, run npm start, and check the local host:
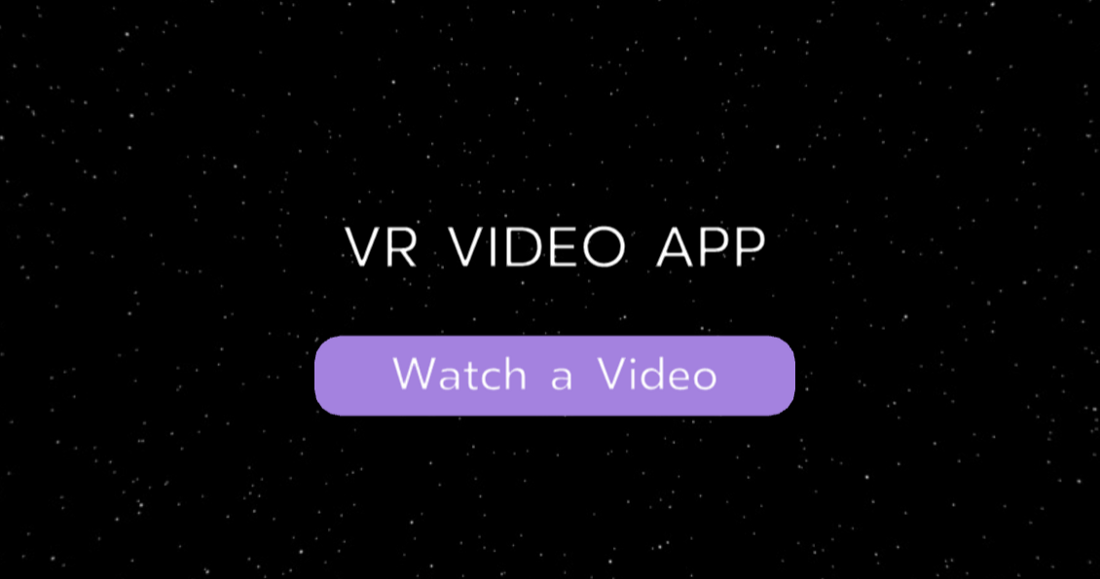
Woohoo! We have completed the static title scene. Now, let’s add some animation.
Animating Our Components
For our entrance animation, we want the title to slide in from the left and fade in. The button will slide in from the right and fade in.
Let’s start with our title component found in Title.js.
First, we import Animated and Easing:
1     import {
2       Text,
3       View,
4       Animated
5     } from 'react-vr';
6
7     import { Easing } from 'react-native';
Then, we update the Text tags to Animated.Text:
1     <Animated.Text style={{fontSize: 0.25, textAlign: 'center', color: "#FFFFFF"\
2 }}>
3     VR VIDEO APP
4     </Animated.Text>
Next, we can set up the shell of the local state:
1     class Title extends React.Component {
2       constructor() {
3         super();
4         this.state = { slideLeft: "", fadeIn: ""};
5       }
6       //render
7     }
We need to update the local state with initial values for our animated values. Let’s take a second to consider this.
The horizontal sliding (slideLeft and slideRight) will be controlled by a translateX transformation. If a translateX value is negative, it places an element to the left. If it is positive, it places an element to the right. Since we want the slides to start from these translated positions and return to their normal position, we can update the local state like so:
this.state = { slideLeft: new Animated.Value(-1), fadeIn: ""};When we change this value to 0 in our animation, it will have the title slide from the left.
Our fadeIn will be used to take the elements from transparent to full opacity. Therefore, we can update it like so:
this.state = { slideLeft: new Animated.Value(-1), fadeIn: new Animated.Value(0)};Now, we can create the shell of a lifecycle hook (for when the component mounts) and an animated sequence:
1     componentDidMount() {
2       Animated.sequence([
3
4       ]).start();
5     }
Next, we want to have all their values in our local state to be changing all at once. Therefore, we can use Animated.parallel and place timing animations for all of our values within it:
 1     componentDidMount() {
 2       Animated.sequence([
 3         Animated.parallel([
 4           Animated.timing(
 5             this.state.slideLeft,
 6             {
 7              toValue: 0,
 8              duration: 2000,
 9              easing: Easing.ease
10             }
11           ),
12           Animated.timing(
13             this.state.fadeIn,
14             {
15              toValue: 1,
16              duration: 2000,
17              easing: Easing.ease
18             }
19           )
20         ])
21       ]).start();
22     }
The final step for our title is to bind the opacity and translateX in the inline styling to the local state:
 1     <Animated.Text
 2       style={{
 3         fontSize: 0.25,
 4         textAlign: 'center',
 5         color: "#FFFFFF",
 6         opacity: this.state.fadeIn,
 7         transform: [
 8           {translateX: this.state.slideLeft}
 9         ]
10     }}>
Let’s save and see if this is working:

Cool!
Let’s do the same thing for our button in Button.js.
First, we import Animated and Easing:
1     import {
2       Text,
3       View,
4       VrButton,
5       Animated
6     } from 'react-vr';
7
8     import { Easing } from 'react-native';
You can copy and paste the constructor and lifecycle hook from the title and update the this.state.slideLeft to this.state.slideRight.
We also want to update the local state for the slideRight value:
this.state = { slideRight: new Animated.Value(1), fadeIn: new Animated.Value(0)};Then, we can bind the inline styling of the button to the local state and change the tag to Animated.View like so:
 1     <Animated.View
 2       style={{
 3         margin: 0.1,
 4         height: 0.3,
 5         backgroundColor: '#A482DF',
 6         borderRadius: 0.1,
 7         opacity: this.state.fadeIn,
 8         transform: [
 9           {translateX: this.state.slideRight}
10         ]
11       }}
12     >
13     //other stuff here
14     </Animated.View>
Let’s make sure this is working:
Perfect!
Let’s finish the next two scenes and then we will add the logic for transitions between each scene.
Creating the Dashboard Components
This scene is going to be the most challenging part of our app. One, it will be a dynamic scene. Meaning, we are going to change what is rendered in this scene before transitioning to another scene. We also need to incorporate the Twitch API to retrieve 6 videos.
In this section, we will start by creating the static scene. Then, we will add entrance animation and dynamic styling based on user input.
To get everything working, we will need to implement the Twitch API. However, this part will be done in a separate section.
Let’s get to it!
Static Dashboard Scene Components
First off, we need to create a file for our scene called Dashboard.js within the scenes folder.
Download this photo and save it in the static_assets folder as dashboard-background.jpg.
For now, we will just have the following code:
 1     import React from 'react';
 2     import {
 3       Text,
 4       View,
 5       asset,
 6       Pano
 7     } from 'react-vr';
 8
 9     //Scene
10     class Dashboard extends React.Component {
11       render() {
12         return (
13           <View>
14             <Pano source={asset('dashboard-background.jpg')}/>
15          </View>
16         )
17       }
18     }
19
20     module.exports = Dashboard;
Cool! Let’s take a look at the mockup to understand how to do the layout components:

How do we express this in Flexbox?
In terms of rows, there will be 2 rows:
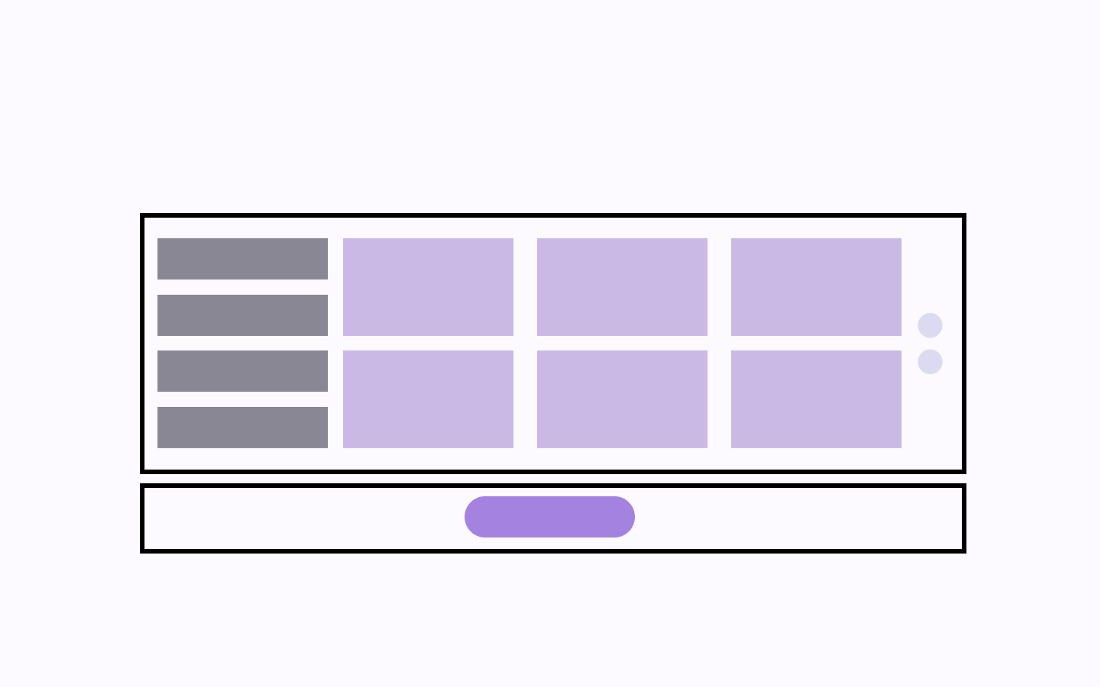
Our first row will have 5 Flexbox items that will each contain their own columns with Flexbox items:
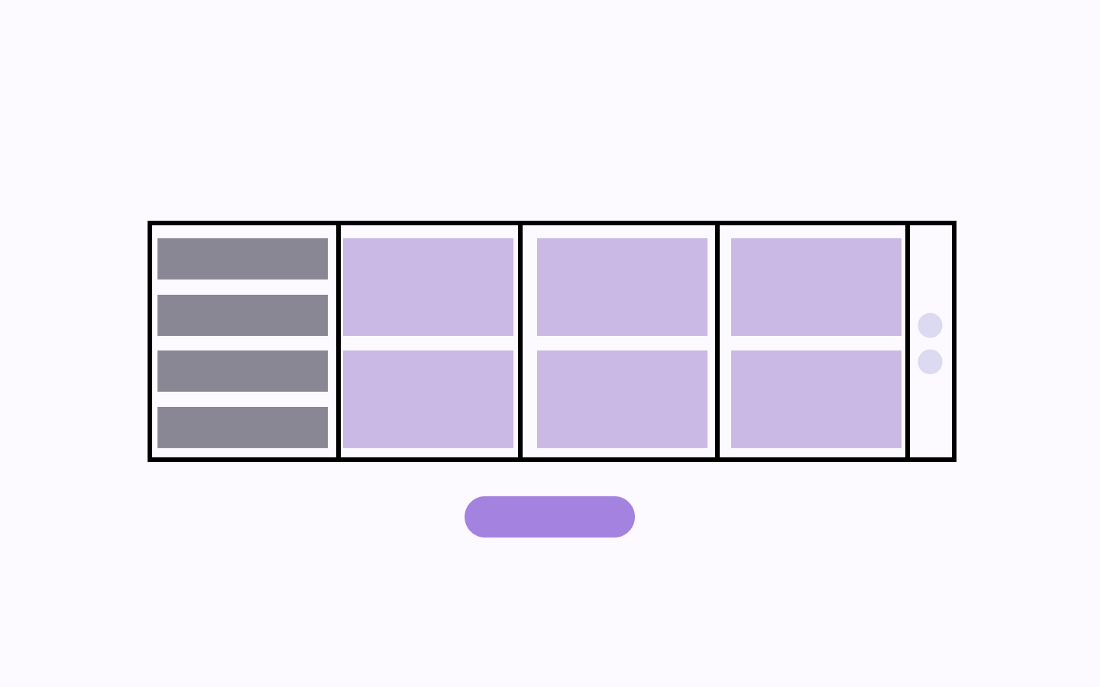
The first column in this row (from the left) will be our MenuButtons component.
The next three columns will be our TileButtons component.
The far right column will be our ProgressCircles component.
The second row of this scene will be our button which is already defined in Button.js.
All that to say, we can create a layout component that will have the code to create 2 outermost rows (and nest the Flexbox items within it) in a file called DashboardLayout.js within out layouts folder.
Here is the code:
 1     import React from 'react';
 2     import {
 3       View
 4     } from 'react-vr';
 5
 6     //Layout
 7     class DashboardLayout extends React.Component {
 8       render() {
 9         return (
10           <View style={{
11             width: 5,
12             flexDirection: 'row',
13             alignItems: 'flex-start',
14             justifyContent: 'center',
15             layoutOrigin: [0.5, 0.5],
16             transform: [{translate: [0, 0, -3]}]
17           }}>
18             //row 1 elements
19           </View>
20
21           <View style={{
22             width: ,
23             flexDirection: 'row',
24             alignItems: 'flex-start',
25             justifyContent: 'center',
26             layoutOrigin: [0.5, 0.5],
27             transform: [{translate: [0, 0, -3]}]
28           }}>
29             //row 2 elements
30           </View>
31         )
32       }
33     }
34
35     module.exports = DashboardLayout;
Note that there are 2 View components for each row within an outermost View component. Each has a Flexbox layout that specifies that it is a row and that all items within it will be centered horizontally and vertically.
Sweet! Now, let’s move on to our first element within the first row of DashboardLayout:
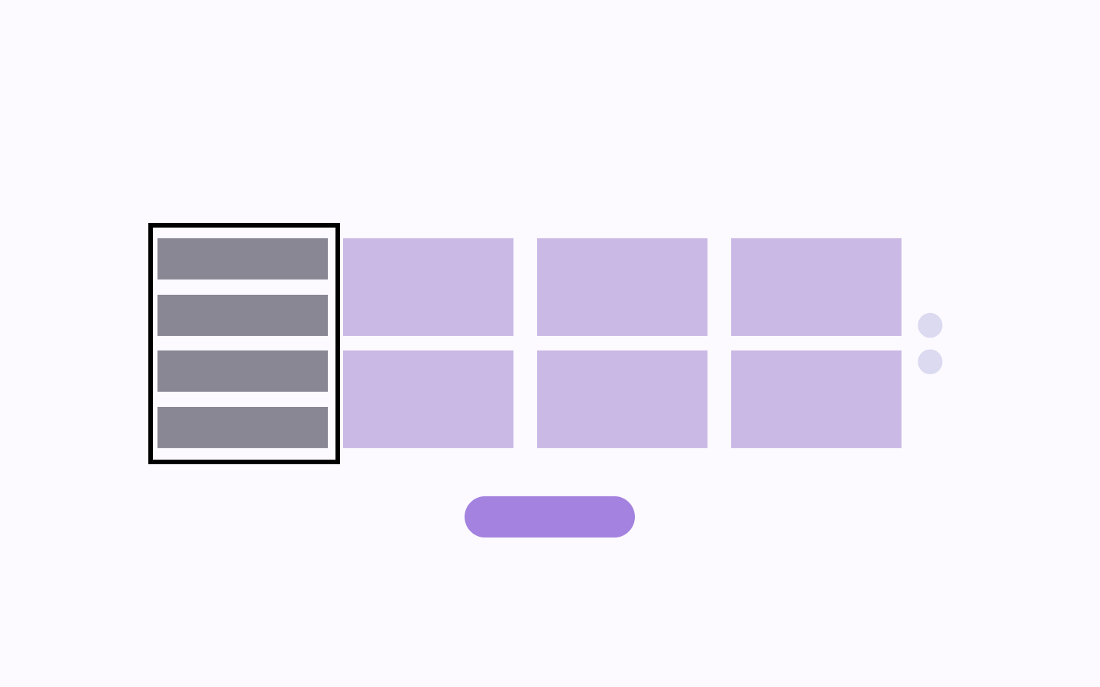
Create a file called MenuButtons.js within the elements folder.
Let’s create the shell of this component with the outermost View component that will be a Flexbox item within the row we created in the previous file and a container for a column:
 1     import React from 'react';
 2     import {
 3       Text,
 4       View,
 5       VrButton
 6     } from 'react-vr';
 7
 8     //Element
 9     class MenuButtons extends React.Component {
10
11     render() {
12         return (
13           <View
14             style={{
15               margin: 0.1,
16               width: 1,
17               flexDirection: 'column',
18               alignItems: 'center',
19               justifyContent: 'center'
20             }}
21           >
22
23           </View>
24         )
25       }
26     }
27
28     module.exports = MenuButtons;
Next, we can do 4 View component for the buttons within this column:
 1     <View
 2       style={{
 3         margin: 0.1,
 4         width: 1,
 5         flexDirection: 'column',
 6         alignItems: 'stretch',
 7         justifyContent: 'center'
 8       }}
 9     >
10       <View
11         style={{
12           margin: 0.1,
13           height: 0.3,
14           backgroundColor: "#898794"
15         }}
16       >
17       </View>
18
19       <View
20         style={{
21           margin: 0.1,
22           height: 0.3,
23           backgroundColor: "#898794"
24         }}
25       >
26       </View>
27
28       <View
29         style={{
30           margin: 0.1,
31           height: 0.3,
32           backgroundColor: "#898794"
33         }}
34       >
35       </View>
36
37       <View
38         style={{
39           margin: 0.1,
40           height: 0.3,
41           backgroundColor: "#898794"
42         }}
43       >
44       </View>
45
46     </View>
Finally, we can insert the VrButton and Text component for each button (only the first button will have actual text):
See GitHub Gist //click to see full code since it’s a bit lengthy
That completes our MenuButtons component!
After that, we can create the TileButtons.js file within our elements folder which will render the following 3 columns:
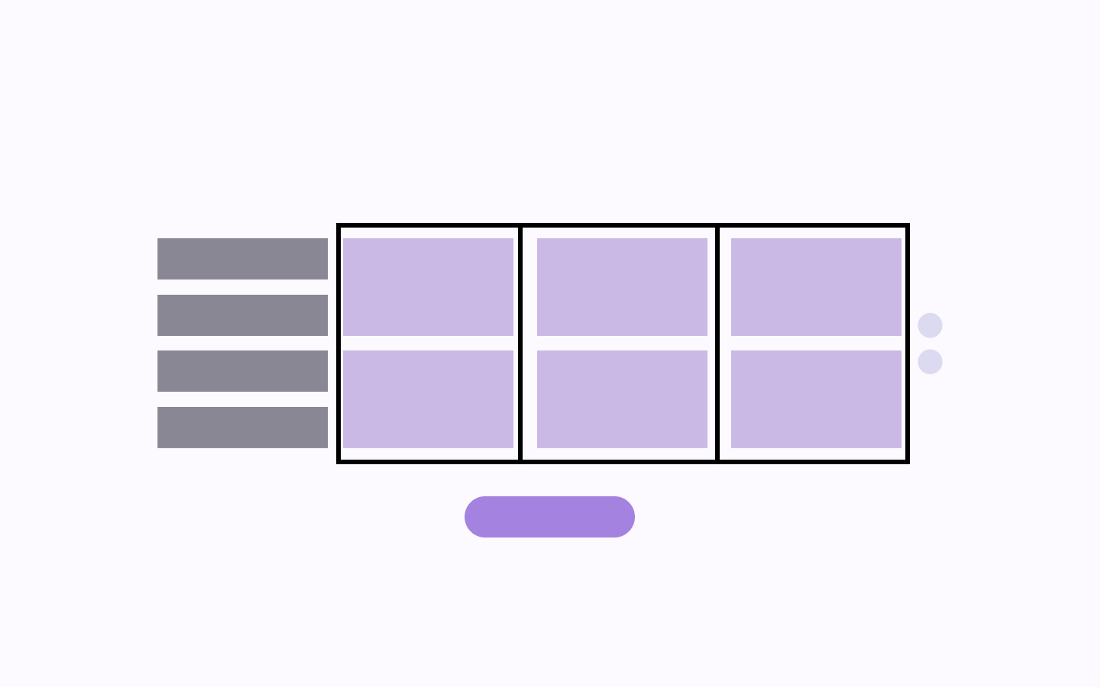
First, we can add the shell of the component and outermost Flexbox row container:
 1     import React from 'react';
 2     import {
 3       Text,
 4       View,
 5       VrButton
 6     } from 'react-vr';
 7
 8     //Element
 9     class TileButtons extends React.Component {
10
11     render() {
12         return (
13           <View style={{flexDirection: 'row', alignItems: 'center', justifyConte\
14 nt: 'center'}}>
15
16           </View>
17         )
18       }
19     }
20
21     module.exports = TileButtons;
This might seem confusing since we already defined a row container in DashboardLayout where this component will be nested. Think of this as being a row container just for our tile button within our outermost row (as defined in DashboardLayout):
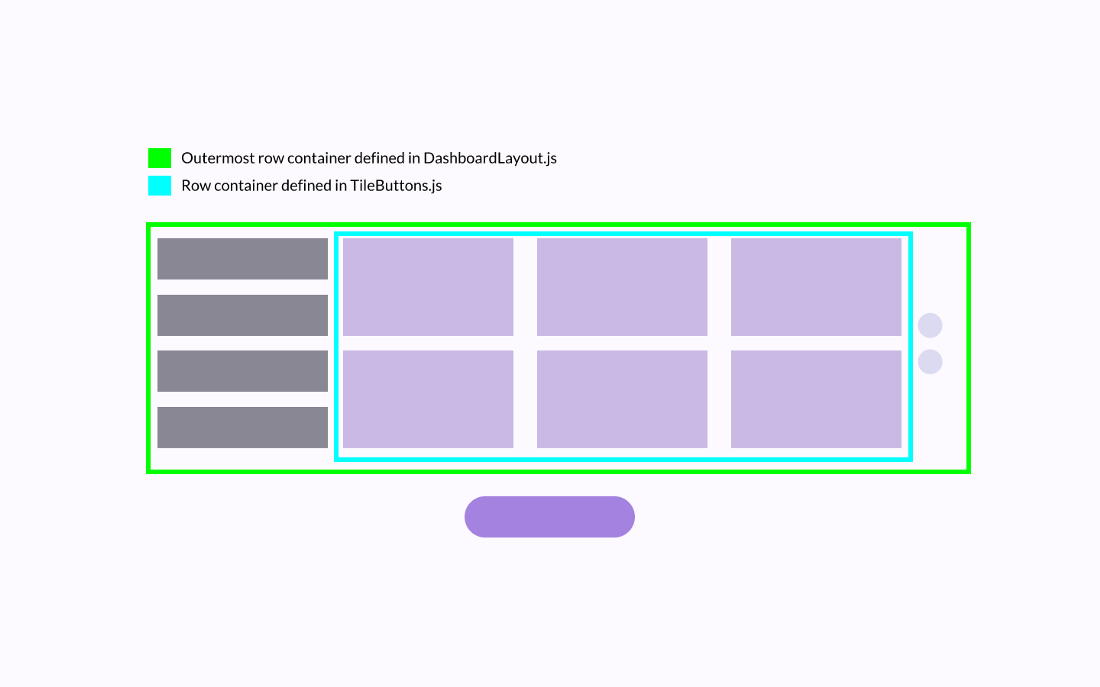
Then, we add 3 View components that will be Flexbox items in the row and column containers for our tile buttons:
 1     import React from 'react';
 2     import {
 3       Text,
 4       View,
 5       VrButton
 6     } from 'react-vr';
 7
 8     //Element
 9     class TileButtons extends React.Component {
10
11     render() {
12         return (
13          <View>
14             <View
15               style={{
16                 margin: 0.1,
17                 width: 1,
18                 flexDirection: 'column',
19                 alignItems: 'center',
20                 justifyContent: 'center'
21               }}
22             >
23
24             </View>
25
26             <View
27               style={{
28                 margin: 0.1,
29                 width: 1,
30                 flexDirection: 'column',
31                 alignItems: 'center',
32                 justifyContent: 'center'
33               }}
34             >
35
36             </View>
37
38          </View>
39         )
40       }
41     }
42
43     module.exports = TileButtons;
Here is a visualization of columns we just defined:
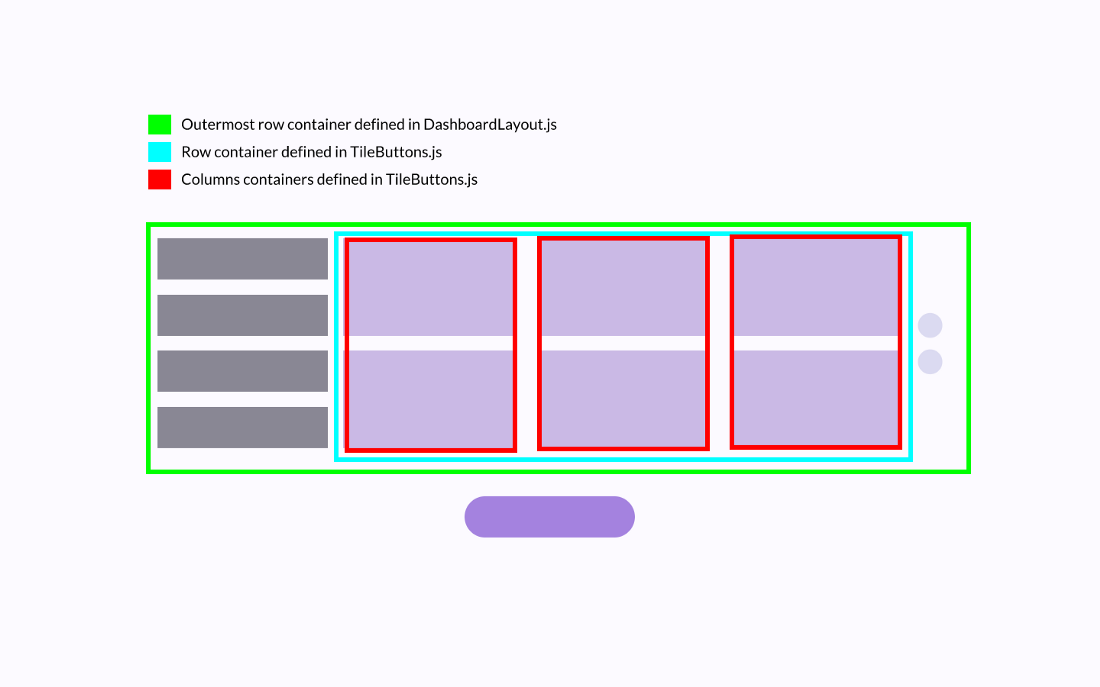
Then, we add 2 items to each column which are View components with a VrButton containing empty text:
See GitHub Gist //click to see full code since a bit lengthy
Again, this is all-together rendering the following 3 columns:

This completes the TileButtons for now.
Our last element in our current row will be ProgressCircle.js:
Create another file called ProgressCircles.js within the elements folder.
Let’s add the shell of the component as well as the View component that will be an element in the current row and the column container for our two circles:
 1     import React from 'react';
 2     import {
 3       View
 4     } from 'react-vr';
 5
 6     //Element
 7     class ProgressCircles extends React.Component {
 8
 9     render() {
10         return (
11           //Outermost View
12           <View>
13             //Column
14             <View
15               style={{
16                 margin: 0.1,
17                 width: 0.2,
18                 flexDirection: 'column',
19                 alignItems: 'center',
20                 justifyContent: 'center'
21               }}
22             >
23
24             </View>
25           </View>
26         )
27       }
28     }
29
30     module.exports = ProgressCircles;
Next, we add the two progress circles which are just View components that will render as circles due to the inline styling:
 1     //Outermost View
 2     <View>
 3       //Column
 4       <View
 5         style={{
 6           margin: 0.1,
 7           width: 0.2,
 8           flexDirection: 'column',
 9           alignItems: 'center',
10           justifyContent: 'center'
11         }}
12       >
13         //Circle 1
14         <View
15           style={{
16             margin: 0.1,
17             width: 0.1,
18             borderRadius: 0.5,
19             height: 0.3,
20             backgroundColor: "#DBDAF1"
21           }}
22         >
23
24         </View>
25
26         //Circle 2
27         <View
28           style={{
29             margin: 0.1,
30             width: 0.1,
31             borderRadius: 0.5,
32             height: 0.3,
33             backgroundColor: "#DBDAF1"
34           }}
35         >
36         </View>
37
38       </View>
39     </View>
Nesting Our Components
We start in DashboardLayout.js and import the 3 elements we just created:
1     import MenuButtons from './elements/MenuButtons.js';
2     import TileButtons from './elements/TileButtons.js';
3     import ProgressCircles from './elements/ProgressCircles.js';
Then, we nest them into the first column:
 1     <View>
 2       <View style={{
 3         width: 5,
 4         flexDirection: 'row',
 5         alignItems: 'flex-start',
 6         justifyContent: 'center',
 7         layoutOrigin: [0.5, 0.5],
 8         transform: [{translate: [0, 0, -3]}]
 9       }}>
10         <MenuButtons/>
11         <TileButtons/>
12         <ProgressCircles/>
13       </View>
14       <View style={{
15         width: 5,
16         flexDirection: 'row',
17         alignItems: 'flex-start',
18         justifyContent: 'center',
19         layoutOrigin: [0.5, 0.5],
20         transform: [{translate: [0, 0, -3]}]
21       }}>
22         //row 2 elements
23       </View>
24     </View>
This will render the following:
Next, we can import our button in the second-row container:
import Button from './elements/Button.js';Then, we nest the button within the second-row container:
 1     <View>
 2       <View style={{
 3         width: 5,
 4         flexDirection: 'row',
 5         alignItems: 'flex-start',
 6         justifyContent: 'center',
 7         layoutOrigin: [0.5, 0.5],
 8         transform: [{translate: [0, 0, -3]}]
 9       }}>
10         <MenuButtons/>
11         <TileButtons/>
12         <ProgressCircles/>
13       </View>
14       <View style={{
15         width: 5,
16         flexDirection: 'row',
17         alignItems: 'flex-start',
18         justifyContent: 'center',
19         layoutOrigin: [0.5, 0.5],
20         transform: [{translate: [0, 0, -3]}]
21       }}>
22         <Button text={this.props.text}/>
23       </View>
24     </View>
Recall, the text of the button component will be passed down as a prop.
After that, we can go to Dashboard.js and start by importing the DashboardLayout component:
import DashboardLayout from './layouts/DashboardLayout.js';Then, we can nest it underneath the Pano tag:
1     <View>
2       <Pano source={asset('dashboard-background.jpg')}/>
3       <DashboardLayout text={this.props.text} />
4     </View>
Note that we passing the text prop down to our button as well.
Next, we can go to index.vr.js and import the Dashboard component:
import Dashboard from './components/scenes/Dashboard.js';Finally, remove the TitleScene component and nest the Dashboard component:
1     <View>
2       <Dashboard text={"Select Environment"}/>
3     </View>
I left the TitleScene component in a comment right before the return:
1     export default class VrVideoApp extends React.Component {
2       render() {
3         //<TitleScene text={"Watch a Video"}/>
4         return (...)
5       }
6     }
Testing Our Component
First off, make sure to remove any comments that I had included in the element components (TileButtons, MenuButtons, and ProgressCircles).
Save all your files and let’s refresh the local host:
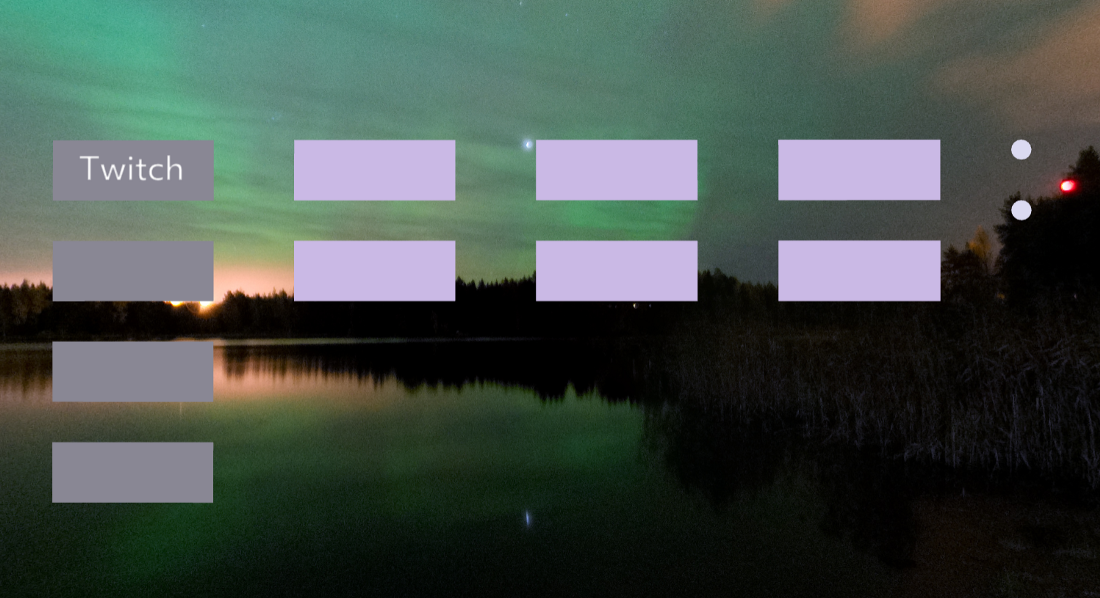
Note: Your tile (light purple) buttons will be larger as I took this screenshot before updating the inline styling as you have copied it from the GitHub gist.
Looks like the row container with our button is a bit too low so let’s update the inline styling of both rows found in DashboardLayout.js:
 1     <View>
 2       <View style={{
 3         width: 5,
 4         flexDirection: 'row',
 5         alignItems: 'flex-start',
 6         justifyContent: 'flex-start',
 7         layoutOrigin: [0.5, 0.5],
 8         transform: [{translate: [0, 0, -3]}],
 9         marginTop: -0.3
10       }}>
11         <MenuButtons/>
12         <TileButtons/>
13         <ProgressCircles/>
14       </View>
15       <View style={{
16         width: 5,
17         height: 0.5,
18         flexDirection: 'row',
19         alignItems: 'flex-start',
20         justifyContent: 'center',
21         layoutOrigin: [0.5, 0.5],
22         transform: [{translate: [0, 0, -3]}],
23         marginTop: -0.7
24       }}>
25         <Button text={this.props.text}/>
26       </View>
27     </View>
Note that I just added some negative marginTop values.
I’m also going to add some left and right padding to our button component found in Button.js:
 1     //in return
 2     <Animated.View
 3       style={{
 4         margin: 0.1,
 5         paddingLeft: 0.2,
 6         paddingRight: 0.2,
 7         height: 0.3,
 8         backgroundColor: '#A482DF',
 9         borderRadius: 0.1,
10         opacity: this.state.fadeIn,
11         transform: [
12           {translateX: this.state.slideRight}
13         ]
14       }}
15     >
16       <VrButton>
17         <Text
18           style={{
19             fontSize: 0.2,
20             textAlign: 'center',
21             color: "#FFFFFF"
22           }}>
23         {this.props.text}
24         </Text>
25       </VrButton>
26     </Animated.View>
Let’s go to the local host and refresh:
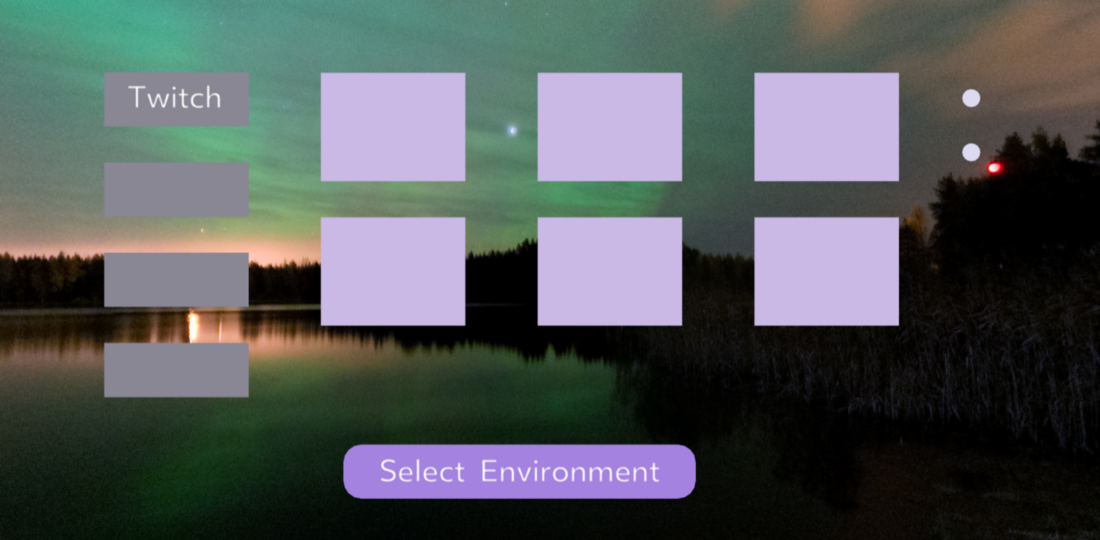
Lookin’ good!
Entrance Animations
Since we are reusing our button component, it’s animation is already set to slide in from the right and fade in.
To make things easy, we will apply the same animation as we did to our title to the entire first row of DashboardLayout.
Open DashboardLayout.js and let’s start by importing Animated and Easing:
1     import {
2       View,
3       Animated
4     } from 'react-vr';
5
6     import { Easing } from 'react-native';
Then, we add the local state that has slideLeft and fadeIn animation values:
1     //class starts here
2     constructor() {
3       super();
4       this.state = { slideLeft: new Animated.Value(-1), fadeIn: new Animated.Val\
5 ue(0)};
6     }
Next, we can add the lifecycle hook with the animation sequences to change these values:
 1     componentDidMount() {
 2       Animated.sequence([
 3         Animated.parallel([
 4           Animated.timing(
 5             this.state.slideLeft,
 6             {
 7              toValue: 0,
 8              duration: 2000,
 9              easing: Easing.ease
10             }
11           ),
12           Animated.timing(
13             this.state.fadeIn,
14             {
15              toValue: 1,
16              duration: 2000,
17              easing: Easing.ease
18             }
19           )
20         ])
21       ]).start();
22     }
Finally, we can update the tag of the View component for the first row container to an Animated.View as well as bind the animated styles:
 1     <Animated.View
 2       style={{
 3         width: 5,
 4         flexDirection: 'row',
 5         alignItems: 'flex-start',
 6         justifyContent: 'flex-start',
 7         layoutOrigin: [0.5, 0.5],
 8         opacity: this.state.fadeIn,
 9         transform: [
10           {translateX: this.state.slideLeft},
11           {translateZ: -3}
12         ],
13         marginTop: -0.3
14       }}
15     >
16       <MenuButtons/>
17       <TileButtons/>
18       <ProgressCircles/>
19     </Animated.View>
Let’s test this out:
Cool beans!
Updating the Scene on User Input
There are a couple things that need to be updated based on the user’s input within this scene.
First, the user should only be able to select one video (contained in our title buttons) and the selected video should have purple border placed around it:
We also want the button to not render until a tile button is selected:
When the user clicks the button display “Select Environment”, then the tile buttons will no longer contain video options but rather an environment (panoramic photo in video player) options. We won’t be able to handle this part until we do the Twitch API code, however, the button text should change to “Watch Video”.
In addition to all this, the first progress circle should be the same color as the button to start:
When the button is clicked to proceed to the environment options, the progress circle should update like so:
That way, the progress circle is keeping track of the stage of this scene.
Let’s begin with applying the conditional rendering of our button.
Since our button component is used in multiple scenes, we need to have the boolean flag that controls whether or no it is rendered to be a passed down prop.
Open up index.vr.js and let’s update the code:
 1     export default class VrVideoApp extends React.Component {
 2       render() {
 3         //<TitleScene showButton={true} text={"Watch a Video"}/>
 4         return (
 5           <View>
 6             <Dashboard showButton={false} text={"Select Environment"}/>
 7           </View>
 8         );
 9       }
10     };
In the code above, we pass in a prop of showButton to the button from both TitleScene (commented out) and Dashboard. We give it a value of true in TitleScene because we want it to render by default. We give it a value of false in Dashboard because we don’t want it to render by default.
Now, we have to pass this prop down to the button component following the path down through TitleScene and Dashboard.
Following the TitleScene path, open TitleLayout.js a nd let’s pass down *showButton to the button component:
<Button showButton={this.props.showButton} text={this.props.text}/>Following the Dashboard path, open DashboardLayout.js and let’s pass down showButton to the button component:
<Button showButton={this.props.showButton} text={this.props.text}/>Finally, we can add the conditional rendering in Button.js to only display the button to start if showButton is true:
 1     render() {
 2       const showButton = this.props.showButton;
 3       return (
 4         <View>
 5           {showButton ? (
 6             <Animated.View
 7               style={{
 8                 margin: 0.1,
 9                 paddingLeft: 0.2,
10                 paddingRight: 0.2,
11                 height: 0.3,
12                 backgroundColor: '#A482DF',
13                 borderRadius: 0.1,
14                 opacity: this.state.fadeIn,
15                 transform: [
16                   {translateX: this.state.slideRight}
17                 ]
18               }}
19             >
20               <VrButton>
21                 <Text
22                   style={{
23                     fontSize: 0.2,
24                     textAlign: 'center',
25                     color: "#FFFFFF"
26                   }}>
27                 {this.props.text}
28                 </Text>
29               </VrButton>
30             </Animated.View>
31           ) :(
32             <View></View>
33           )}
34         </View>
35       )
36     }
If we check our local host, we can see that the button is no longer rendering by default as expected:
Next, let’s set up the progress circles to have dynamic background colors controlled by a local state.
Open ProgressCircles.js.
First, we can add a local state that will have the color of the first circle be the darker purple (same color as button) and the second circle be the same color as we currently see:
1 constructor() {
2 super();
3 this.state = { circle1Color: "#A482DF" , circle2Color: "#DBDAF1"};
4 }
Then, we simply bind this to our inline styling:
1 backgroundColor: this.state.circle1Color
2
3 backgroundColor: this.state.circle2Color
Refresh the local host to now see the following:
For our next step, let’s have the button appear on the click of any tile button.
Open DashboardLayout.js.
We want to toggle on our button on the click of tile button. Both of these components are in different files but nested under DashboardLayout. DashboardLayout currently passes down the showButton prop which controls whether the button renders. Therefore, we need to have the event handling function (that will be called from the buttons in TileButtons.js) in this file so that it can change the value of the showButton prop that is passed down.
First, let’s add a property called showButton to the local state:
1 this.state = { slideLeft: new Animated.Value(-1), fadeIn: new Animated.Value\
2 (0), showButton: this.prop.showButton};
3
4 //showButton false by default
Then, we want the showButton prop that we pass down to the button element to be bound to this local state property:
<Button showButton={this.state.showButton} text={this.props.text}/>Next, we write the event handling function that will be passed down to the TileButtons component as a prop. This function will update showButton to true:
1 //component lifecycle here
2
3 updateShowButton() {
4 this.setState({showButton: true});
5 }
6
7 //render function here
Now, let’s pass this down to the TileButtons component:
<TileButtons updateShowButton={this.updateShowButton.bind(this)}/>To conclude, we call this function on the click of any of our VrButtons in TileButton.js:
<VrButton onClick={this.props.updateShowButton}>If we refresh the local host, we can see this in action:
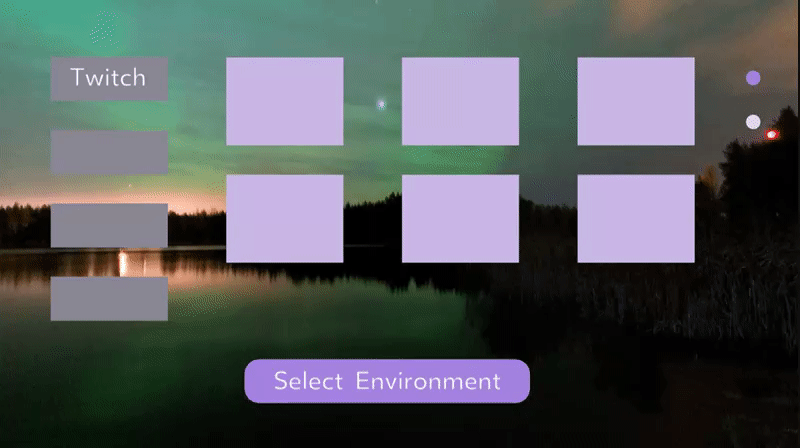
Awesome! Only three things left!
The next task is to have the second progress circle to take on the darker purple color and the first progress circle to take on the white color.
We can handle this much like we did the rendering of our button in this scene. We will have a property in the local state of DashboardLayout and an event handler that can update that property. Finally, this event handler will be triggered by the click of the button component and will ultimately control the coloring of the progress circles.
We can start this task by first adding to the local state found in DashboardLayout.js:
1 this.state = {
2 slideLeft: new Animated.Value(-1),
3 fadeIn: new Animated.Value(0),
4 showButton: false,
5 color1: "#A482DF",
6 color2: "#DBDAF1"
7 };
In the code above, we define two new properties: color1 and color2. These properties will be passed down to ProgressCircles and control the colors of the circles. Next, let’s add an event handler that will reverse the color properties to reflect the current stage of the scene:
1 updateScene() {
2 this.setState({color1: "#DBDAF1", color2: "#A482DF"});
Next, we pass this event handler down to the Button component:
<Button updateScene={this.updateScene.bind(this)} showButton={this.state.showButton} text={this.props.text}/>After that, we want the VrButton in Button.js to call this passed down event handler on click:
<VrButton onClick={this.props.updateScene}>Back in DashboardLayout.js, we can bind the color1 and colors2 properties in the local state to props passed down to the ProgressCircles component:
<ProgressCircles color1={this.state.color1} color2={this.state.color2}/>The final piece to the puzzle for this task is to remove the local state in ProgressCircles.js and have the passed down props bound to the inline styling of the circle:
1 //remove the constructor with local state somewhere up here
2 //update the following in the render function
3
4 <View
5 style={{
6 margin: 0.1,
7 width: 0.1,
8 borderRadius: 0.5,
9 height: 0.1,
10 backgroundColor: this.props.color1
11 }}
12 >
13 </View>
14 <View
15 style={{
16 margin: 0.1,
17 width: 0.1,
18 borderRadius: 0.5,
19 height: 0.1,
20 backgroundColor: this.props.color2
21 }}
22 >
23 </View>
Let’s check the local host to make sure this task is completed:
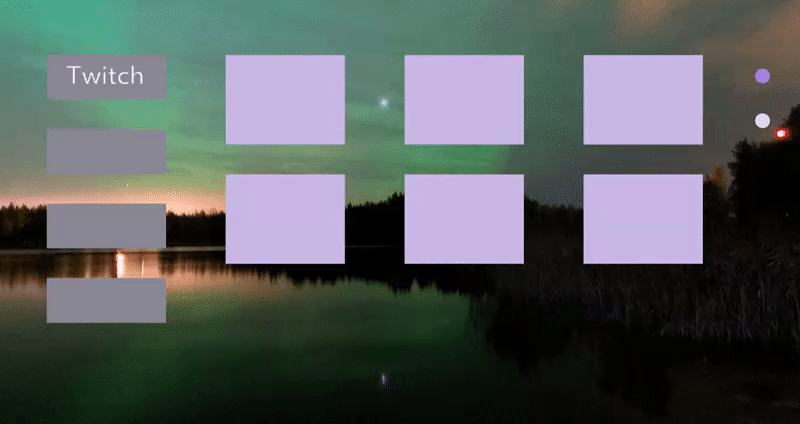
Right on! Two more tasks then we can then we can take a breather.
The next task is pretty easy. We want to update the button component’s text to “Watch Video” at the same time that we update the progress circles.
We need to have the text prop being passed down the button component to be dynamically updated. Therefore, let’s start by updating our constructor:
1 constructor(props) {
2 super(props);
3 this.state = {
4 slideLeft: new Animated.Value(-1),
5 fadeIn: new Animated.Value(0),
6 showButton: false,
7 color1: "#A482DF",
8 color2: "#DBDAF1",
9 text: this.props.text
10 };
11 }
In the code above, we are now passing in the inherited props to the constructor so we can set the initial text property of the local state equal to this.props.text.
Then, we can update this in our updateScene event handler:
1 updateScene() {
2 this.setState({color1: "#DBDAF1", color2: "#A482DF", text: "Watch Video"});
3 }
Finally, we bind the text prop of Button to the local state instead of just passing down the inherited prop:
<Button updateScene={this.updateScene.bind(this)} showButton={this.state.showButton} text={this.state.text}/>Let’s give it a whirl:
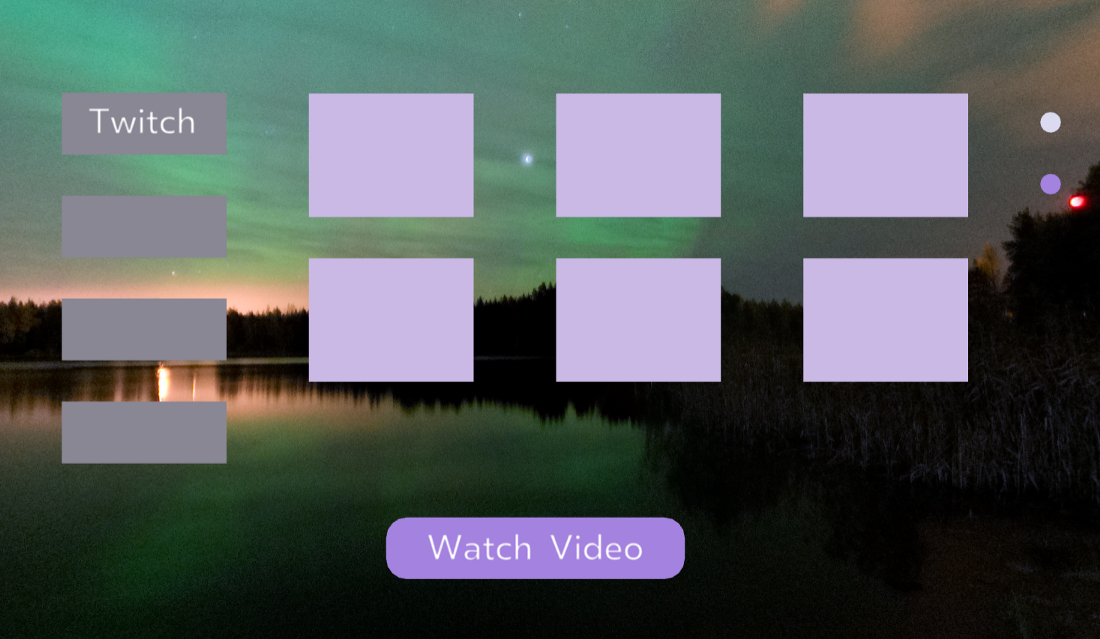
Woohoo! Just one more task!
Our final task for updating this scene on a user input is to add the dynamic styling of our tile buttons so that a darker purple border arises when a tile is clicked (and only one can have a border at a time):

The first thing to do for this is to update the inline styling of the View components right above the VrButtons within TileButtons.js:
1 <View
2 style={{
3 margin: 0.1,
4 height: 0.6,
5 backgroundColor: "#CAB9E5",
6 borderWidth: "0",
7 borderColor: "#A482DF",
8 borderStyle: "solid"
9 }}
10 >
Because the borderWidth is set to 0, no border will be displayed by default. If we adjust this, however, the border will display.
We want to have the borderWidth update on the click of each tile button so only one tile has a border at a time.
How do we do this?
Like we have been doing in the previous tasks, we will control this with passed in props from the DashboardLayout component.
Open DashboardLayout.js and let’s update the local state:
1 this.state = {
2 slideLeft: new Animated.Value(-1),
3 fadeIn: new Animated.Value(0),
4 showButton: false,
5 color1: "#A482DF",
6 color2: "#DBDAF1",
7 text: this.props.text,
8 borderWidths: [0, 0, 0, 0, 0, 0]
9 };
In the code above, we have added an array which can be used to control the styling of the borderWidth values of the tile buttons. Each number in borderWidths refers to one tile button.
We need an event handler attached to the tile buttons that says: “Hey! Tile ___ here. I was clicked so change my border’s width so you can see it.”
Because we already have an onClick event (updateShowButton) attached to the VrButtons in TileButtons.js, we need to contain one event handler called updateStage that will show the button on the first click of a tile and update the tile’s border width of every click:
1 //previously updateShowButton
2 updateStage(input) {
3 if(this.state.showButton === false) {
4 this.setState({showButton: true});
5 }
6
7 switch (input) {
8 case 1:
9 this.setState({borderWidths: [0.05, 0, 0, 0, 0, 0]});
10 break;
11 case 2:
12 this.setState({borderWidths: [0, 0.05, 0, 0, 0, 0]});
13 break;
14 case 3:
15 this.setState({borderWidths: [0, 0, 0.05, 0, 0, 0]});
16 break;
17 case 4:
18 this.setState({borderWidths: [0, 0, 0, 0.05, 0, 0]});
19 break;
20 case 5:
21 this.setState({borderWidths: [0, 0, 0, 0, 0.05, 0]});
22 break;
23 case 6:
24 this.setState({borderWidths: [0, 0, 0, 0, 0, 0.05]});
25 break;
26 }
27 }
In the code above, we update showButton to true if it is currently false. We also use a switch statement to update the width of the border that called this event handler.
Now, let’s pass down this event handler and the borderWidths property as props to TileButtons:
<TileButtons updateStage={this.updateStage.bind(this)} borderWidths={this.state.borderWidths}/>Next, we can update the VrButtons in TileButtons.js to call this event handler prop that was passed down and pass in an input (key/index):
1 <VrButton onClick={ () => this.props.updateStage(1) }>
2
3 //update input value for each VrButton
Finally, we can bind the borderWidth values for each tile button to the values in the borderWidths prop:
1 <View
2 style={{
3 margin: 0.1,
4 height: 0.6,
5 backgroundColor: "#CAB9E5",
6 borderWidth: this.props.borderWidths[1],
7 borderColor: "#A482DF",
8 borderStyle: "solid"
9 }}
10 >
Here’s the final TileButtons.js and DashboardLayout.js code at this point.
Update the code and let’s see if this is working:
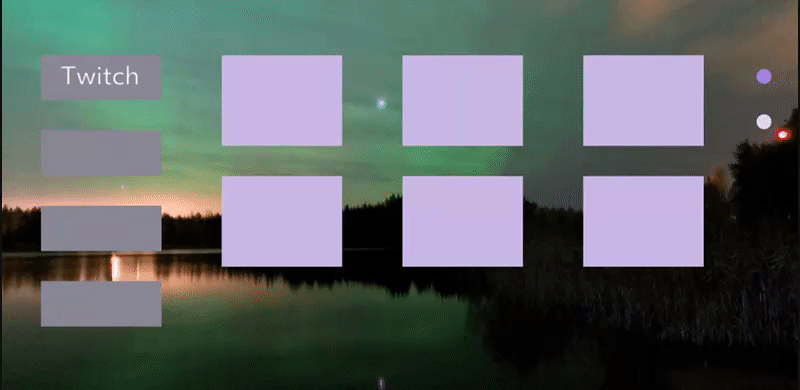
Woohoo! We have finally finished the updating of our Dashboard scene based on a user’s input.
We still need to do the Twitch API stuff, but you deserve a pat on the back and a break!
Final Code
The code for the entire project at this point is available on GitHub.
Study Break

This is definitely the lengthiest chapter that we will have in this book.
Feel free to take a deep breath, grab some coffee, stretch, whatever.
If you want to continue this later, you can use something like Pocket.
Whenever you are ready, we can continue to finish our video player component, implement the Twitch API, and then tie together transitions to complete our video app.
Creating the Video Player Components
Static Video Player Components
First, let’s create our scene component called VideoPlayer.js within the scenes folder.
Open this file and let’s add the code:
1 import React from 'react';
2 import {
3 Text,
4 View,
5 asset,
6 Pano
7 } from 'react-vr';
8
9 //Scene
10 class VideoPlayer extends React.Component {
11 render() {
12 return (
13 <View>
14 <Pano source={asset('title-background.jpg')}/>
15
16 </View>
17 )
18 }
19 }
20
21 module.exports = VideoPlayer;
Remember, the Pano source will be controlled by the user’s selection in the Dashboard scene. For now, we can just leave it as title-background.jpg.
Next, we can create the VideoPlayerLayout.js file within the layouts folder.
In this file, we want a simple container for the video player element that will display in the front of the virtual scene and a simple container to display the button in the back of the virtual scene:
1 import React from 'react';
2 import {
3 View
4 } from 'react-vr';
5
6 //Layout
7 class VideoPlayerLayout extends React.Component {
8
9 render() {
10 return (
11 <View>
12 <View style={{
13 flex: 1,
14 width: 8,
15 flexDirection: 'column',
16 alignItems: 'stretch',
17 backgroundColor: '#333333',
18 layoutOrigin: [0.5, 0.5],
19 transform: [{translate: [0, 0, -5]}]
20 }}>
21 //insert Video element
22 </View>
23
24 <View style={{
25 flex: 1,
26 width: 2.5,
27 flexDirection: 'column',
28 alignItems: 'stretch',
29 layoutOrigin: [0.5, 0.5],
30 transform: [{translate: [0, 0, 5]}]
31 }}>
32 //insert button component
33 </View>
34 </View>
35 )
36 }
37 }
38
39 module.exports = VideoPlayerLayout;
Note that we are using transform: [{translate: [0, 0, 5]}] to have the button component render in the back of the virtual world.
Since we are reusing the button component, we just need to create the video element in VideoElement.js (within the elements folder). Note: I included “Element” in the file naming convention since Video is a predefined component.
Open this file and replace it with the following:
1 import React from 'react';
2 import {
3 Video,
4 View,
5 asset
6 } from 'react-vr';
7
8 //Element
9 class VideoElement extends React.Component {
10 render() {
11 return (
12 <View style={{ margin: 0.1, height: 4}}>
13 <Video style={{height: 4}} source={asset('fireplace.mp4')} />
14 </View>
15 )
16 }
17 }
18
19 module.exports = VideoElement;
In the code above, we are adding a Flexbox item to our container and using a Video component to display a video.
Let’s use the fireplace.mp4 file that we used in Chapter 3 just so we can test this out. You can download this video here.
Cool! We can move on to nesting our components for this scene.
Nesting Our Components
First, we can nest import and nest the VideoPlayer scene in our app component found in index.vr.js:
1 //other imports here
2 import VideoPlayer from './components/scenes/VideoPlayer.js';
3
4 export default class VrVideoApp extends React.Component {
5 render() {
6 //<TitleScene showButton={true} text={"Watch a Video"}/>
7 //<Dashboard showButton={false} text={"Select Environment"}/>
8 return (
9 <View>
10 <VideoPlayer showButton={true} text={"Back to Dashboard"}/>
11 </View>
12 );
13 }
14 };
15
16 AppRegistry.registerComponent('VrVideoApp', () => VrVideoApp);
Note that I have commented out the Dashboard that was being nested and passed props into VideoPlayer so the button will render with the right text by default.
Going another level down, we import and nest VideoPlayerLayout in VideoPlayer.js:
1 import VideoPlayerLayout from './layouts/VideoPlayerLayout.js'
2
3 //Scene
4 class VideoPlayer extends React.Component {
5 render() {
6 return (
7 <View>
8 <Pano source={asset('title-background.jpg')}/>
9 <VideoPlayerLayout showButton={this.props.showButton} text={this.pro\
10 ps.text}/>
11 </View>
12 )
13 }
14 }
Note that we are continuing to pass down the props to our button component.
Let’s go down to VideoPlayerLayout.js and add our imports for the elements:
1 import VideoElement from './elements/VideoElement.js';
2 import Button from './elements/Button.js';
Then, let’s nest the elements like so:
1 <View>
2 <View style={{...}}>
3 <VideoElement/>
4 </View>
5
6 <View style={{...}}>
7 <Button showButton={this.props.showButton} text={this.props.text}/>
8 </View>
9 </View>
Testing Our Scene
Refresh the local host and let’s check to see if our Video Player scene is rendering:
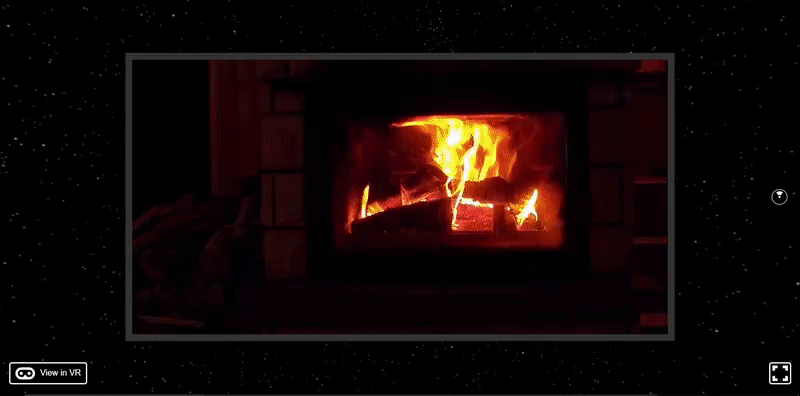
Lookin’ good except for that dang button that is too low and needs to be flipped.
We can flip the button’s container (found in VideoPlayerLayout.js) by adding rotateY: -180:
1 <View style={{
2 flex: 1,
3 width: 2.5,
4 flexDirection: 'column',
5 alignItems: 'stretch',
6 layoutOrigin: [0.5, 0.5],
7 transform: [{translate: [0, 0, 5]}, {rotateY: -180}]
8 }}>
If we check the local host, we will see:
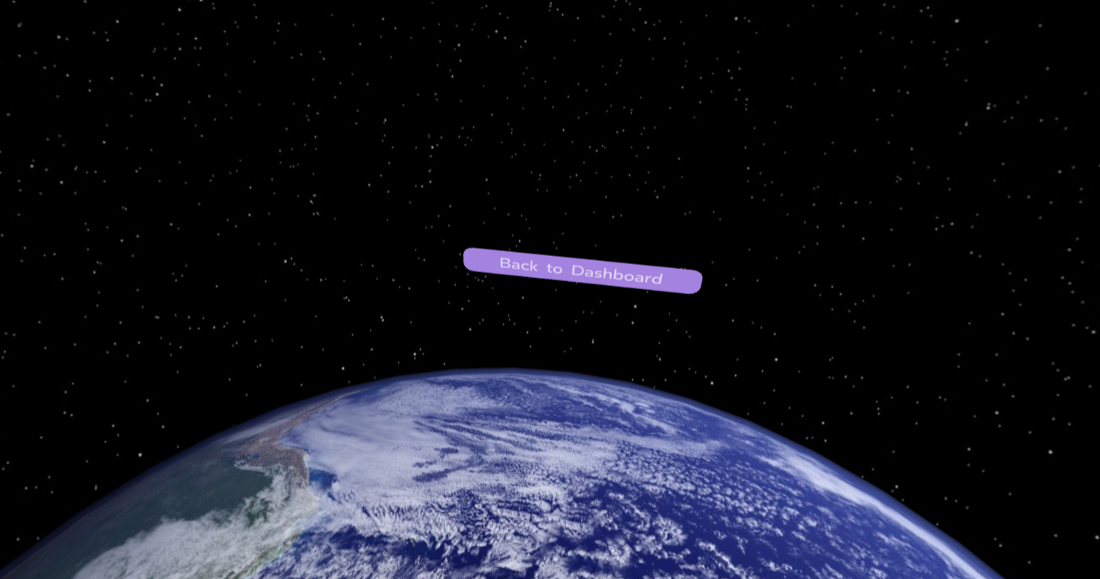
We can update the translate value on the Y axis to raise the button container:
transform: [{translate: [0, 3.5, 5]}, {rotateY: -180}]We can now see the following from the local host:
Adding Entrance Animation
The final step in this scene at the time being is to add entrance animation. Our button element already has entrance animation.
We can add the following animation to have the VideoElement component fade in (update VideoElement.js):
In this code, we import Animated and Easing, add a local state with an animation value for controlling the opacity, bind the inline styling to this animated value, and play the animation when the component mounts.
If we refresh the local host, we now see this in effect:
Implementing the Twitch API

Creating an API Key
First off, create a Twitch account if you have not already.
Then, we can create a Twitch API key by visiting the connections page.
Under Other Connections, you can click to register an app and retrieve the API key.
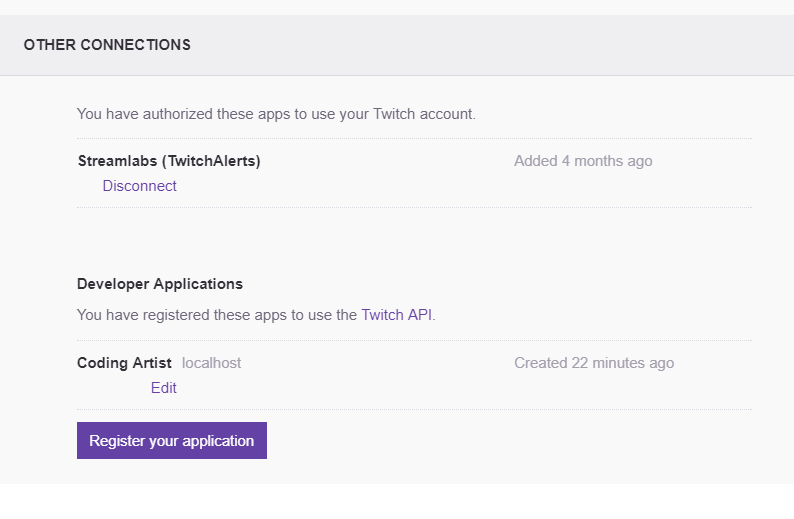
When registering an app, make sure to specify the redirect URI as http://localhost:
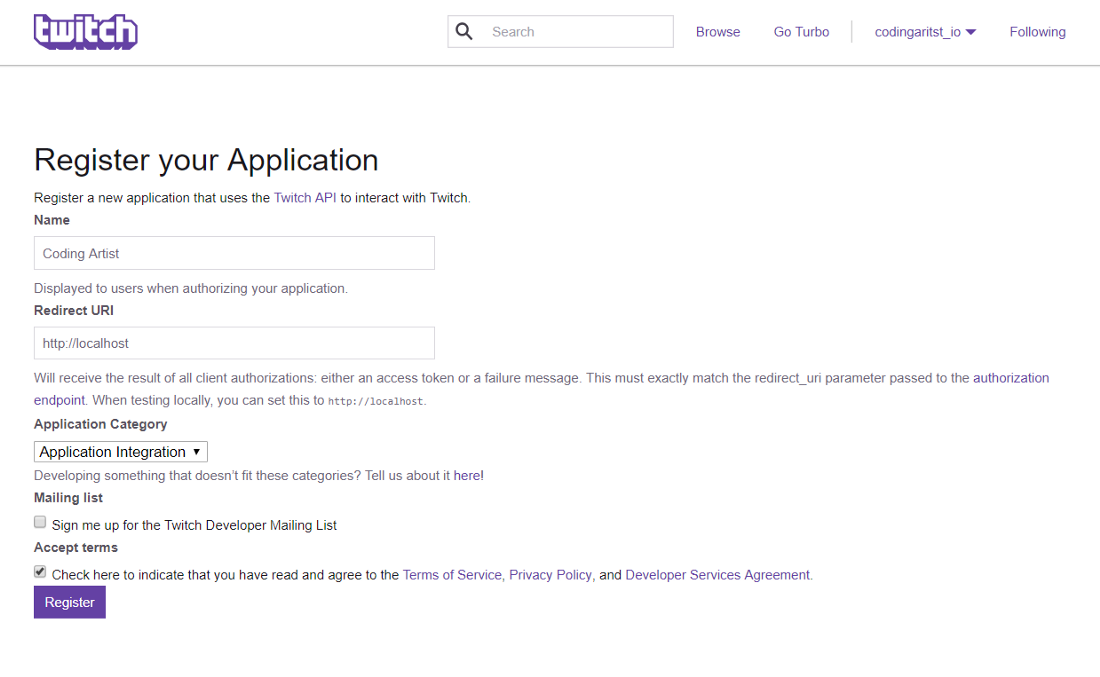
Hit Register, copy the Client ID that is generated, and paste it into an empty file in your code editor.
We will be able to use this client ID in order to retrieve the data we need.
Installing Axios
To make API requests, we can use Axios (specifically, we will use the React Native version).
We can install it by running the following in command line:
npm install react-native-axios --saveBefore we move along, let’s import this into index.vr.js where we will be making the API call:
import axios from 'react-native-axios';Retrieving Information of Streams
We want to retrieve streaming videos from Twitch that can be played from within our video player. For our Dashboard, we want to display the video cover image (previews) of 6 streams and have the user select which one they want to watch.
We will retrieve the data of the streams from our app component and pass down the cover image addresses to our Dashboard as a prop.
We want to retrieve these streaming videos before our app component mounts so we add the following in index.vr.js:
1 export default class VrVideoApp extends React.Component {
2 componentWillMount() {
3
4 }
5 //render
6 }
Then, let’s add the shell of the Axios code that will request streaming videos and their information:
1 componentWillMount() {
2 axios.get('')
3 .then(response => {
4
5 })
6 .catch(e => {
7 console.log(error);
8 });
9 }
Within axios.get(''), we can put the URL that will return featured Twitch streams. The URL can be found on the official Twitch API documentation:
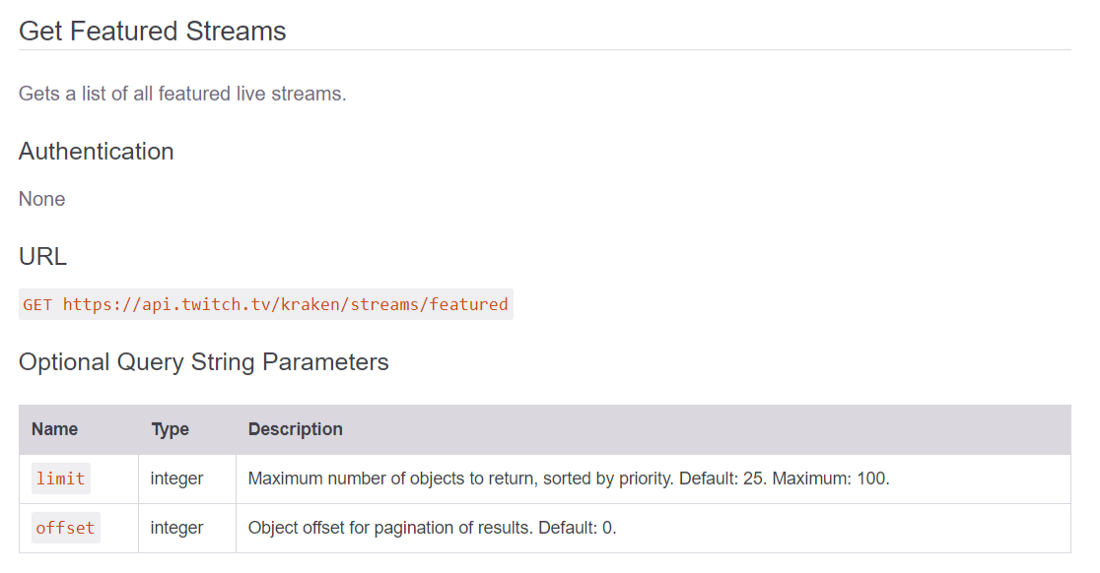
Knowing this, let’s insert the following URL:
1 componentWillMount() {
2 axios.get('https://api.twitch.tv/kraken/streams/featured')
3 .then(response => {
4
5 })
6 .catch(e => {
7 console.log(error);
8 });
9 }
Next, we can attach some URL parameters so there is only data returned for 6 featured stream (1 for each tile in our Dashboard scene):
1 componentWillMount() {
2 axios.get('https://api.twitch.tv/kraken/streams/featured?limit=6')
3 .then(response => {
4
5 })
6 .catch(e => {
7 console.log(error);
8 });
9 }
Now, we need to add another URL parameter that authenticates us to retrieve data. We add the client_id which we generated previously:
1 //update with your client_ID
2 componentWillMount() {
3 axios.get('https://api.twitch.tv/kraken/streams/featured?limit=6&client_\
4 id=skawlpb80ixx8e9cxafxepbn66xhe1')
5 .then(response => {
6
7 })
8 .catch(e => {
9 console.log(error);
10 });
11 }
So far, our code is saying: “Hey, Twitch! We have an address for getting 6 features streams and some verification that you’re cool with me doing this. Once you give us what we need, then we’ll have to do something with what you gave us. If you catch an error, just log it for us. ”
Let’s see if this is working by logging the response:
1 componentWillMount() {
2 axios.get('https://api.twitch.tv/kraken/streams/featured?limit=6&client_id\
3 =skawlpb80ixx8e9cxafxepbn66xhe1')
4 .then(response => {
5 console.log(response);
6 })
7 .catch(e => {
8 console.log(error);
9 });
10 }
Refresh the local host and check the console. We should see the following data is returned:
In the retrieved data (Object), there is data (Object) for 6 featured streams within an array called featured.
Within one of the featured stream objects, there is an object called stream containing the information we need (cover/preview image URL and an ID):
Let’s create two functions that will gather the preview URLs and stream IDs into arrays: gatherPreviews and gatherIDs.
Starting with the former, let’s call this once we get a response from the API call:
1 componentWillMount() {
2 axios.get('https://api.twitch.tv/kraken/streams/featured?limit=6&client_id\
3 =skawlpb80ixx8e9cxafxepbn66xhe1')
4 .then(response => {
5 console.log(response);
6 this.gatherPreviews(response);
7 })
8 .catch(e => {
9 console.log(error);
10 });
11 }
Note that we are passing gatherPreviews the response object.
Now, let’s add the shell of gatherPreviews:
1 gatherPreviews(response) {
2
3 }
Then, we want to map (go through) the stream previews from the featured arrays to a new array called previews:
1 gatherPreviews(response) {
2 const previews = response.data.featured.map(function(feat) {
3 return feat.stream.preview.large;
4 });
5
6 console.log(previews);
7 }
Note that response.data.features.map and feat.stream.preview.large was known by looking at the data which we logged to the console.
Let’s refresh the local host and we should see that the previews array (which we logged) is in fact storing 6 preview image URLs:
Let’s finish the data retrieval by writing up the gatherStreamIDs function.
First, update the local state like so:
this.state = { previews: "", IDs: ""}Next, we want to call this function when get a response from the API call:
1 componentWillMount() {
2 axios.get('https://api.twitch.tv/kraken/streams/featured?limit=6&client_id\
3 =skawlpb80ixx8e9cxafxepbn66xhe1')
4 .then(response => {
5 console.log(response);
6 this.gatherPreviews(response);
7 this.gatherStreamIDs(response);
8 })
9 .catch(e => {
10 console.log(error);
11 });
12 }
Finally, we add the function which will gather all the stream IDs, store them in a new array, and update the local state property IDs to the value of this new array (also called IDs):
1 gatherStreamIDs(response) {
2 const IDs = response.data.featured.map(function(feat) {
3 return feat.stream._id;
4 });
5
6 console.log(IDs);
7 }
As you can see above, I logged IDs which is correctly storing the stream IDs:
Displaying the Preview Images
The next major step is to pass down the preview image URLs from the local state in index.vr.js to the TileButtons component so the tiles will display the preview images.
Let’s start by adding a local state and add the previews array to the local state as a property also called previews in index.vr.js:
1 constructor() {
2 super();
3 this.state = { previews: ""}
4 }
5
6 //lifecycle component here
7
8 gatherPreviews(response) {
9 const previews = response.data.featured.map(function(feat) {
10 return feat.stream.preview.large;
11 });
12
13 this.setState({previews: previews});
14 }
Let’s pass this property down to the Dashboard scene as a prop also called previews:
1 render() {
2 //<TitleScene showButton={true} text={"Watch a Video"}/>
3 //<VideoPlayer showButton={true} text={"Back to Dashboard"}/>
4 return (
5 <View>
6 <Dashboard previews={this.state.previews} showButton={false} text={"Se\
7 lect Environment"}/>
8 </View>
9 );
10 }
Now, we will have to pass this prop down all the way down to the TileButtons component.
Let’s begin this process in Dashboard.js:
<DashboardLayout previews={this.props.previews} text={this.props.text} />We can then go down another level to DashboardLayout.js:
<TileButtons previews={this.props.previews} updateStage={this.updateStage.bind(this)} borderWidths={this.state.borderWidths}/>In TileButtons.js, we are currently rendering empty Text components between the VrButtons:
1 <Text
2 style={{
3 fontSize: 0.2,
4 textAlign: 'center',
5 color: "#FFFFFF",
6 }}>
7
8 </Text>
This was necessary so the tile containers (styled with a light purple color) would display. We need to replace this with an Image component that has the source bound to one of the preview URLs.
Before we add the Image component, let’s import it:
1 import {
2 Text,
3 View,
4 VrButton,
5 Image
6 } from 'react-vr';
Then, we can add the Image component and bind the source to the preview URLs (these Image components will replace the Text components):
1 <VrButton onClick={ () => this.props.updateStage(1) }>
2 <Image source={{uri: this.props.previews[0]}} style={{width: 1, height: 0.\
3 6}}/>
4 </VrButton>
See GitHub Gist for all updates
Note that we have to specify the width and height of the Image. We set it to the same height/width ratio as the containers.
Let’s see if this worked:
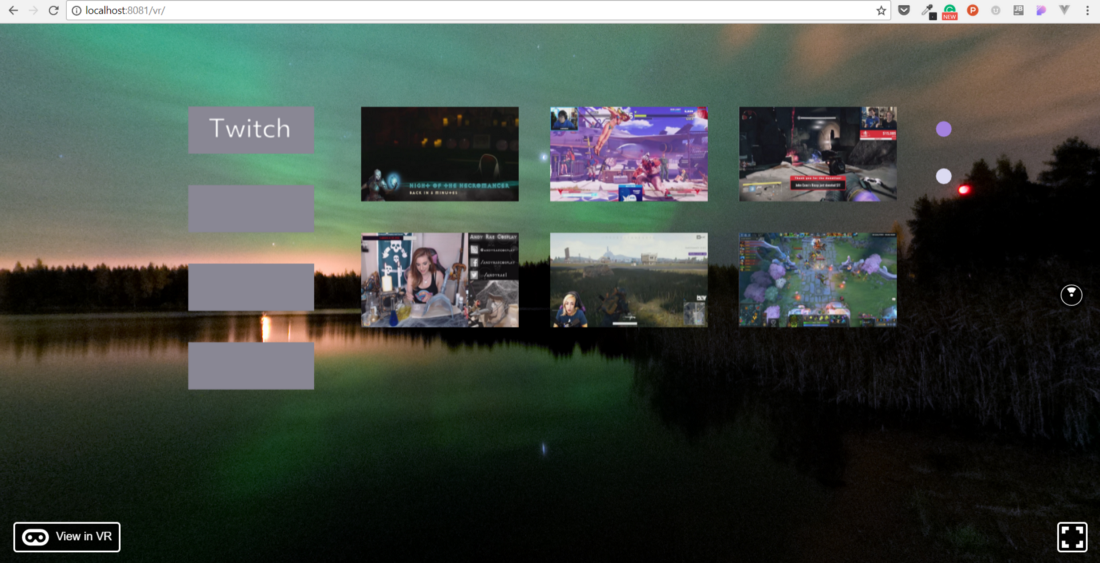
So cool!
The final piece in this section is to fix the borders:
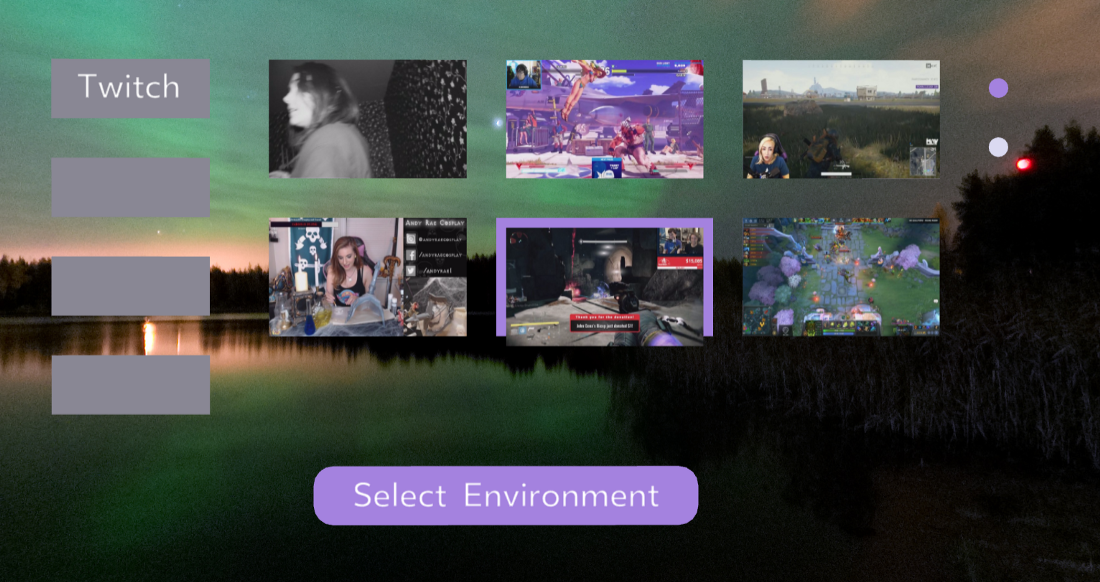
This requires moving the borderWidth and borderColor inline styling properties from the View components to the Image components:
1 <Image
2 source={{uri: this.props.previews[0]}} 3 style=
4 {{
5 width: 1,
6 height: 0.6,
7 borderWidth: this.props.borderWidths[0],
8 borderColor: "#A482DF"
9 }}10 />
See GitHub Gist for all updates
Refresh local host and you will see that this is working!
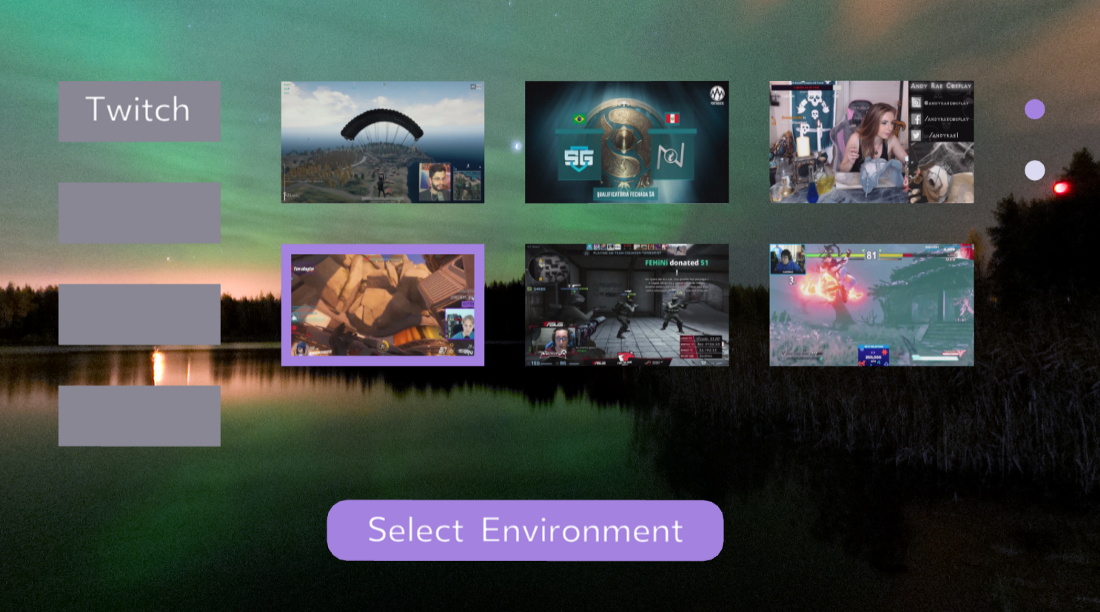
Display the Environment Images
When the user clicks on the button when display “Select Environment”, we want to display the images of 6 possible environments to choose from. Which image is clicked will ultimately control what panoramic photo is rendered in our Video Player scene.
For now, we just want to focus on display the environment photos.
First, we need 4 more panoramic photos. Add the Arizona, Hawaii, New Hampshire, and Texas panoramic photos from Chapter 2 into our static_assets folder.
Next, we can add an array in the local state called environments in DashboardLayout.js which will contain the file names of all the panoramic photos:
1 constructor(props) {
2 super(props);
3 this.state = {
4 slideLeft: new Animated.Value(-1),
5 fadeIn: new Animated.Value(0),
6 showButton: false,
7 color1: "#A482DF",
8 color2: "#DBDAF1",
9 text: this.props.text,
10 borderWidths: [0, 0, 0, 0, 0, 0],
11 environments: ["title-background.jpg", "dashboard-background.jpg", "Ariz\
12 ona.jpg", "Hawaii.jpg", "New Hampshire.jpg", "Texas.jpg"]
13 };
14 }
We also will add a property that will tell us the stage of our scene (whether a user is selecting from streams or environments):
1 this.state = {
2 //everything else
3 stage: 1
4 };
Currently, we are just updating the progress circles’ colors and button text when a user clicks the button from stage 1 (when stream images are displaying) within the updateScene function.
We also want to update the stage from within this function:
1 updateScene() {
2 this.setState({color1: "#DBDAF1", color2: "#A482DF", text: "Watch Video", \
3 stage: 2});
4 }
Then, we want to pass the environments and stage as props down to the TileButtons component like so:
1 <TileButtons
2 stage={this.state.stage}
3 environments={this.state.environments}
4 previews={this.props.previews}
5 updateStage={this.updateStage.bind(this)}
6 borderWidths={this.state.borderWidths}
7 />
In TileButtons.js, we will use conditional rendering to either display the stream preview photos or environment photos depending on the stage of the scene.
To do this, let’s first import asset:
1 import {
2 Text,
3 View,
4 VrButton,
5 Image,
6 asset
7 } from 'react-vr';
Now, we can store the stage prop into a variable:
1 render() {
2 const stage = this.props.stage;
3 //...
4 }
Finally, we use this stage variable for conditional rendering where we either use the previews array prop or environments array prop for the Image source:
1 {stage === 1 ? (
2 <Image
3 source={{uri: this.props.previews[0]}} 4 style=
5 {{
6 width: 1,
7 height: 0.6,
8 borderWidth: this.props.borderWidths[0],
9 borderColor: "#A482DF"
10 }}11 />
12 ): (
13 <Image
14 source={asset(this.props.environments[0])}
15 style=
16 {{
17 width: 1,
18 height: 0.6,
19 borderWidth: this.props.borderWidths[0],
20 borderColor: "#A482DF"
21 }}22 />
23 )}
See GitHub Gist for all updates
The code above can be read as: “If we are in the first stage where a user is selecting the stream video, then show them all the stream preview images. Else, show them the environments they can select to display as the panoramic of the video player.”
Let’s refresh the local host and test this out:
Sweet! As you can see, the rendering is really slow given the high resolution of the panoramic photos. However, it’s not worth our time to fix this.
Setup to Record User Input From Dashboard
There is one last thing that we want to accomplish before we move on to the next main section of this chapter. That is, we want to do the setup to record the stream ID and environment panoramic that the user selects from the Dashboard scene and pass it to the VideoPlayer component.
First, let’s add the IDs array from the gatherStreamIDs function to the local state found in index.vr.js:
1 this.state = { previews: "", IDs: ""};
2
3 gatherStreamIDs(response) {
4 const IDs = response.data.featured.map(function(feat) {
5 return feat.stream._id;
6 });
7
8 this.setState({IDs: IDs});
9 }
Next, let’s two properties (selectedStreamID and selectedEnv) which will ultimately store the user’s selection in the Dashboard scene:
this.state = { previews: "", IDs: "", selectedStreamID: "", selectedEnv: ""};Note that we are storing these properties in the app component so we can pass down their values as props to the VideoPlayer scene component.
We can also add an event handler that will take in two parameters, the stage and the value. This will be triggered from the Dashboard scene and will allow us to capture the user inputs at each stage. Based on those parameters, we can update the local state as needed:
1 captureSelection(stage, value) {
2 switch (stage) {
3 case 1:
4 this.setState({selectedStreamID: value});
5 break;
6 case 2:
7 this.setState({selectedEnv: value});
8 break;
9 }
10 }
We want this event handler to be called from the updateScene function in DashboardLayout.js. Therefore, we will pass down this event handler to the Dashboard component in index.vr.js:
1 <Dashboard
2 captureSelection={this.captureSelection.bind(this)}
3 previews={this.state.previews}
4 showButton={false}
5 text={"Select Environment"}
6 />
In Dashboard.js, let’s pass this prop down another level to the DashboardLayout component:
<DashboardLayout captureSelection={this.props.captureSelection} previews={this.props.previews} text={this.props.text} />This is as far as we can go at the moment with captureSelection since the rest of the logic depends on how we transition between each scene.
There is one final thing that we can do. Back in index.vr.js, let’s pass down the selected stream and selected environment photo to the VideoPlayer component:
1 render() {
2 //<TitleScene showButton={true} text={"Watch a Video"}/>
3 //<VideoPlayer streamID={this.state.selectedStreamID} env={this.state.se\
4 lectedEnv} showButton={true} text={"Back to Dashboard"}/>
5
6 //...
7 }
Scene Transitions
In this final coding section, we are going to add the code so we can transition through each scene. We will also finish up the capturing of the users inputs from the Dashboard scene to have this all working smoothly.
Scene 1 to Scene 2 Transition
Let’s start by adding the conditional rendering from our app component to control which scene is currently being rendered.
First, let’s add a property to the local state called scene in index.vr.js:
this.state = { scene: 1, previews: "", IDs: "", selectedStreamID: "", selectedEnv: ""};Then, let’s update the return with conditional rendering depending on the value of scene:
1 render() {
2 const scene = this.state.scene;
3 return (
4 <View>
5 {scene === 1 ? (
6 <TitleScene showButton={true} text={"Watch a Video"}/>
7 ) : (
8 scene === 2 ? (
9 <Dashboard
10 captureSelection={this.captureSelection.bind(this)}
11 previews={this.state.previews}
12 showButton={false}
13 text={"Select Environment"}
14 />
15 ) : (
16 <VideoPlayer streamID={selectedStreamID} env={selectedEnv} showBut\
17 ton={true} text={"Back to Dashboard"}/>
18 )
19 )}
20 </View>
21 );
22 }
The code above can be read as: “If we are in scene 1, show the title scene. Else, show the dashboard scene for scene 2 or the video player scene for scene 3.”
Next, let’s add an event handler that will update the scene property so the requested scene renders next:
1 changeScenes(nextScene) {
2 switch (nextScene) {
3 case 1:
4 this.setState({scene: 1});
5 break;
6 case 2:
7 this.setState({scene: 2});
8 break;
9 case 3:
10 this.setState({scene: 3});
11 break;
12 }
13 }
This event handler will always be called by the Button component. In order to know what scene to request next, the button must know what scene it is currently in.
This means we will do more passing down of props.
Let’s start with passing the event handler we just created and the scene property as props to the TitleScene component:
1 <TitleScene
2 showButton={true}
3 text={"Watch a Video"}
4 changeScenes={this.changeScenes.bind(this)}
5 scene={this.state.scene}
6 />
In TitleScene.js, we can pass the props down to the TitleLayout component:
1 <TitleLayout
2 showButton={this.props.showButton}
3 text={this.props.text}
4 changeScenes={this.props.changeScenes}
5 scene={this.props.scene}
6 />
In the next level down, TitleLayout.js, we can pass these props down to the button:
1 <Button
2 showButton={this.props.showButton}
3 text={this.props.text}
4 changeScenes={this.props.changeScenes}
5 scene={this.props.scene}
6 />
In Button.js, we want to render a button that calls changeScenes with the requested new scene passed in.
To do this, we have a variable called nextScene that has a different value depending on the current scene:
1 render() {
2 const showButton = this.props.showButton;
3 const currentScene = this.props.scene;
4 let nextScene;
5 switch (currentScene) {
6 case 1:
7 nextScene = 2;
8 break;
9 case 2:
10 nextScene = 3;
11 break;
12 case 3:
13 nextScene = 1;
14 break;
15 }
16 //return
17 }
Then, we update the onClick of the VrButton to be:
<VrButton onClick={() => this.props.changeScenes(nextScene)}>Let’s refresh the local host and see if this is working:
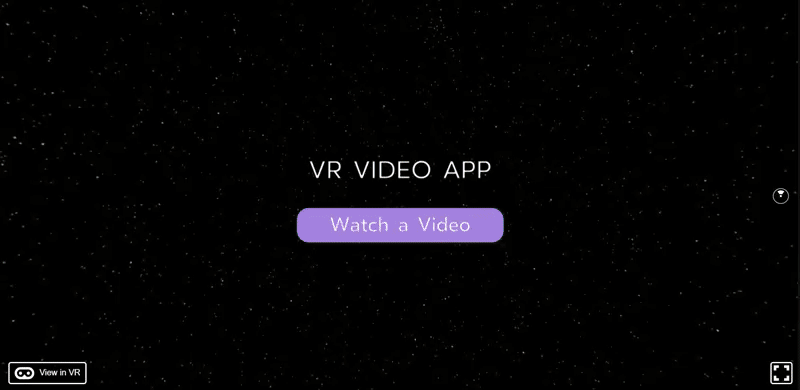
Cool beans!
Scene 3 to Scene 1 Transition
Scene 2 to Scene 3 will be more work so let’s skip it for now.
This transition shouldn’t be too difficult.
First, let’s update the local state in index.vr.js so scene starts at 3 (this is to test as it will eventually be automatically controlled):
this.state = { scene: 3, previews: "", IDs: "", selectedStreamID: "", selectedEnv: ""};Next, we just pass down changeScenes and scene as props through the VideoPlayer component and down to the button:
index.vr.js
1 <VideoPlayer
2 streamID={this.state.selectedStreamID}
3 env={this.state.selectedEnv}
4 showButton={true}
5 text={"Back to Dashboard"}
6 changeScenes={this.changeScenes.bind(this)}
7 scene={this.state.scene}
8 />
VideoPlayer.js
1 <VideoPlayerLayout
2 showButton={this.props.showButton}
3 text={this.props.text}
4 changeScenes={this.props.changeScenes}
5 scene={this.props.scene}
6 />
VideoPlayerLayout.js
1 <Button
2 showButton={this.props.showButton}
3 text={this.props.text}
4 changeScenes={this.props.changeScenes}
5 scene={this.props.scene}
6 />
If you check the local host, this will be working correctly.
Scene 2 to Scene 3 Transition
This section will be the most work of all the transitions because it’s the most complicated scene as it contains two stages.
Take a deep breath and let’s do it!
First, let’s update the scene property in the local state back to 1:
this.state = { scene: 3, previews: "", IDs: "", selectedStreamID: "", selectedEnv: ""};Next, we just pass down changeScenes and scene as props through the Dashboard component and down to the button:
index.vr.js
1 <Dashboard
2 captureSelection={this.captureSelection.bind(this)}
3 previews={this.state.previews}
4 showButton={false}
5 text={"Select Environment"}
6 changeScenes={this.changeScenes.bind(this)}
7 scene={this.state.scene}
8 />
Dashboard.js
1 <DashboardLayout
2 captureSelection={this.props.captureSelection}
3 previews={this.props.previews}
4 text={this.props.text}
5 changeScenes={this.props.changeScenes}
6 scene={this.props.scene}
7 />
DashboardLayout.js
1 <Button
2 updateScene={this.updateScene.bind(this)}
3 showButton={this.state.showButton}
4 text={this.state.text}
5 changeScenes={this.props.changeScenes}
6 stage={this.state.stage}
7 scene={this.props.scene}
8 />
Note that we also pass the stage property found in the local state of the DashboardLayout component. This will allow us to have two separate onClick events depending on what stage we are at within this Dashboard scene.
In Button.js, let’s add conditional rendering so we can have a different VrButton component for scene 2 as it will have two possible onClick events:
1 {currentScene === 2 ? (
2 <VrButton
3 onClick={
4 () => {
5
6 }
7 }
8 >
9 <Text
10 style={{
11 fontSize: 0.2,
12 textAlign: 'center',
13 color: "#FFFFFF"
14 }}>
15 {this.props.text}
16 </Text>
17 </VrButton>
18 ) : (
19 <VrButton onClick={() => this.props.changeScenes(nextScene)}>
20 <Text
21 style={{
22 fontSize: 0.2,
23 textAlign: 'center',
24 color: "#FFFFFF"
25 }}>
26 {this.props.text}
27 </Text>
28 </VrButton>
29 )}
Notice that we have an empty onClick event for the scene 2 VrButton.
Next, let’s store the stage prop into a variable like so:
1 //switch statement up here
2 const stage = this.props.stage;
3 return (
4 //...
Let’s then add a switch statement where we will either go to stage 2 of this scene and display our environment photos or go to scene 3 depending on the value of the stage variable we just created:
1 {currentScene === 2 ? (
2 <VrButton
3 onClick={
4 () => {
5 switch (stage) {
6 case 1:
7 this.props.updateScene();
8 break;
9 case 2:
10 this.props.changeScenes(nextScene);
11 break;
12 }
13 }
14 }
15 >
16
17 //...
Our code can now be read as: “If we are in scene 2, then we want a VrButton that will either go to stage 2 of the scene or go to scene 3.”
Refresh the local host and let’s test this out:
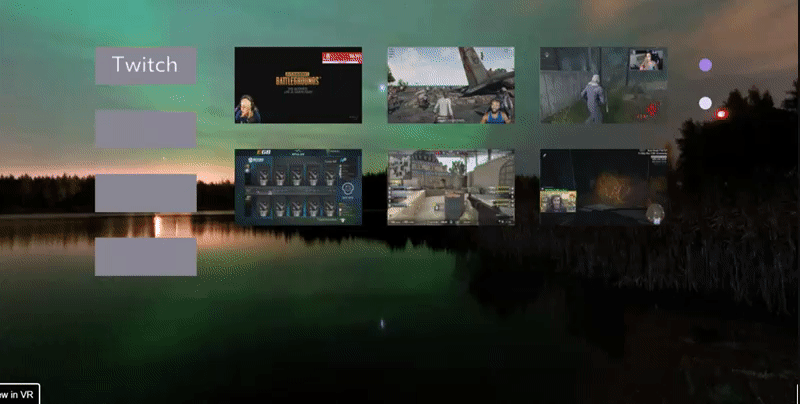
Hoot hoot! We are almost done!
Playing the Selected Video in the Selected Environment
Currently, we have already done some setup for an event handler called captureSelection. This event handler has been passed all the way down into the DashboardLayout component from the app component.
1 captureSelection(stage, value) {
2 switch (stage) {
3 case 1:
4 this.setState({selectedStreamID: value});
5 break;
6 case 2:
7 this.setState({selectedEnv: value});
8 break;
9 }
10 }
The event handler needs to be triggered on the click of the button component when it is being used in the Dashboard scene. It will be triggered in the first and second stages of the scene with a value being passed in to update the selected stream ID and environment managed in the local state of the app component.
If we go to DashboardLayout.js, there is an event handler called updateStage which essentially keeps track of which tile button is being clicked and updates the border accordingly:

In order to know which border to highlight, a number between 1 and 6 is based in. Therefore, we can keep track of the user’s selection within this event handler.
First, let’s add a local state property called selectionIndex:
1 this.state = {
2 slideLeft: new Animated.Value(-1),
3 fadeIn: new Animated.Value(0),
4 showButton: false,
5 color1: "#A482DF",
6 color2: "#DBDAF1",
7 text: this.props.text,
8 borderWidths: [0, 0, 0, 0, 0, 0],
9 selectionIndex: ""
10 };
Then, let’s keep update this from within the updateStage event handler:
1 updateStage(input) {
2 if(this.state.showButton === false) {
3 this.setState({showButton: true});
4 }
5
6 switch (input) {
7 case 1:
8 this.setState({borderWidths: [0.05, 0, 0, 0, 0, 0], selectionIndex: 1}\
9 );
10 break;
11 case 2:
12 this.setState({borderWidths: [0, 0.05, 0, 0, 0, 0], selectionIndex: 2}\
13 );
14 break;
15 case 3:
16 this.setState({borderWidths: [0, 0, 0.05, 0, 0, 0], selectionIndex: 3}\
17 );
18 break;
19 case 4:
20 this.setState({borderWidths: [0, 0, 0, 0.05, 0, 0], selectionIndex: 4}\
21 );
22 break;
23 case 5:
24 this.setState({borderWidths: [0, 0, 0, 0, 0.05, 0], selectionIndex: 5}\
25 );
26 break;
27 case 6:
28 this.setState({borderWidths: [0, 0, 0, 0, 0, 0.05], selectionIndex: 6}\
29 );
30 break;
31 }
32 }
The next step is to write the logic so the selectionIndex value can be used to as the value passed into the captureSelection event handler when the user selects the final stream (first stage) and selects the final environment (second stage).
So, where can we call the captureSelection event handler with the selectionIndex value for the end of the first stage?
Well, when does the first stage change to second stage? It changes when an event handler called updateScene is called. Let’s call captureSelection within this event handler right before we update the stage:
1 updateScene() {
2 this.props.captureSelection(this.state.stage, this.state.selectionIndex);
3 this.setState({color1: "#DBDAF1", color2: "#A482DF", text: "Watch Video", \
4 stage: 2});
5 }
Notice how we passed in the current stage and the current selectionIndex to captureSelection who reads it as: “Hey, Update Scene! I see you have captured the user’s input for the first stage. Let me use this to update the selectedStreamID property contained here in the local state that the video player needs.”
Unfortunately, we need to do some tweaking in index.vr.js and DashboardLayout.js.
First, remove the environments array from the local state of DashboardLayout and move it to the app component’s local state in index.vr.js:
environments: ["title-background.jpg", "dashboard-background.jpg", "Arizona.jpg", "Hawaii.jpg", "New Hampshire.jpg", "Texas.jpg"]This will make sense shortly. For now, let’s pass this array down as a prop down to the DashboardLayout.
index.vr.js
1 <Dashboard
2 captureSelection={this.captureSelection.bind(this)}
3 previews={this.state.previews}
4 environments={this.state.environments}
5 showButton={false}
6 text={"Select Environment"}
7 changeScenes={this.changeScenes.bind(this)}
8 scene={this.state.scene}
9 />
Dashboard.js
1 <DashboardLayout
2 environments={this.props.environments}
3 captureSelection={this.props.captureSelection}
4 previews={this.props.previews}
5 text={this.props.text}
6 changeScenes={this.props.changeScenes}
7 scene={this.props.scene}
8 />
Next, let’s change the passing down of environments within DashboardLayout.js to be from props and not the local state:
1 <TileButtons
2 stage={this.state.stage}
3 environments={this.props.environments}
4 previews={this.props.previews}
5 updateStage={this.updateStage.bind(this)}
6 borderWidths={this.state.borderWidths}
7 />
Ok, why did we make this change of passing down environments from the app component?
Let’s see as we update captureSelection in index.vr.js.
We want captureSelection to use the inputted value passed in to select from the arrays containing the stream IDs and environment files:
1 captureSelection(stage, value) {
2 switch (stage) {
3 case 1:
4 this.setState({selectedStreamID: this.state.IDs[value-1]});
5 break;
6 case 2:
7 this.setState({selectedEnv: this.state.environments[value-1]});
8 break;
9 }
10 }
Now, the Video Player scene will be passed in the correct stream ID and environment file that matches the user’s input. Note that we do value-1 since the passed in value is a range of 1–6 while the arrays are 0–5.
If environments was still in the DashboardLayout component then this wouldn’t work.
A lot of changes! I know. Let’s recap where we are at.
If our button were to call updateScene (as defined in the DashboardLayout component), then we will have captured the correct stream ID that is being passed to our video player.
Now, we need to write the logic so our button calls updateScene at the end of the first stage and goes to the next scene at the end of the second stage.
To do this, let’s add a stage property to the local state found in DashboardLayout.js so the button can handle things accordingly:
1 this.state = {
2 slideLeft: new Animated.Value(-1),
3 fadeIn: new Animated.Value(0),
4 showButton: false,
5 color1: "#A482DF",
6 color2: "#DBDAF1",
7 text: this.props.text,
8 borderWidths: [0, 0, 0, 0, 0, 0],
9 selectionIndex: "",
10 stage: 1
11 };
Now, let’s pass this down to our button:
1 <Button
2 updateScene={this.updateScene.bind(this)}
3 showButton={this.state.showButton}
4 text={this.state.text}
5 changeScenes={this.props.changeScenes}
6 stage={this.state.stage}
7 scene={this.props.scene}
8 />
In Button.js, store the inherited stage prop into a variable right above the return:
1 const stage = this.props.stage;
2 //return here
Then, let’s call updateScene on the click of the button within the first stage and changeScenes on the click within the second stage:
1 {currentScene === 2 ? (
2 <VrButton
3 onClick={
4 () => {
5 switch (stage) {
6 case 1:
7 this.props.updateScene();
8 break;
9 case 2:
10 this.props.changeScenes(nextScene);
11 }
12 }
13 }
14 >
Let’s see if this is working by logging the captured selection of stage 1 in the captureSelection function in index.vr.js:
1 captureSelection(stage, value) {
2 switch (stage) {
3 case 1:
4 alert(this.state.IDs[value-1]);
5 this.setState({selectedStreamID: this.state.IDs[value-1]});
6 break;
7 case 2:
8 this.setState({selectedEnv: this.state.environments[value-1]});
9 break;
10 }
11 }
Really quickly, let’s also correct one former mistake. We want to retrieve the channel hosting the stream and not the stream ID in order to play our video when we get there. So, let’s quickly update our Twitch API call:
1 gatherStreamIDs(response) {
2 const IDs = response.data.featured.map(function(feat) {
3 return feat.stream.channel.name;
4 });
5
6 this.setState({IDs: IDs});
7 }
Finally! We have completed the first capture. Let’s test it by refreshing the local host:

Super cool! If now go to http://player.twitch.tv/?channel=beyondthesummit then we can see the streaming video:
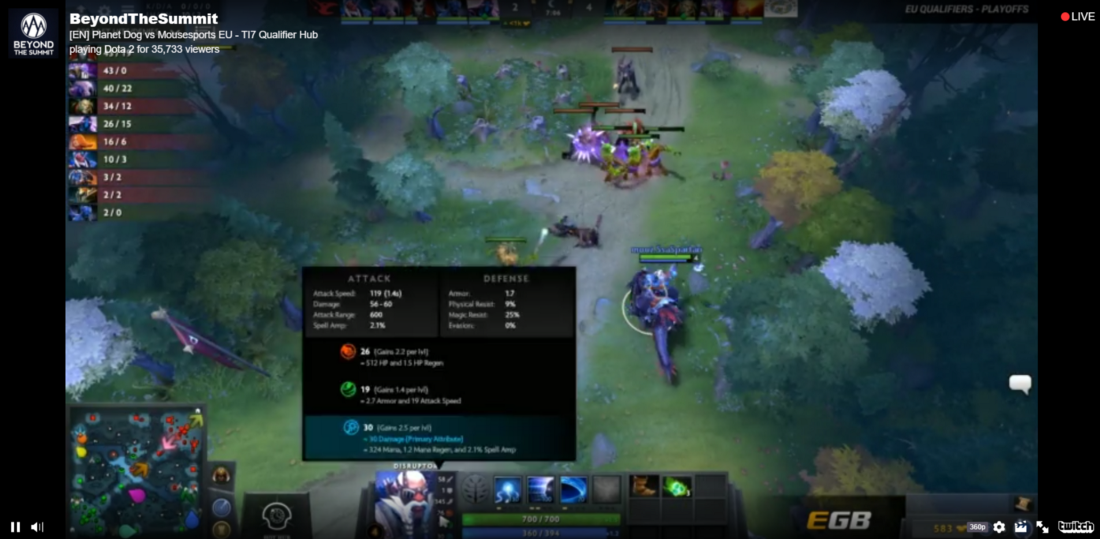
You can now see how all this effort to capture the user input in stage 1 is necessary to embed streams in our virtual world.
Before we can write the code to make this work in our Video Player scene’s components, we still need to capture the user’s input in stage 2 of the Dashboard scene which will control what panoramic photo is rendered in the video player.
At the end of stage 2, our button calls the event handler to change scenes.
Therefore, let’s add another parameter to the changeScenes function in index.vr.js for the selectionIndex (user’s input/selected tile button):
1 changeScenes(nextScene, selectionIndex) {
2 //...
3 }
Let’s use this new parameter to call captureSelection:
1 changeScenes(nextScene, selectionIndex) {
2 switch (nextScene) {
3 case 1:
4 this.setState({scene: 1});
5 break;
6 case 2:
7 this.setState({scene: 2});
8 break;
9 case 3:
10 this.captureSelection(2, selectionIndex);
11 this.setState({scene: 3});
12 break;
13 }
14 }
Now, the end of stage 2 of the Dashboard scene (right before transition to scene 3) will capture the user’s input and retrieve the correct environment file from the array.
The final step is to have our Button component pass in this extra parameter.
To do this, we need start by passing down the selectionIndex prop as a prop to our Button component in DashboardLayout.js:
1 <Button
2 updateScene={this.updateScene.bind(this)}
3 showButton={this.state.showButton}
4 text={this.state.text}
5 changeScenes={this.props.changeScenes}
6 stage={this.state.stage}
7 scene={this.props.scene}
8 selectionIndex={this.state.selectionIndex}
9 />
Store this prop into a variable within the render function in Button.js:
1 //more stuff up here
2 const stage = this.props.stage;
3 const selectionIndex = this.props.selectionIndex;
4 //return here
Then, our button passes this variable as the second parameter of changeScenes:
1 {currentScene === 2 ? (
2 <VrButton
3 onClick={
4 () => {
5 switch (stage) {
6 case 1:
7 this.props.updateScene();
8 break;
9 case 2:
10 this.props.changeScenes(nextScene, selectionIndex);
11 }
12 }
13 }
14 >
15
16 //...
Open index.vr.js and let’s log this captured selection to see if the correct environment value is being retrieved:
1 captureSelection(stage, value) {
2 switch (stage) {
3 case 1:
4 console.log(this.state.IDs[value-1]);
5 this.setState({selectedStreamID: this.state.IDs[value-1]});
6 break;
7 case 2:
8 console.log(this.state.environments[value-1]);
9 this.setState({selectedEnv: this.state.environments[value-1]});
10 break;
11 }
12 }
Refresh your local host and check the console:

Flippin’ cool beans! We are finally done with the Dashboard scene!
Playing the Selected Stream in the Selected Environment
To complete our app, we need to take the streamID and env props being passed down to the VideoPlayer component to render the live streaming video of a Twitch channel and the panoramic photo of the environment in the Video Player scene.
Rendering the proper panoramic photo is really easy, we can just update the following line in VideoPlayer.js:
<Pano source={asset(this.props.env)}/>Let’s refresh the local host and see if this worked:
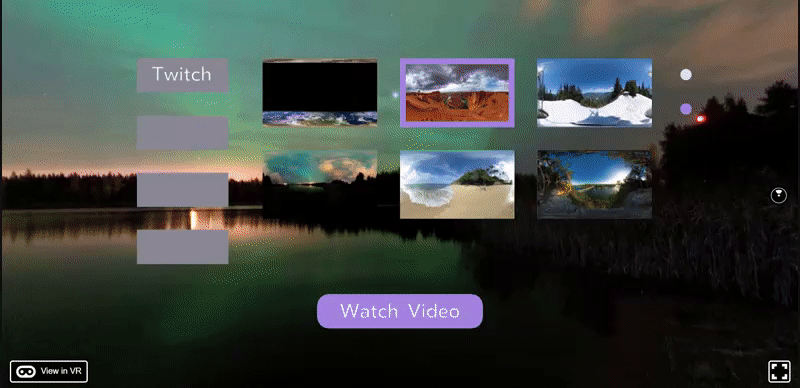
Very neat!
Next, we want to pass down the stream channel URL to the VideoElement component so we can embed a live stream video in place of our fireplace.
In VideoPlayer.js, let’s first create a local state that will control the streamURL:
1 constructor() {
2 super();
3 this.state = { streamURL: "" }
4 }
Before this component mounts, let’s update the streamURL:
1 componentWillMount() {
2 this.setState({ streamURL: 'http://player.twitch.tv/?channel=' + this.prop\
3 s.streamID })
4 //example: http://player.twitch.tv/?channel=beyondthesummit
5 }
Then, we pass this down all the way to VideoElement.js:
VideoPlayer.js
1 <VideoPlayerLayout
2 streamURL={this.state.streamURL}
3 showButton={this.props.showButton}
4 text={this.props.text}
5 changeScenes={this.props.changeScenes}
6 scene={this.props.scene}
7 />
VideoPlayerLayout.js
<VideoElement streamURL={this.props.streamURL}/>The final step of our entire application is to play the live streaming video found at the passed in URL.
Psh! That’s easy, Mike. We can just do this:
<Video style={{height: 4}} source={{uri: this.props.streamURL}} />C’mon! Did you think it would be that easy?
The Video component in React VR embeds the video source into a simple <video> HTML element. However, the Twitch API documentation says that it needs to be embedded into an <iframe> component:

How do we do this?
Good question. I literally paused as I was writing this and spent hours and hours trying to resolve this.
7 hours later. I have had no luck which brings this chapter to an anticlimactic end.
Nevertheless, I still want to publish this chapter. Reason being, a reader will likely able to figure this last piece out.
Final Code
Final code available via GitHub.
Extra Practice/Improvements
Admittedly, there’s a lot of improvements that can be made to this app:
- There’s a bug where the first tile button only works when dev tools is open.
- The environment (panoramic) images could be compressed for faster loading.
- Overall, there could be better organization of this app and a more modular approach. I seemed to put way too much code in DashboardLayout.js.
There’s also some opportunities to practice your React VR skills even further:
- Use 3D modeling for the panoramic environments in place of static images.
- Incorporate API calls to load videos from sources other than Twitch. Check out GraphQL.
- Add animations between scenes and to provide better feedback to user inputs.
- Implement panoramic ambient sounds for the environment.
- Add loading animation.
Learn React VR (Chapter 9 | Reacting to Our Exploration)
Scope of This Chapter
My goal for this book was to explore the uncharted territory of React VR and produce several guides for you to be equipped to explore on your own. The idea was that you could learn faster and avoid hours of hurdles and frustrations that I ran into for you. Overall, I think I have accomplished this goal and provided a great ebook for beginners to React VR.
Now that I have equipped you to do your own exploration, I am going to provide some suggestions for moving forward with React VR. This will include skills to improve upon and project ideas that you may want to try out.
Skills to Improve
After spending a lot of time with React VR as I put together this ebook, I believe I was able to get a sense of what skills are really valuable to get better with React VR. I’ll tell you what those skills are so you can look into them more if you feel compelled.
3D Modeling
Hands down, the most valuable skill to improve upon with React VR is 3D modeling. When doing standard React development, I really believe that scalable vector graphics can bring a breath of fresh air to a user interface:
](https://cdn-images-1.medium.com/max/1250/1-B5lkLaUZkgPuZ3fO0orBQ.png)React.js for the Visual Learner*
When it comes to making VR apps, the equivalent of this is 3D modeling.
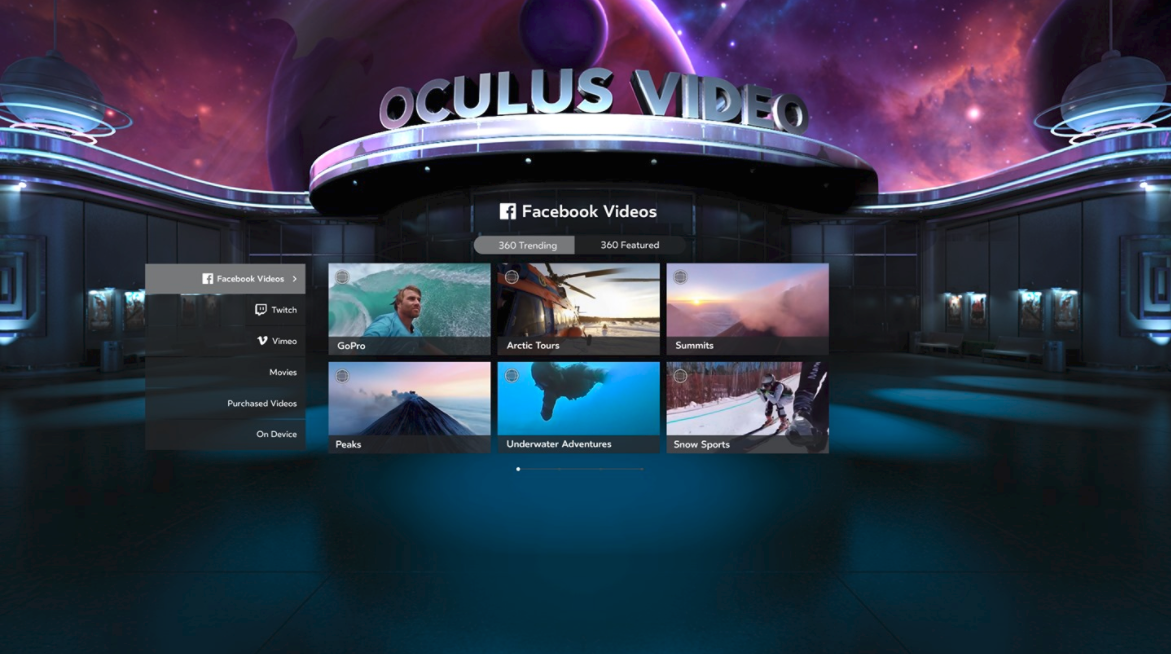
Oculus Video
For example, look at the panoramic show above that is a 3D model from Oculus Video. Now, compare this to the panoramic equirectangular photo that we used in our dashboard:
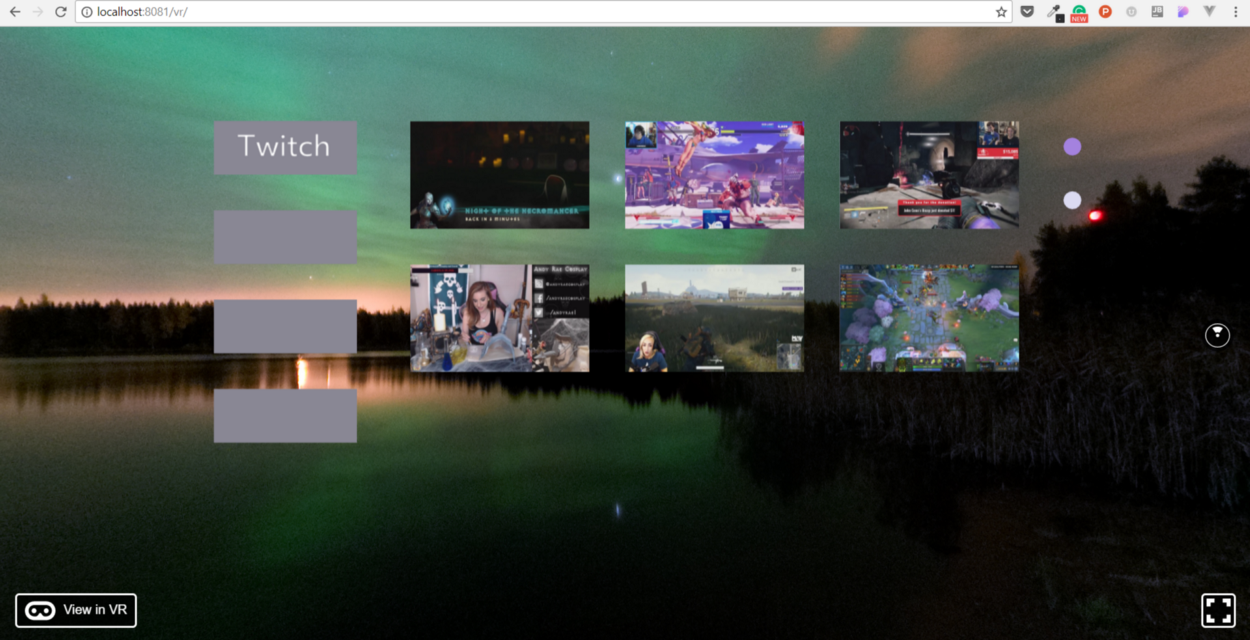
The 3D modeling is a complete breath of fresh air.
If you possess the ability to write React VR code and craft beautiful 3D models, then the sky is the limit for creating VR applications. You take your skills to game development, product prototyping, visual experiences, movies etc.
I recommend exploring Medium, Google, and other good resources to teach yourself 3D modeling. Particularly, I would choose Blender as the 3D modeling software to learn.
Animation
In Chapter 4 and Chapter 5 of this book, we were able to learn pretty much everything we need to know for doing animations in React VR:
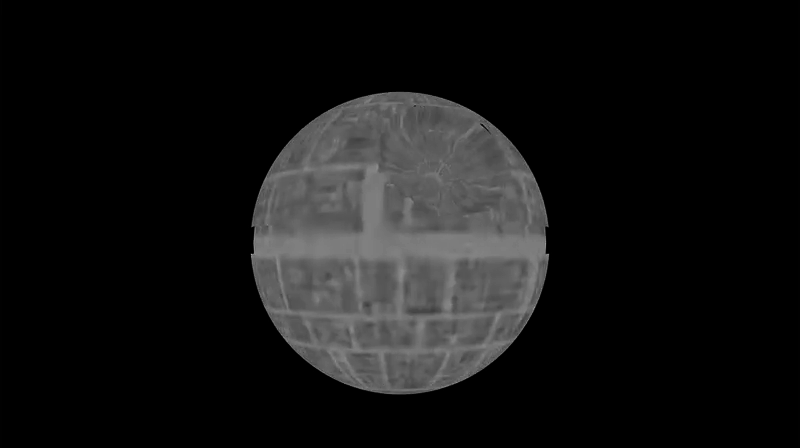
Obviously, there is a tremendous opportunity to learn how to animate 3D models.
Additionally, there is also a huge need for learning how to use animations to improve the user experience (as we discussed in Chapter 7).
Before this book, I had never worked with the Animated API or animating 3D models. Despite that, it was easy to catch on because of my hard work in learning fundamental animation principles.
If you are not familiar with basic animation principles, I learned by practicing animations on scalable vector graphics using GreenSock in non-VR apps.
Focus on the overall workflow of sketching a basic animation storyboard, creating the vector graphic, and applying animations within an organized sequence.

](https://cdn-images-1.medium.com/max/1250/1ENt8TwCJPr8Ghoypbow0Yw.gif)Codepen Editor*
There are two really good resources that I used for learning about scalable vector graphics and animations.
The first is Practical SVG by Chris Coyier. This book helped me learn the fundamentals of working with SVG.
The second is SVG Animations: From Common UX Implementations to Complex Responsive Animation by Sarah Drasner. I can’t say enough good things about this book. It taught me about the major JavaScript animation libraries, like GreenSock and fueled my interest in UX.
In order to get better at animations for improving UX design, I just like to read up on Medium. Look at animations people are making and try to remake them yourself. Start to think about the value animations can bring.
Sound Engineering
Because text is not as prevalent in VR apps, sound engineering becomes very important for UX design. If you can become really good at creating and implementing sounds that aid the UX, then you have a really unique and necessary skill-set. I’m not an expert on this type of thing, but here’s a good Medium article to peak your interest.
In addition to sounds for the UX, sound engineering is also taken to a whole ‘nother level in VR development because of the possibility of concentrating sound in 360 degrees. If you have an interest in exploring this, it will come in handy for VR development.
3D Photography and Videography
This one is really straightforward. If you can create your own 3D photos and videos to use in VR apps, then there is a tremendous opportunity for you. Particularly, this is really useful for using VR for marketing which a lot of employers will be interested in.
React Native
VR development seems to have huge promise, but let’s be honest, it’s hard to find a job at the moment doing just that. While this present a tremendous opportunity to stand out, I realize some people want to shift their focus on skills that impact their career right here and right now.
If that’s the case, I would pivot and look into React Native as mobile development is very much a hot skill that potential employers have already embraced.
As I worked with React VR, I quickly realized that there was a ton of overlap with React Native. If you learned React Native before returning to React VR, then you would probably have no issue at all getting back into it. In fact, you will be much stronger than someone who has no React Native experience.
Potential Real-World Projects
There are people way more intelligent, creative, and qualified who can predict the future use cases of virtual reality. However, I’ll still take a stab at some real-world projects that you can create and showcase. I will discuss this on a very high level, but hopefully, it is enough to stir creative juices.
3D Marketing Projects
When I learned how to work with SVG animations, I thought it would be interesting to apply animations to things that were ordinarily static. Specifically, I thought about how this could enhance marketing.
| [VR Car | Oculus](https://www.oculus.com/experiences/rift/1371947092898229/)](https://cdn-images-1.medium.com/max/1250/1U6QPA9XLSOjshXBactb7HQ.png)[VR Car | Oculus](https://www.oculus.com/experiences/rift/1371947092898229/)* |
Here is some marketing content that is typically static that you could take to the next level and bring into a virtual world:
- infographics (you can animate them and make them interactive)
- advertisements
- product previewing (i.e. allow users to preview clothing on a 3D mannequin before buying)
- blogs/vlogs
- social media platform
- live streaming
- webinars
3D Data Visualization
Look at Dribbble shots of data visualization and try to improve upon them in a virtual world.
Holocard by Cosmin Capitanu](https://cdn-images-1.medium.com/max/1250/0K56HnFUbvfZzauaC.png)Holocard by Cosmin Capitanu*
After that, you can take it to the next level and find products on Product Hunt that do analytics and use that as inspiration for a VR analytics product.
3D Entertainment
This is how VR is mainly used nowadays and it isn’t going anywhere.
| [Eagle Flight | Oculus](https://www.oculus.com/experiences/rift/1003772722992854/)](https://cdn-images-1.medium.com/max/1250/1VFQAaa3x4EN-g6aNkjUAvw.png)[Eagle Flight | Oculus](https://www.oculus.com/experiences/rift/1003772722992854/)* |
Like I mentioned with 3D marketing projects, think of how entertainment is currently delivered and how it could be improved when brought into a virtual world.
Here are some broad ideas:
- game development
- books
- movies/tv shows
- media streaming service
- museums
- tours
- amusement parks
- carnivals
3D Misc.
360 Photos by Oculus](https://cdn-images-1.medium.com/max/1250/1uZlC5TSIWB9hcxDnGCK8Vw.png)360 Photos by Oculus*
I’ve provided the major categories of virtual reality use cases. I’ll conclude with more ideas that came to mind as I wrote this chapter:
- interactive library
- pet/child monitoring
- security
- spa
- calendar
- photo albums
- fast food ordering
This should be plenty to get you thinking and stretch your creativity.
Concluding Thoughts
I have nothing more to say other than thank you for reading my ebook. I’m just an ordinary developer trying to gain a creative skill-set and teach what I learn in the process. I hope that my material, despite its flaws, was extremely practical and useful.
Cheers,
Mike Mangialardi
Founder of Coding Artist
