
Table of Contents
-
Part 2 - Laravel
-
Chapter 4- Getting to know the Laravel
- Configuring the virtual host
- Directory permission
- Generating an encryption key
- Routes
- Routing types (verbs)
- Passing parameters in routing
- Using regular expressions
- Naming routings
- Grouping routes
- Middleware
- Controllers
- Implicit Controllers (automatic)
- Controllers and Resource
- Explicit controllers (manual)
- Implicit or explicit routing?
- Ajax
- JSON Response
- Exceptions in JSON format
-
Chapter 4- Getting to know the Laravel
Part 2 - Laravel
Chapter 4- Getting to know the Laravel
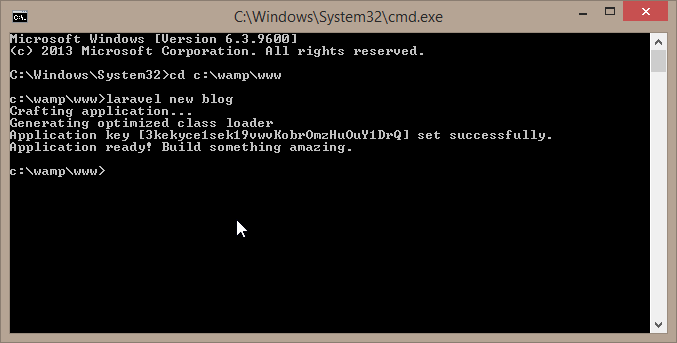
Now that we have all libraries properly installed, we can initiate the study of Laravel. An application in Laravel can be created by the following command:
With this command, an application with the name blog is created. Let’s run this command in the web directory of our system, which can be /home/user/www on Linux or c:\wamp\www on Windows .
The file structure created in the project “blog” is similar to the following figure:

Configuring the virtual host
The first task after you create the application is to set up your virtual host. Let’s assume that this application should be accessed via the url blog.com. For the Windows environment, edit the file C:\wamp\bin\apache\apache2.4.9\conf\httpd.conf including the following text in the end:
<VirtualHost *>
    ServerName blog.com
    DocumentRoot "c:/wamp/www/blog/public"
    <Directory "c:/wamp/www/blog/public">
        Options FollowSymLinks
        AllowOverride All
        Order allow,deny
        Allow from all
    </Directory>
</VirtualHost>
And change the hosts file including the following text:
127.0.0.1 blog.com
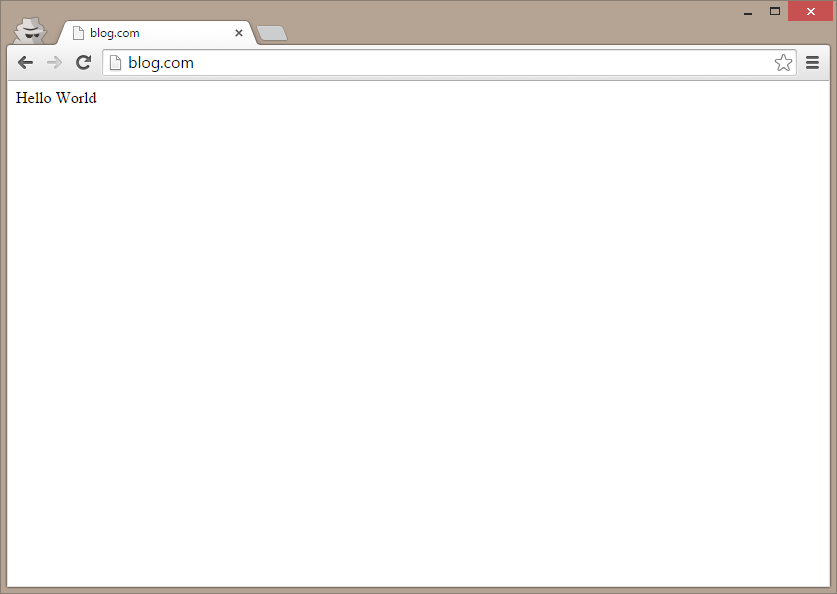
After restart the Wamp Server, open the url blog.com, getting the response:
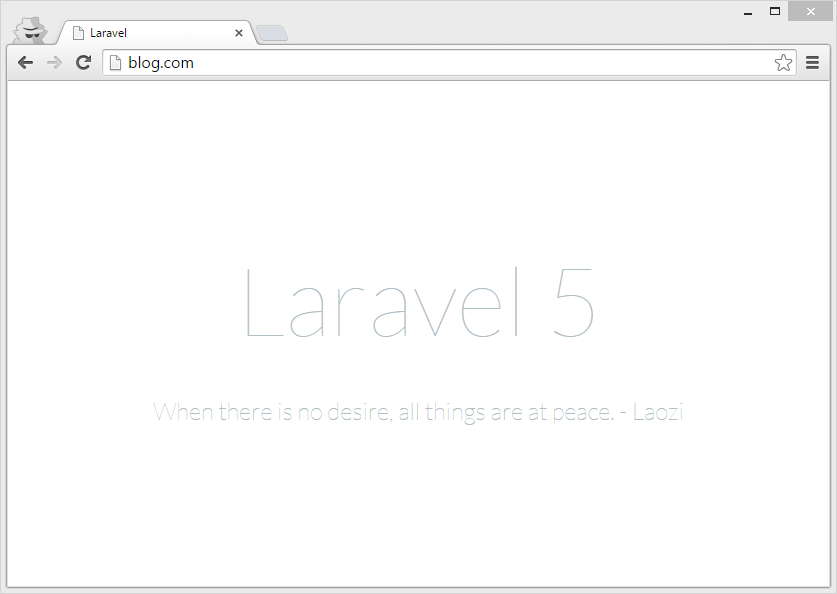
Note that the virtual domain was created pointing to the folder blog/public, which should be the only directory visible to external access. For security reasons, the other directories of the application, such as “app” and “config”, should never have public access. Do not create the virtual domain pointing to the directory of the application, especially on production servers. Always create it pointing to the public directory.
Directory permission
If you have any problem related to permission while accessing the url blog.com, for instance Failed to open stream: Permission denied, you must give written permission to the storage directory of the application. On Linux, do:
777 www/blog/storage
Generating an encryption key
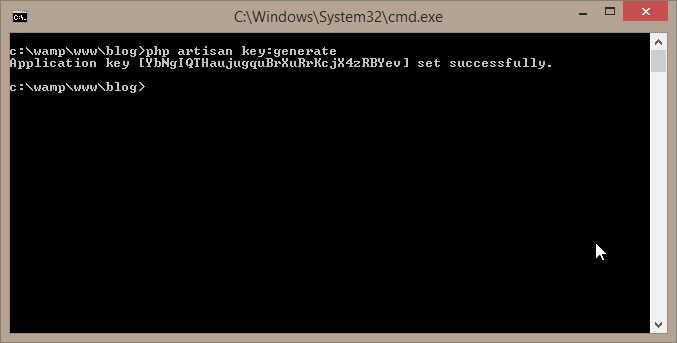
It is important for the security of your application to encrypt any type of information that will be allocated in the session or the cookies that the system creates. To do this, you must run the following command:
Run it in the blog directory, as shown in the following figure:
Routes
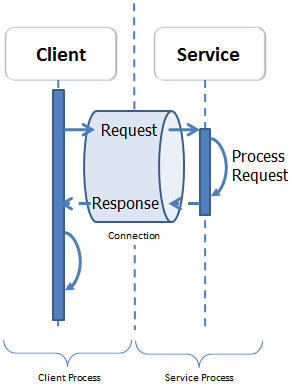
In the simplest definition of HTTP access, we always have two common actions in any web technology: Request and Response. A * Request * is performed when the browser (which we call client) makes an access to a server via an URL. This URL contains, in the most basic format, the access path to the server, which is commonly called web address, and the type of the request, which can be GET and POST, among others. After the web server processes this request, it sends a response to the client, usually in text format. This “conversation” between the client and the server can be illustrated in the following figure:
This idea must be understood so that we can continue to the routing definition. Defining a route is setting up a particular URL to perform something unique within our system. That is, through the routing we can create URLs that will define how the AngularJS will access the server to get data. This step is critical for us to understand how AngularJS will “talk” to the Laravel.
First, let’s open the Laravel routing, which is located in app/Http/routes.php:
<?php
Route::get('/', function () {
    return view('welcome');
});
Using the Route::get we are creating a custom configuration for the GET request, which is the request made by the browser when we access any URL. The first parameter of this method is / which means the root of the Web site address, in this case blog.com. The second parameter is an anonymous function that will be executed to set the response to the client. This function contains the following code return view('welcome'); that defines the creation of a view from laravel, as in the following image:
Let’s do a simple change to the code so that instead of generating a view from Laravel, it returns the text “Hello World”. See:
<?php
Route::get('/', function () {
    return "Hello World";
});
After refreshing the blog.com page, we have the following result:
With this, we can use the Laravel routing to create all the necessary functions for the AngularJS to communicate with the server. When we create a real project, you will see that the starting point of the project is to create the routing configuration, that we will call RESTful API, even though the term API is not the correct definition for this process.
To create a RESTful API, it is necessary to know all the routing configurations that the Laravel provides, and we will see that below in detail.
Routing types (verbs)
A web request can be classified in many different types, that we call by the term VERBS. In our examples, we will use the following types: GET, POST, PUT, DELETE. Each type will define a common action, which can be understood by the following table:
| Method | Action | Example |
|---|---|---|
| GET | Responds with simple information about a resource | GET blog.com/user/1 |
| POST | Used to add data and information | POST blog.com/user |
| PUT | Used to edit data and information | PUT blog.com/user |
| DELETE | Used to remove an information | DELETE blog.com/user/1 |
To use other types of request in addition to GET, you can use the following code:
<?php
Route::get('/', function () {
    return "Hello World";
});

Route::post('user/', function () {
    return "POST USER";
});

Route::put('user/', function () {
    return "PUT USER";
});

Route::delete('user', function () {
    return "DELETE USER";
});
You can also use more than one type of request, as in the following example:
<?php
Route::match(['get', 'post'], '/', function () {
    return 'Hello World with GET or POST';
});
Is valid to remember that, by convention, everytime we change data, we should use POST or PUT, and when any data is deleted, use DELETE. In current browsers, PUT and DELETE are not yet supported, but that will not be a problem for our system because all AngularJS client requests made to the Laravel server will be via Ajax.
Passing parameters in routing
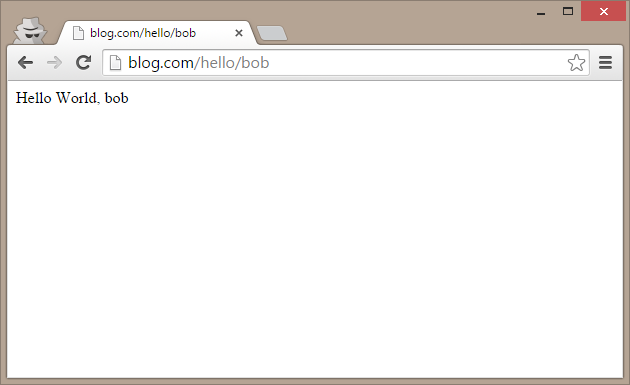
You can configure one or more parameters that must be passed by the URL. For instance, the URL “/hello/bob” has the following response: “Hello world!”. To do this, create the parameter {name}, according to the code as follows:
<?php
Route::get('/hello/{name}', function ($name) {
    return "Hello World, $name";
});
Note that the parameter created is defined in the URL with the use of keys, and also set as a parameter in the anonymous function. The result of the code above should be as below:
You can create as many parameters as needed, recommending only that use / to each of them. You can also pass an optional parameter through the use of the ?. The following example shows a simple way to add 2 or 3 numbers:
<?php
Route::get('/sum/{value1}/{value2}/{value3?}',
                        function ($value1,$value2,$value3=0) {

        $sum =  $value1+$value2+$value3;
        return "Sum: $sum";

});
Using regular expressions
Sometimes it is necessary to set up a condition for the routing to be successful. In the sum of numbers example, what would happen if we used the url “blog.com/sum/1/two/4”? Possibly throw an error in PHP, since we need to sum only numbers. In this way, we can use the attribute where as a condition for routing to be performed. The following example ensures that the sum is performed only with numbers:
<?php
Route::get('/sum/{value1}/{value2}/{value3?}',
                    function ($value1,$value2,$value3=0) {
    $sum =  $value1+$value2+$value3;
    return "Sum: $sum";
})->where([
                        'value1'=>'[0-9]+',
                        'value2'=>'[0-9]+',
                        'value3'=>'[0-9]+'
                        ]);
To validate a string, you can use [A-Za-z]. Any level of regular expression validation can be used.
Many routes use the primary key of the record in their URLs, which makes it necessary to verify if this key is an integer. For example, to delete a user, we could use the following setup:
<?php
Route::delete('/user/{id}', function ($id) {
    return "delete from user where idUser=$id";
})->where('id', '[0-9]+');
The example above is perfectly valid, but assume that almost all its routes have ids, and must be validated. In that case all routes would have the ->where(), making the code more repetitive and breaking the DRY (Don’t Repeat Yourself) principle.
To fix this problem we can set up that every variable called id must be a number. To do this in Laravel, we must add a pattern in the file app/Providers/RouteServiceProvider.php, as follows:
<?php

namespace App\Providers;

use Illuminate\Routing\Router;
use Illuminate\Foundation\Support\Providers\RouteServiceProvider as Ser\
viceProvider;

class RouteServiceProvider extends ServiceProvider
{
    protected $namespace = 'App\Http\Controllers';

    public function boot(Router $router)
    {

        $router->pattern('id', '[0-9]+');

        parent::boot($router);
    }

    /// code continues

}
The class RouteServiceProvider provides all the routing functionality of your application, including the creation of routes that are in the file app\http\routes.php. Using the pattern you can set a default regular expression for a variable, in this case id. This way, any variable called id in routing will have the regular expression tested.
Naming routings
You can add a name to a route to use it in other routes. This avoids the use of writing directly to the URL route, improving the code stream. In the following example, assume two distinct routes, it will create a new user and return a text with a link to his profile. You can write the following code:
<?php
Route::get('user/{id}/profile', function ($id) {
    return "Show Profile id: $id";
});

Route::get('user/new', ['as' => 'newUser', function () {
    return "User created.  <a href='blog.com/user/1/profile'>See Profil\
e</a> ";
}]);
Note that the link < a href ... > created, include the domain name and the path of blog.com route, which is not good because if there is any change in the name of the domain or URL of the route this link will no longer work. To fix it, we should initially name the route that displays the user’s profile, as follows:
<?php
Route::get('user/{id}/profile',
    ['as' => 'profileUser', function ($id) {
    return "User profile id: $id";
}]);
Note that the second parameter of the method Route::get becomes an array, which contains two elements, the first being identified by the key and containing the name of the routing, and the second the function we already know.
After you create the name of the route, you can get the full URL using the route, as in the following code:
<?php
Route::get('user/{id}/profile',
        ['as' => 'profileUser', function ($id) {
    return "User profile id $id";
}]);

Route::get('user/new', ['as' => 'newUser', function () {
    $userProfileLink = route('profileUser',['id'=>1]);
    return "User Created.
    <a href='$userProfileLink'>Profile</a>";
}]);
In this code, we use the route method passing the name of the route and the parameter id.
Grouping routes
Laravel routes configuration allows the grouping of routes to keep a better reading of the source code. The following example is perfectly valid:
<?php
Route::get('/post/new', function () {
    return "/post/new";
});

Route::get('/post/edit/{id}', function ($id) {
    return "/post/edit/$id";
});

Route::get('/post/delete/{id}', function ($id) {
    return "/post/delete/$id";
});
But the code of these 3 routes can be improved with the command Route::group and a prefix, as follows:
<?php
Route::group(['prefix' => 'post'], function () {
    Route::get('/new', function () {
        return "/post/new";
    });

    Route::get('/edit/{id}', function ($id) {
        return "/post/edit/$id";
    });

    Route::get('/delete/{id}', function ($id) {
        return "/post/delete/$id";
    });
});
That is, by creating a prefix, all routes within the Route::group will be bound to it.
Middleware
A middleware is a way to filter the requests that are processed by Laravel. There are routes that, for instance, can only be performed if the user is authenticated, or any other type of requirement. A middleware is created in the folder app/Http/Middleware, which already has some ready for use.
To better understand the concept, let’s focus on authentication. The Laravel already has a system ready to authenticate (login) the user, and we will use it here to perform a test. The authentication middleware is located in app/Http/Middleware/Authenticate.php and you can use it on its route through the following example:
<?php
Route::get('/testLogin', ['middleware' => 'auth', function () {
   return "logged!";
}]);
In this code, by accessing blog.com/testLogin, the page will either be redirected to the login screen, or throw an unauthorized access error. These details can be viewed in the file app/Http/Middleware/Authenticate.php, on the handle method. The main idea of the middleware is providing a way to perform actions before and after the request, in order to accomplish some specific task.
Controllers
Until now we addressed several concepts about the routing in Laravel and how we can, through the URL of an application, perform different tasks. The file blog\app\Http\routes.php create several routes, but we will not program all the system functionalaties in it. Following the MVC development pattern, most of the functionality of the system are allocated in the controller and the model of the application.
A controller is a piece of the application that usually reflects a common entity. For example, a blog have several entities such as the user, a post and a comment. All these entities, which usually are also system tables, have their own controllers. With that we leave the routes.php file to configure less common routes of the application, and use the controllers to set up routes that relate to the entity in question. That is, the routes related to the user will be configured in the User controller, and the routes related to a comment will be set up in the Comment controller. All the controllers are created in the folder app\Http\Controllers, with the suffix “Controller”.
Create a controller is relatively simple, you can create a php file or use the command line, as the following example:
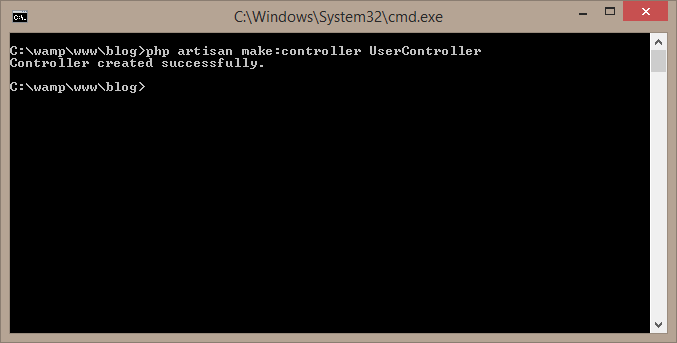
Implicit Controllers (automatic)
After running the command, the controller UserController is created, with some relevant code. But what we want for our system is link the routing to the methods of the controller. That is, after we create the controller UserController we want to somehow make the URL “blog.com/user/new” to call a method within the controller, there is no more need to edit the file routes.php. Setting up is relatively easy with the code Route::controller, which must be added to the routes.php file, and must reference the part of the URL that will contain the redirection and the controller itself.
In the case of the controller UserController:
<?php
Route::get('/', function () {
    return "Hello World";
});

Route::controller("user","UserController");
After you setting up the URL, that contains /user, will call UserController methods, we just need to create these methods, whose default is to prefix the request type (Get, Post, Put, etc) and concatenate with the method name. We can then change the class blog\app\Http\Controllers\UserController.php to:
<?php

namespace App\Http\Controllers;

use Illuminate\Http\Request;

use App\Http\Requests;
use App\Http\Controllers\Controller;

class UserController extends Controller
{

    public function getIndex(){
        return "user/";
    }

    // ....

}
This means that, when performing a call GET with the URL “blog.com/user/show/1”, the method getShow of class UserController is called, assigning the parameter id of the method, and returning the text “get user/show/1”. Note that only the configuration of the controller is in the routes.php, and the whole Setup to access the methods of the entity User is in the UserController class.
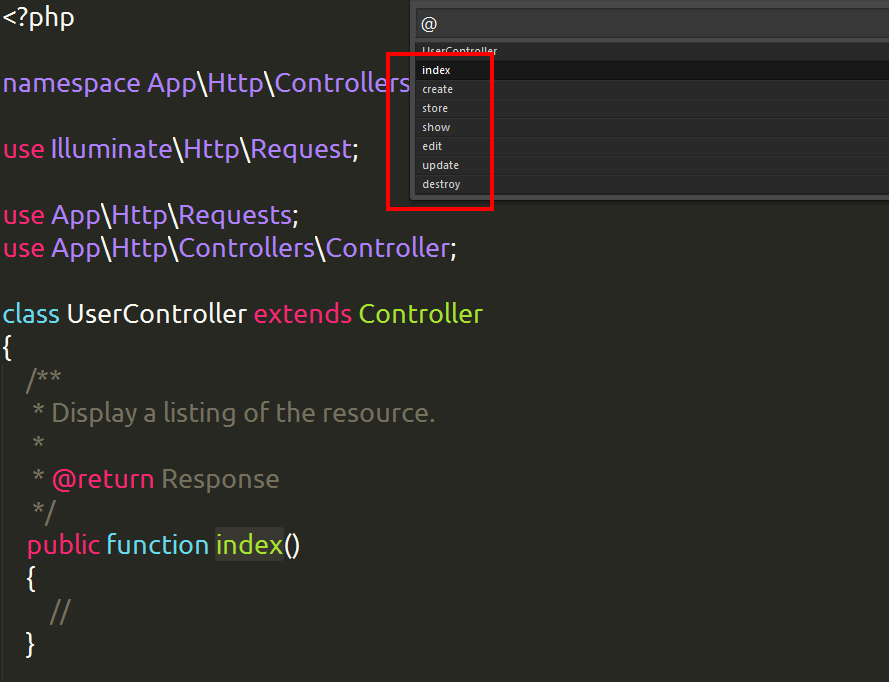
Controllers and Resource
We have seen how to call the routes of an application to a specific controller, but we can go a little further in the configuration of a controller and create a resource, which is a set of preconfigured methods with its pre-designed request types. When we create the controller with the PHP command make artisan: controller the following methods are created automatically:
Create a resource in the routes.php file , with the following code:
<?php
Route::get('/', function () {
    return "Hello World";
});

Route::controller("user","UserController");

//Resource:
Route::resource('user', 'UserController');
We have enabled the following configuration:
| Type | Path | Action | Method |
|---|---|---|---|
| GET | /user | index | user.index |
| GET | /user/create | create | user.create |
| POST | /user | store | user.store |
| GET | /user/{id} | show | user.show |
| GET | /user/{id}/edit | edit | user.edit |
| PUT | /user/{id} | update | user.update |
| DELETE | /user/{id} | delete | user.delete |
Explicit controllers (manual)
When we use Route::controller, we define an automatic access between the request and the controller, needing only to prefix the method name of the controller. There is another way to set up the controller application access with the creation of each method, as the following example:
<?php
Route::get('/', function () {
    return "Hello World";
});

Route::get('user/', 'UserController@index');
Route::get('user/create', 'UserController@create');
Route::post('user/', 'UserController@store');
Route::get('user/{id}', 'UserController@show');
Route::get('user/{id}/edit', 'UserController@edit');
Route::put('user/{id}', 'UserController@update');
Route::delete('user/{id}', 'UserController@delete');
In this way, you need to write each route in the routes.php file, but the implementation of each route continues in the controller. There are some small advantages in writing the routes manually. One of them is to use the PHP command artisan route:list to get the list of routes of your application, as the following image.
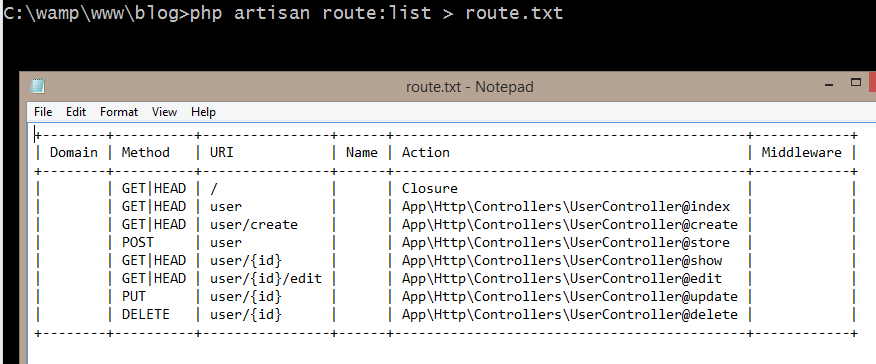
This will be very useful for the server access API documentation. Another advantage is having the accurate control of how your web application is being exposed via the API, thus ensuring a better comfort when debugging the code.
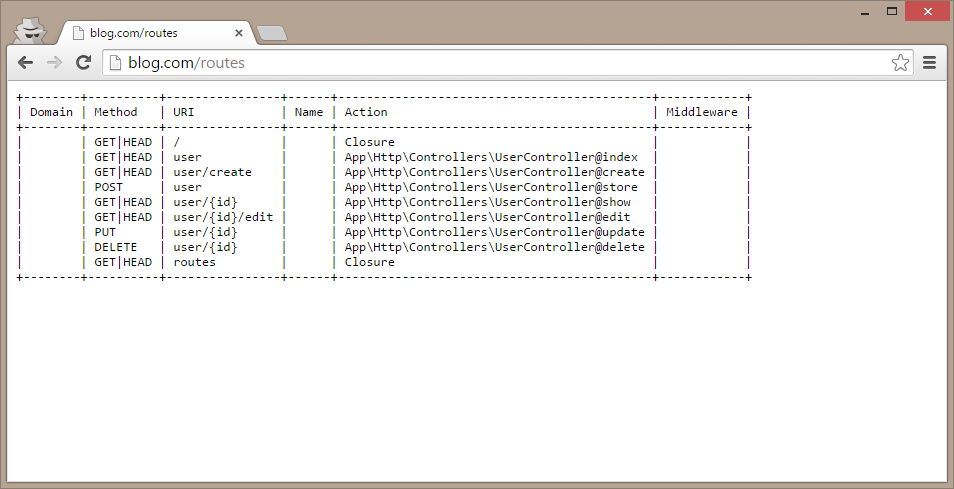
You can also create a routing to display all existing routes in the browser itself, as the following code:
<?php

Route::get('routes', function() {
     \Artisan::call('route:list');
     return "<pre>".\Artisan::output();
});
It displays the following output:
Implicit or explicit routing?
There is no consensus among the most correct way. Many programmers like the implicit mode because they don’t have to define all the routes in the routes.php file, while others argue that creating these routes manually is the right thing to do. In this work, the focus is to create something that is simple and intuitive, so instead of having various methods in the controller that can be accessed freely by AngularJS, we have, in the routes.php file, all access setting, clearly and concisely.
The way, when we program the server access methods with AngularJS, we know that these methods are in a single file (API). There are other advantages to use the explicit access, as the response data formatting (JSON or XML), which will be discussed in a later chapter.
Ajax
A request is the client (browser) access to the server. In this work, we will be addressing a Request as being AngularJS connecting to Laravel, via Ajax. This process is widely used to get data from the server, to populate an AngularJS table or just to persist data.
When Laravel respond to AngularJS, we have the answer (Response), which must necessarily be performed with a standard format, called JSON, which is a lighter format than XML and widely used in Ajax requests. The following image illustrates the process.
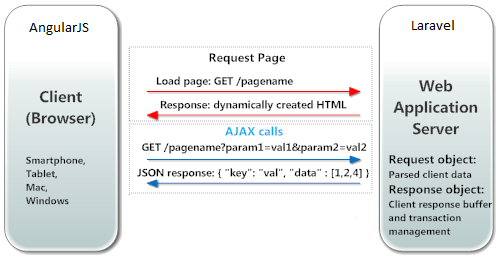
We are here setting a data communication standard between the AngularJS and the Laravel, a pattern used in any client/server communication via Ajax. One of the advantages of this pattern is that both sides, server and client, are independent in the process, which means that if any some reason there is an change in the technology on the client or on the server, the pattern will stay the same.
For example, if there is a need to change the Laravel for some framework in Java (note that we changed even the programming language), simply create the same API with the same JSON responses and the client in AngularJS will stay the same.
Similarly, if we keep the Laravel on the server and use another client, as Android in a mobile device, it can make Ajax requests to the server and get the same data from the AngularJS.
JSON Response
For the Laravel to reply in JSON, all we need is that the method on the controller return an Array or an object from Eloquent (we will see Eloquent in a later chapter).
For example, assuming the routes.php file contains:
<?php

Route::get('user/', 'UserController@index');
And the index method of the UserController is:
<?php

namespace App\Http\Controllers;

use Illuminate\Http\Request;

use App\Http\Requests;
use App\Http\Controllers\Controller;

class UserController extends Controller
{

    public function index(){
        $array = array('foo', 'bar');
        return $array;
    }

    // .......
}
We have the following response in the browser:
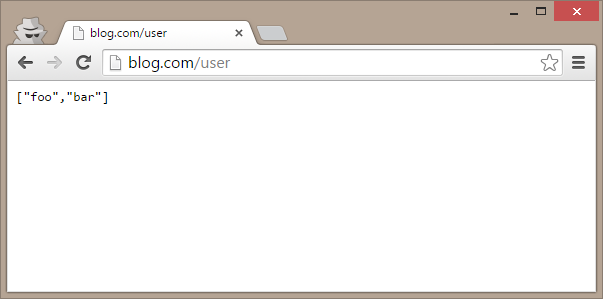
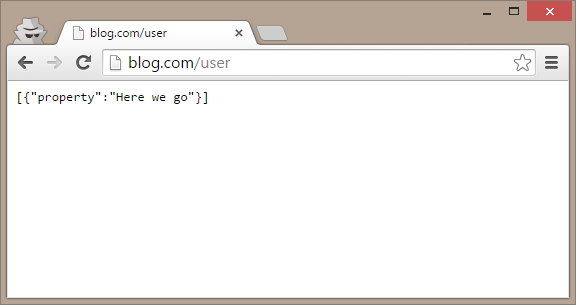
That is the Array in JSON format. If there is the need to return an object, the ideal is to add this object to an Array and return it, as in the following example:
<?php

namespace App\Http\Controllers;

use Illuminate\Http\Request;

use App\Http\Requests;
use App\Http\Controllers\Controller;

class UserController extends Controller
{

    public function index(){
        $object = new \stdClass();
        $object->property = 'Here we go';
        return array($object);
    }

    // .......
}
Whose answer will be:
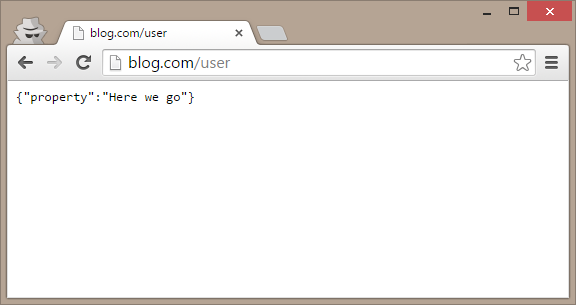
You can also use the method response ()->json(), as the following example:
<?php

namespace App\Http\Controllers;

use Illuminate\Http\Request;

use App\Http\Requests;
use App\Http\Controllers\Controller;

class UserController extends Controller
{

    public function index(){
        $object = new \stdClass();
        $object->property = 'Here we go';
        return response()->json($object);
    }

    // .......
}
The result is displayed in the following image.
By Convention, we can define the Laravel Controller will always return an array or an object of Eloquent, always in JSON format.
Exceptions in JSON format
It is vital that the exceptions in Laravel return the same JSON format that we are adopting. In the following example, when you create a generic exception:
<?php

namespace App\Http\Controllers;

use Illuminate\Http\Request;

use App\Http\Requests;
use App\Http\Controllers\Controller;

class UserController extends Controller
{

    public function index(){
        throw new \Exception("My error");
        return array("ok");
    }

    // .......
}
We got the following reply:
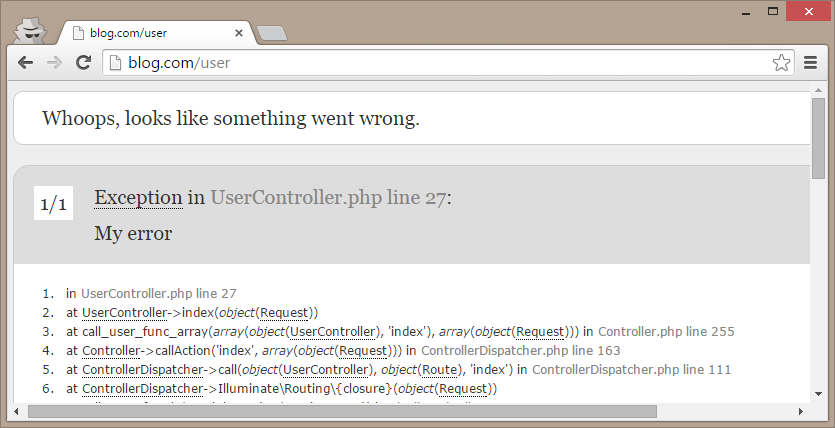
What definitely is not valid for the standard JSON. We have to somehow return this error in JSON. Fortunately this is entirely possible with Laravel, simply change the file app\Exceptions\Handler.php as shown in the following code:
<?php

namespace App\Exceptions;

use Exception;
use Symfony\Component\HttpKernel\Exception\HttpException;
use Illuminate\Foundation\Exceptions\Handler as ExceptionHandler;

class Handler extends ExceptionHandler
{
    protected $dontReport = [
        HttpException::class,
    ];

    public function report(Exception $e)
    {
        return parent::report($e);
    }

    public function render($request, Exception $e)
    {
        if ($request->wantsJson()){
            $error = new \stdclass();
            $error->message = $e->getMessage();
            $error->code = $e->getCode();
            $error->file = $e->getFile();
            $error->line = $e->getLine();
            return response()->json($error, 400);
        }
        return parent::render($request, $e);
    }
}
In this code, change the method render including a custom error in JSON format. This error will only be generated in Ajax requests, thanks to if ($request->wantsJson()). This is useful to define how the message is presented to the user. In order to be able to test this error, we must simulate an Ajax request to Laravel, and this can be accomplished with an extension of Google Chrome called Postman, adding the URL blog.com/user to the header in the GET request, as the following image:
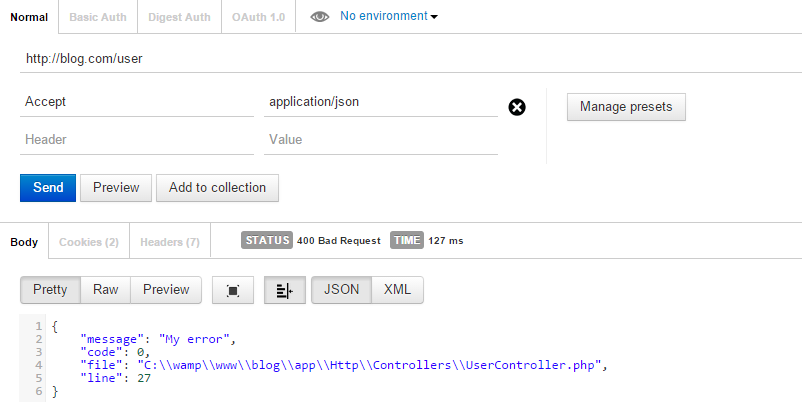
Summing up, the error is displayed as the request, and as the AngularJS will always make an Ajax call to Laravel, the error will also be displayed in the JSON format.