
Table of Contents
- Support
- About The Leanpub Manual
- The 5 Writing Modes of Leanpub
- Markua vs. Leanpub Flavoured Markdown
- Getting Started with In-Browser Plain Text Editor Writing Mode
- Getting Started with Dropbox Writing Mode
-
Getting Started with Git and GitHub Writing Mode
- Creating Your Book’s GitHub Repository
- Creating a Book in GitHub Writing Mode
- Adding Leanpub As A Collaborator on Your Book’s GitHub Repository
- Adding Default Content to Your GitHub Repository
- Creating a Preview
- Writing in Your Book
- Make a New Preview of Your Book
- How the List of Files in Book.txt Works
- Next Steps
-
Getting Started with Git and Bitbucket Writing Mode
- Creating Your Book’s Bitbucket Repository
- Creating a Book in Bitbucket Writing Mode
- Adding Leanpub As A Collaborator on Your Book’s Bitbucket Repository
- Adding Default Content to Your Bitbucket Repository
- Creating a Preview
- Writing in Your Book
- Make a New Preview of Your Book
- How the List of Files in Book.txt Works
- Next Steps
- Getting Started with Bring Your Own Book Writing Mode
Support
Where to Get Help
Readers
- Help Center
- We have lots of great documentation and FAQs for readers and authors in our Help Center at http://help.leanpub.com. Basically, whenever we’re asked a good, general question, we post a generalized version of the answer there as well. There are specific sections for readers and purchasing, or you can just search the entire help center.
- Email hello@leanpub.com
- If you have a specific problem that you can’t find the answer to in our Help Center and don’t want to post on the forum, email us at hello@leanpub.com and we’ll be happy to help you.
Leanpub Authors
- Help Center
- Our help center isn’t just for readers. We have lots of great documentation and FAQs in our Help Center for Leanpub authors as well. In fact, there are about three times as many articles for authors on our Help Center as there are for readers. The Help Center is at http://help.leanpub.com.
- The Leanpub Author Forum
- Just as every Leanpub book can have a forum, we have a forum for Leanpub authors as well. Join the Leanpub Author Forum and post your question there. Our authors enjoys helping each other out, and we pay attention too. Please ask all general questions there.
- Email hello@leanpub.com
- If you have a specific problem that you can’t find the answer to in our Help Center and don’t want to post on the forum, email us at hello@leanpub.com and we’ll be happy to help you.
- Getting Started
- To learn how to get started with the various writing modes, read this manual.
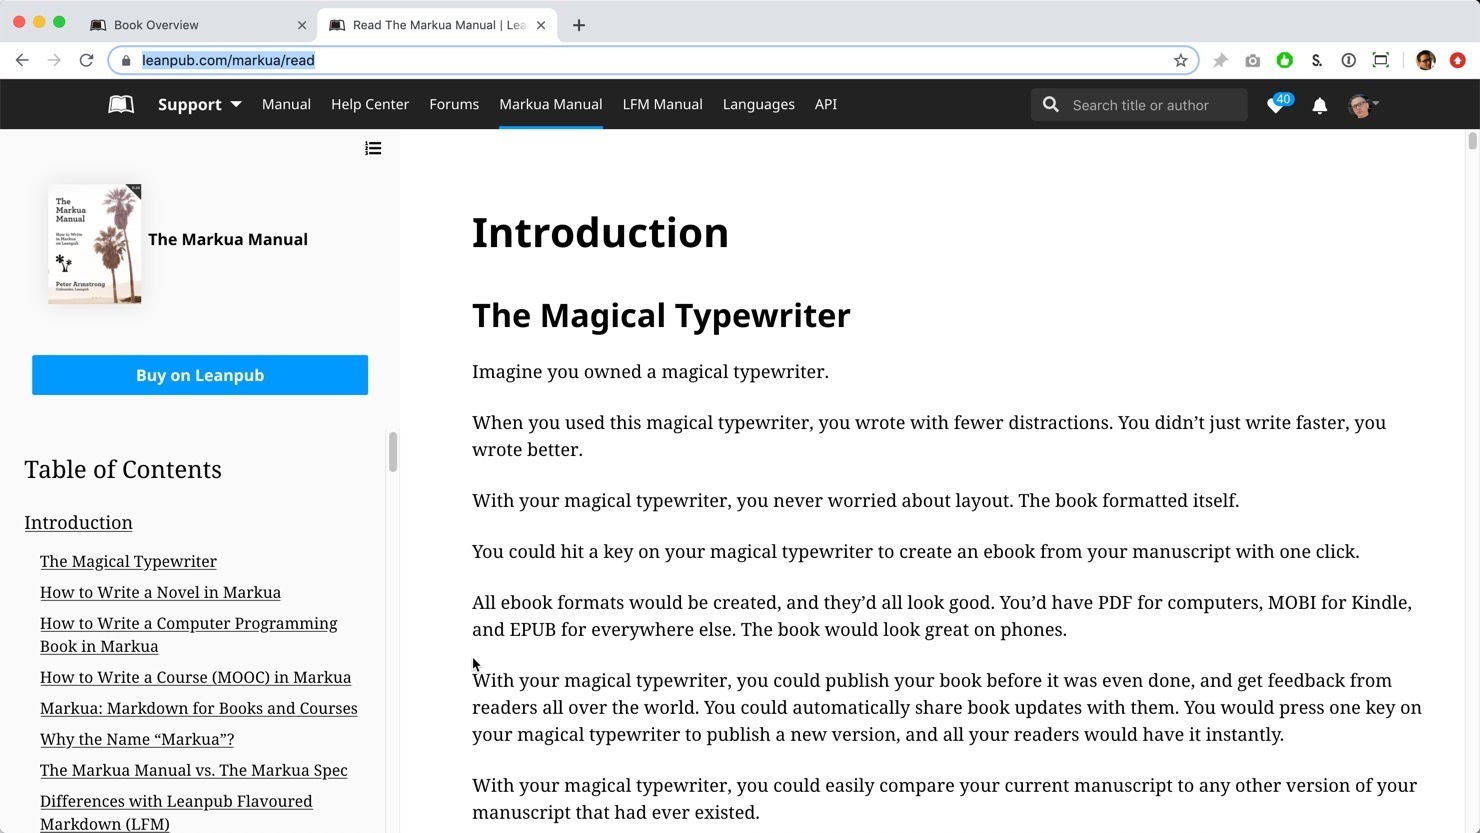
- Markua
- To learn how to write in Markua on Leanpub, see The Markua Manual.
- Leanpub Flavoured Markdown
- To learn how to write in Leanpub Flavoured Markdown, see The Leanpub Flavoured Markdown Manual.
- The Leanpub Frontmatter Podcast
- Leanpub has a podcast called Frontmatter, where we interview authors about their lives & careers, their areas of expertise and the issues of the moment, and their experiences as authors. Every episode is deeply researched and covers subjects that are equally of human interest, general interest, and of professional interest, particularly for writers. We highly recommend it as a resource during your writing journey.
About The Leanpub Manual
Welcome to The Leanpub Manual!
This is a short manual. It contains three things:
- A description of the various writing modes.
- A discussion of Leanpub Flavoured Markdown vs. Markua
- Getting Started instructions for each writing mode.
The Getting Started instructions in this many vary based on the writing mode of your book. So, you should only read the Getting Started chapter for the specific writing mode you have chosen.
If you already know which writing mode you want to choose, and if the Leanpub Flavoured Markdown vs. Markua decision doesn’t apply (or you want to save it for later), you can skip to the Getting Started chapter for that writing mode now.
If you want to first learn a bit about the different writing modes, and a bit about the Leanpub Flavoured Markdown vs. Markua decision, read on.
The 5 Writing Modes of Leanpub
There are 5 different writing modes on Leanpub:
- Leanpub In-Browser Text Editor
- Dropbox
- GitHub
- Bitbucket
- Bring Your Own Book
In the first four writing modes, you write in plain text. This plain text can be formatted in either Leanpub Flavoured Markdown (LFM) or Markua. Both of these are dialects of Markdown, which was created as a way for bloggers to easily write blog posts. (Markdown is easier to write than HTML.)
In the last writing mode, Bring Your Own Book, you don’t write in plain text, so you don’t write in either Leanpub Flavoured Markdown or Markua. Instead, you write your book any way you like (such as using Word, Pages, or LaTeX), and then you just upload PDF, EPUB, and MOBI files that you produce using your tools. (You can also choose to upload any one or two of these formats - you don’t need all three.)
So, if you’re using our In-Browser Text Editor, Dropbox, GitHub, or Bitbucket, you’ll be able to use Leanpub Flavoured Markdown or Markua. You can change back and forth between them as often as you want. It’s as easy as clicking a checkbox.
Reasons to Use GitHub or Bitbucket
If you’re a programmer and comfortable with Git, we recommend you choose GitHub or Bitbucket over Dropbox. Here are 5 reasons why:
- You can run your own version control, which is great for collaborating with co-authors and keeping track of versions for yourself.
- You can also choose a Dropbox folder for the generated preview and published versions of your book to be automatically copied into.
- You can set up webhooks so that whenever you commit and push, we automatically preview (or, if you live on the edge, automatically publish) your book.
- You can use different branches for preview and publish, so that you can have a bugfix branch (say master) and a development branch for the next version of your book.
- You can use a different branch for a course, based on the same repository as the book. (Again, courses require that you use Markua, so if you’re writing a book which you think might be a good course, that’s another reason to use it.)
If you’re not a programmer, we recommend using Dropbox mode. Every time you preview or publish, we store a version of your manuscript as a backup, so we recommend you preview and publish often.
Markua vs. Leanpub Flavoured Markdown
On Leanpub, there are two ways to write in plain text:
- Markua
- Leanpub Flavoured Markdown (LFM)
Leanpub Flavoured Markdown came first; Markua is its replacement. Both LFM and Markua are dialects of Markdown. Markua is newer and better than LFM.
To write in Markua or LFM, you need to be in Dropbox, GitHub or Bitbucket writing mode, or you need to be writing in the Leanpub In-Browser Text Editor.
There are six good reasons to write a book in Markua:
- Markua is better than LFM. A lot better. Markua fixes the many mistakes we made with LFM.
- Markua is the future of Leanpub.
- Markua has more features than LFM.
- If you want to create a course on Leanpub, you need to use Markua.
- The Leanpub In-Browser Text Editor is better with Markua now, and it’s going to be way better soon. (We’re working on an upgrade to the Leanpub In-Browser Text Editor which will only be available for Markua books.)
- The Markua Manual is newer and better than the Leanpub Flavoured Markdown Manual.
There are two good reasons to write a book in LFM:
- You already started your book in LFM and you don’t want to convert it yet.
- You are writing a translation of a book which is written in LFM.
Switching Writing Modes
If you have an existing Leanpub book and you want to switch writing modes, you go here:
Author > Books > (your book) > Settings > Writing Mode
Once you’ve chosen an appropriate writing mode, you then can switch between the Markua and LFM dialects of Markdown here:
Author > Books > (your book) > Settings > Markdown Dialect
Getting Started with In-Browser Plain Text Editor Writing Mode
You can write a Leanpub book using the In-Browser Plain Text Editor writing mode. In this section we’ll show you how to create a book, how to write in the In-Browser Editor, and how generate your first preview.
We also have a video, if you prefer to learn that way! You can watch the video here: https://youtu.be/QC8Utbrc9MM.
Once you have successfully generated your first preview, you’ll know everything you know to get started writing in the In-Browser Plain Text Editor writing mode.
You’ll find more information and detailed instructions on the “Getting Started” page for your book, which you’ll go to automatically when you create your book.
Creating a Book in In-Browser Plain Text Editor Writing Mode
Go to https://leanpub.com/create/book to create a book in our In-Browser Plain Text Editor writing mode.
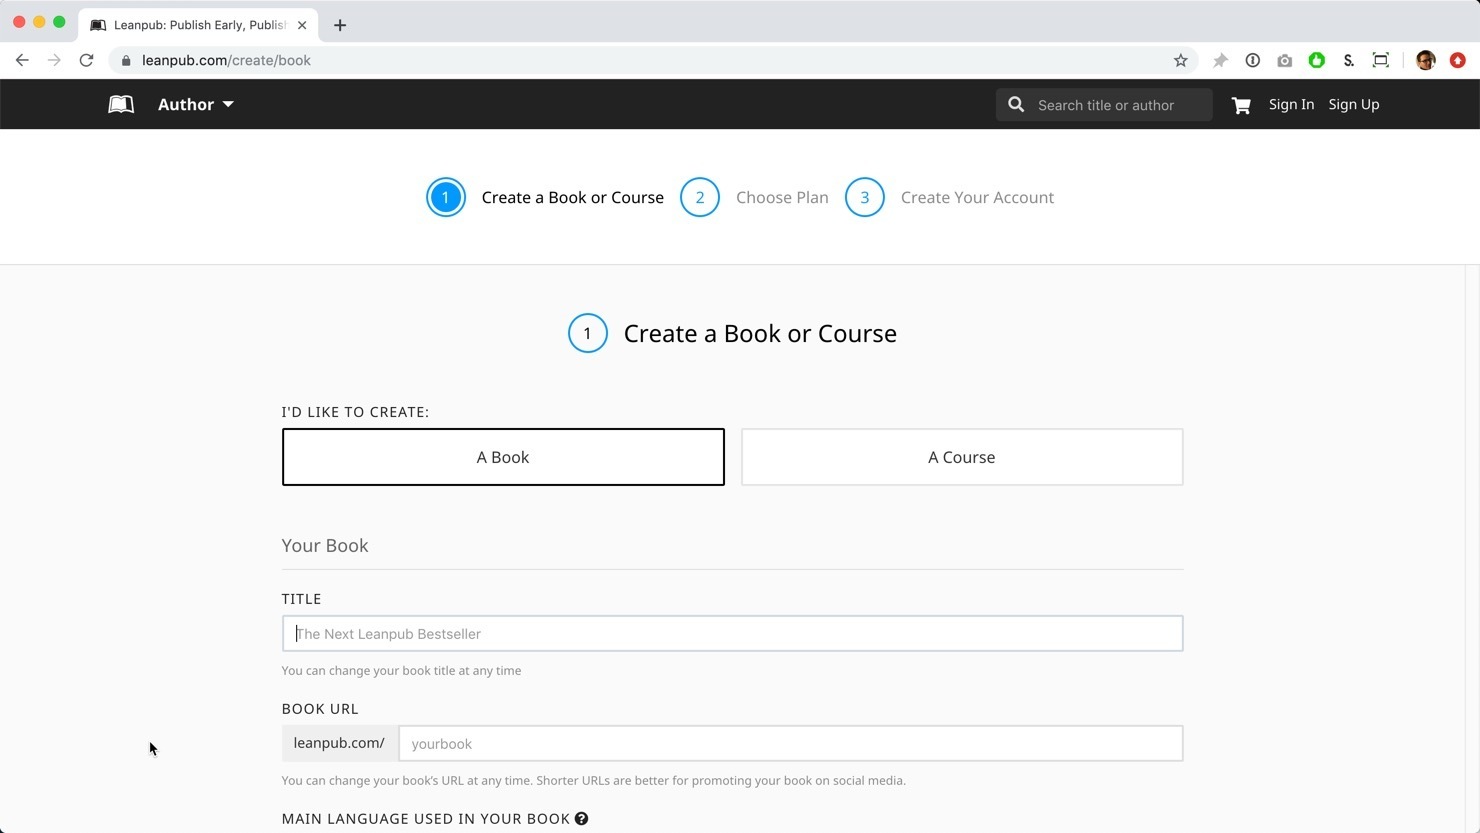
Next, type a title for your book into the “TITLE” box. You can change your title later.
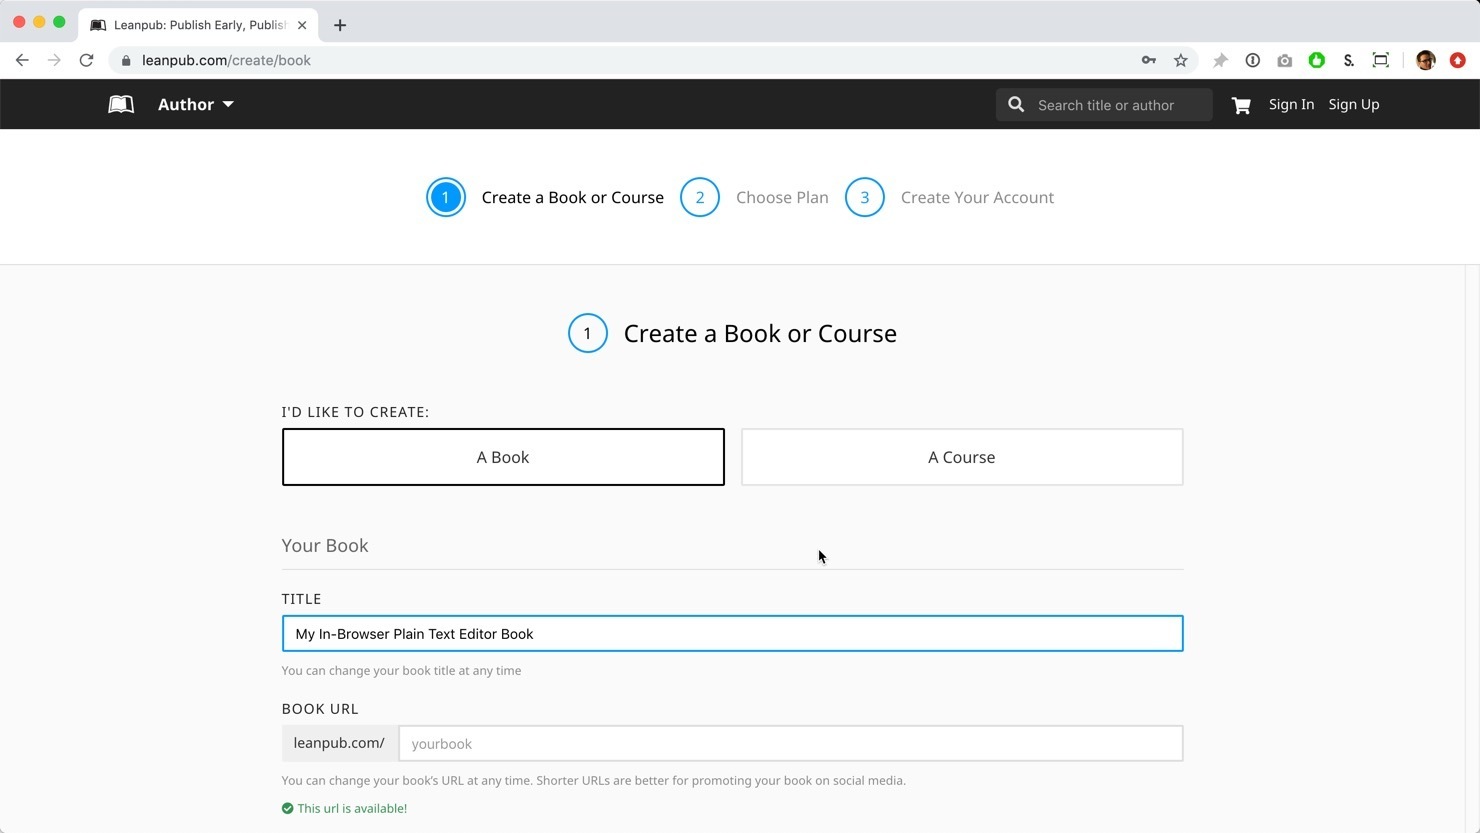
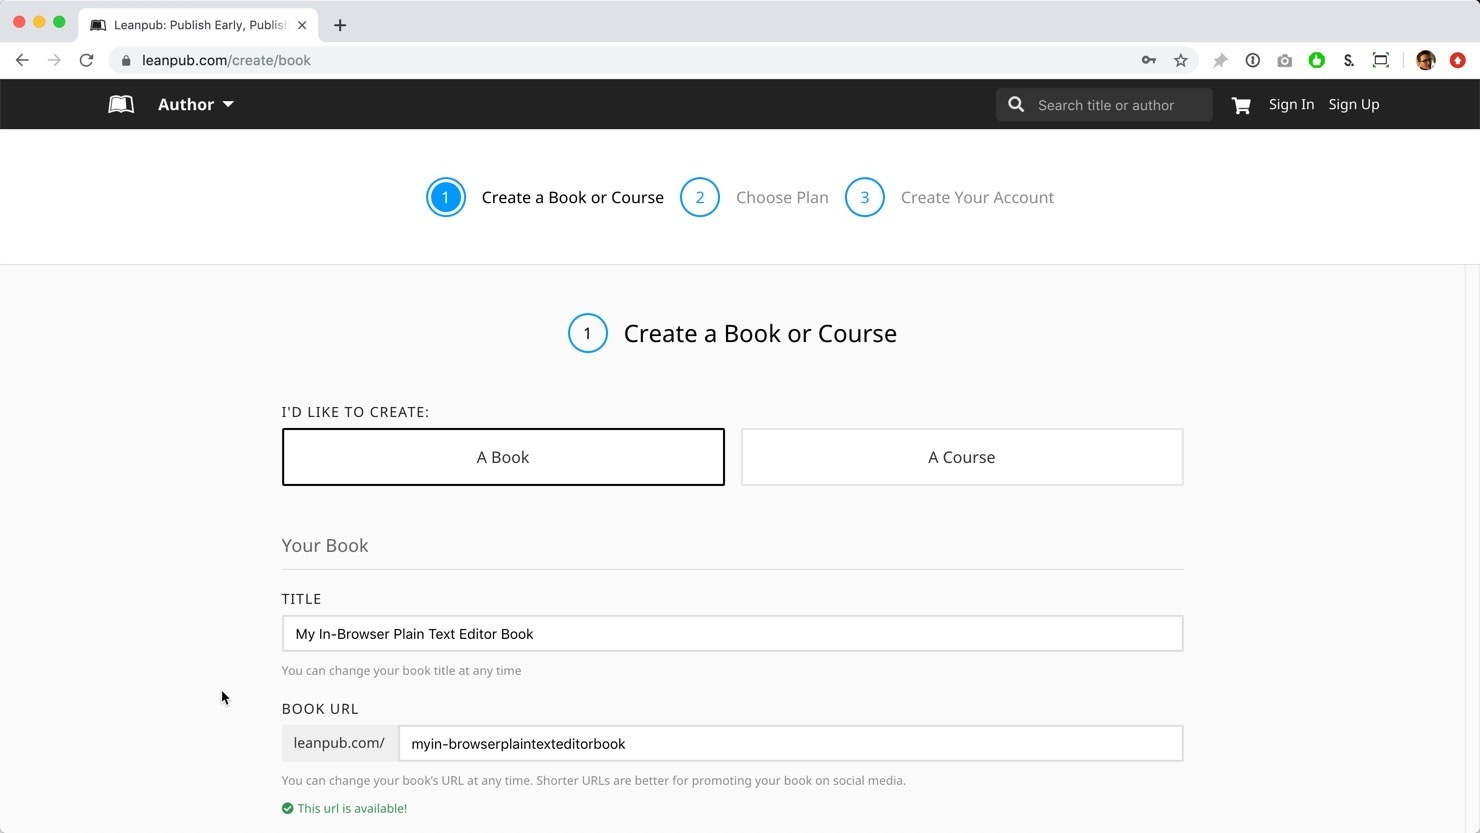
Click in the “BOOK URL” box. Leanpub will automatically suggest a URL for your book’s web page on Leanpub. You can change this URL at any time.
Scroll down and you will see “MAIN LANGUAGE USED IN YOUR BOOK.” You can select a language from the drop-down. Like the other settings, you can change this at any time.
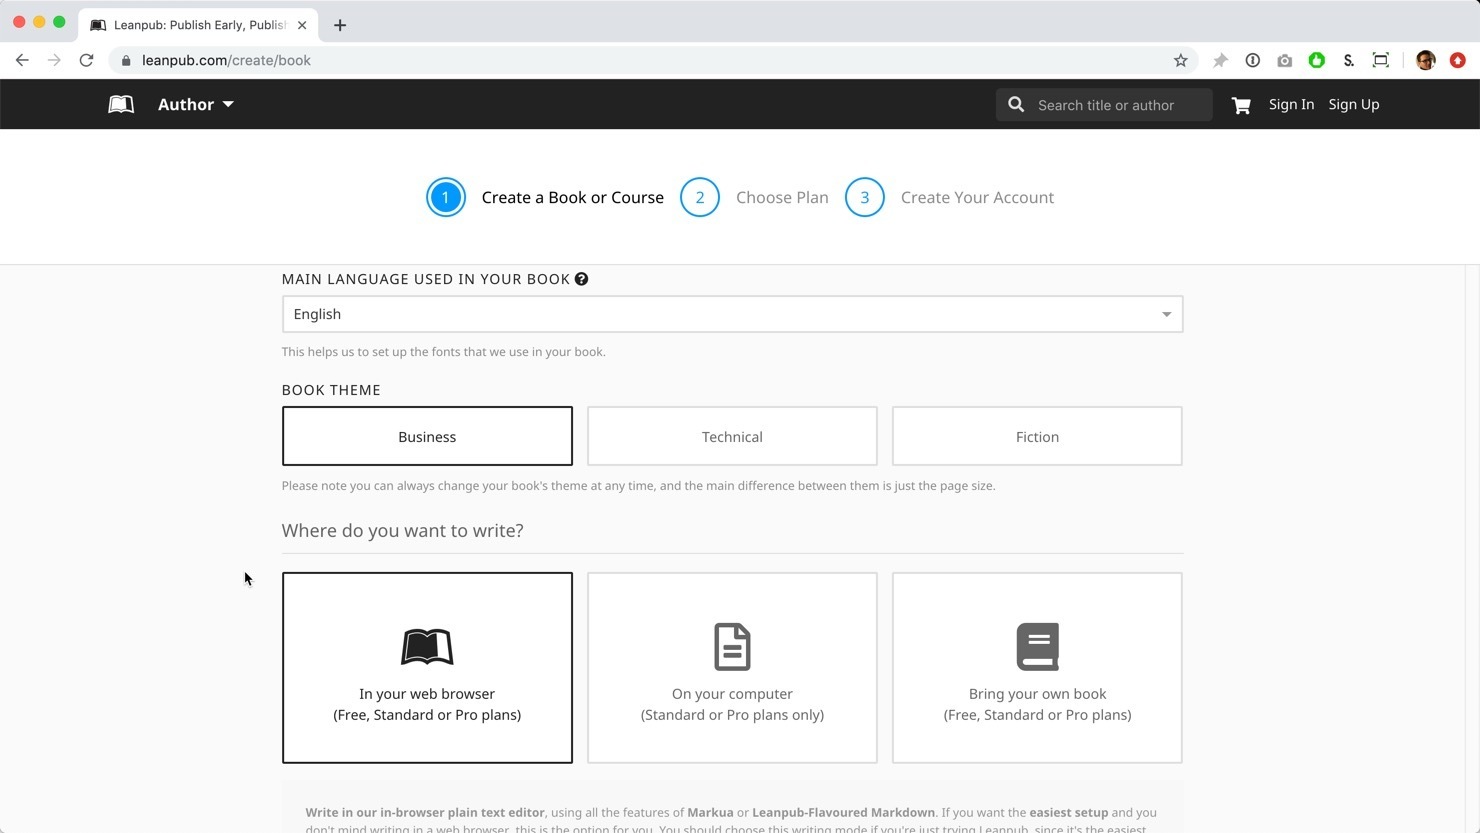
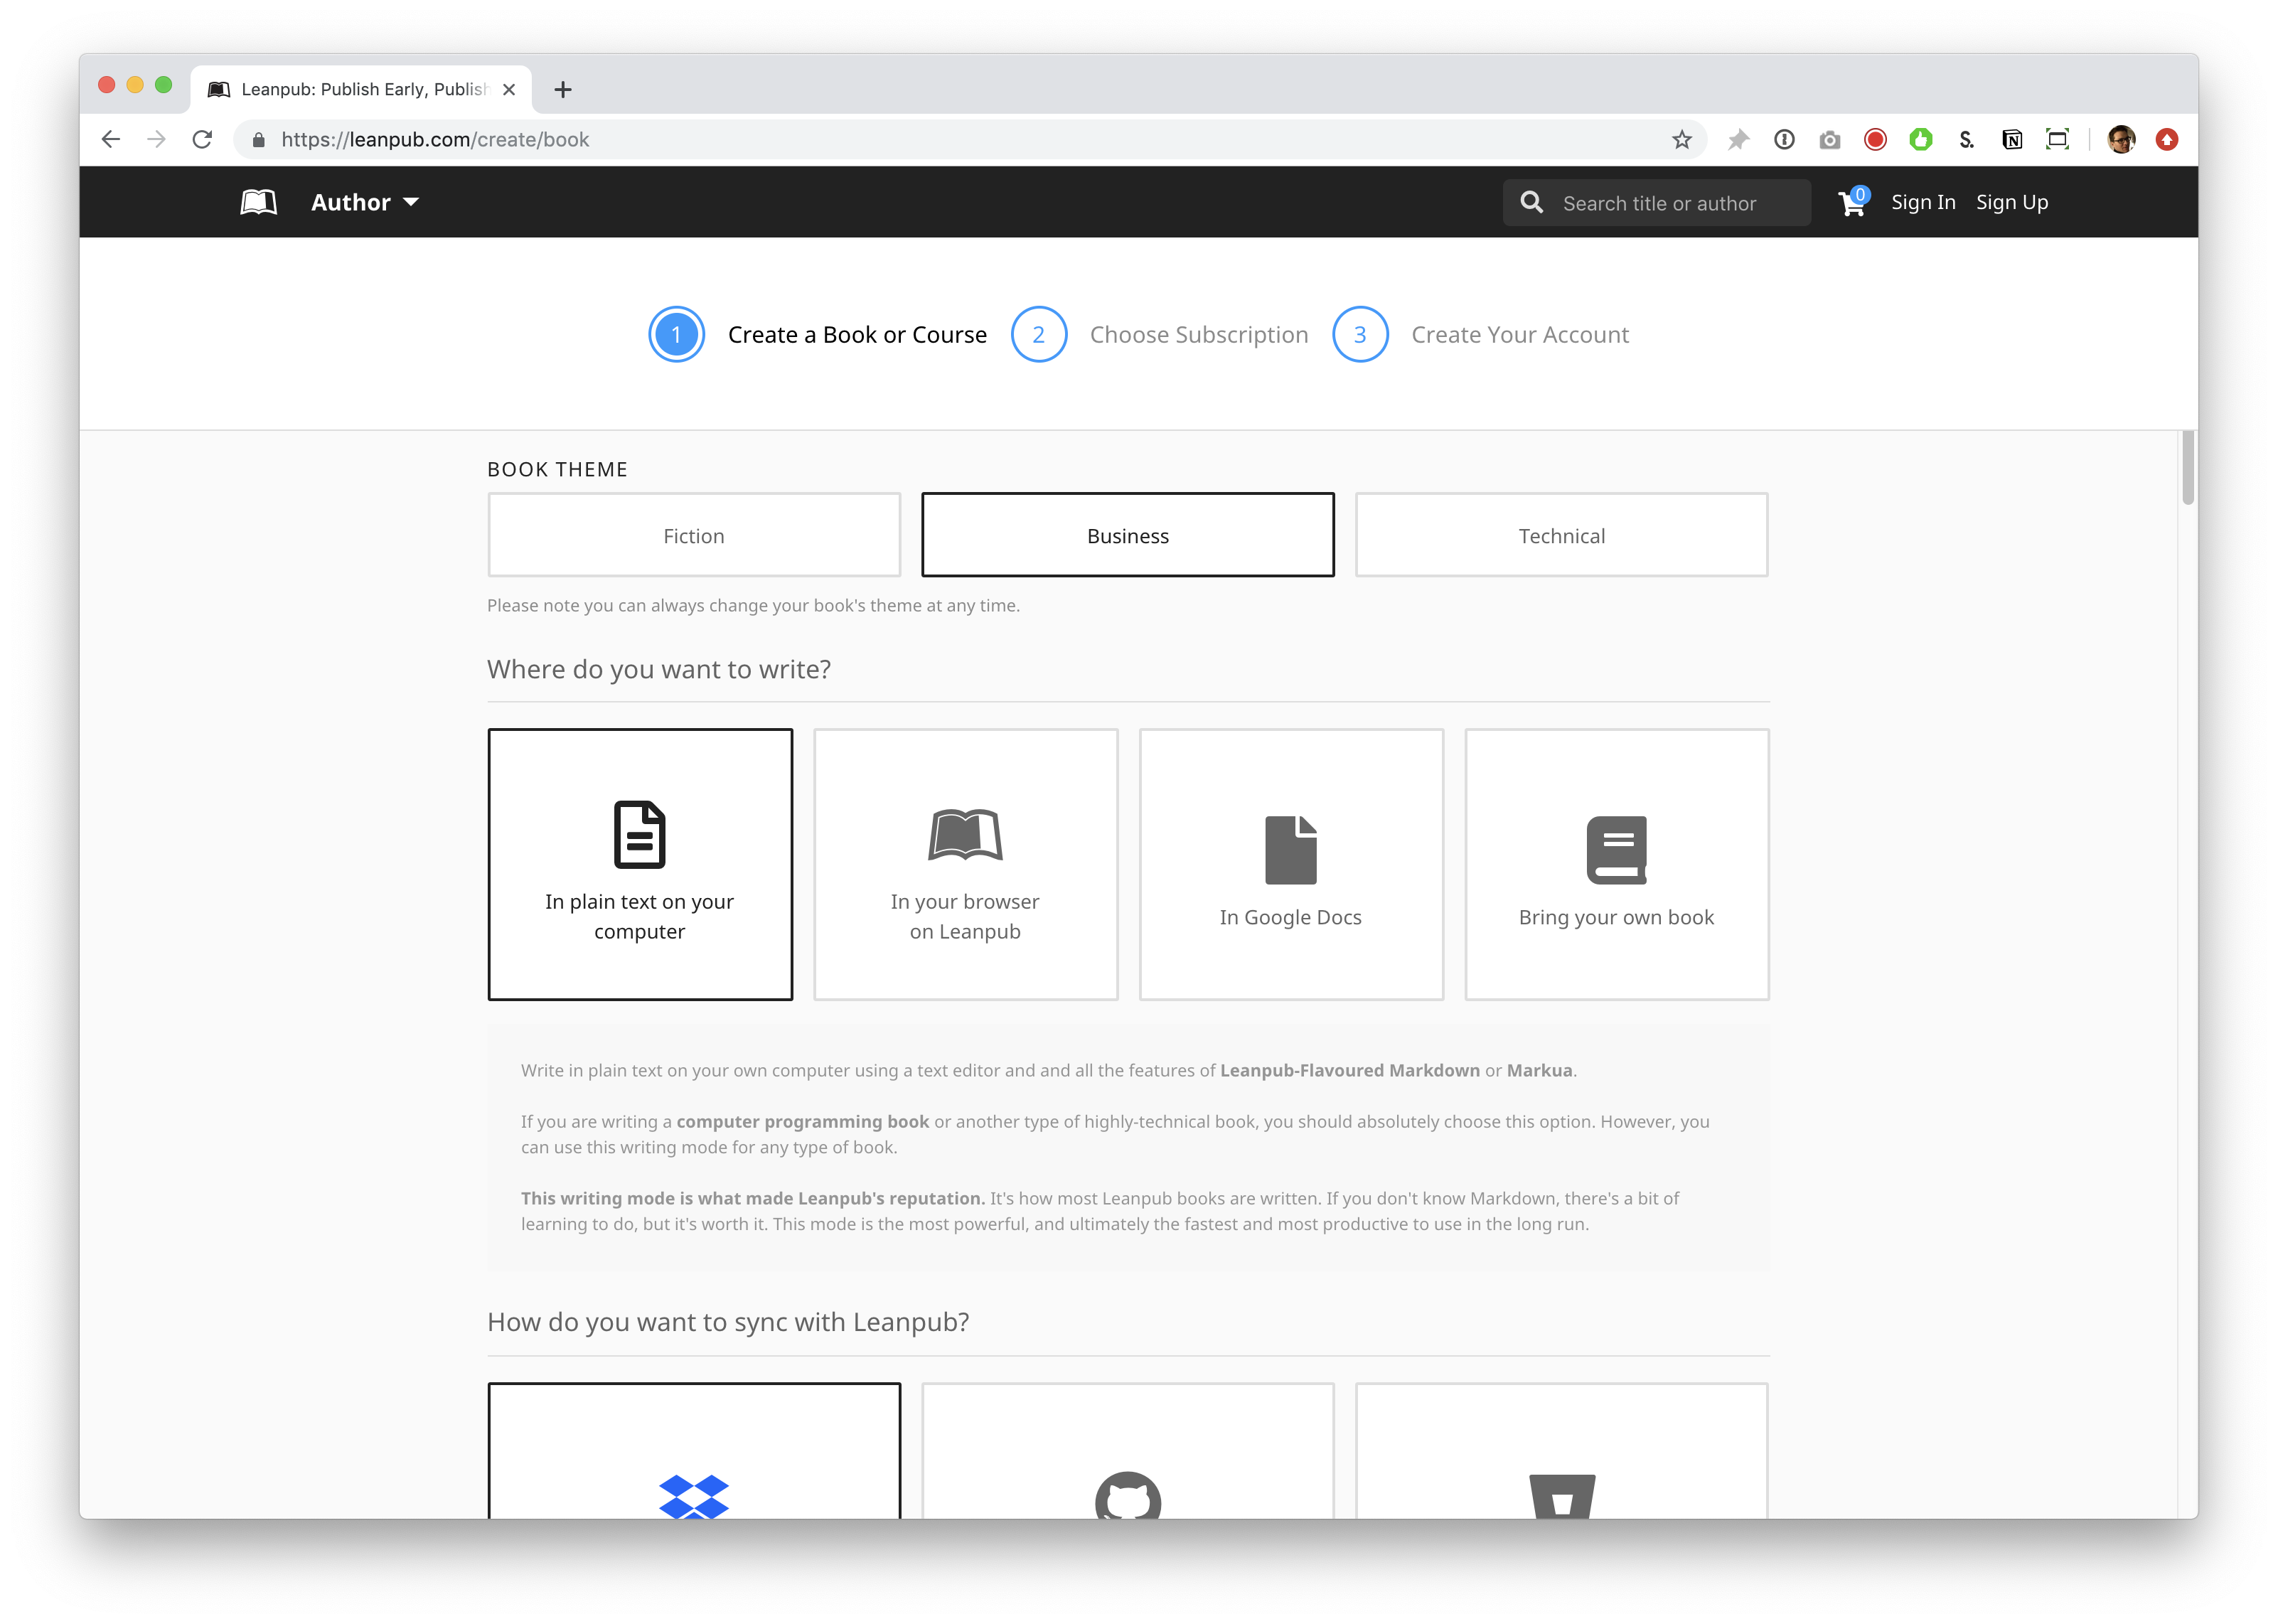
Scroll down and you will see the “BOOK THEME” options. “Business” will be selected by default. The Book Theme is just a set of standard formatting options conventional for books on these subjects. You are not required to choose any particular option. You can change your Book Theme at any time.
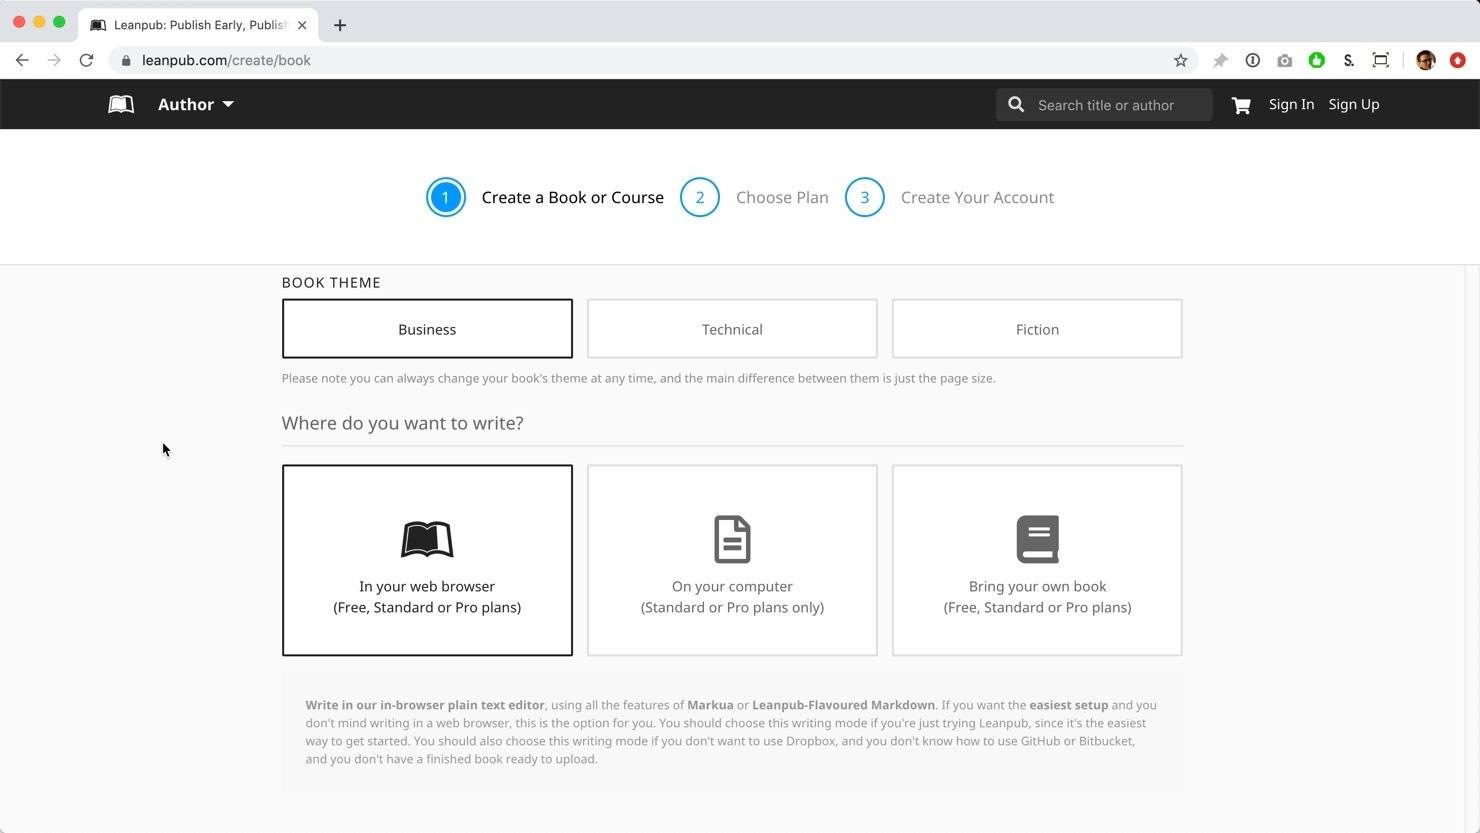
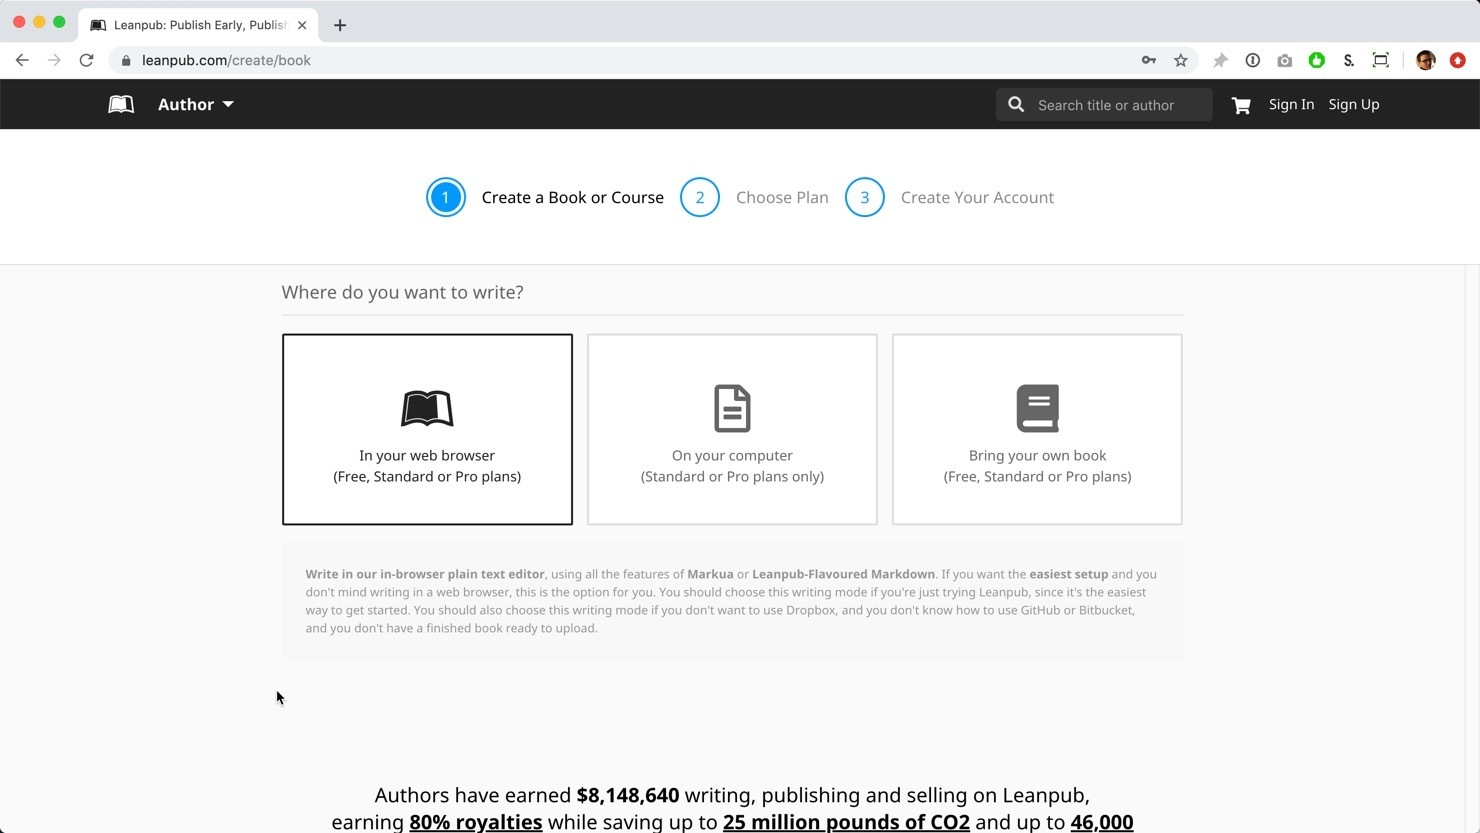
In the section below, you will be presented with various Writing Mode options. By default, the “In your web browser” option will be selected, which is what we want:
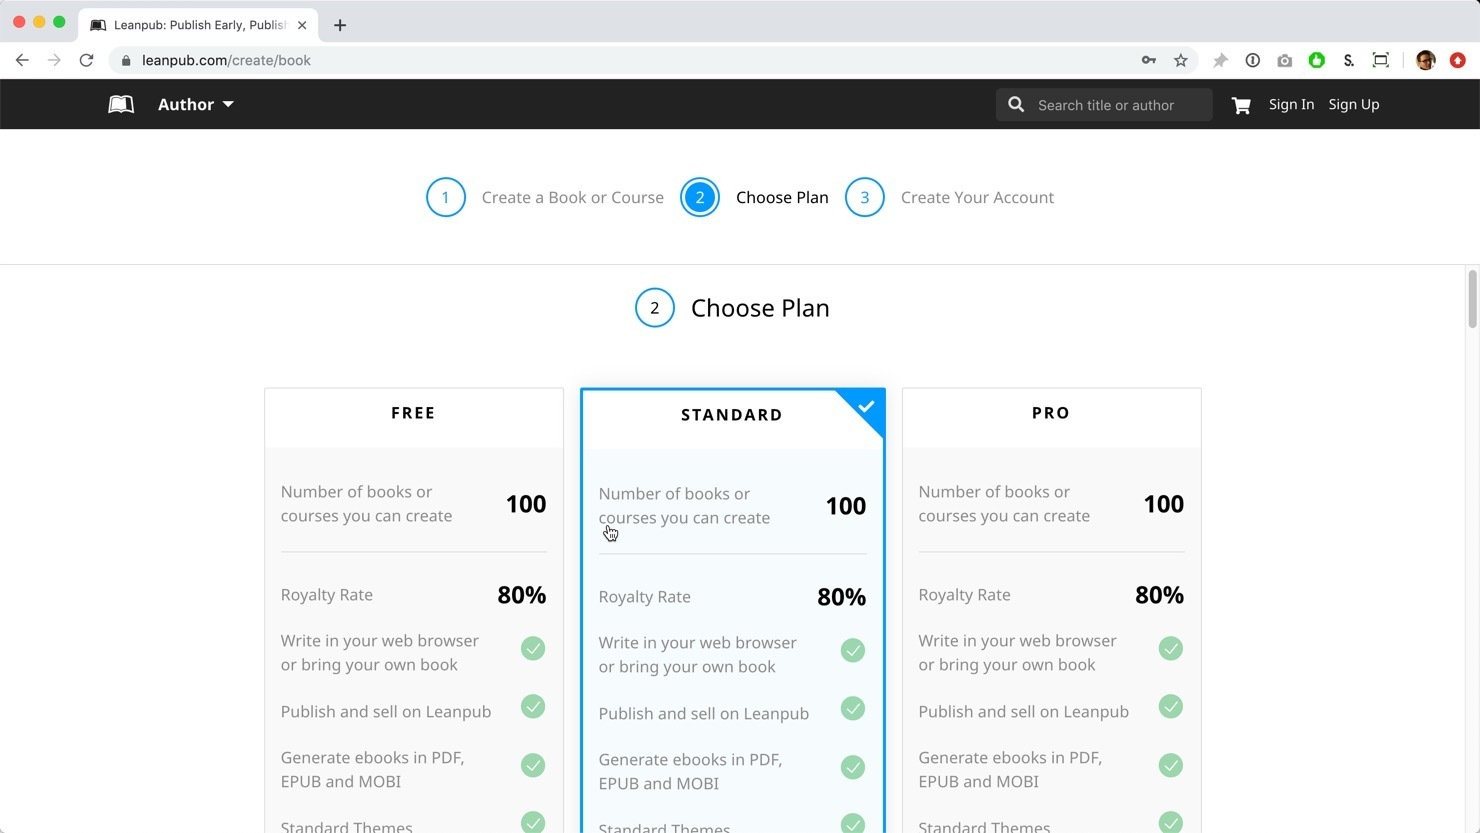
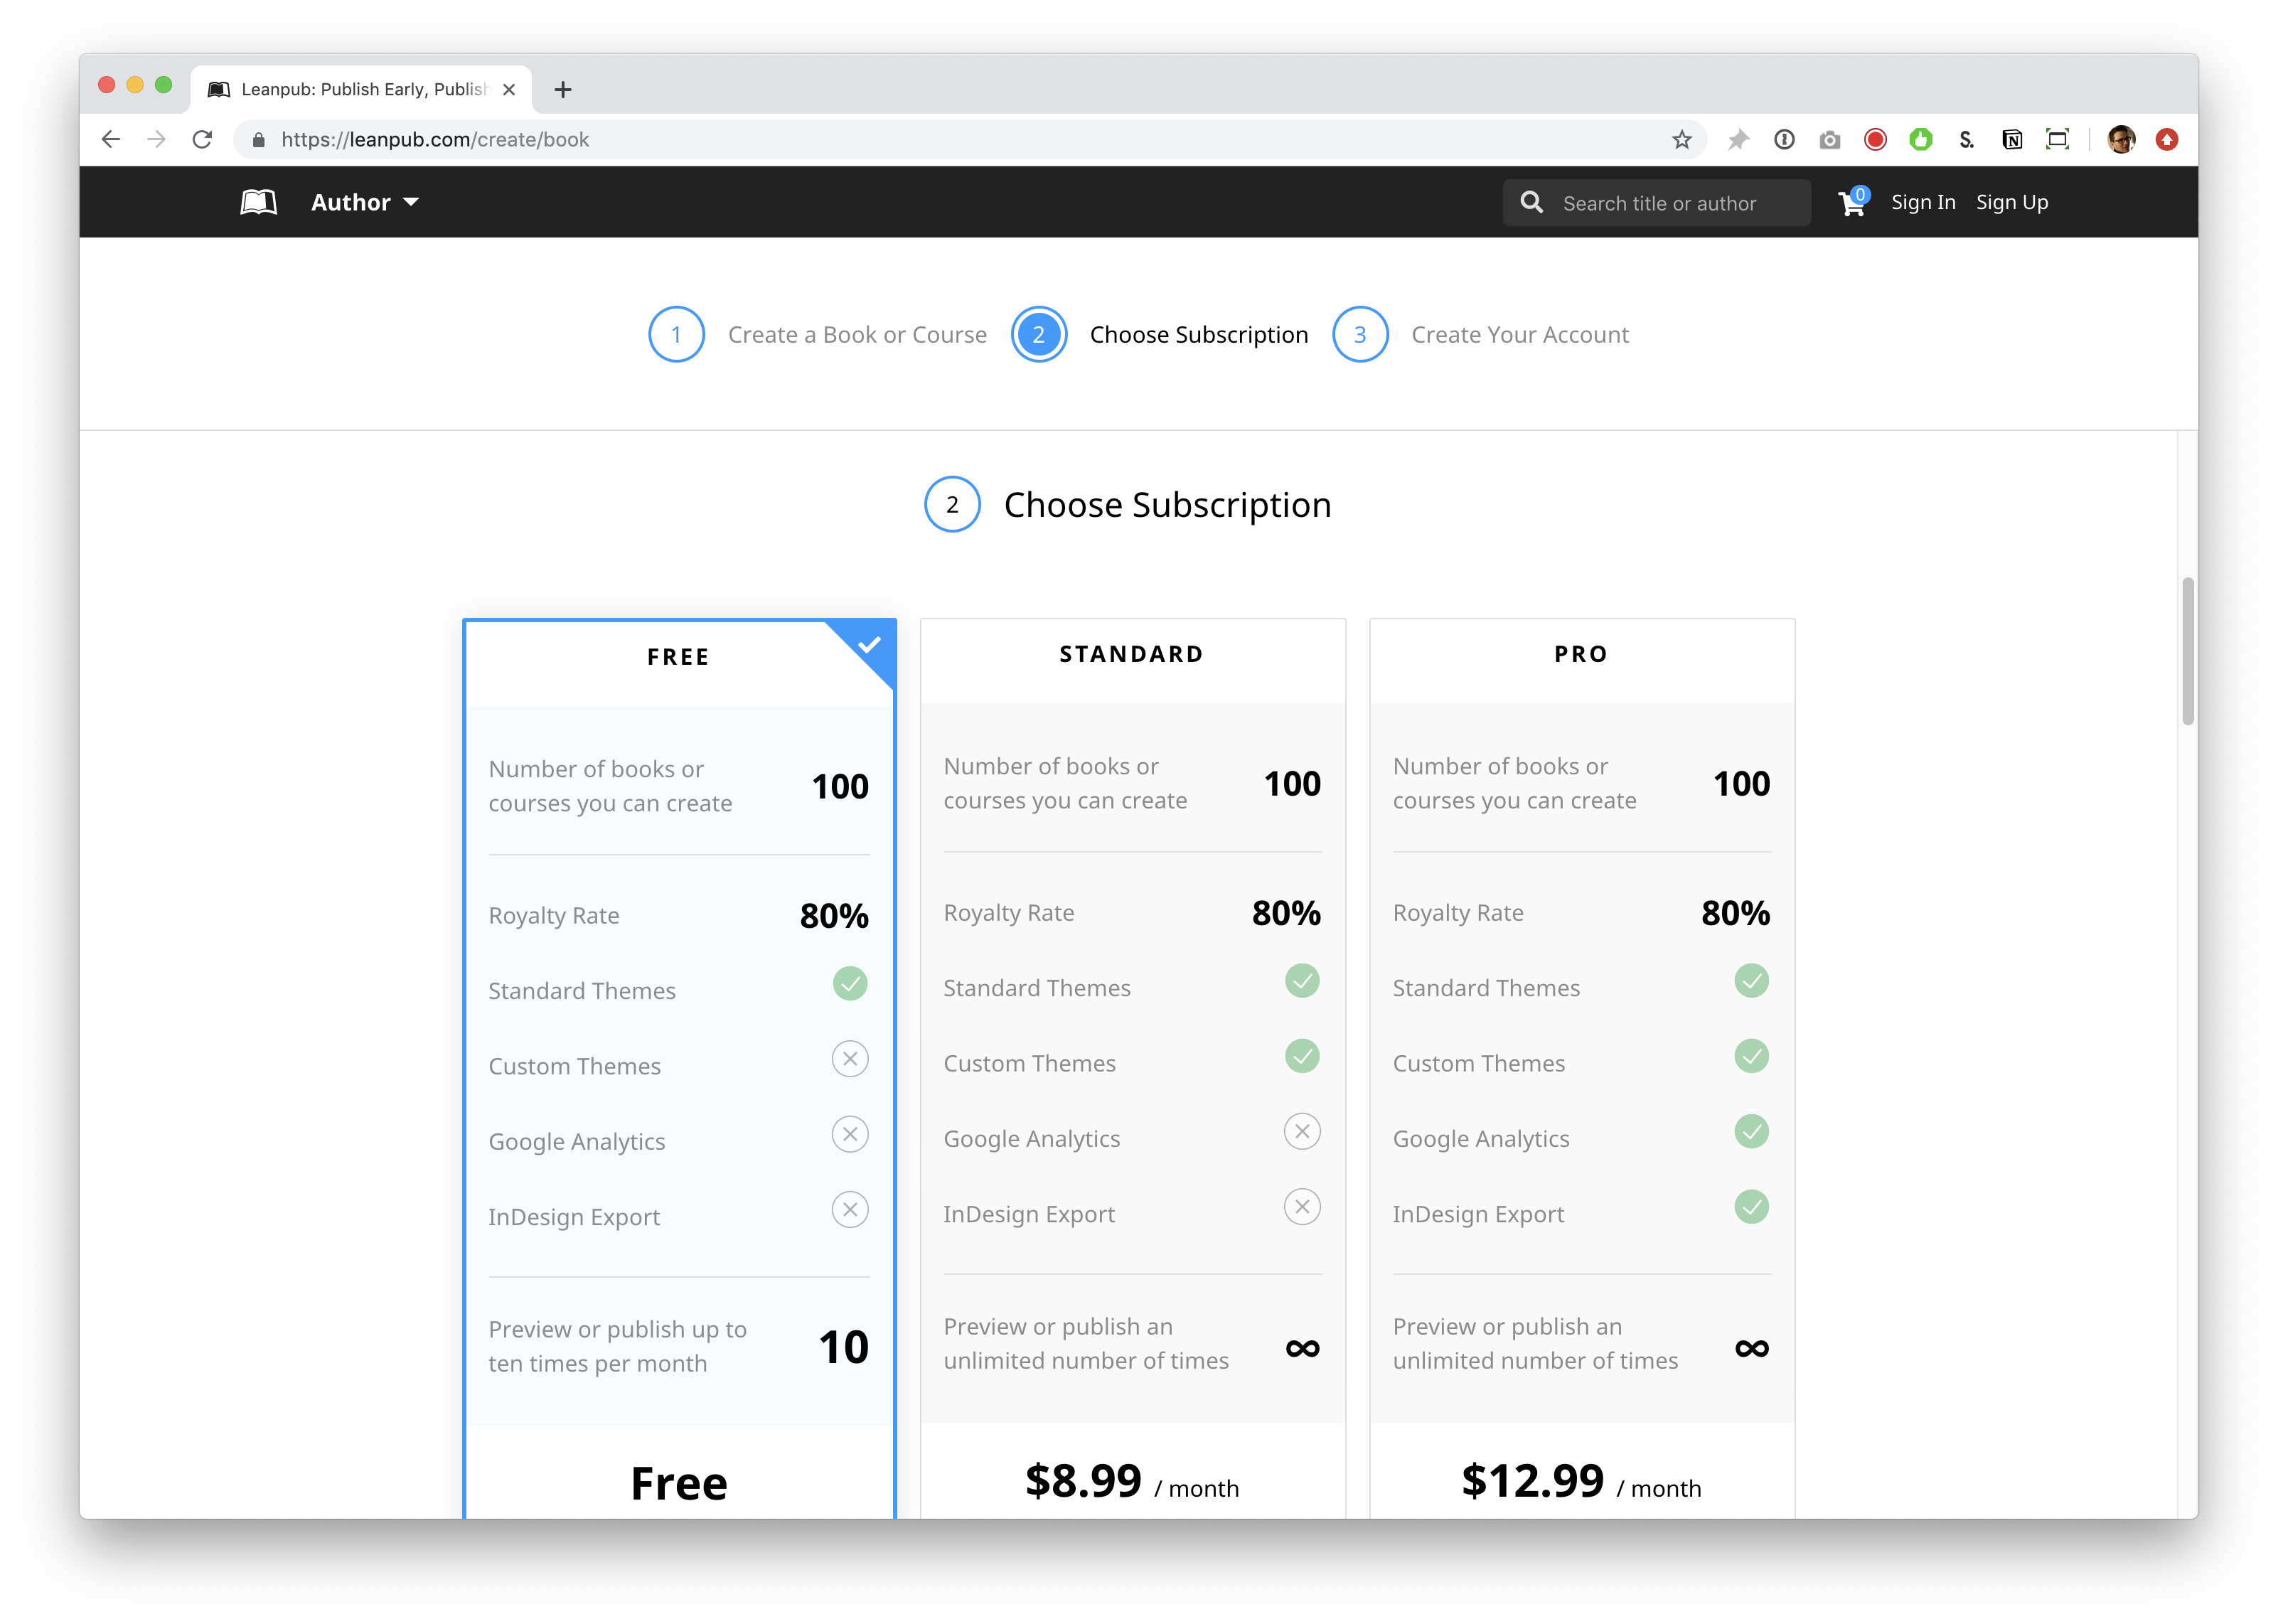
When you scroll down, you will see the subscription plan options. By default, “Standard” will be selected, if you are setting up your first book in Leanpub.
Select a plan.
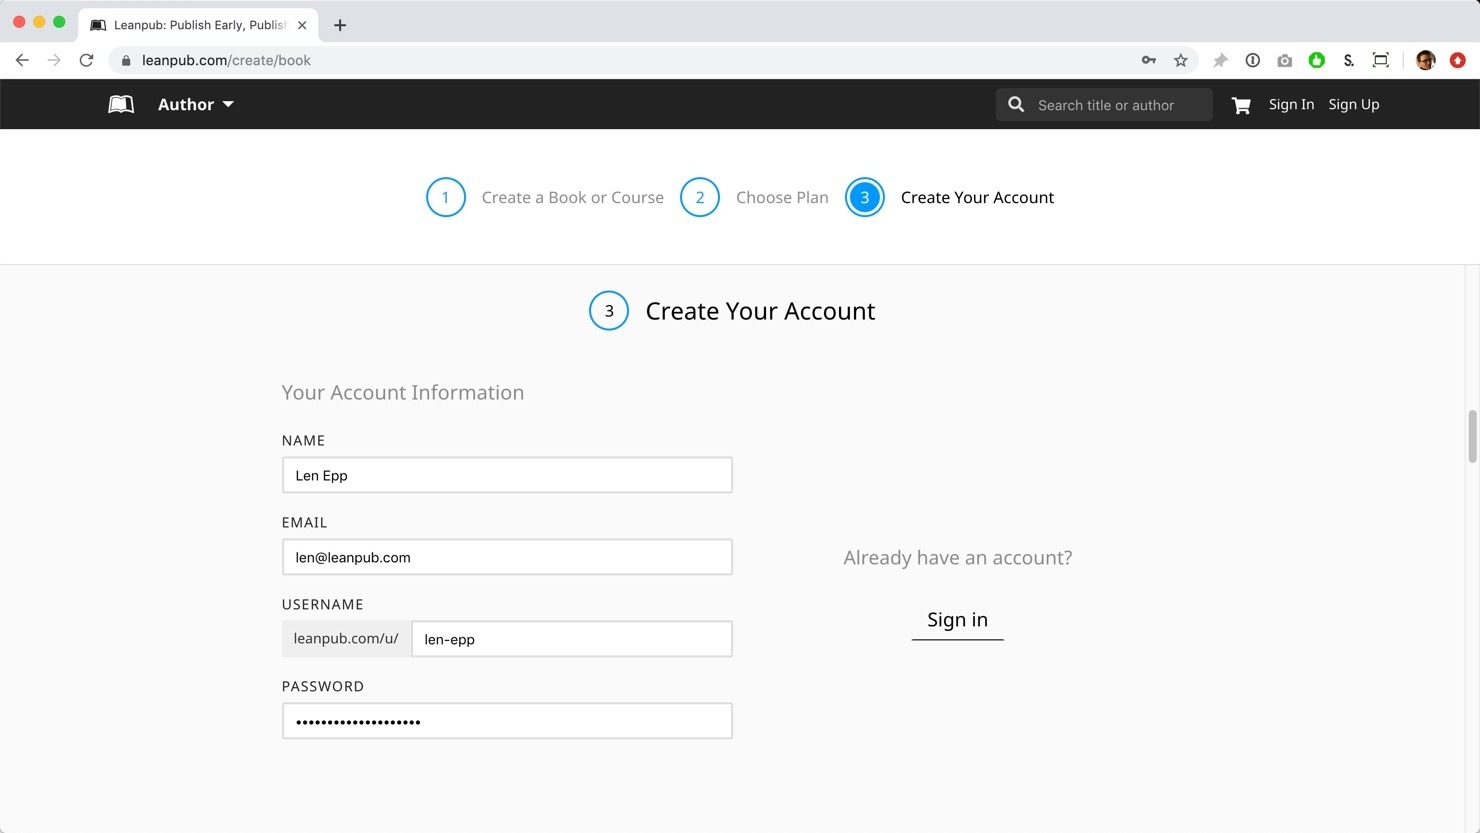
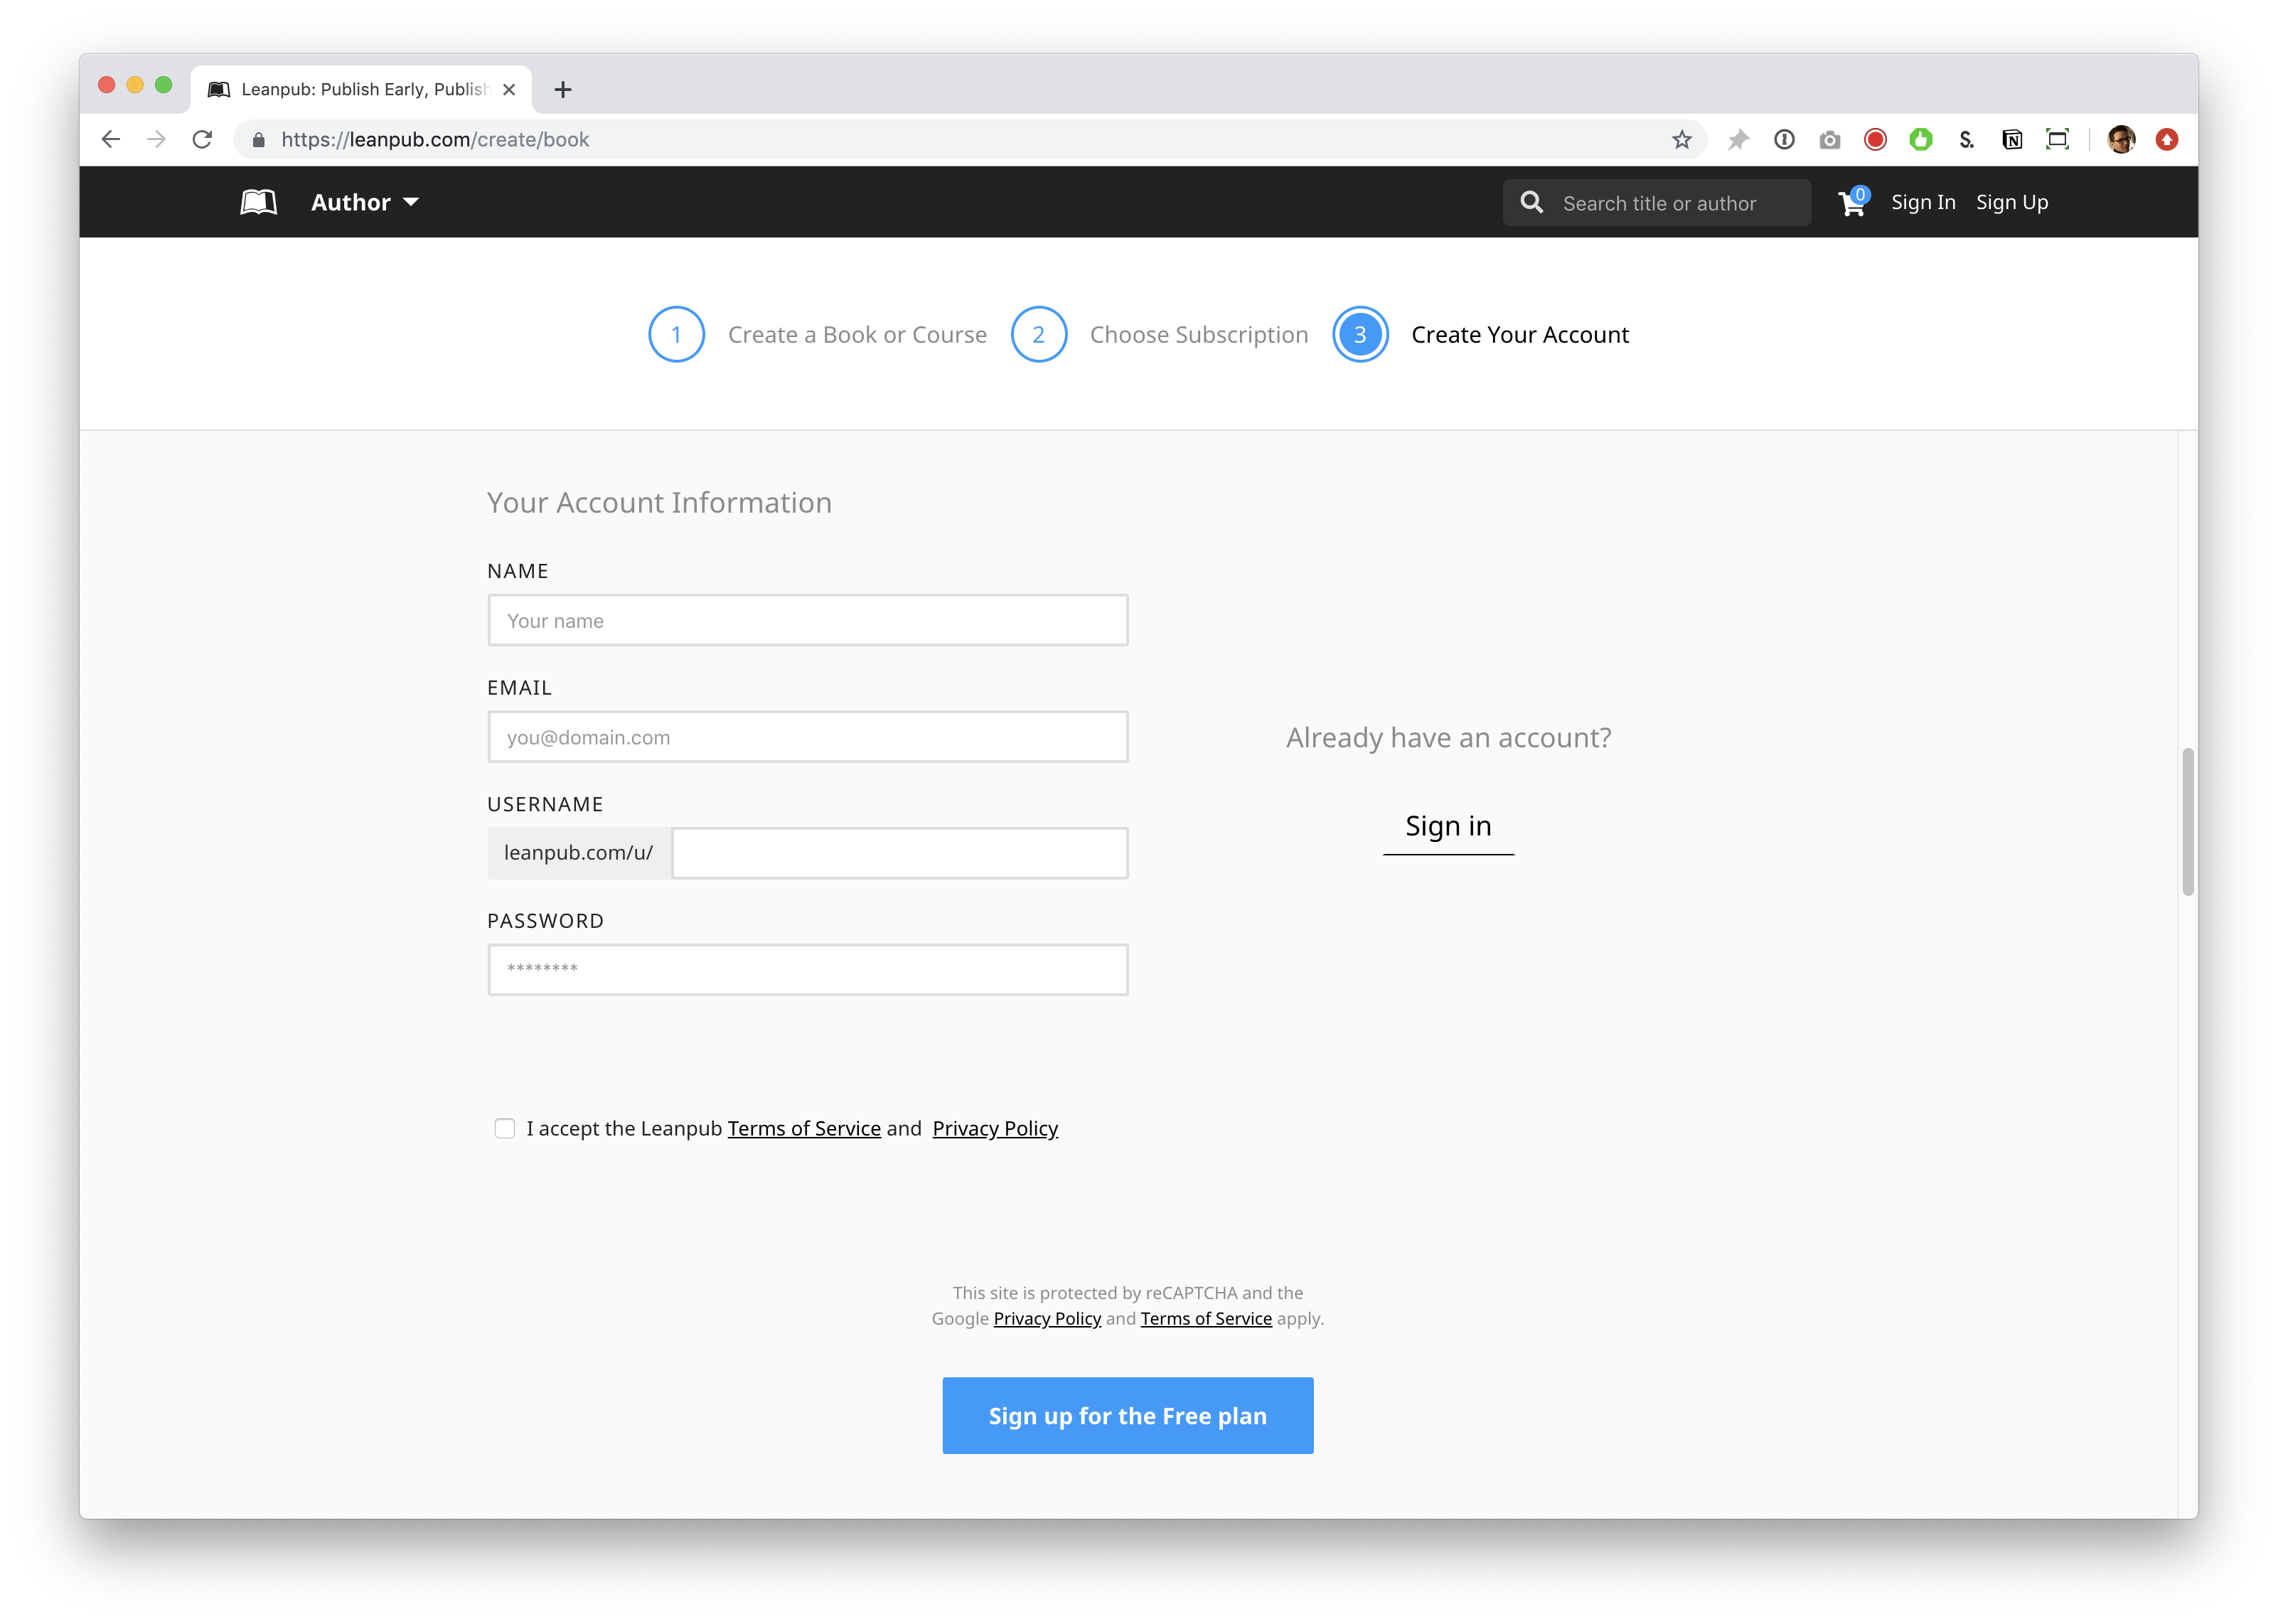
Scroll down and, if you are not signed in to a Leanpub account, you will see an option to enter information to create a new account. You will also see an option to sign in, if you already have a Leanpub account.
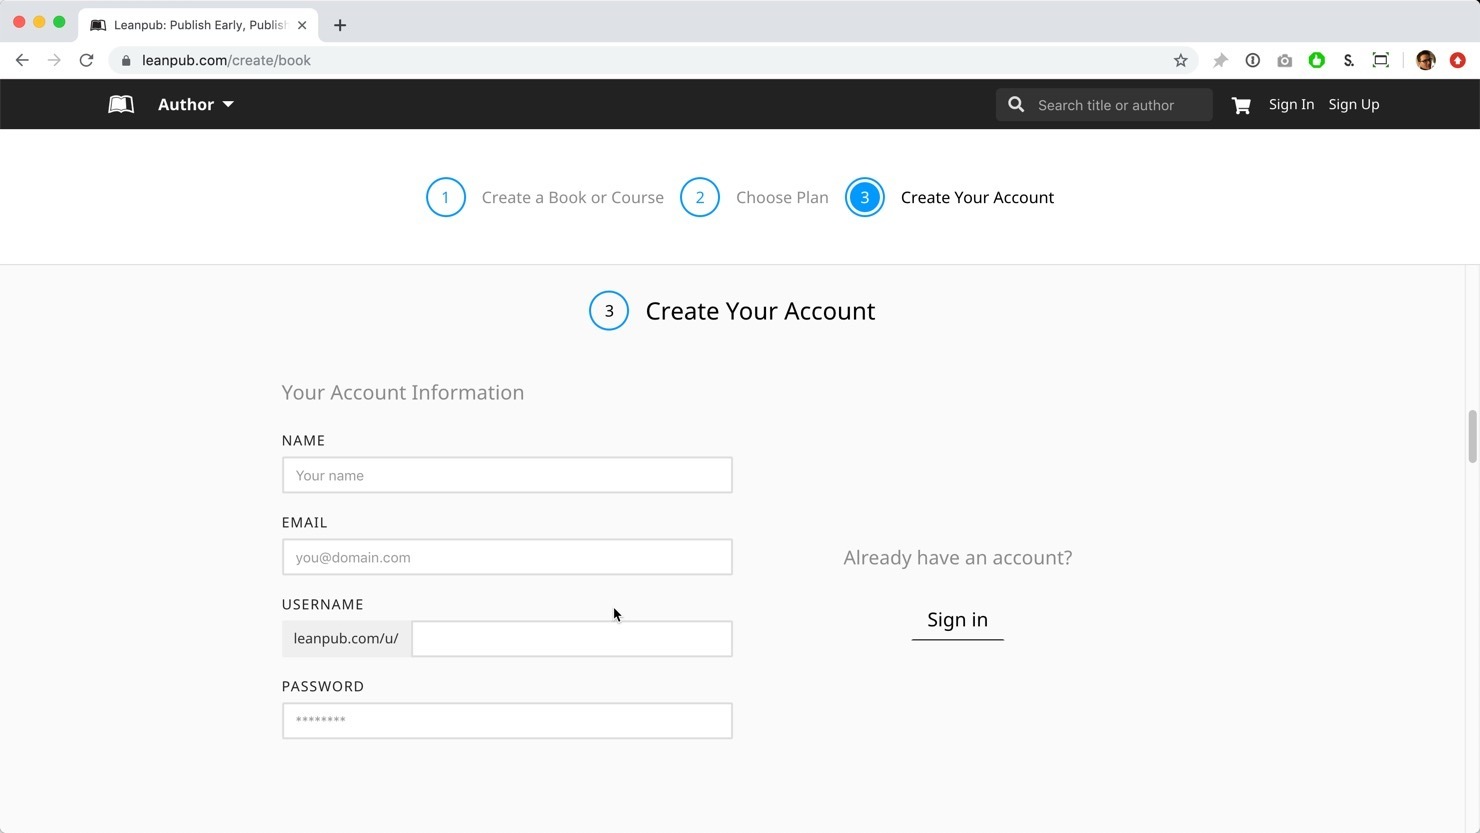
To create a new account, fill in the relevant information.
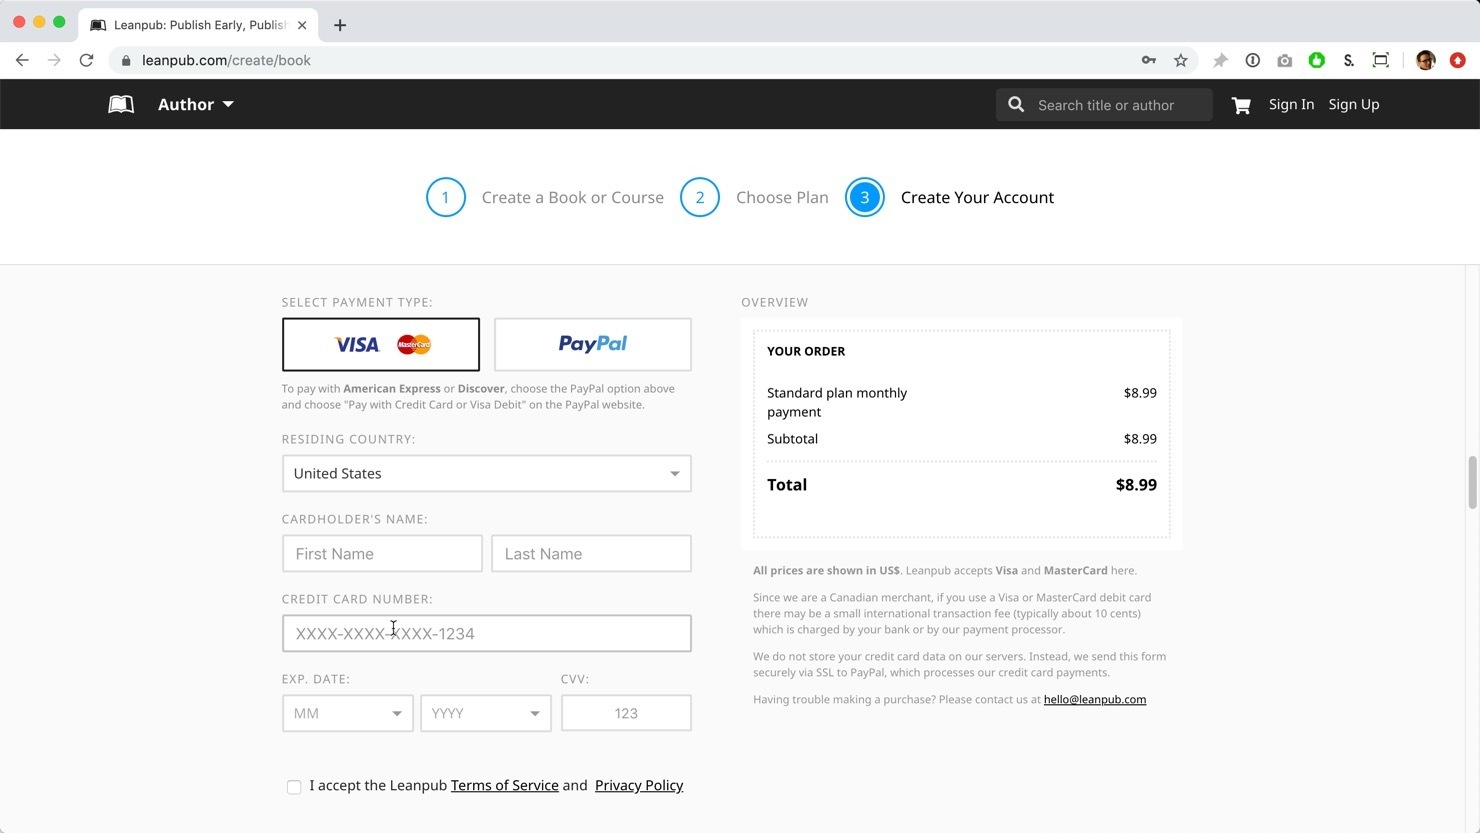
If you selected a paid account, you’ll see a form for entering your payment information:
Finally, click the blue button to finish creating your new In-Browser Plain Text Editor book.

Getting Started
You will now be taken to the Getting Started page for the In-Browser Plain Text Editor writing mode:

On this page, you will see lots of helpful information that we recommend you read at some point. However, for this tutorial, let’s just dive in to the In-Browser Plain Text editor, where you will spend your time writing your book!
To go to the editor, click the link at the top of the page that says ”If you already know what you’re doing and you just want to start writing, click here!”
Where You Write Your Book
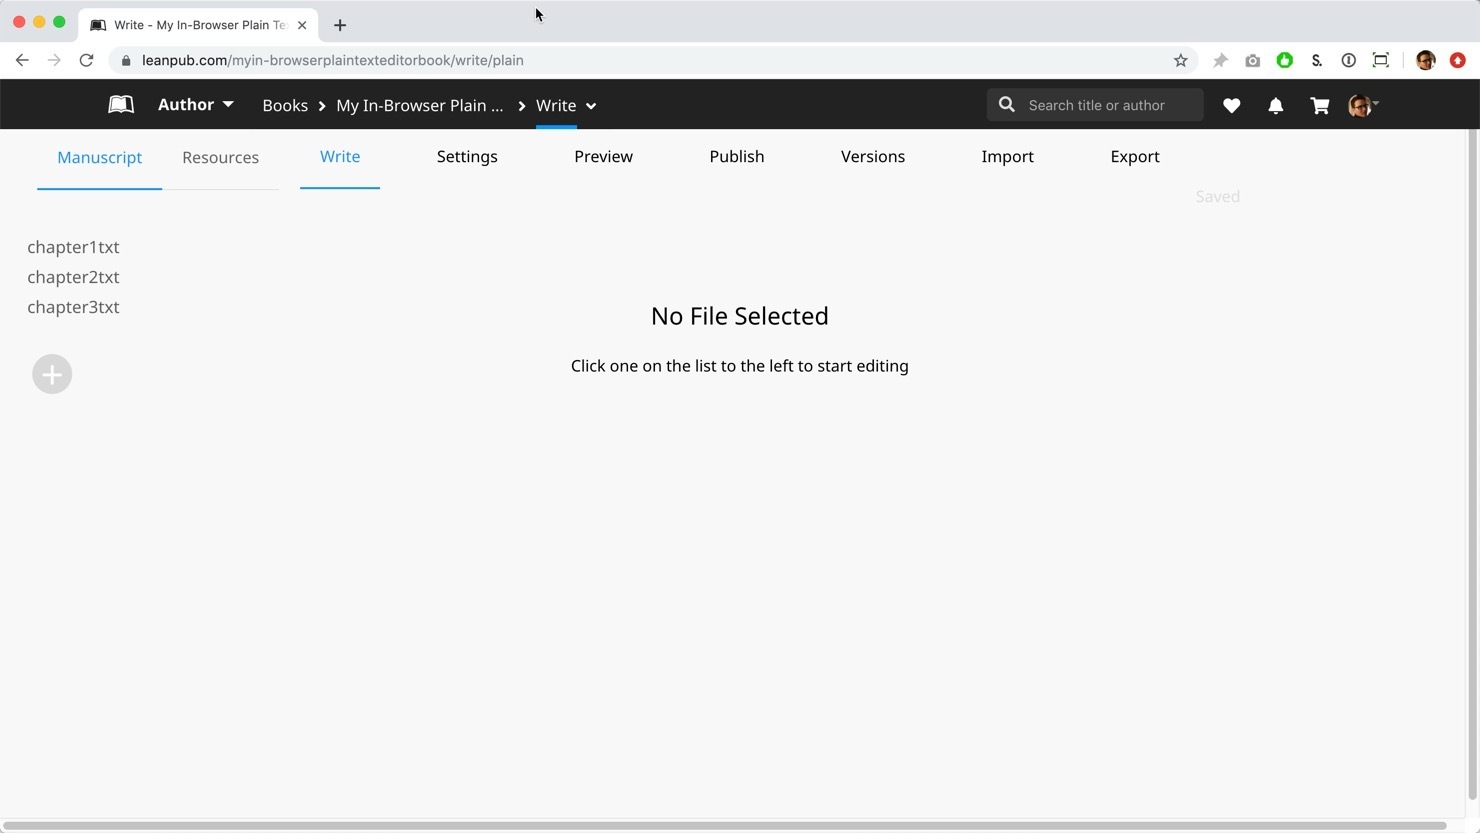
You will now be taken directly to the page where you will be writing your book:
If you use bookmarks in your web browser, we recommend you bookmark this page in your web browser in a bookmark folder for your book, but this is not required.
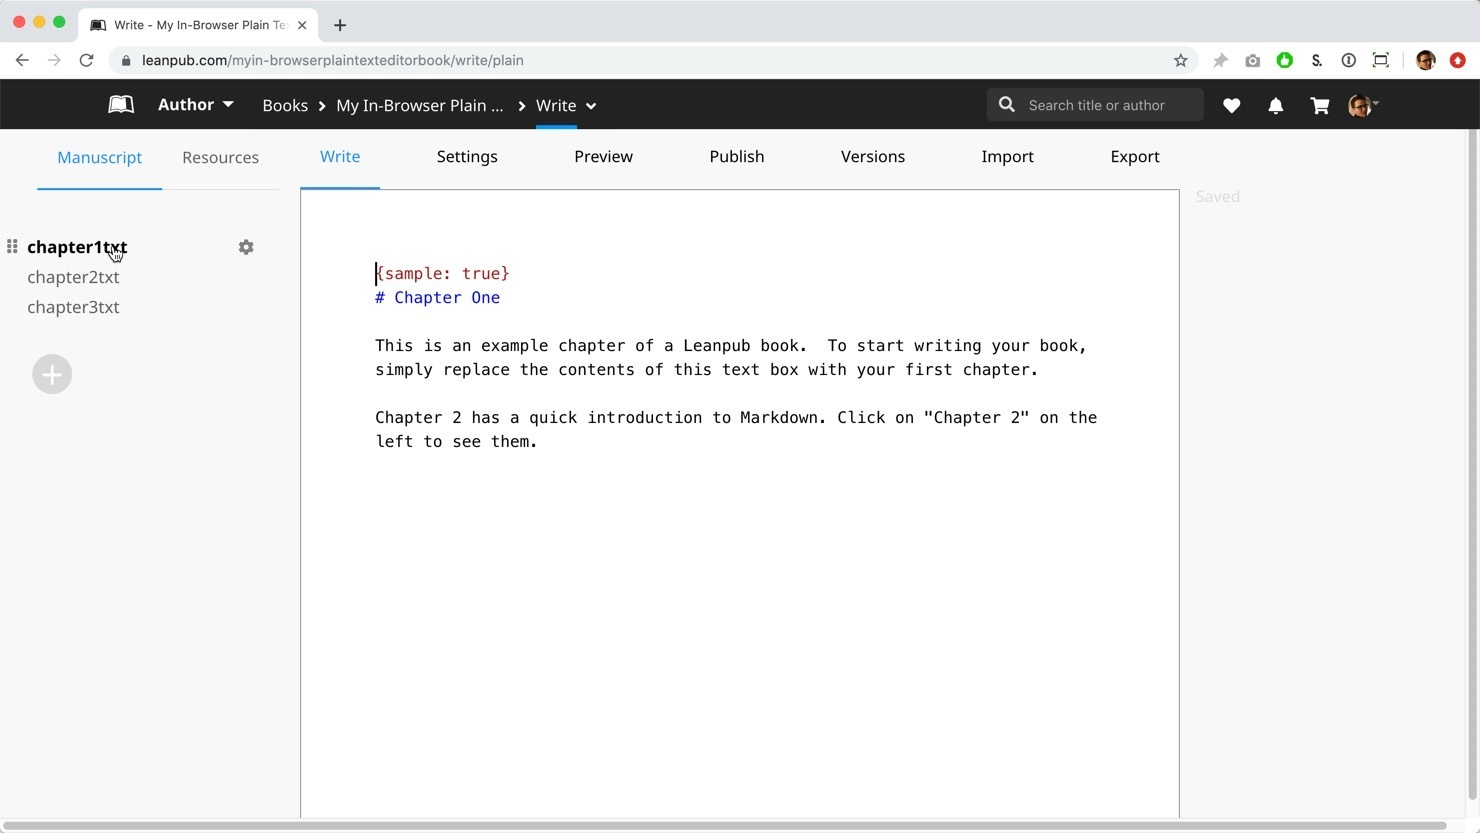
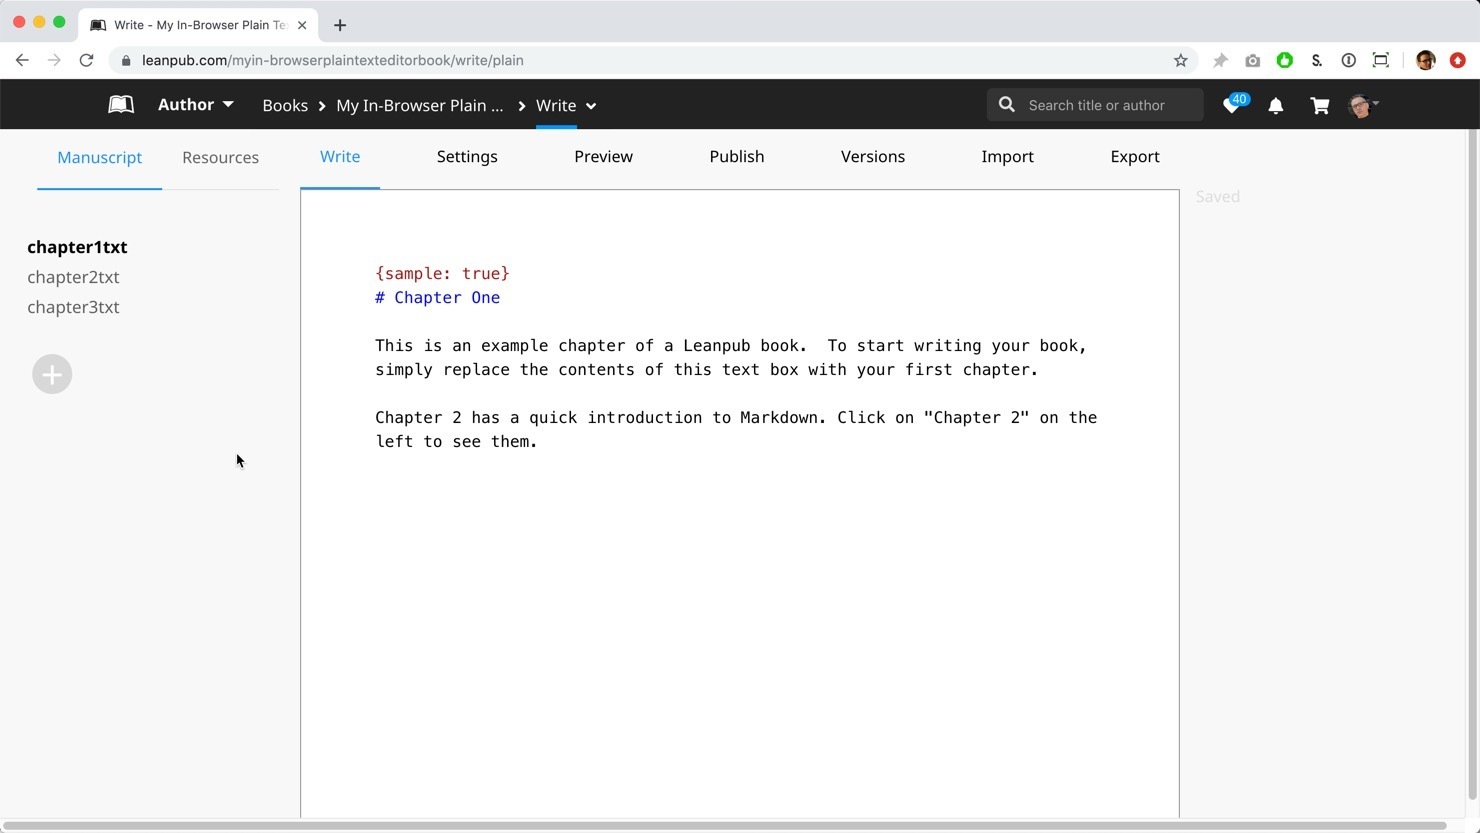
When you are on the Write page, you will see a menu of files at the top left.
You will see that we have provided three default chapter files:
First, click on the chapter1txt file at the top right.
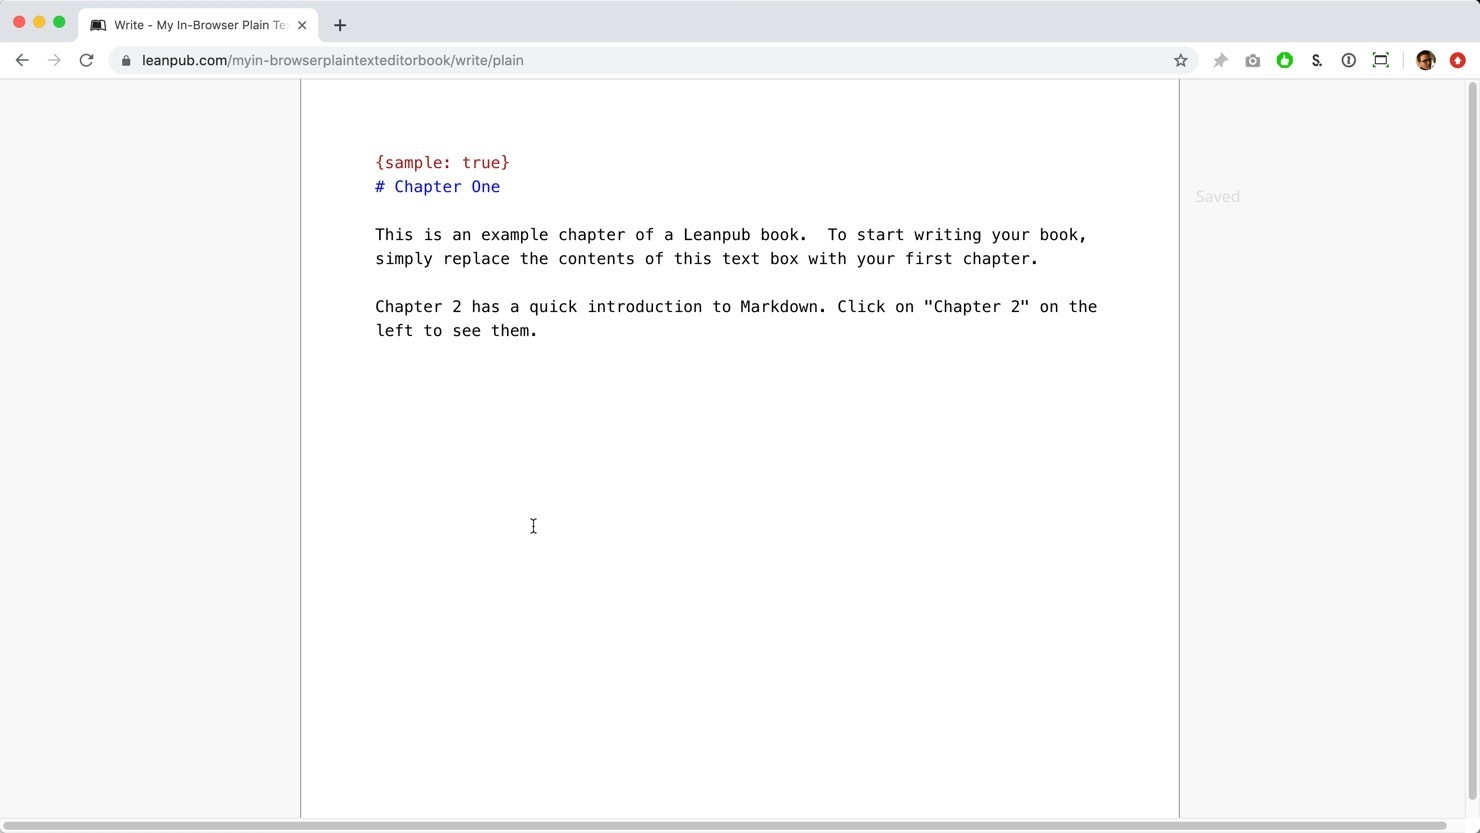
This will take you to the first chapter of the default content Leanpub provides to help you get started with each new book:
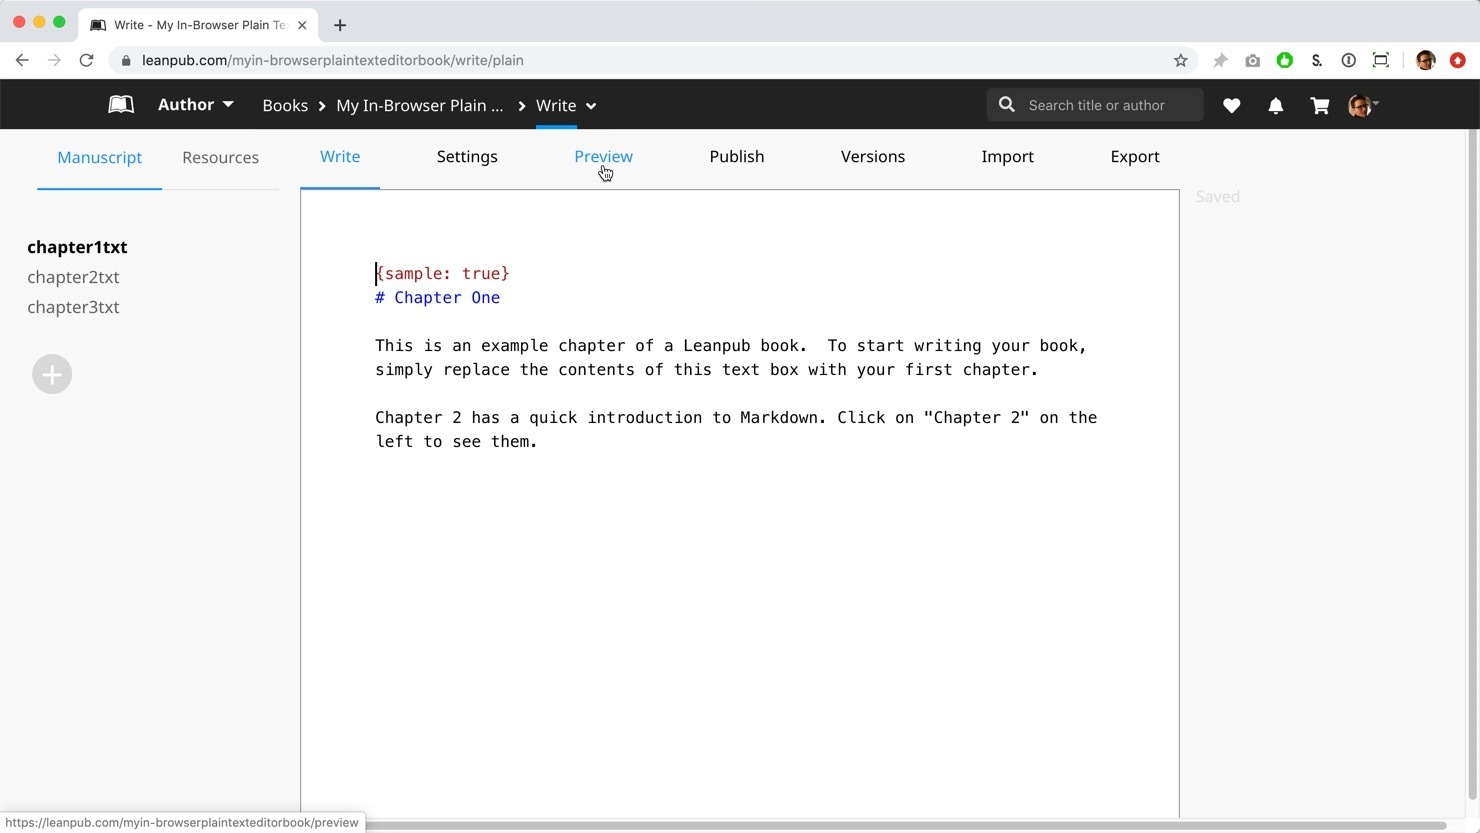
Creating a Preview
Next, let’s create a Preview of your book from the default chapter content. (A “Preview” is a private version of your book you can create at any time, to see what your book looks like.)
To do this click on the Preview link you’ll see at the top of the page:
This will take you to the Preview page for your book:
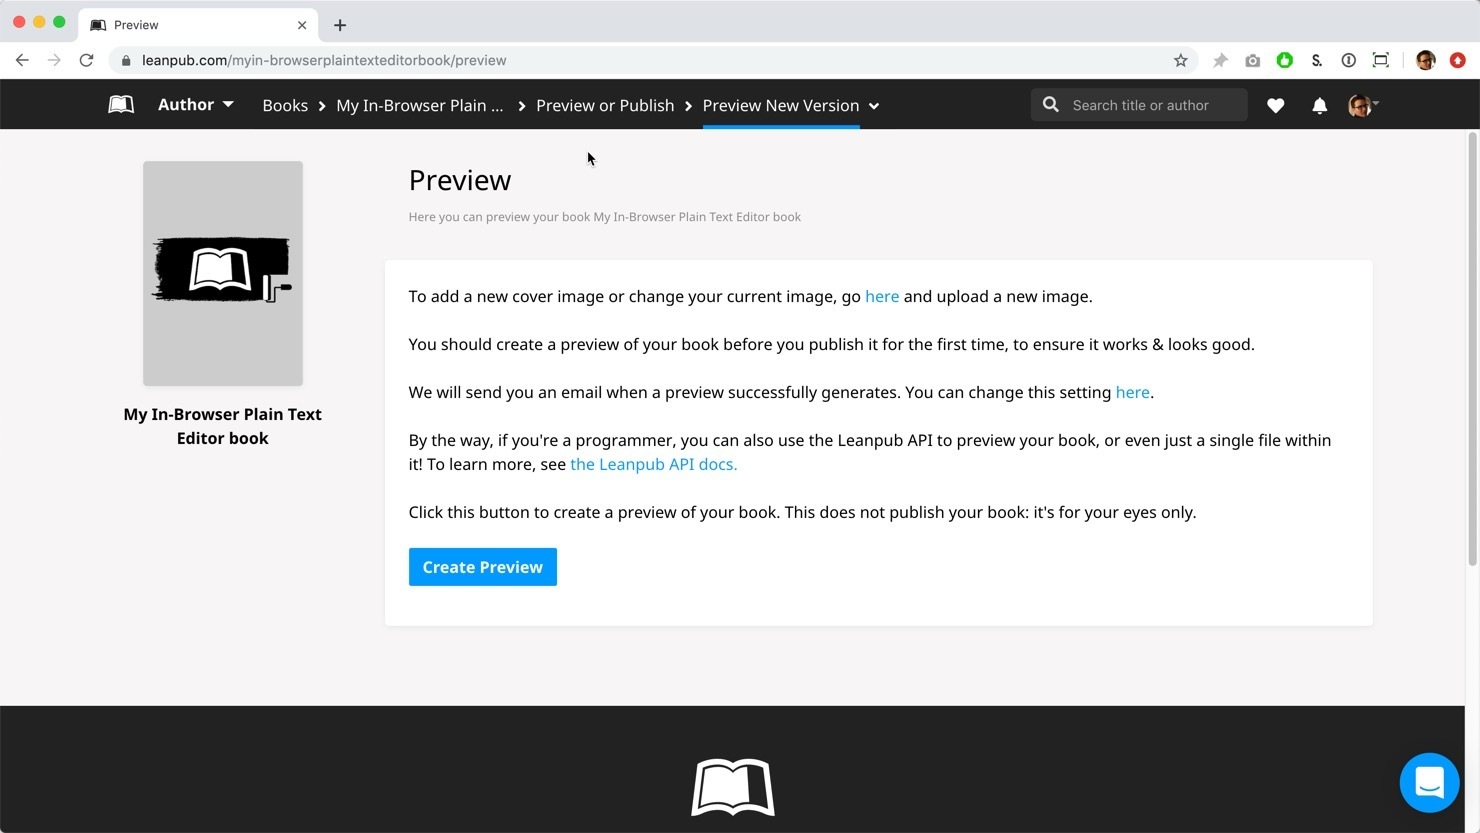
Now, click the blue “Create Preview” button.
You will now see a progress bar at the top of the page. This shows the steps carried out by Leanpub’s book generators, every time you create a new Preview.
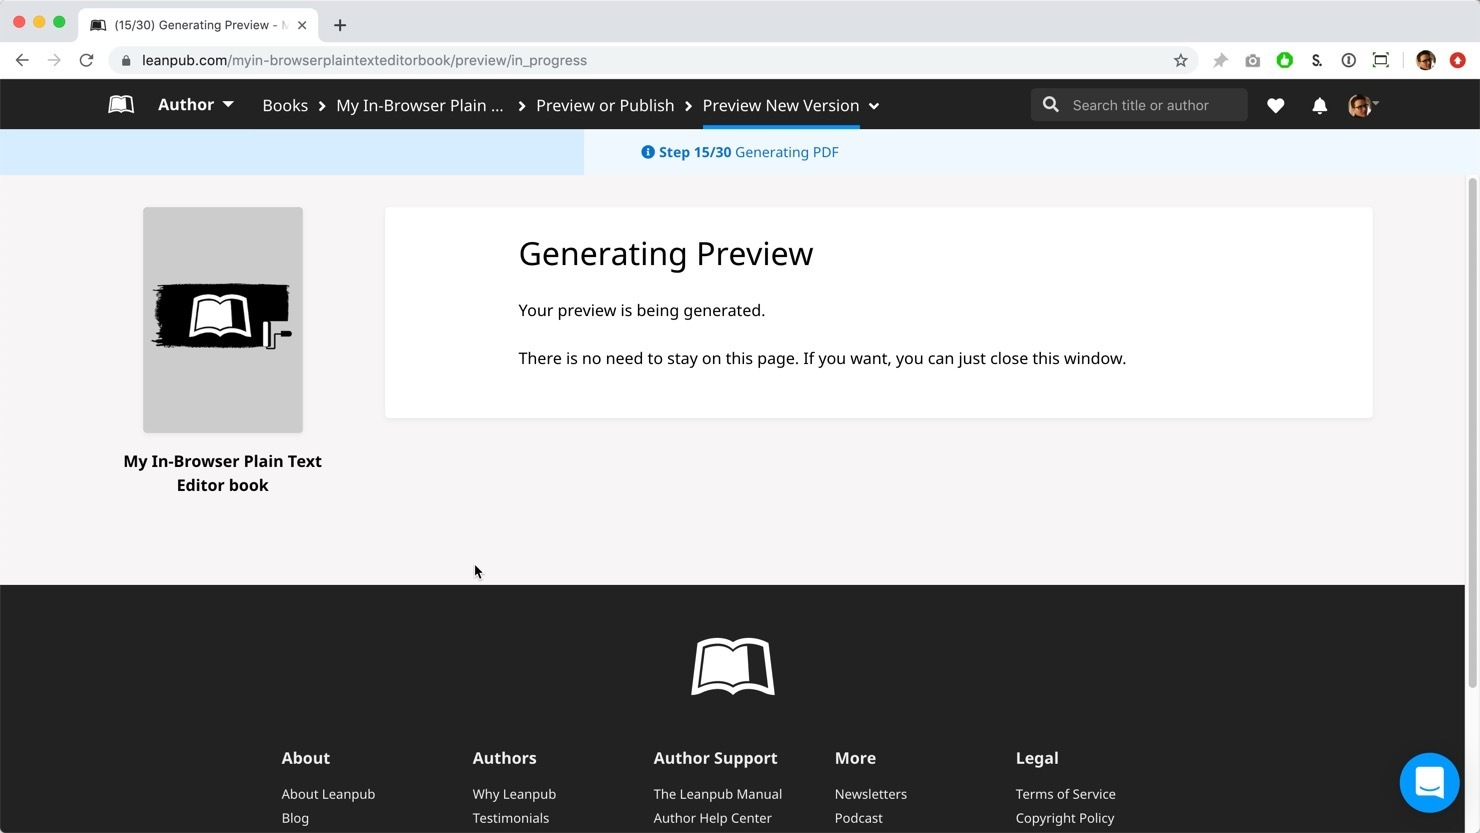
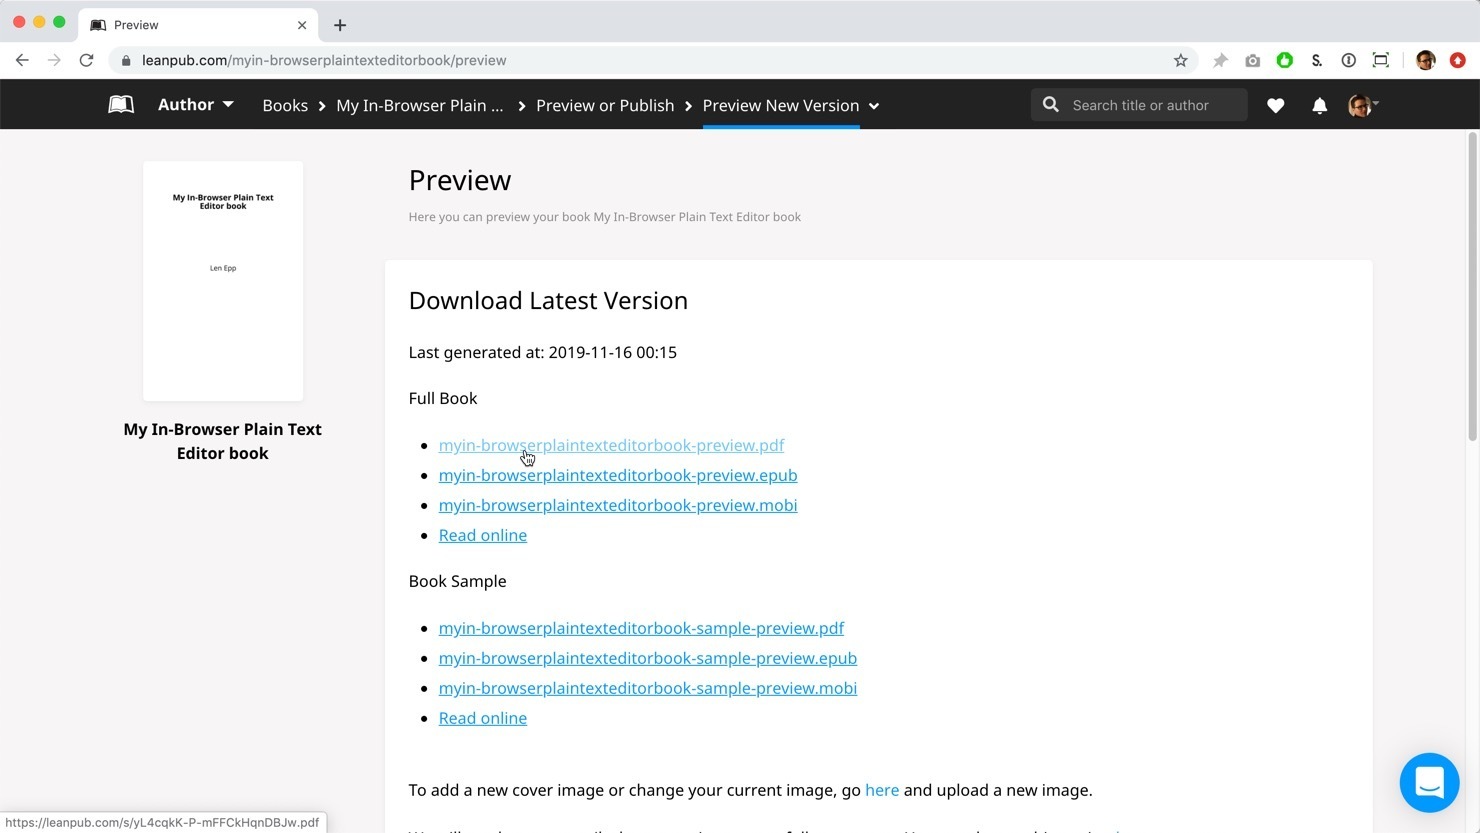
When the process is complete, the progress bar will turn green, and you’ll see the download links for your book:

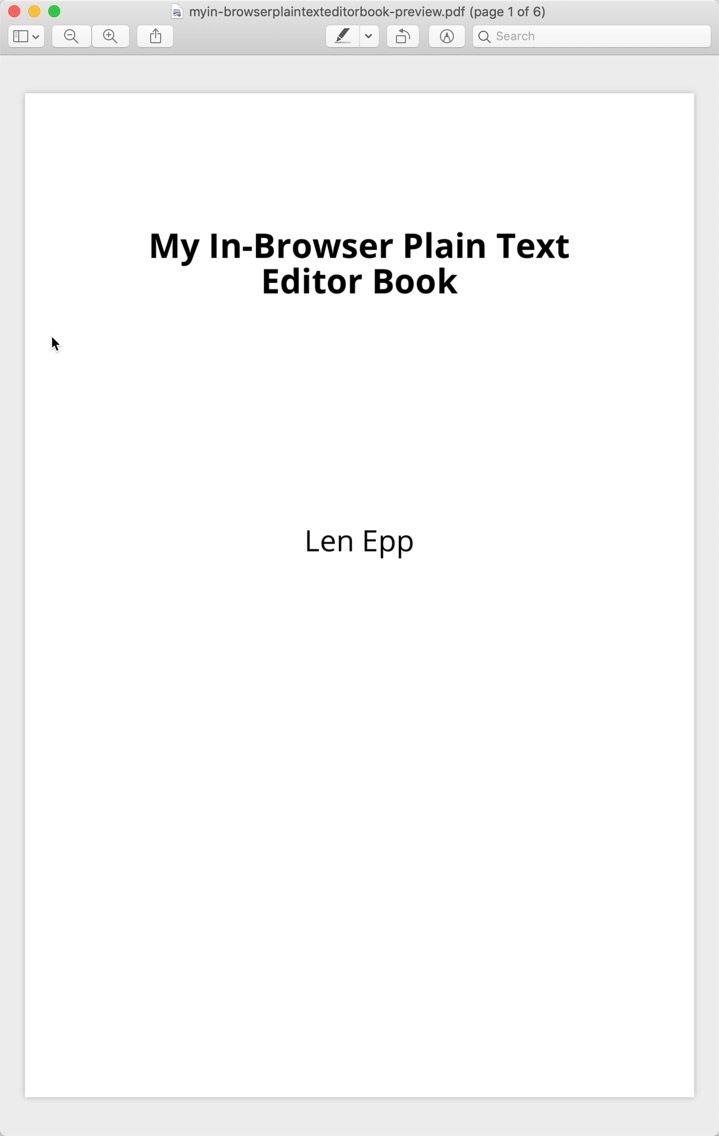
Next, click the top link to download the PDF version of your Preview:
Here’s what the PDF looks like when it is opened on a Mac (your PDF might look different, depending on your settings, and what app is used to open the PDF on your device):
Go to the fourth page in the document, and you’ll see the same content you saw on the Write page earlier, when you selected the first chapter:

(Also, your device might not open the PDF automatically. If it does not open automatically when the download completes, to open the PDF, you’ll need to go to the folder on your computer where you keep files downloaded from the internet.)
Writing In Your Book
OK, now let’s do some writing!
Let’s go back to the Write page for your book. To do that, select Write from the Leanpub menu:
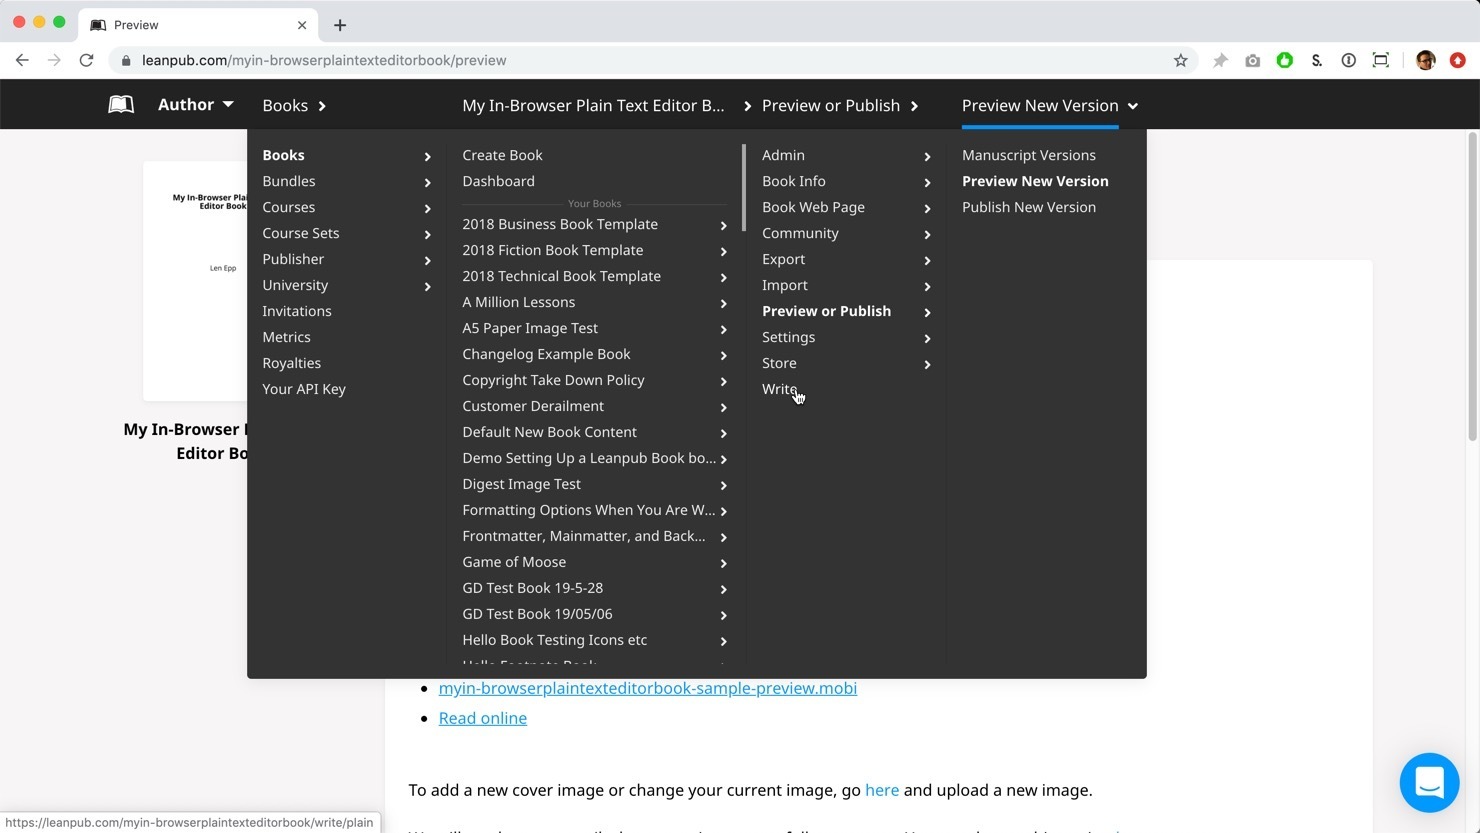
This will take you back to the Write page:
In this step of the tutorial we will show you how to write in your book, and how to add and delete chapters.
First, let’s type something in the first chapter. Click into the page, and you’ll see the editor changes to a “focus” mode, with less clutter, so you can focus when are writing:
Next, hit the Enter or Return key a couple of times and then type Hello World!
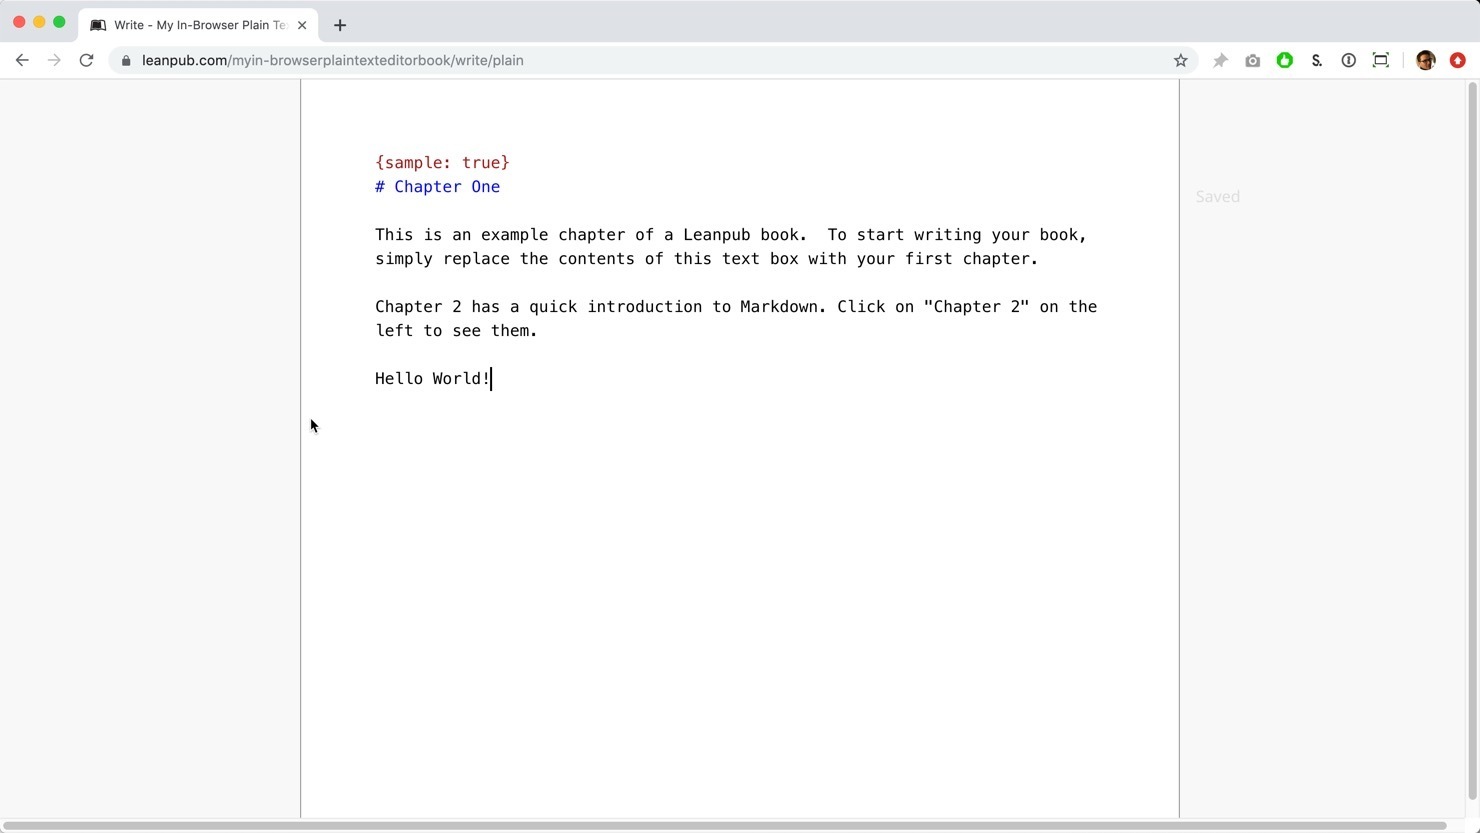
Any changes you type in the editor will be saved automatically.
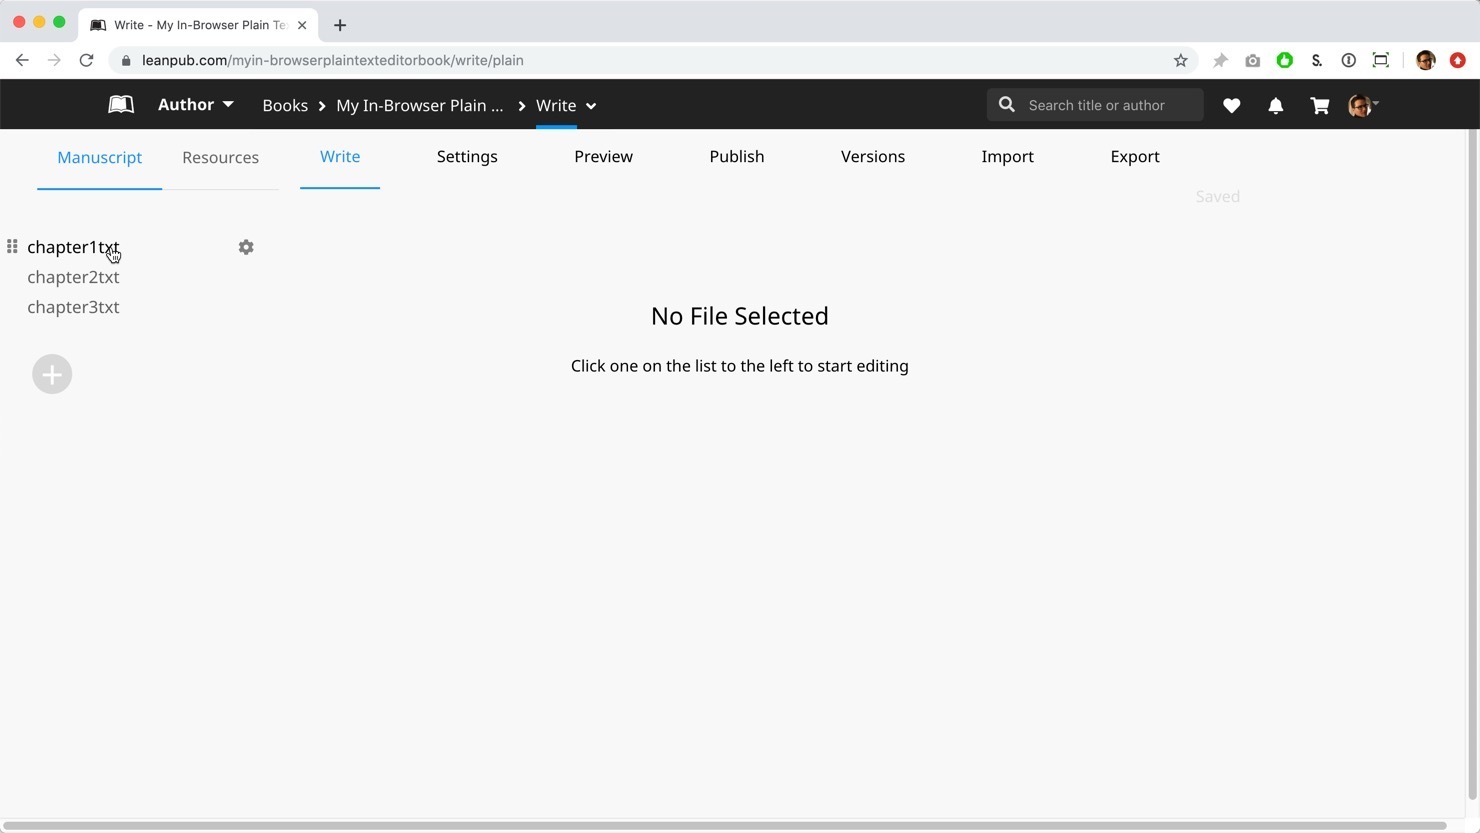
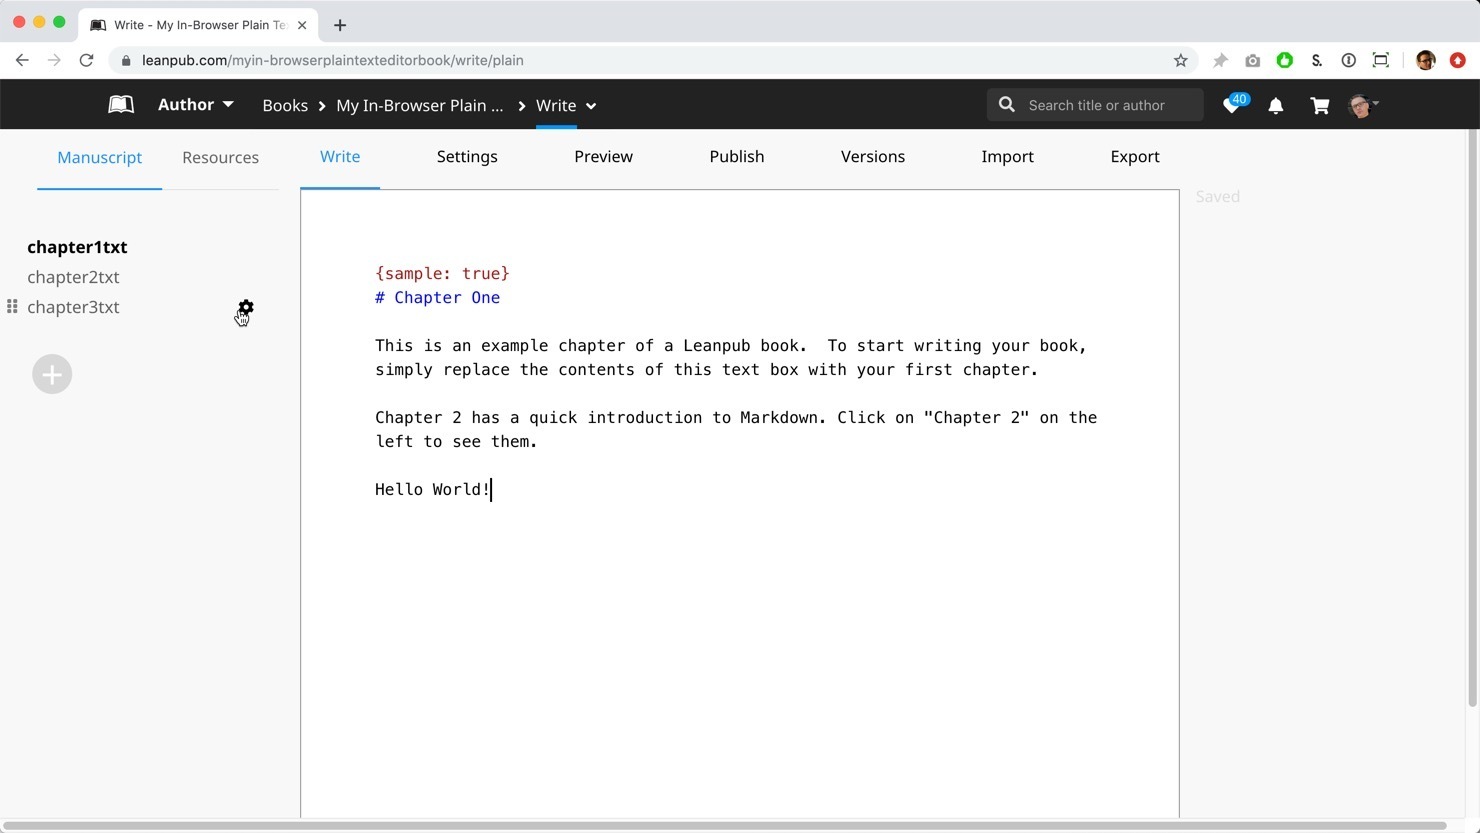
Next, let’s delete a chapter. Click on the left side of the screen to bring back the chapter menu:

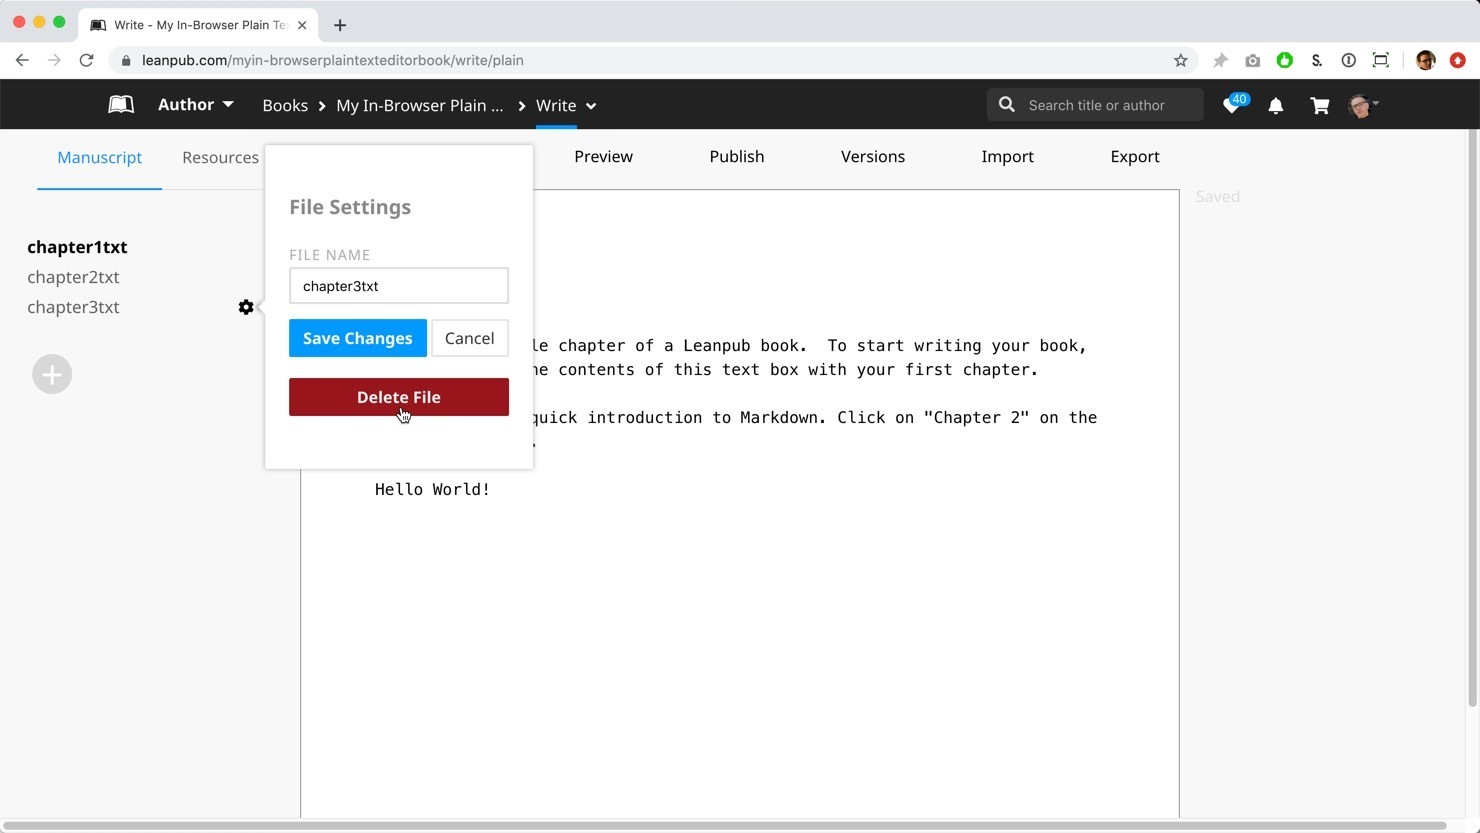
Hover your mouse over chapter3txt and click on the gear wheel icon you will see:
Now, you’ll see a box appear called File Settings:
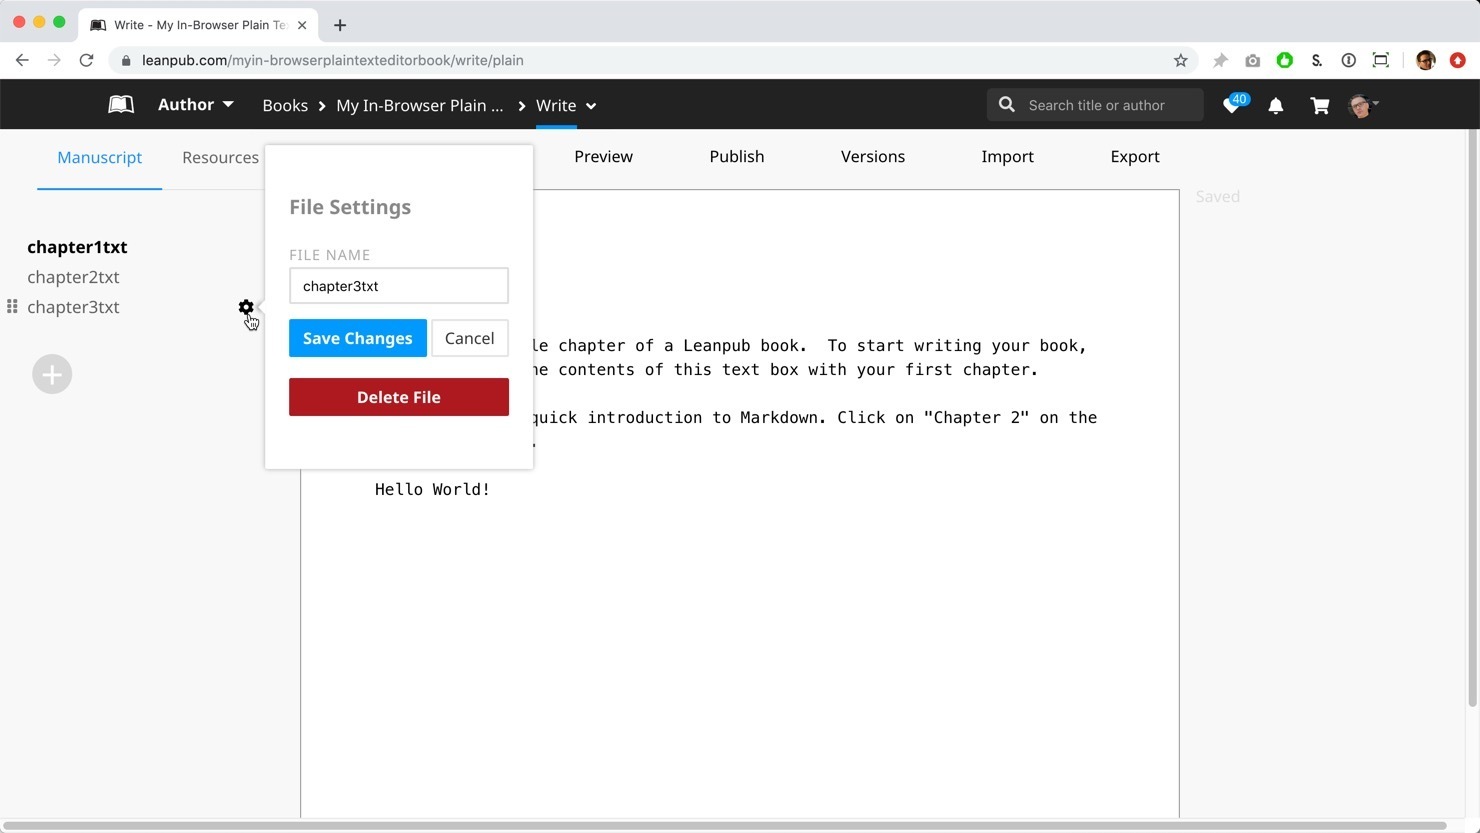
You can do a few things in the File Settings box, including rename the file.
We want to delete this chapter, so next, click the red “Delete File” button:
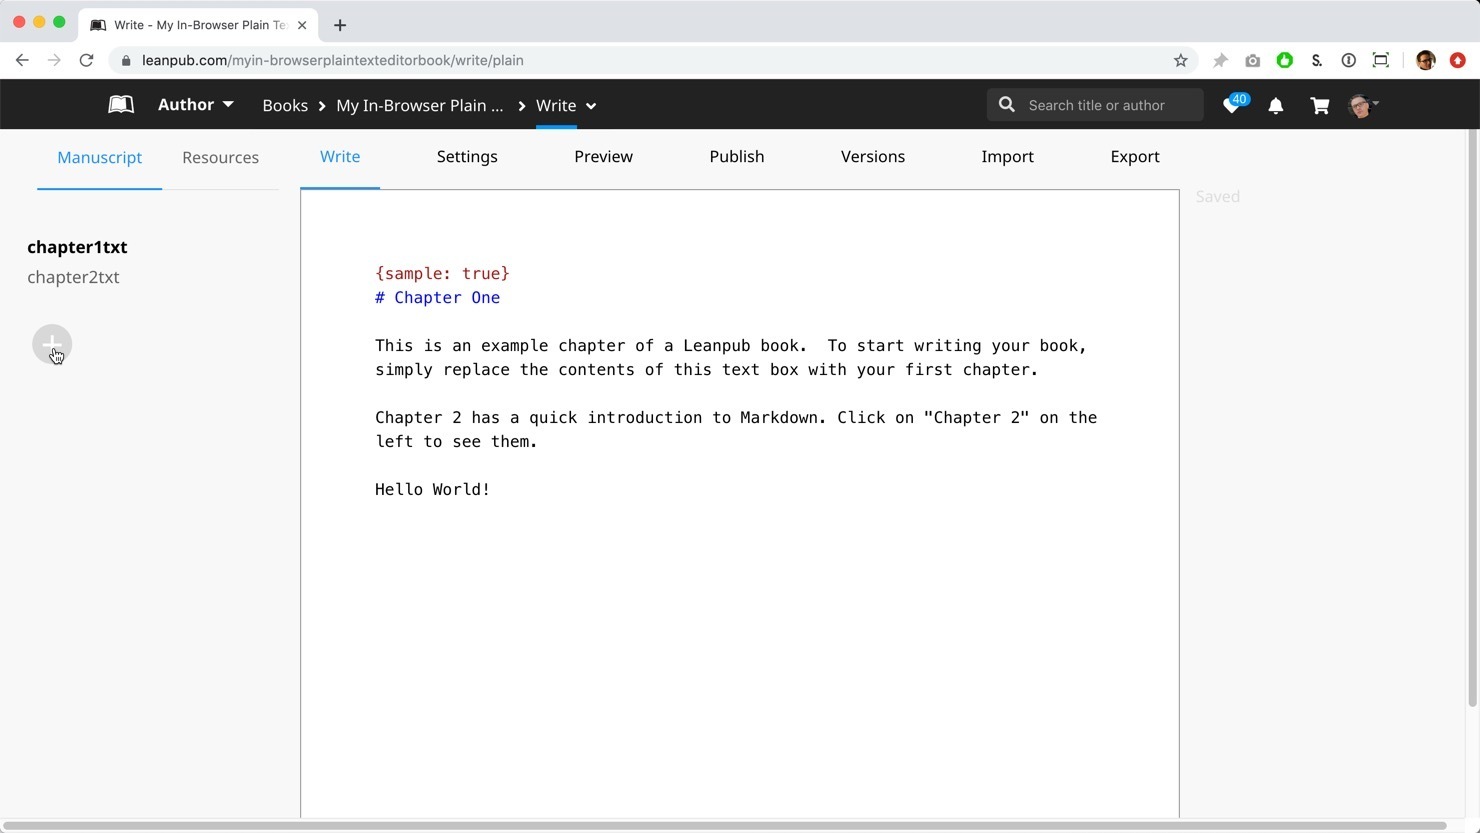
The chapter will now disappear from the menu at the left:

Next, let’s create a new chapter.
In the menu on the left, click on the + sign in the circle:
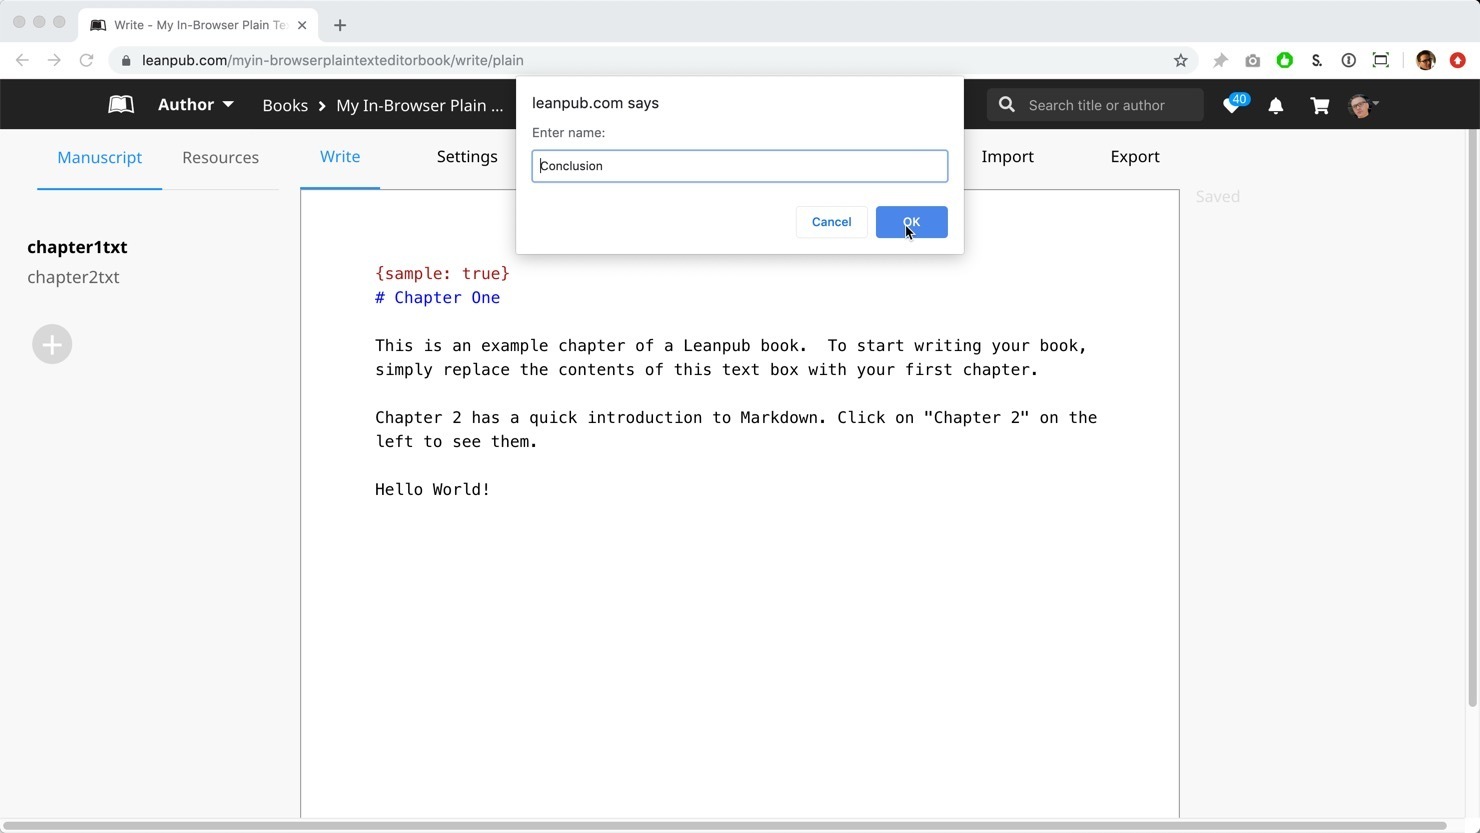
You will now see a box appear, where you can type a name for your new chapter:
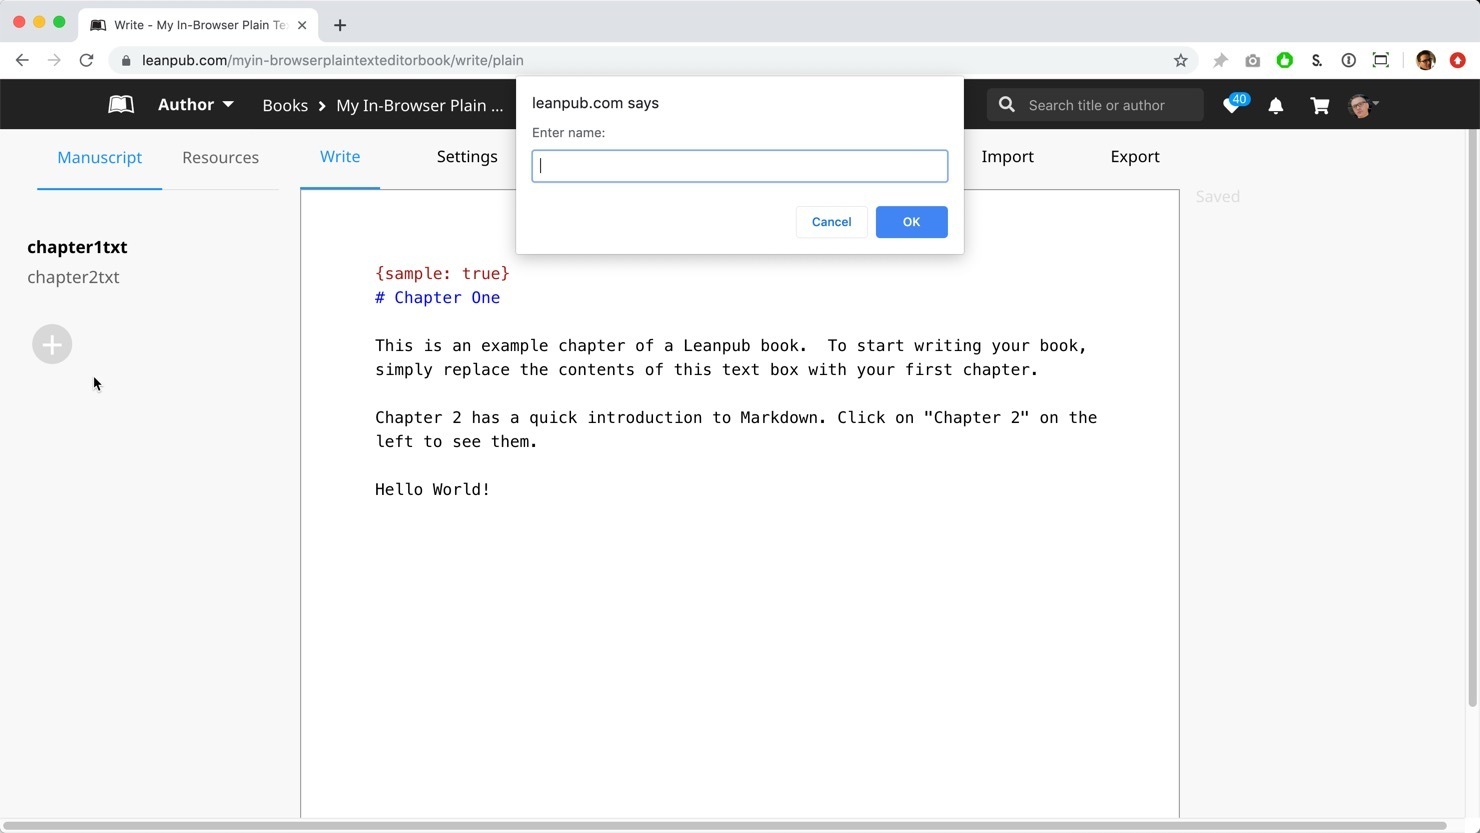
Let’s name this chapter Conclusion. First, type Conclusion in the box:
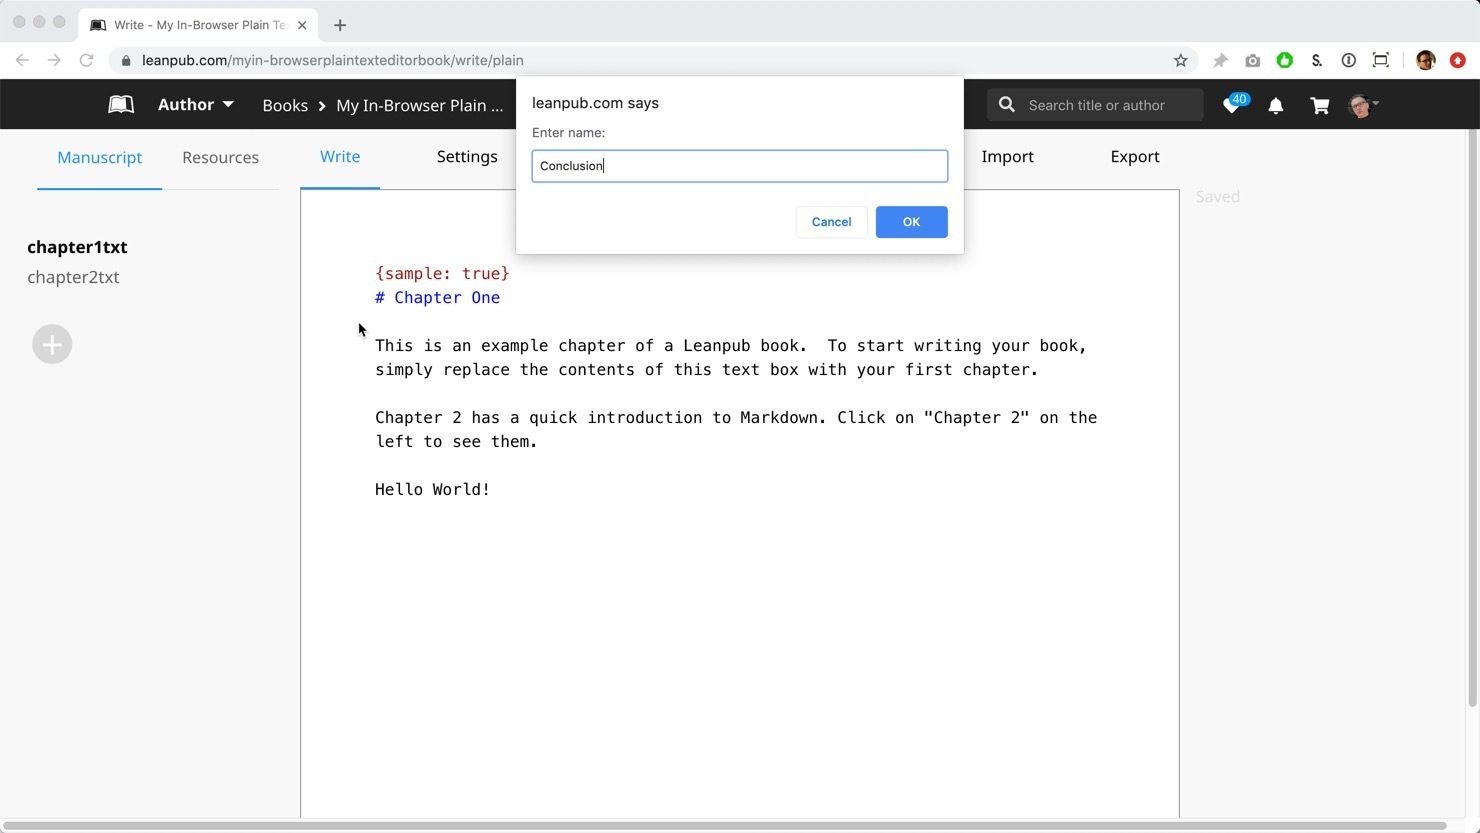
Then, click the blue OK button:
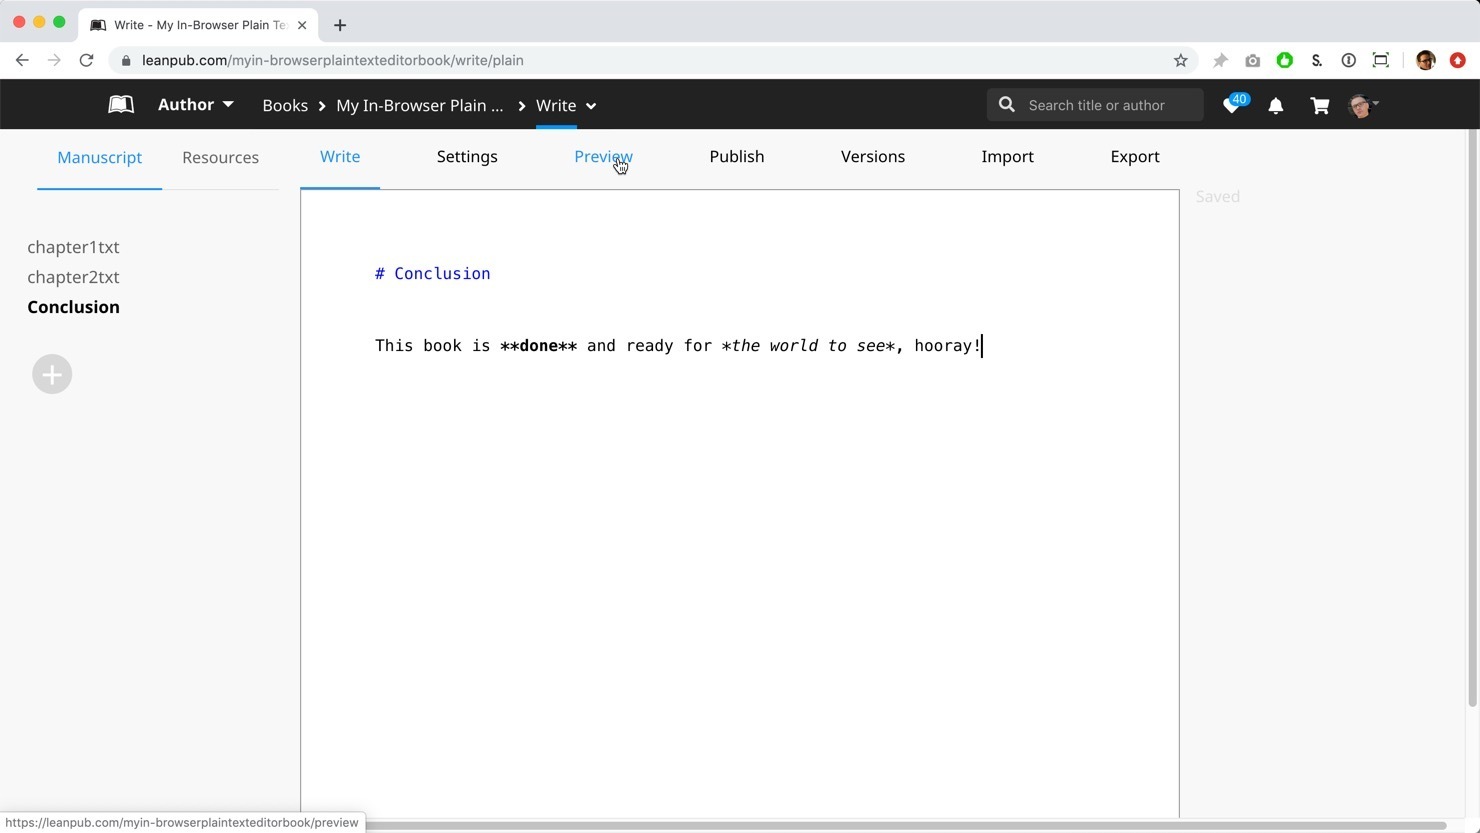
You will now see a chapter file on the left called “Conclusion.”
Now, you will see a blinking cursor in the Write tab. Type the following:

OK, let’s make a new Preview, to see what the book looks like now. Click Preview at the top of the page:
This will take you back to the Preview page for your book:
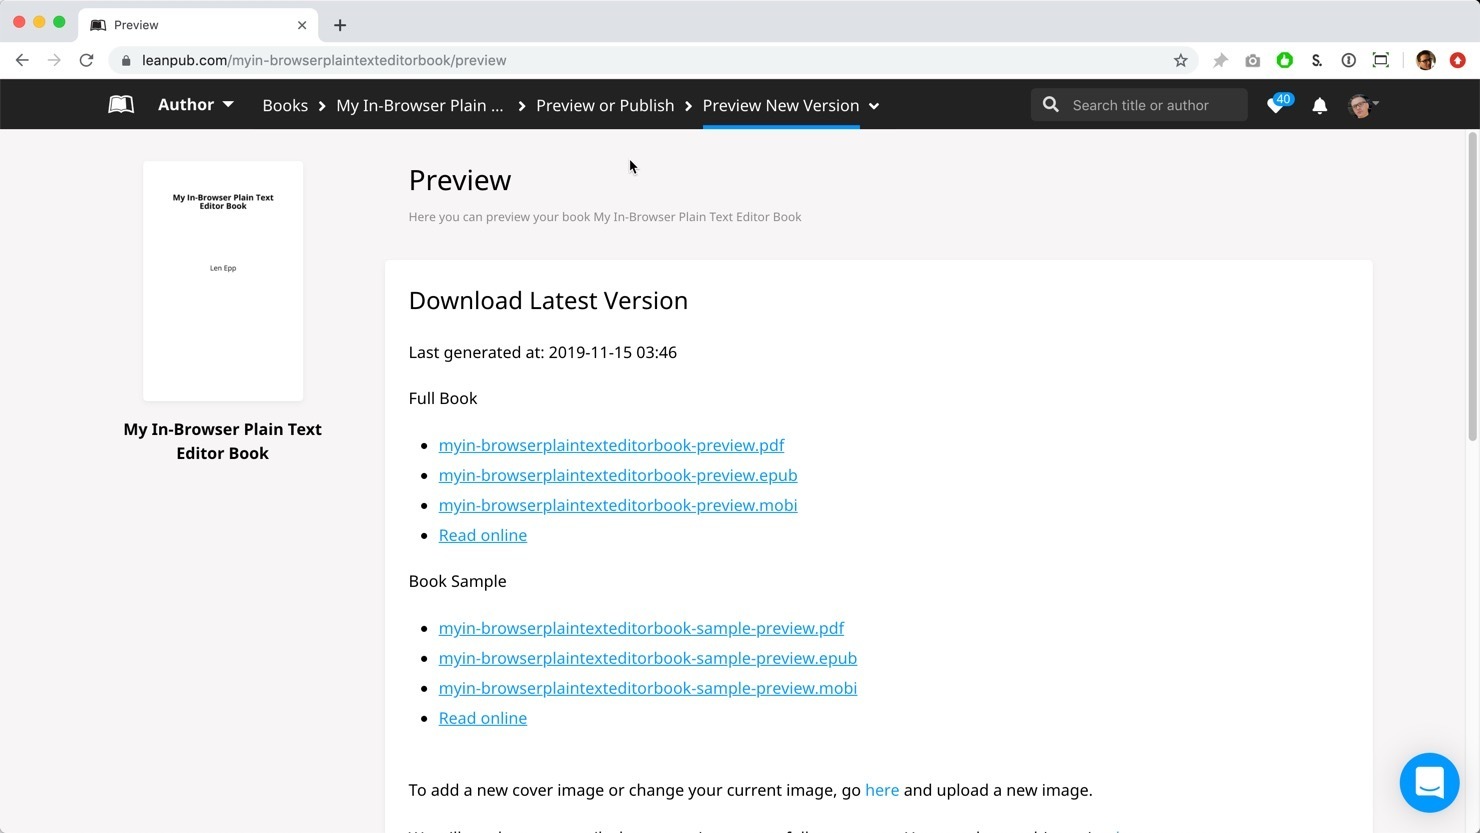
Scroll down to see the blue Create Preview button, and click on it, to generate a new Preview of your book:
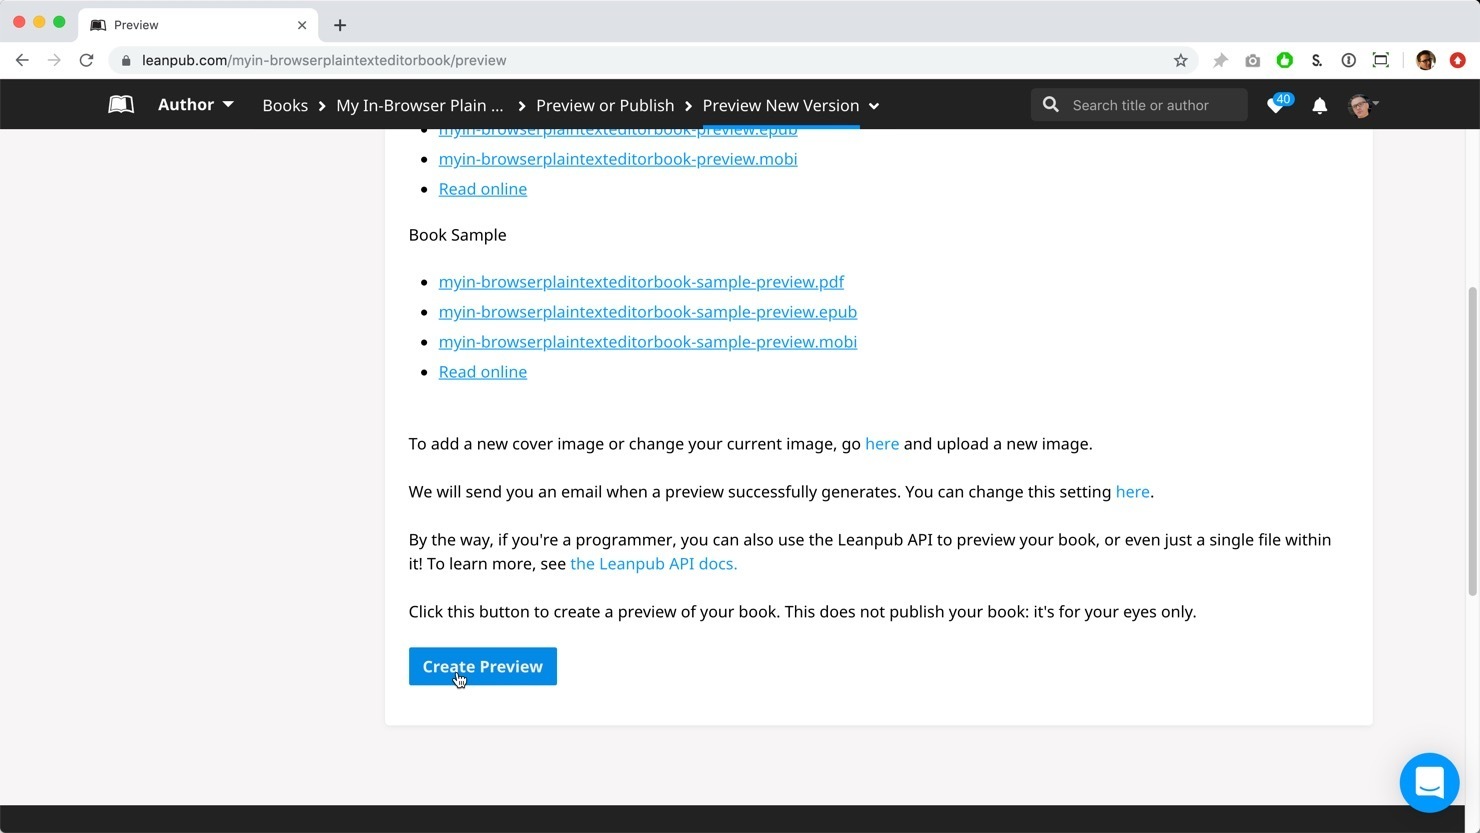
When the process completes, you will see the links, with an updated time stamp (the time is set to Coordinated Universal Time):

Click on the PDF download link at the top, like you did earlier in this walkthrough.
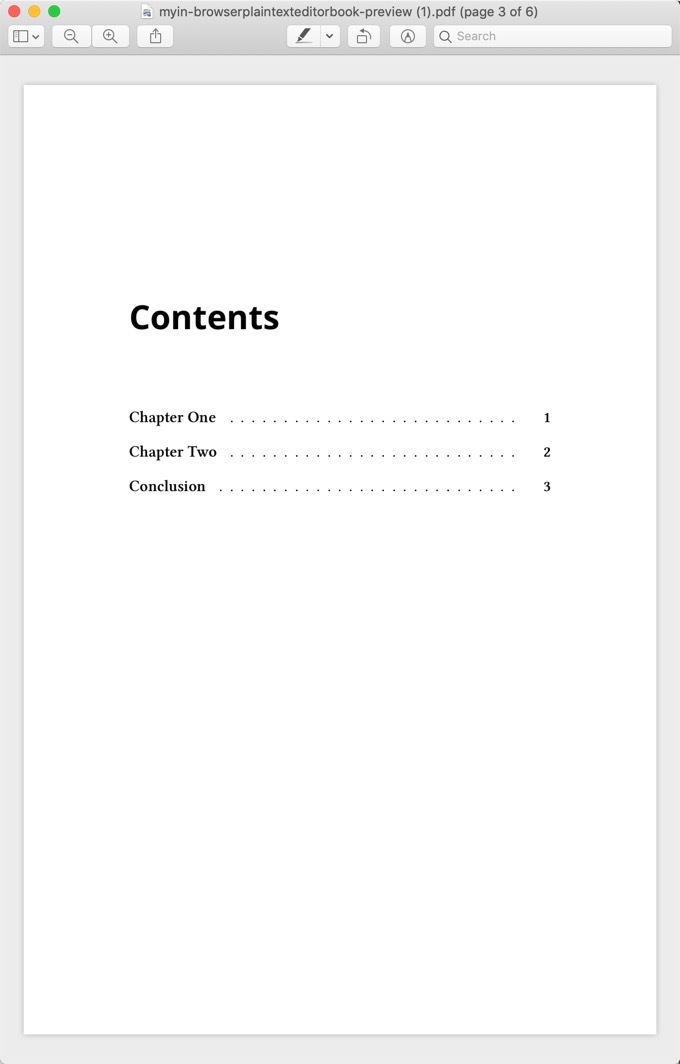
You will now see that there is a chapter called Conclusion in the table of contents:
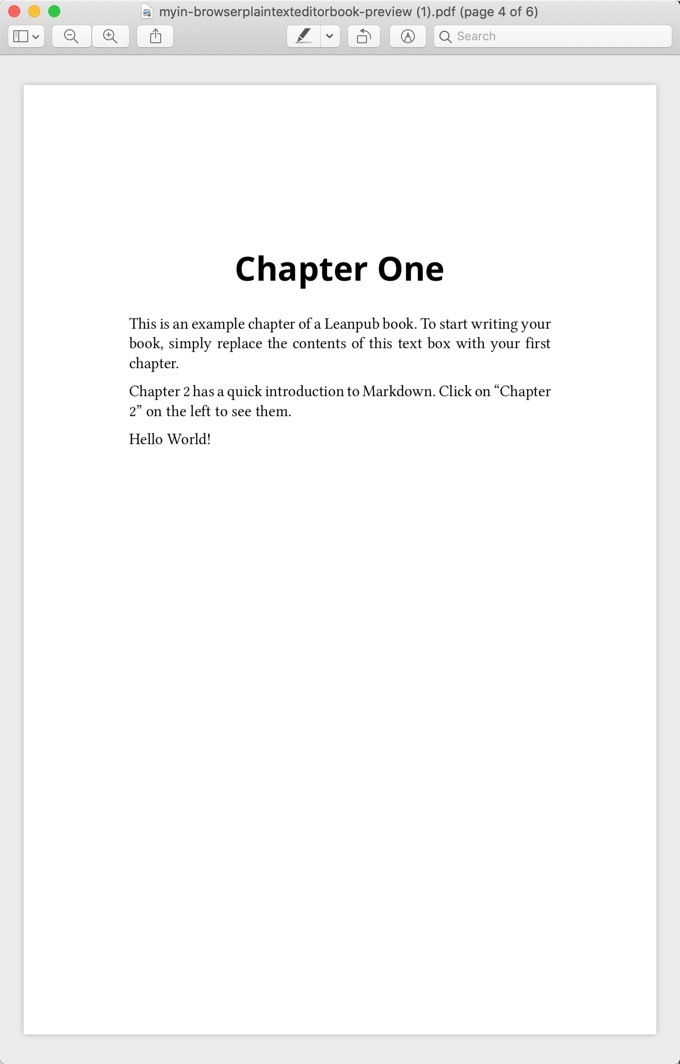
Next, go to Chapter One, and you’ll see Hello World! there now:
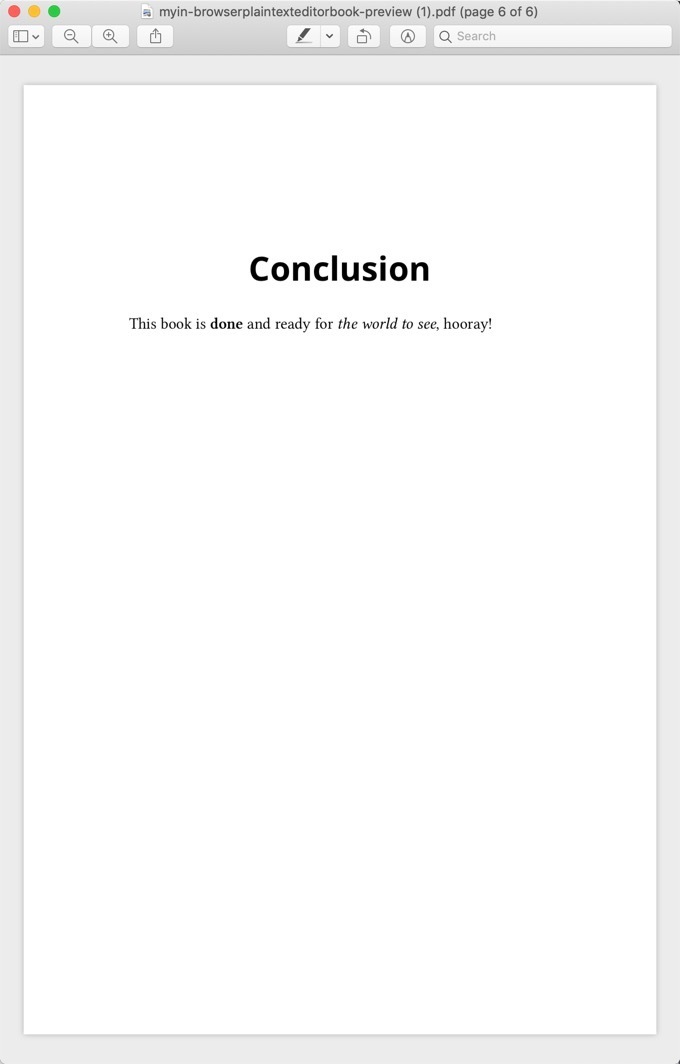
Finally, go to the end of the PDF, to see the Conclusion:
Congratulations! You’ve completed the Getting Started walkthrough for writing a book in Leanpub using our In-Browser Plain Text Editor.
Next Steps
Next, we recommend you explore the Overview page for your book:
Author > Books > [Your Book Title] > Book Info > Overview
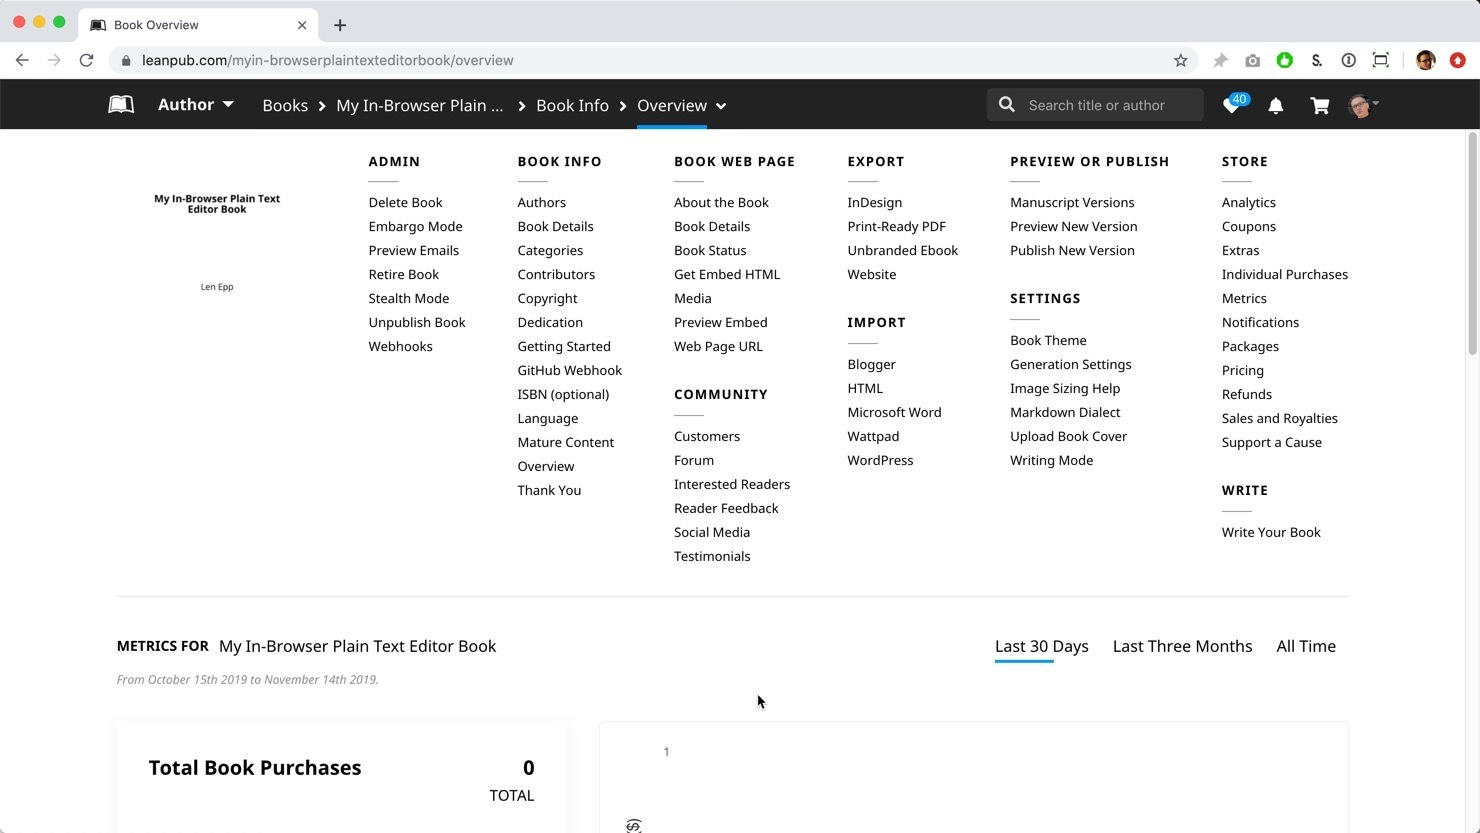
On the Overview page, you can see all the pages you need to get your book set up on Leanpub, like “Upload Book Cover” and the “Book Details” page, where you can explain what your book is about to potential readers.
You might also want to check out the Markua manual here:
Markua is the name of the manuscript markup system you use to write books in plain text on Leanpub. It’s easy to learn the basics you need to write most books. In fact you know some Markyua already: in this tutorial, when you created the Conclusion chapter, you learned to type # at the beginning of a line to make a chapter heading!
If you have any questions or can’t find anything, please search our Help Center for authors here: http://help.leanpub.com/author-help.
You can also reach out to our friendly and knowledgable community of successful Leanpub authors here: https://community.leanpub.com/c/authors.
Happy writing!
Getting Started with Dropbox Writing Mode
You can write a Leanpub book using Dropbox. In this chapter we’ll show you how to create a book and generate your first preview.
Once you have successfully generated your first preview, you’ll know everything you know to get started writing in the Dropbox writing mode.
You’ll find more information and detailed instructions on the “Getting Started” page for your book, which you’ll go to automatically when you create your book.
Creating a Book in Dropbox Writing Mode
Go to https://leanpub.com/create/book to create a new book in Dropbox.

Next, type a title for your book into the “TITLE” box. You can change your title later.
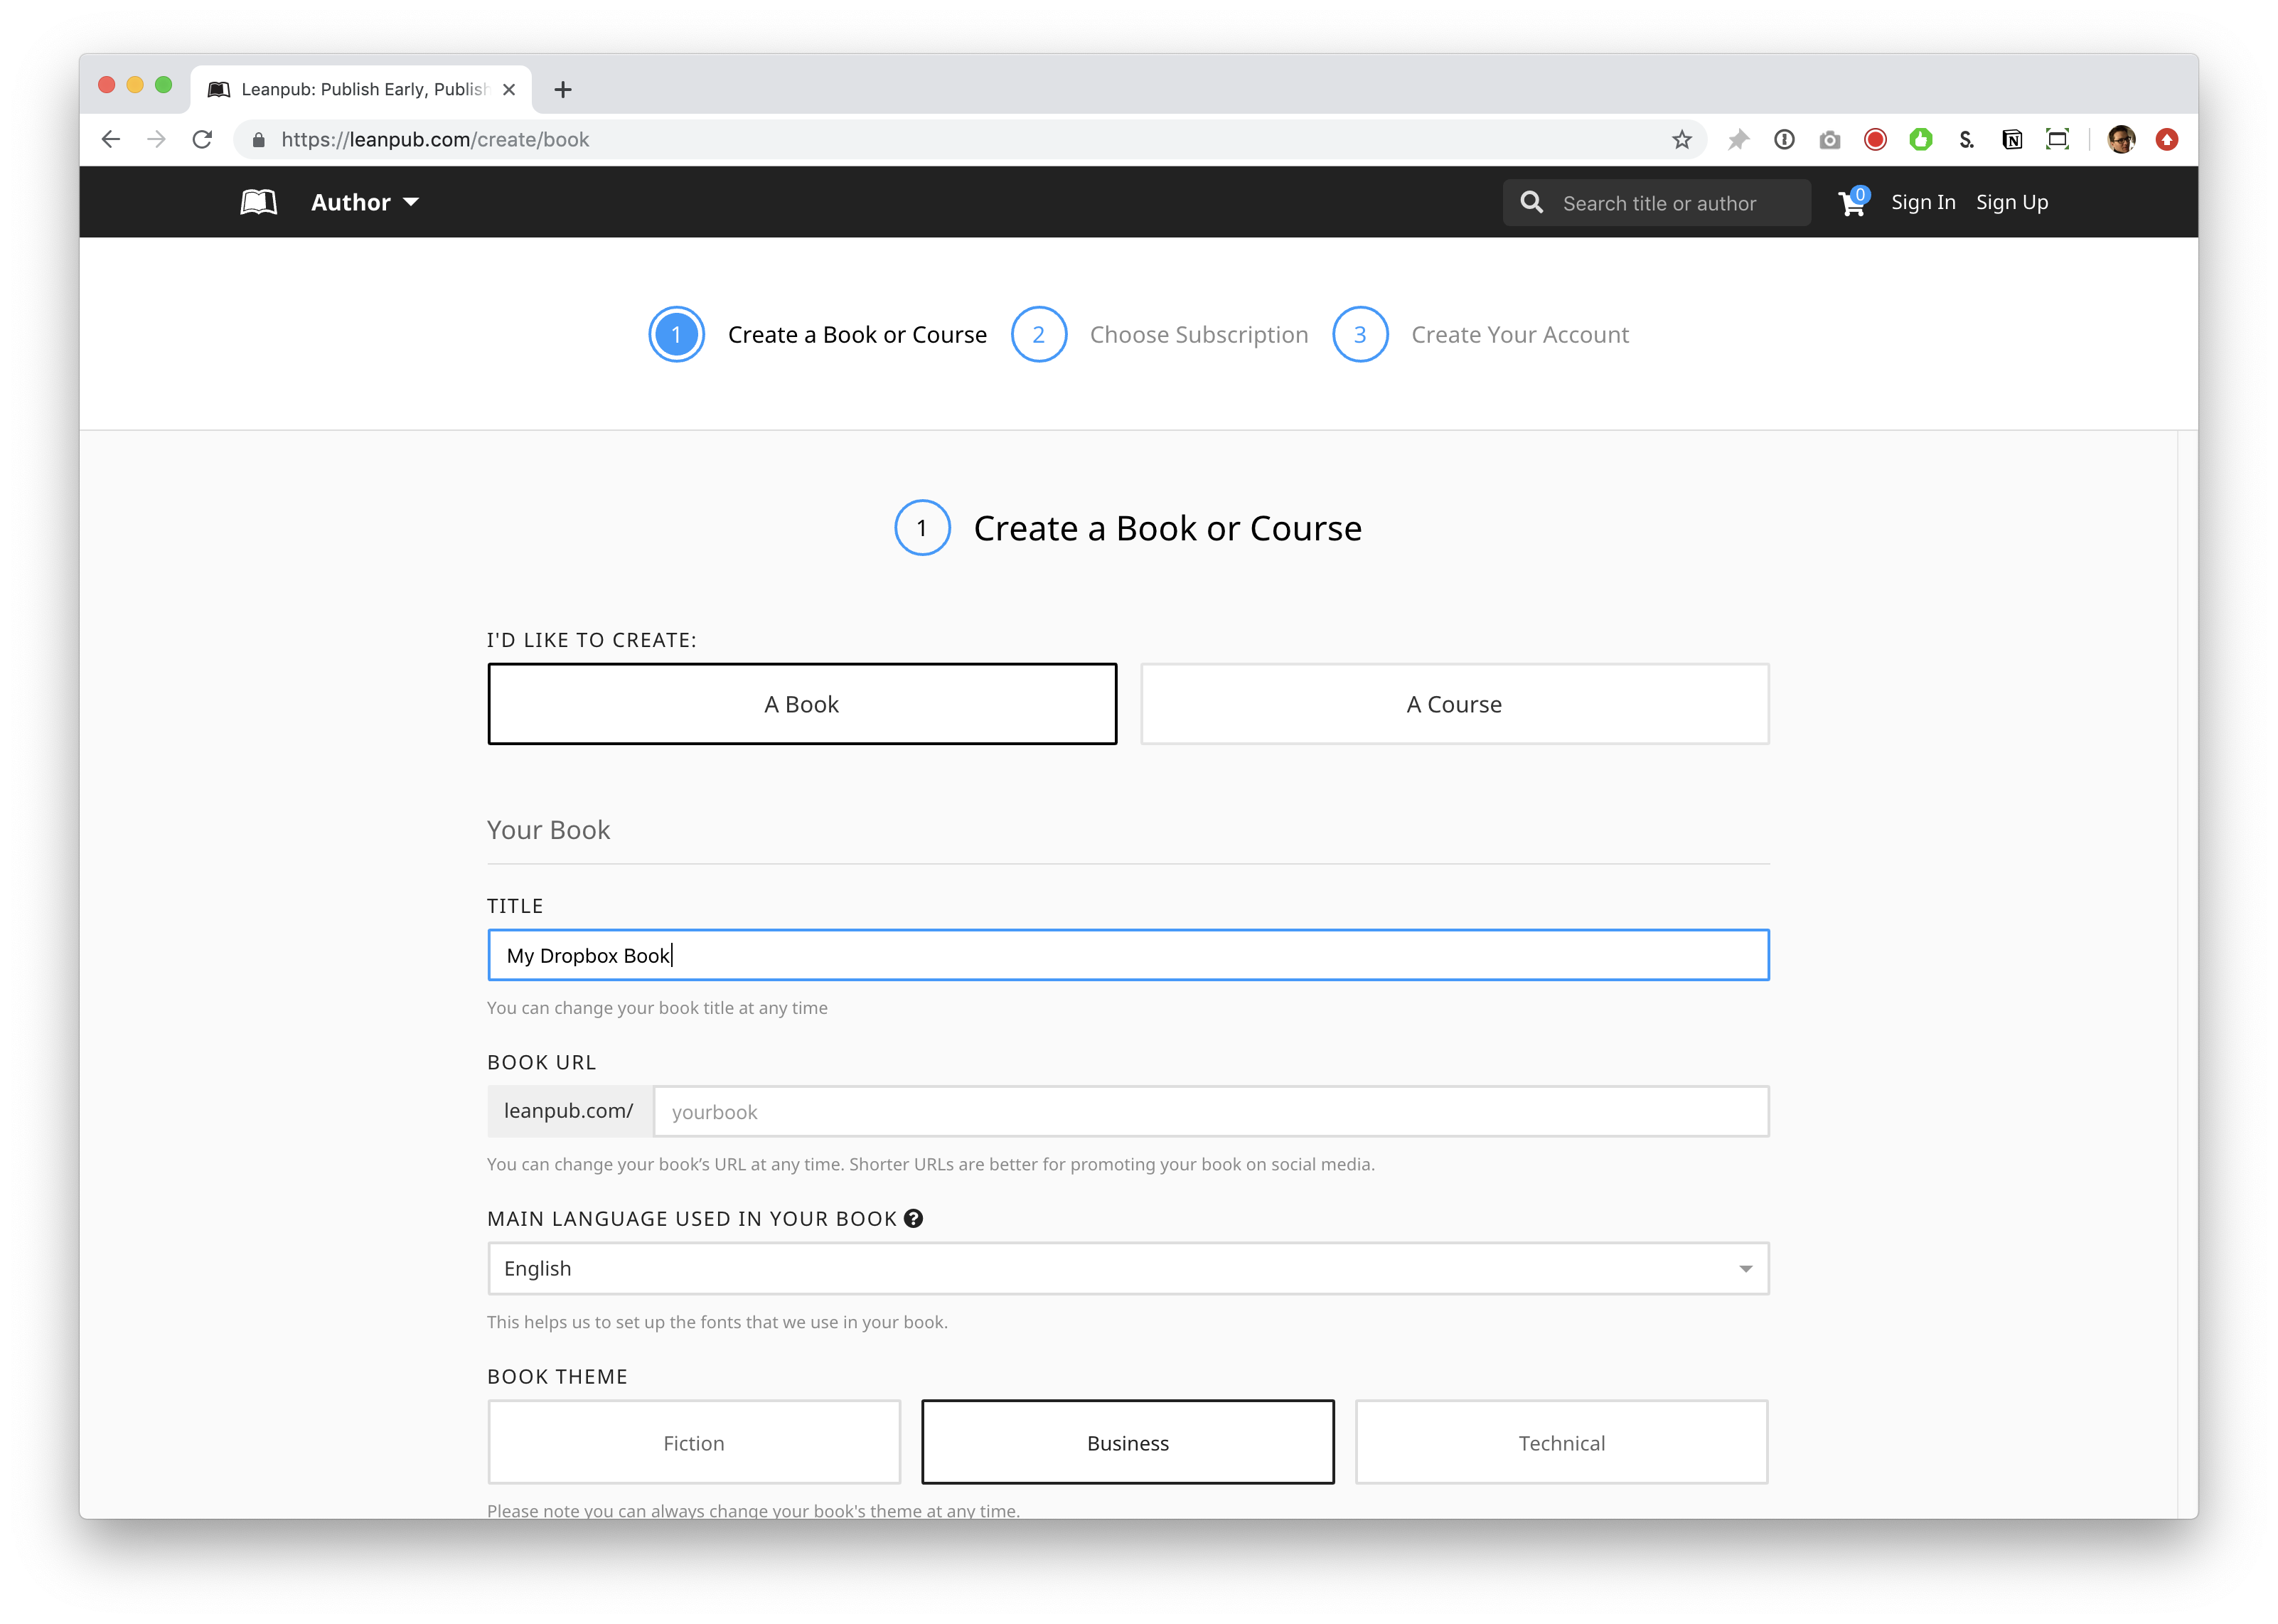
Click in the “BOOK URL” box. Leanpub will automatically suggest a URL for your book’s web page on Leanpub. You can change this URL at any time.
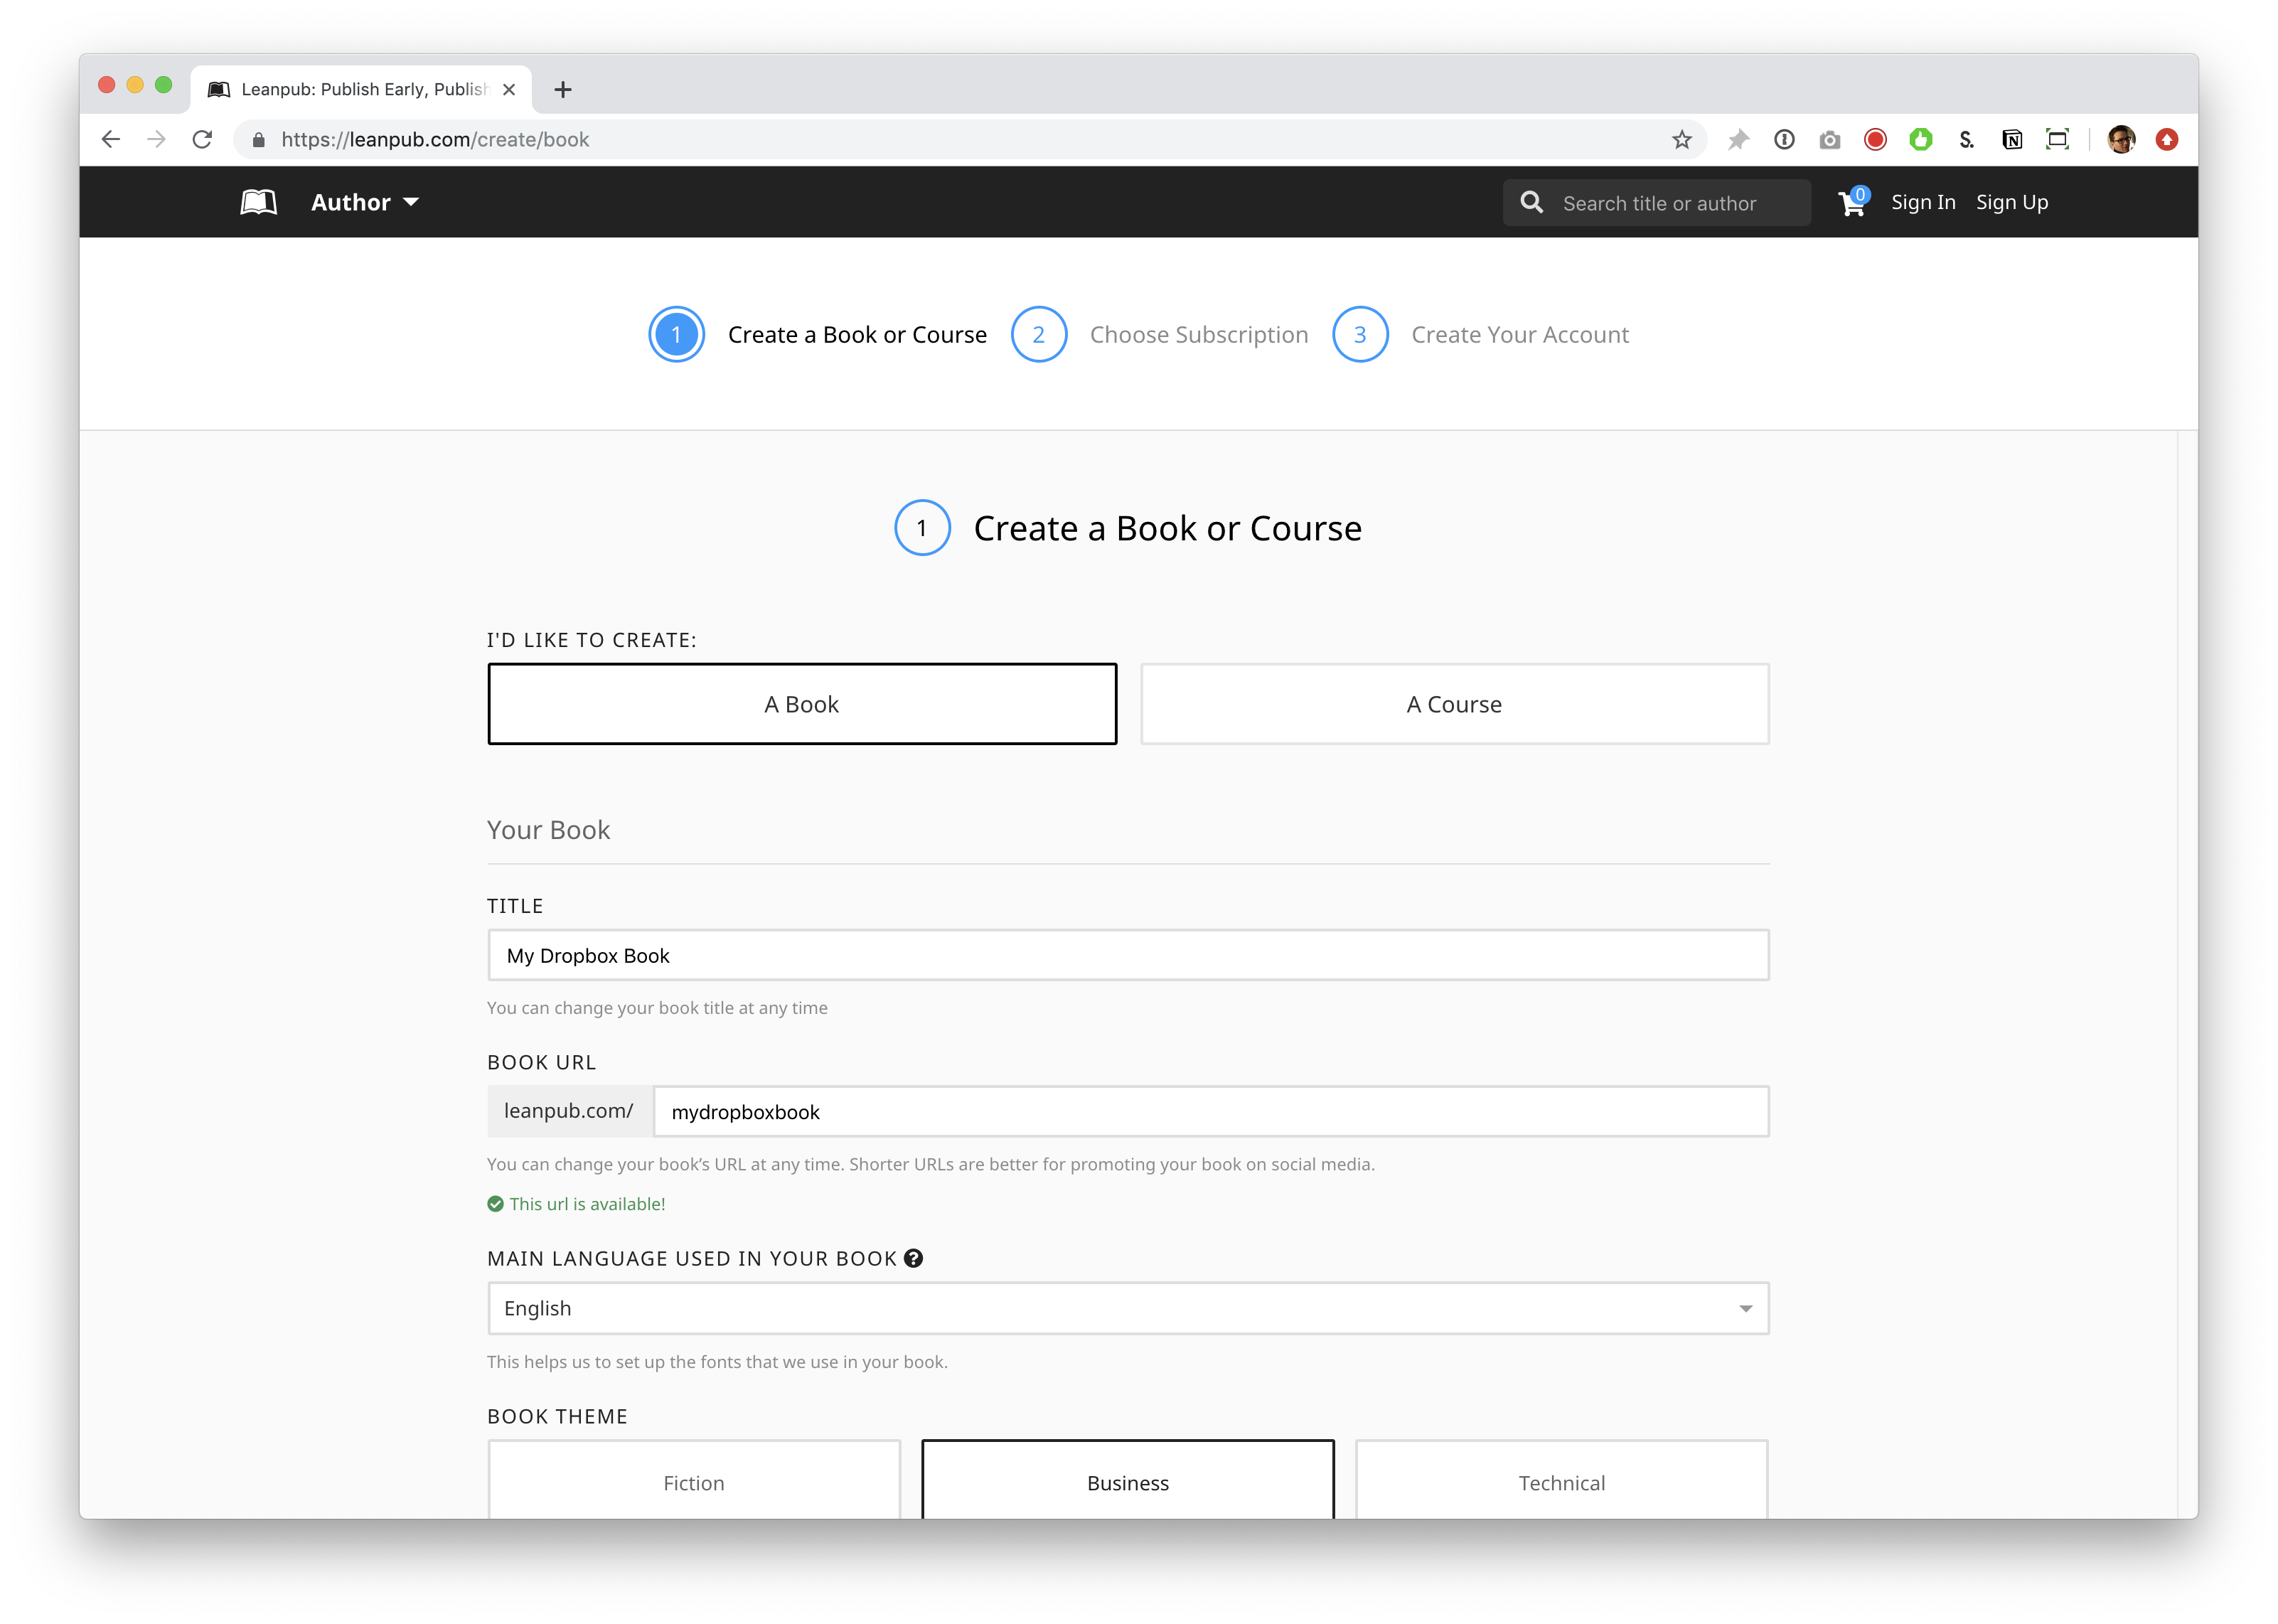
Scroll down and you will see “MAIN LANGUAGE USED IN YOUR BOOK.” You can select a language from the drop-down. Like the other settings, you can change this at any time.
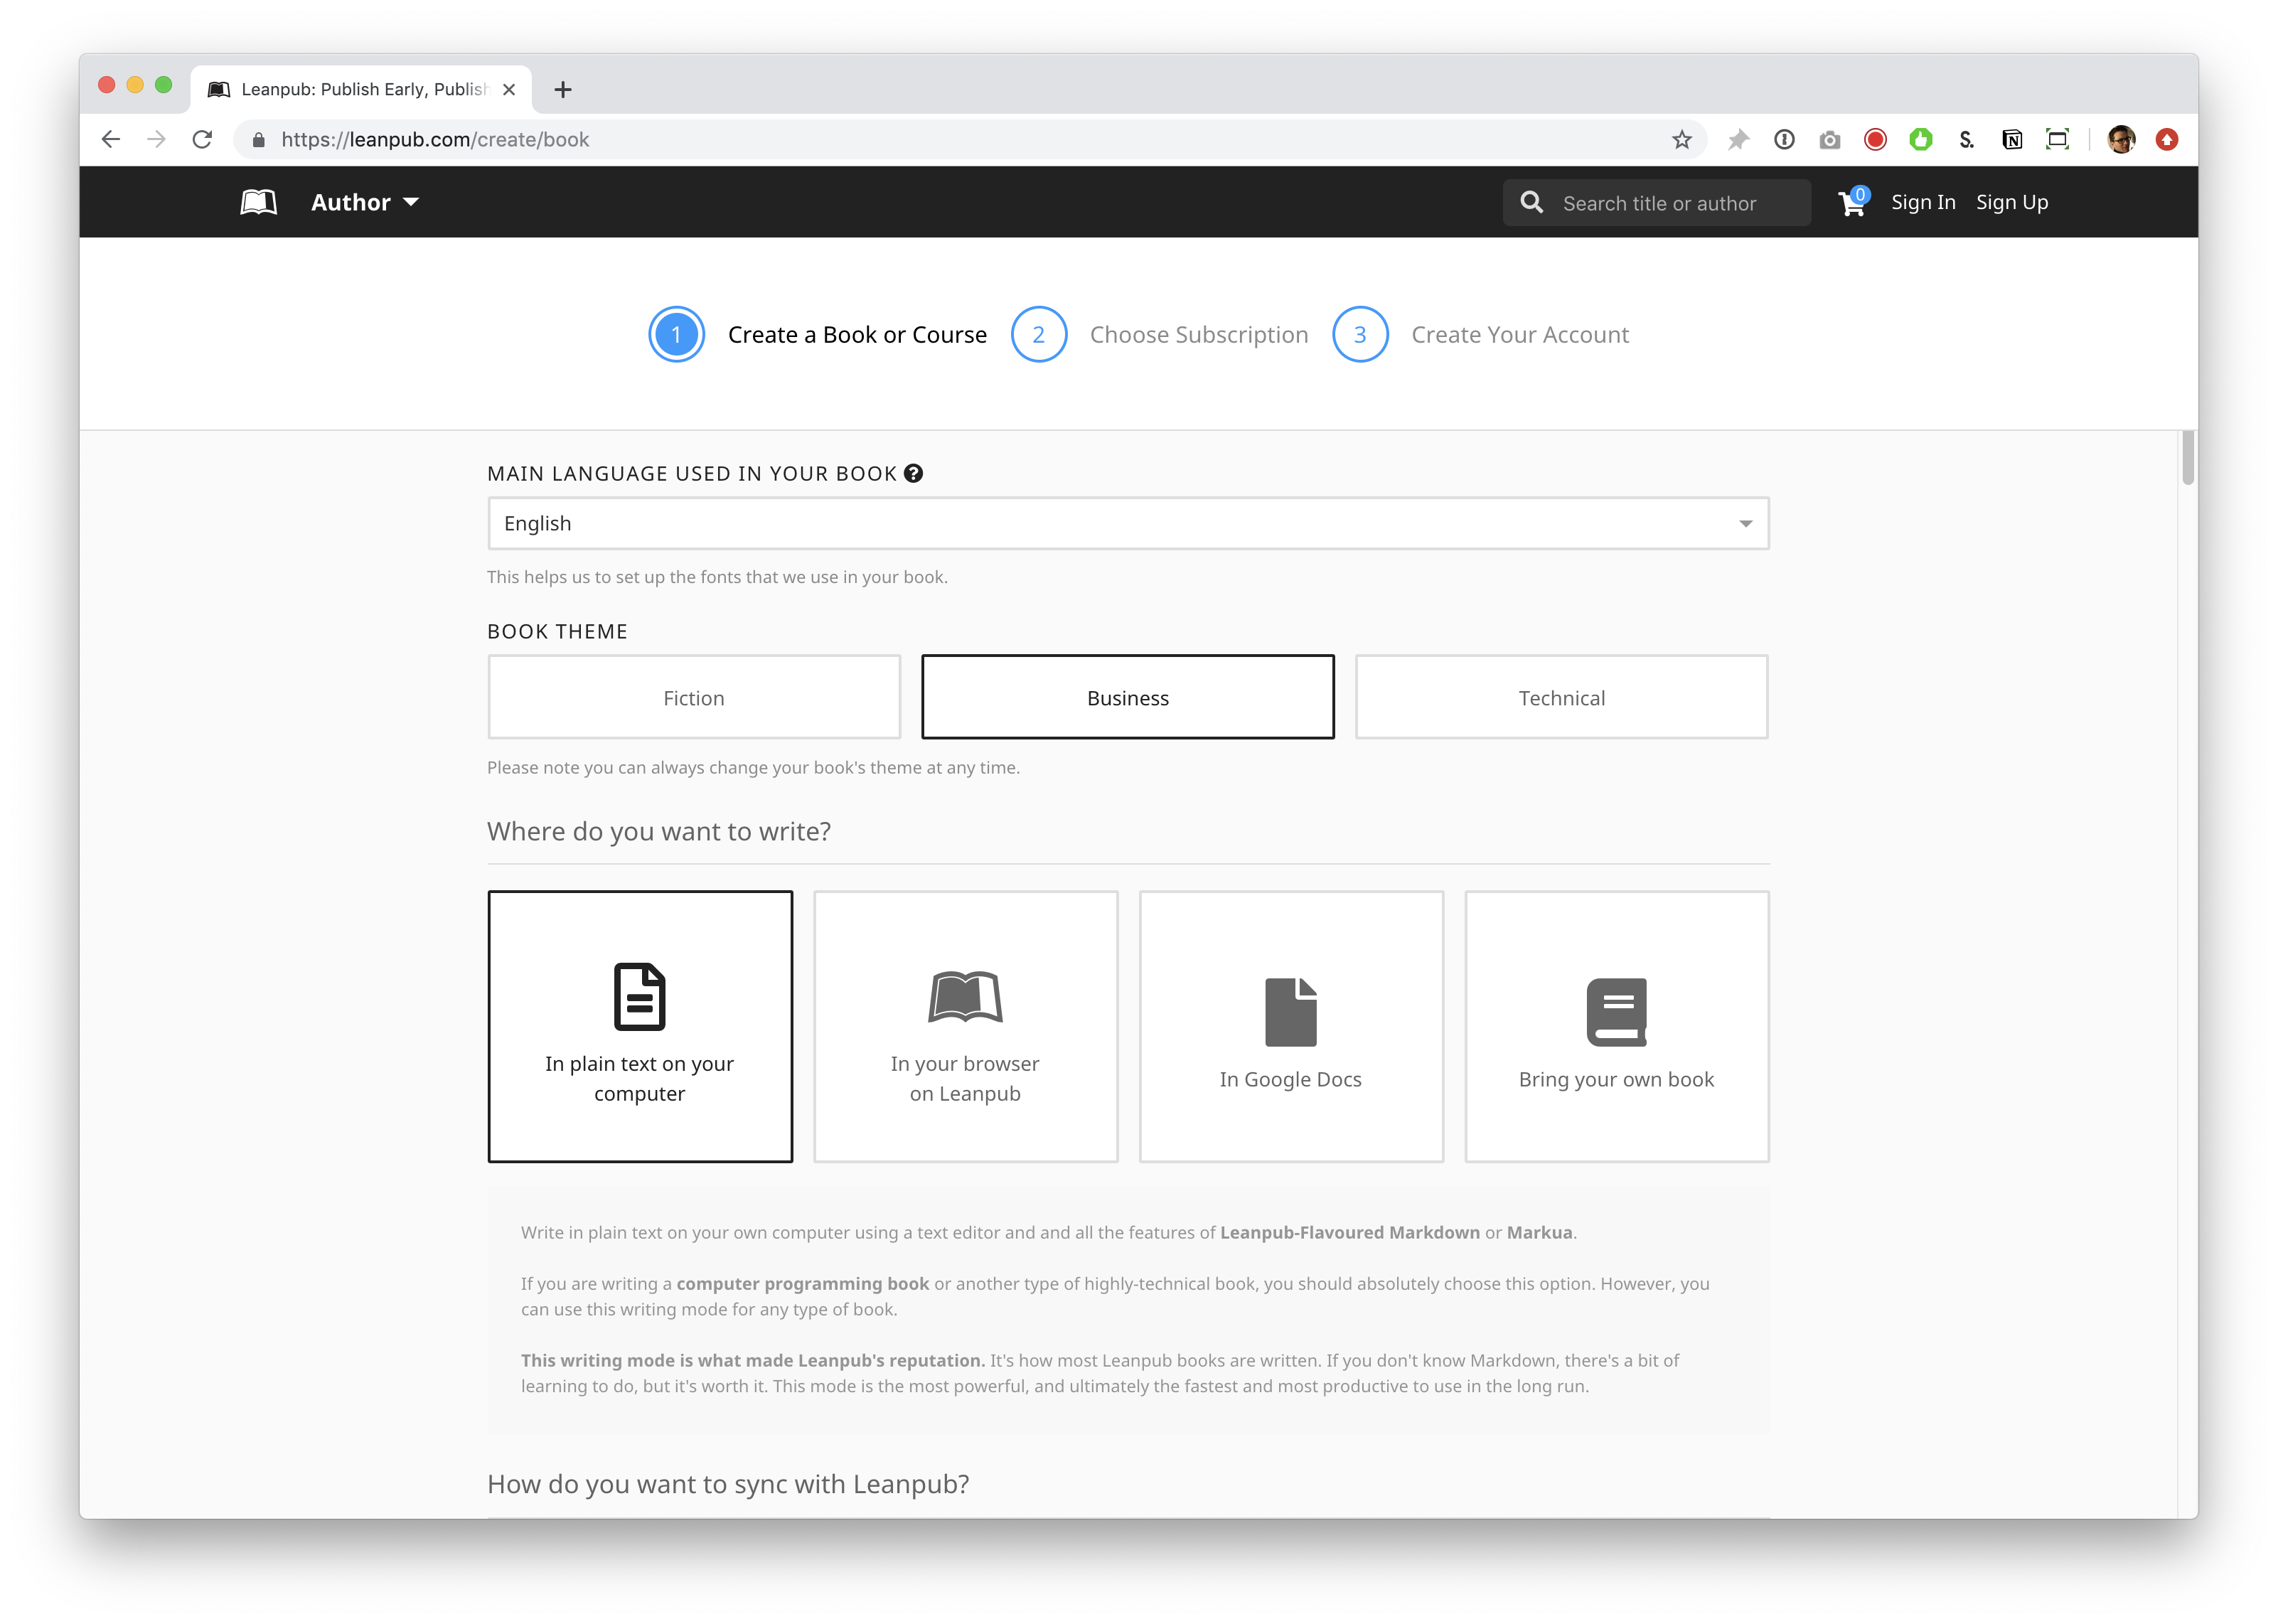
Scroll down and you will see the “BOOK THEME” options. “Business” will be selected by default. The Book Theme is just a set of standard formatting options conventional for books on these subjects. You are not required to choose any particular option. You can change your Book Theme at any time.
For this tutorial, we selected the “Fiction” Book Theme.
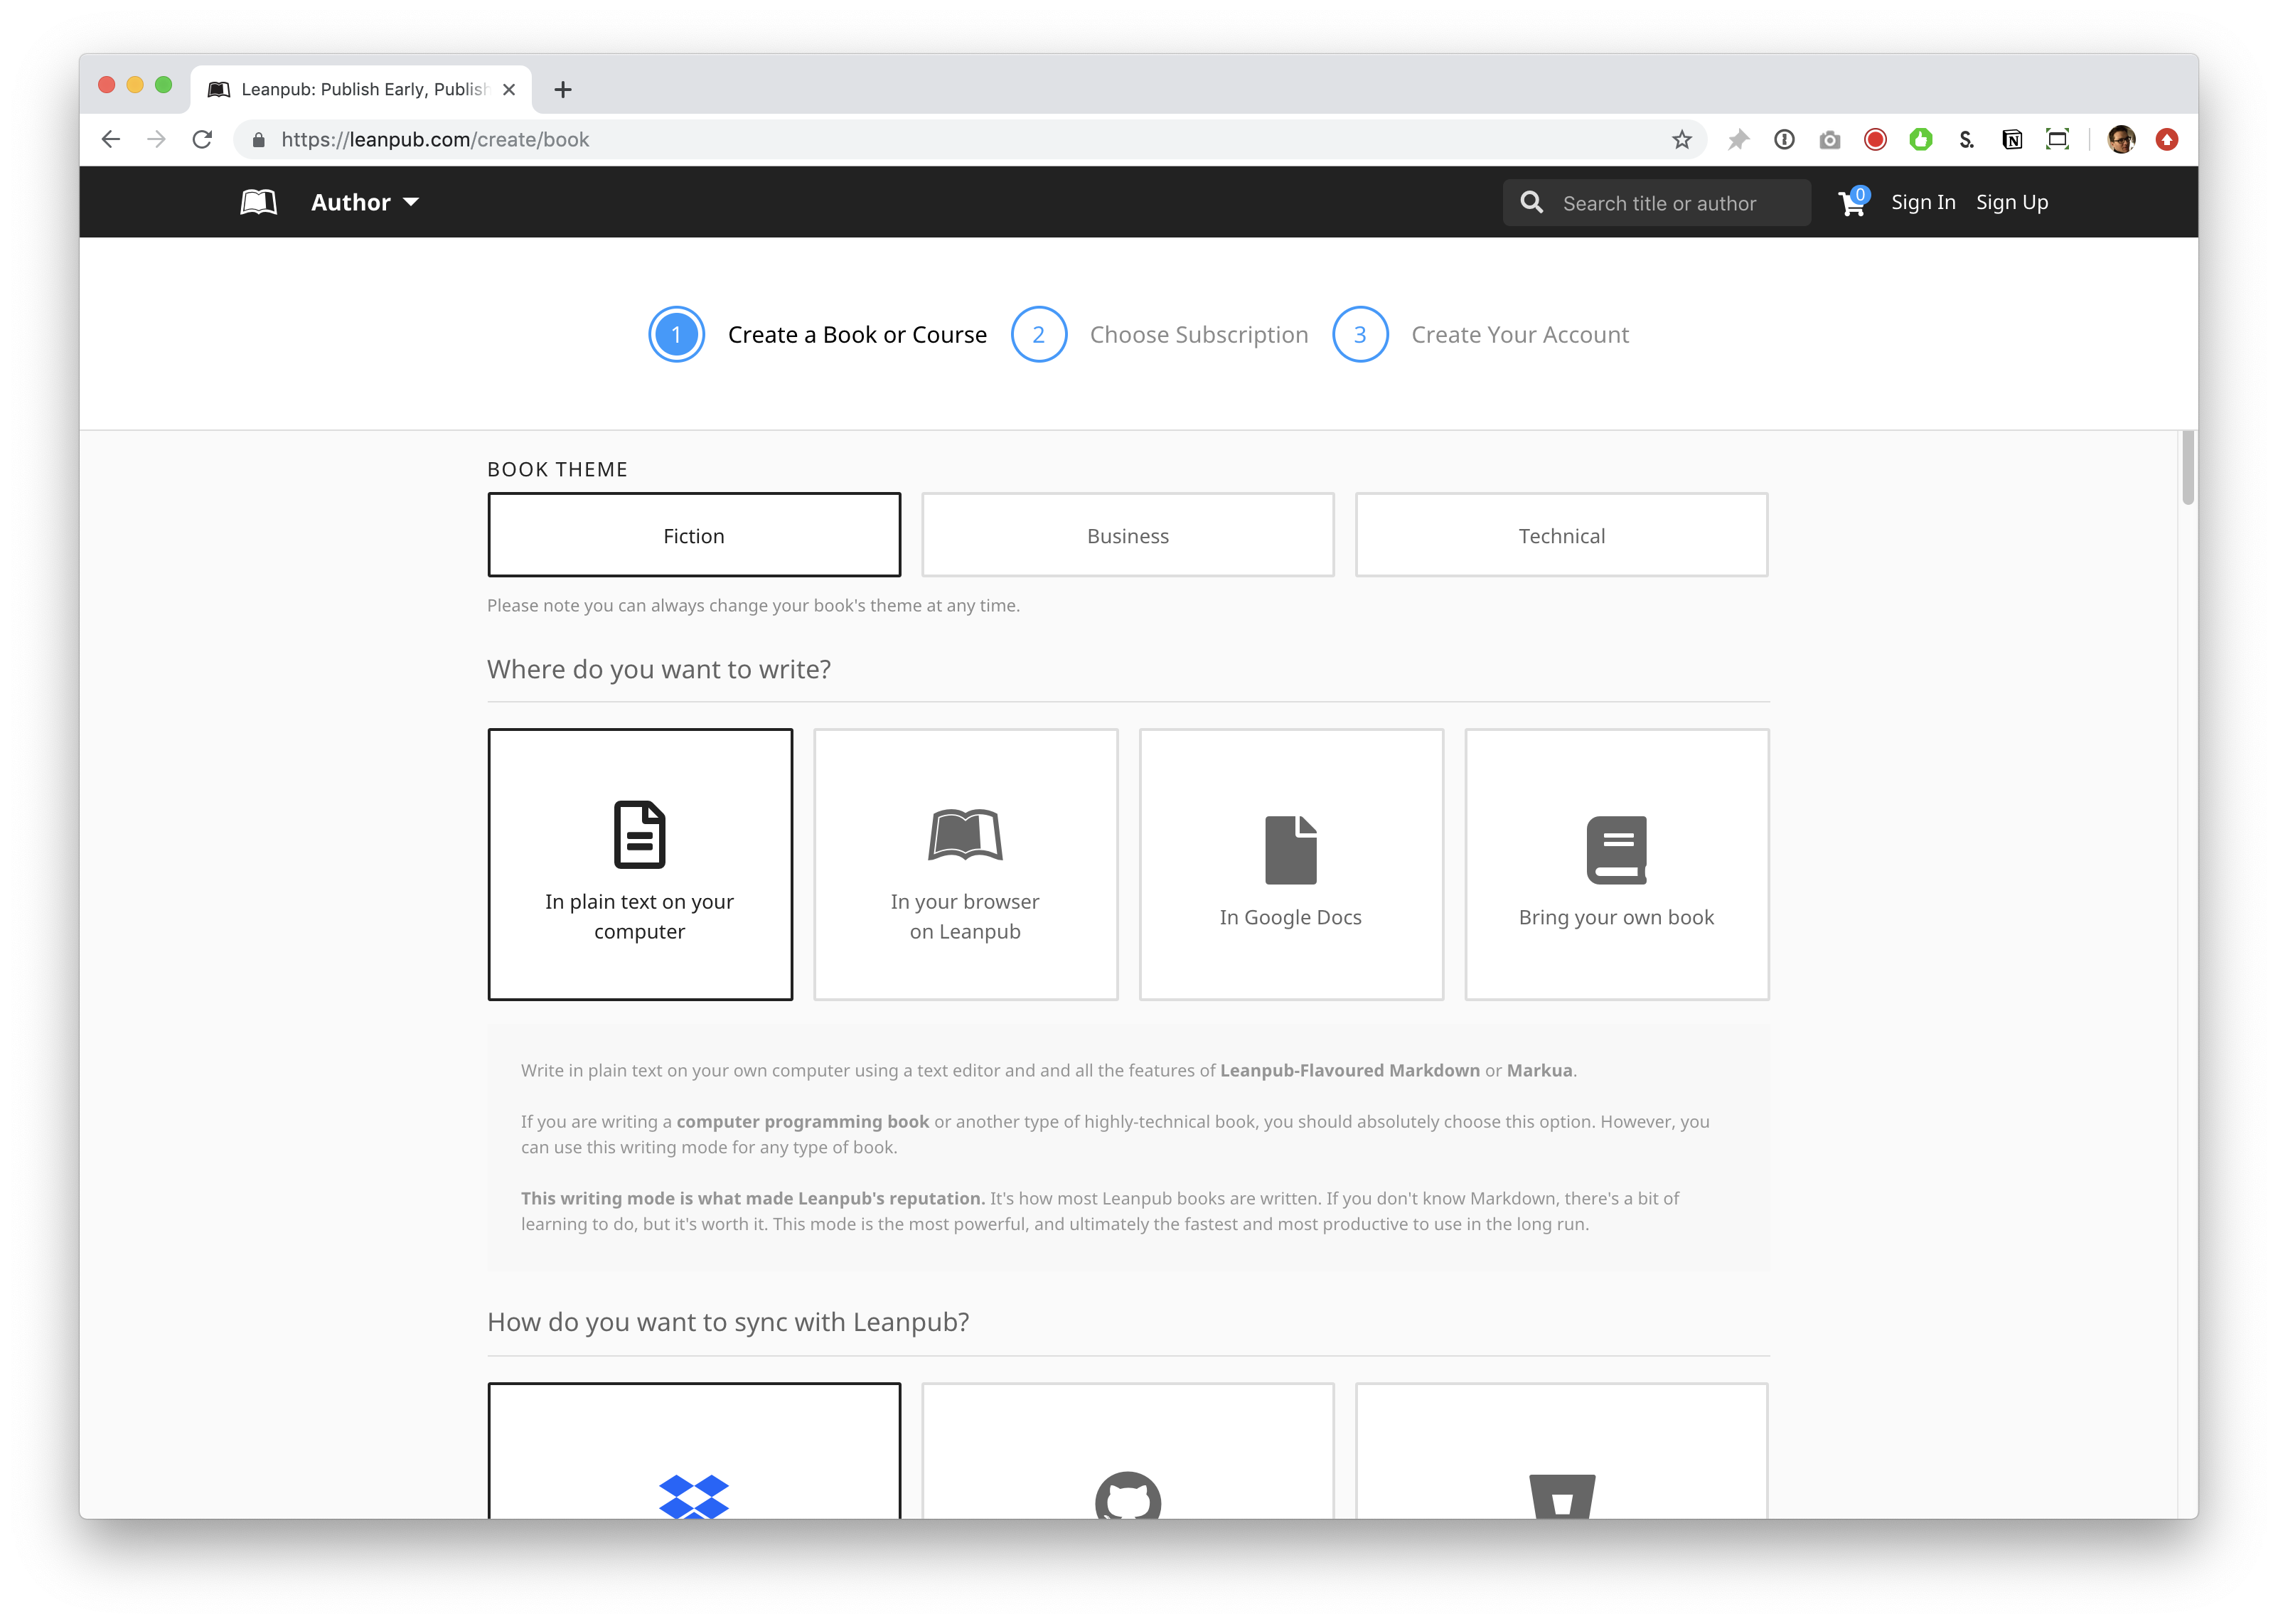
In the section below, you will be presented with various Writing Mode options. For this tutorial, you don’t need to do anything, because writing on your computer in Dropbox is selected by default.

When you scroll down, you will see the subscription plan options. By default, “Free” will be selected. If you have a paid Leanpub account already, you will see that plan selected automatically.
Select a plan.
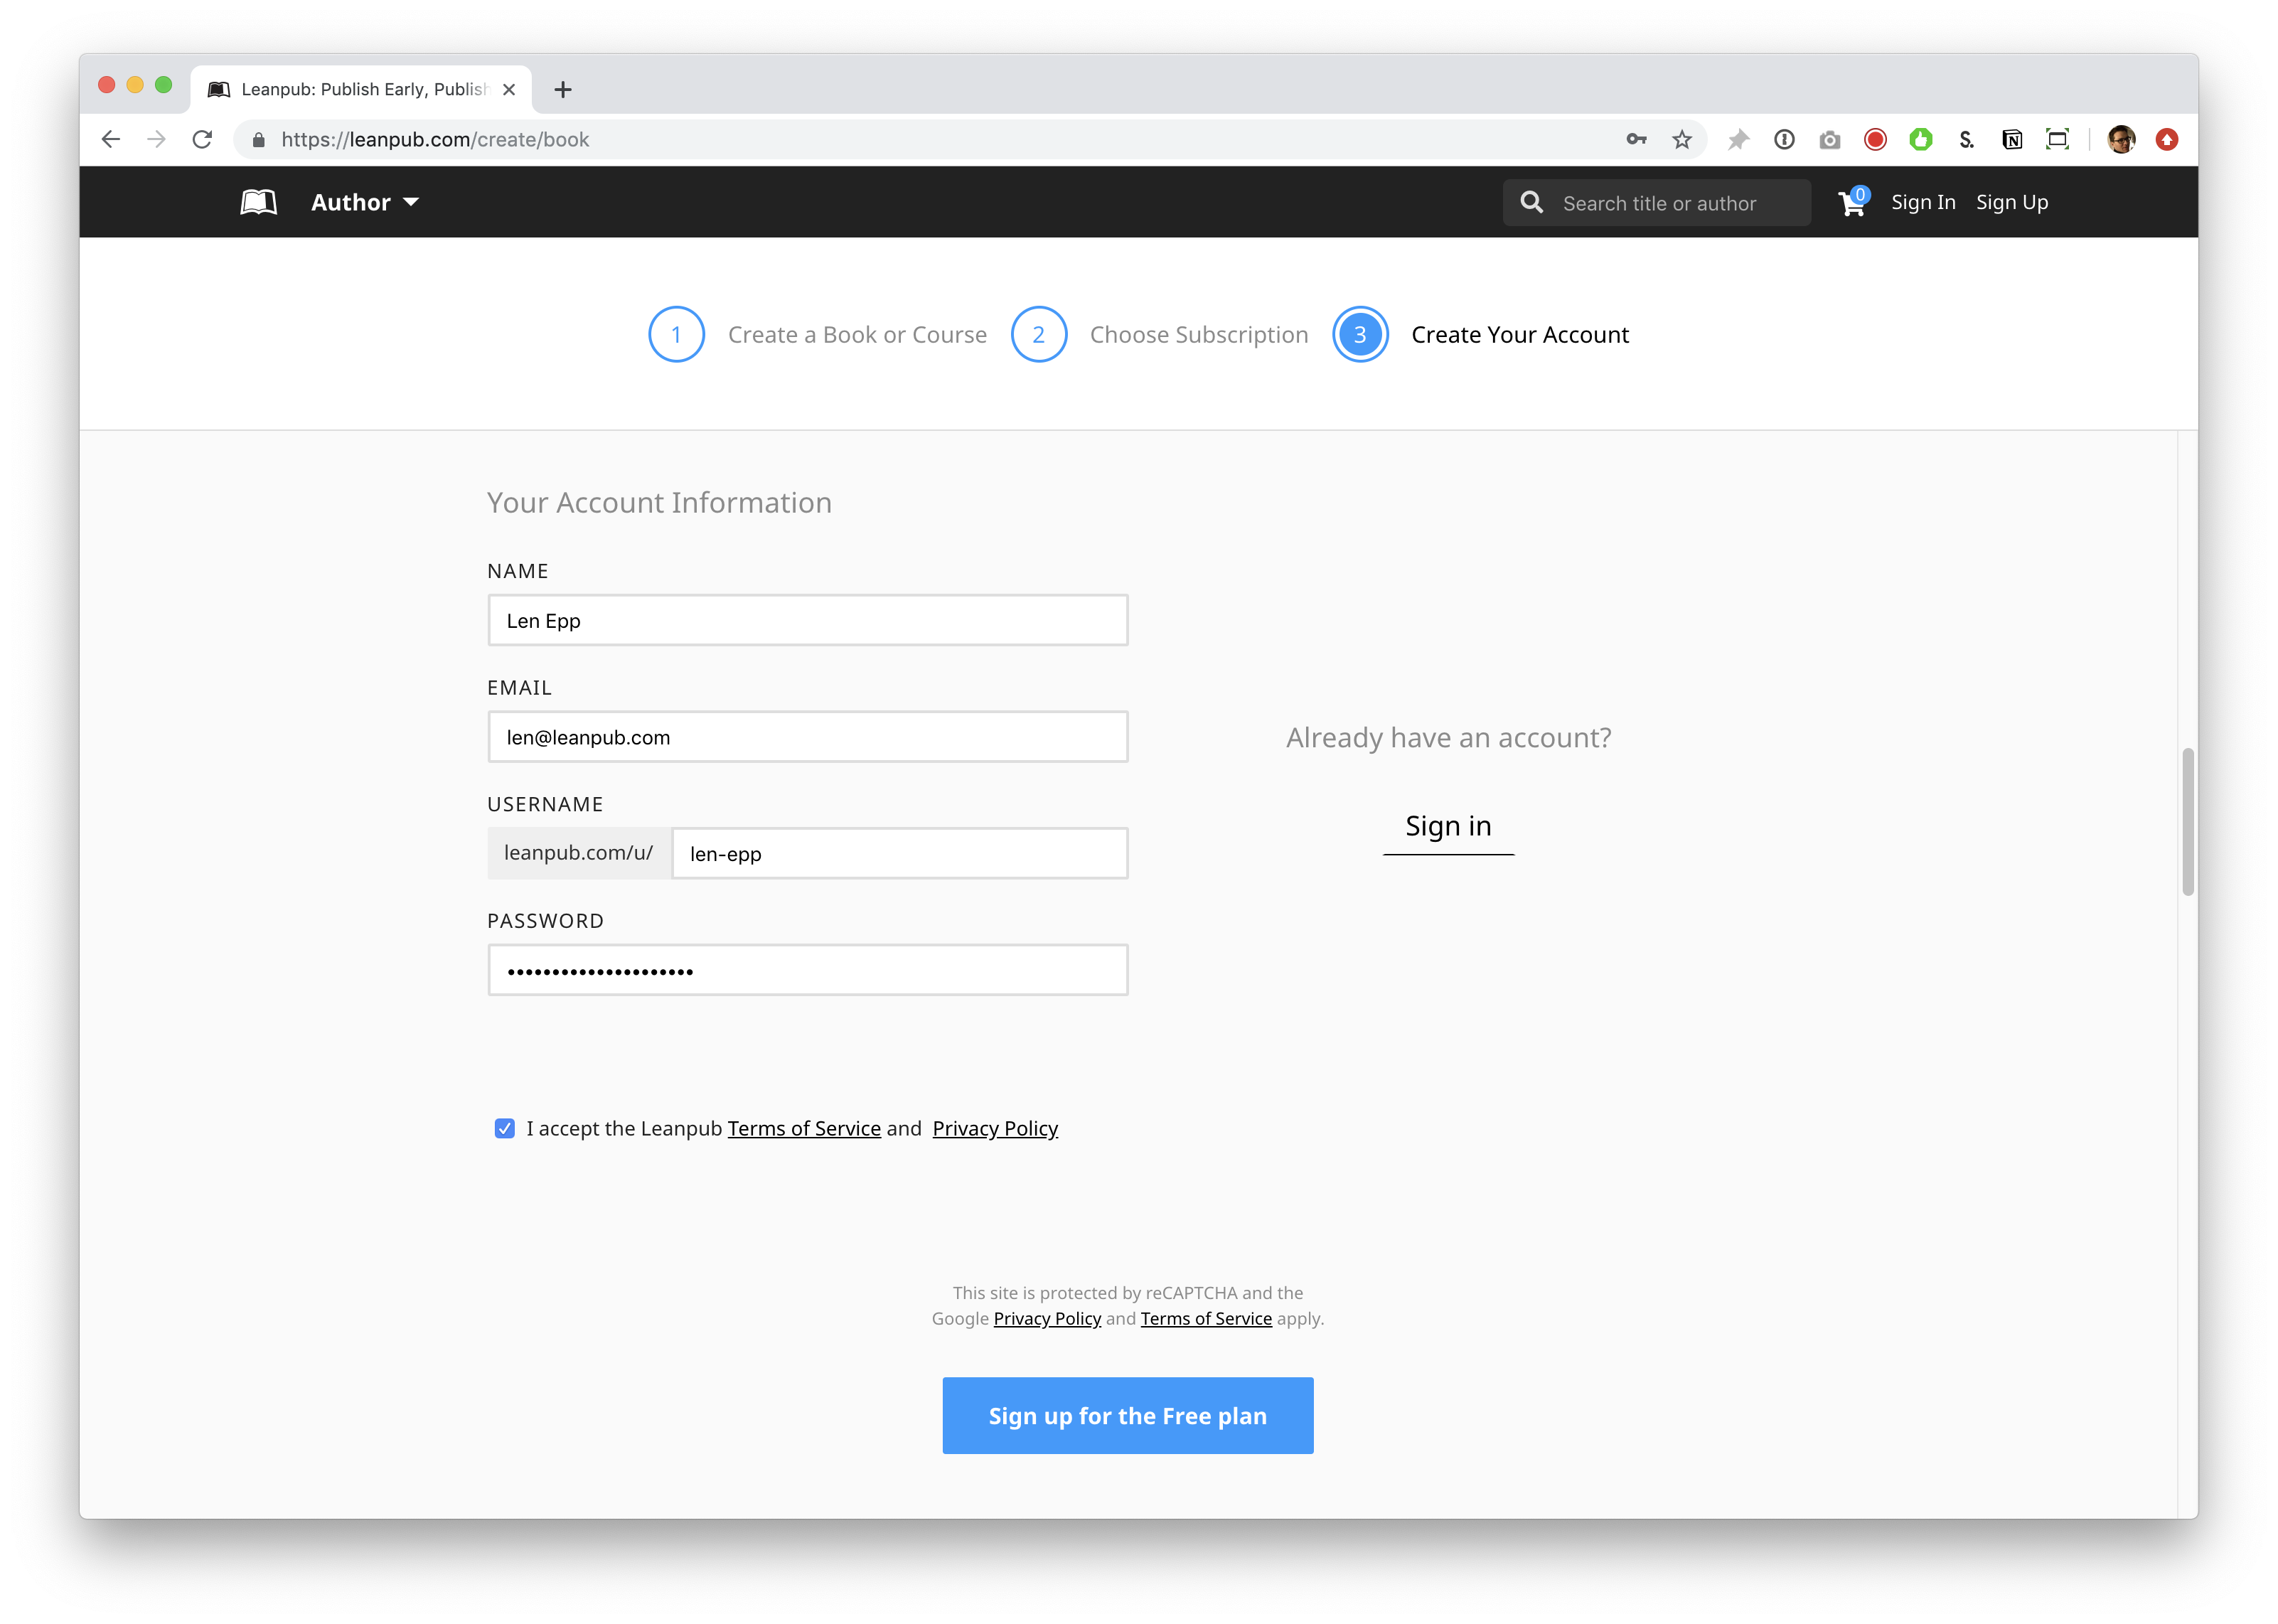
Scroll down and, if you are not signed in to a Leanpub account, you will see an option to enter information to create a new account. You will also see an option to sign in, if you already have a Leanpub account.
To create a new account, fill in the relevant information.
In Dropbox mode, you should use the same email address for Leanpub as you do for your Dropbox account. If you don’t have Dropbox account, you can get one for free here:
Finally, click the blue button to finish creating your new Dropbox book.
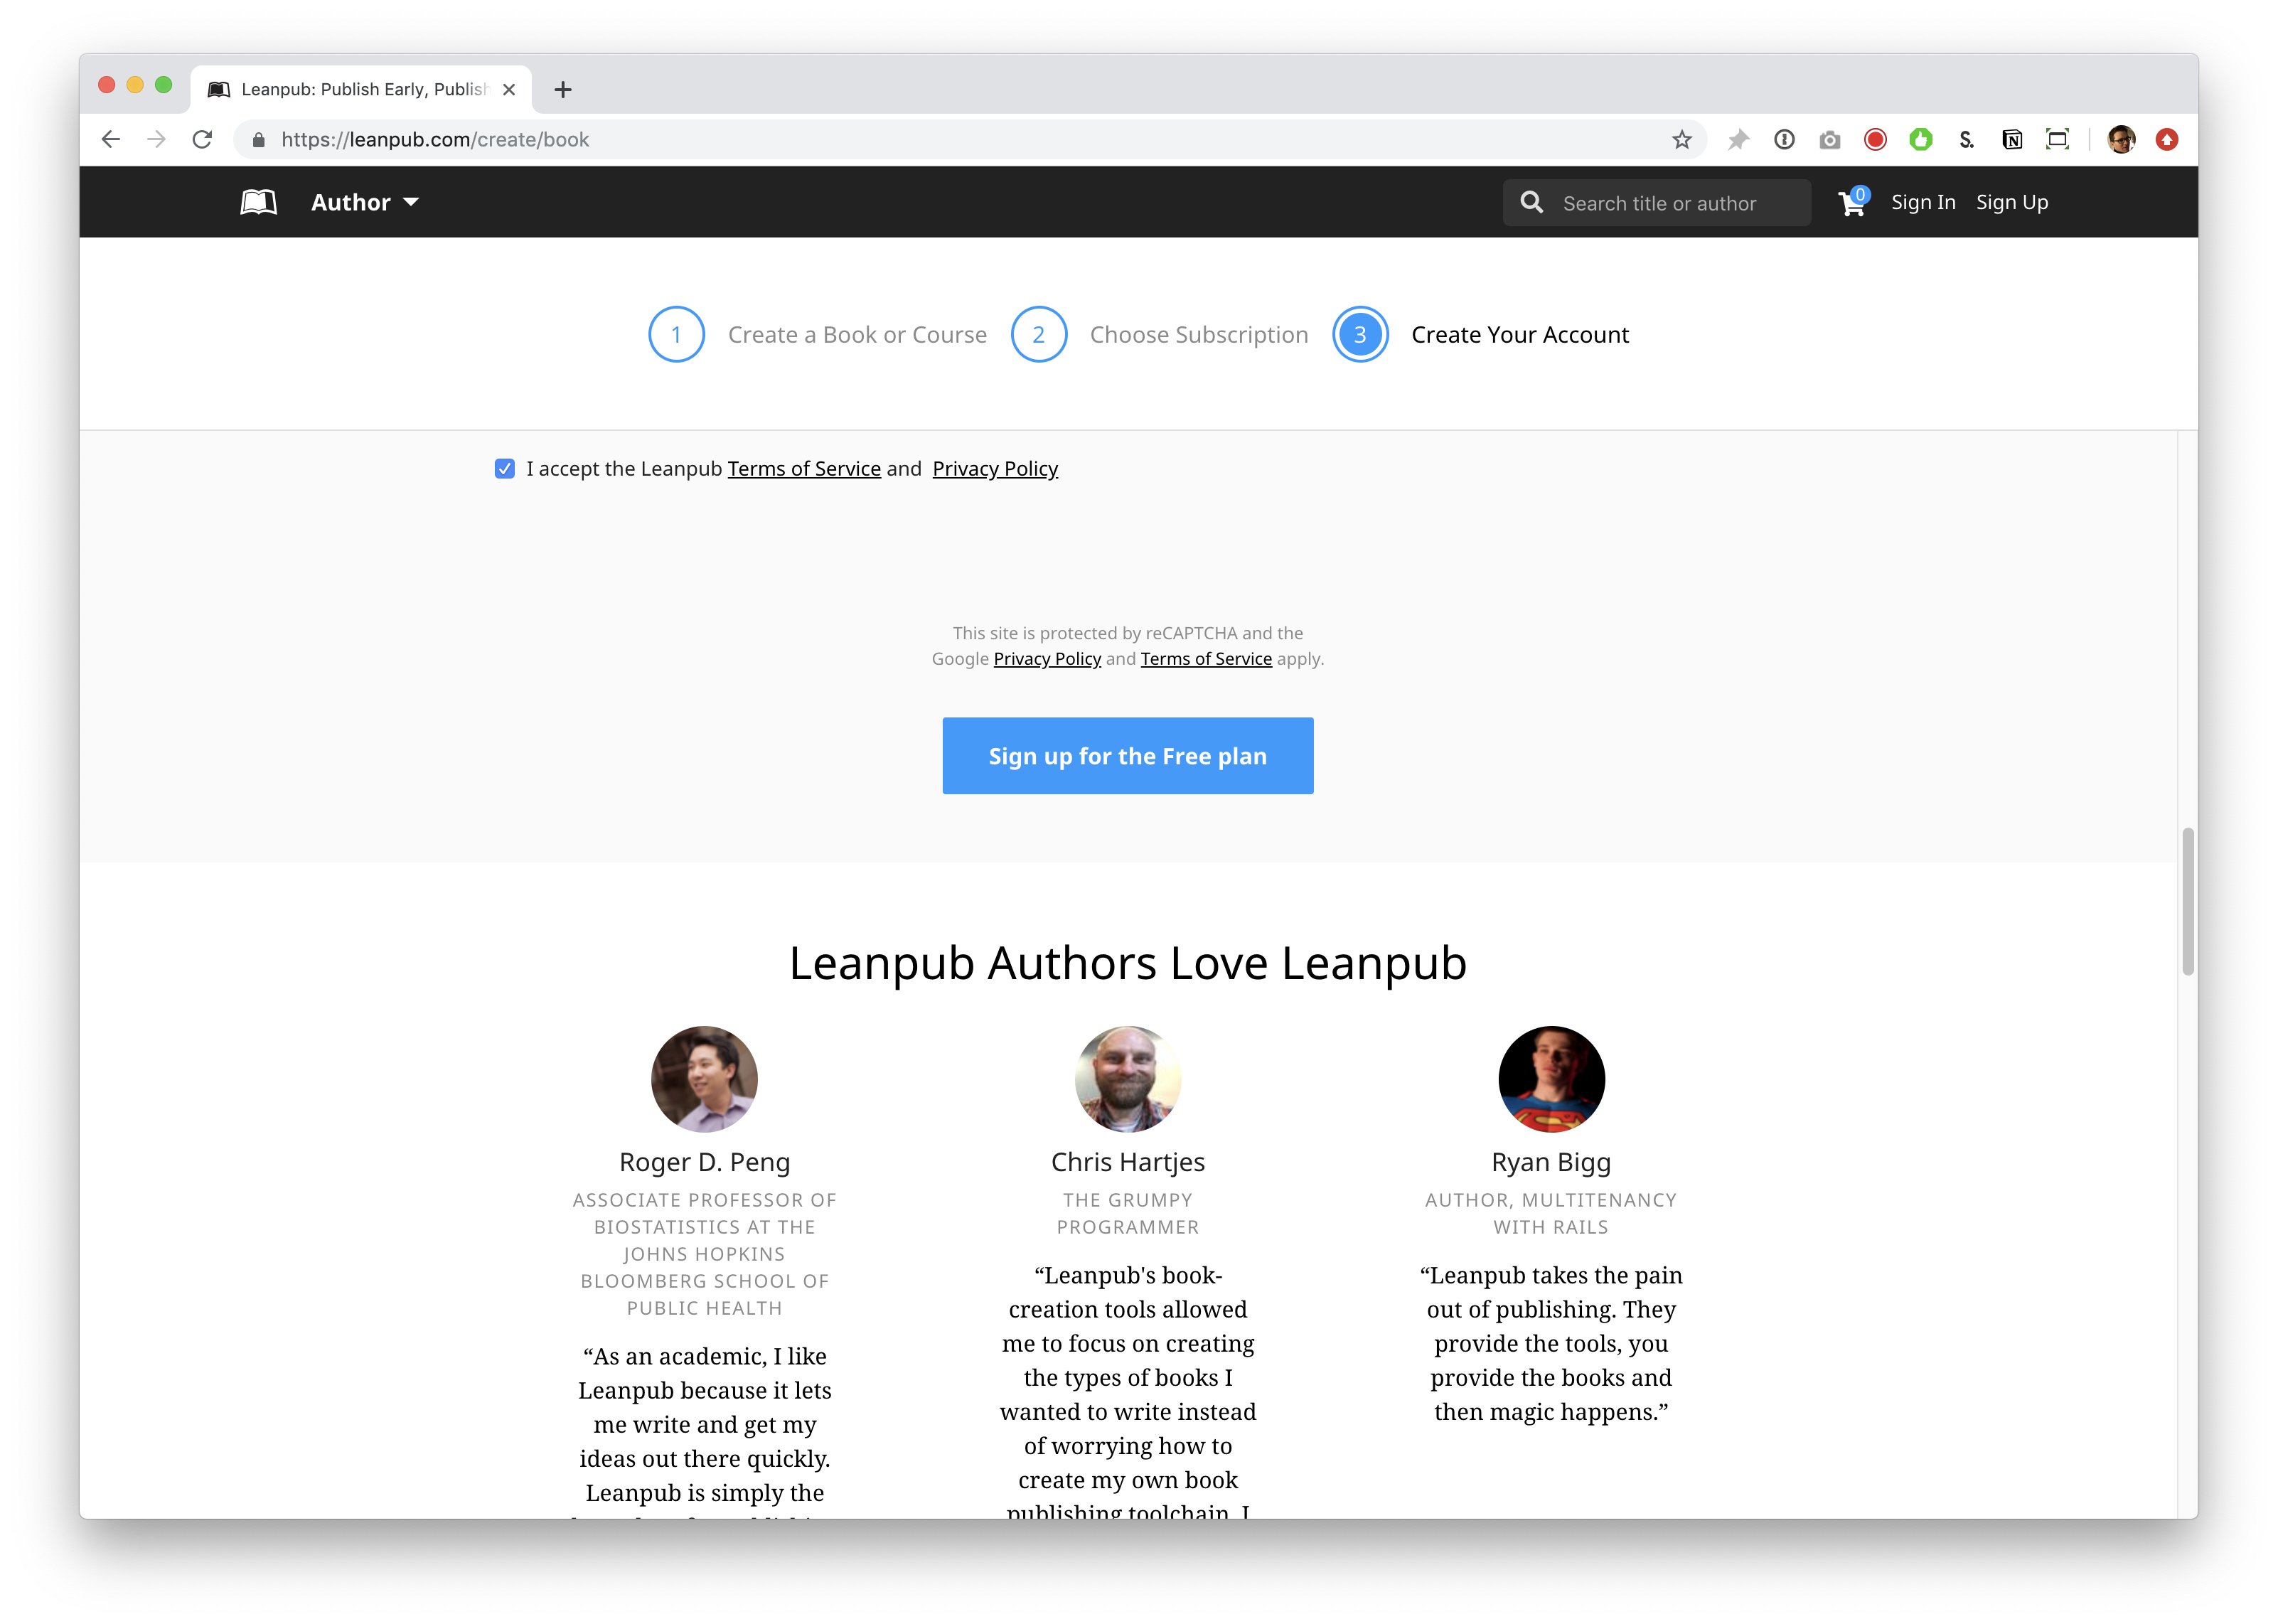
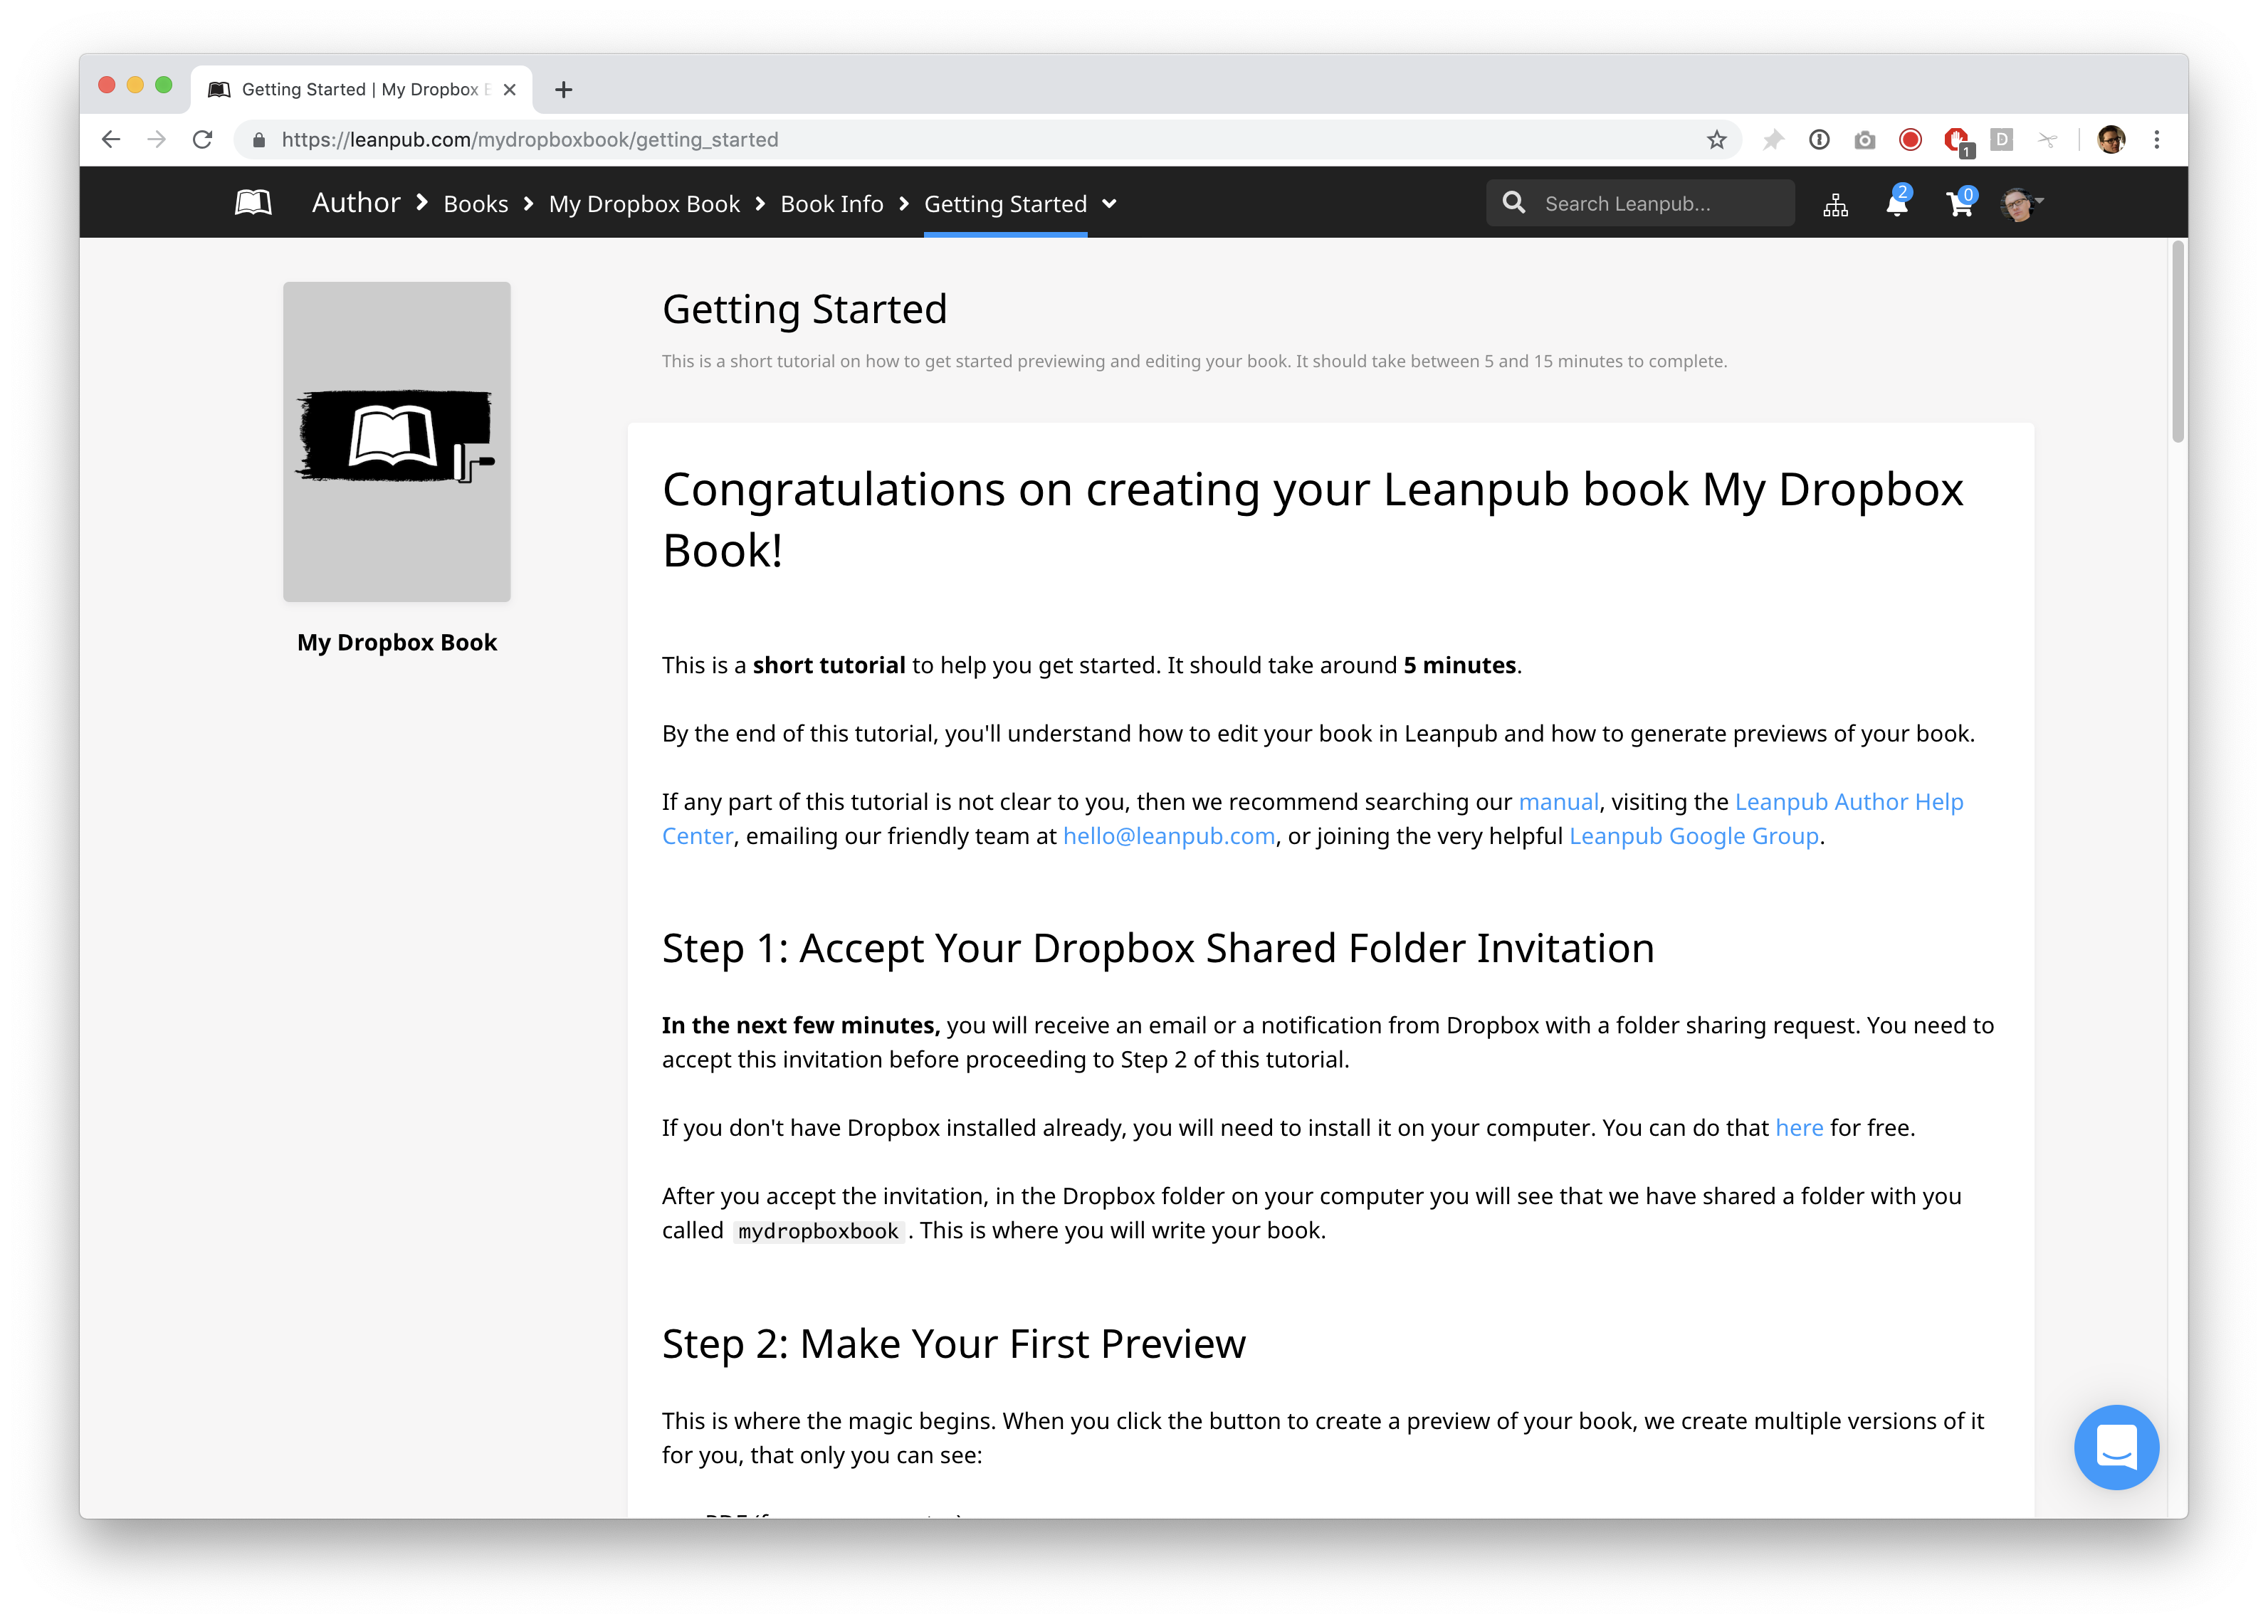
You will now see that you are on the Getting Started page for your book. You will see a progress bar at the top of the page, while our book generators are creating your new book.
If you use bookmarks in your web browser, we recommend you bookmark this page in your web browser in a bookmark folder for your book, but this is not required.
Look at the Author “breadcrumb” menu at the top of the screen. This is how you will navigate to the web pages you will be using in Leanpub to work on your book and see all the features we provide, like uploading a book cover, or setting a price for your book.
When you are finished this tutorial, we recommend you explore the various Author options.
Setting Up Your Book In Dropbox
When you clicked the button to create your book, Leanpub’s Bookbot created a folder for your book in Dropbox, and sent a Dropbox shared folder invitation to the email address you used when you signed up.
It may take one or two minutes for you to receive the Dropbox shared folder invitation.
To accept the invitation, you can click on the Dropbox icon in the menu bar for your computer (these images are on a Mac; if you are using a PC, it will look different.)
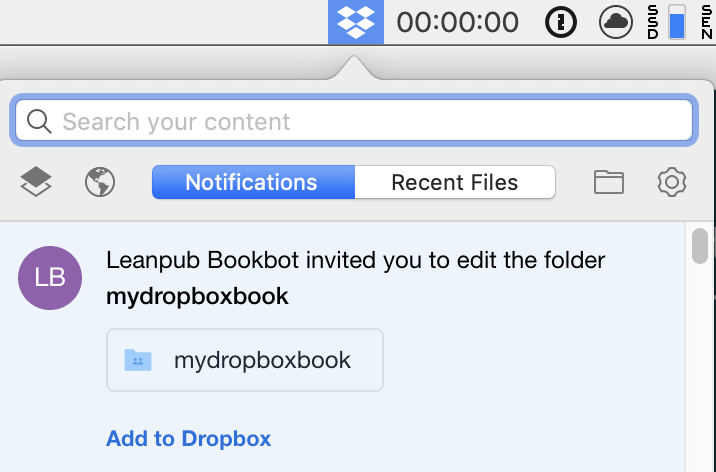
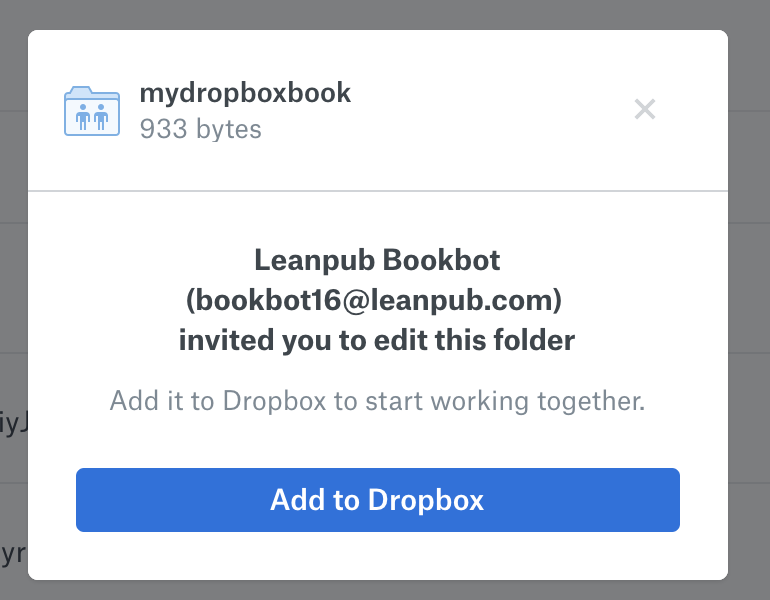
Click “Add to Dropbox.”
Alternatively, you can accept the invitation by logging in to Dropbox. You should see the book invitation near the top of the “Home” screen:
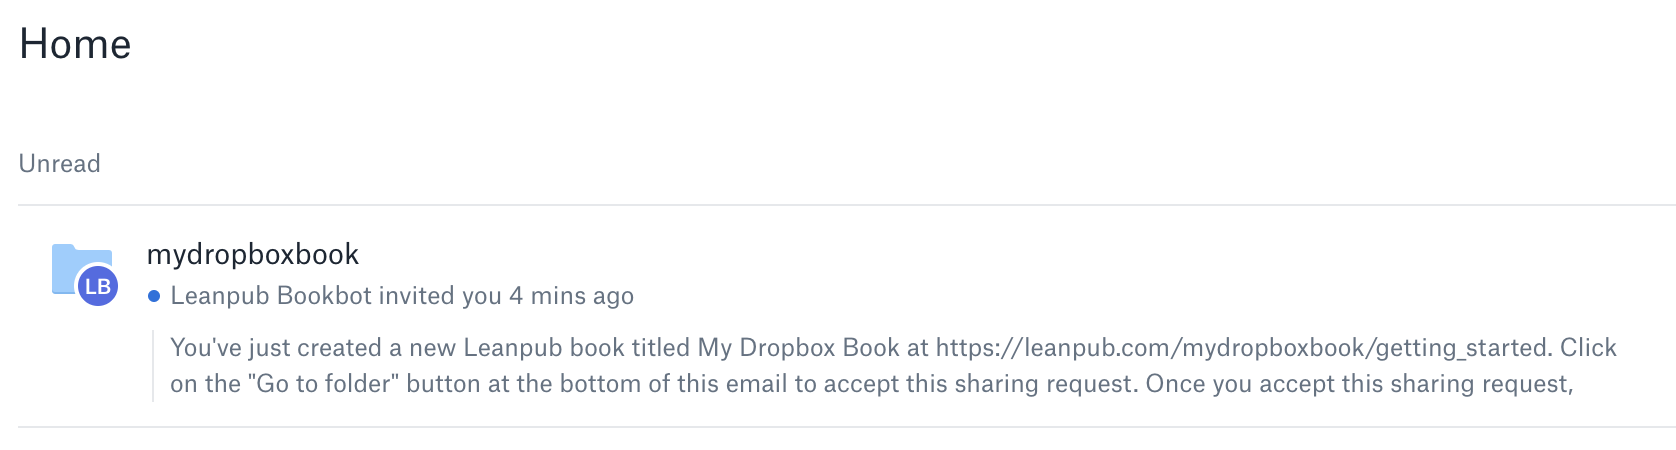
If you click on the invitation, you will be able to click “Add to Dropbox:”
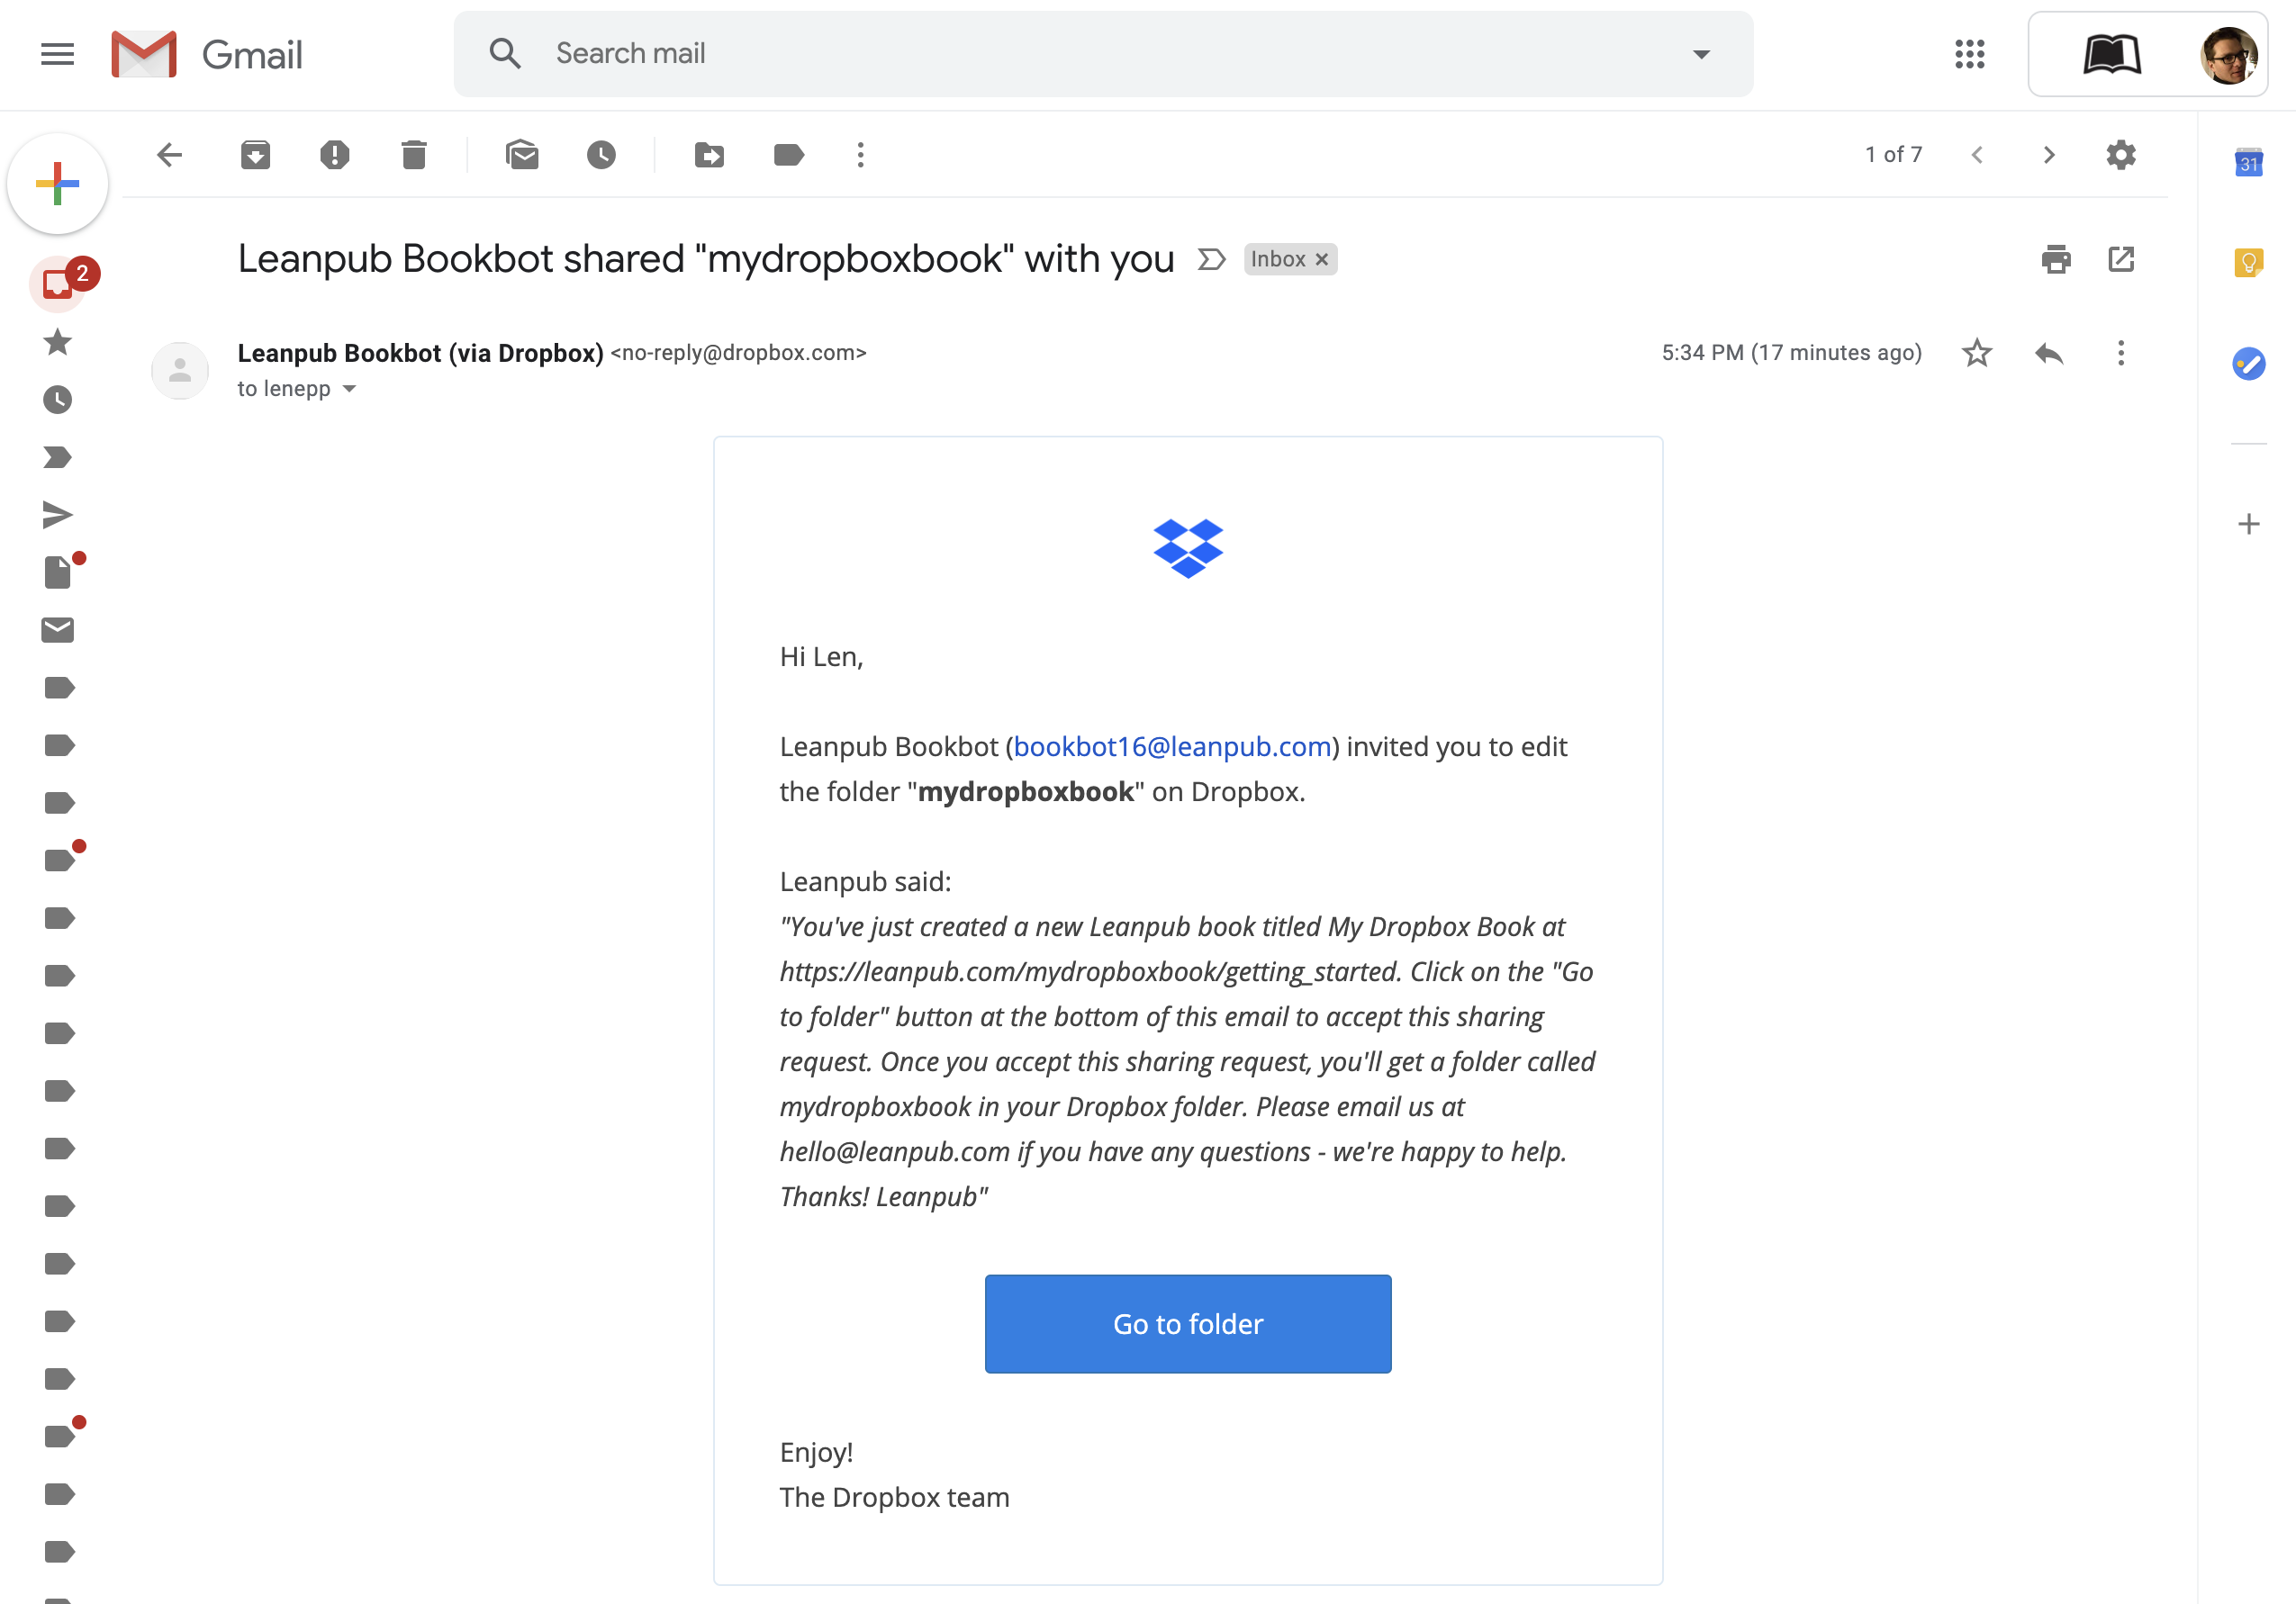
Another way to accept the Dropbox invitation is in your email. Here is what it looks like in Gmail:

If you open the email, you should see a button that takes you to your Dropbox account in your browser, and then lets you accept the invitation:
Within a minute or two, in your Dropbox folder on your computer, you should see the folder for your new book:

Creating a Preview
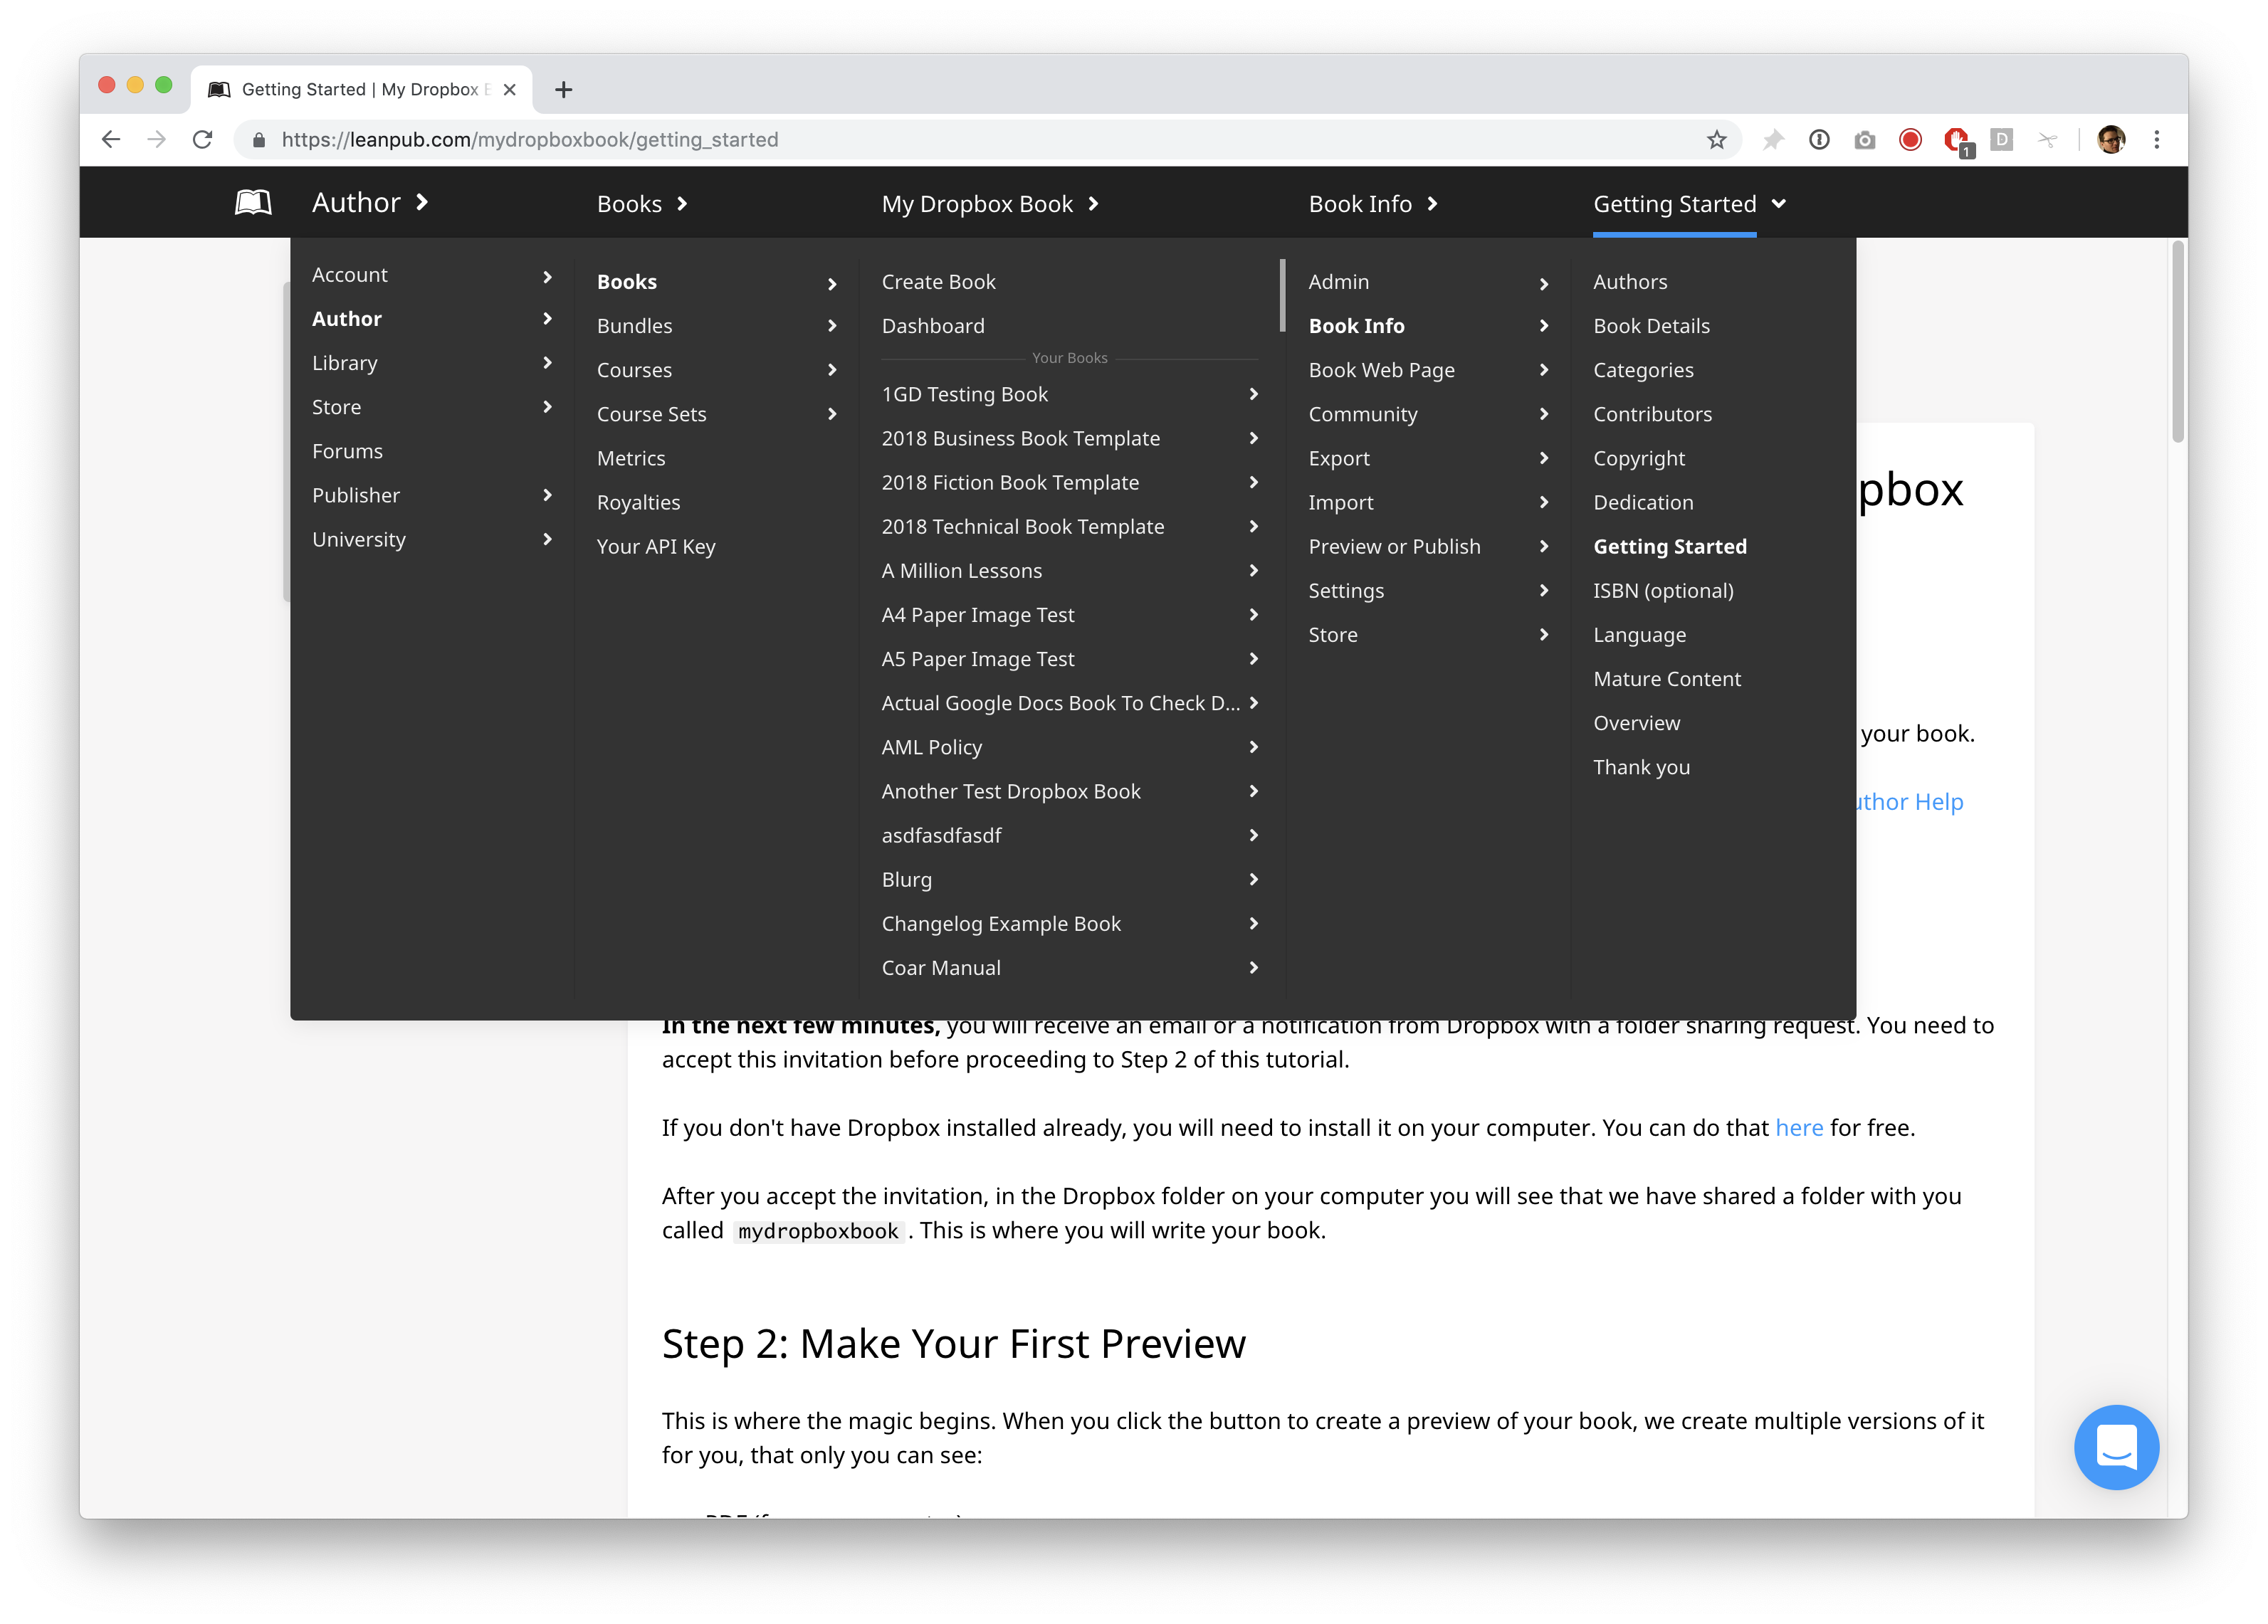
To create your first preview, using the default content we included in your new book, go back the Getting Started page for your book:
Click on “Getting Started” at the top, and you will see the Author menu. It will look something like this:
Click on “Preview or Publish” under the “Book Info” column, and you will see something like this:

Select “Preview’ in the column to the right, and you will go to the “Preview” page for your book:

Click the “Create Preview” button. You will go to a page like this, where you will see a progress bar at the top:
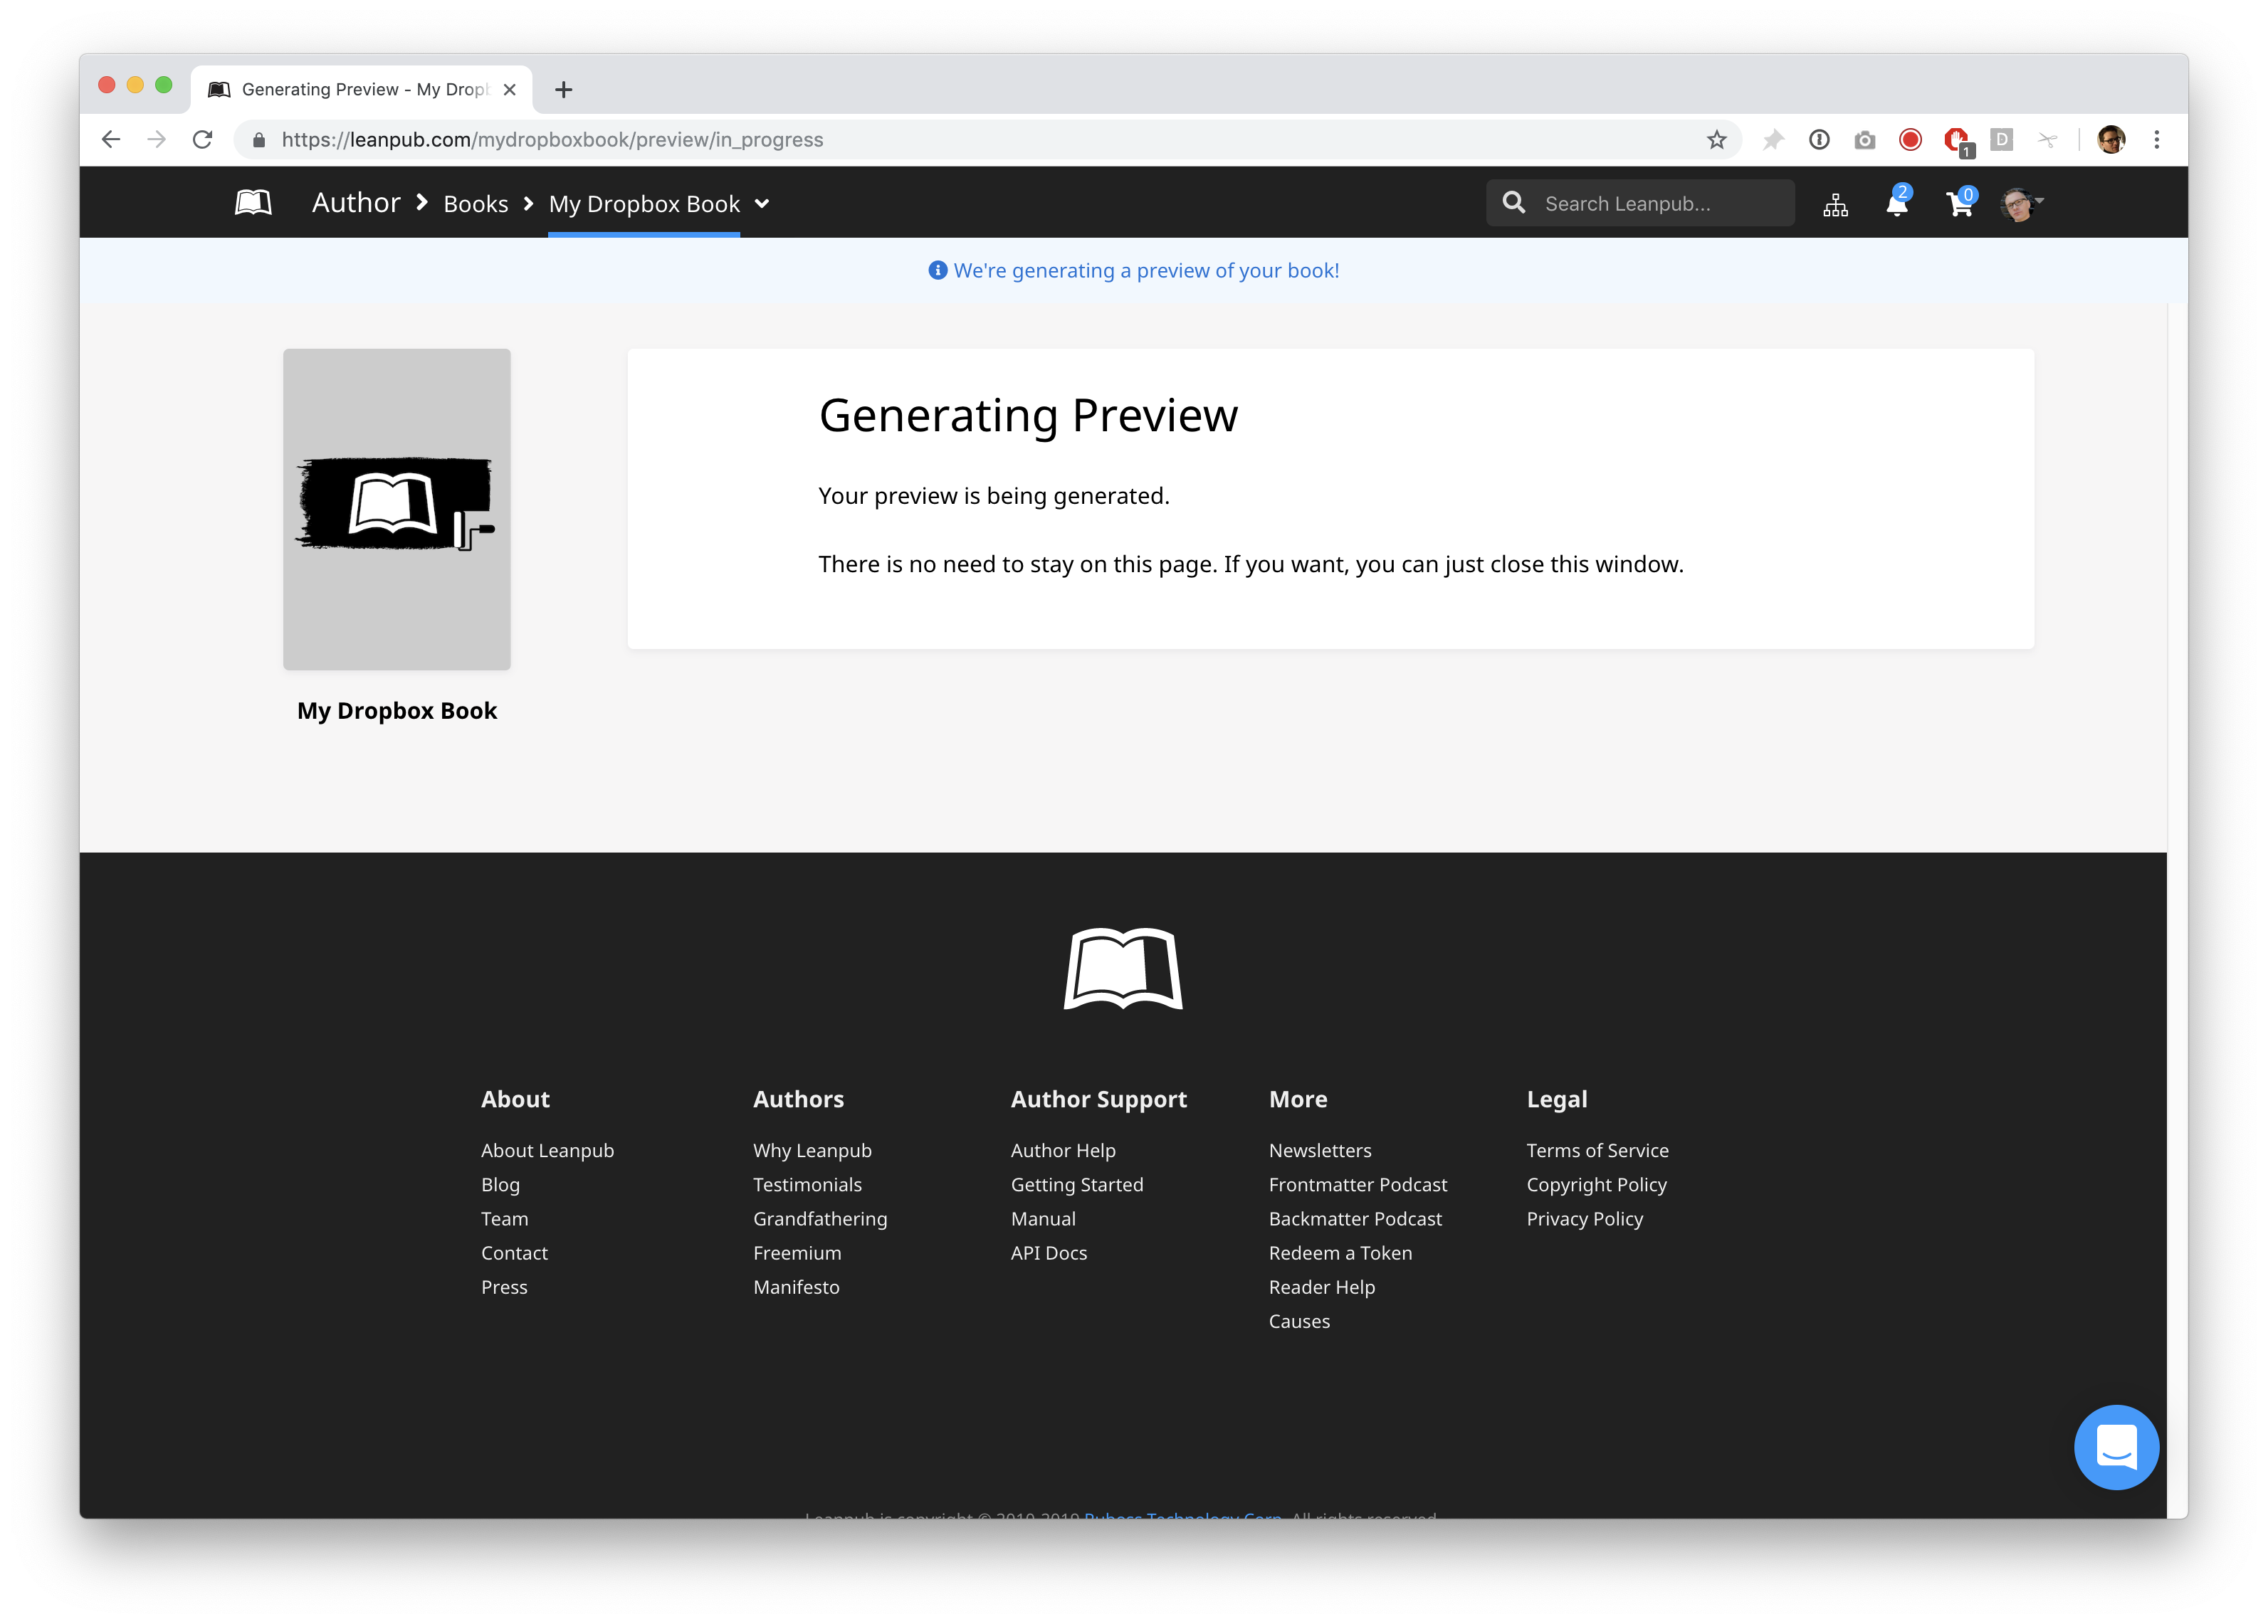
When the preview process is complete, you will see download links for the preview, in a variety of formats:
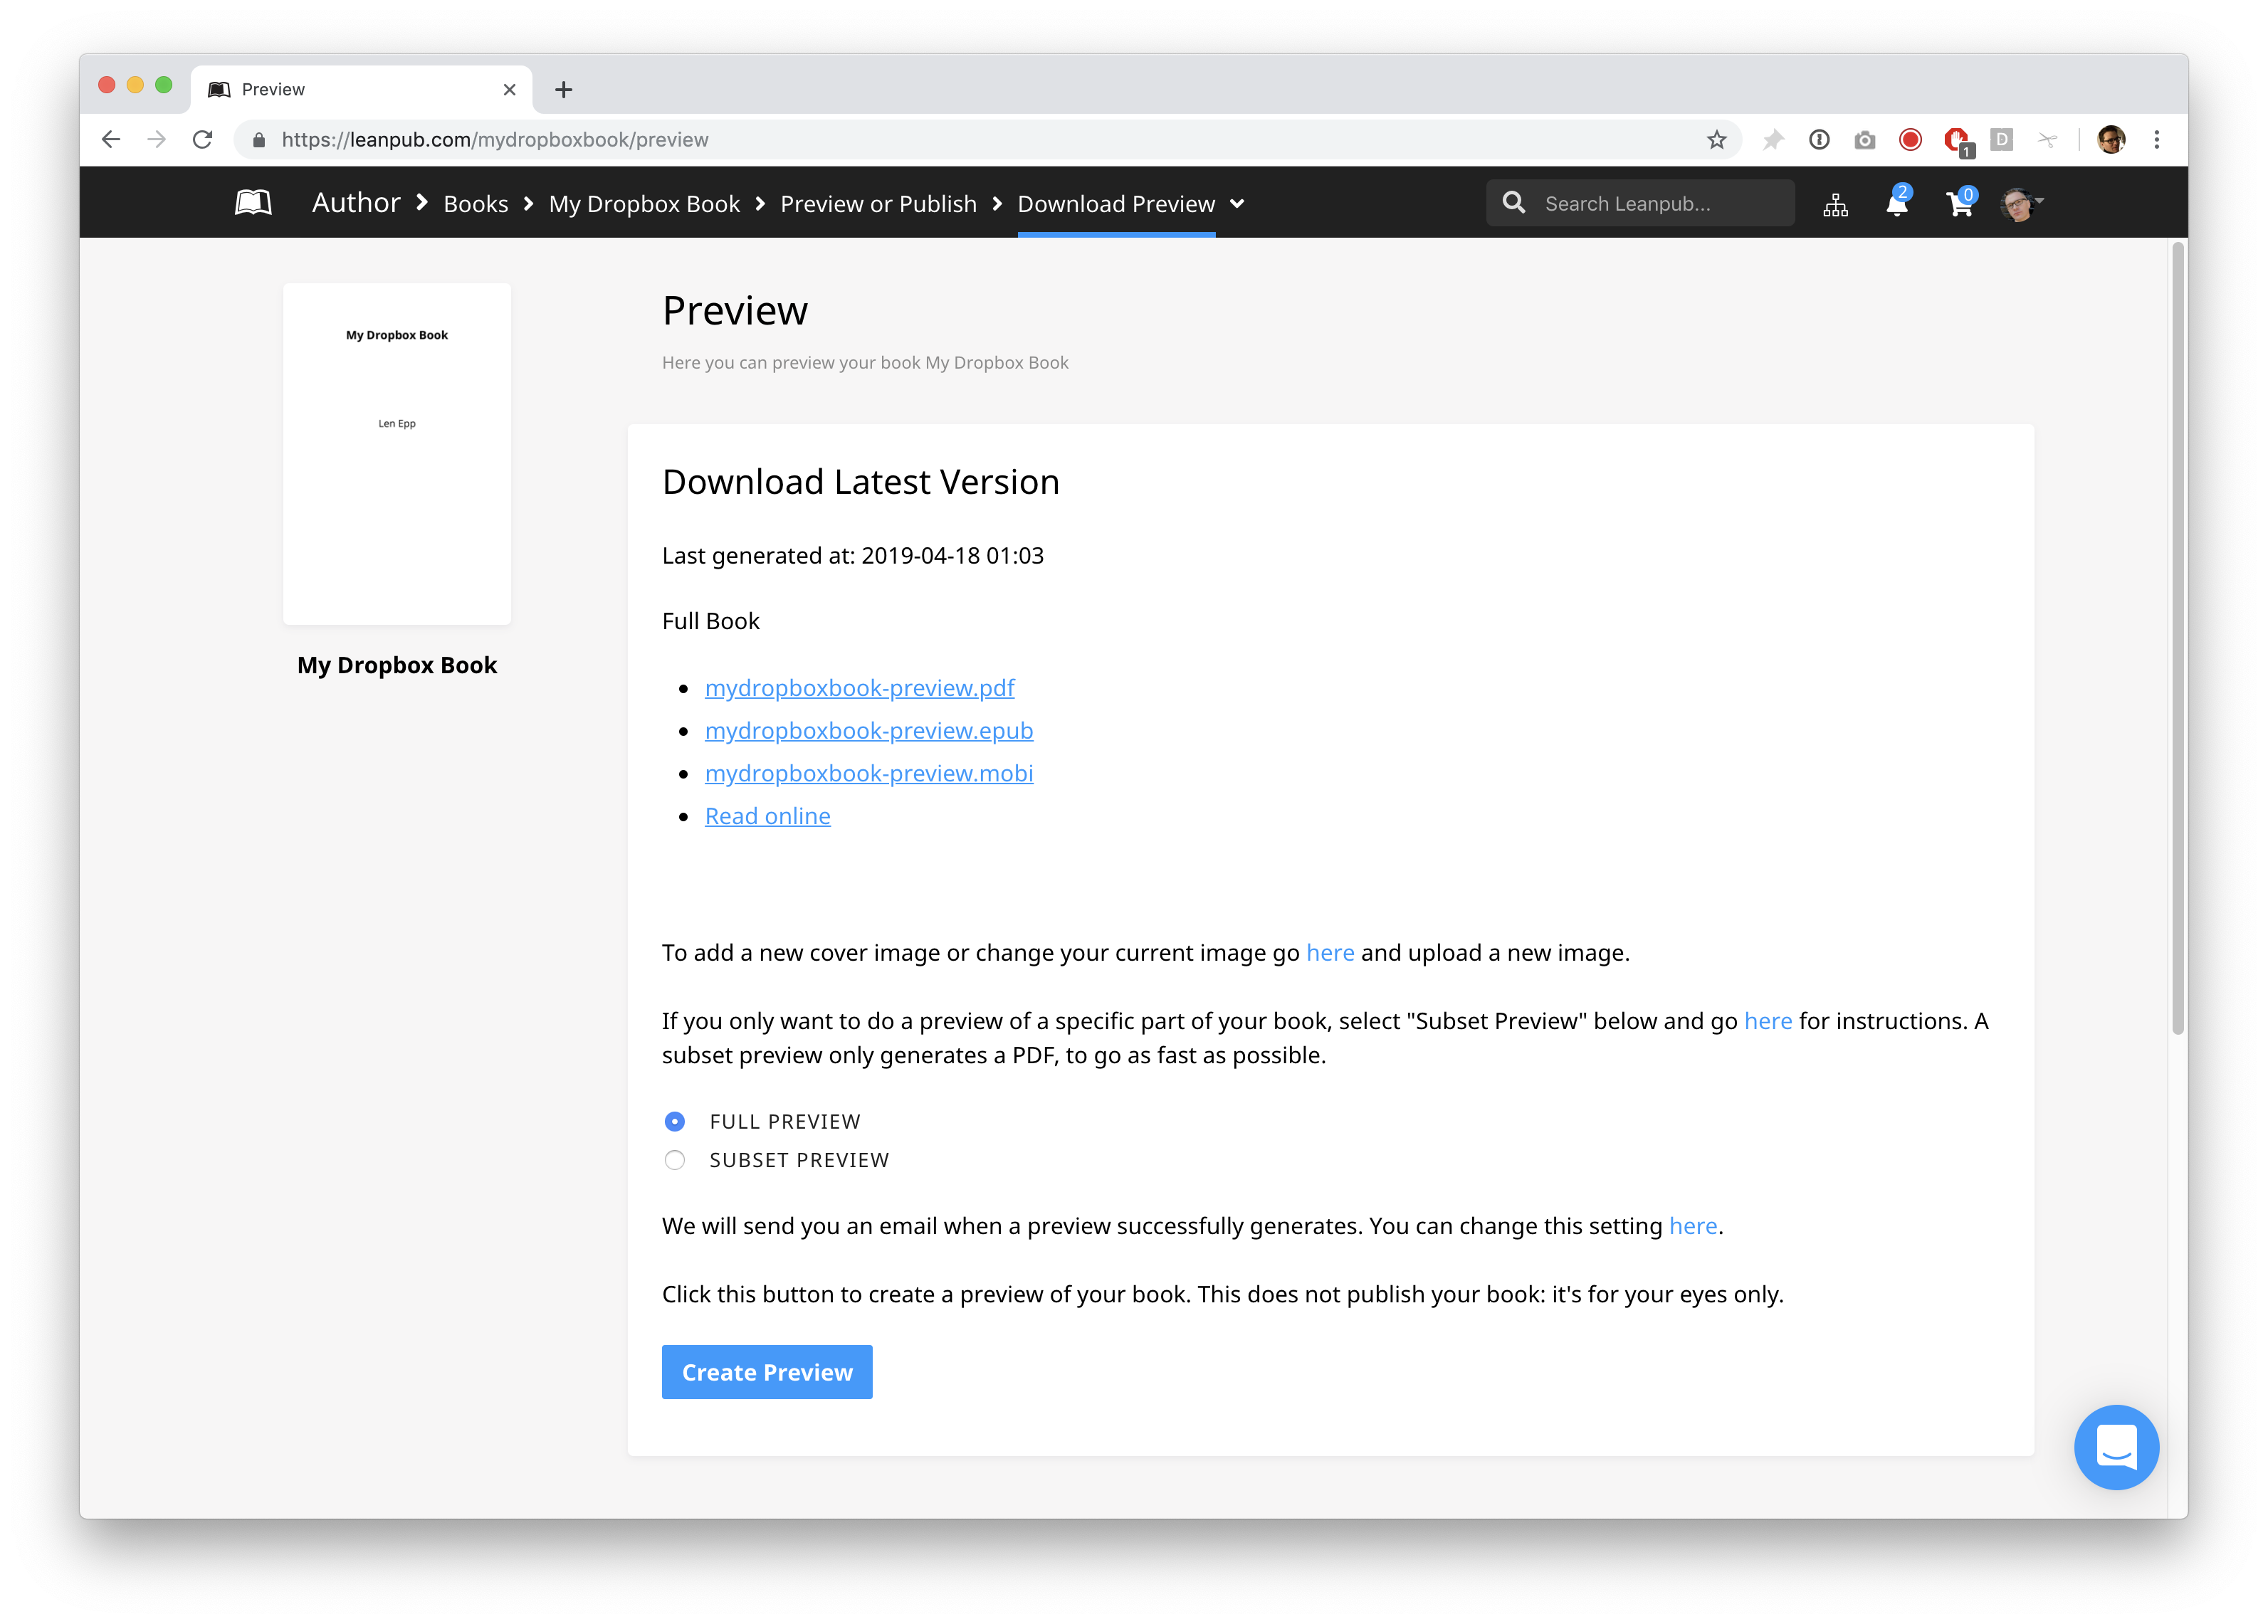
Click on the links to see what your book looks like in the various formats.
Writing in Your Book
Open your book folder in Dropbox. You’ll see a folder named manuscript inside it. This is where you write your book.
If you have just created a new book, the manuscript folder will contain four files with the file name extension .txt. There will also be a folder called resources:
Open the file called chapter1.txt by double-clicking on it. You can also open the file in any specific text editing software you prefer.
Next, delete the contents of the file and type:
In your text editor, save this change.
Make a New Preview of Your Book
The next time you create a preview of your book, you will see that Chapter One has changed, and it now says “Hello, world!”
To create a new preview, repeat what you did when you made your first preview, by using the Author menu in Leanpub to go to:
Author > Books > [Your Book Title] > Preview or Publish > Preview
How the List of Files in Book.txt Works
When you create a preview, you may not want our book generators to use all of the files in your manuscript folder. Also, you may want the contents of your book to reflect a different order than the order they are presented in, in your manuscript folder.
So, whenever you create a preview, our friendly bookbots generate your book using only the files that you have listed in the Book.txt file that is in your book’s manuscript folder, and they use those files in the order that you have listed them.
Let’s see how this works.
First, delete a file. In your book’s manuscript folder, select the file named chapter3.txt and delete it.
Now, let’s rename a file. The files listed in Book.txt can have any name you want to give them. (To be clear, the files do not have to include the word “chatper” in the file name.)
In your book’s manuscript folder, select the file chapter2.txt.
Now, change the file name to conclusion.txt by right-clicking on the file and selecting “Rename.” **(Your computer might show a different word than “Rename,” but there should be an option to change any file’s name if you right-click on the file.)
Now that we have changed the files in the manuscript folder, we need to update the list of files in the Book.txt file.
Using your text editor, open the Book.txt file.
In the Book.txt file, you will see this list of files, like this:
First, delete chapter2.txt. Then, delete chapter3.txt.
Next, on the second line, type conclusion.txt.
Now, your list of files in Book.txt will look like this:
Next, open the file conclusion.txt.
Now, delete everthing in the file, and type this:
Finally, save this change your text editor.
Go back to the preview page for your book at:
Author > Books > [Your Book Title] > Preview or Publish > Preview
The next time you create a preview, it will reflect the changes you have made.
Congratulations! You’ve completed the Getting Started tutorial for writing a book in Leanpub using Dropbox.
Next Steps
Next, we recommend you explore the Overview page for your book:
Author > Books > [Your Book Title] > Book Info > Overview
On the Overview page, you can see all the pages you need to get your book set up on Leanpub, like “Upload Book Cover” and the “Book Details” page, where you can explain what your book is about to potential readers.
If you have any questions or can’t find anything, please search our Help Center for authors here: http://help.leanpub.com/author-help.
Happy writing!
Getting Started with Git and GitHub Writing Mode
You can write a Leanpub book using Git and GitHub. In this chapter we’ll show you how to create a book and generate your first preview.
Once you have successfully generated your first preview, you’ll know everything you know to get started writing in the GitHub writing mode.
You’ll find more information and detailed instructions on the “Getting Started” page for your book, which you’ll go to automatically when you create your book.
Creating Your Book’s GitHub Repository
The first thing you need to is create a repository for your book on GitHub.
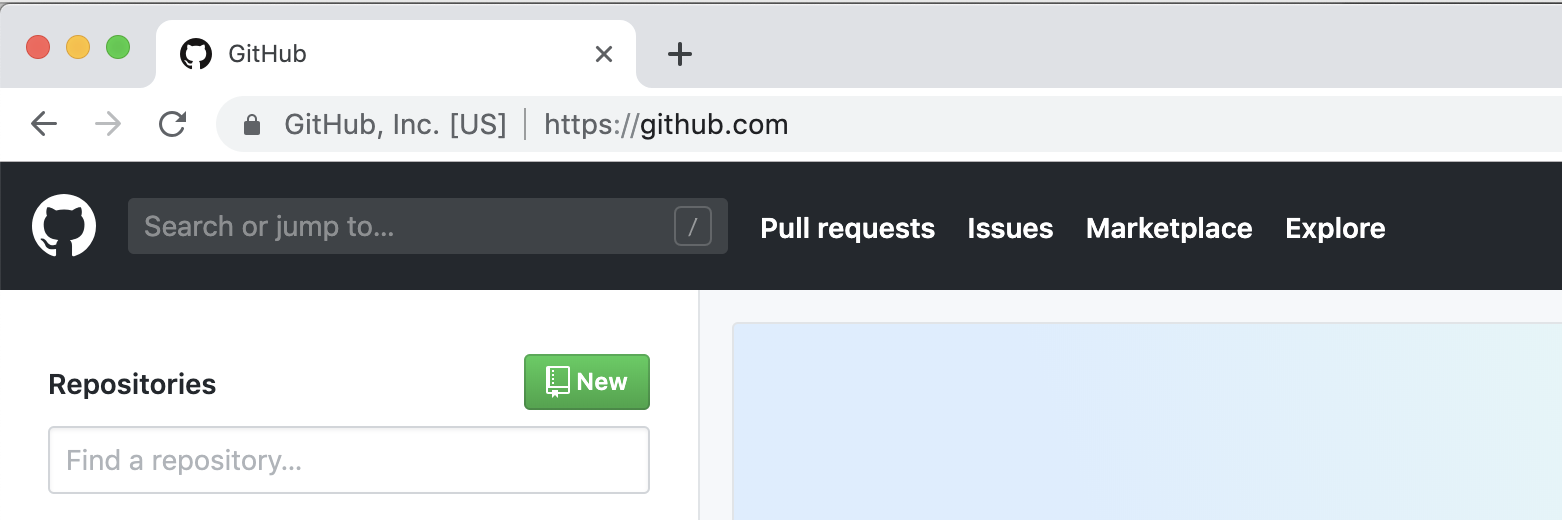
To do this, go to https://github.com and sign in.
Click the green “New” button to the right of the list of Repositories.
This will take you to a page where you can set up a new repository for your Leanpub book.

By default, “Public” will be selected. This means anyone can see your repository. Select “Private” if you don’t want anyone to be able to see your repository.
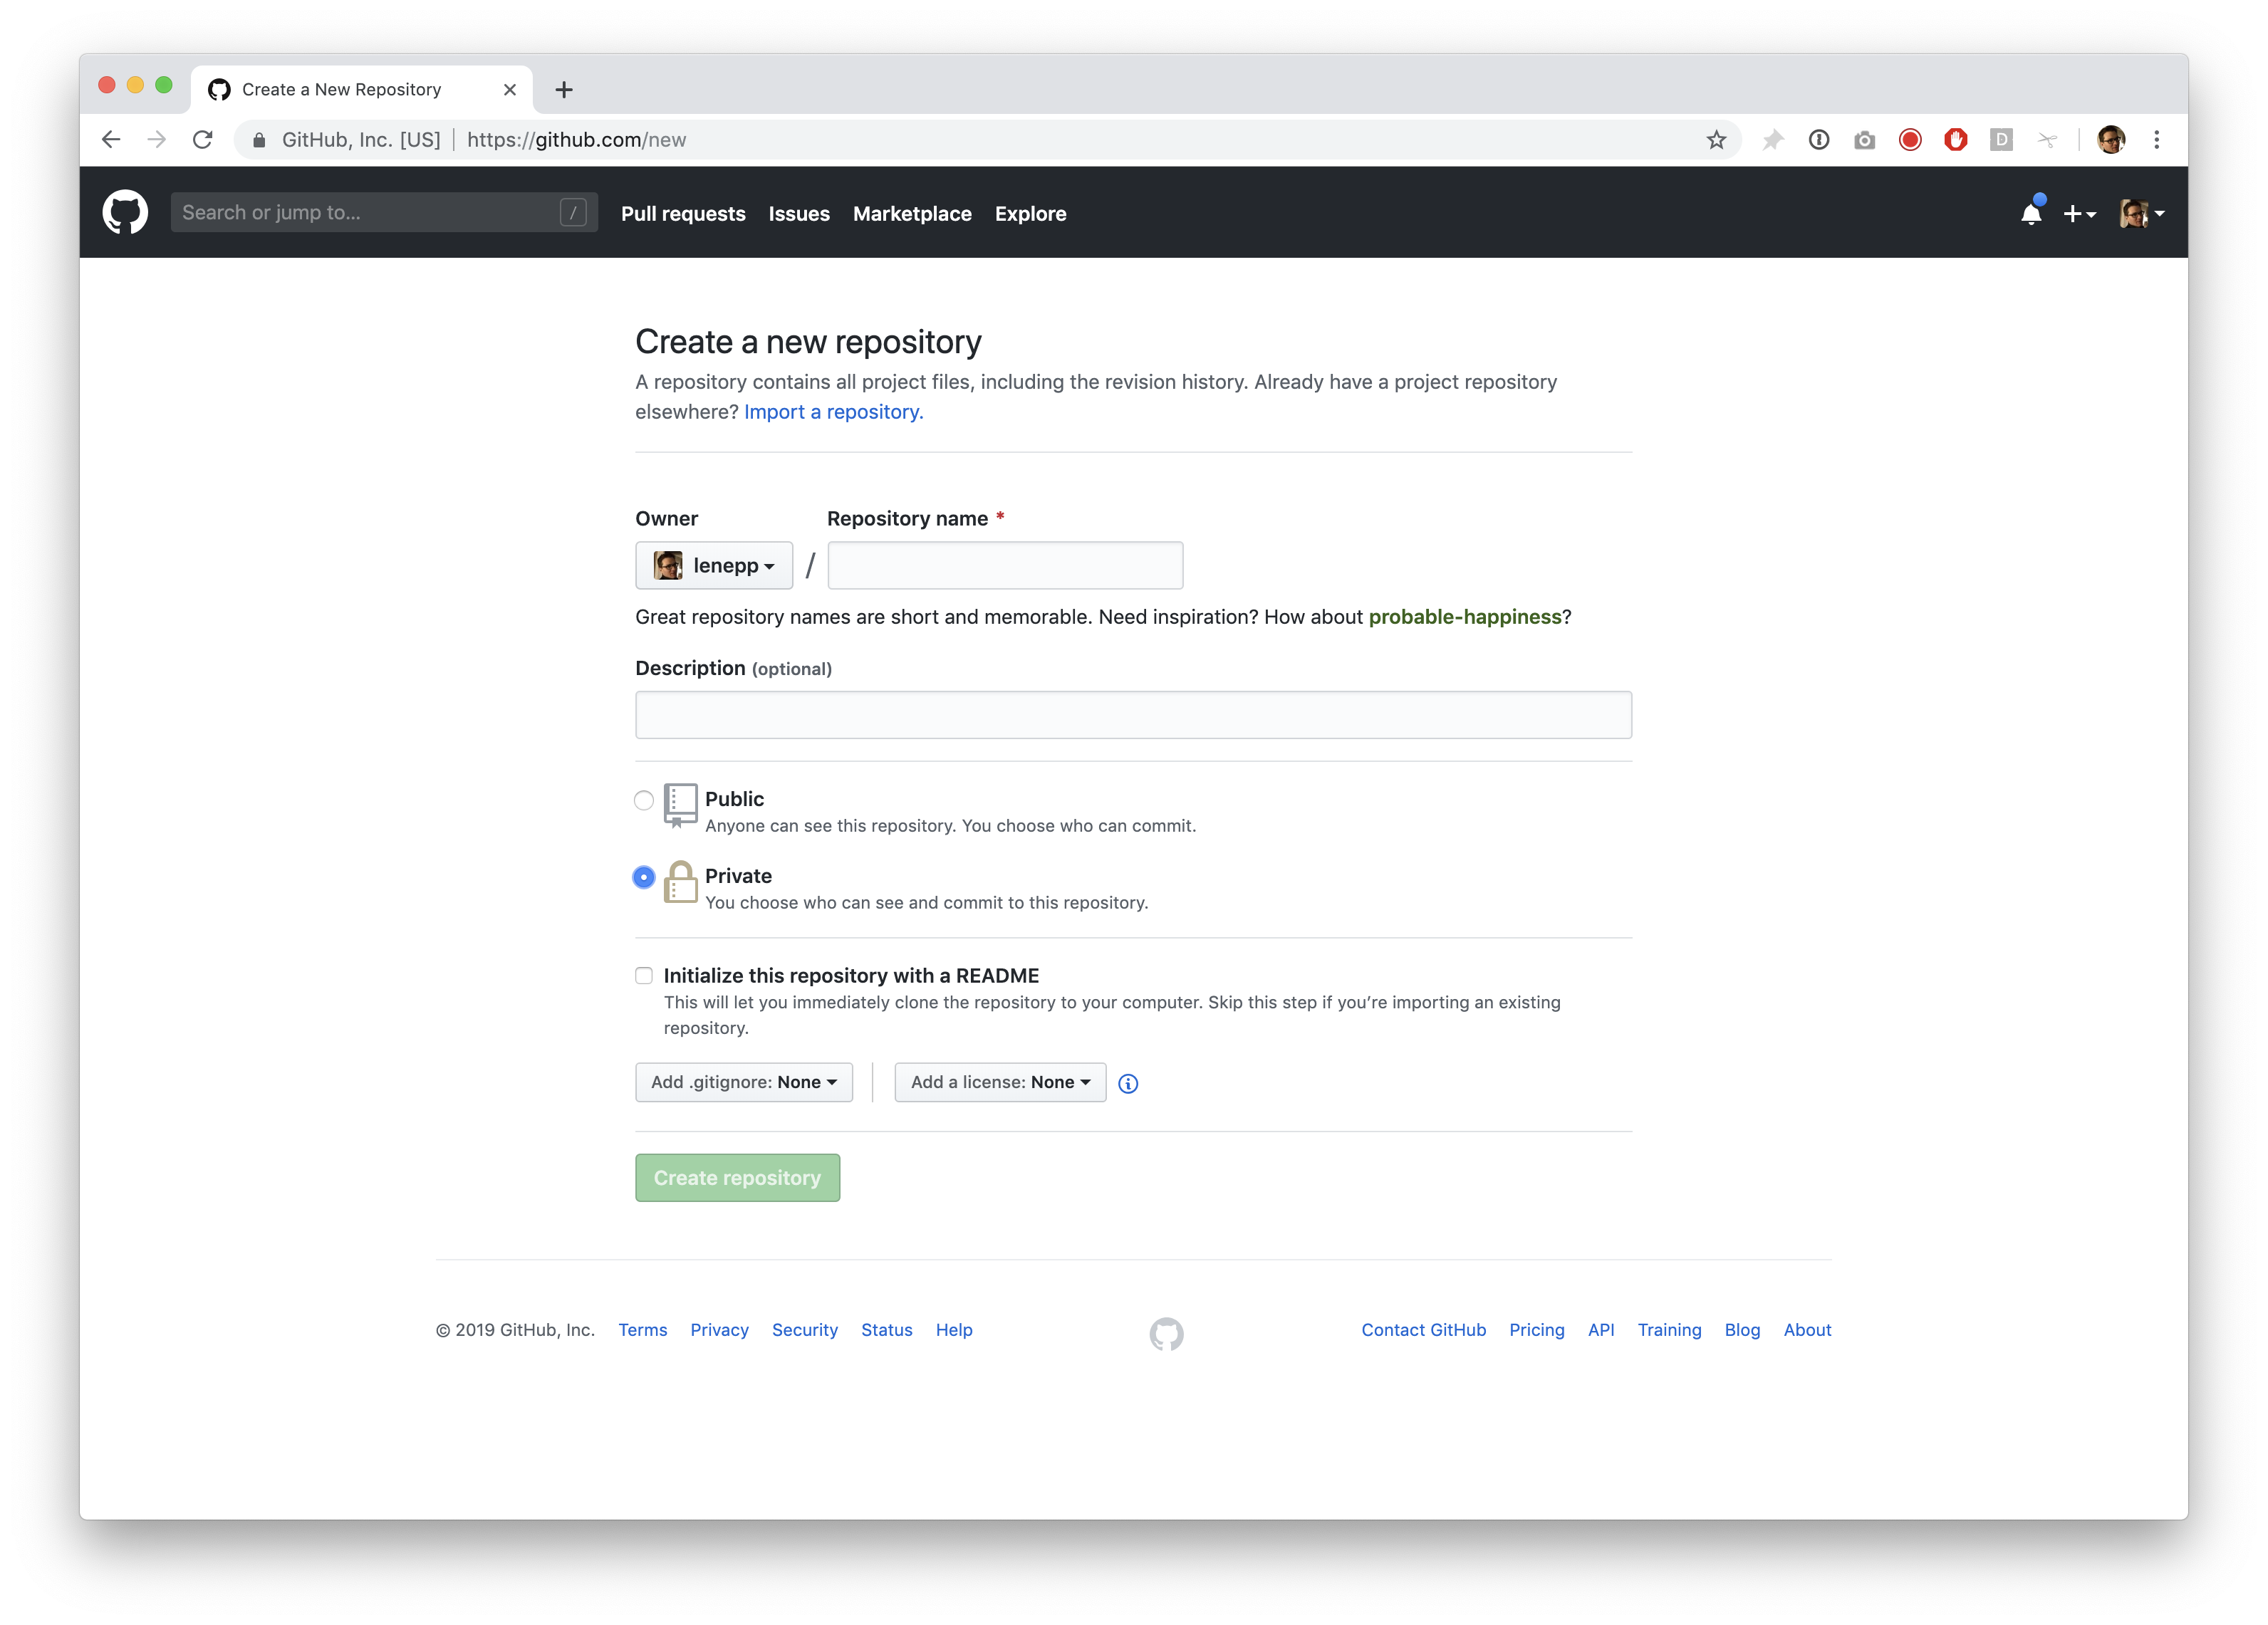
Next, type a name for your repository.
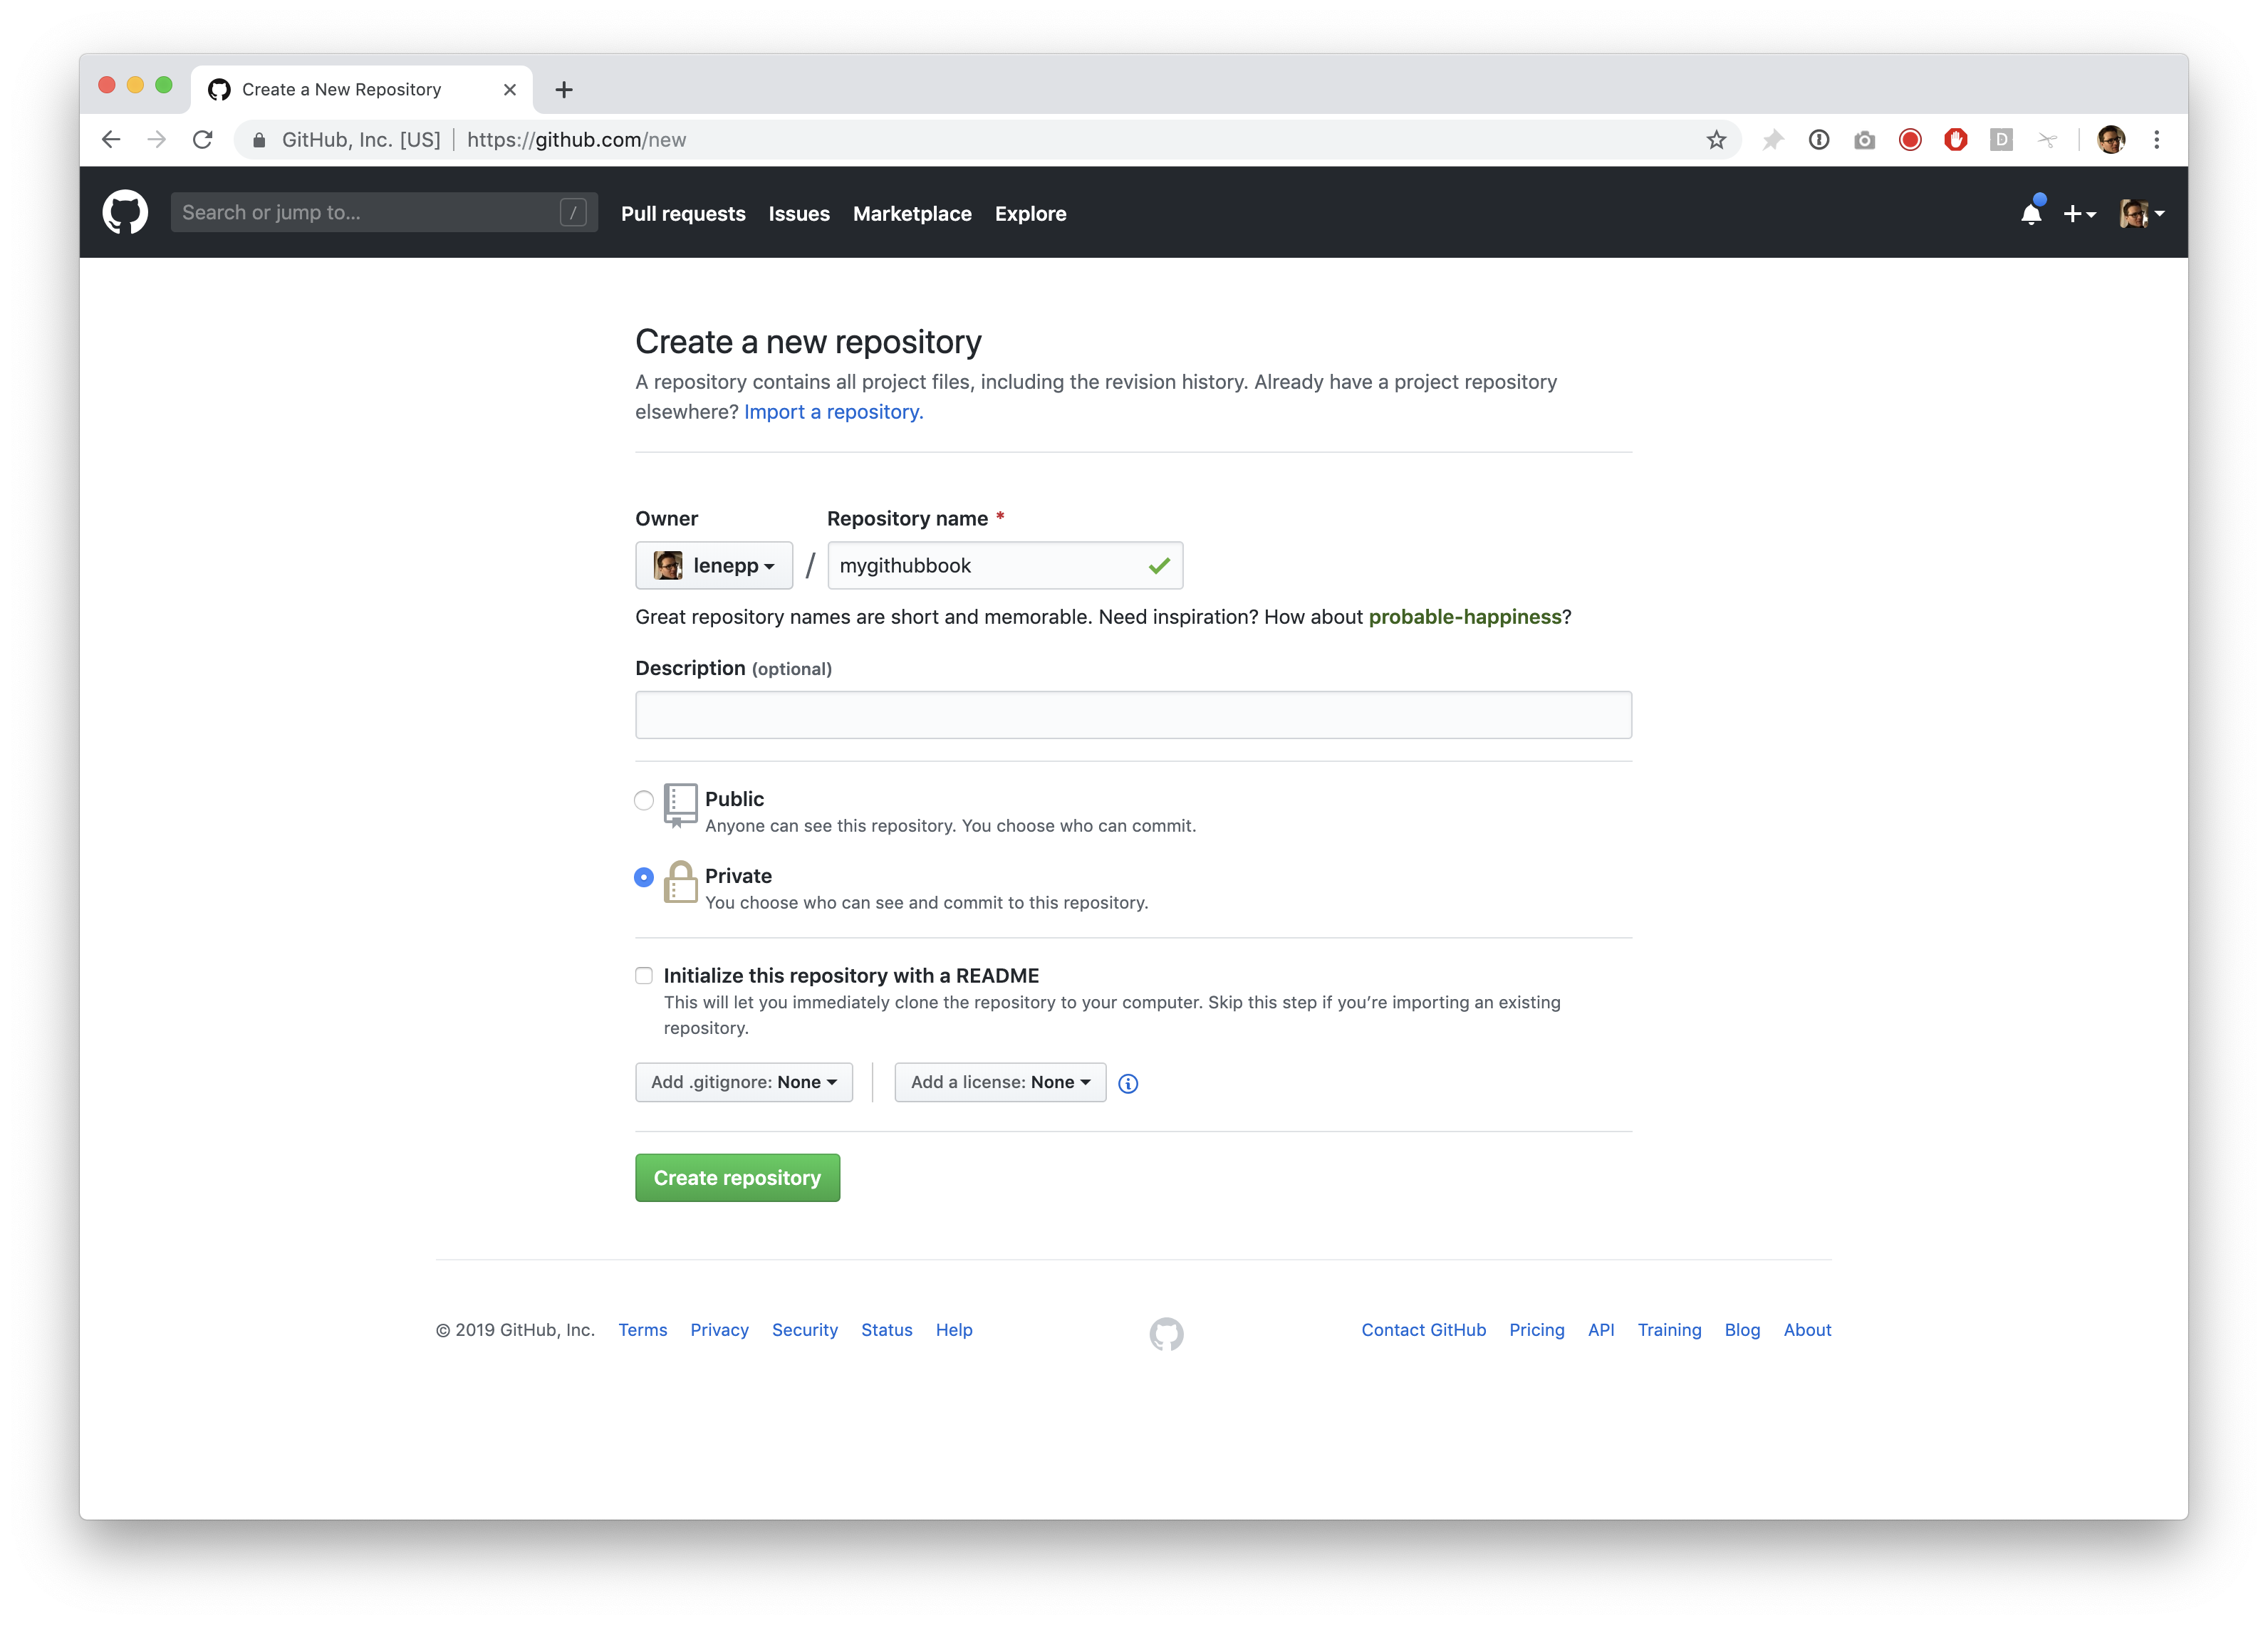
Click the green “Create repository” button. If you want, you can click the checkbox to initialize the repository with a README. It doesn’t matter, but this will get rid of the warning message later.
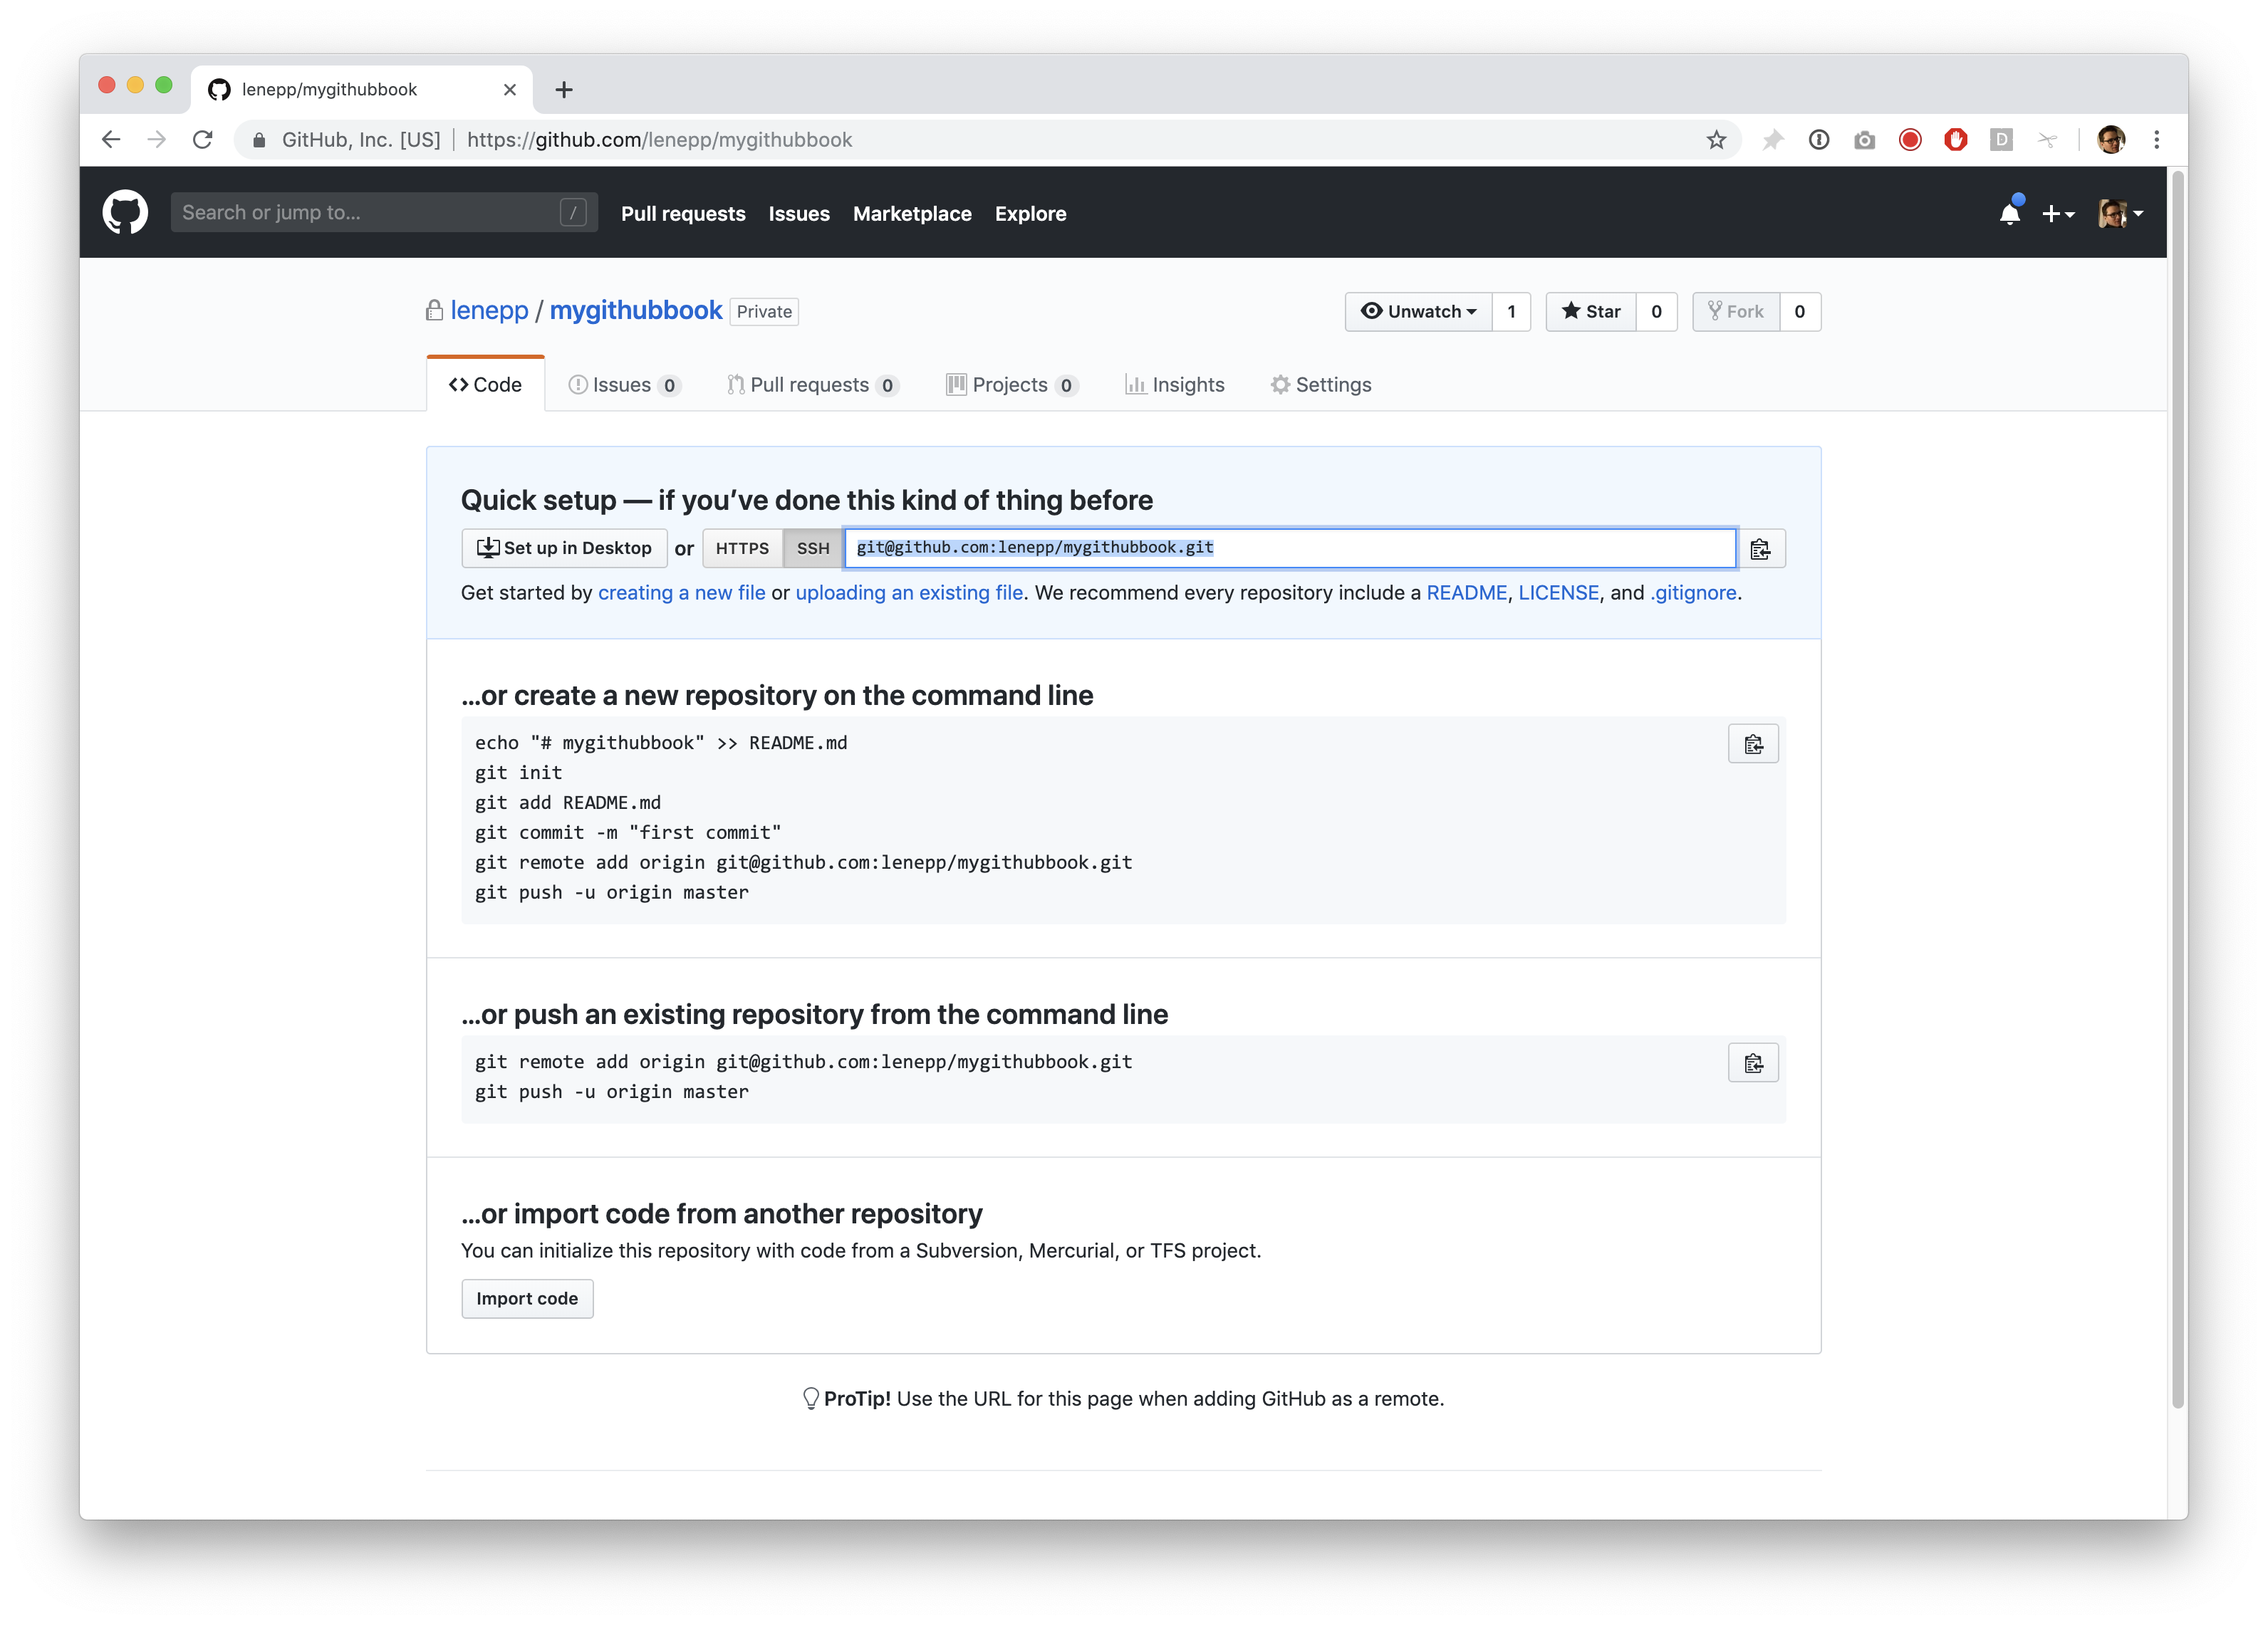
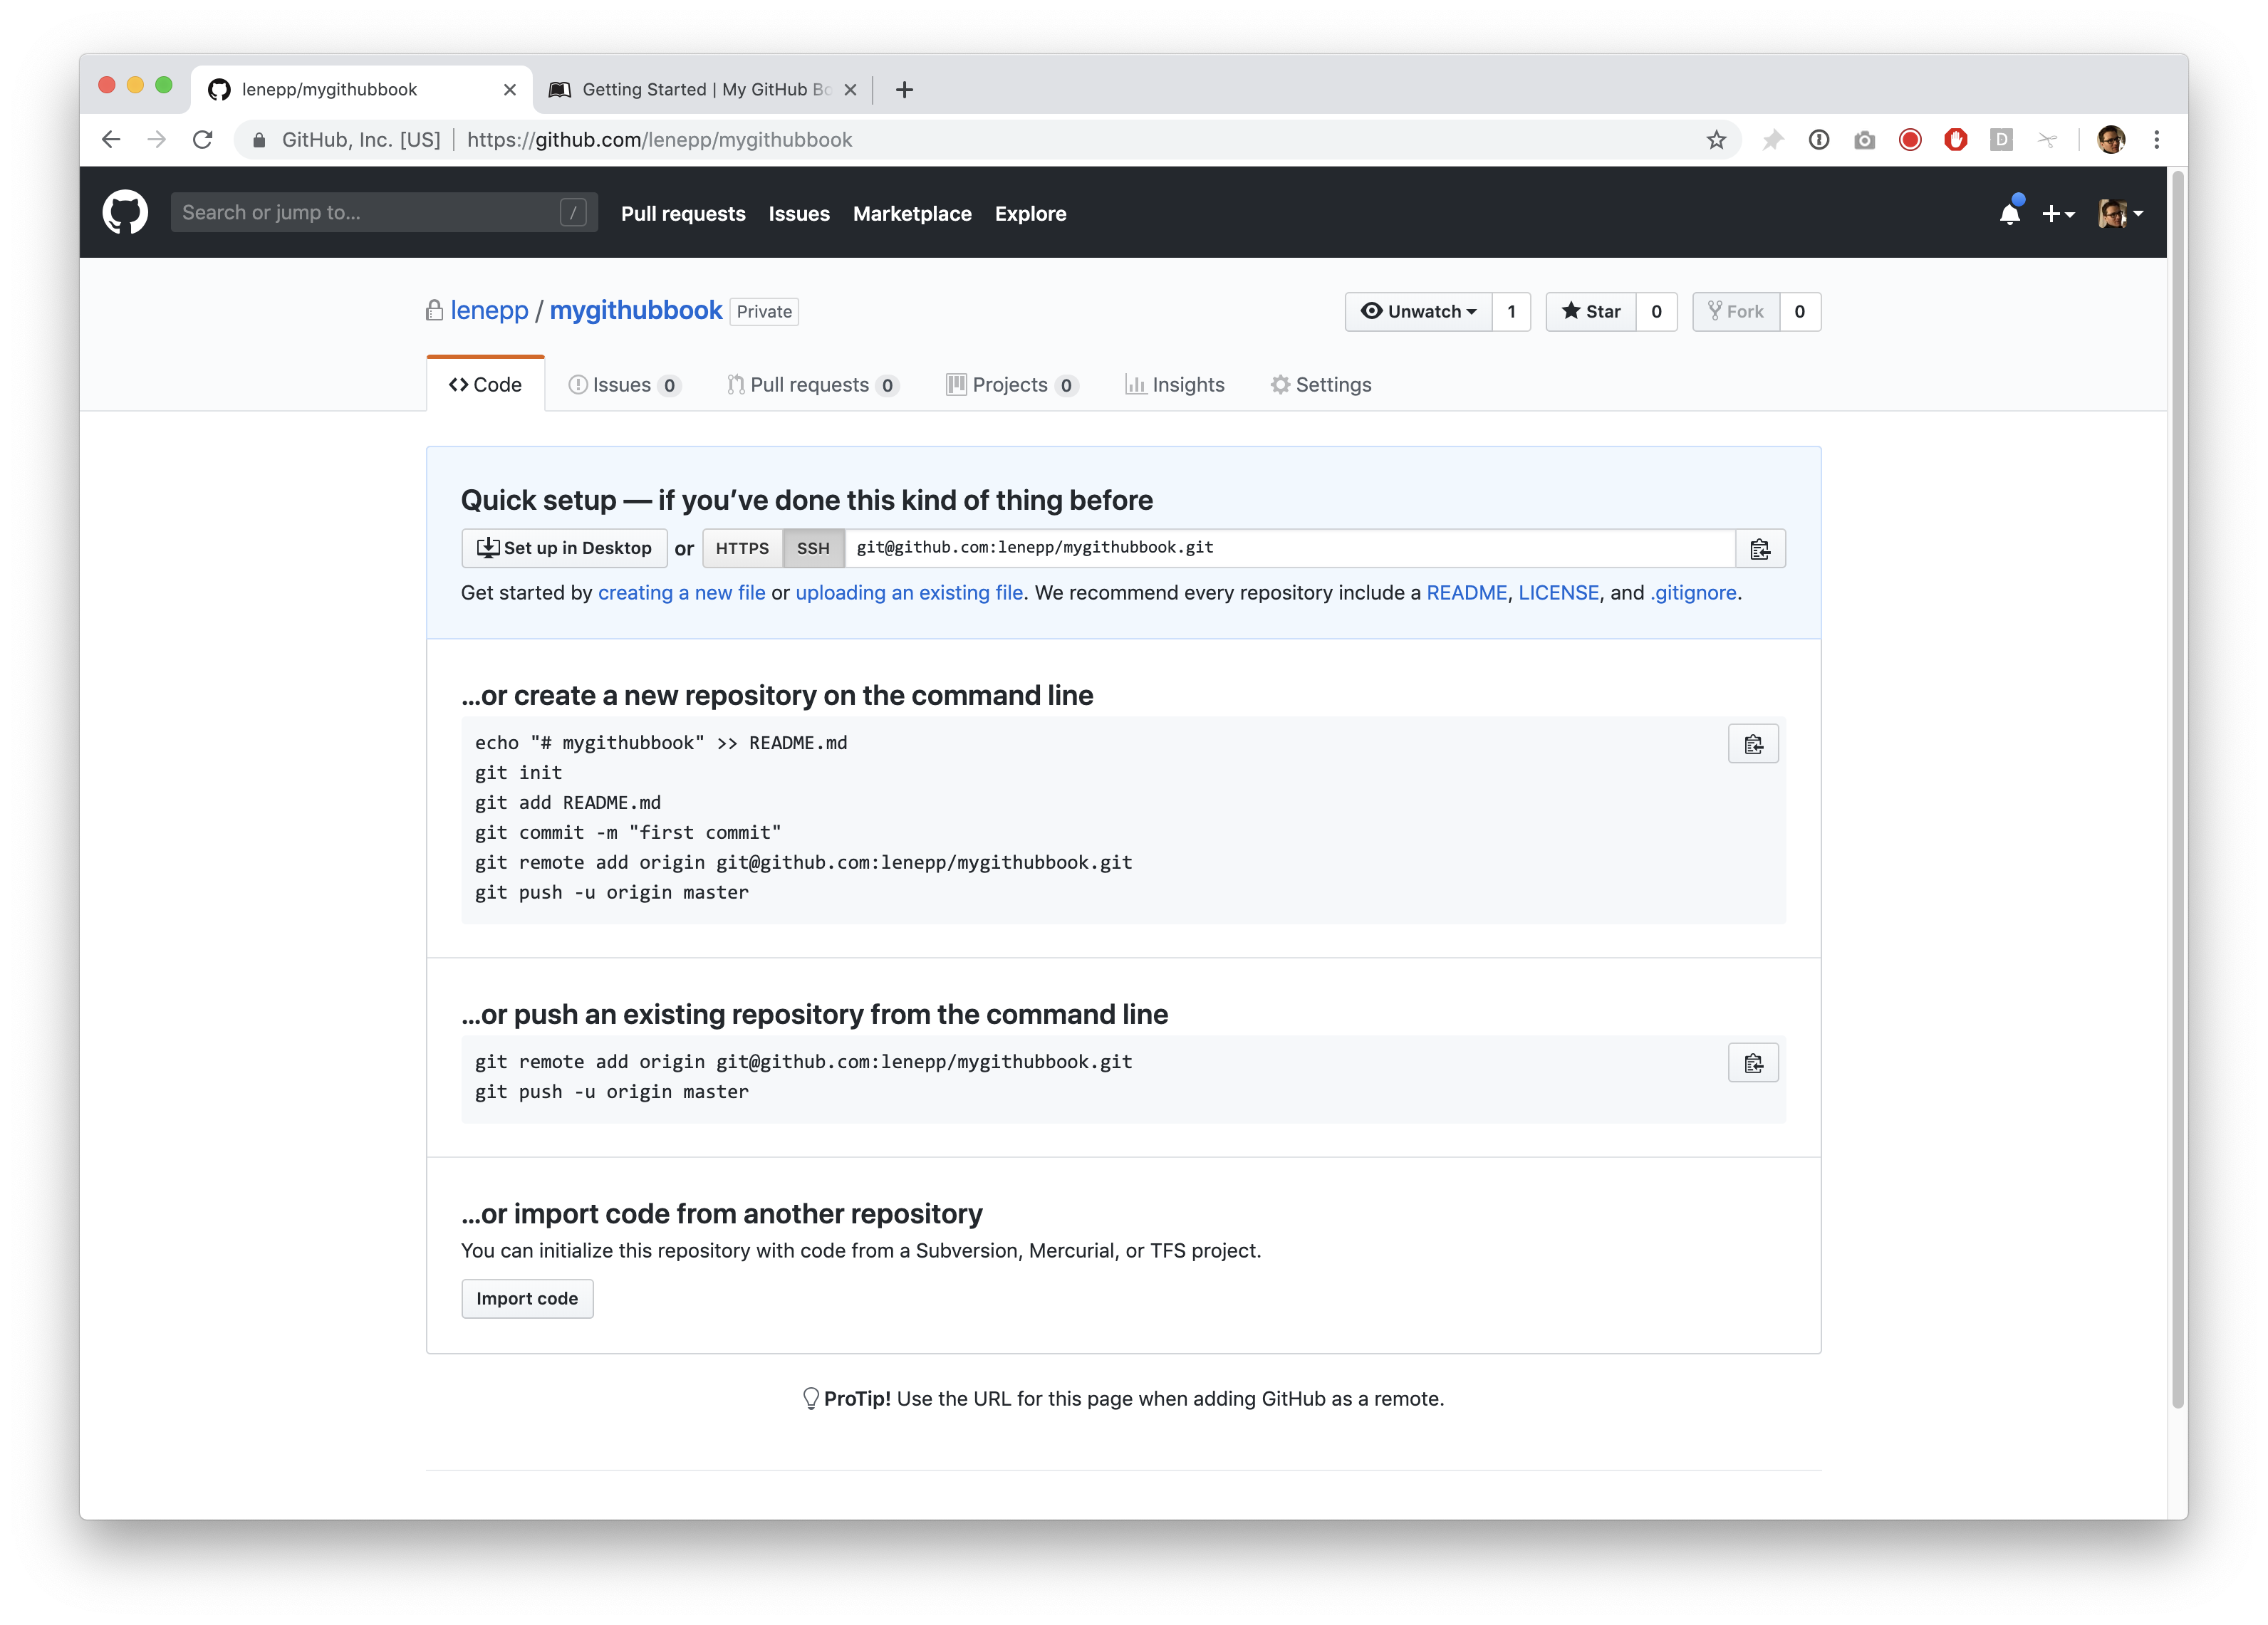
This will take you to a “Quick setup” page:

Select the repository information and copy it, or click the little copy-to-clipboard icon button.
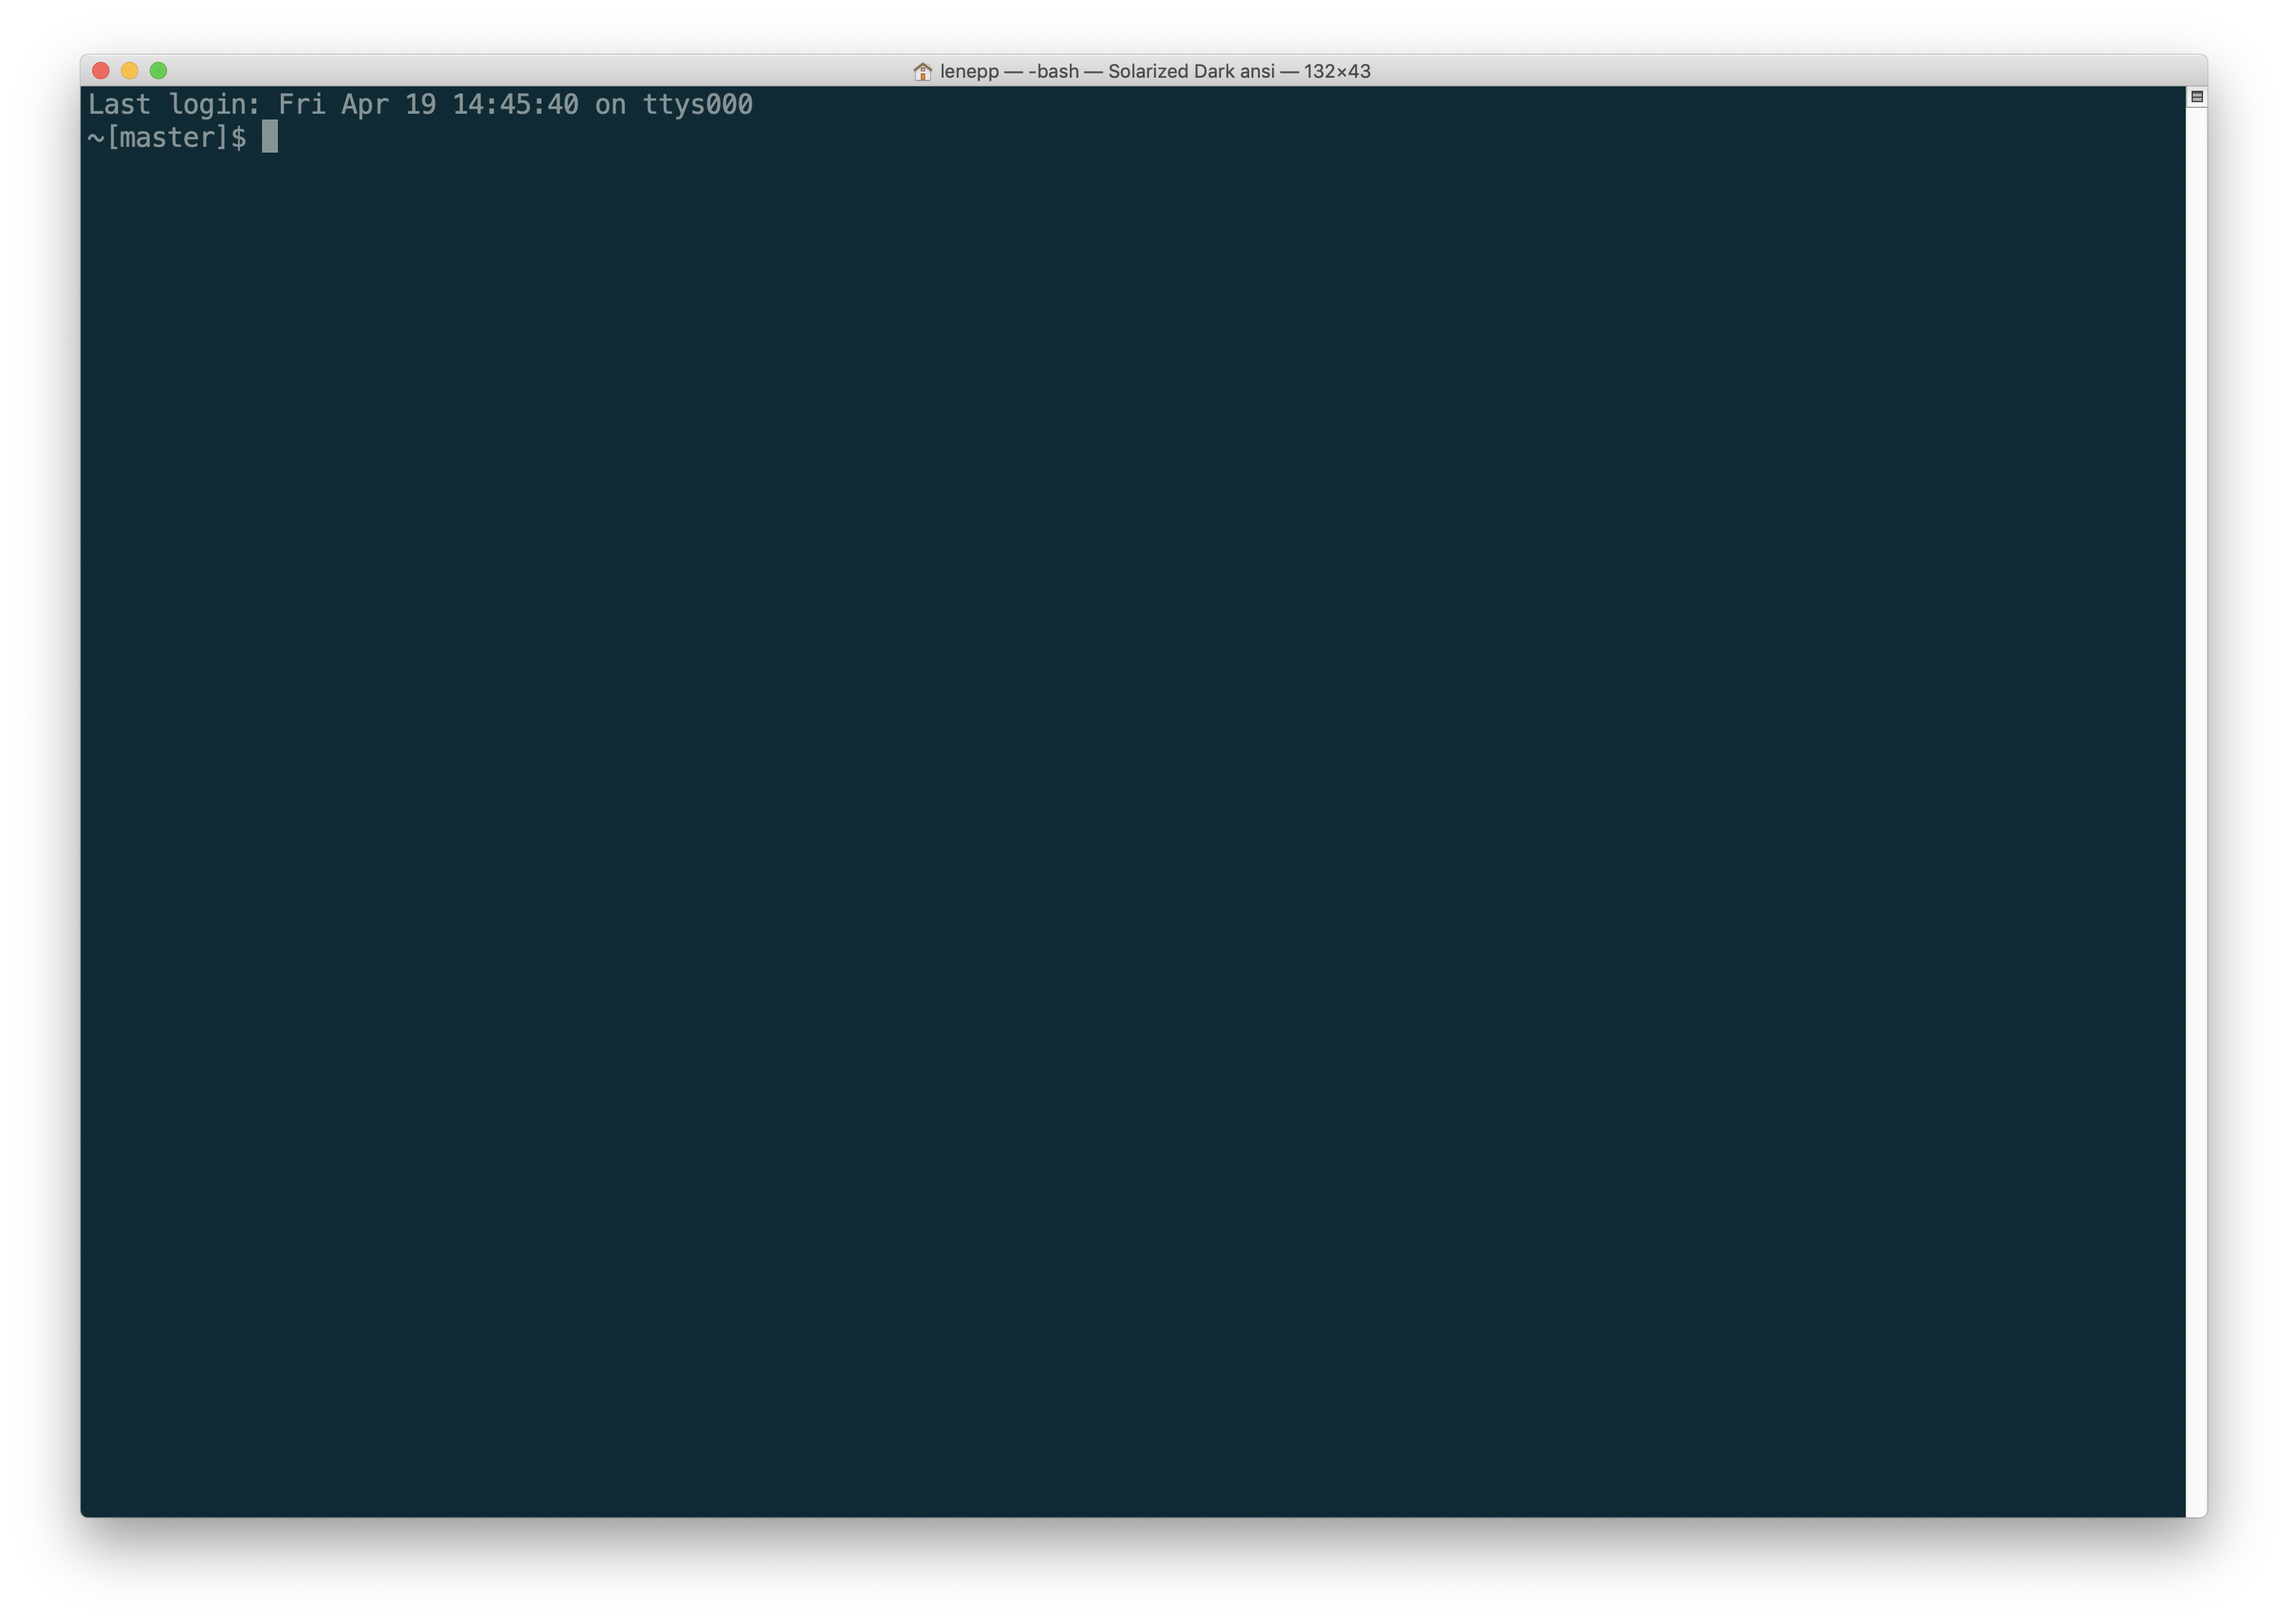
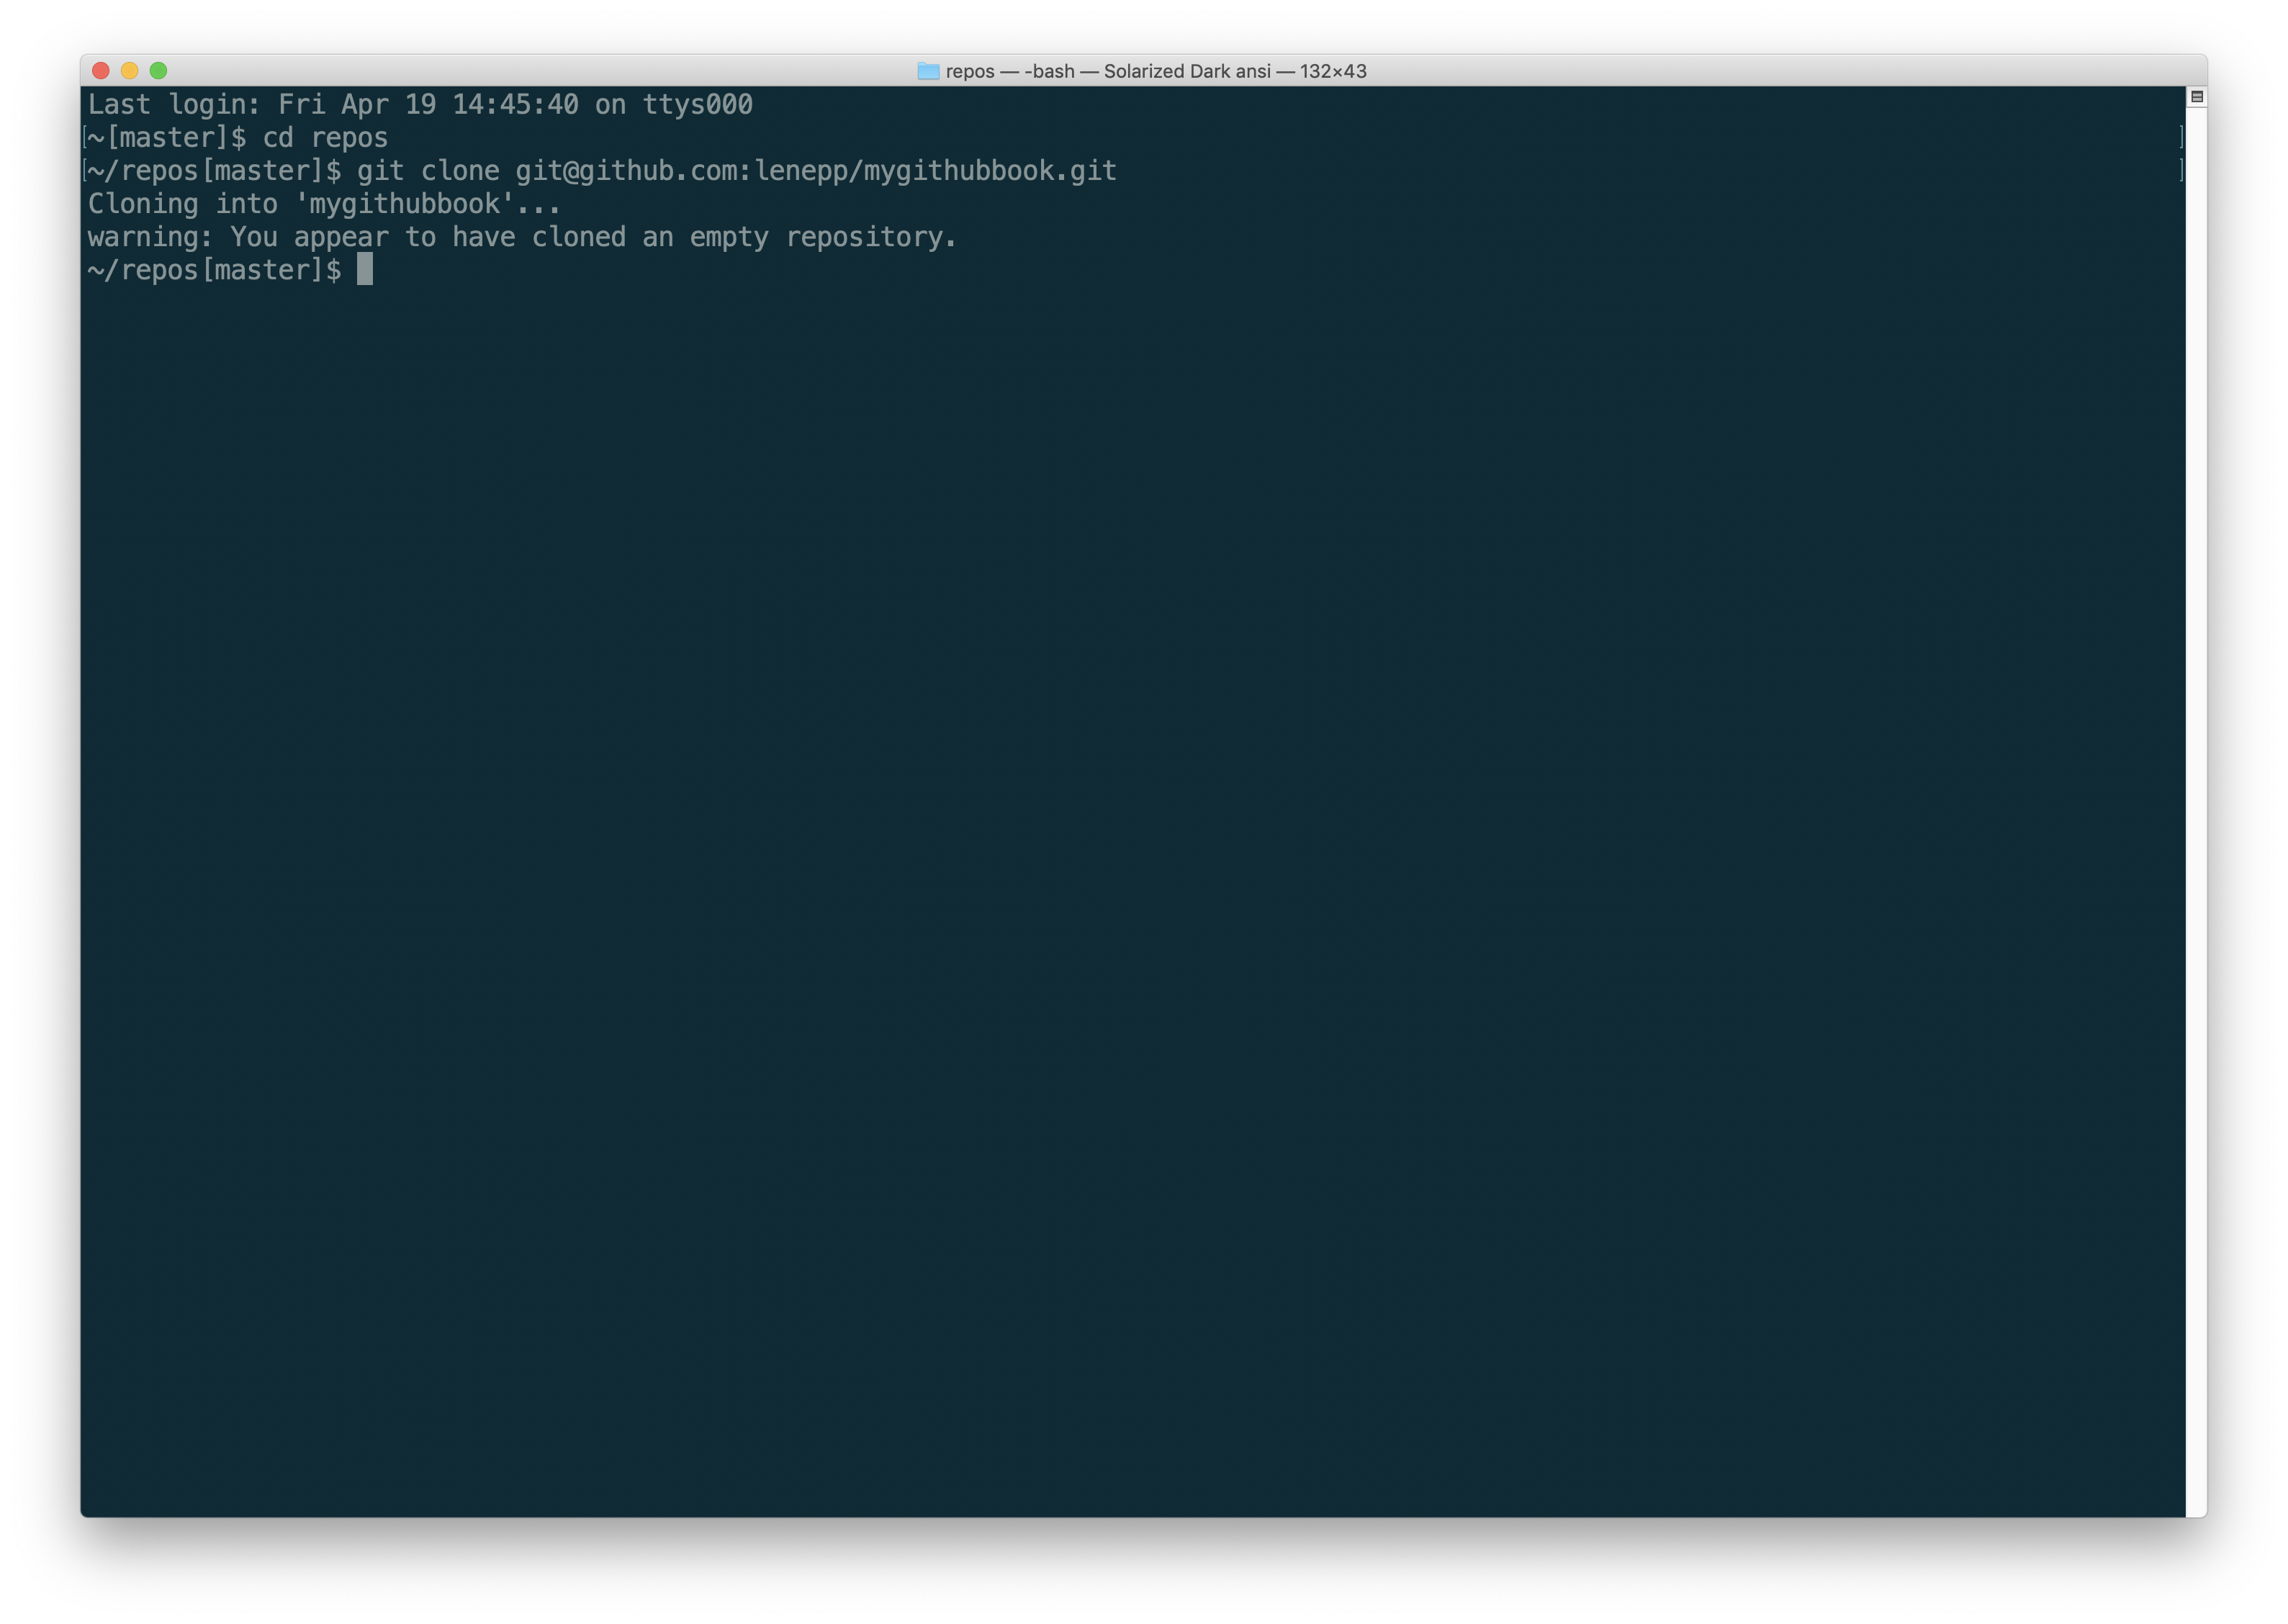
Go to the command line on your computer. In this tutorial we’re using a Mac, so we use Terminal.
Go to the folder on your computer where you want to clone your GitHub repository. In this tutorial, that is a folder called repos.

Type git clone and paste in the repository information you copied on GitHub, and hit Enter.
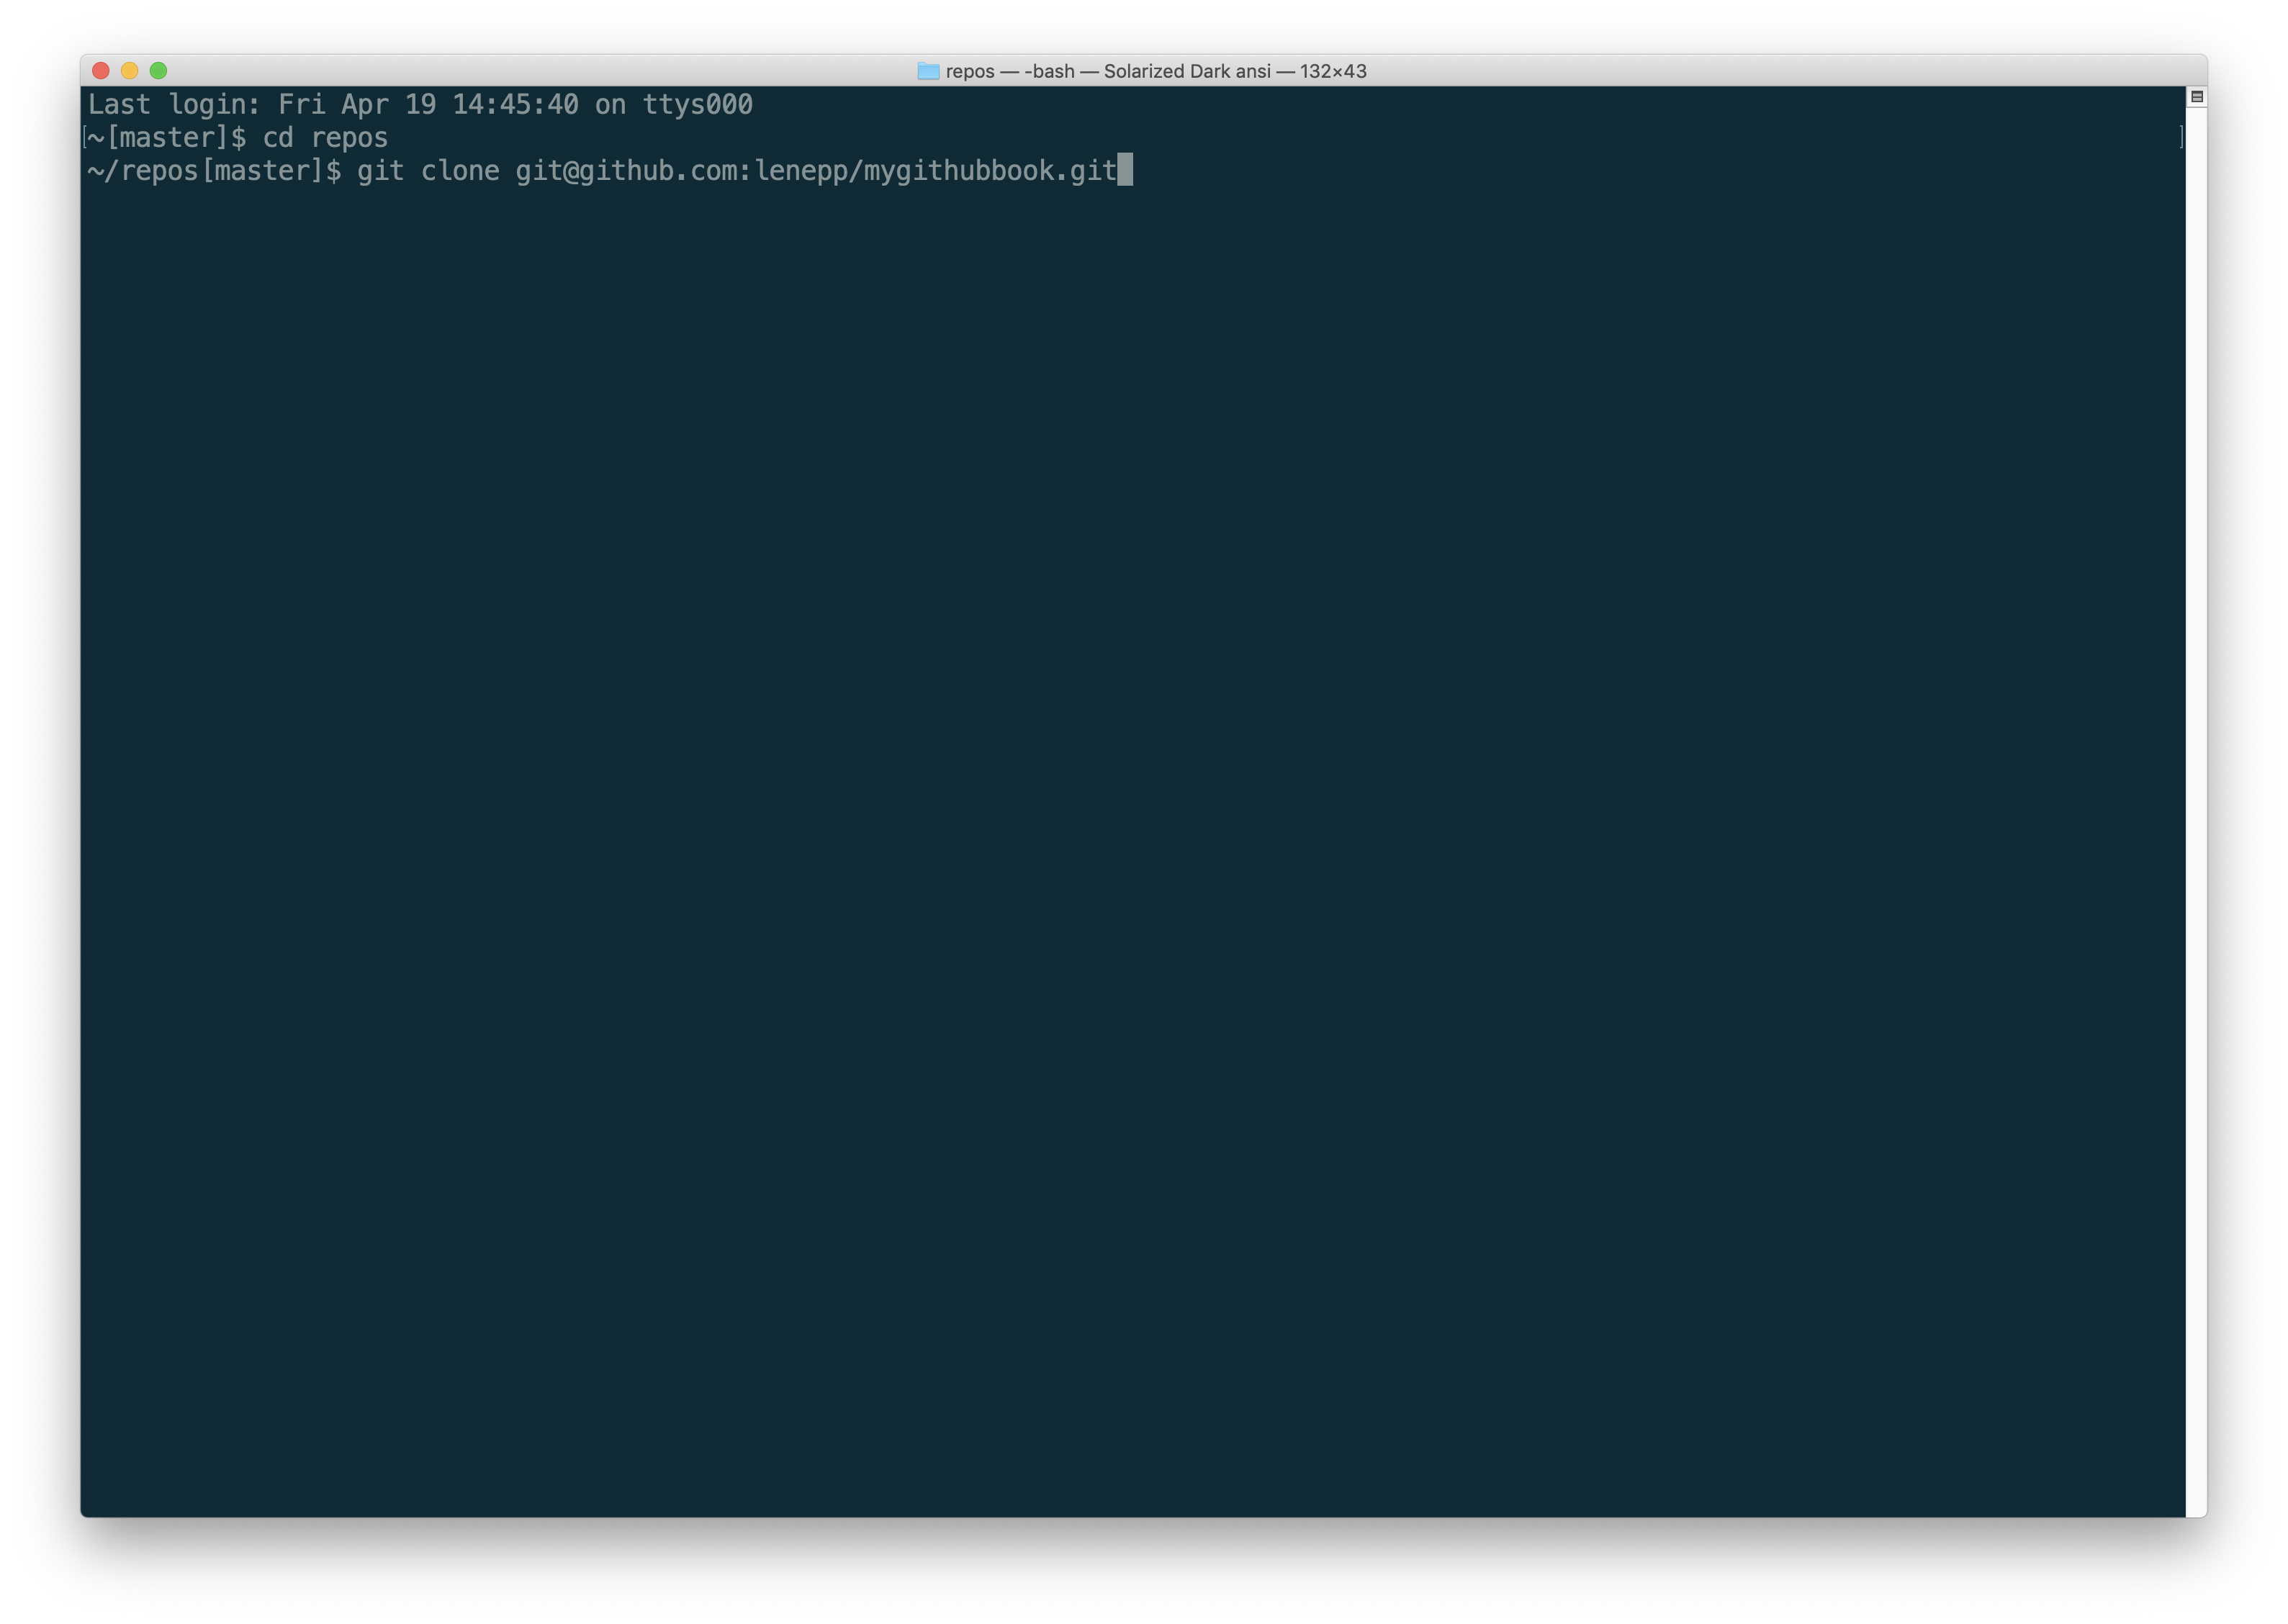
After a moment, you will see a message saying that the repository has been cloned.
Creating a Book in GitHub Writing Mode
Go to https://leanpub.com/create/book to create a book in GitHub writing mode.
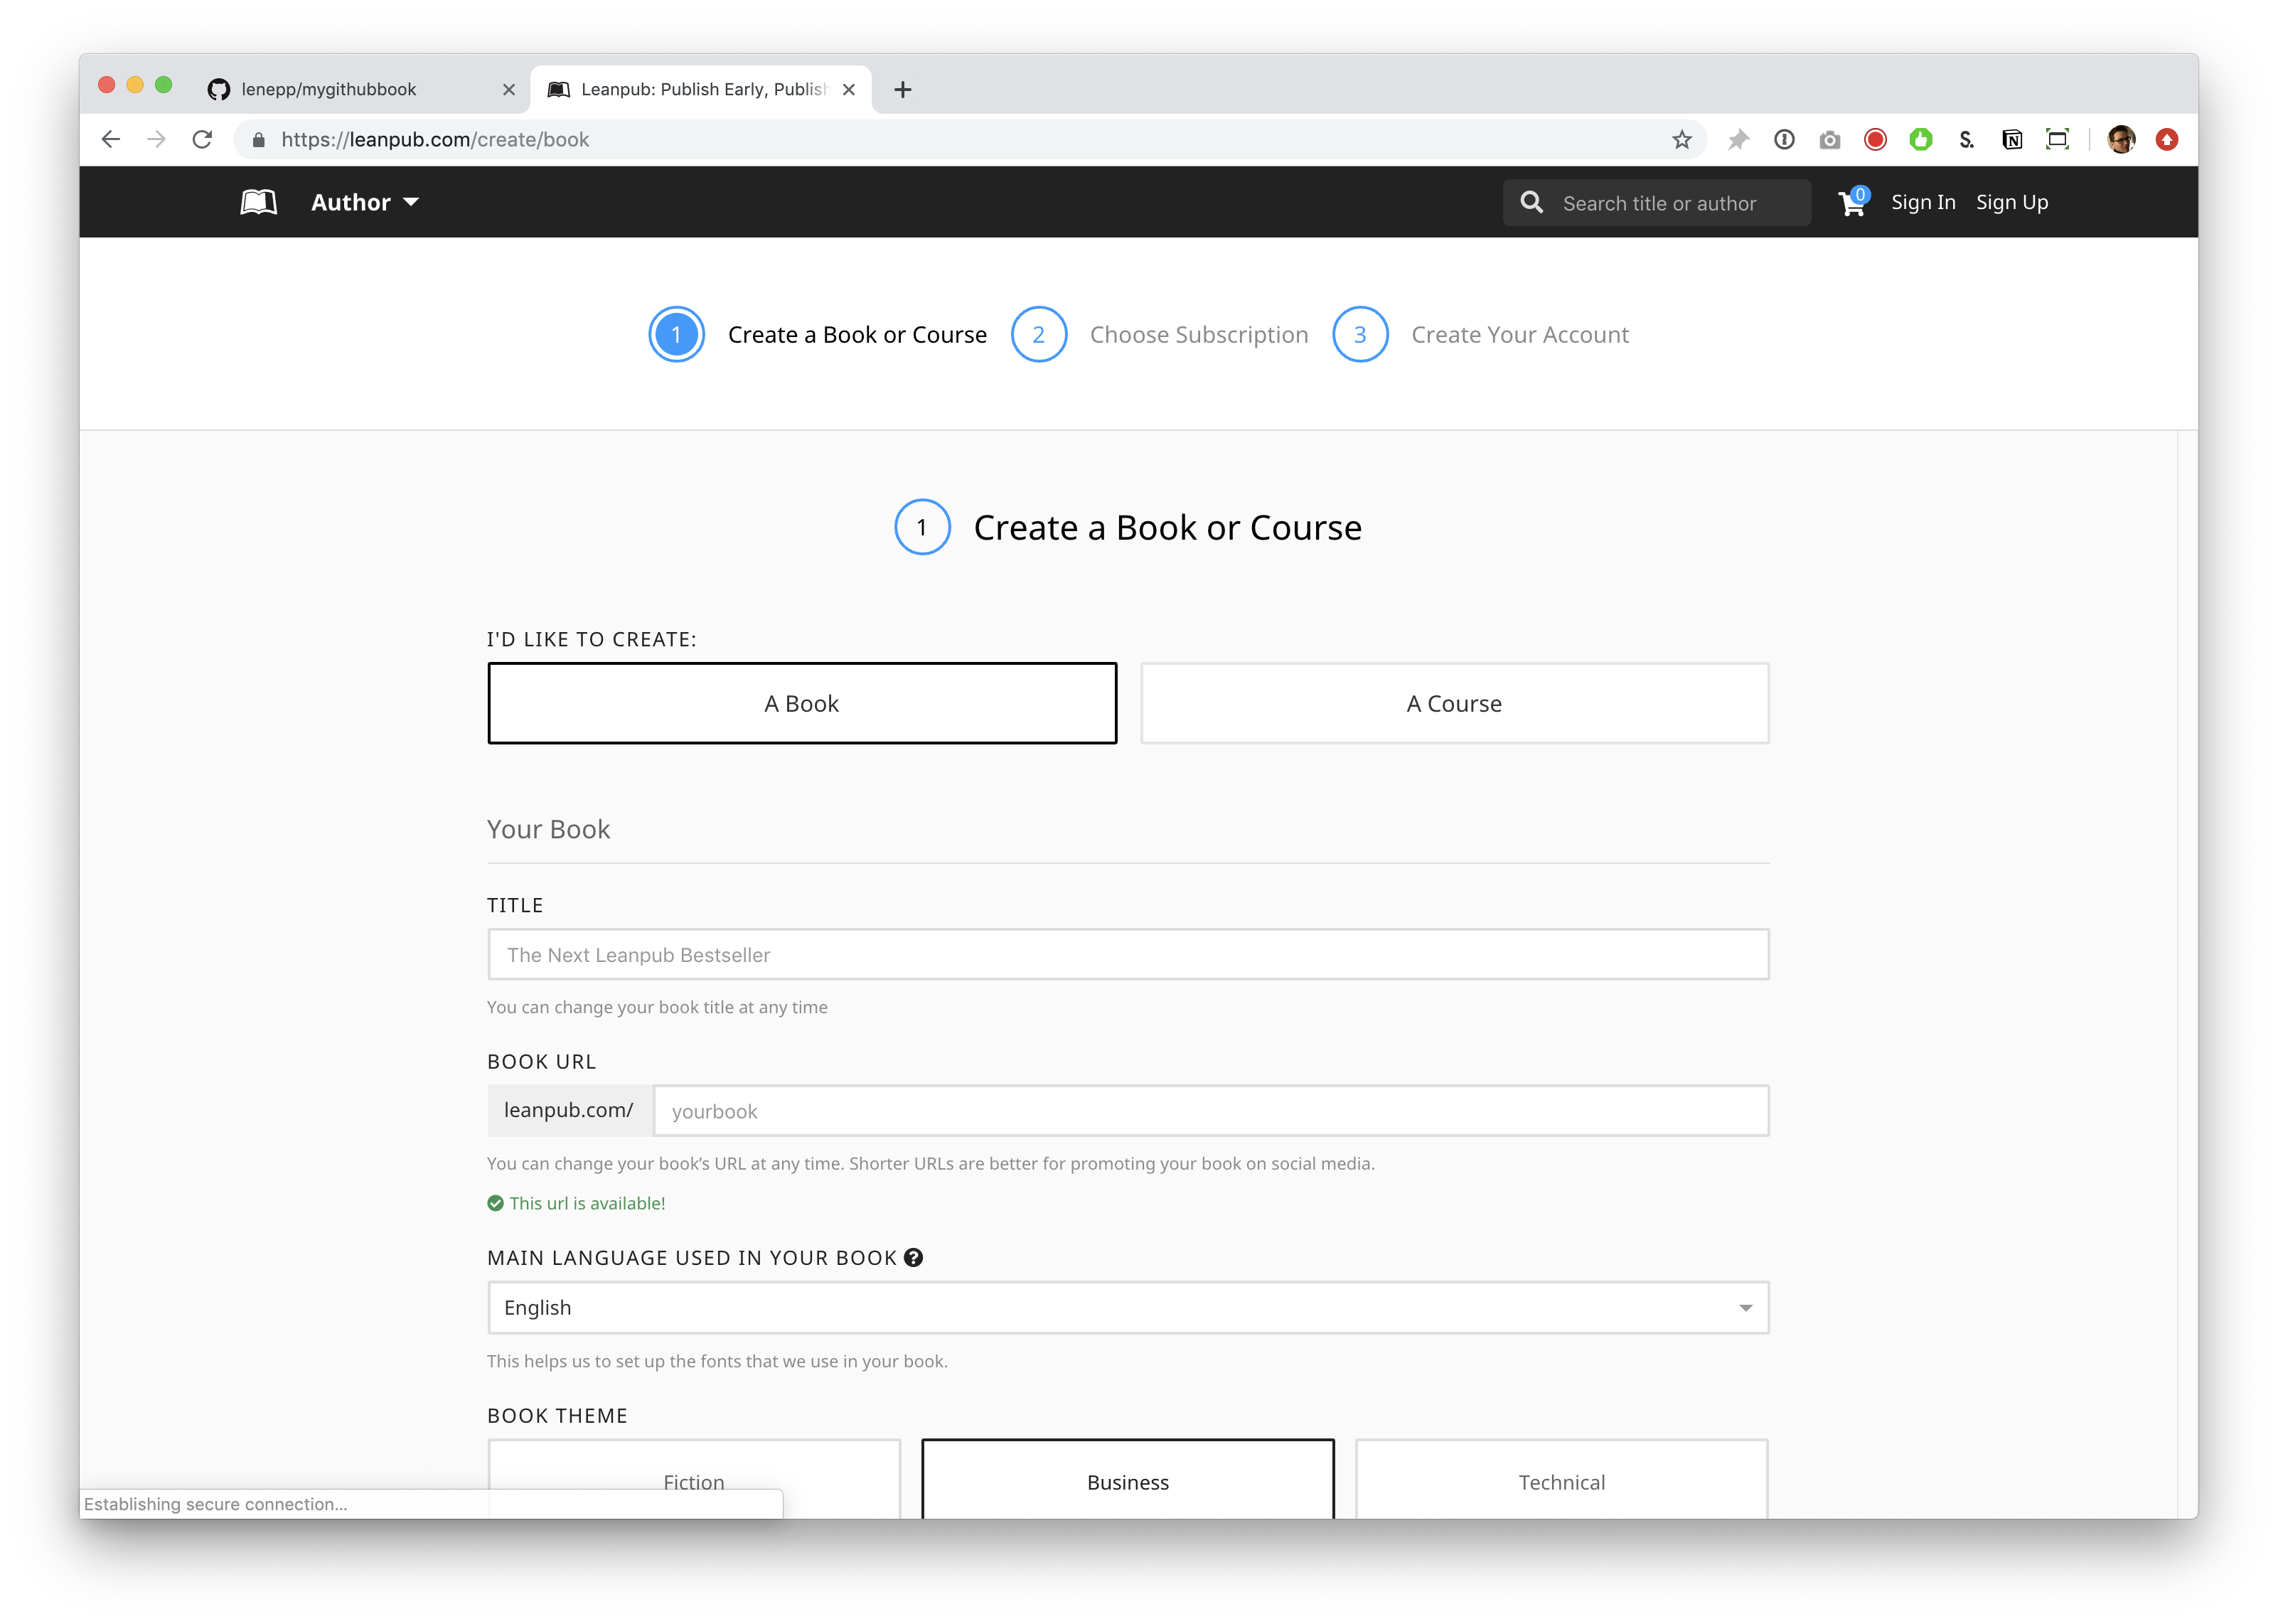
First, type a title for your book into the “TITLE” box. You can change your title later.

Click in the “BOOK URL” box. Leanpub will automatically suggest a URL for your book’s web page on Leanpub. You can change this URL at any time.
In this case, the URL that was automatically generated was already taken. This will be rare for you, but is a lot more common for us when making tutorials!
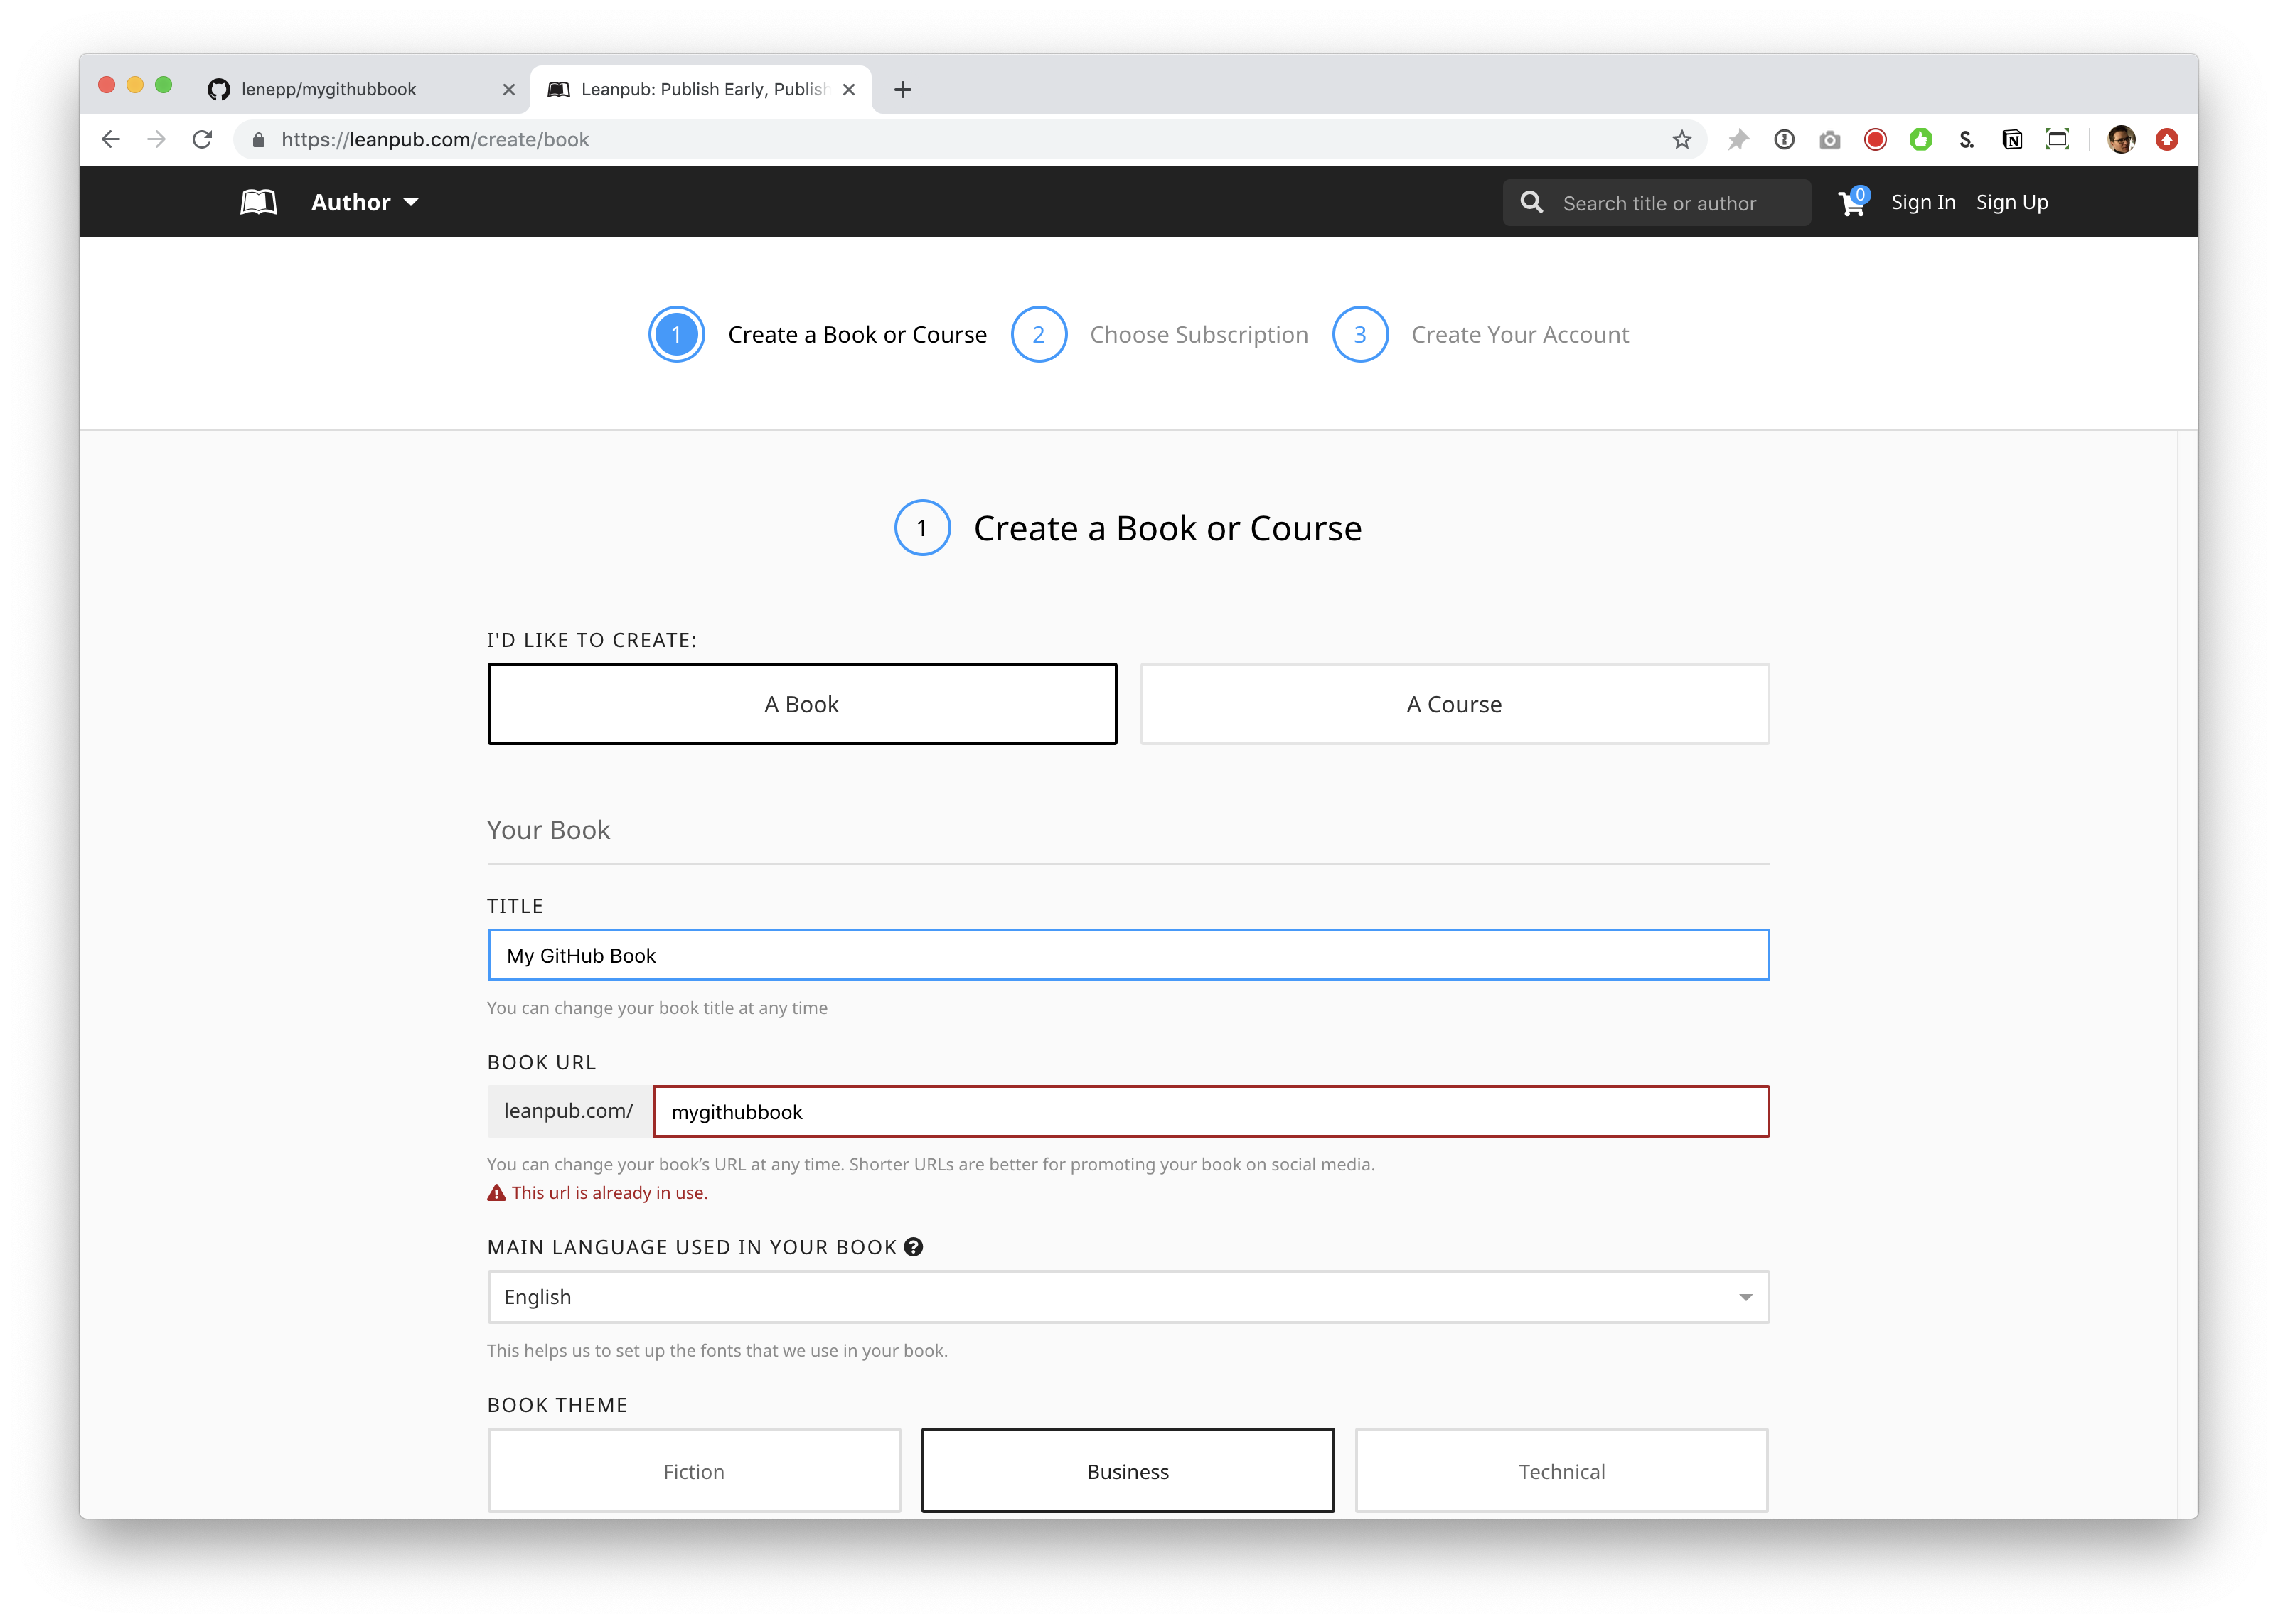
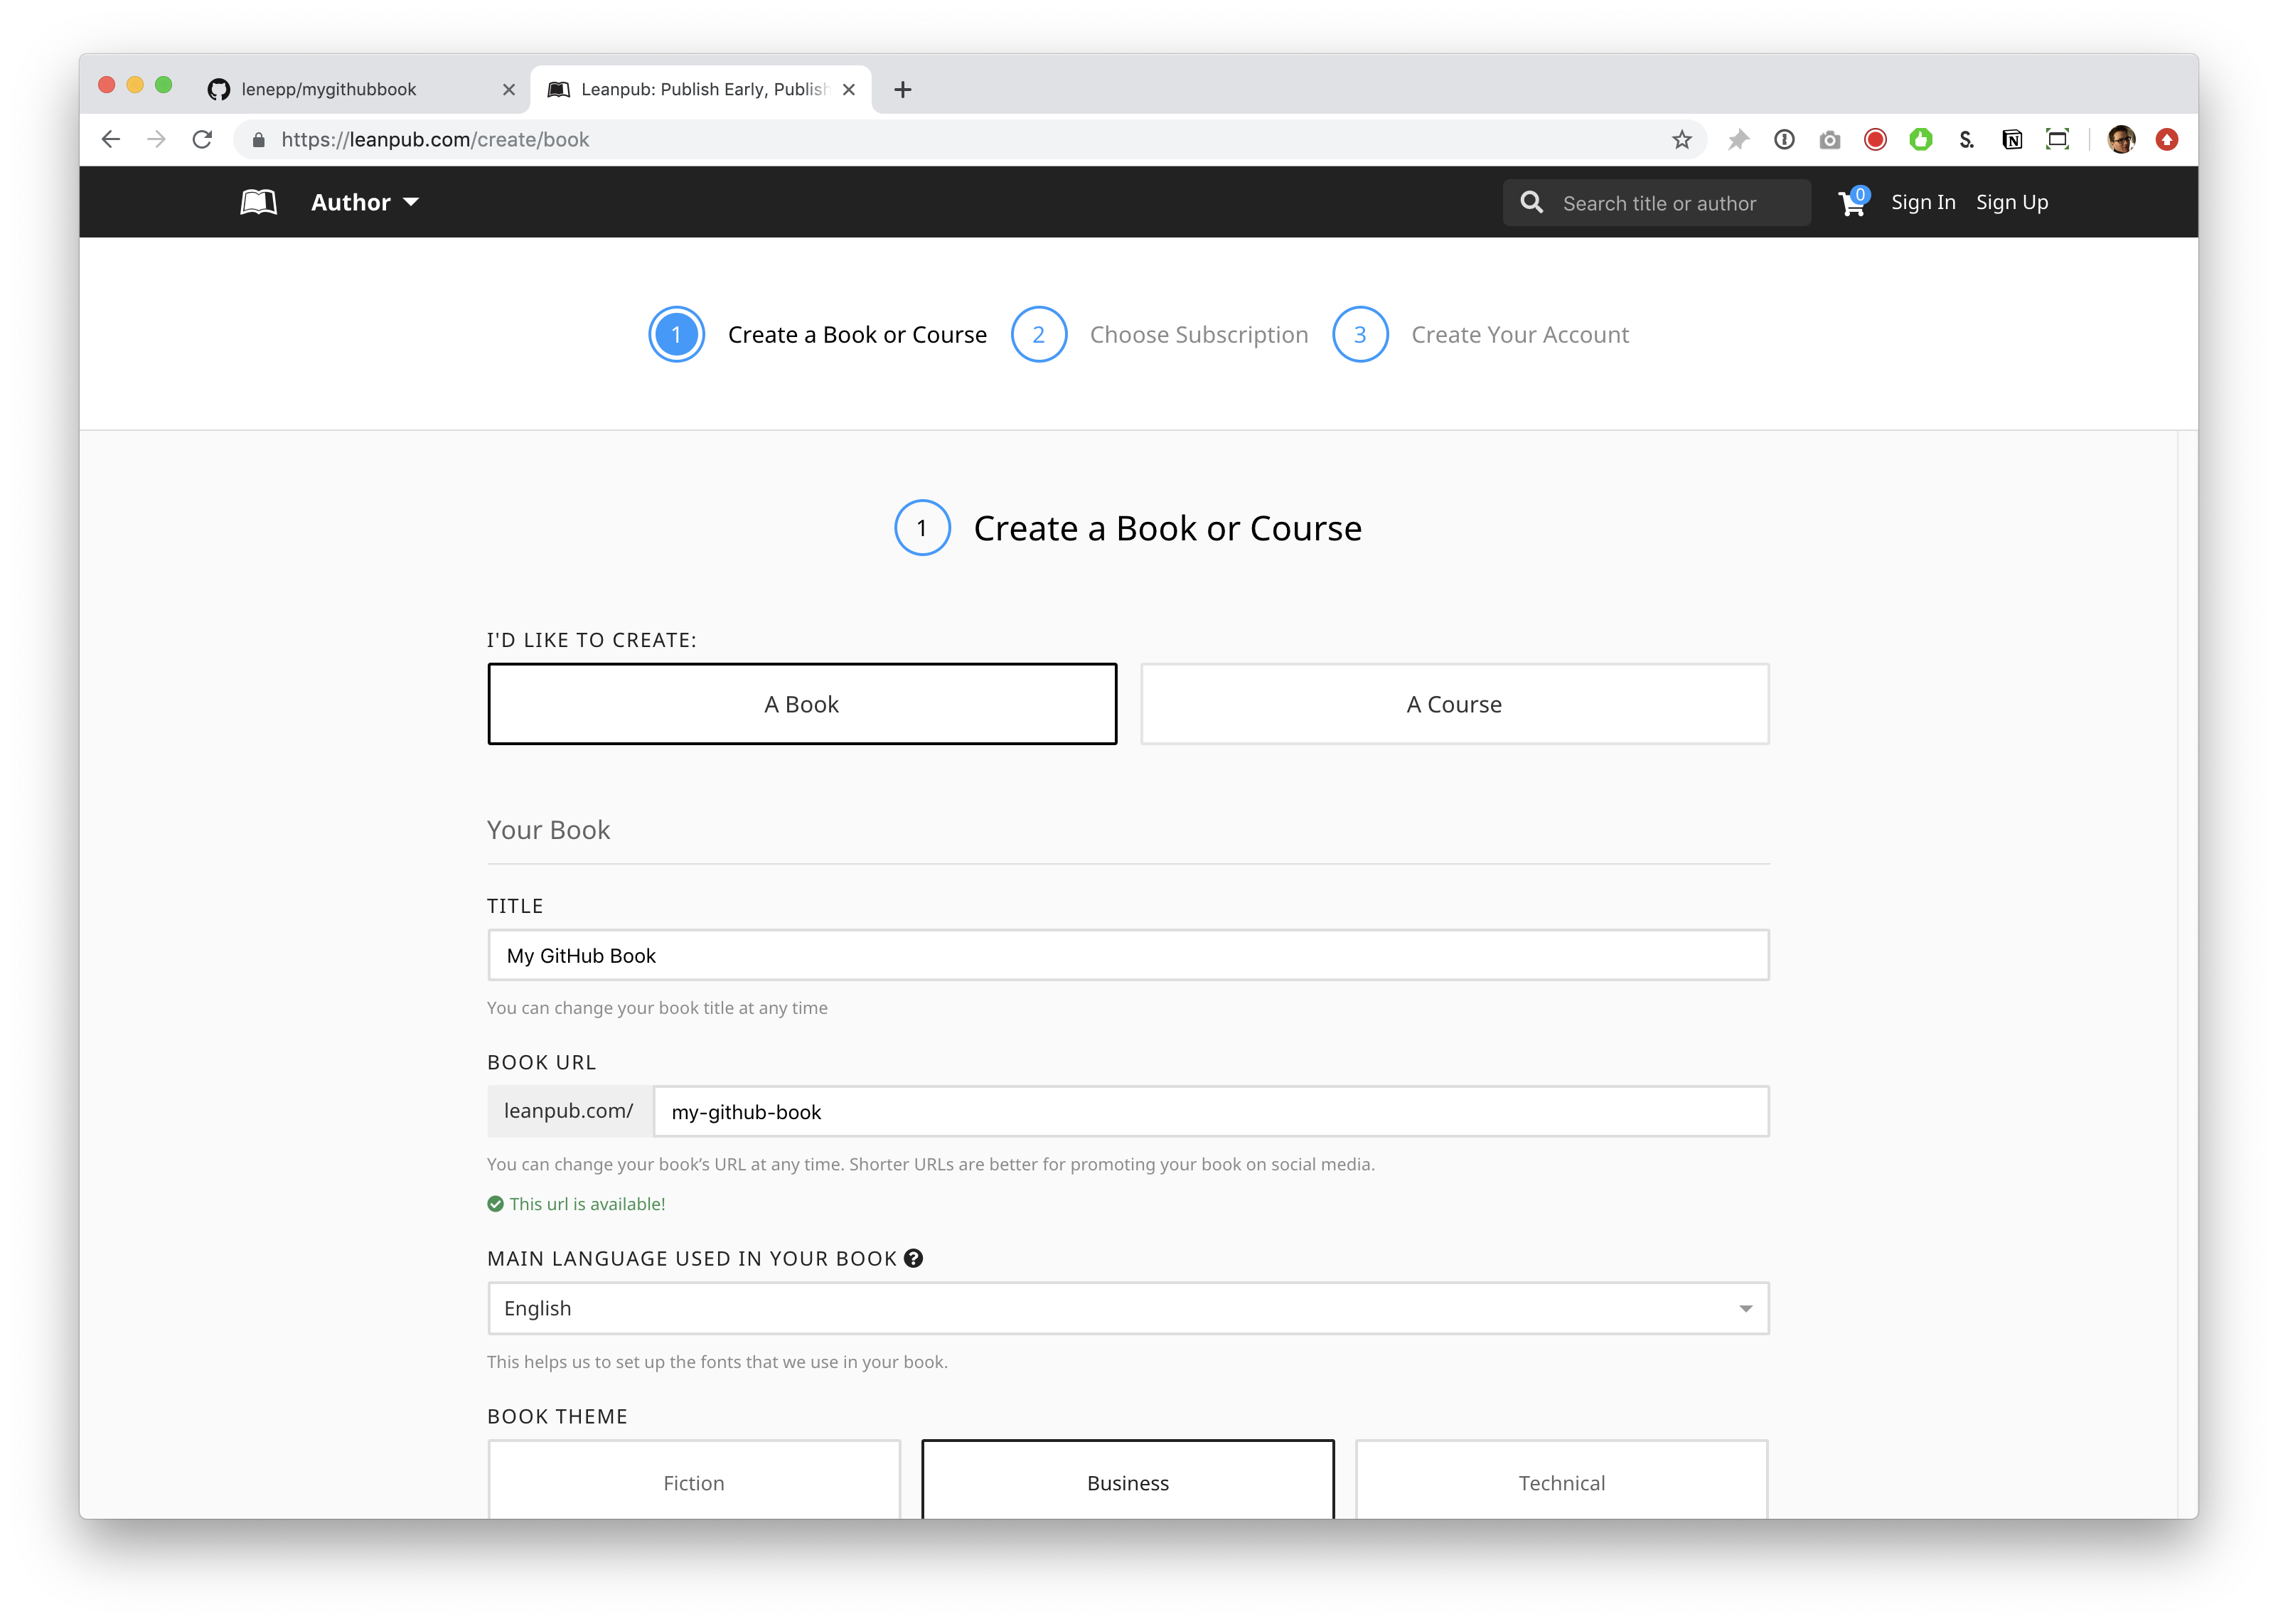
If a URL you want is already taken, you can add hyphens or numbers to create a URL that is close to it, but it’s better to use other words so people don’t get confused between your book and someone else’s!
Scroll down and you will see “MAIN LANGUAGE USED IN YOUR BOOK.” You can select a language from the drop-down. Like the other settings, you can change this at any time.
Scroll down and you will see the “BOOK THEME” options. “Business” will be selected by default. The Book Theme is just a set of standard formatting options conventional for books on these subjects. You are not required to choose any particular option. You can change your Book Theme at any time.
For this tutorial, we selected the “Fiction” Book Theme.
In the section below, you will be presented with various Writing Mode options. For this tutorial, select “Using Git and GitHub.”
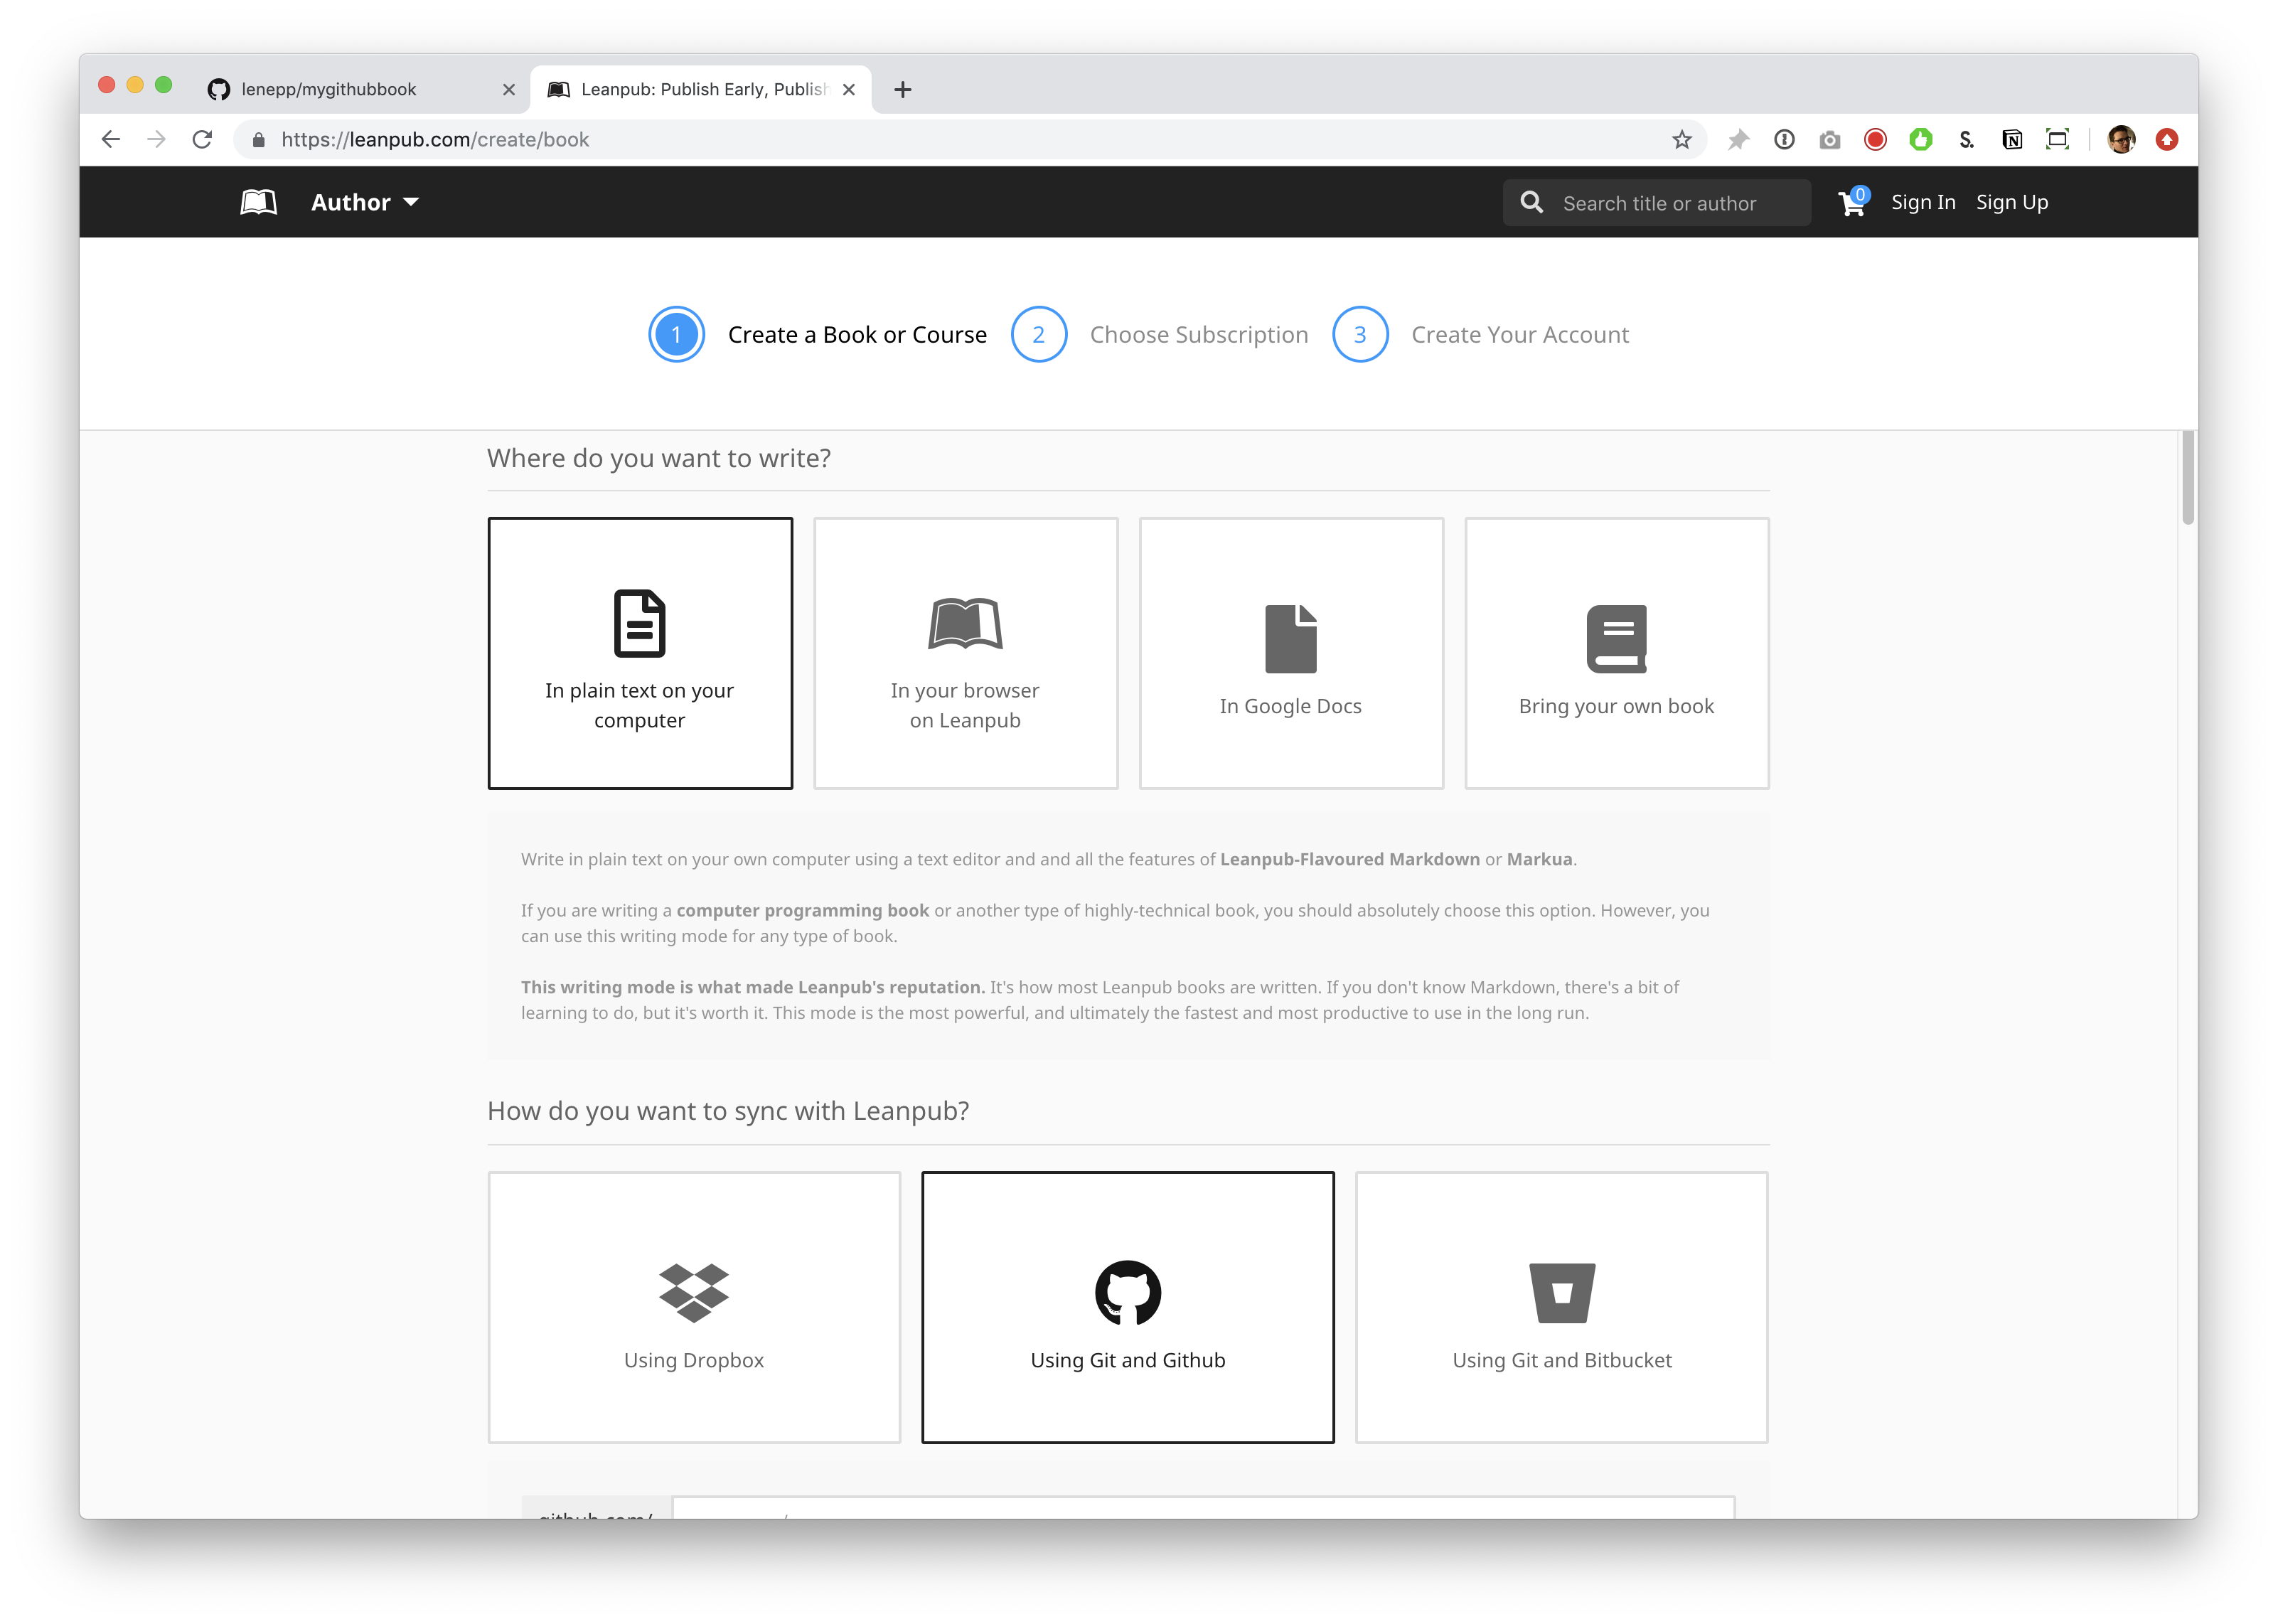
Scroll down and you will see a box to enter your GitHub username, followed by a forward slash / and your GitHub repo name.
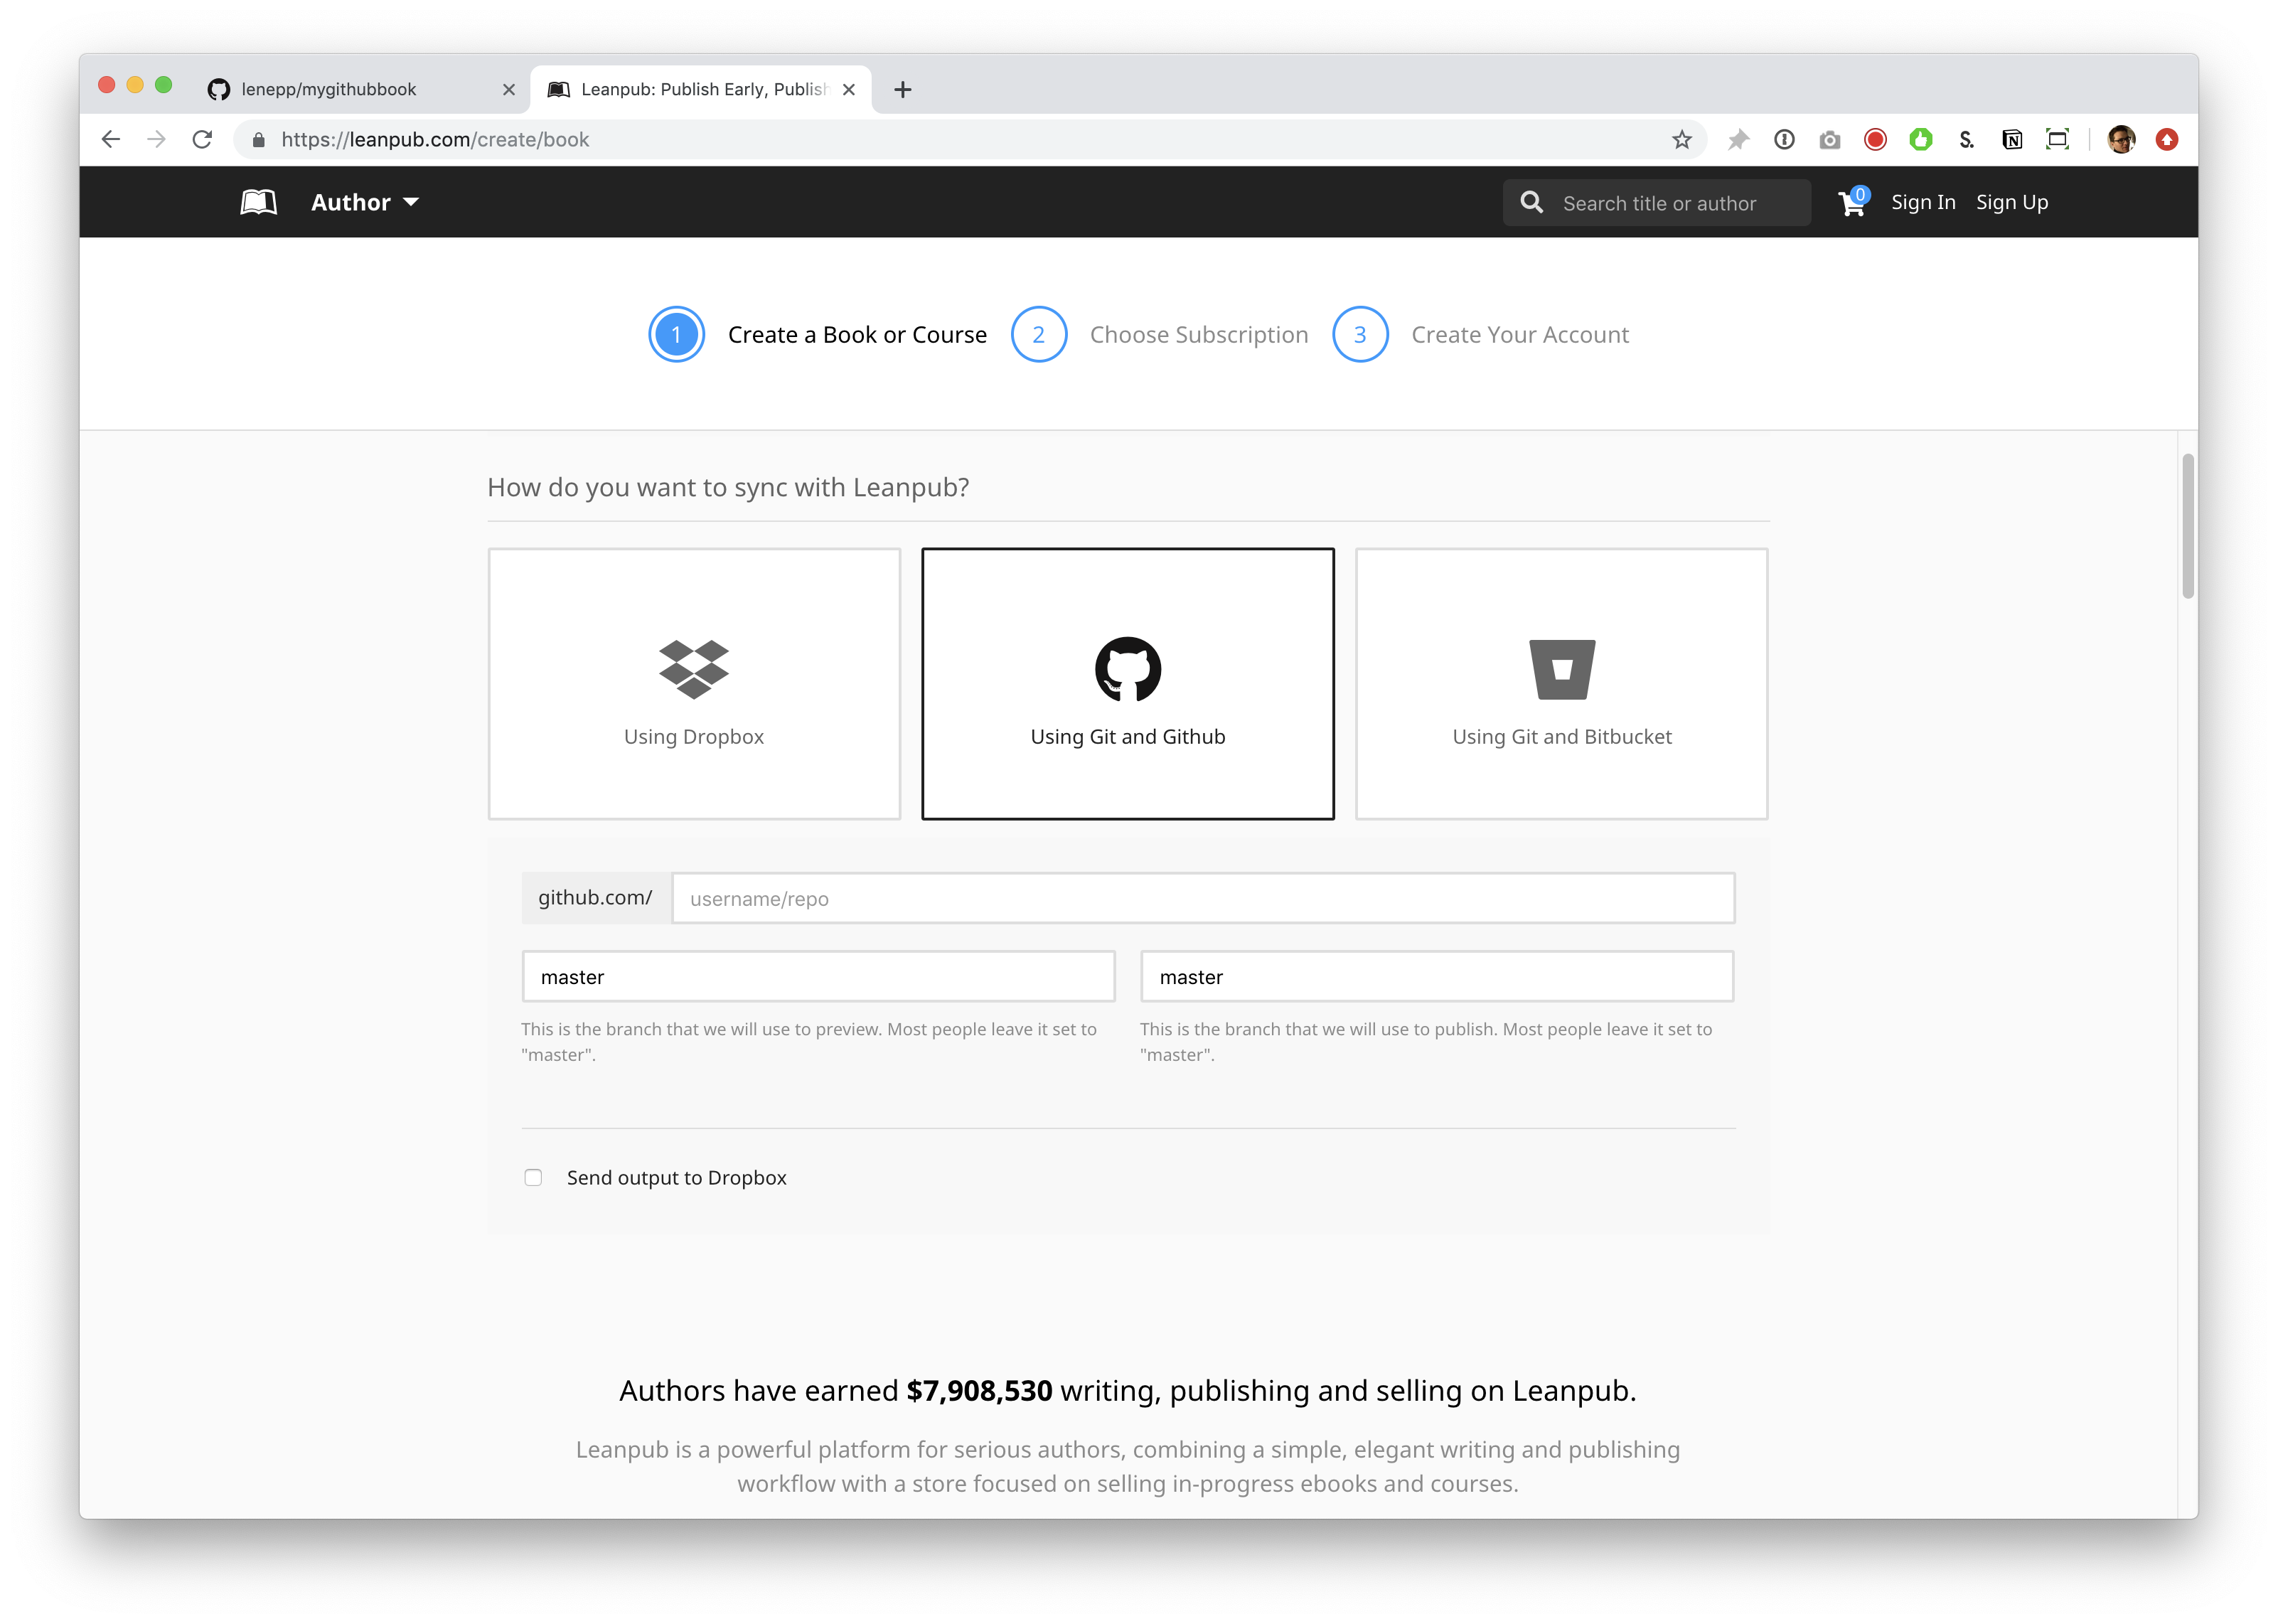
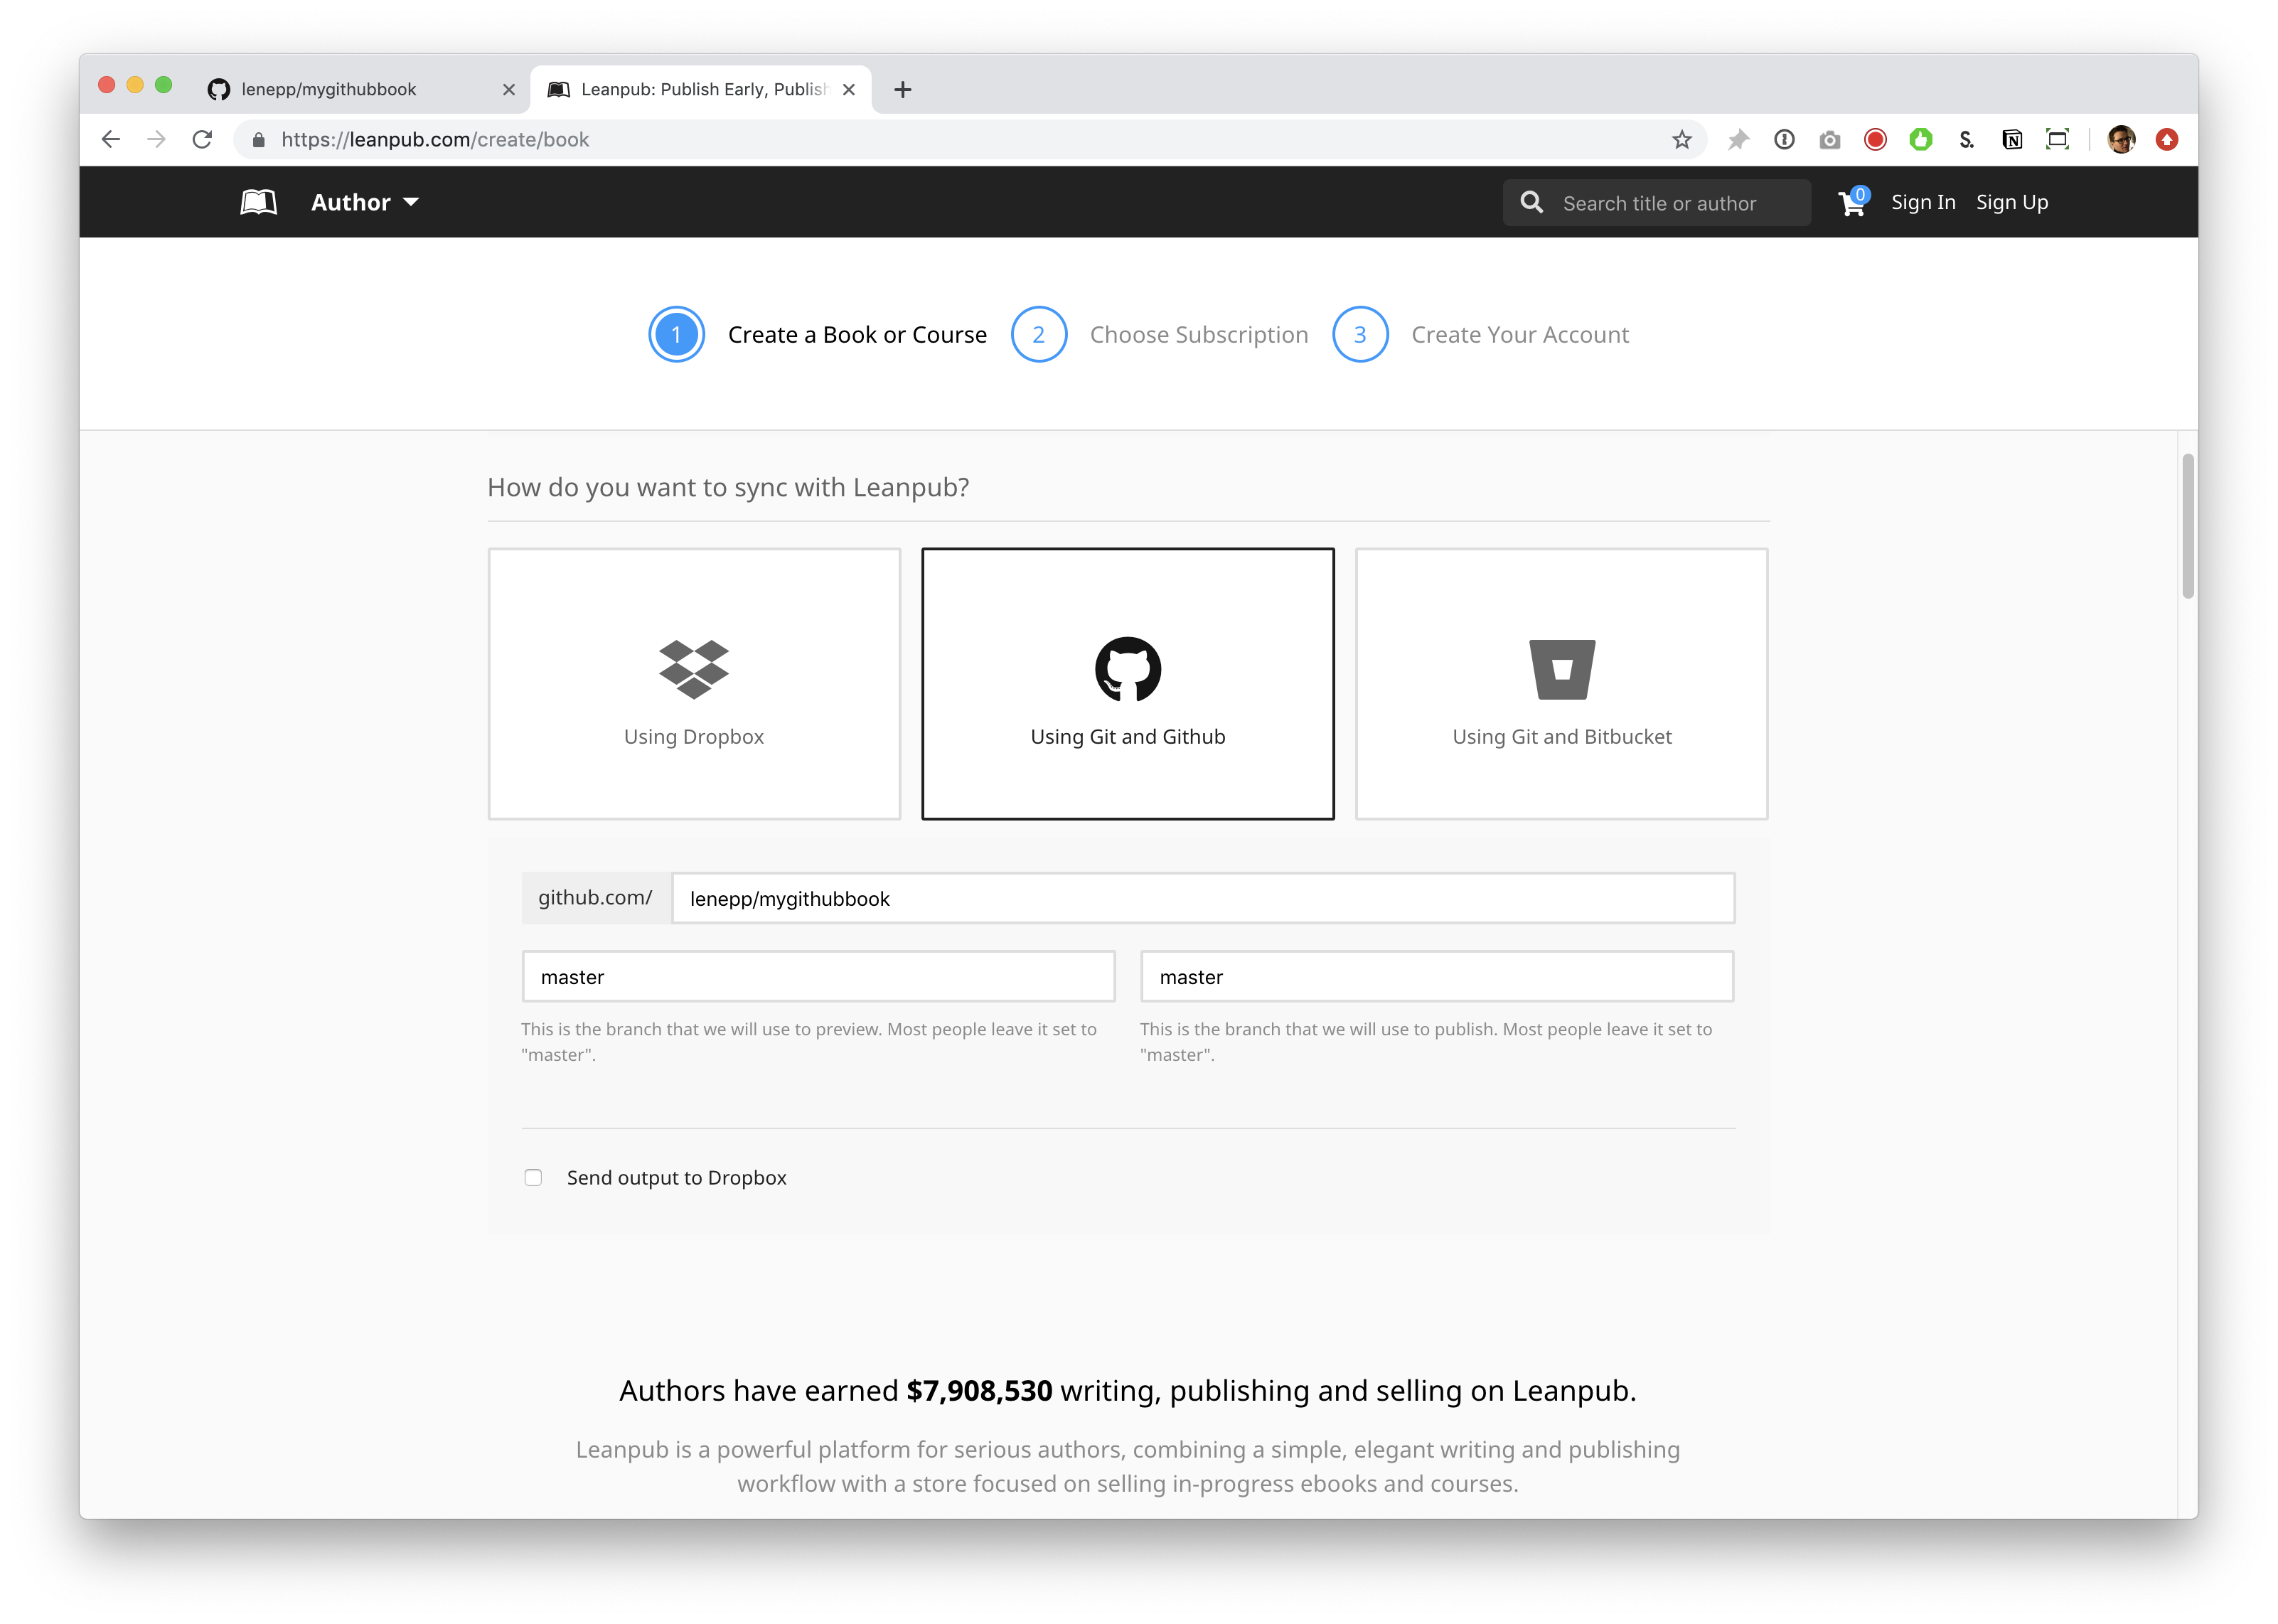
Enter your GitHub username, followed by a forward slash / and your GitHub repo name.
When you scroll down further, you will see the subscription plan options. By default, “Free” will be selected. If you have a paid Leanpub account already, you will see that plan selected automatically.
Select a plan.
Scroll down and, if you are not signed in to a Leanpub account, you will see an option to enter information to create a new account. You will also see an option to sign in, if you already have a Leanpub account.
To create a new account, fill in the relevant information.
Finally, click the blue button to finish creating your new GitHub book.
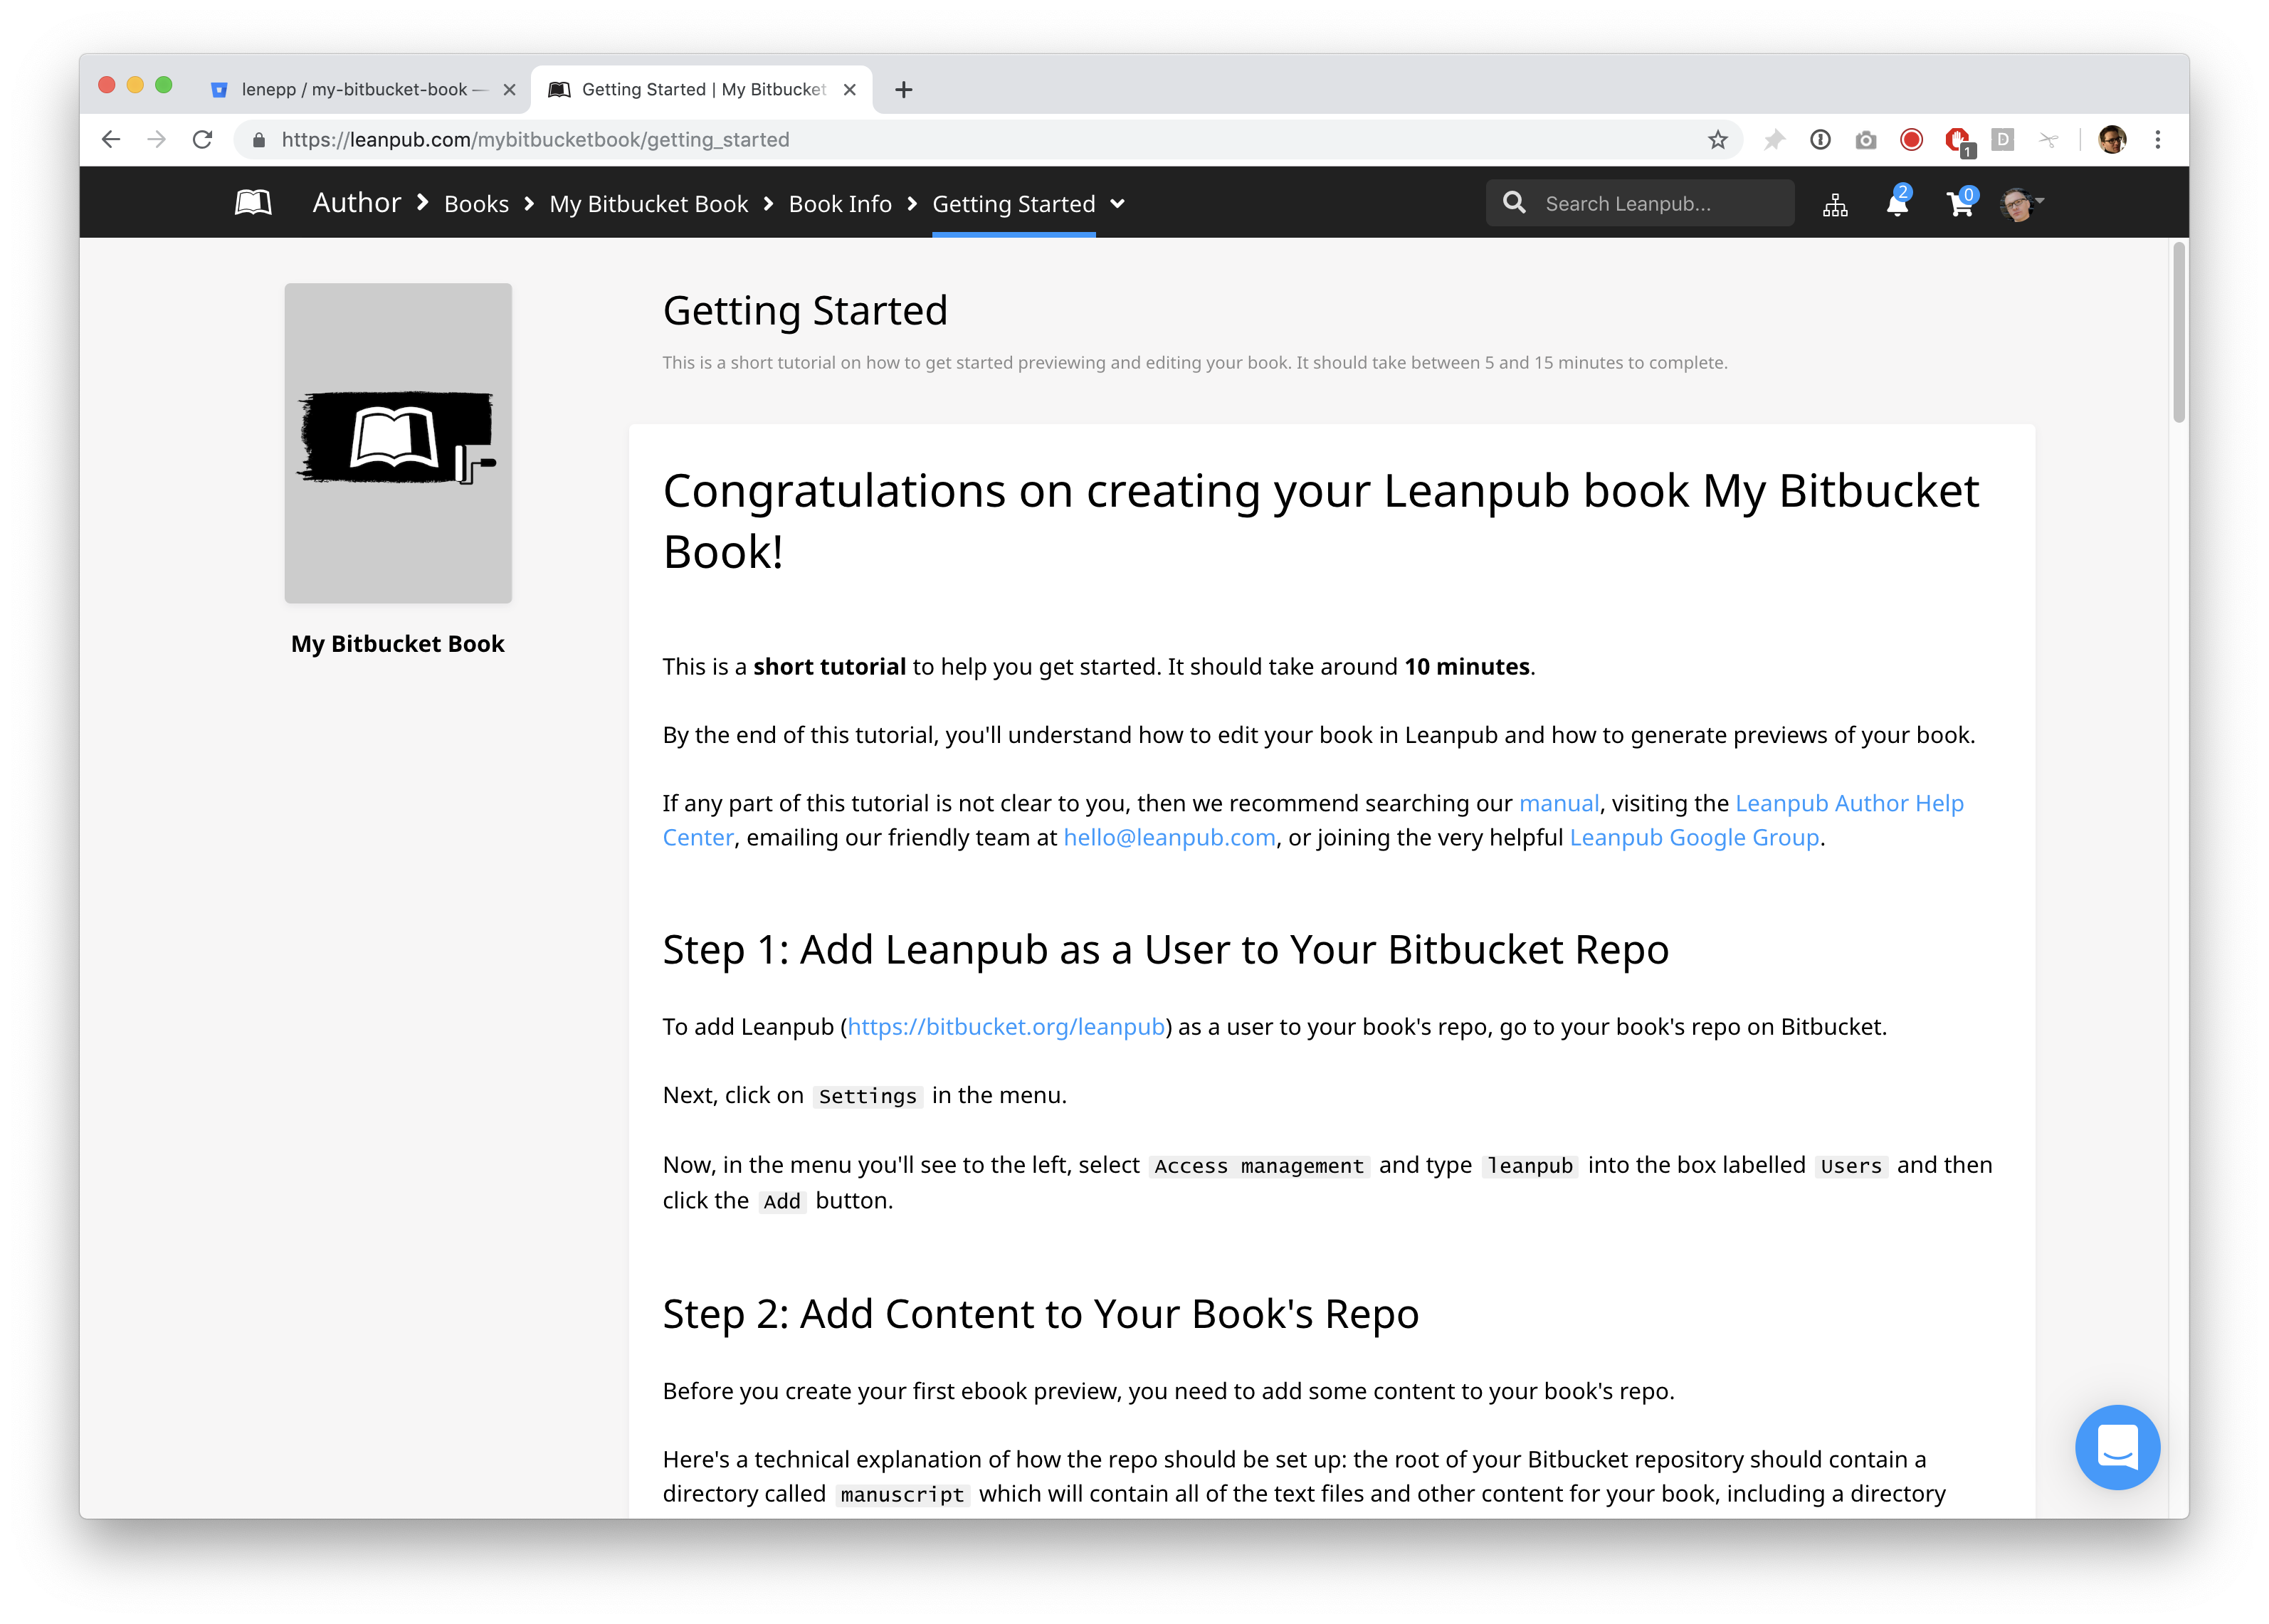
You will now see that you are on the Getting Started page for your book:
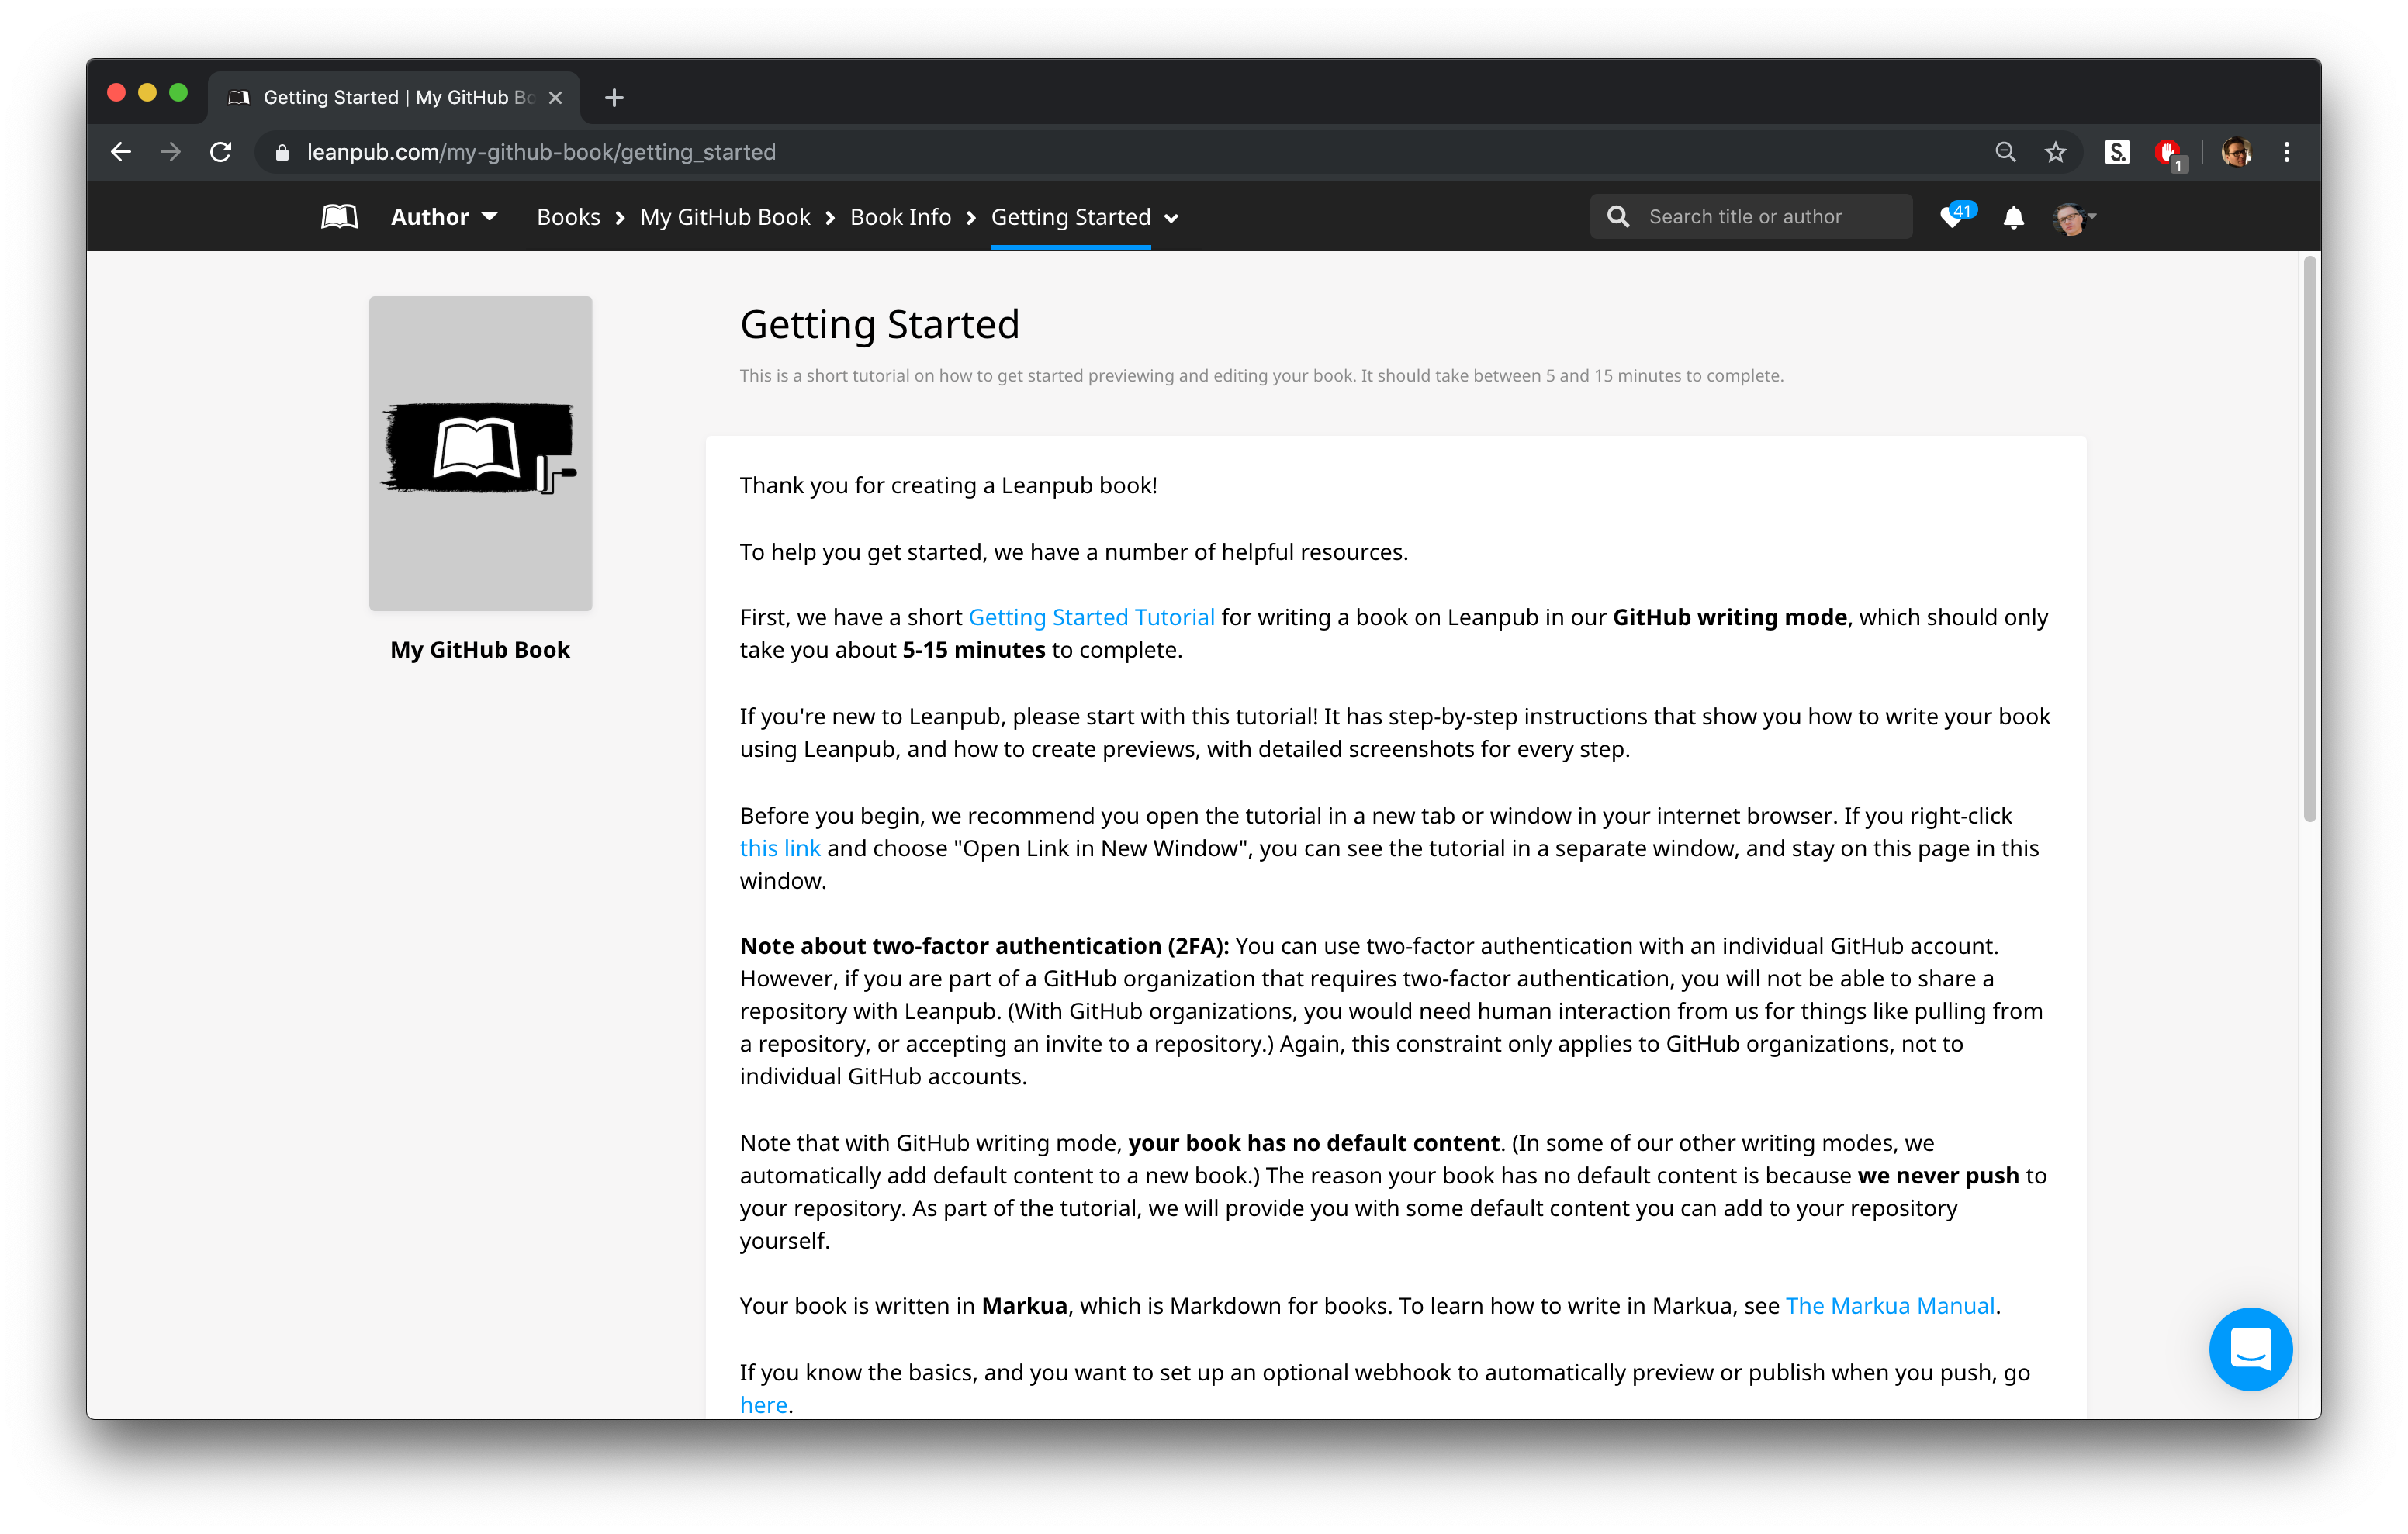
[Please note this screenshot has been updated, so it doesn’t exactly match the rest of the screenshots in this tutorial.]
If you use bookmarks in your web browser, we recommend you bookmark this page in your web browser in a bookmark folder for your book, but this is not required.

Look at the Book Tools “breadcrumb” menu at the top of the screen. This is how you will navigate to the web pages you will be using in Leanpub to work on your book and see all the features we provide, like uploading a book cover, or setting a price for your book.
When you are finished this tutorial, we recommend you explore the various Book Tools options.
Adding Leanpub As A Collaborator on Your Book’s GitHub Repository
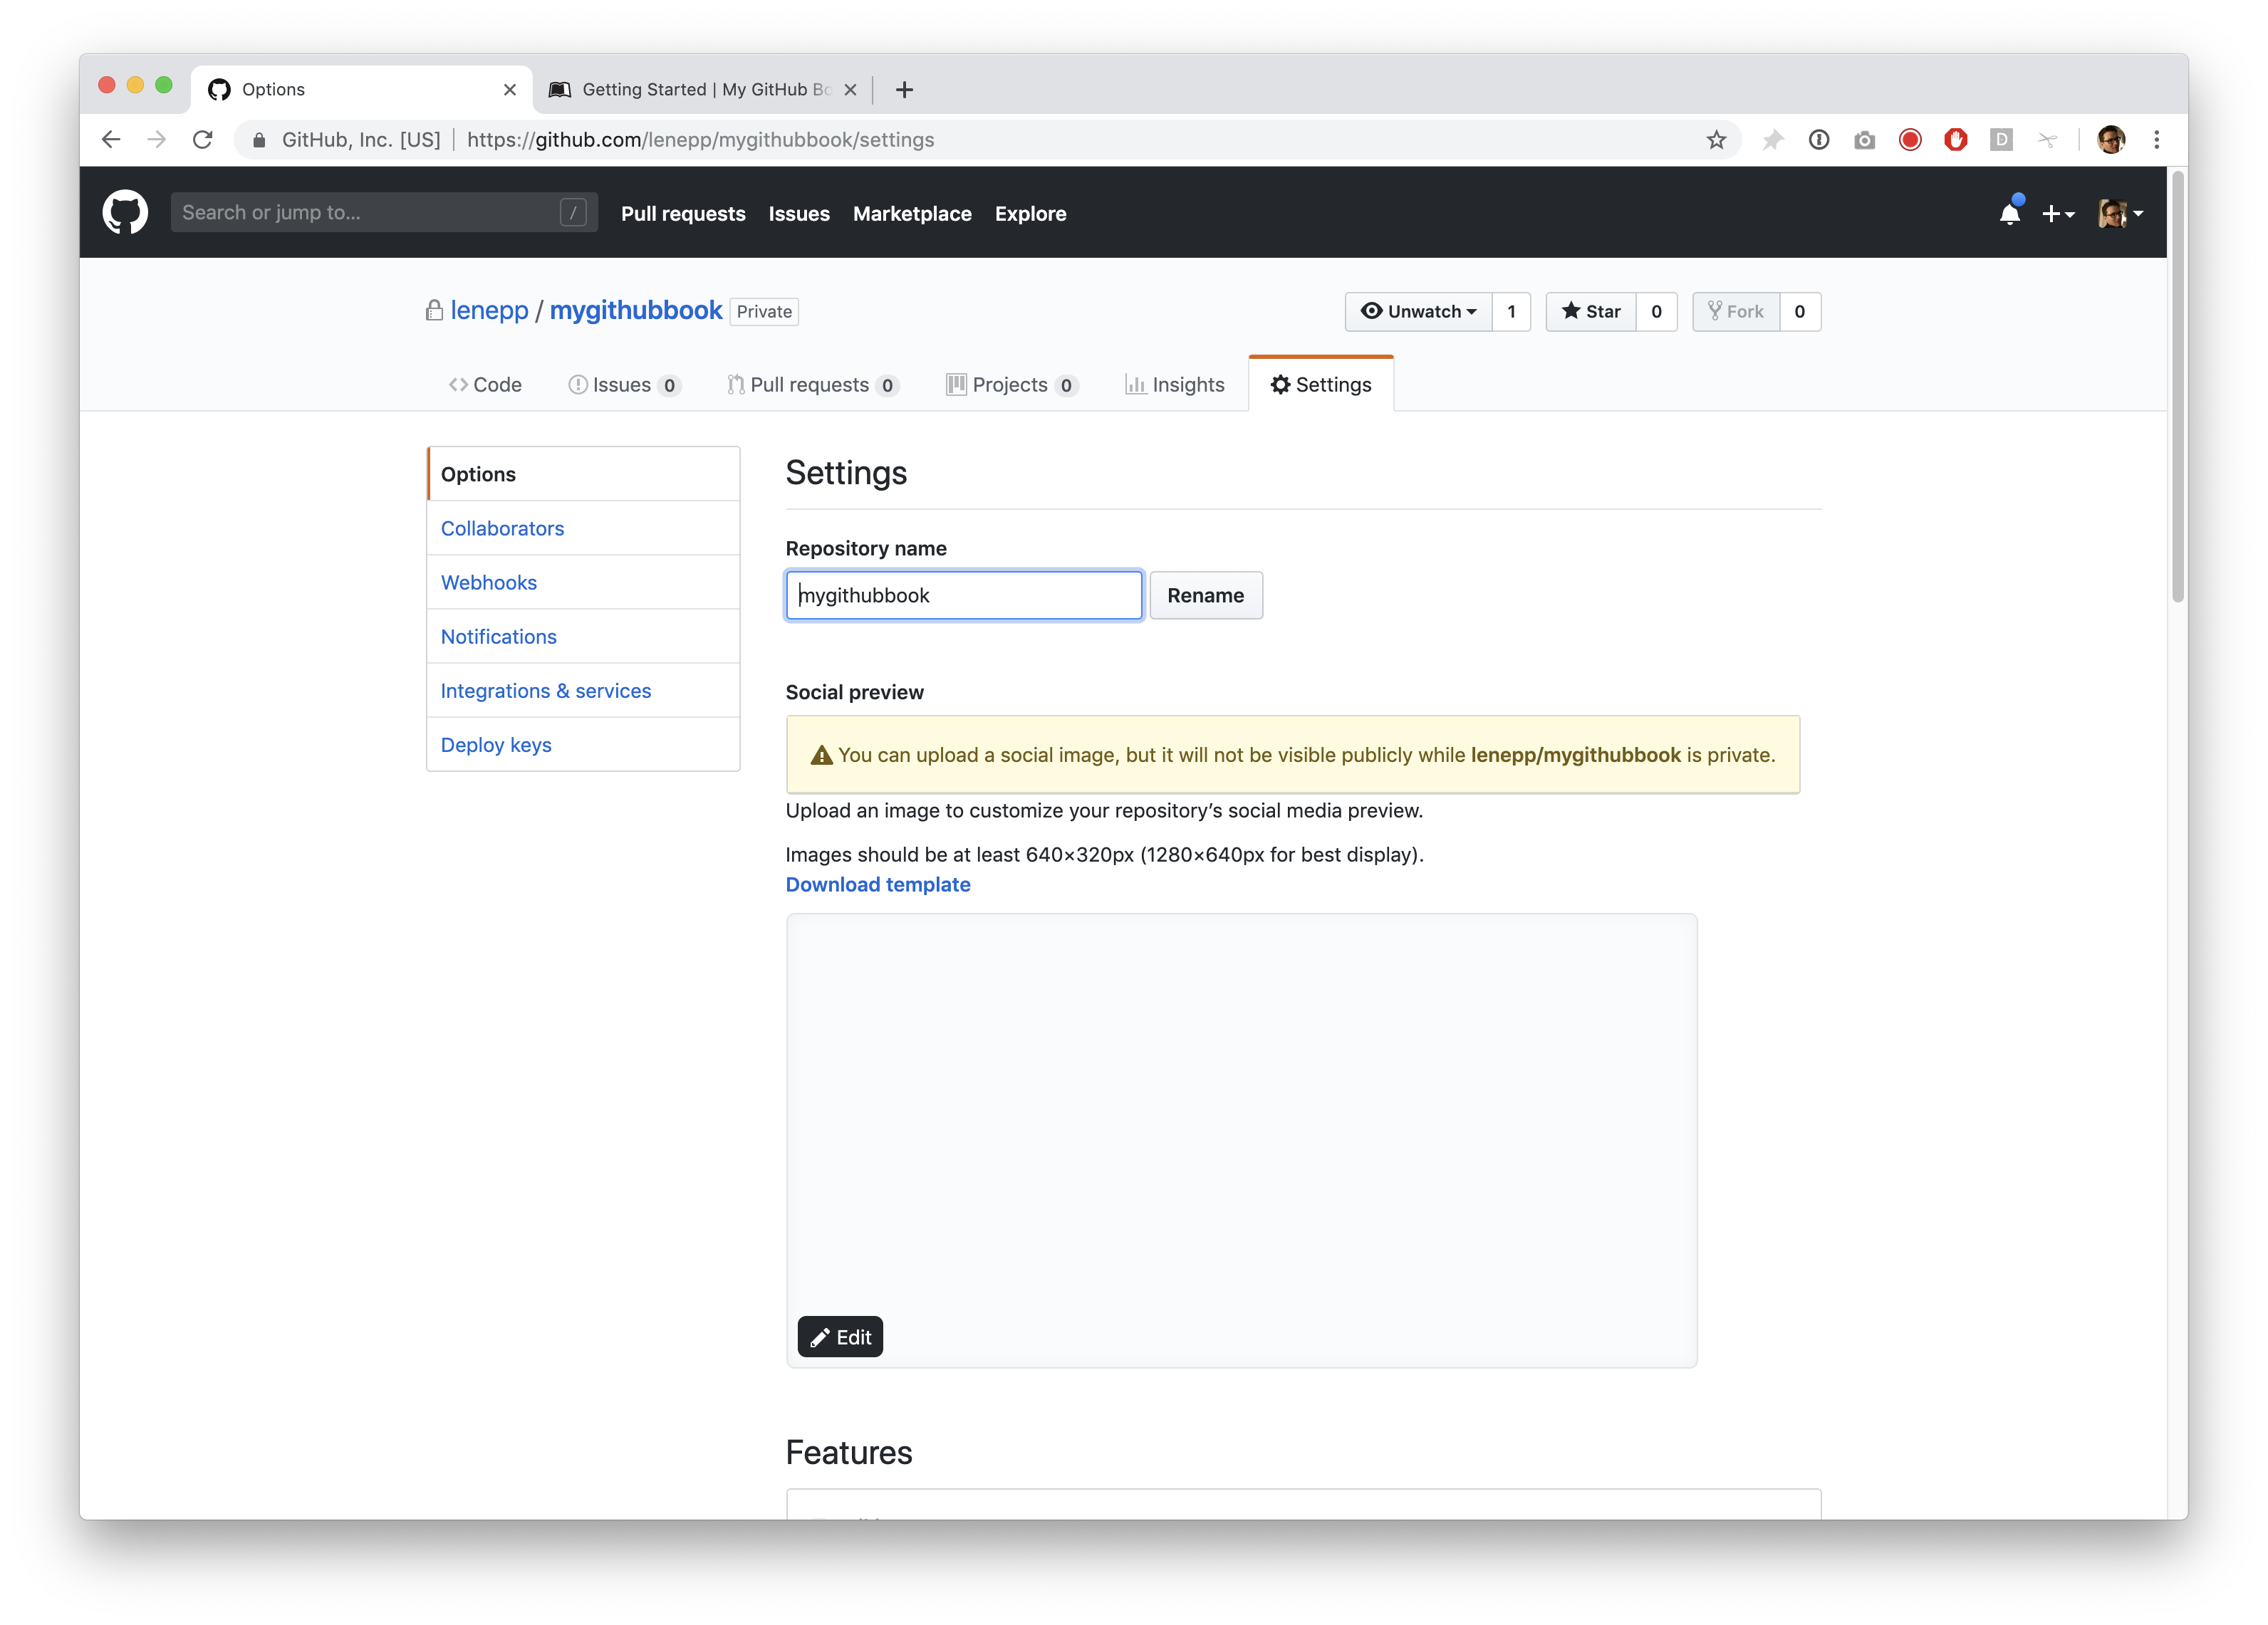
Go back to the GitHub page for your book’s GitHub repository.
Click on “Settings” near the top right, to go to the “Settings” page for the repository.
Click on “Collaborators” in the menu on the left, to go to the “Collaborators” page for the repository.
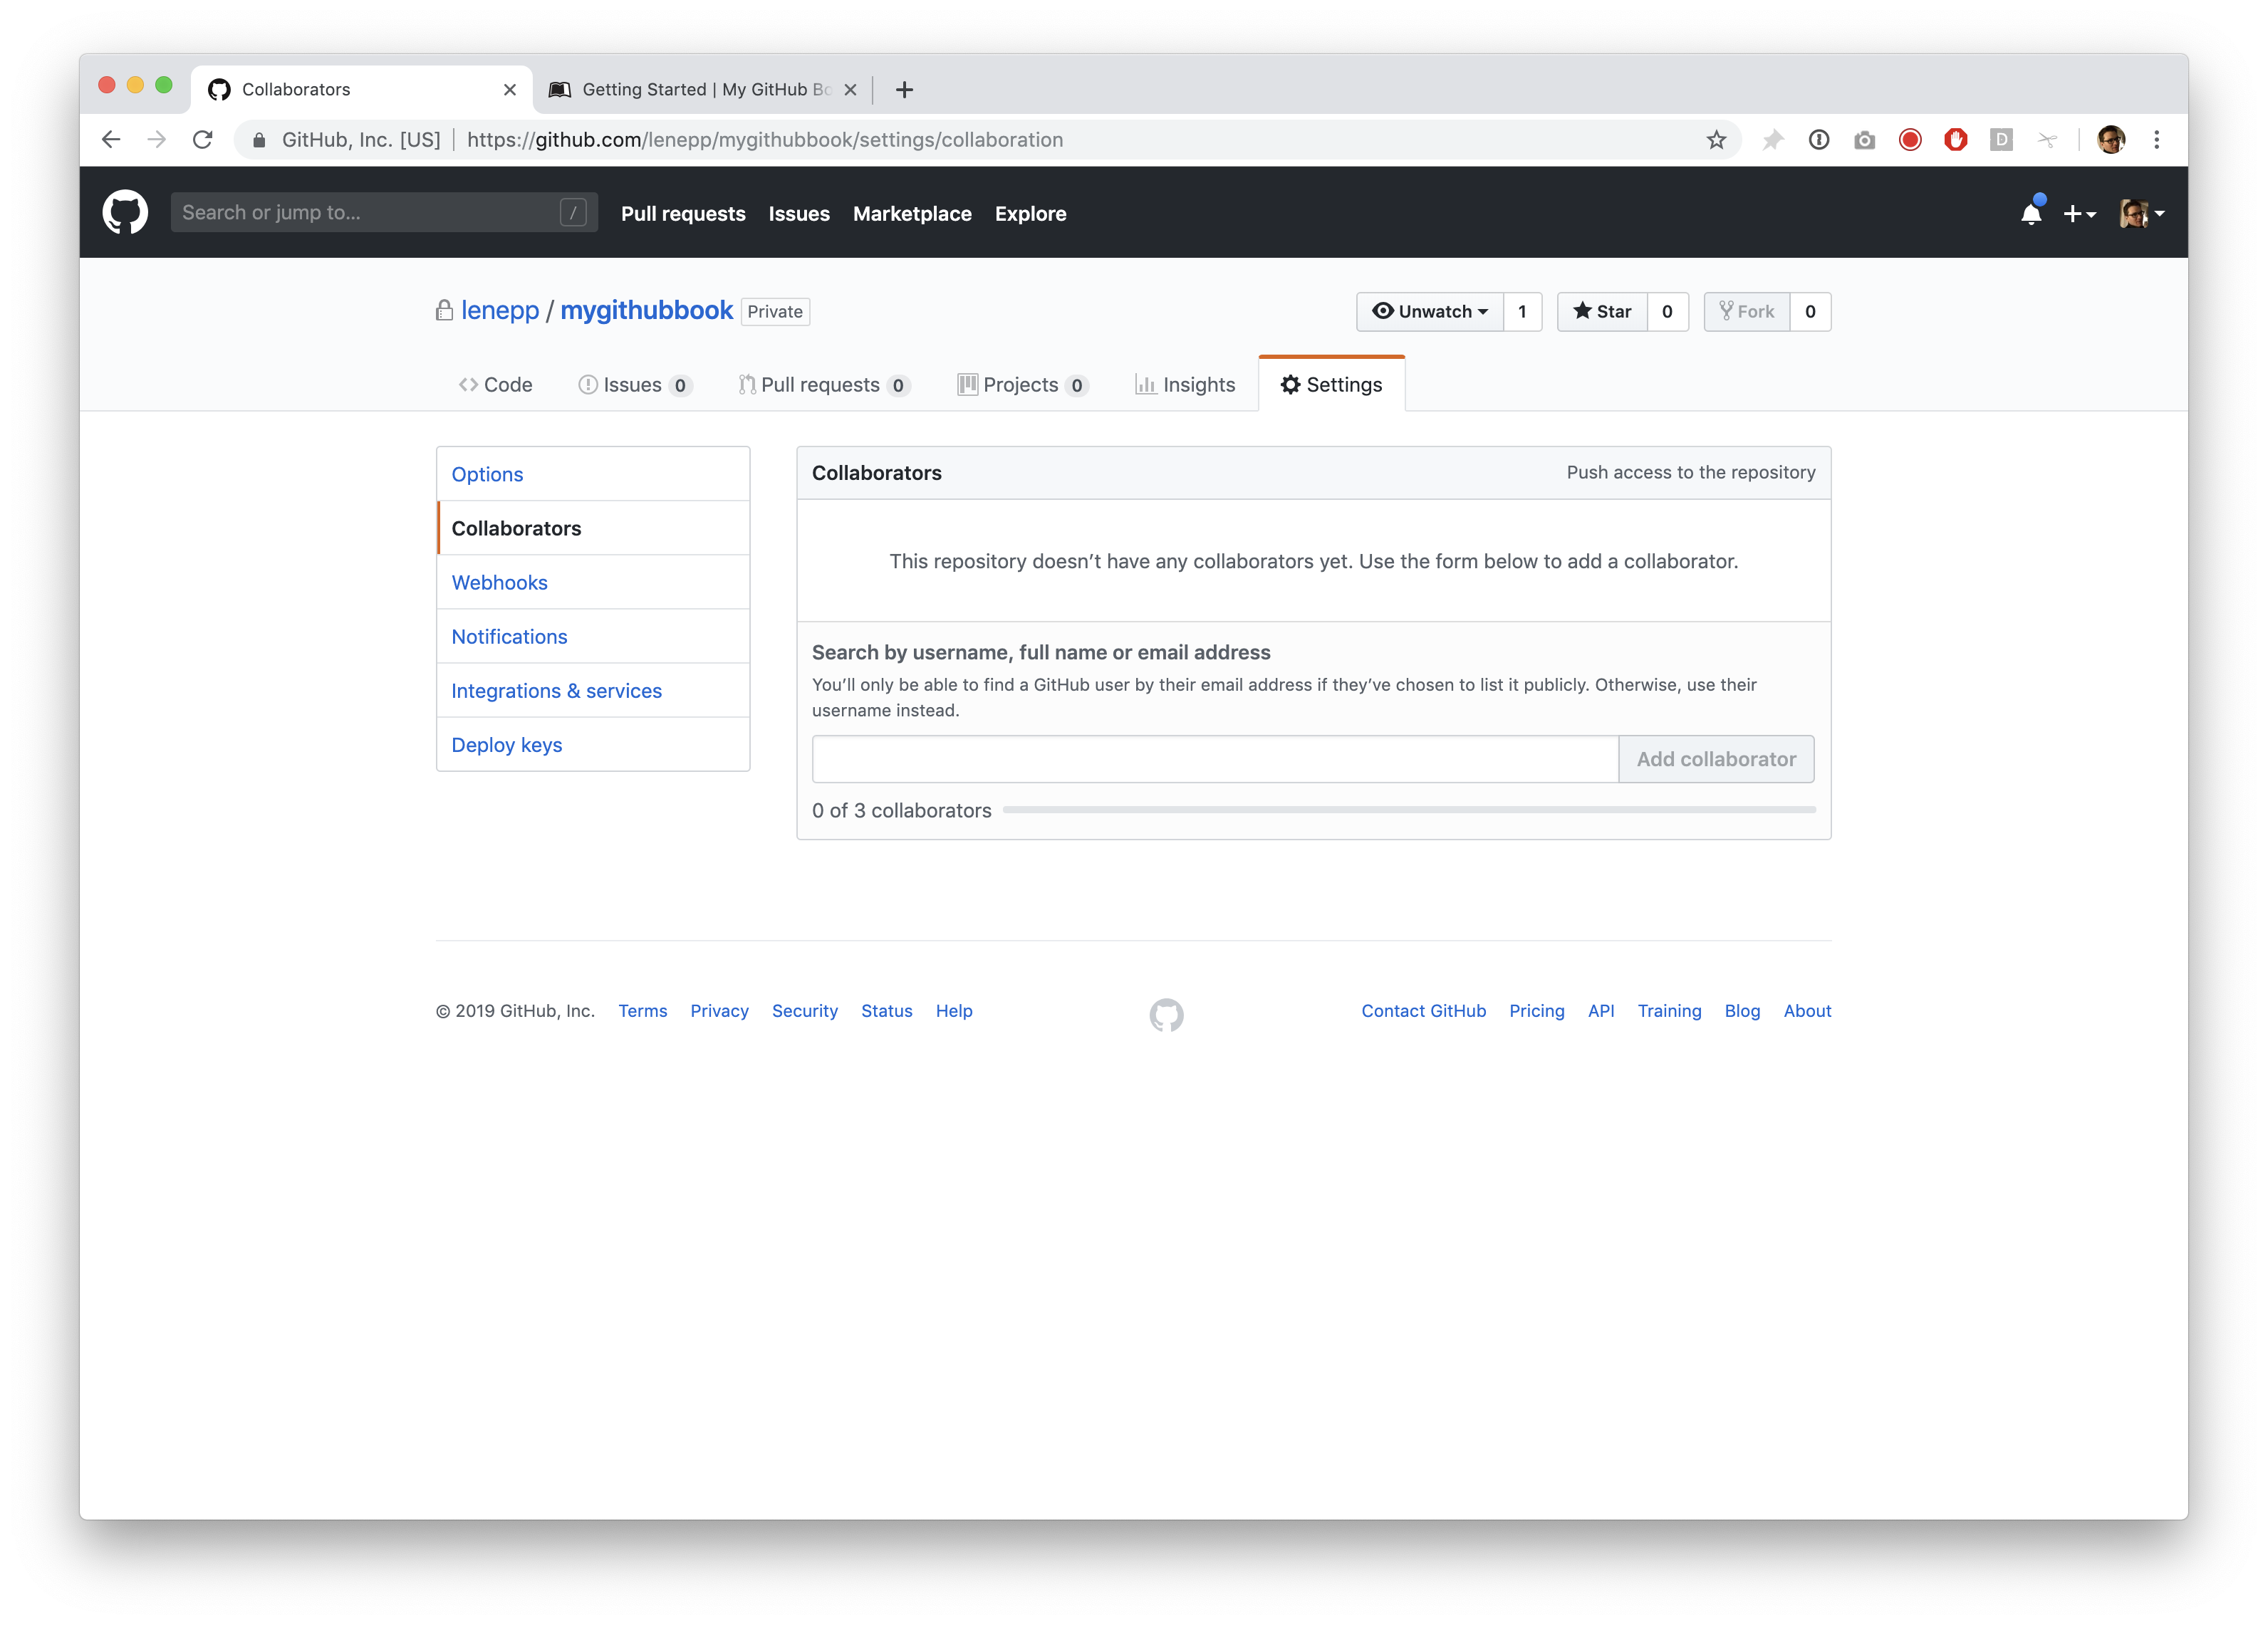
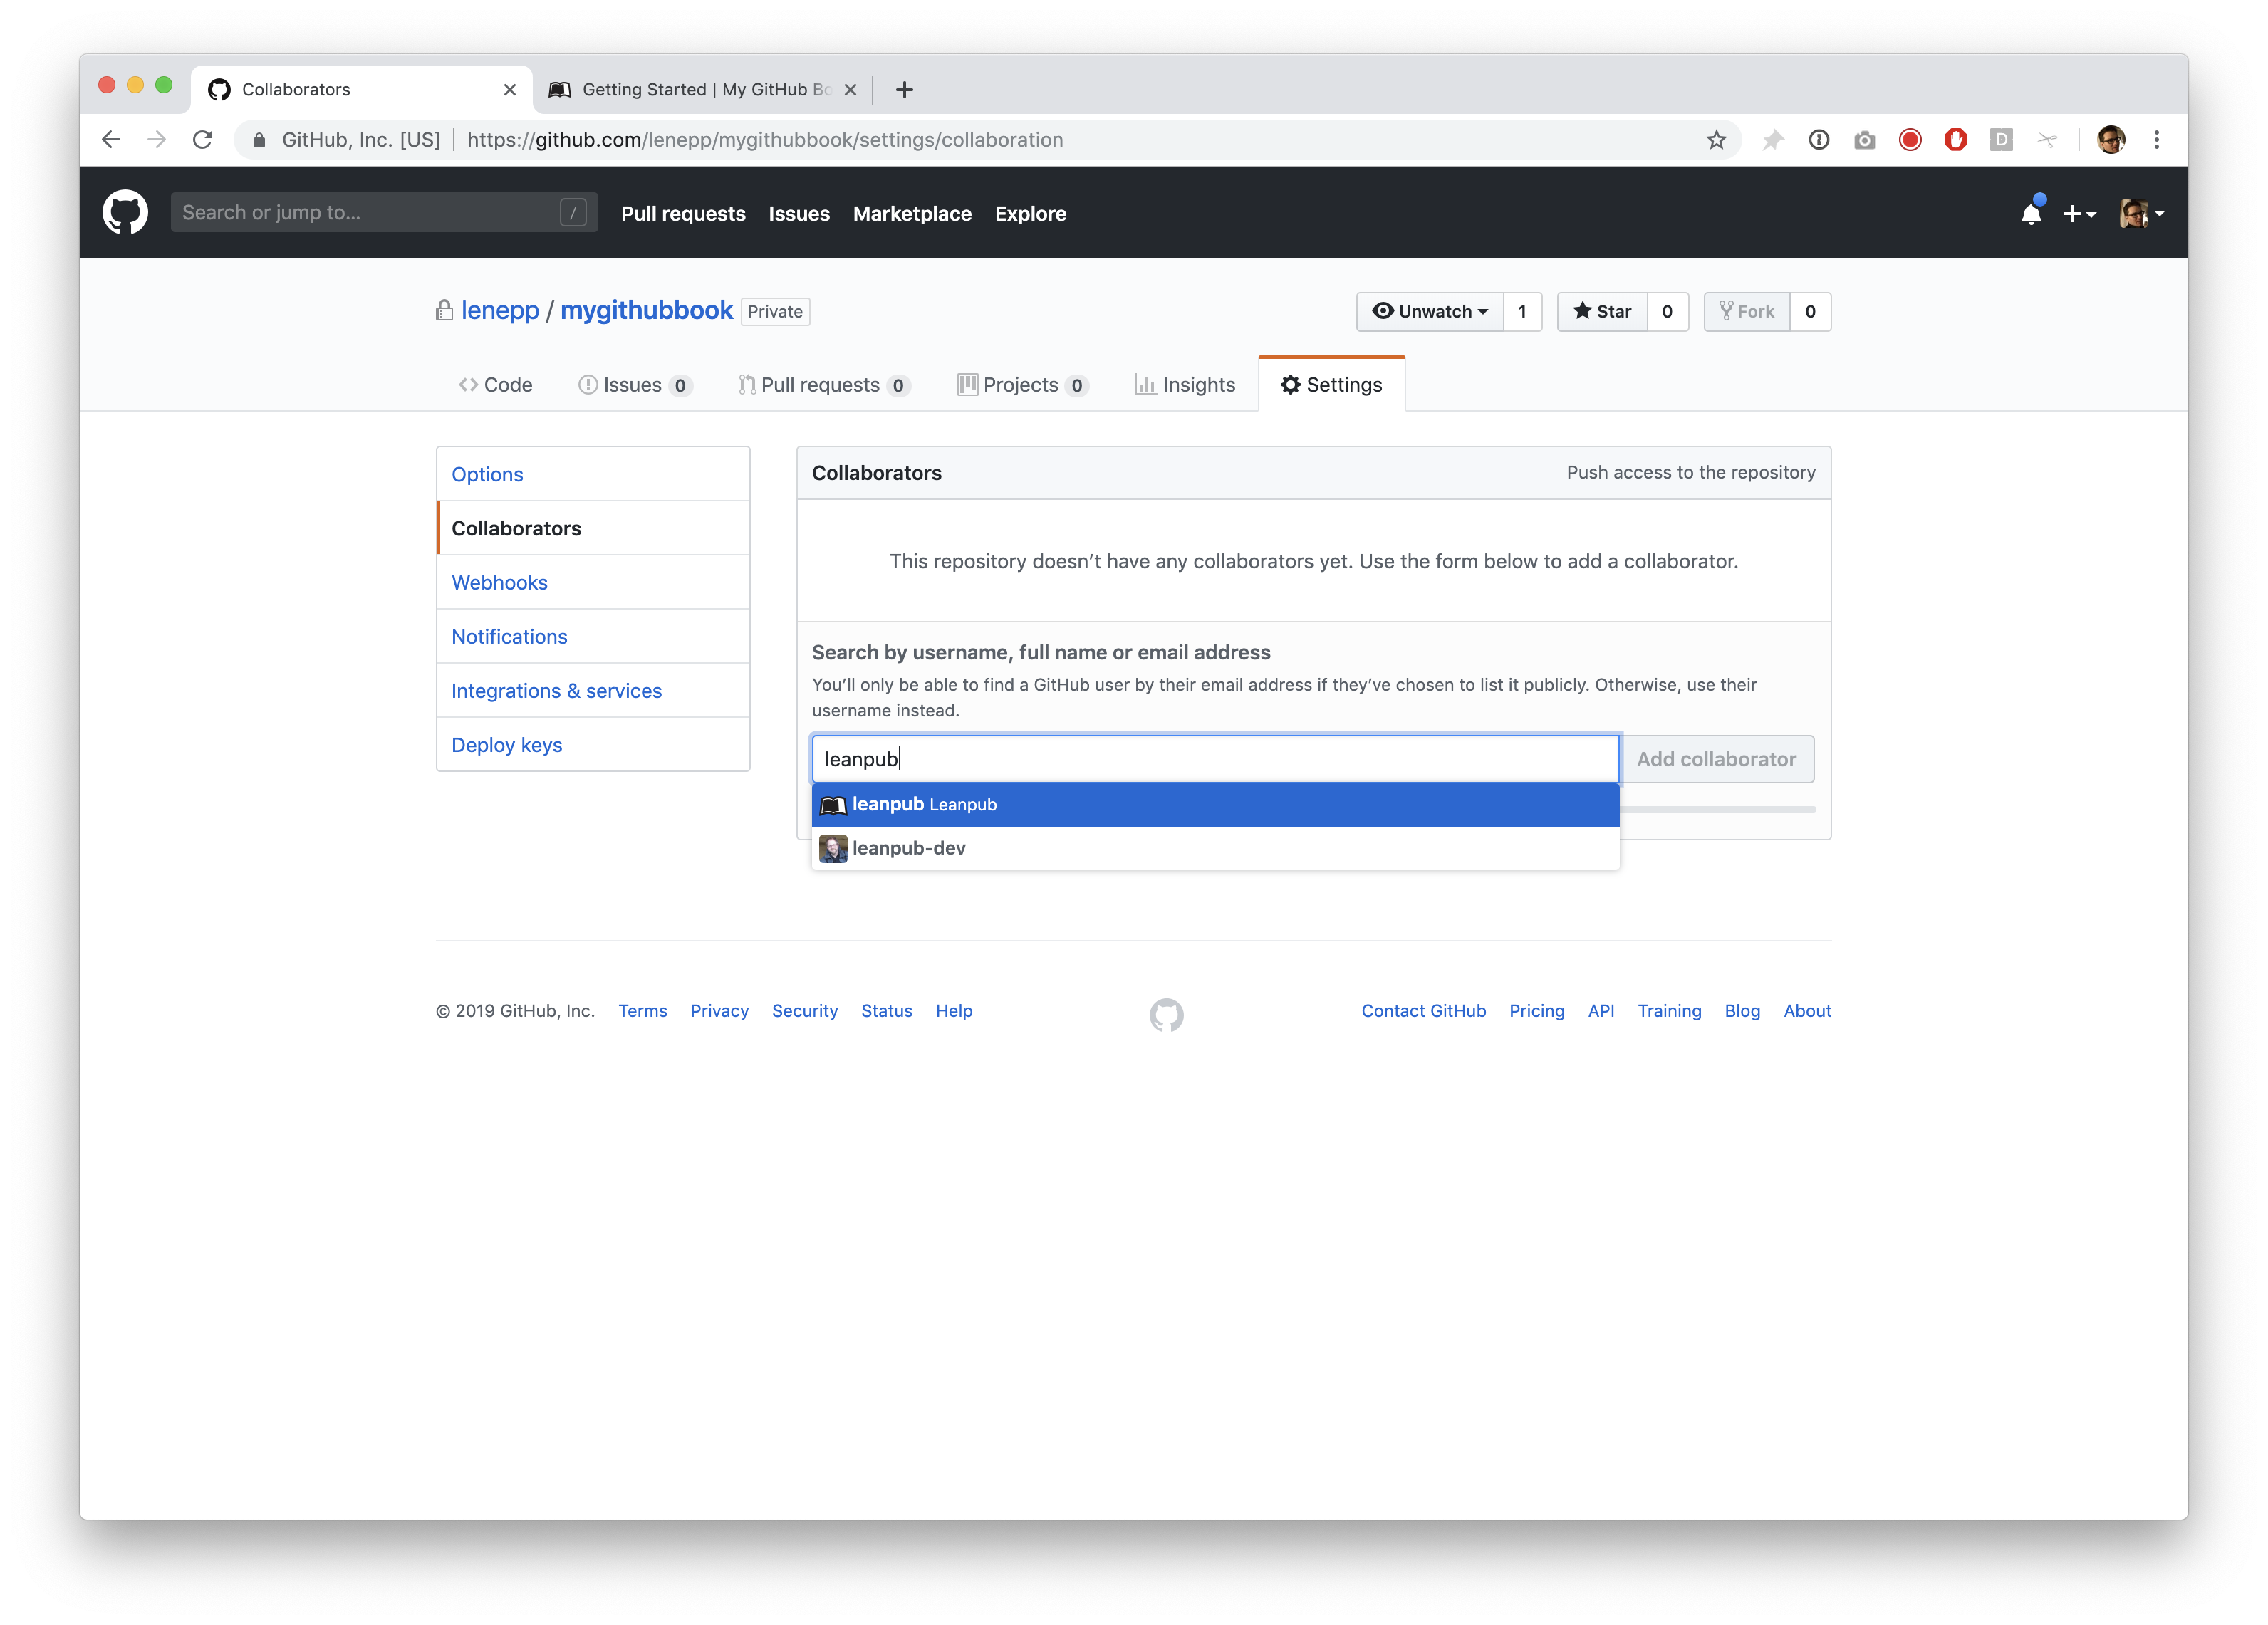
Type “leanpub” in the search box to find the leanpub GitHub user.
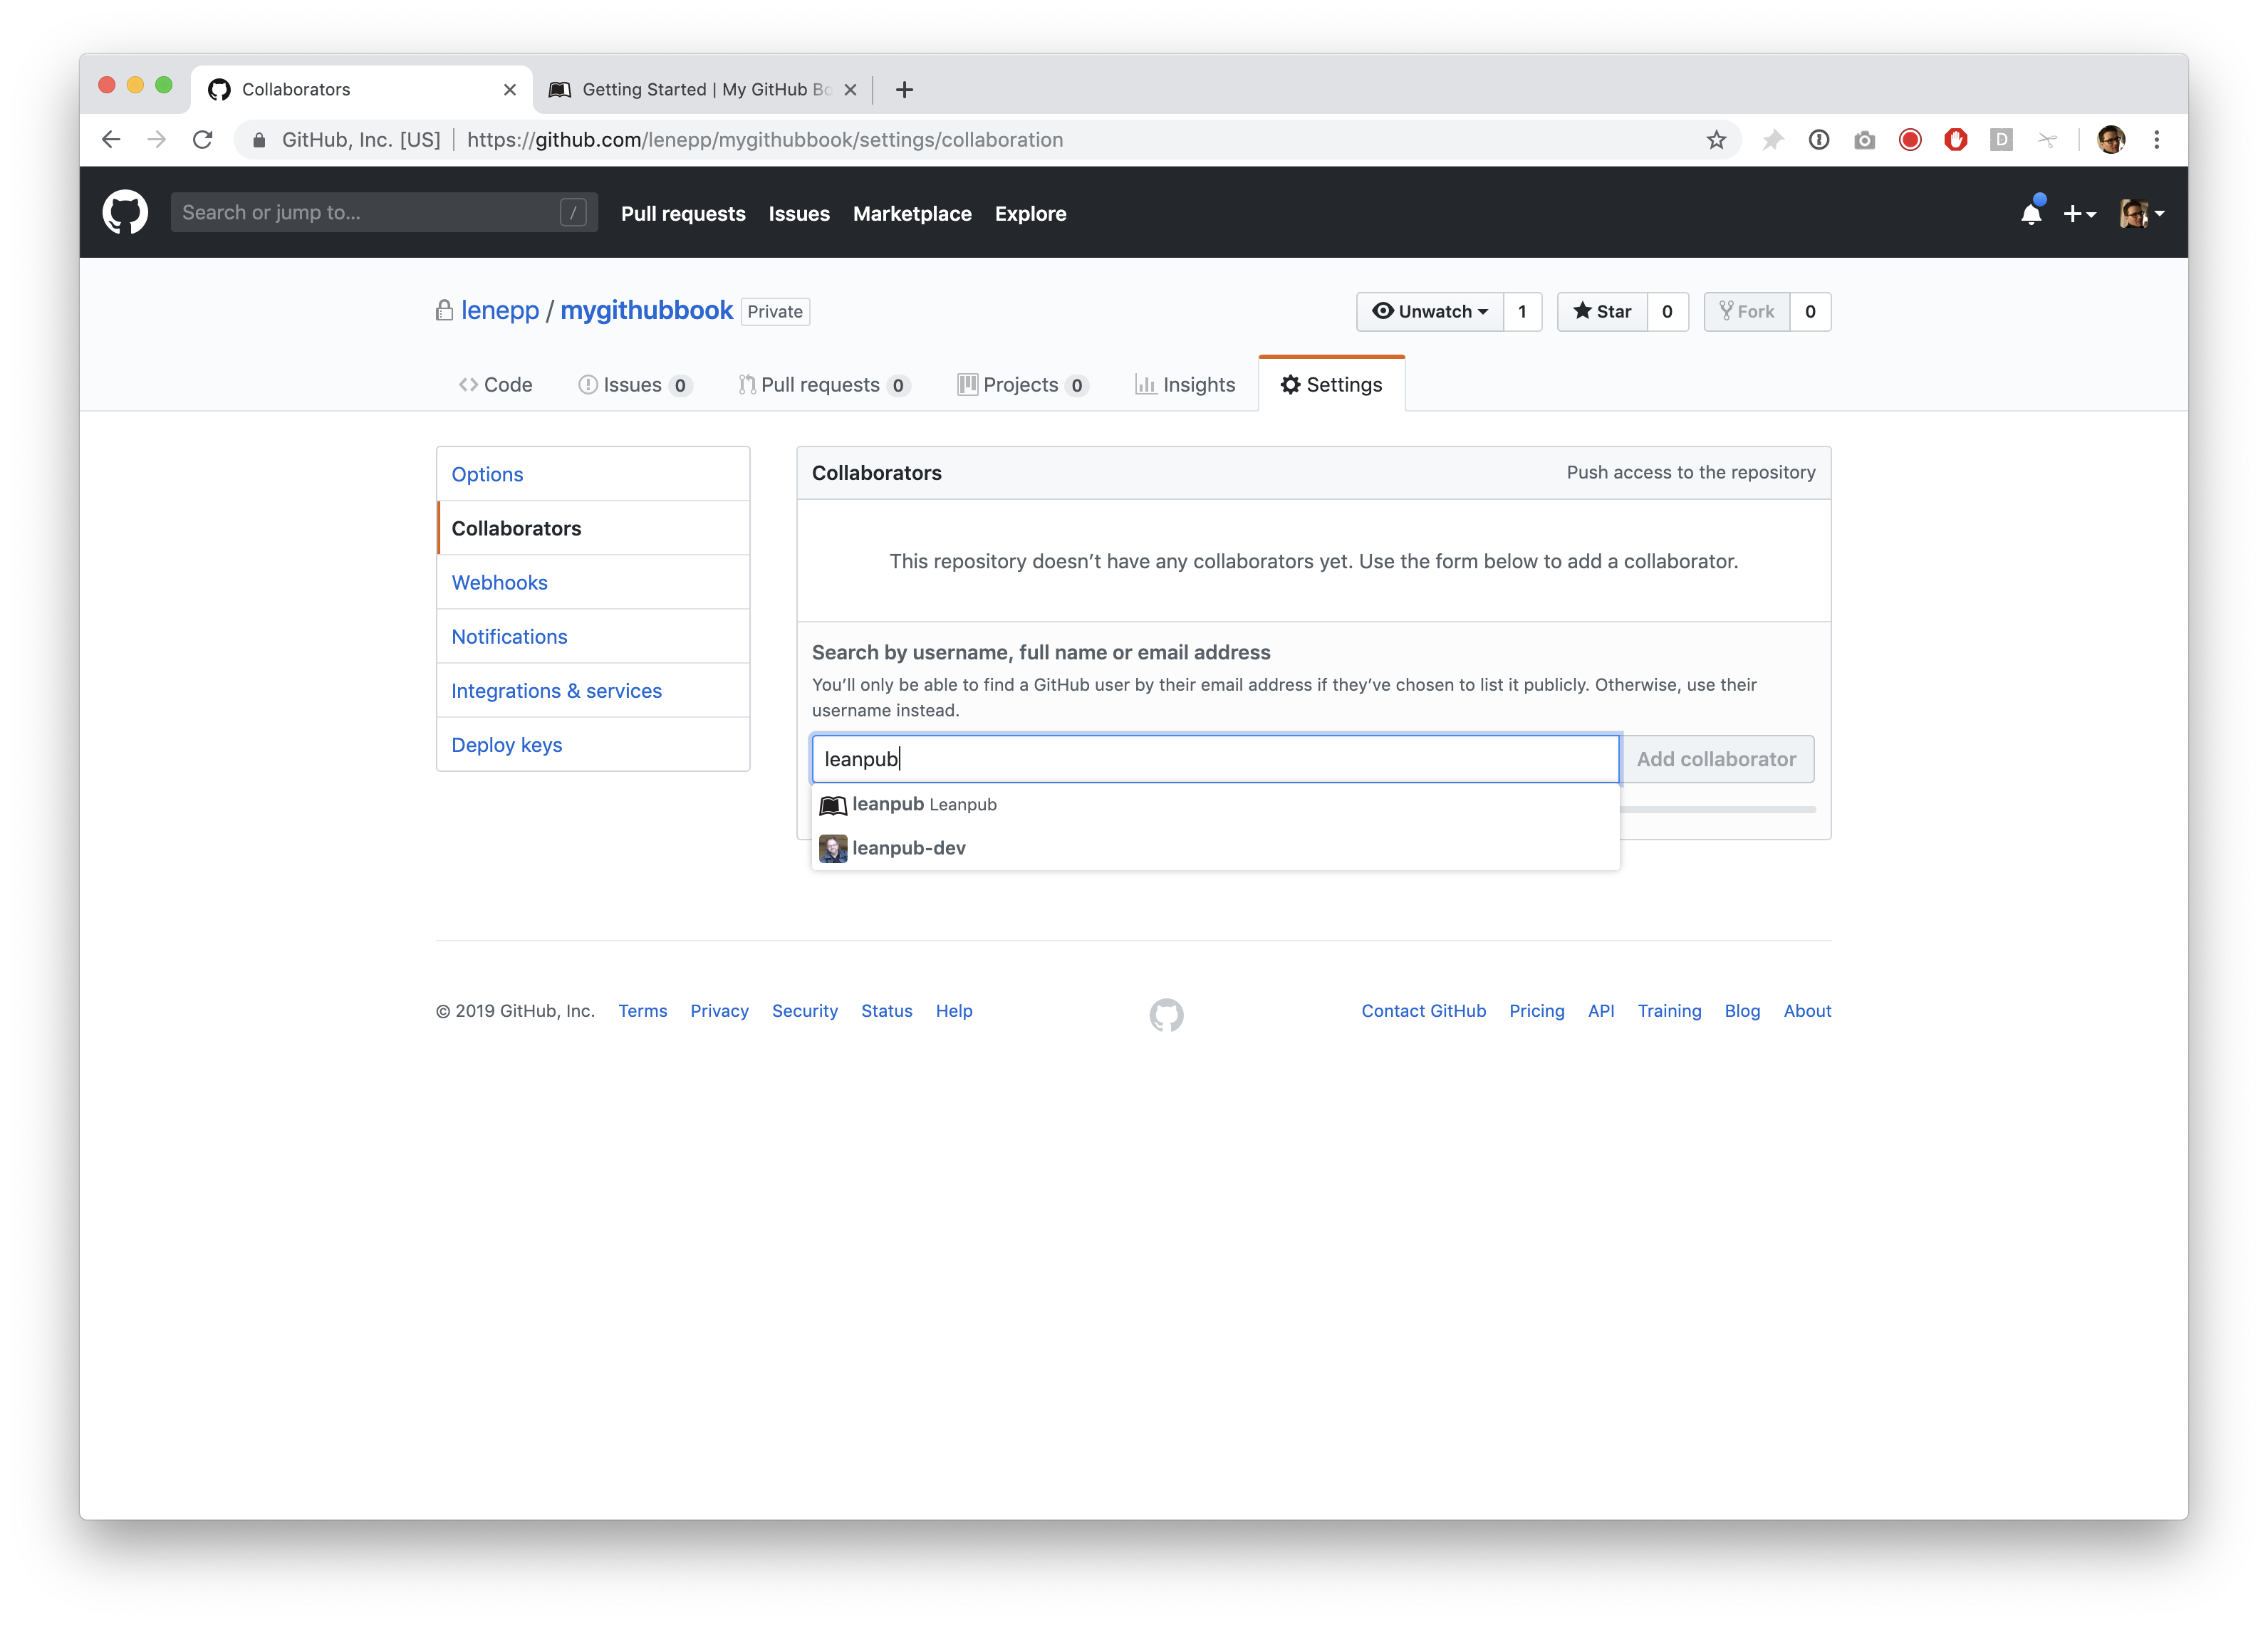
Select the “leanpub” user and click the “Add collaborator” button.
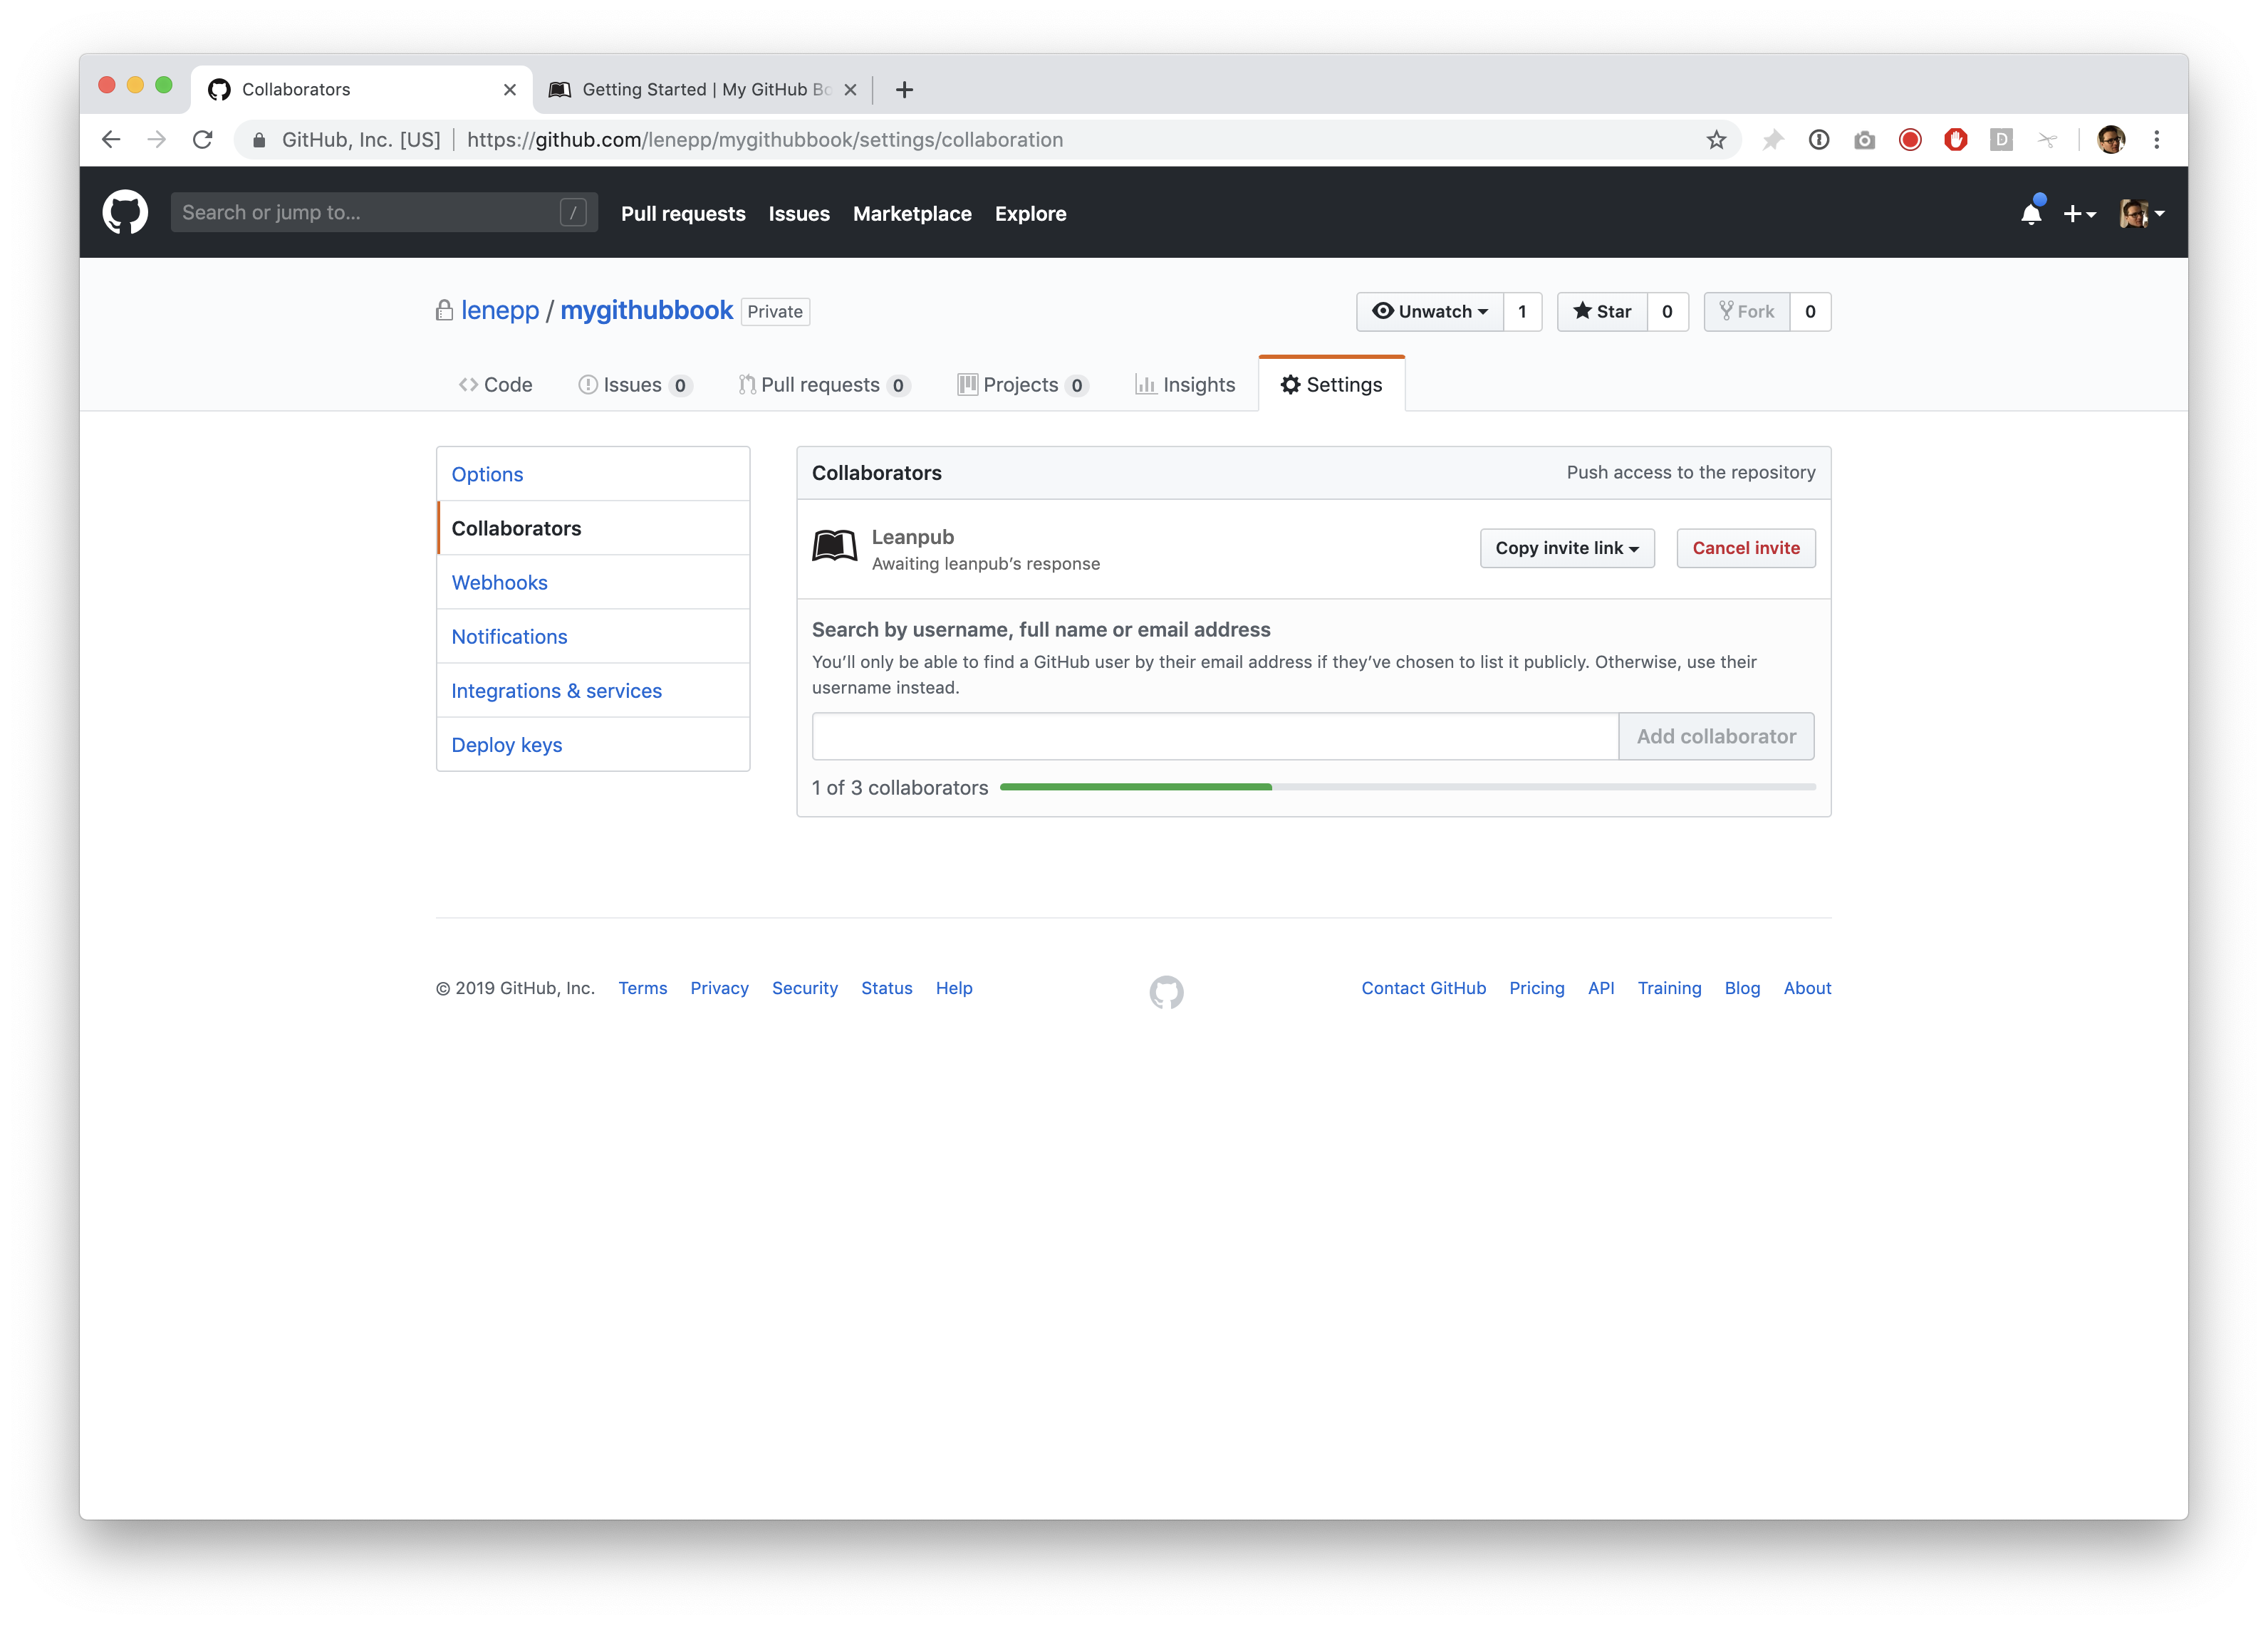
Until Leanpub has automatically accepted the invite, previewing or publishing your book will not work. If this has not happened in 15 minutes, please email hello@leanpub.com and let us know!
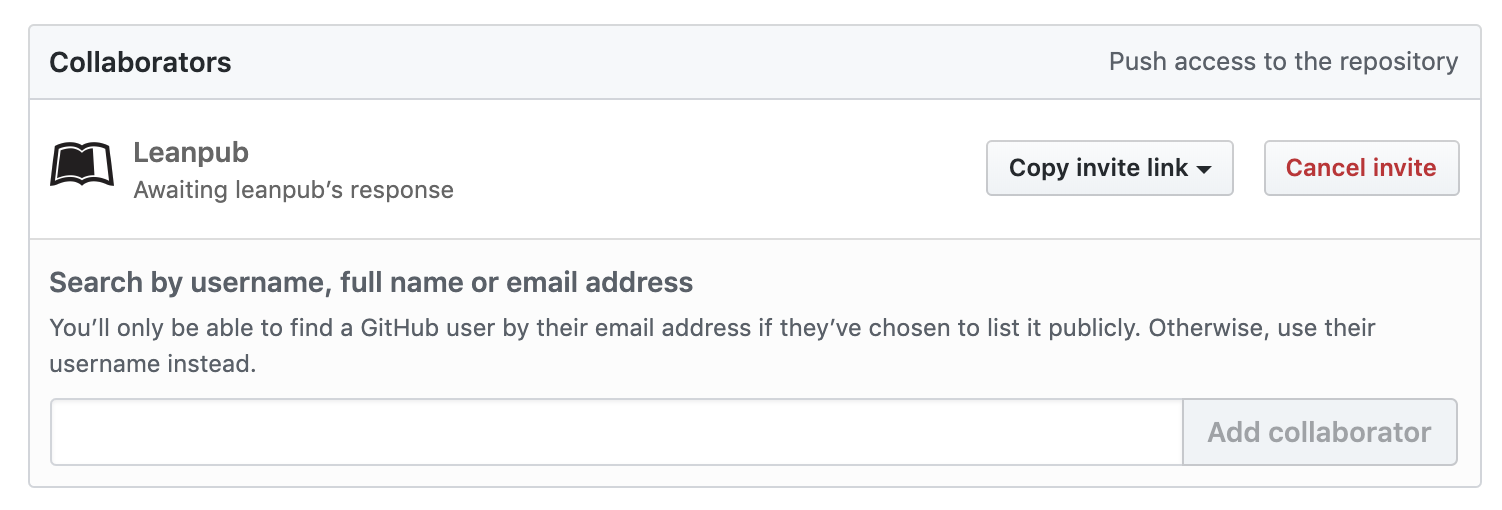
You will see that Leanpub has been added as a collaborator on the repository.
Adding Default Content to Your GitHub Repository
Next, you need to add some content to your GitHub repository. (Leanpub NEVER commits to your GitHub repository, since we do not want to cause merge conflicts.)
To download our default book content, click this link to download the zip file. This will download the default content to your computer.
You will now find the file wherever you store downloads on your computer.

Double-click the folder to unzip it.

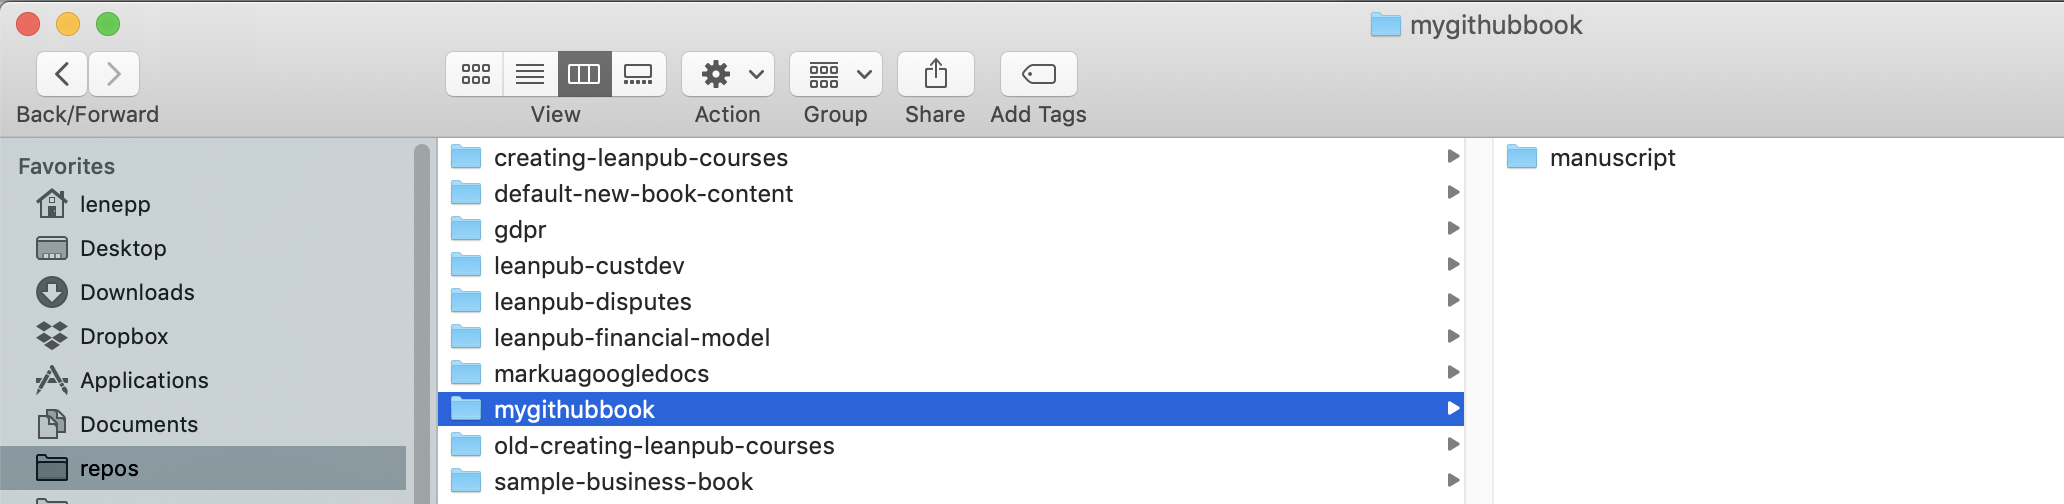
Copy the “manuscript” folder. Then, go to the cloned GitHub repository on your computer, and paste the “manuscript” folder into the repository.
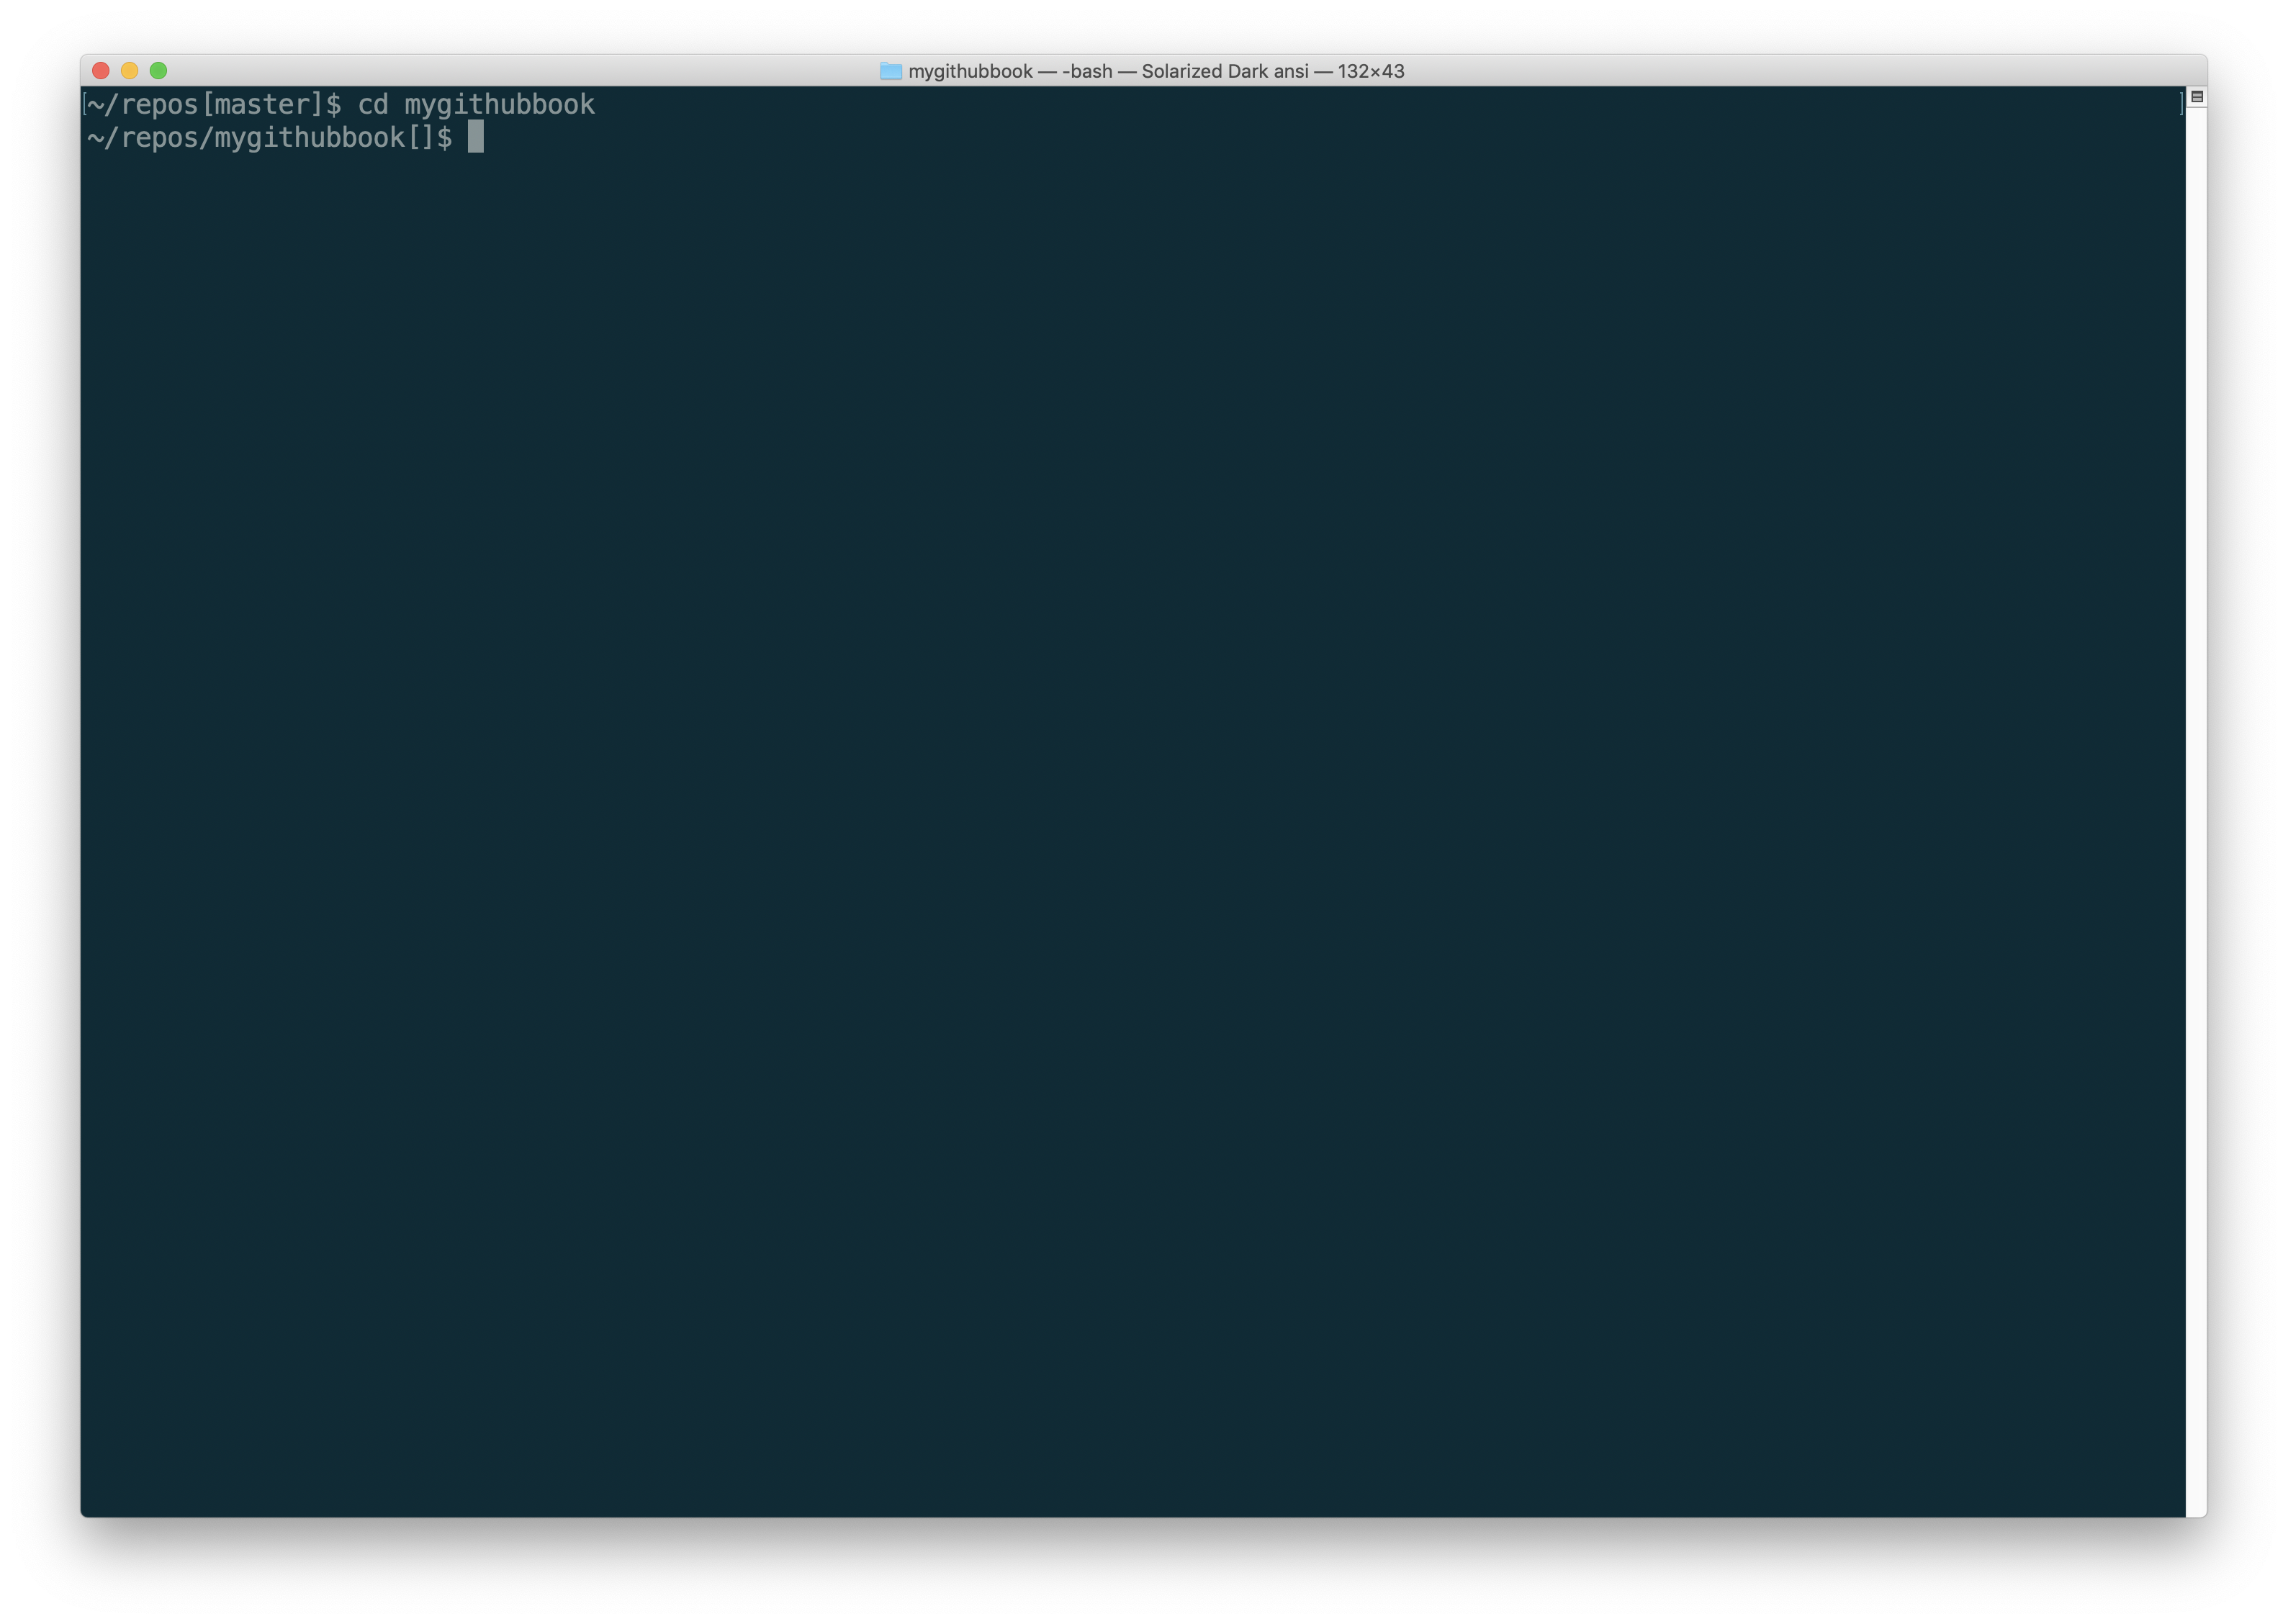
Go back to the command line on your computer and change to the GitHub repository for your book.
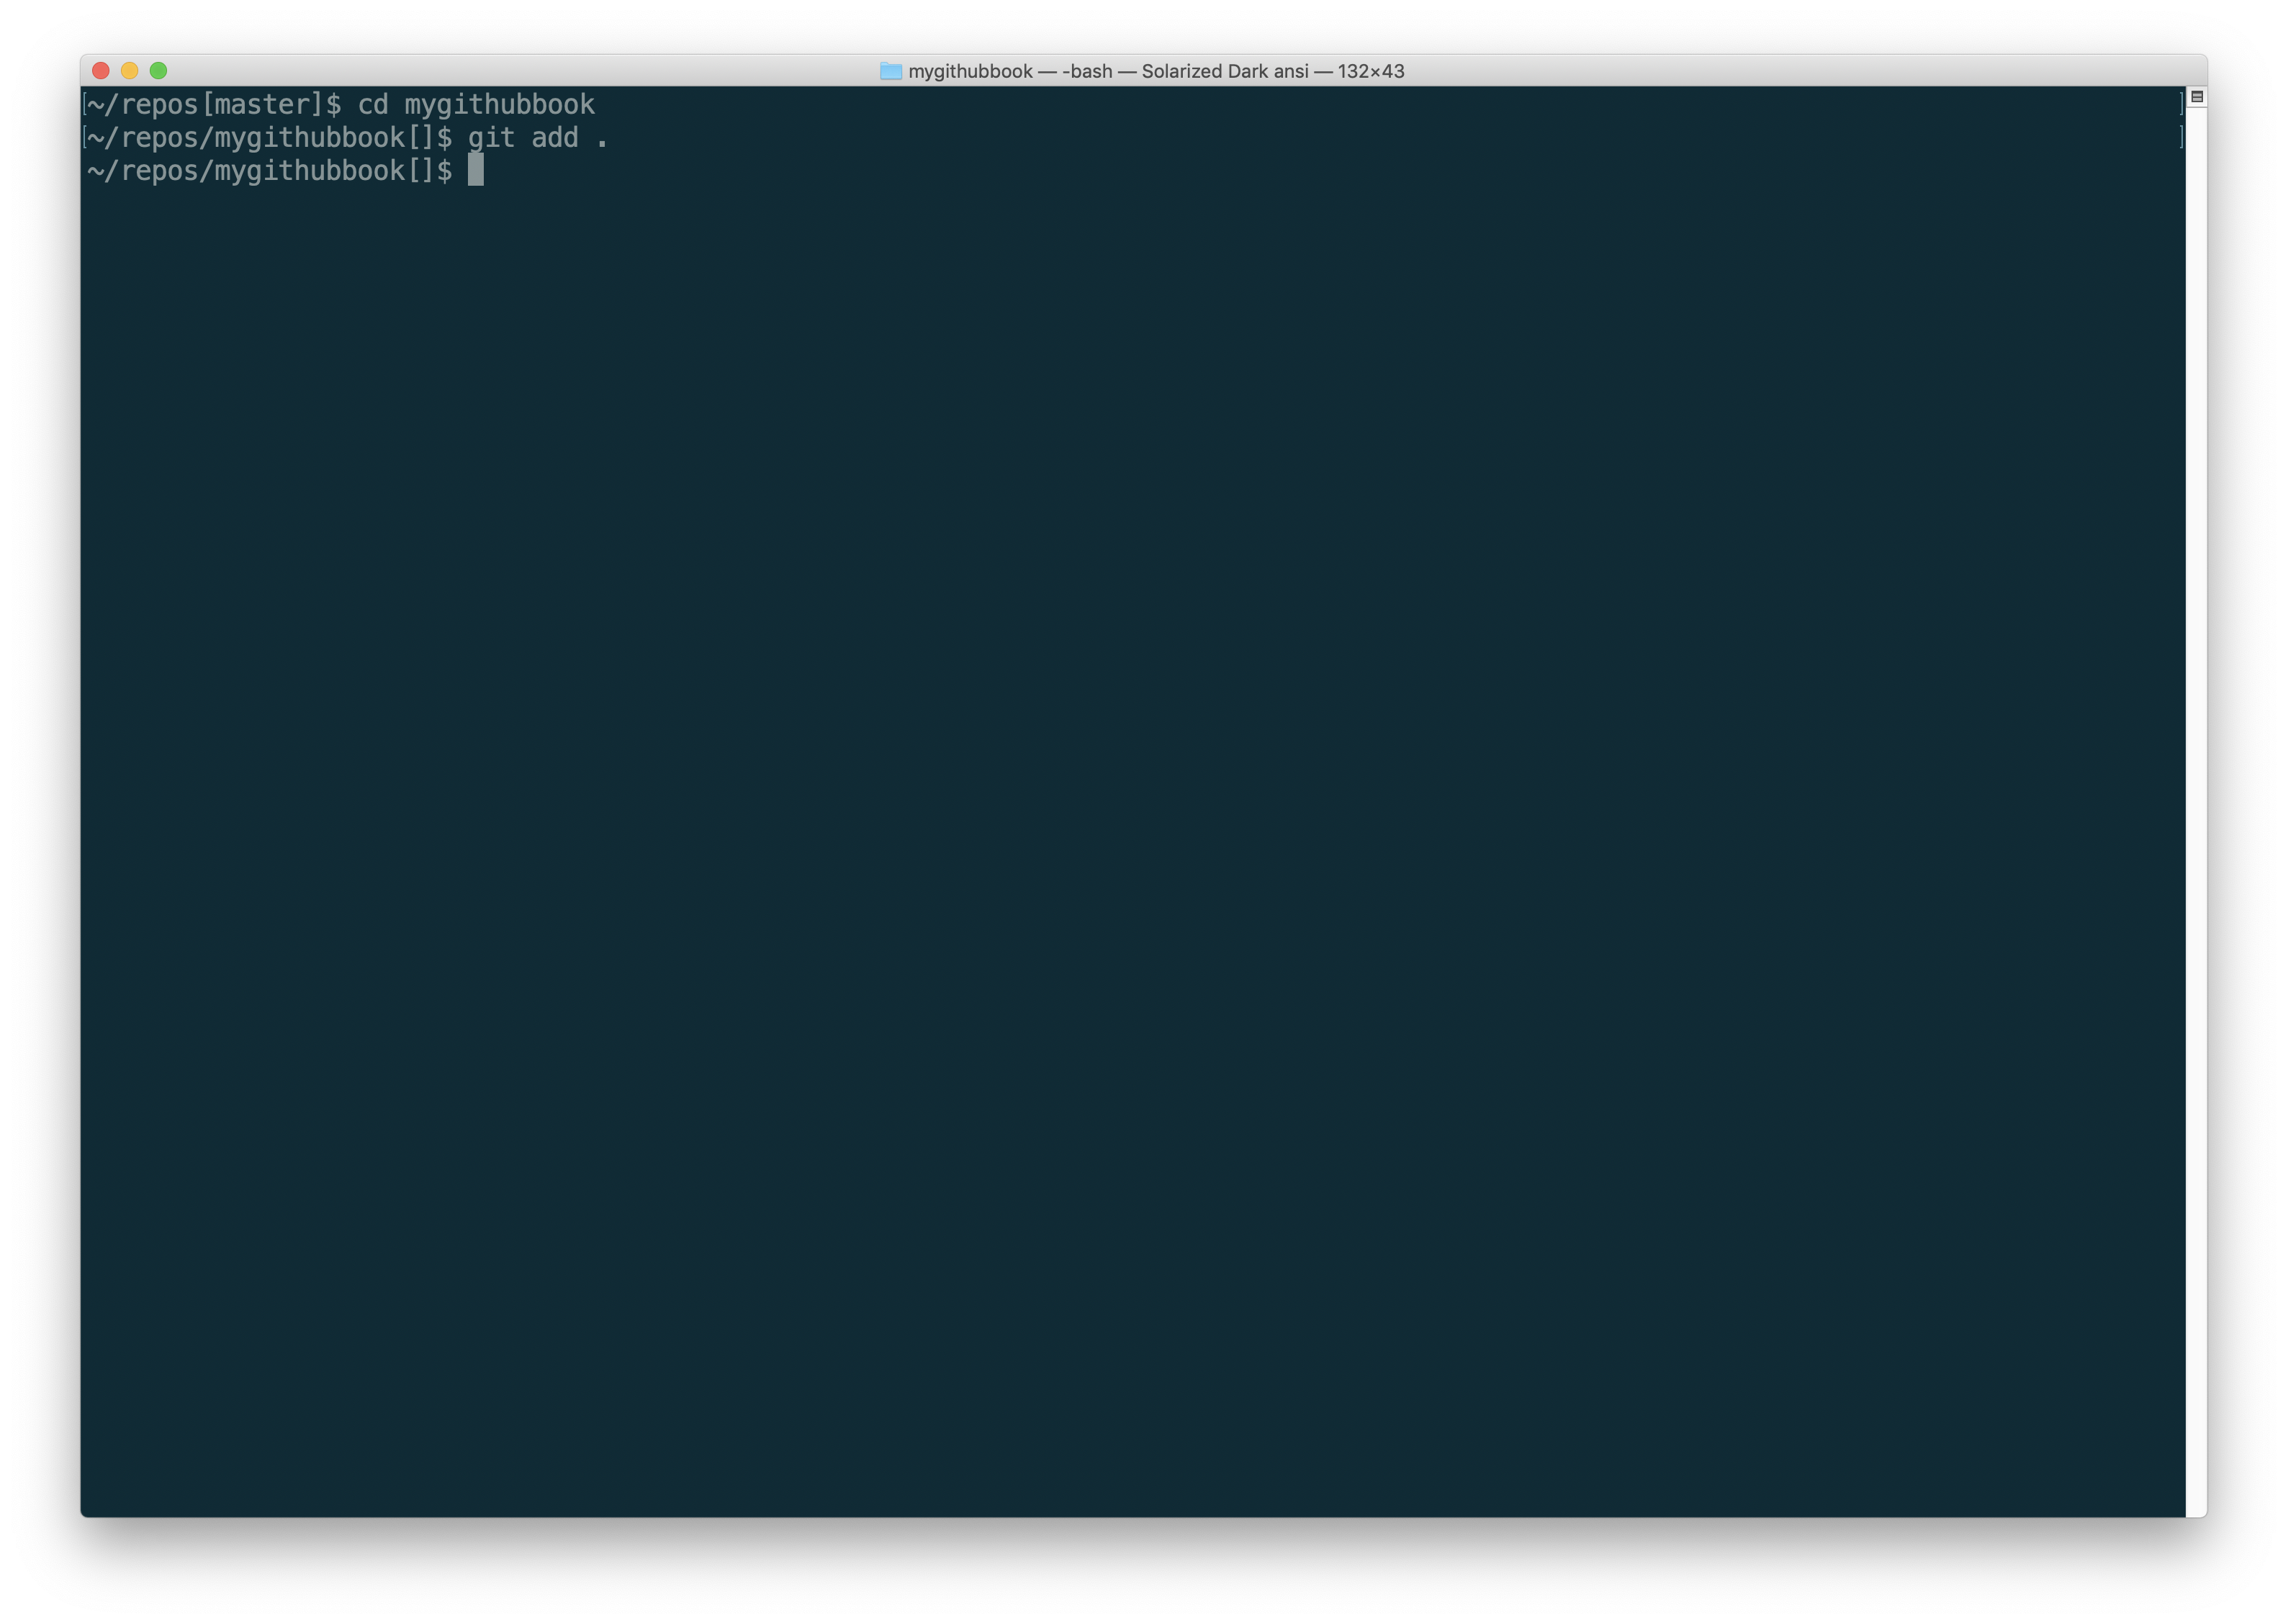
Type git add . to the content using Git.
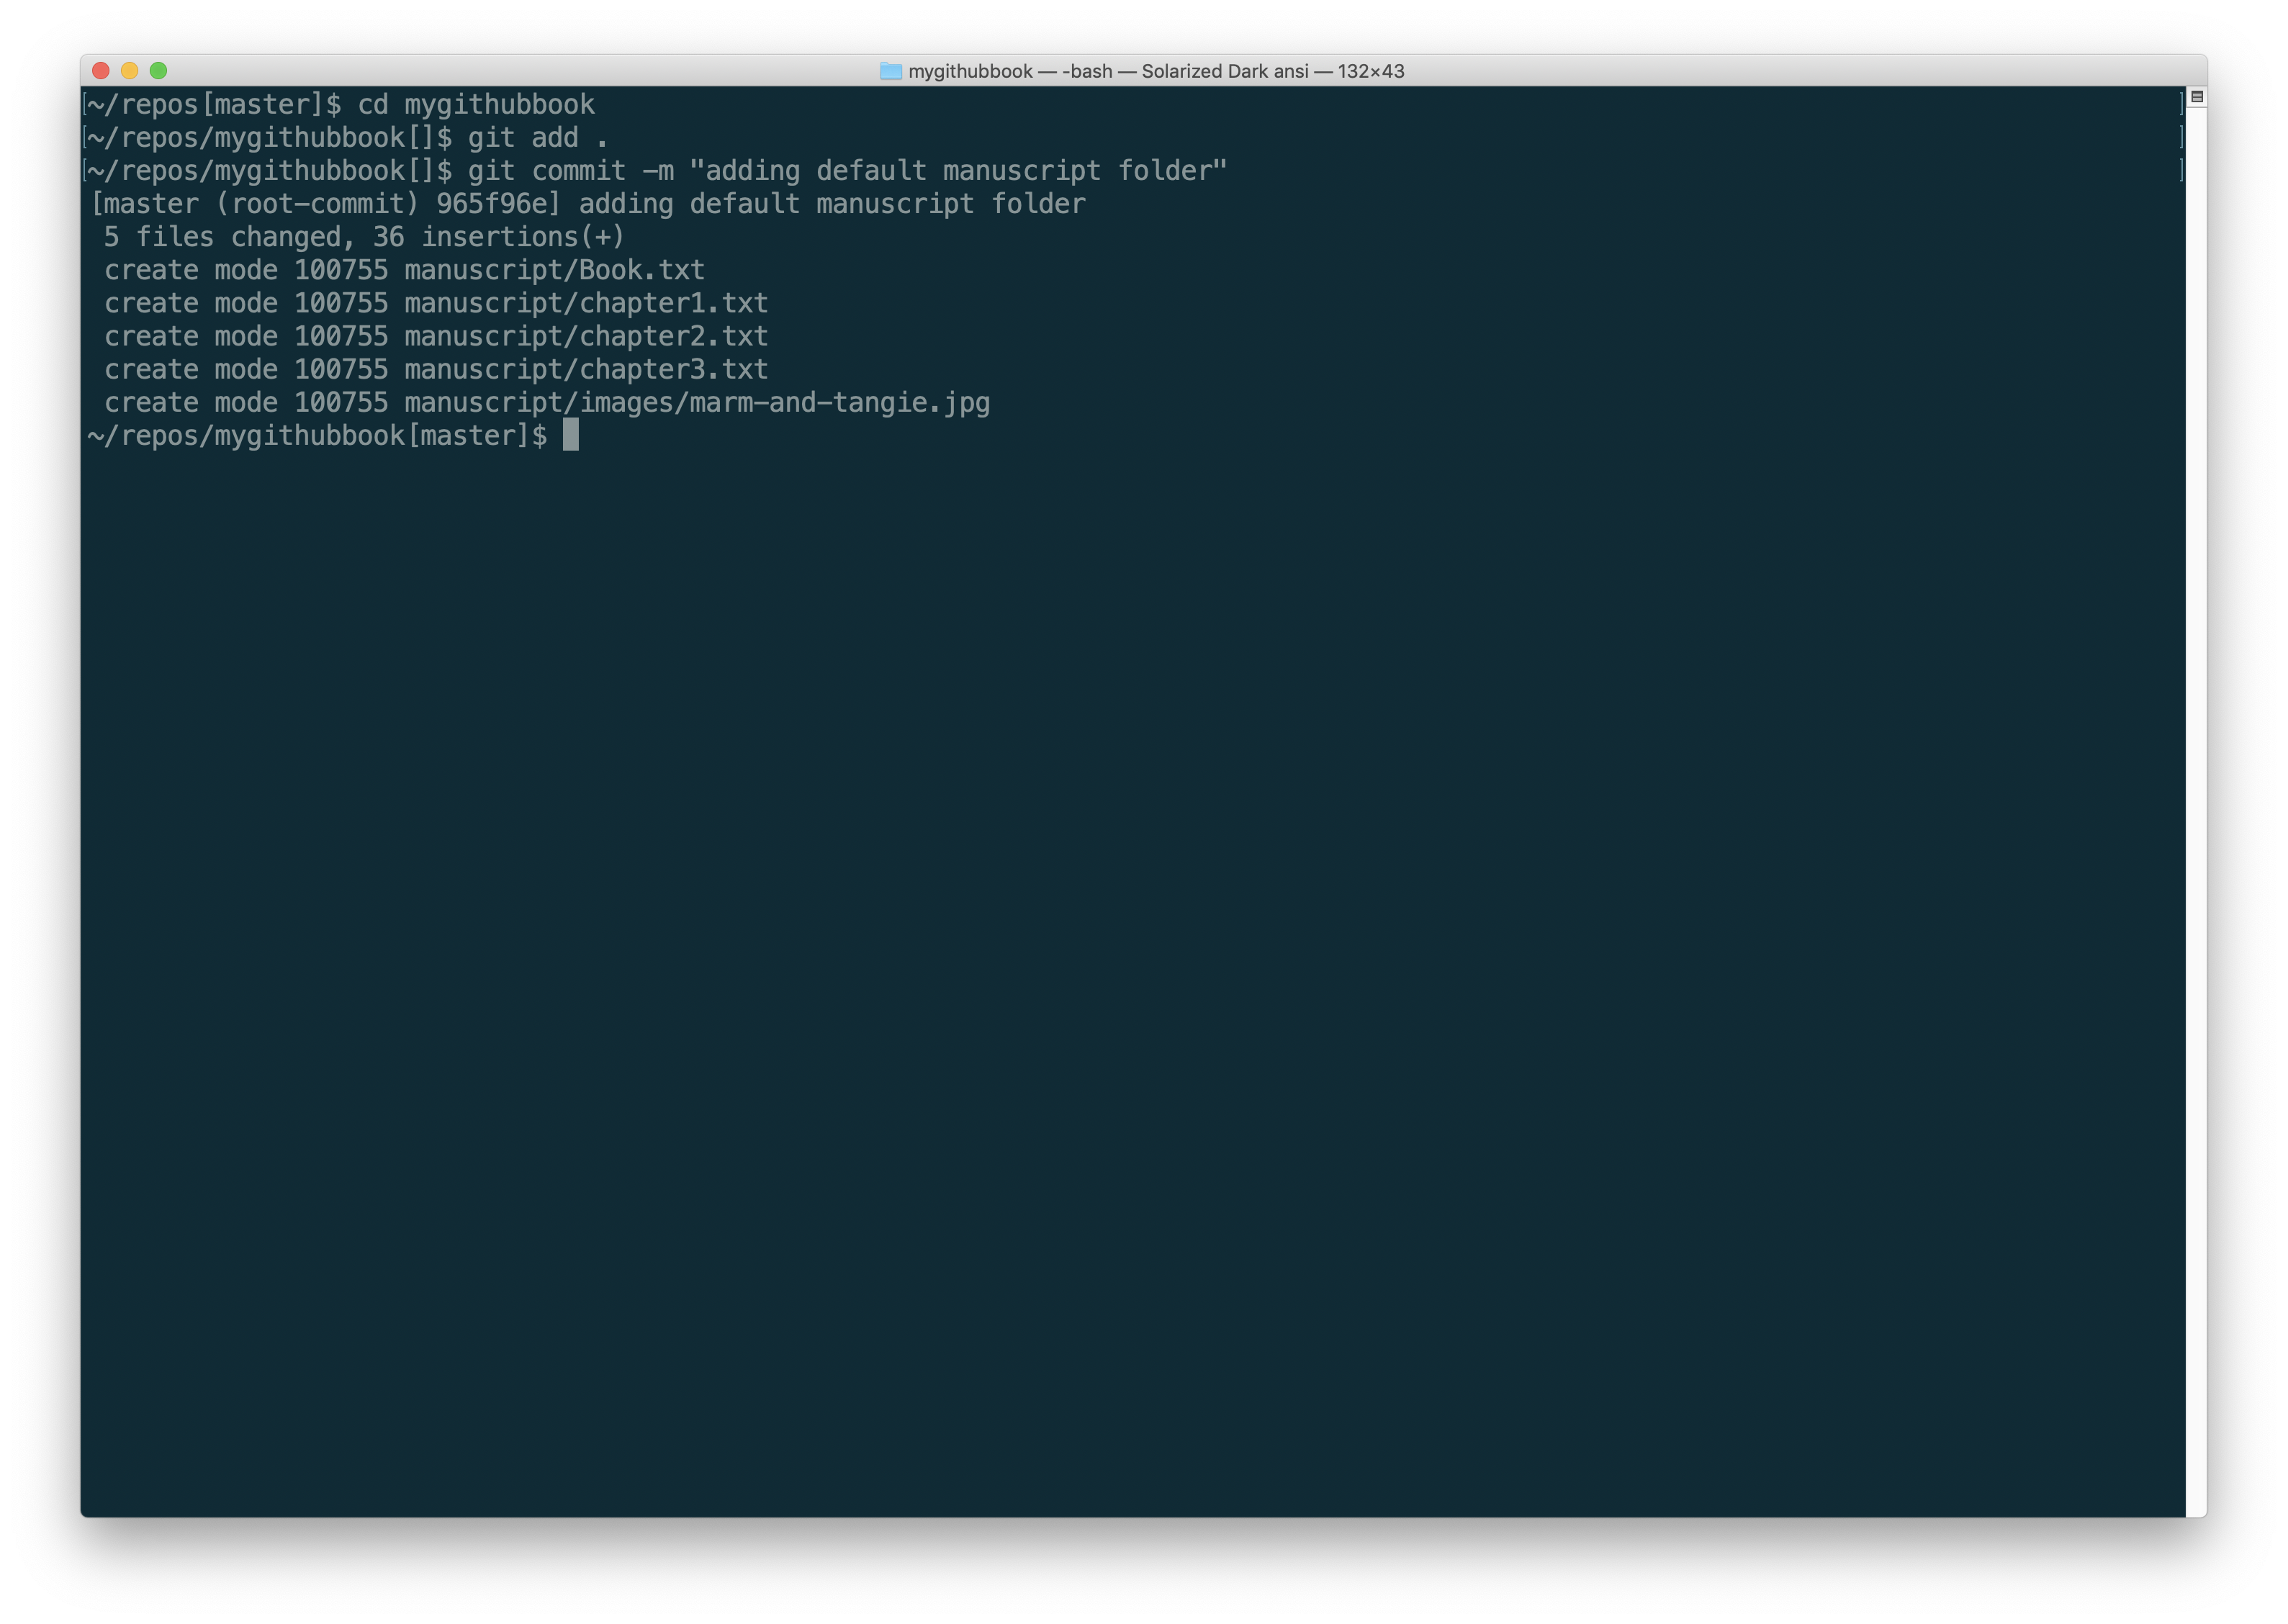
Type git commit -m "adding default manuscript folder". You will see messages indicating that the content has been committed.
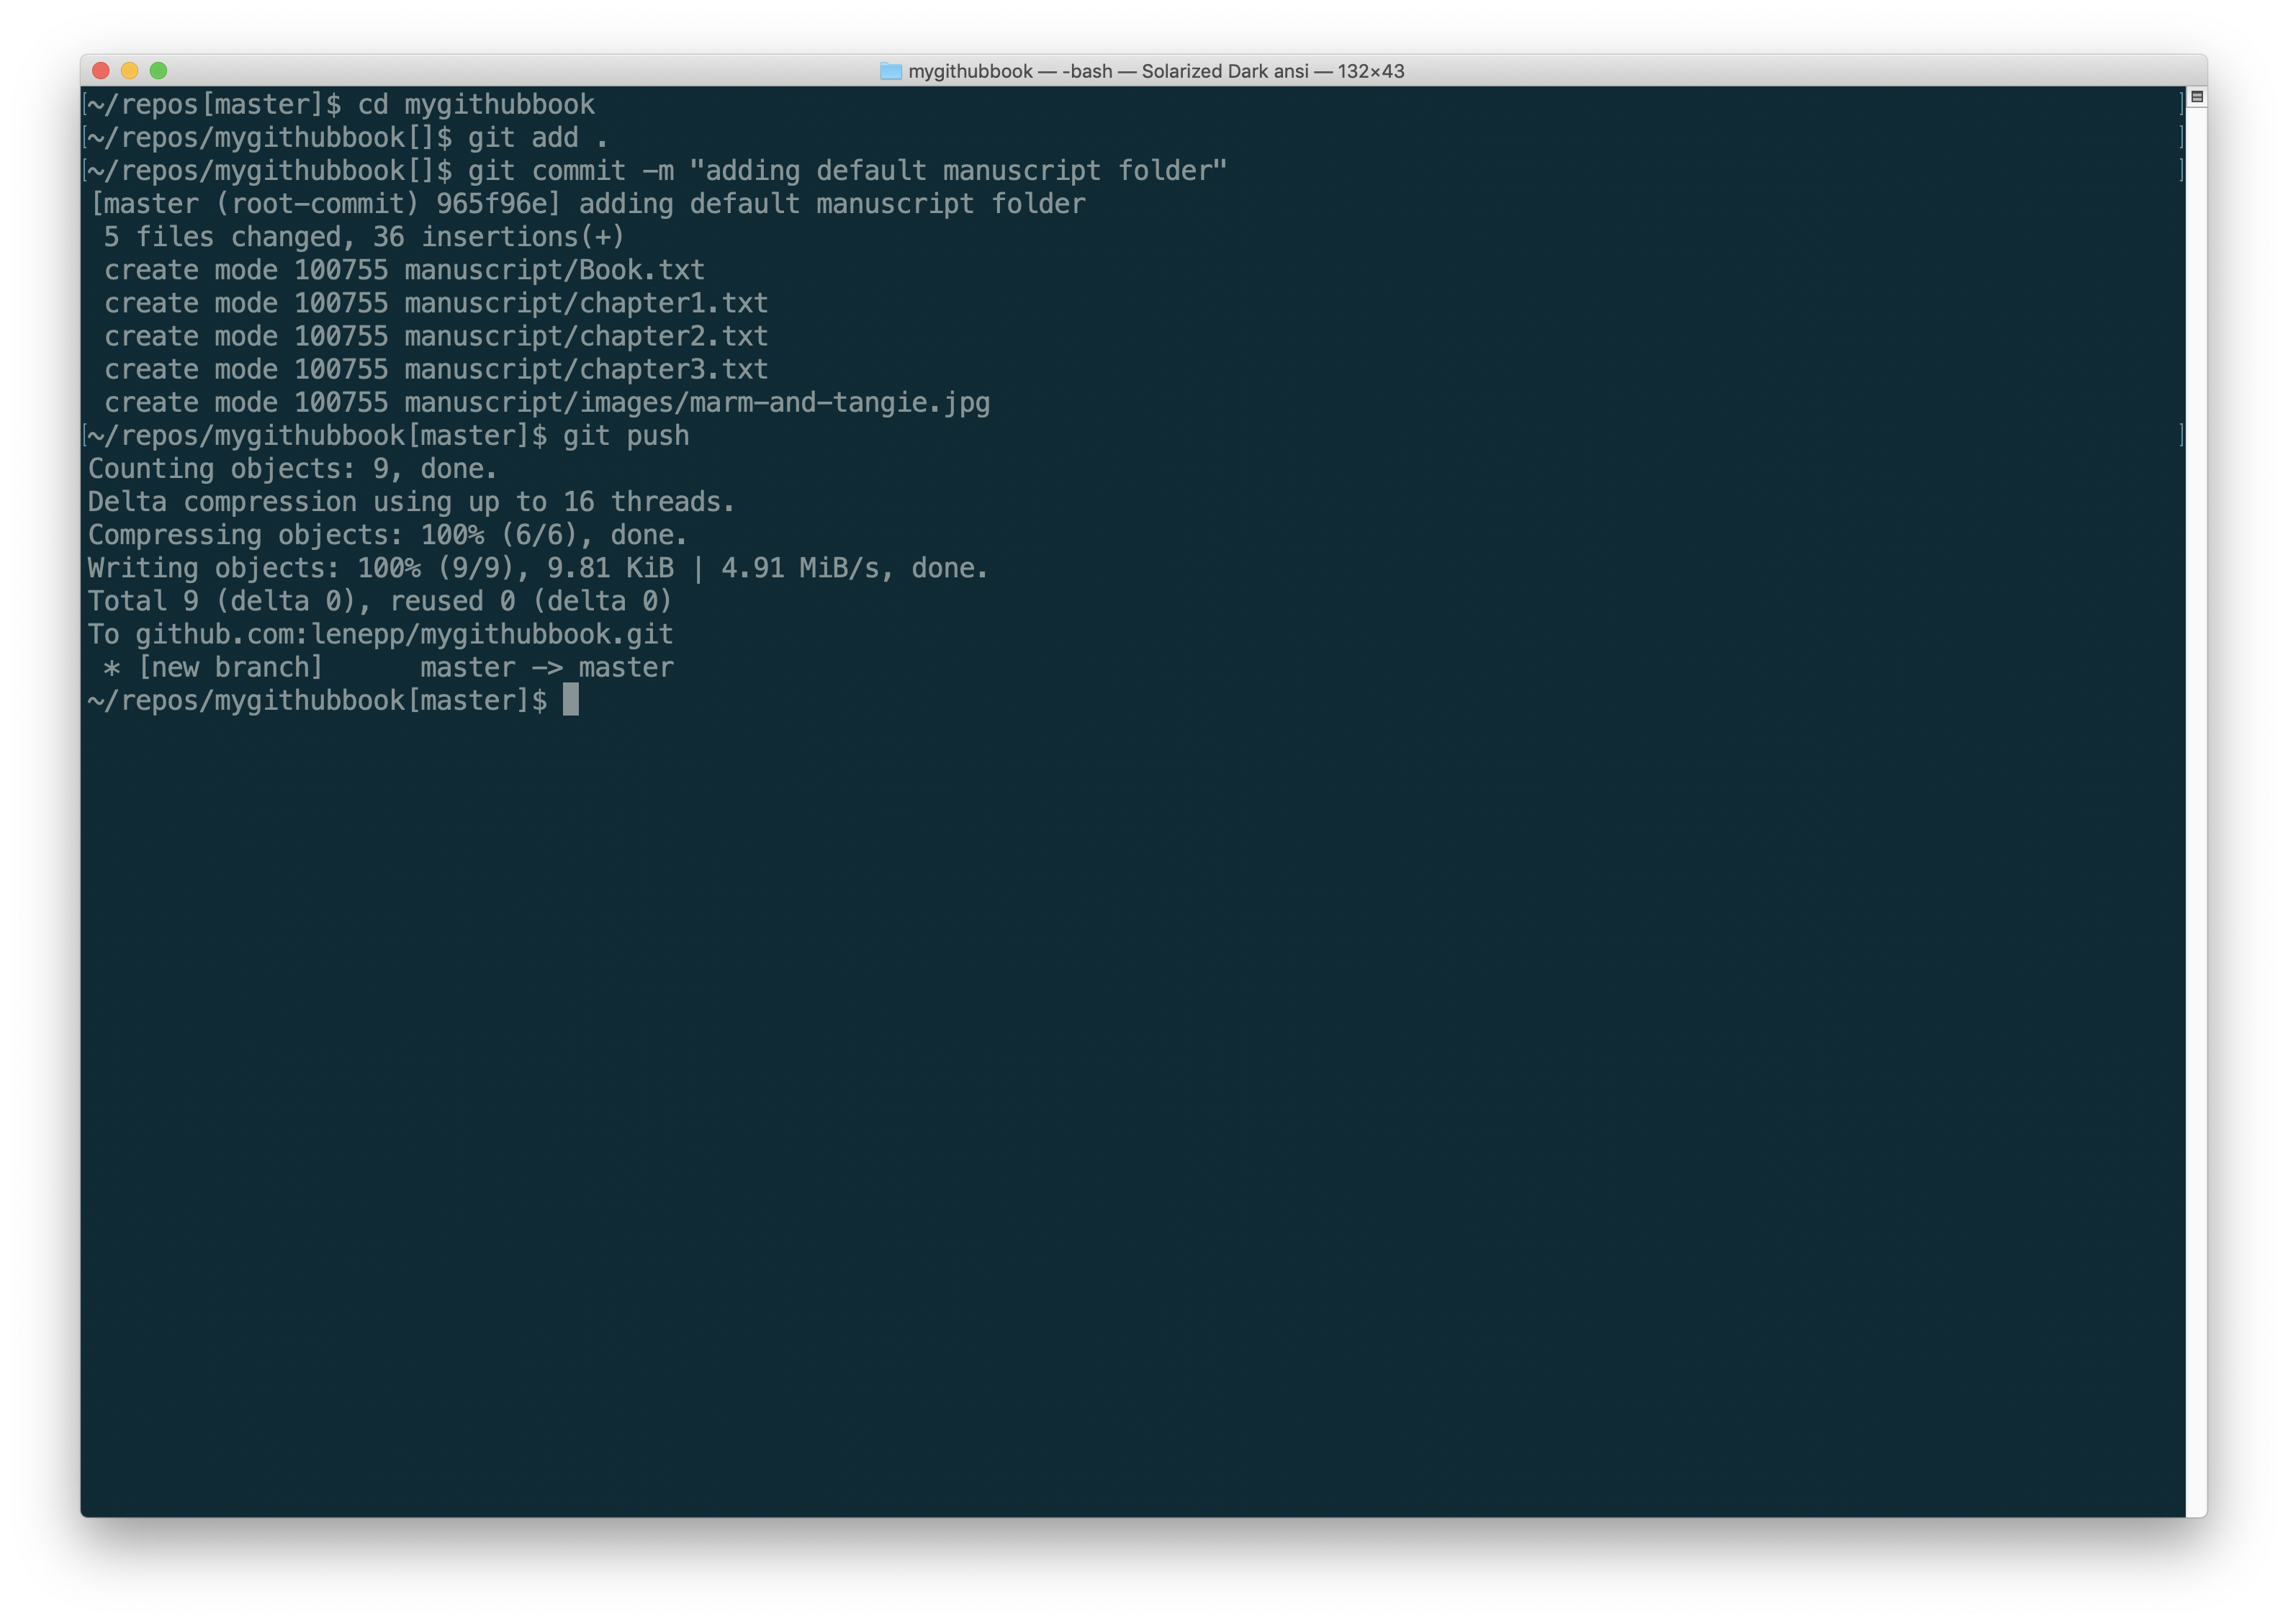
Type git push to push the commit to the repository on GitHub.
Creating a Preview
To create your first preview, using the default content we included in your new book, go back to the Getting Started page for your book:
Click on “Getting Started” at the top, and you will see your the Book Tools menu. It will look something like this:

Click on “Preview or Publish” under the “Book Info” column, and you will see something like this:
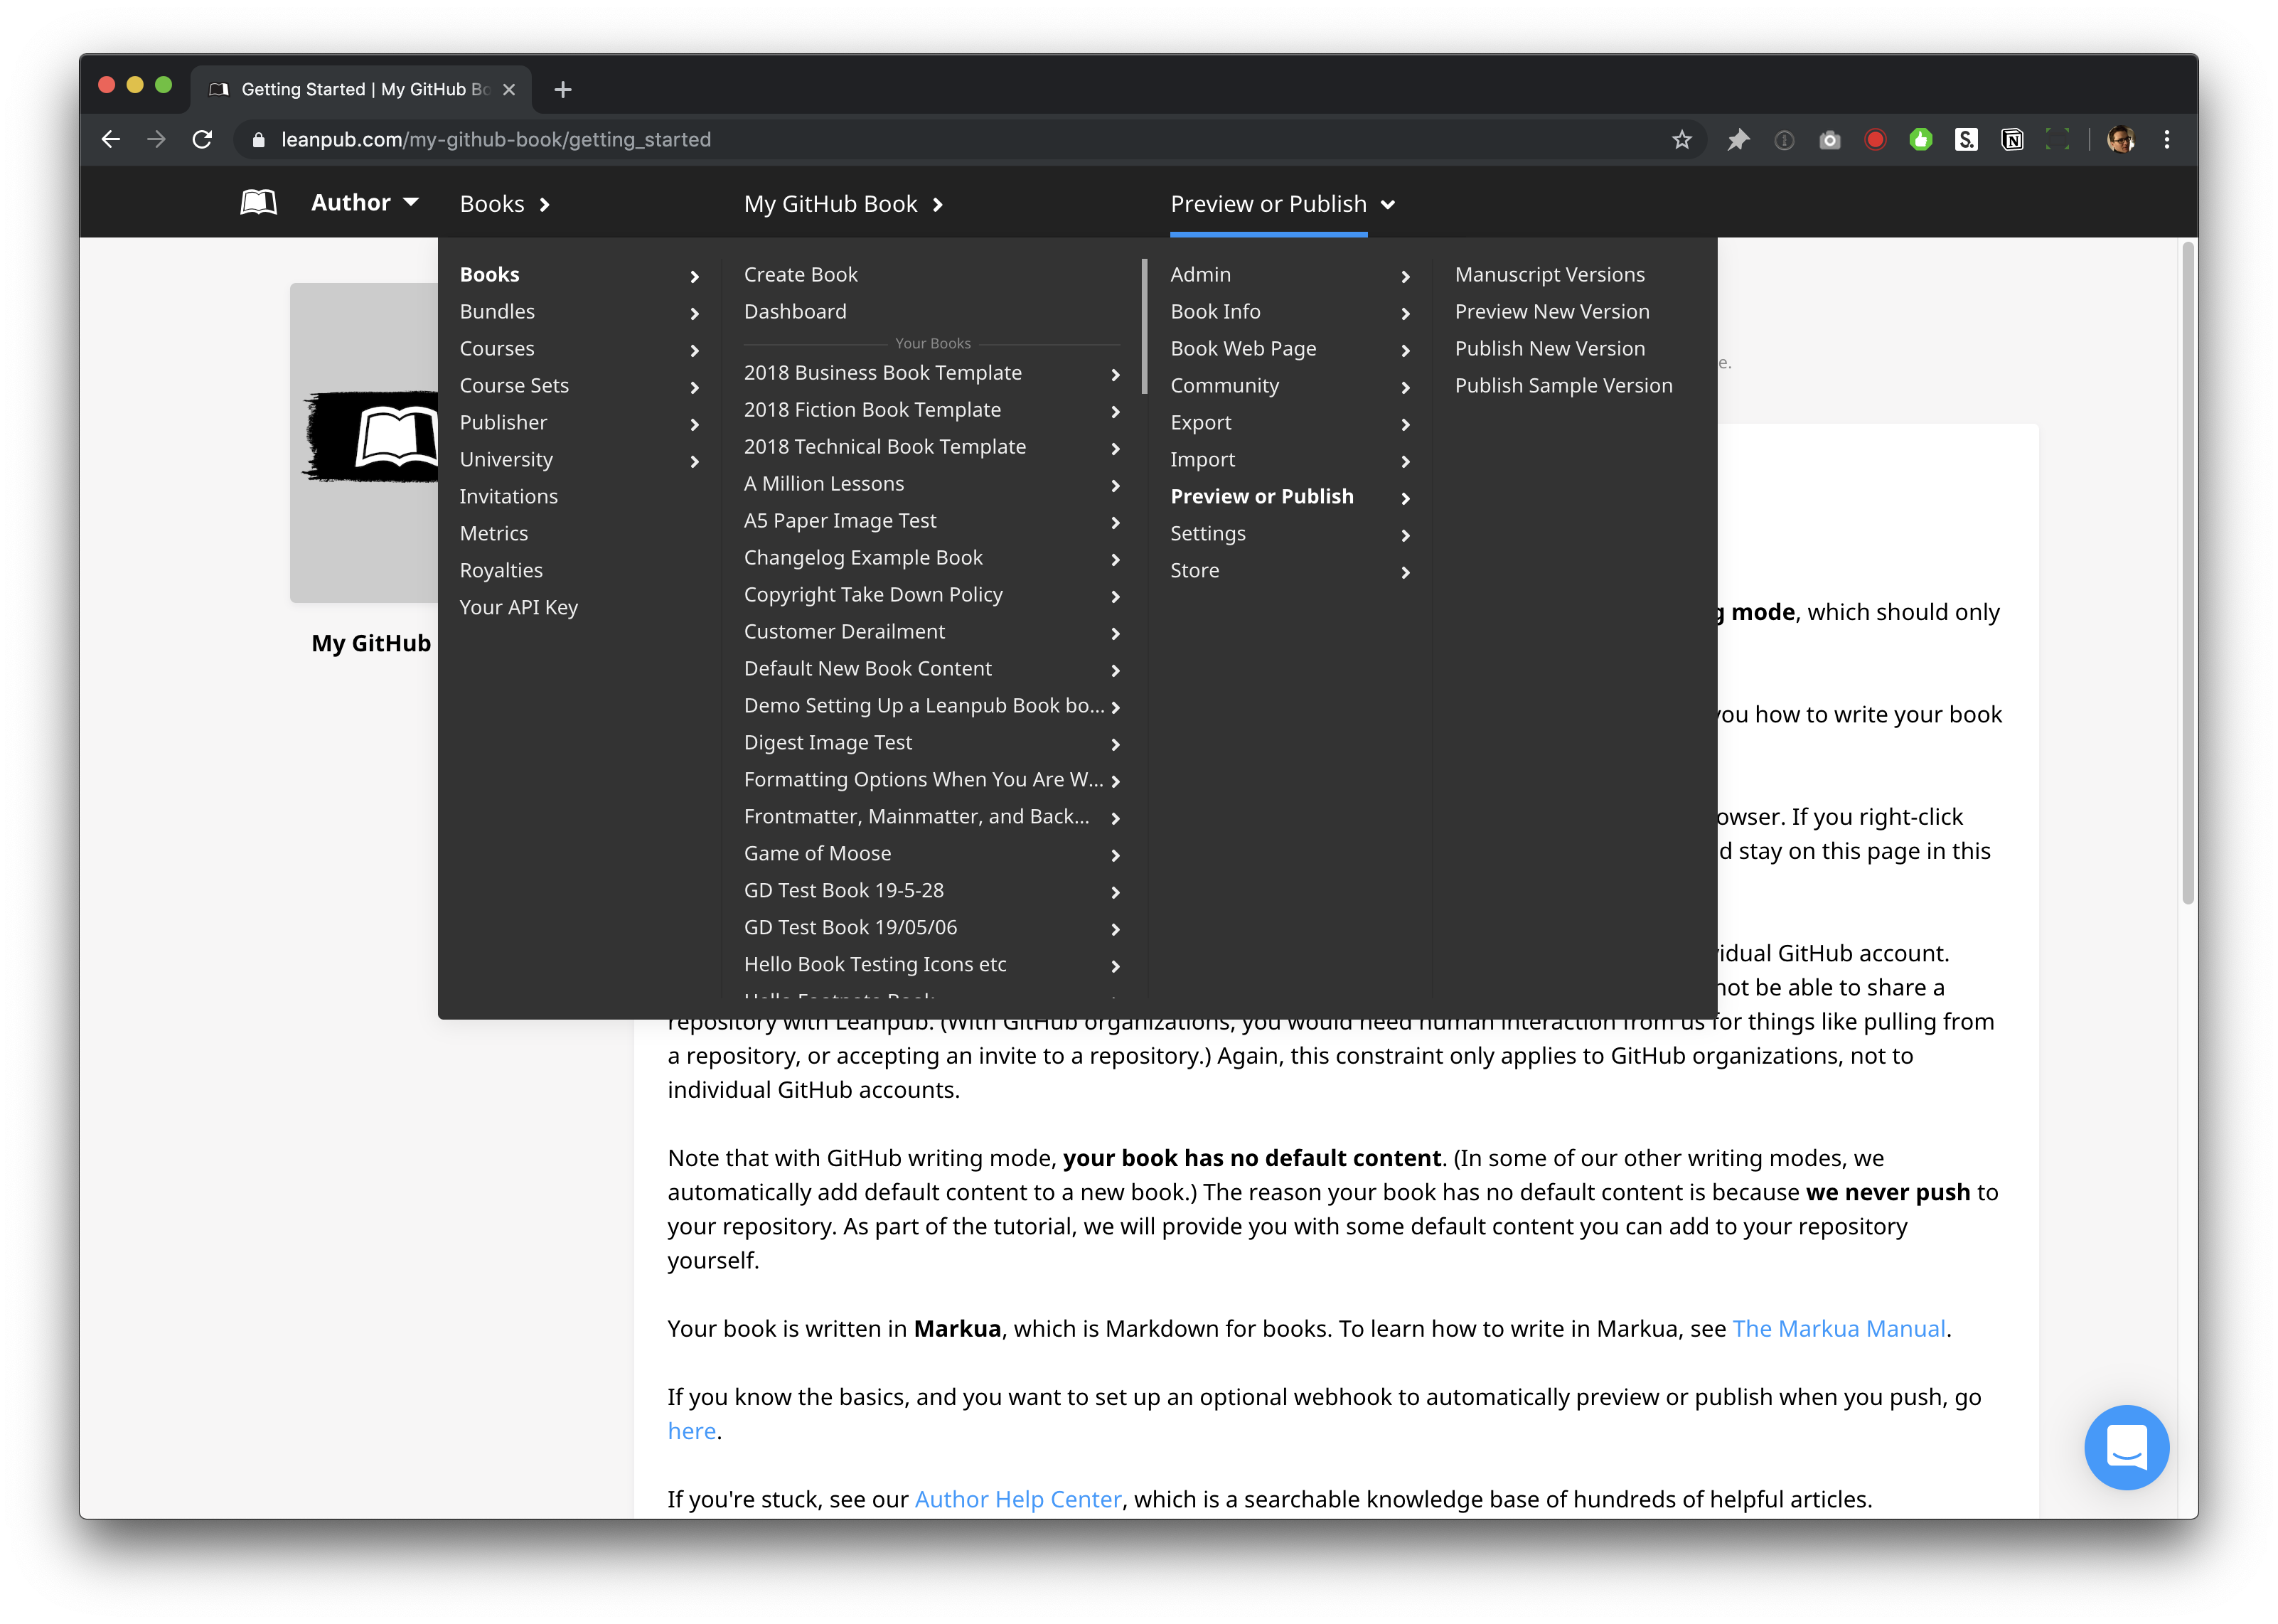
Select “Preview’ in the column to the right, and you will go to the “Preview” page for your book:
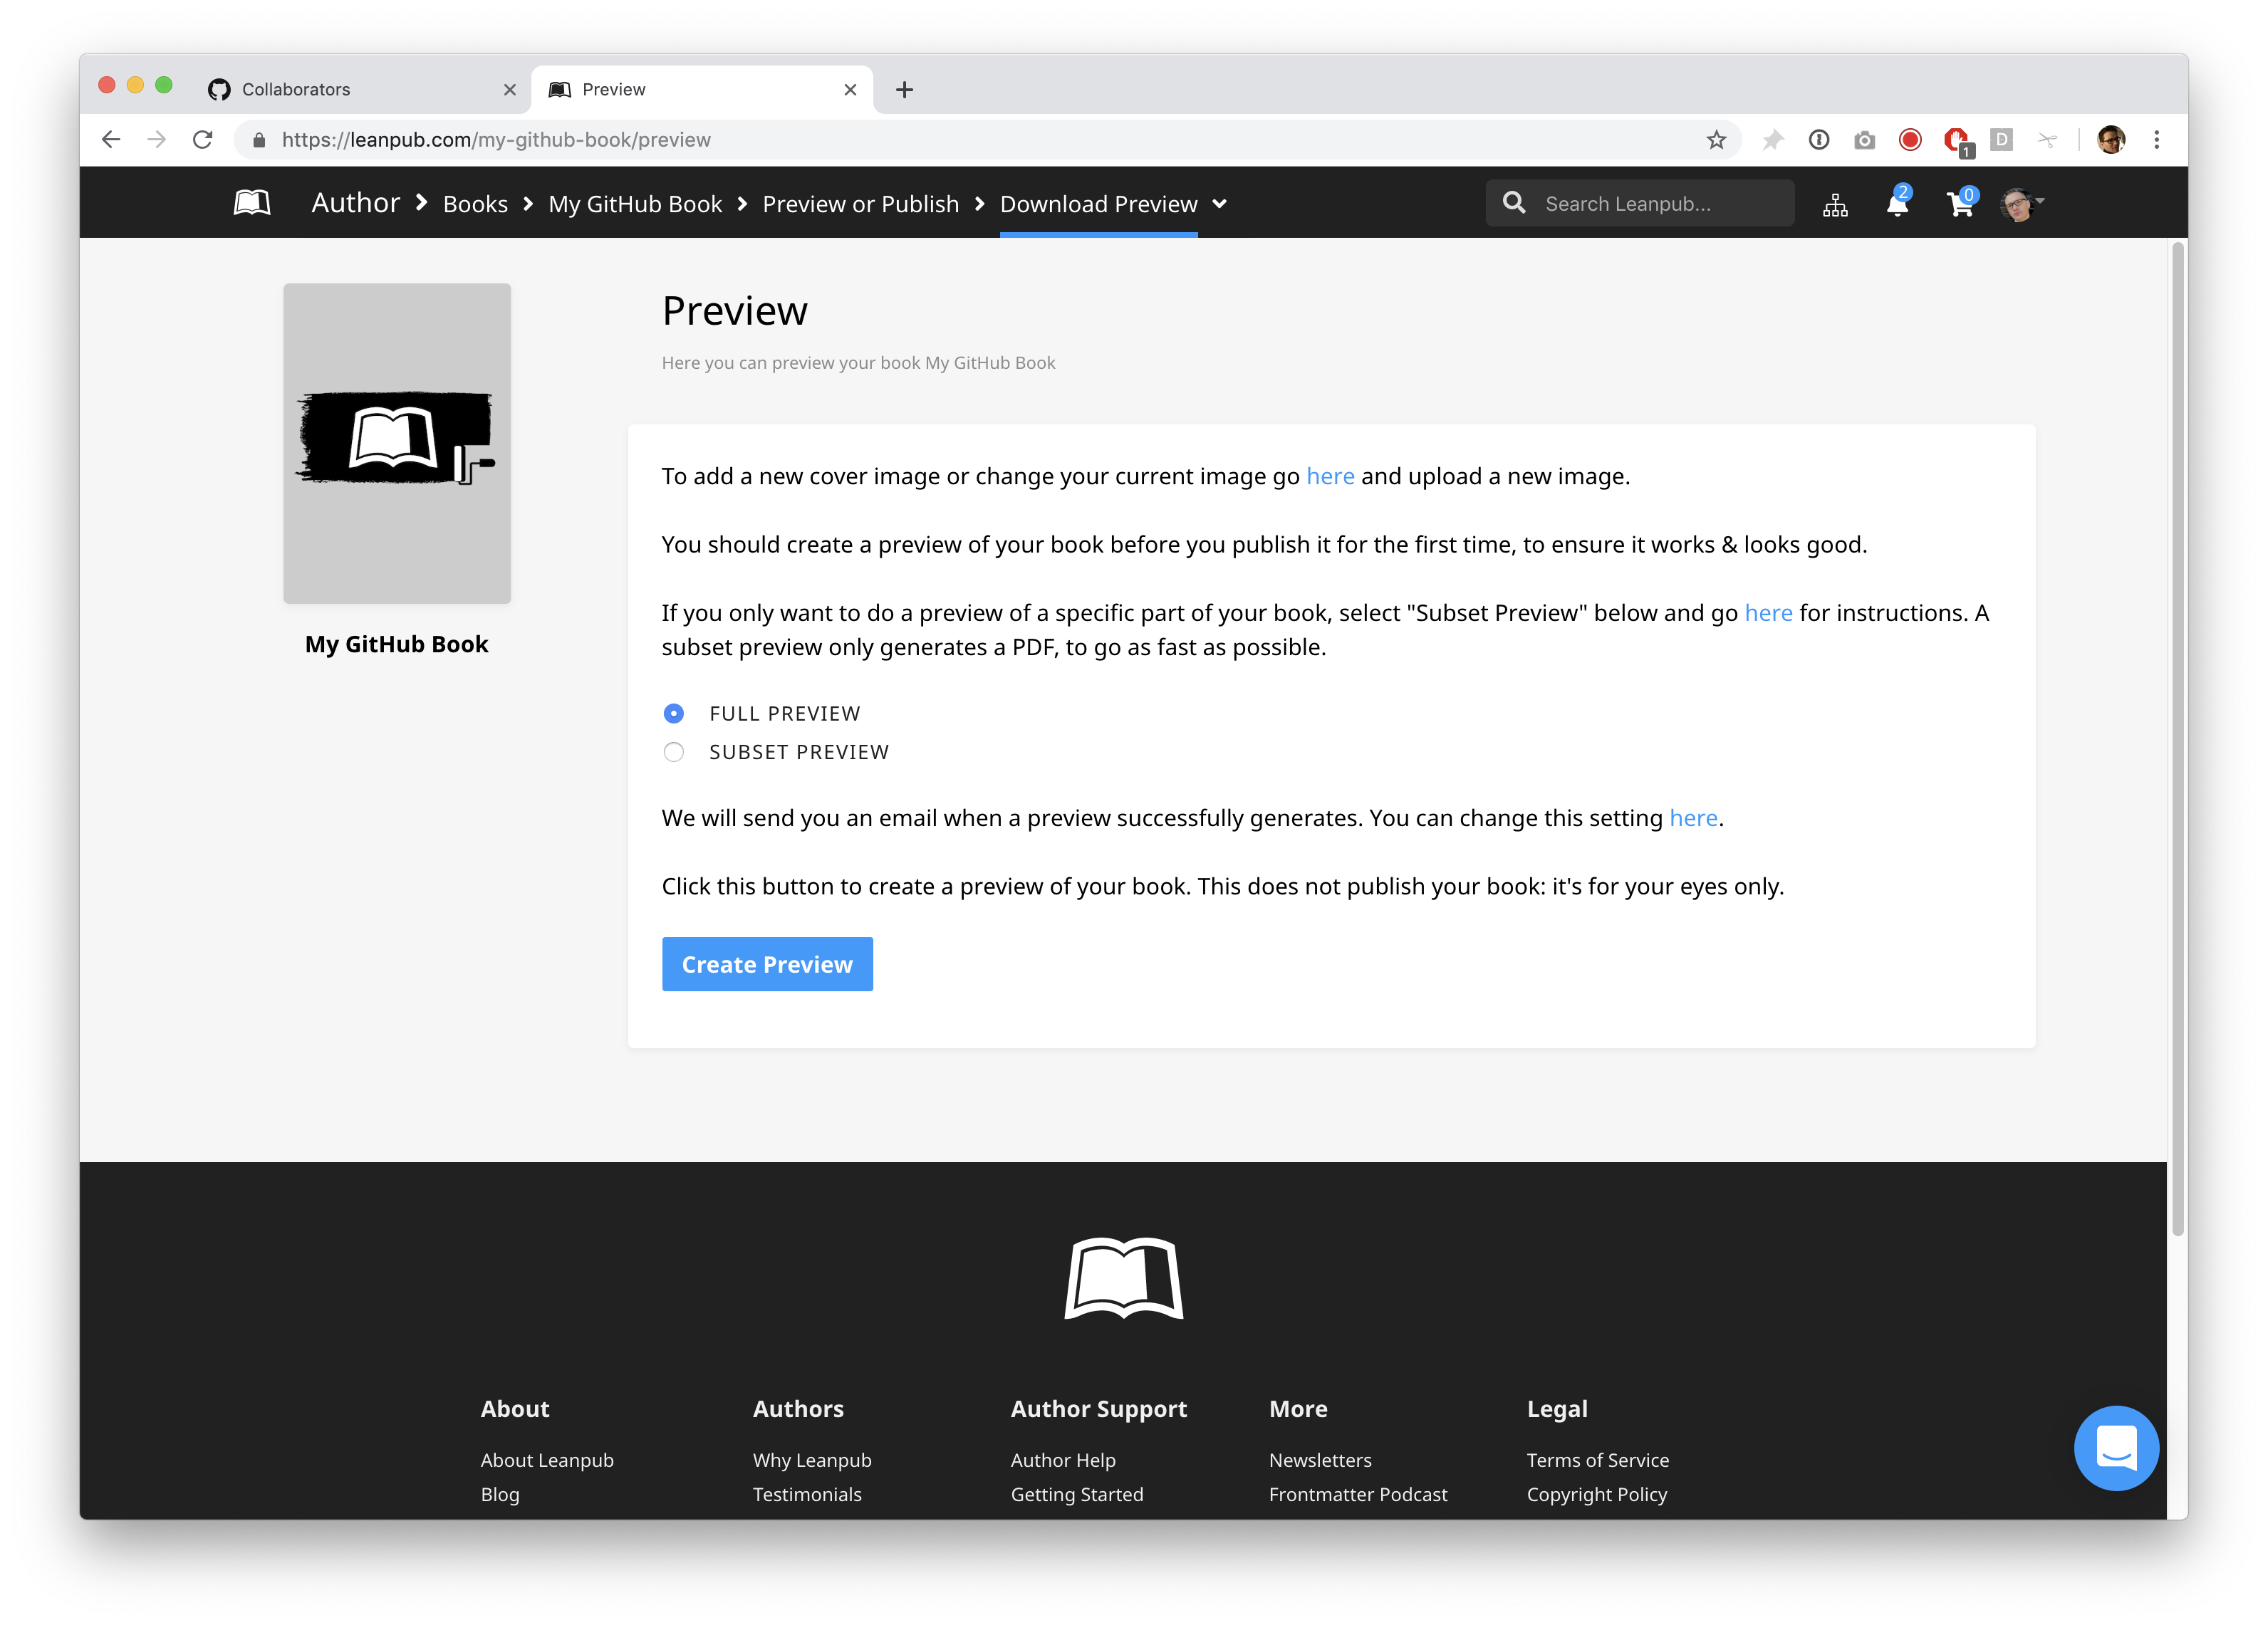
Click the “Create Preview” button. You will go to a page like this, where you will see a progress bar at the top:
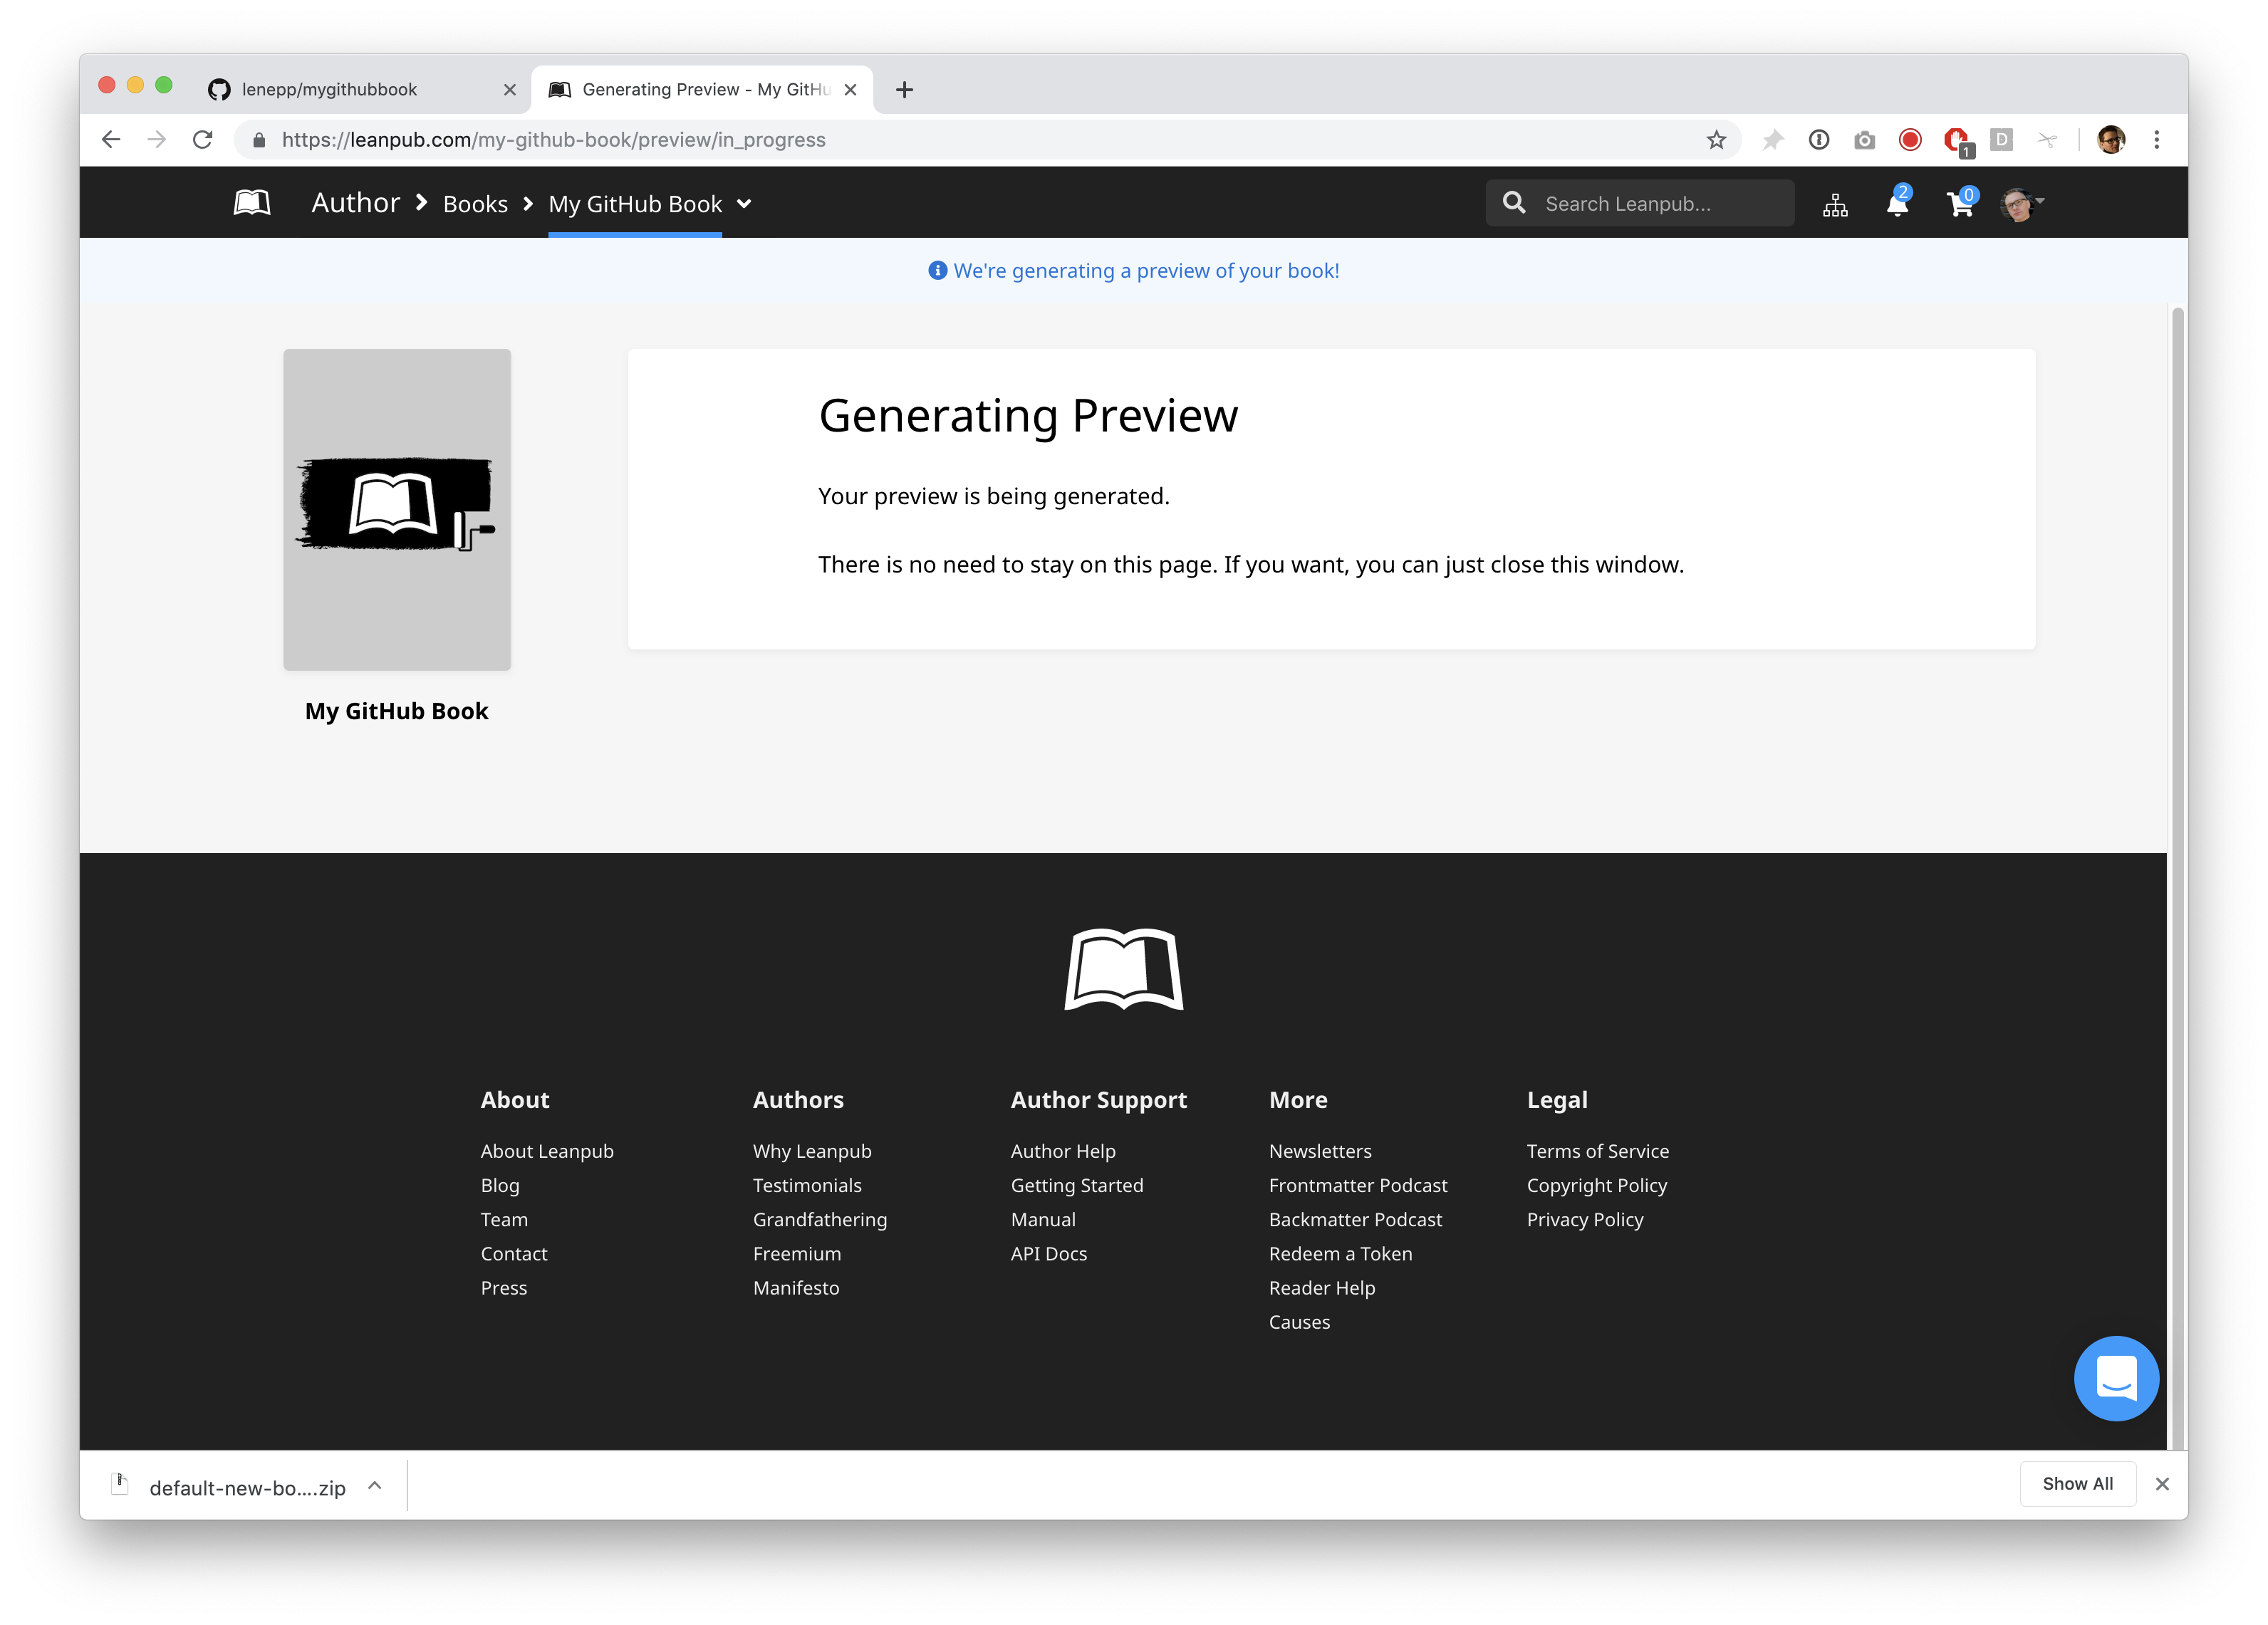
When the preview process is complete, you will see download links for the preview, in a variety of formats:

Click on the links to see what your book looks like in the various formats.
Writing in Your Book
Open your book folder in Github. You’ll see a folder named manuscript inside it. This is where you write your book.
If you have just created a new book, the manuscript folder will contain four files with the file name extension .txt. There will also be a folder called resources:
Open the file called chapter1.txt by double-clicking on it. You can also open the file in any specific text editing software you prefer.
Next, delete the contents of the file and type:
In your text editor, save this change.
Make a New Preview of Your Book
Next, you need to commit your changes and push them to GitHub.
On the command line, type git commit -m "first tutorial steps" and hit the return key.
Next, type ‘git push’ and hit the return key.
The next time you create a preview of your book, you will see that Chapter One has changed, and it now says “Hello, world!”
To create a new preview, repeat what you did when you made your first preview, by using the Author menu in Leanpub to go to:
Author > Books > [Your Book Title] > Preview or Publish > Preview
How the List of Files in Book.txt Works
When you create a preview, you may not want our book generators to use all of the files in your manuscript folder. Also, you may want the contents of your book to reflect a different order than the order they are presented in, in your manuscript folder.
So, whenever you create a preview, our friendly bookbots generate your book using only the files that you have listed in the Book.txt file that is in your book’s manuscript folder, and they use those files in the order that you have listed them.
Let’s see how this works.
First, delete a file. In your book’s manuscript folder, select the file named chapter3.txt and delete it.
Now, let’s rename a file. The files listed in Book.txt can have any name you want to give them. (To be clear, the files do not have to include the word “chatper” in the file name.)
In your book’s manuscript folder, select the file chapter2.txt.
Now, change the file name to conclusion.txt by right-clicking on the file and selecting “Rename.” **(Your computer might show a different word than “Rename,” but there should be an option to change any file’s name if you right-click on the file.)
Now that we have changed the files in the manuscript folder, we need to update the list of files in the Book.txt file.
Using your text editor, open the Book.txt file.
In the Book.txt file, you will see this list of files, like this:
First, delete chapter2.txt. Then, delete chapter3.txt.
Next, on the second line, type conclusion.txt.
Now, your list of files in Book.txt will look like this:
Next, open the file conclusion.txt.
Now, delete everthing in the file, and type this:
Finally, save this change your text editor.
Next, you need to commit your changes and push them to GitHub.
On the command line, type git commit -m "finishing tutorial" and hit the return key.
Next, type ‘git push’ and hit the return key.
Now, go back to the preview page for your book at:
Author > Books > [Your Book Title] > Preview or Publish > Preview
The next time you create a preview, it will reflect the changes you have made.
Congratulations! You’ve completed the Getting Started tutorial for writing a book in Leanpub using GitHub.
Next Steps
Next, we recommend you explore the Overview page for your book:
Author > Books > [Your Book Title] > Book Info > Overview
On the Overview page, you can see all the pages you need to get your book set up on Leanpub, like “Upload Book Cover” and the “Book Details” page, where you can explain what your book is about to potential readers.
If you have any questions or can’t find anything, please search our Help Center for authors here: http://help.leanpub.com/author-help.
Happy writing!
Getting Started with Git and Bitbucket Writing Mode
You can write a Leanpub book using Git and Bitbucket. In this chapter we’ll show you how to create a book and generate your first preview.
Once you have successfully generated your first preview, you’ll know everything you know to get started writing in the Bitbucket writing mode.
You’ll find more information and detailed instructions on the “Getting Started” page for your book, which you’ll go to automatically when you create your book.
Creating Your Book’s Bitbucket Repository
The first thing you need to is create a repository for your book on Bitbucket.
To do this, go to https://bitbucket.org and sign in.
Click the + plus sign to the left in the menu at the top of the page.
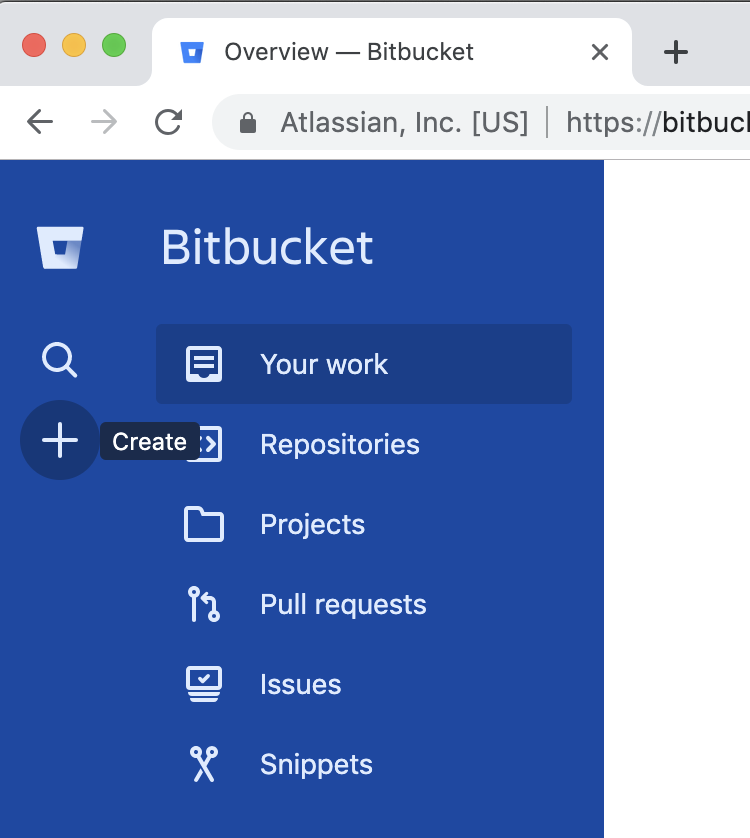
Under “CREATE”, select “Repository.”
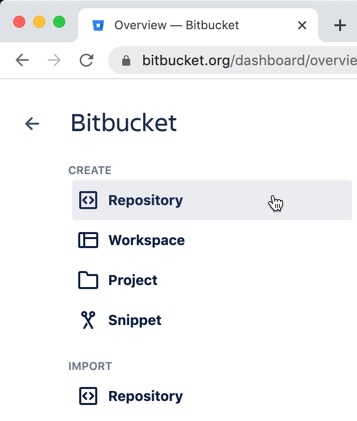
This will take you to a page where you can set up a new repository for your Leanpub book.
By default, “Private repository” will be selected. Leave this set to “Private repository” if you don’t want anyone to be able to see your repository.
Next, you’ll have to associate the repository with a Project:
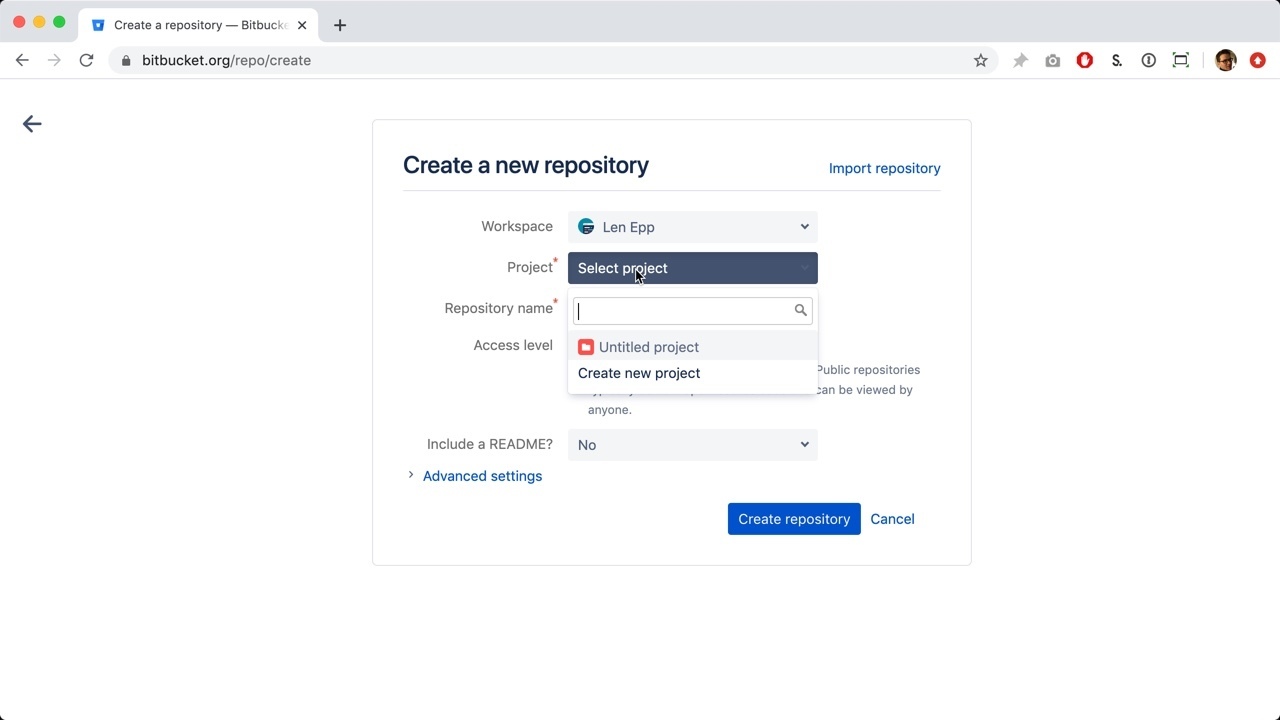
Select an existing project, or click on “Create new project”:

You will now have an option to create a name for your new project:
For this tutorial, we’re going to name the project “My Leanpub Book”:

Next, type a name for your repository.
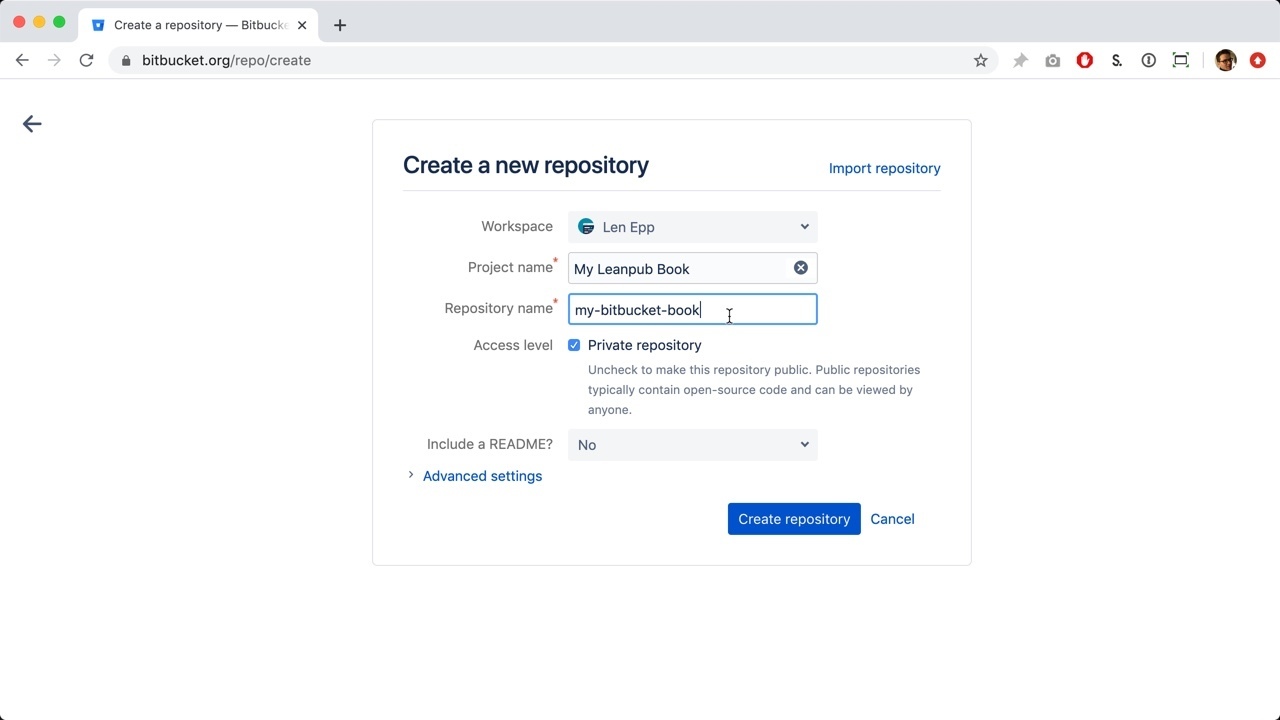
Click the blue “Create repository” button.
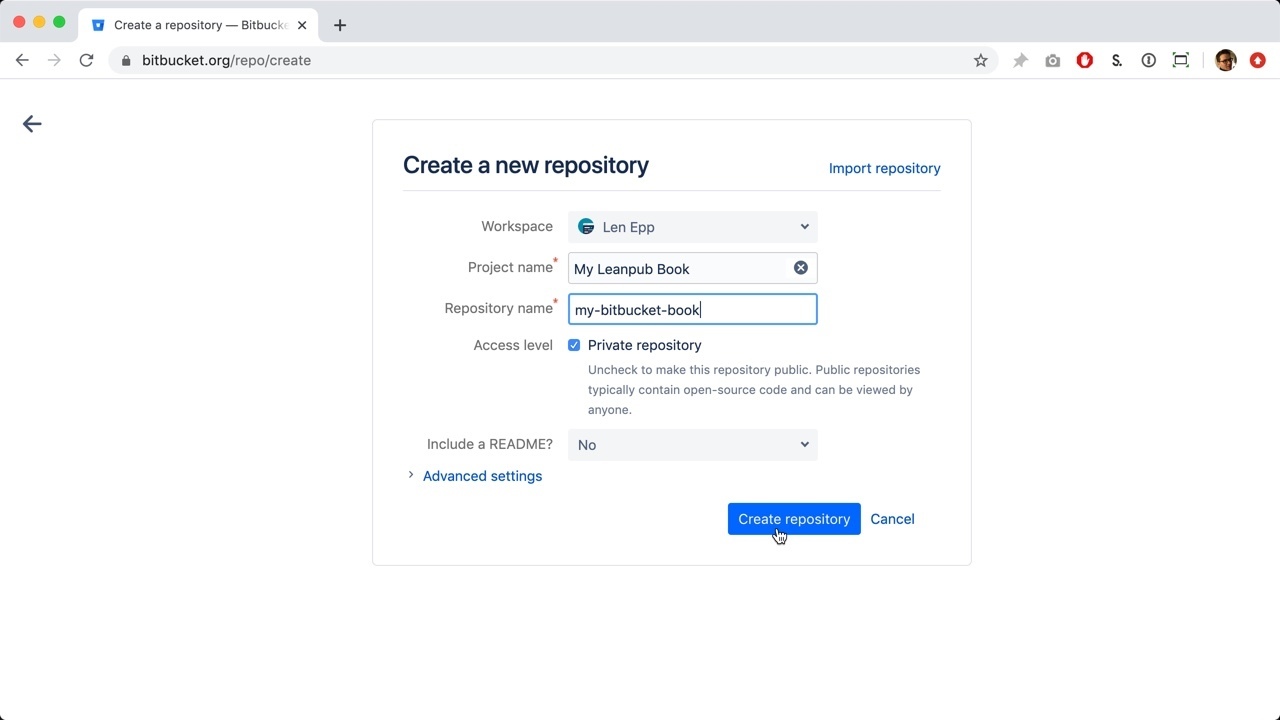
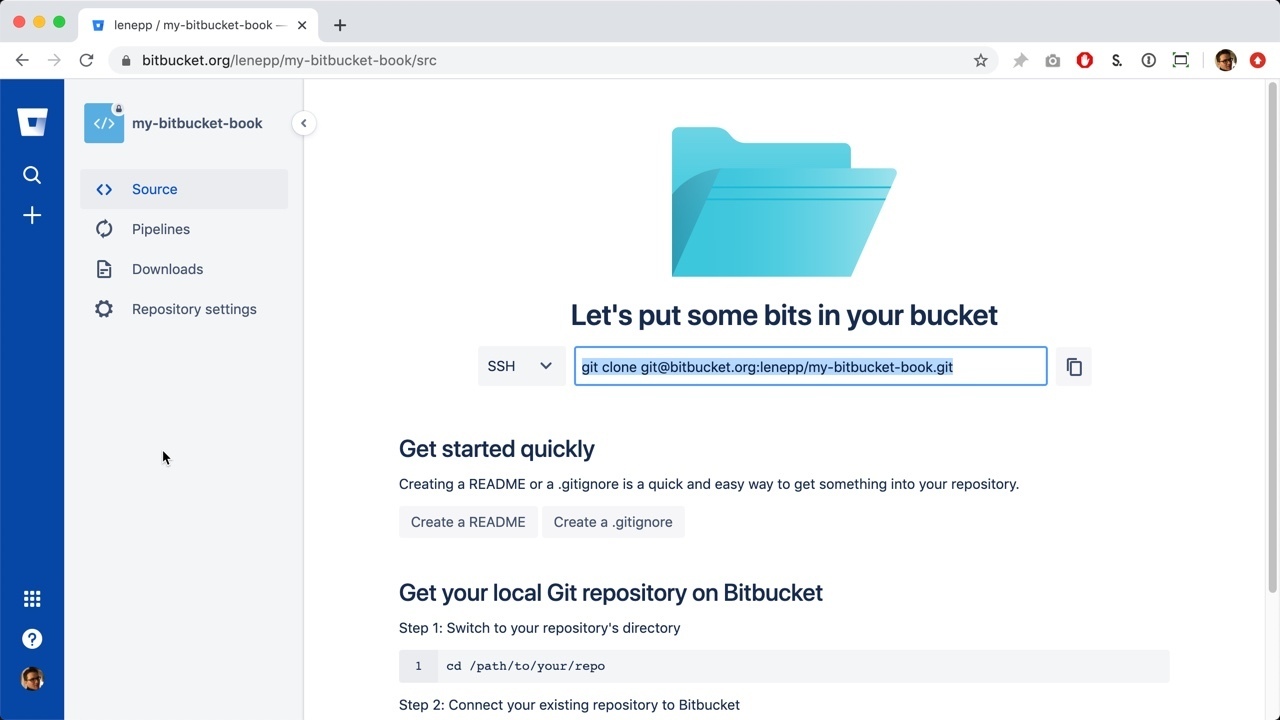
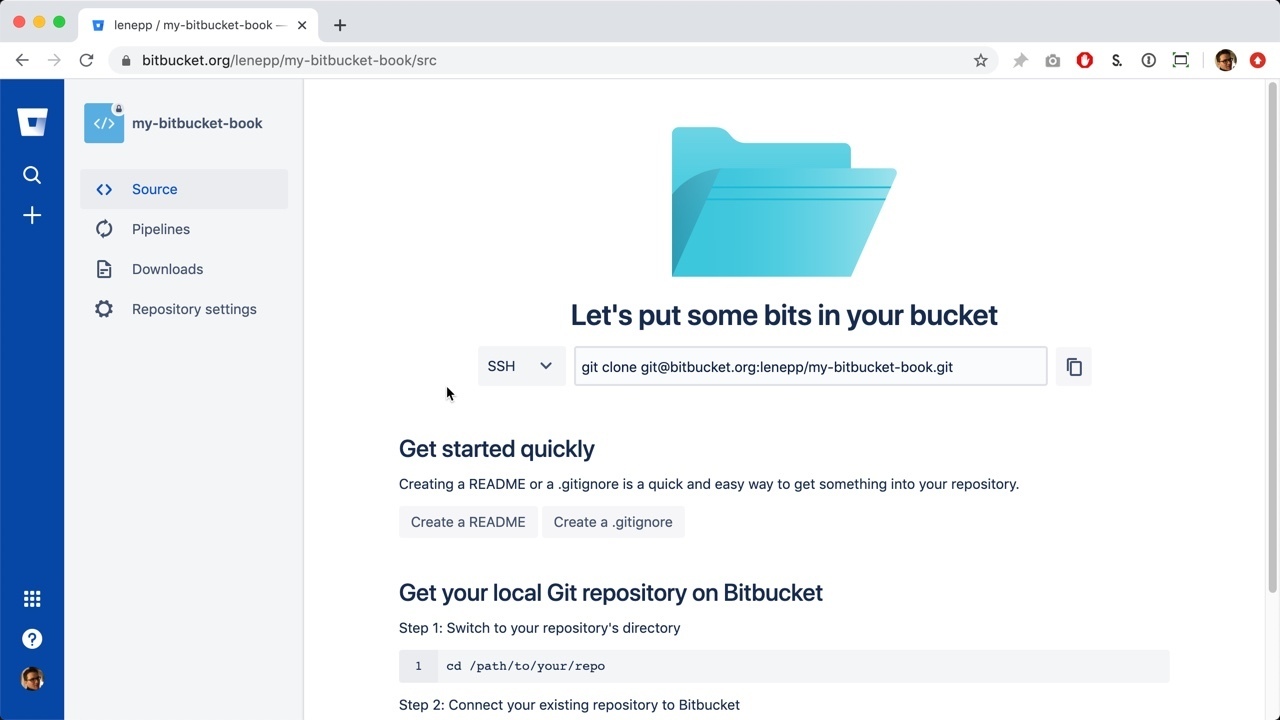
This will take you to a “Get started quickly” page:
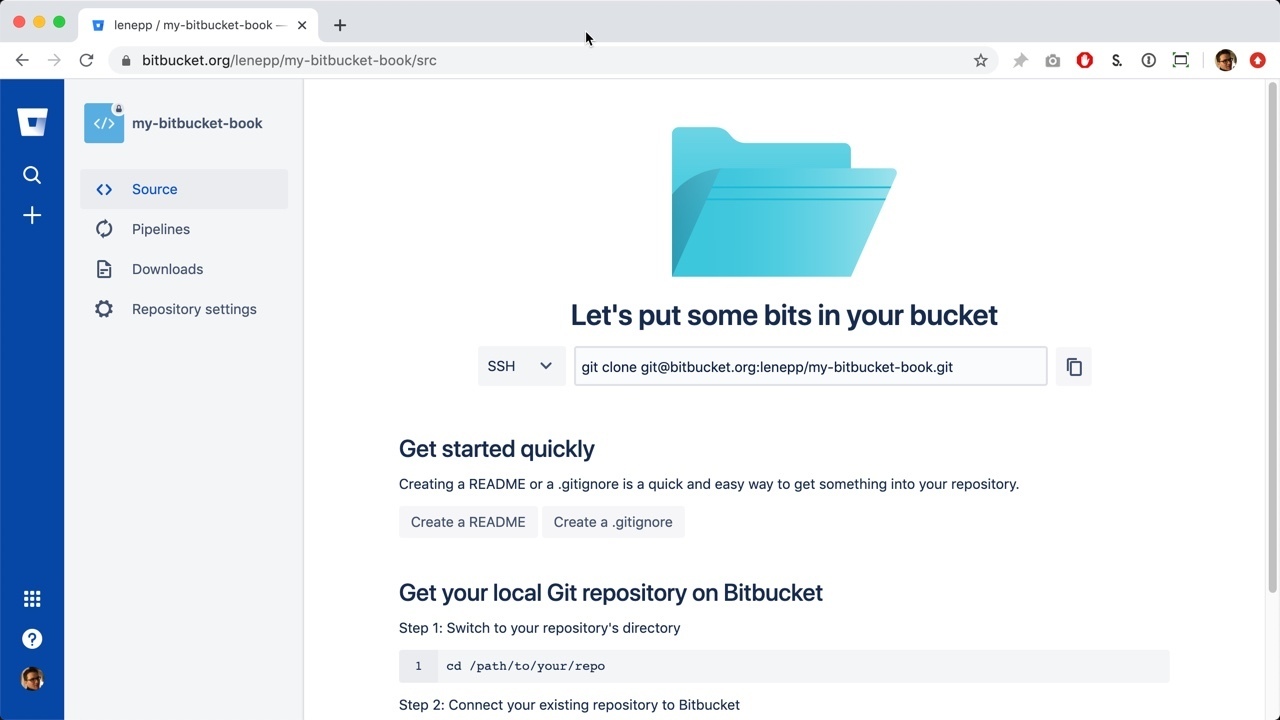
Select the repository information and copy it.
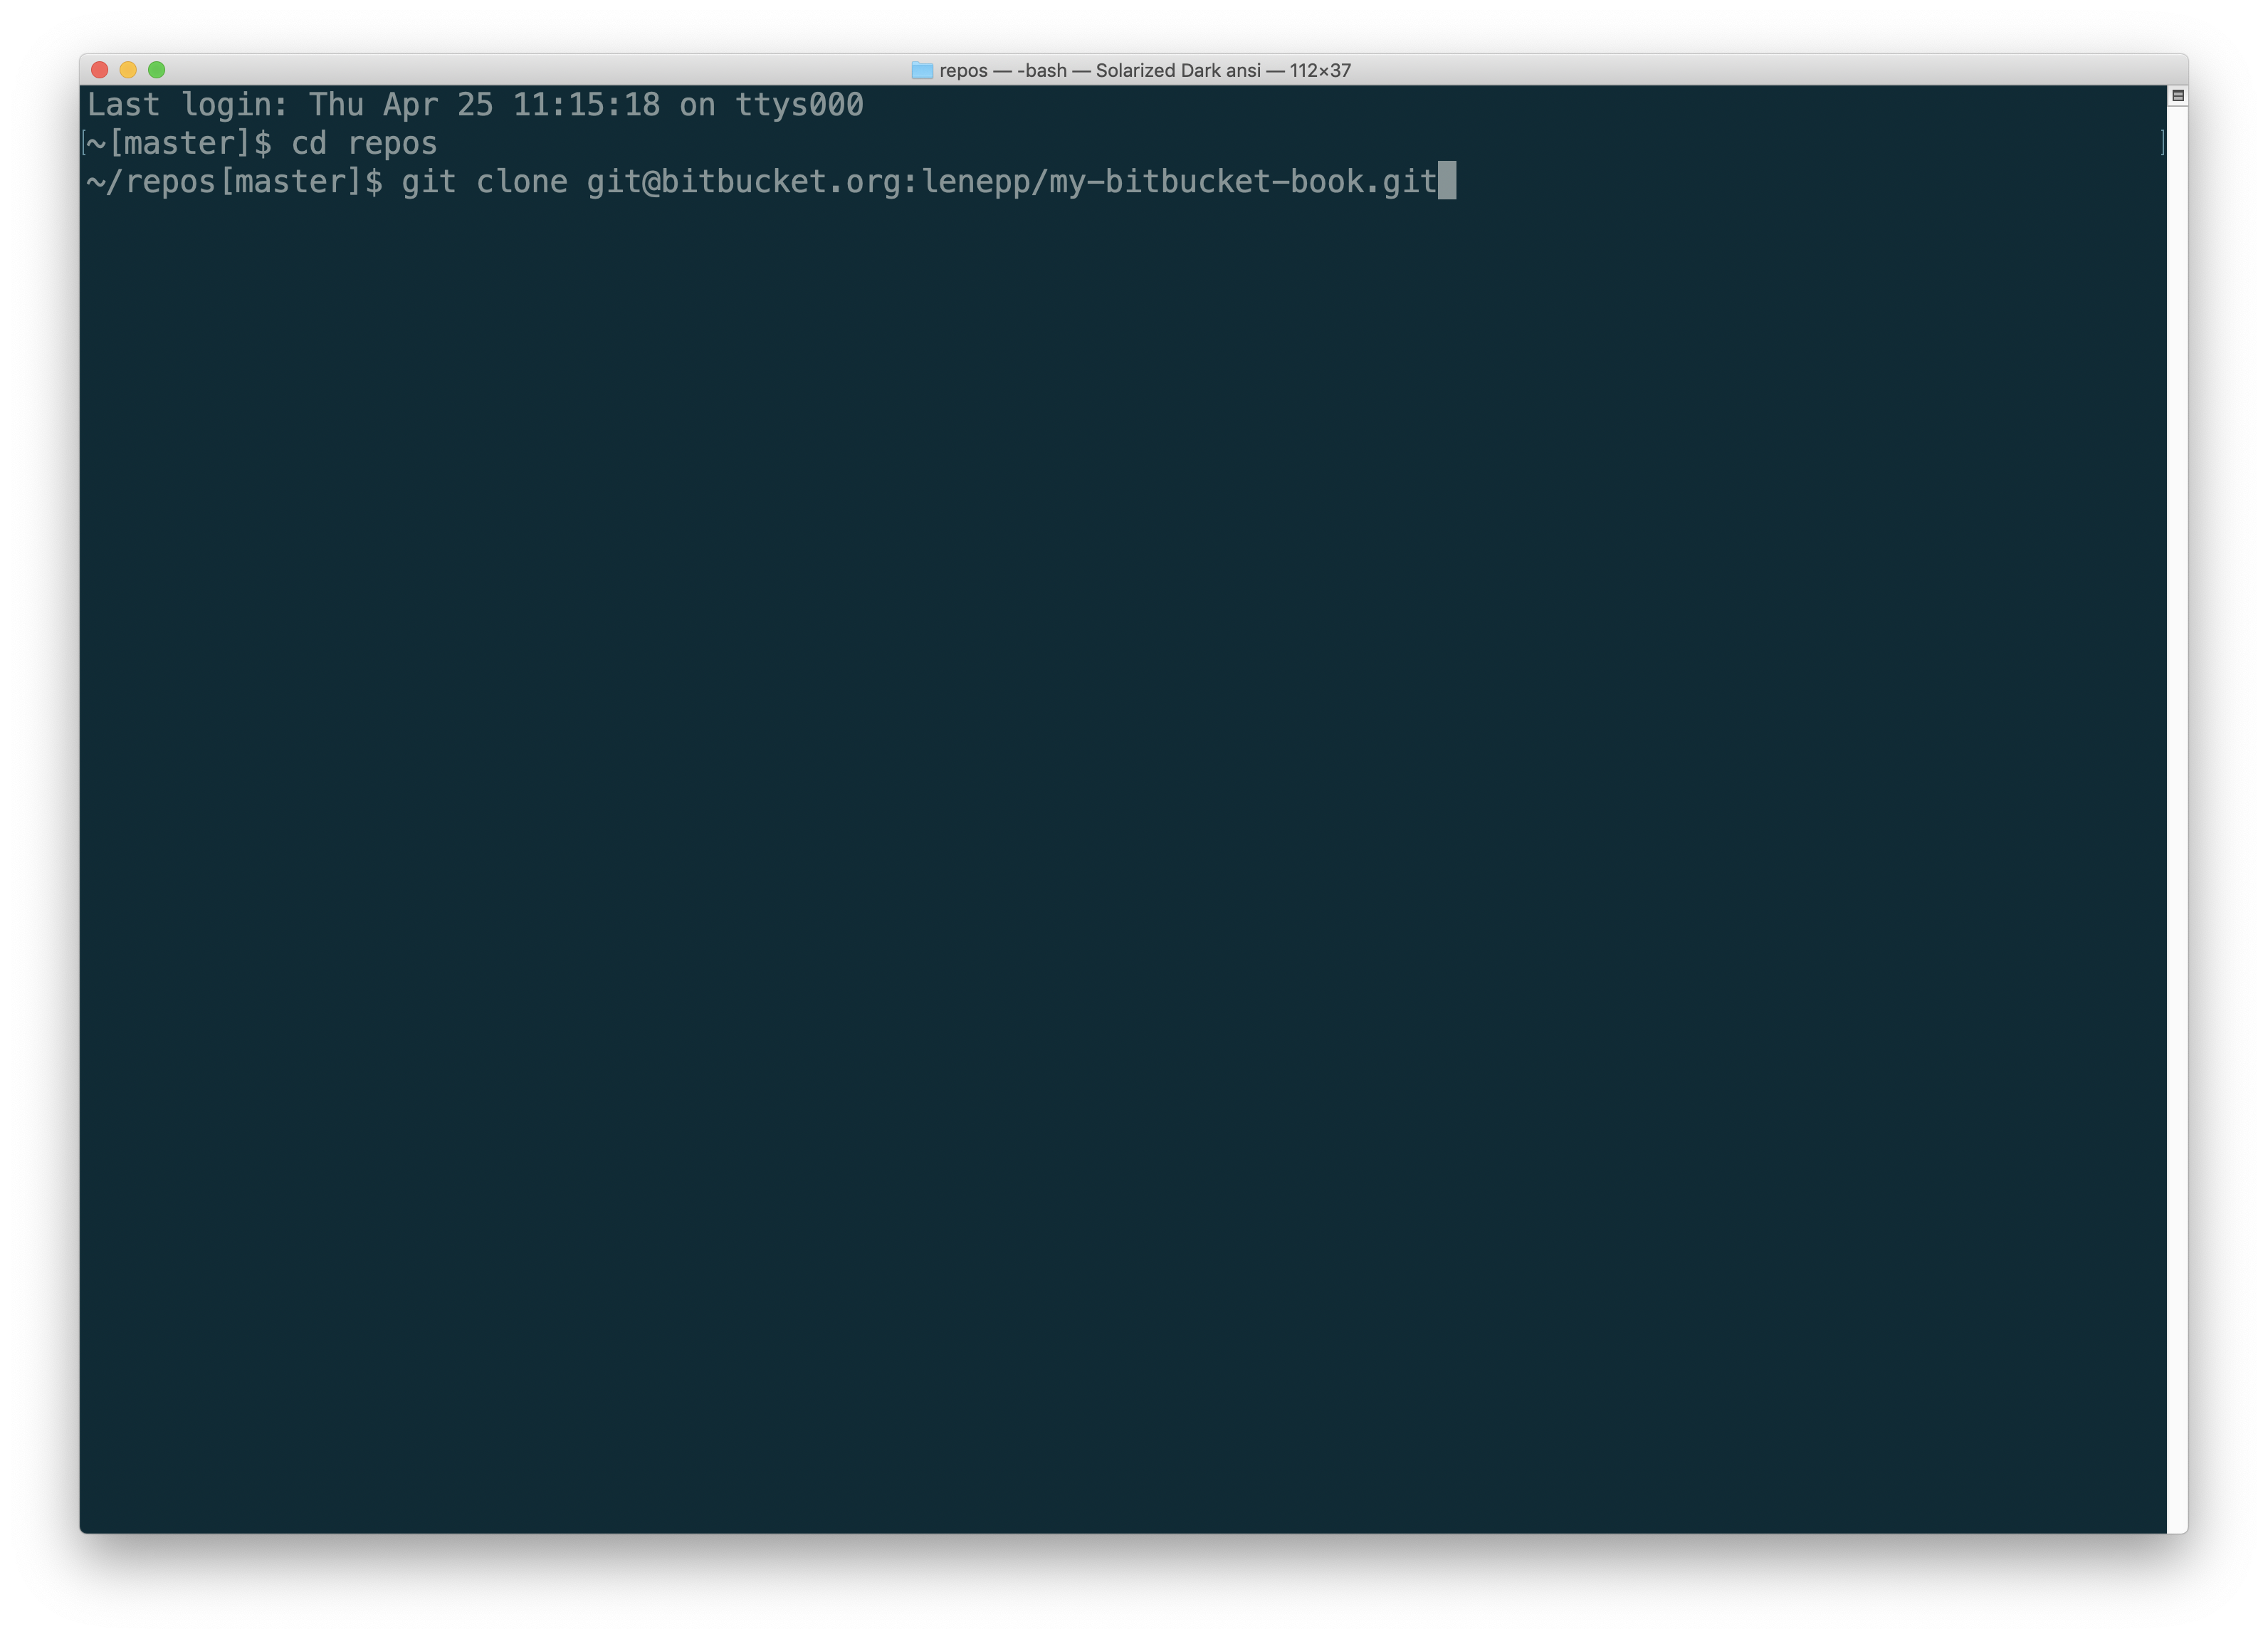
Go to the command line on your computer. In this tutorial we’re using a Mac, so we use Terminal.

Go to the folder on your computer where you want to clone your Bitbucket repository. In this tutorial, that is a folder called repos.

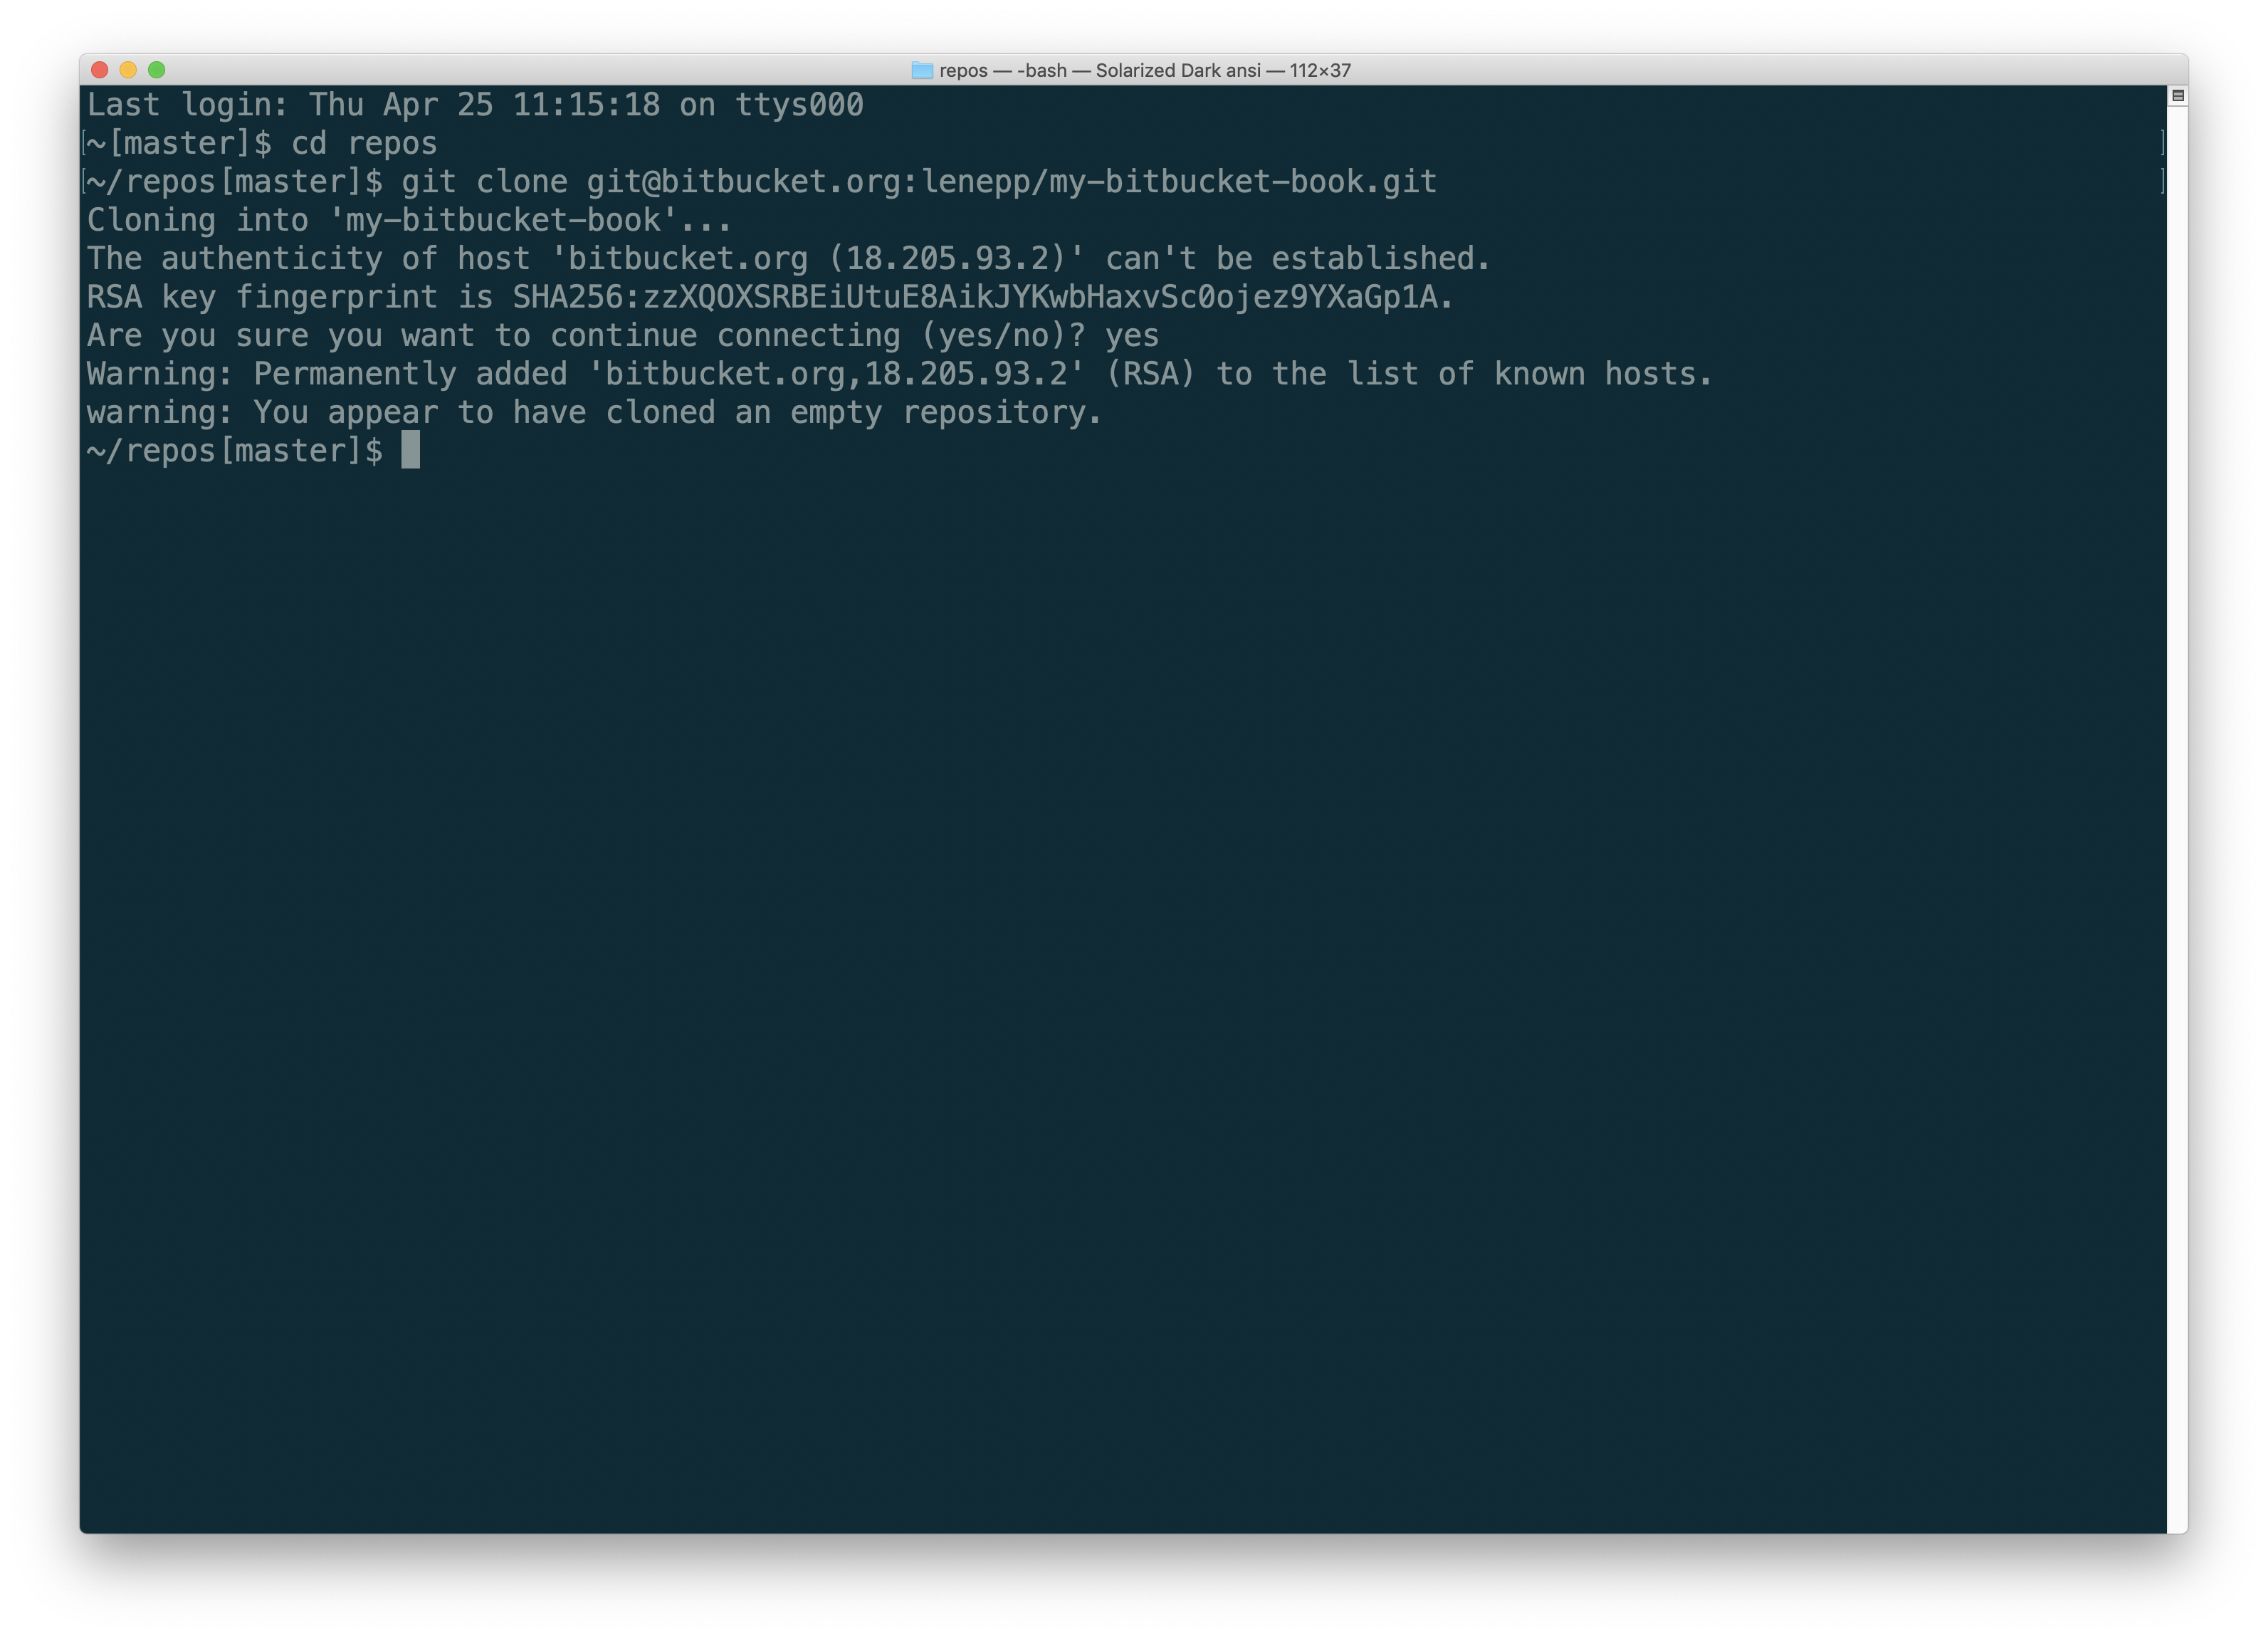
Paste in the repository information you copied on Bitbucket, and hit Enter.
You may see a message asking if you are sure you want to connect. If you are sure, type “yes” and hit return.
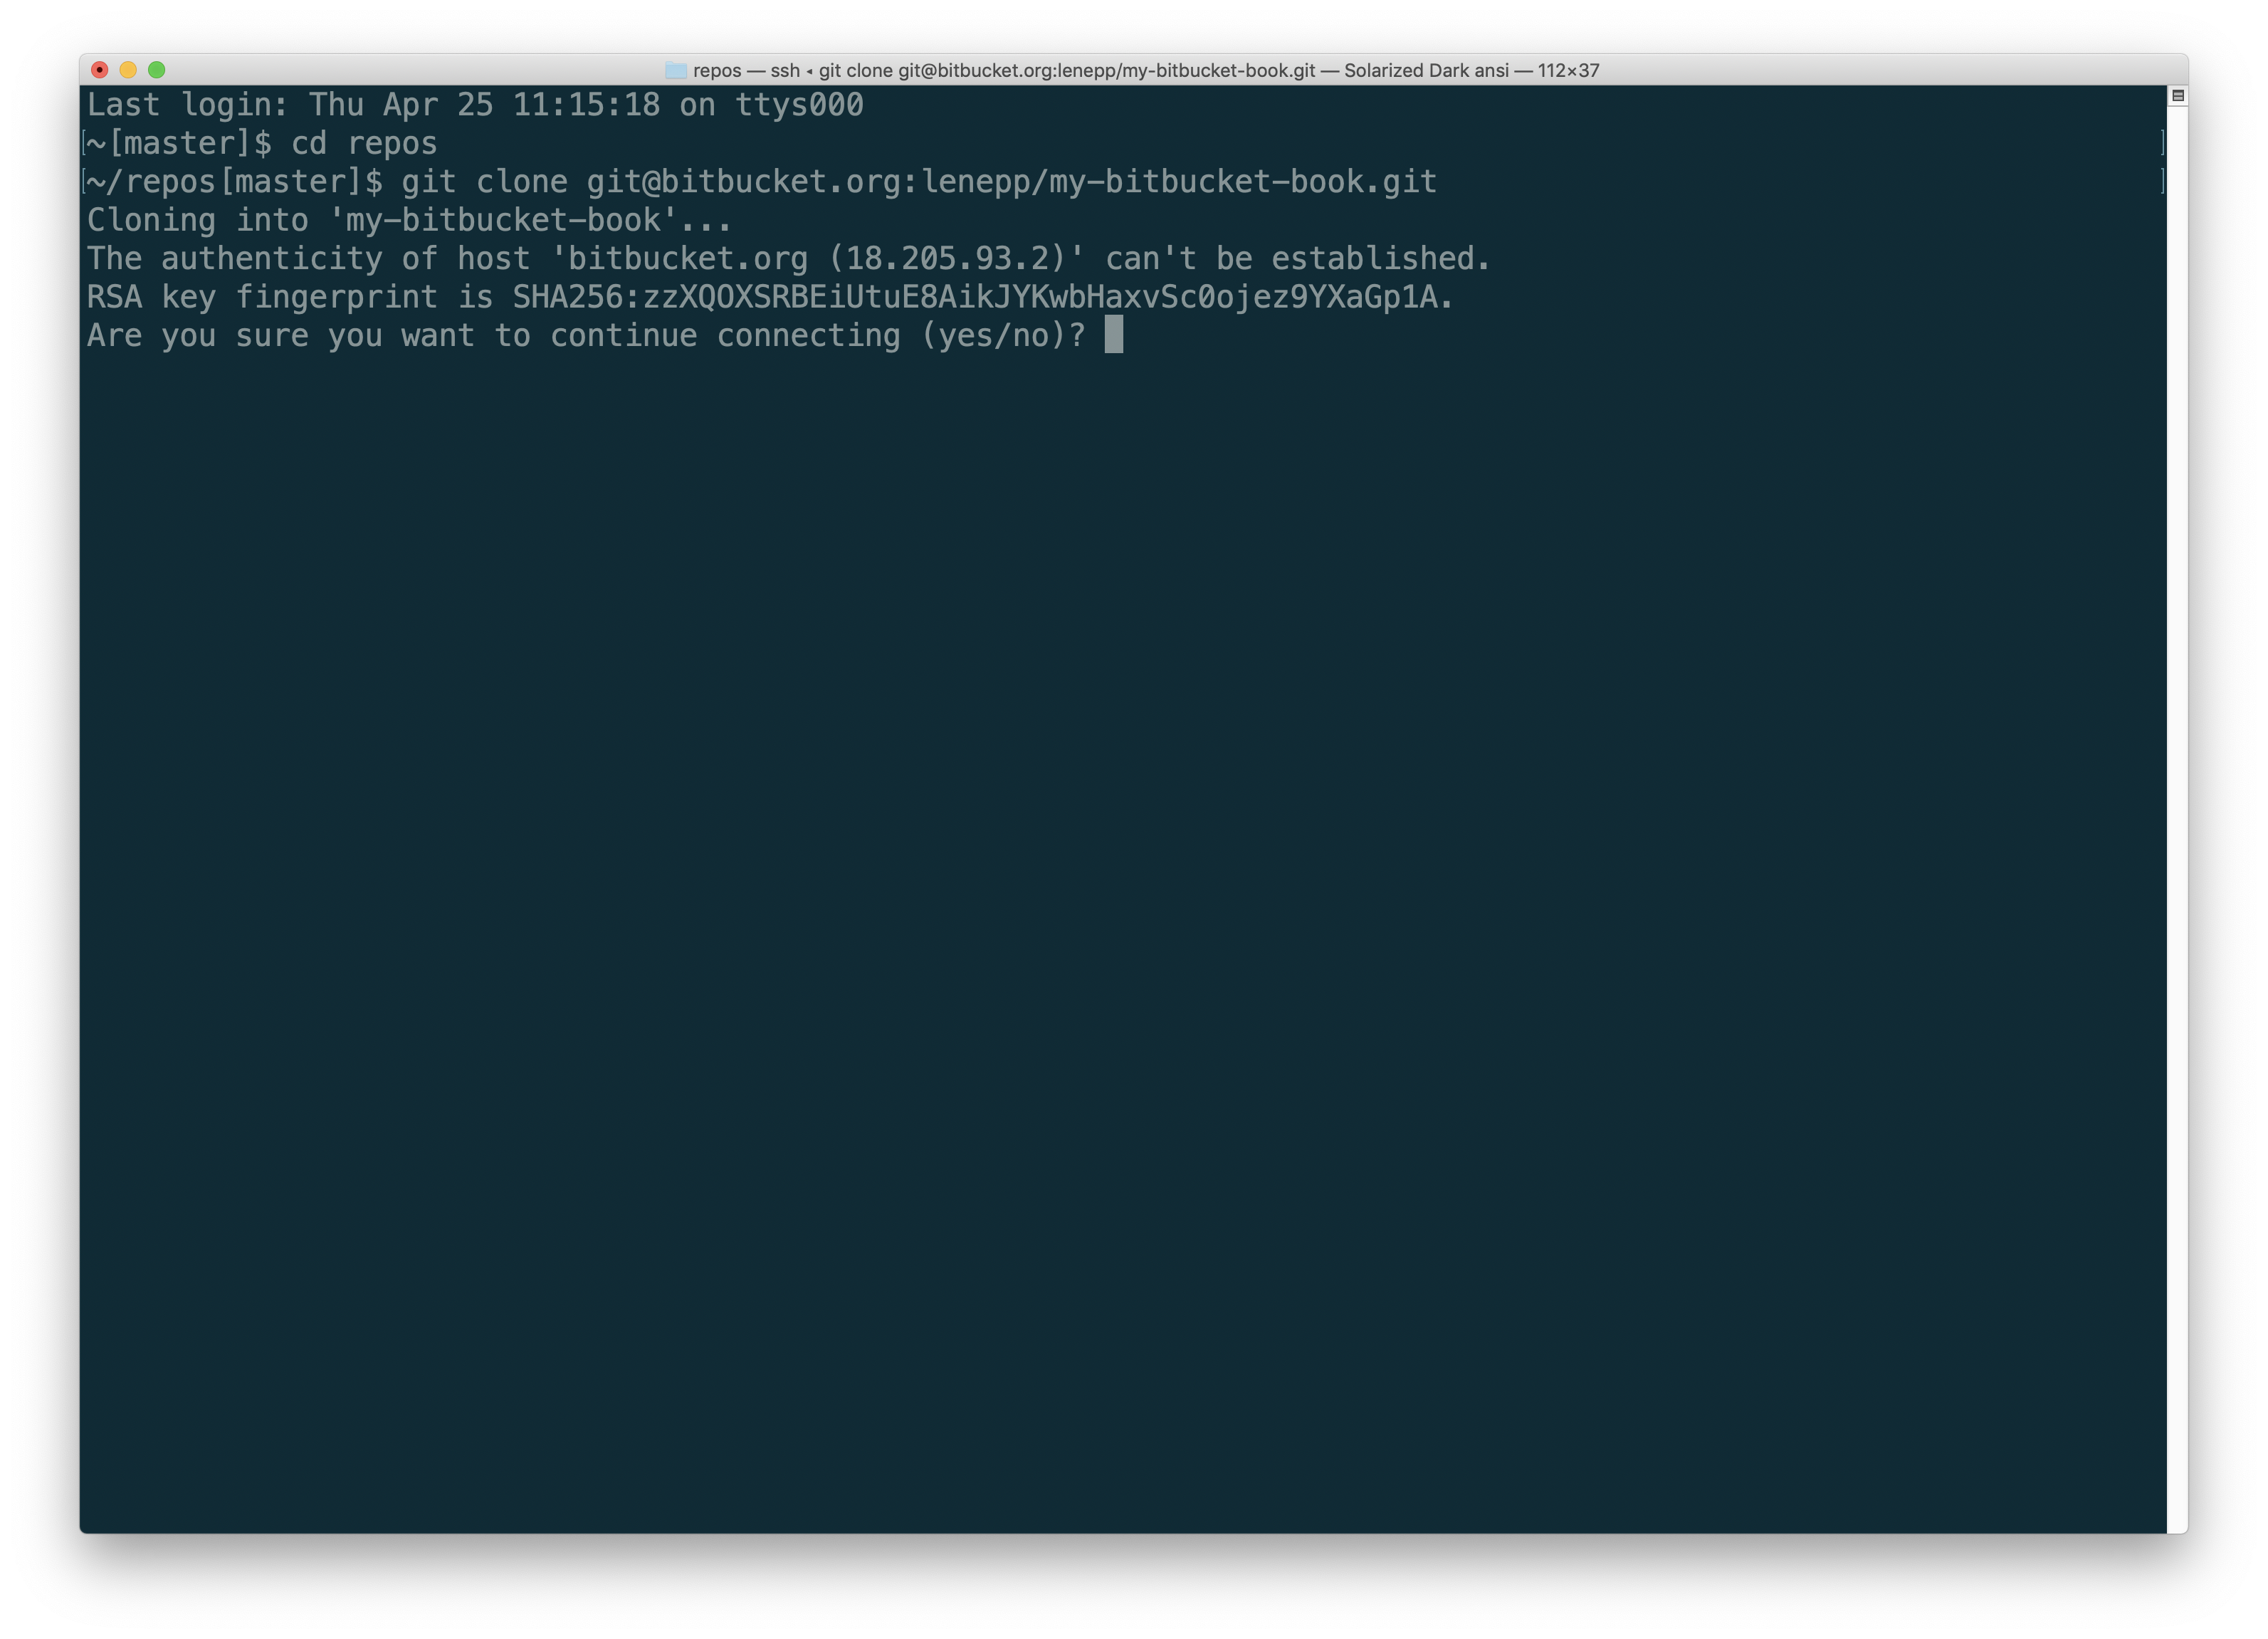
After a moment, you will see a message saying that the repository has been cloned.
Creating a Book in Bitbucket Writing Mode
Go to https://leanpub.com/create/book to create a book in Bitbucket writing mode.

First, type a title for your book into the “TITLE” box. You can change your title later.
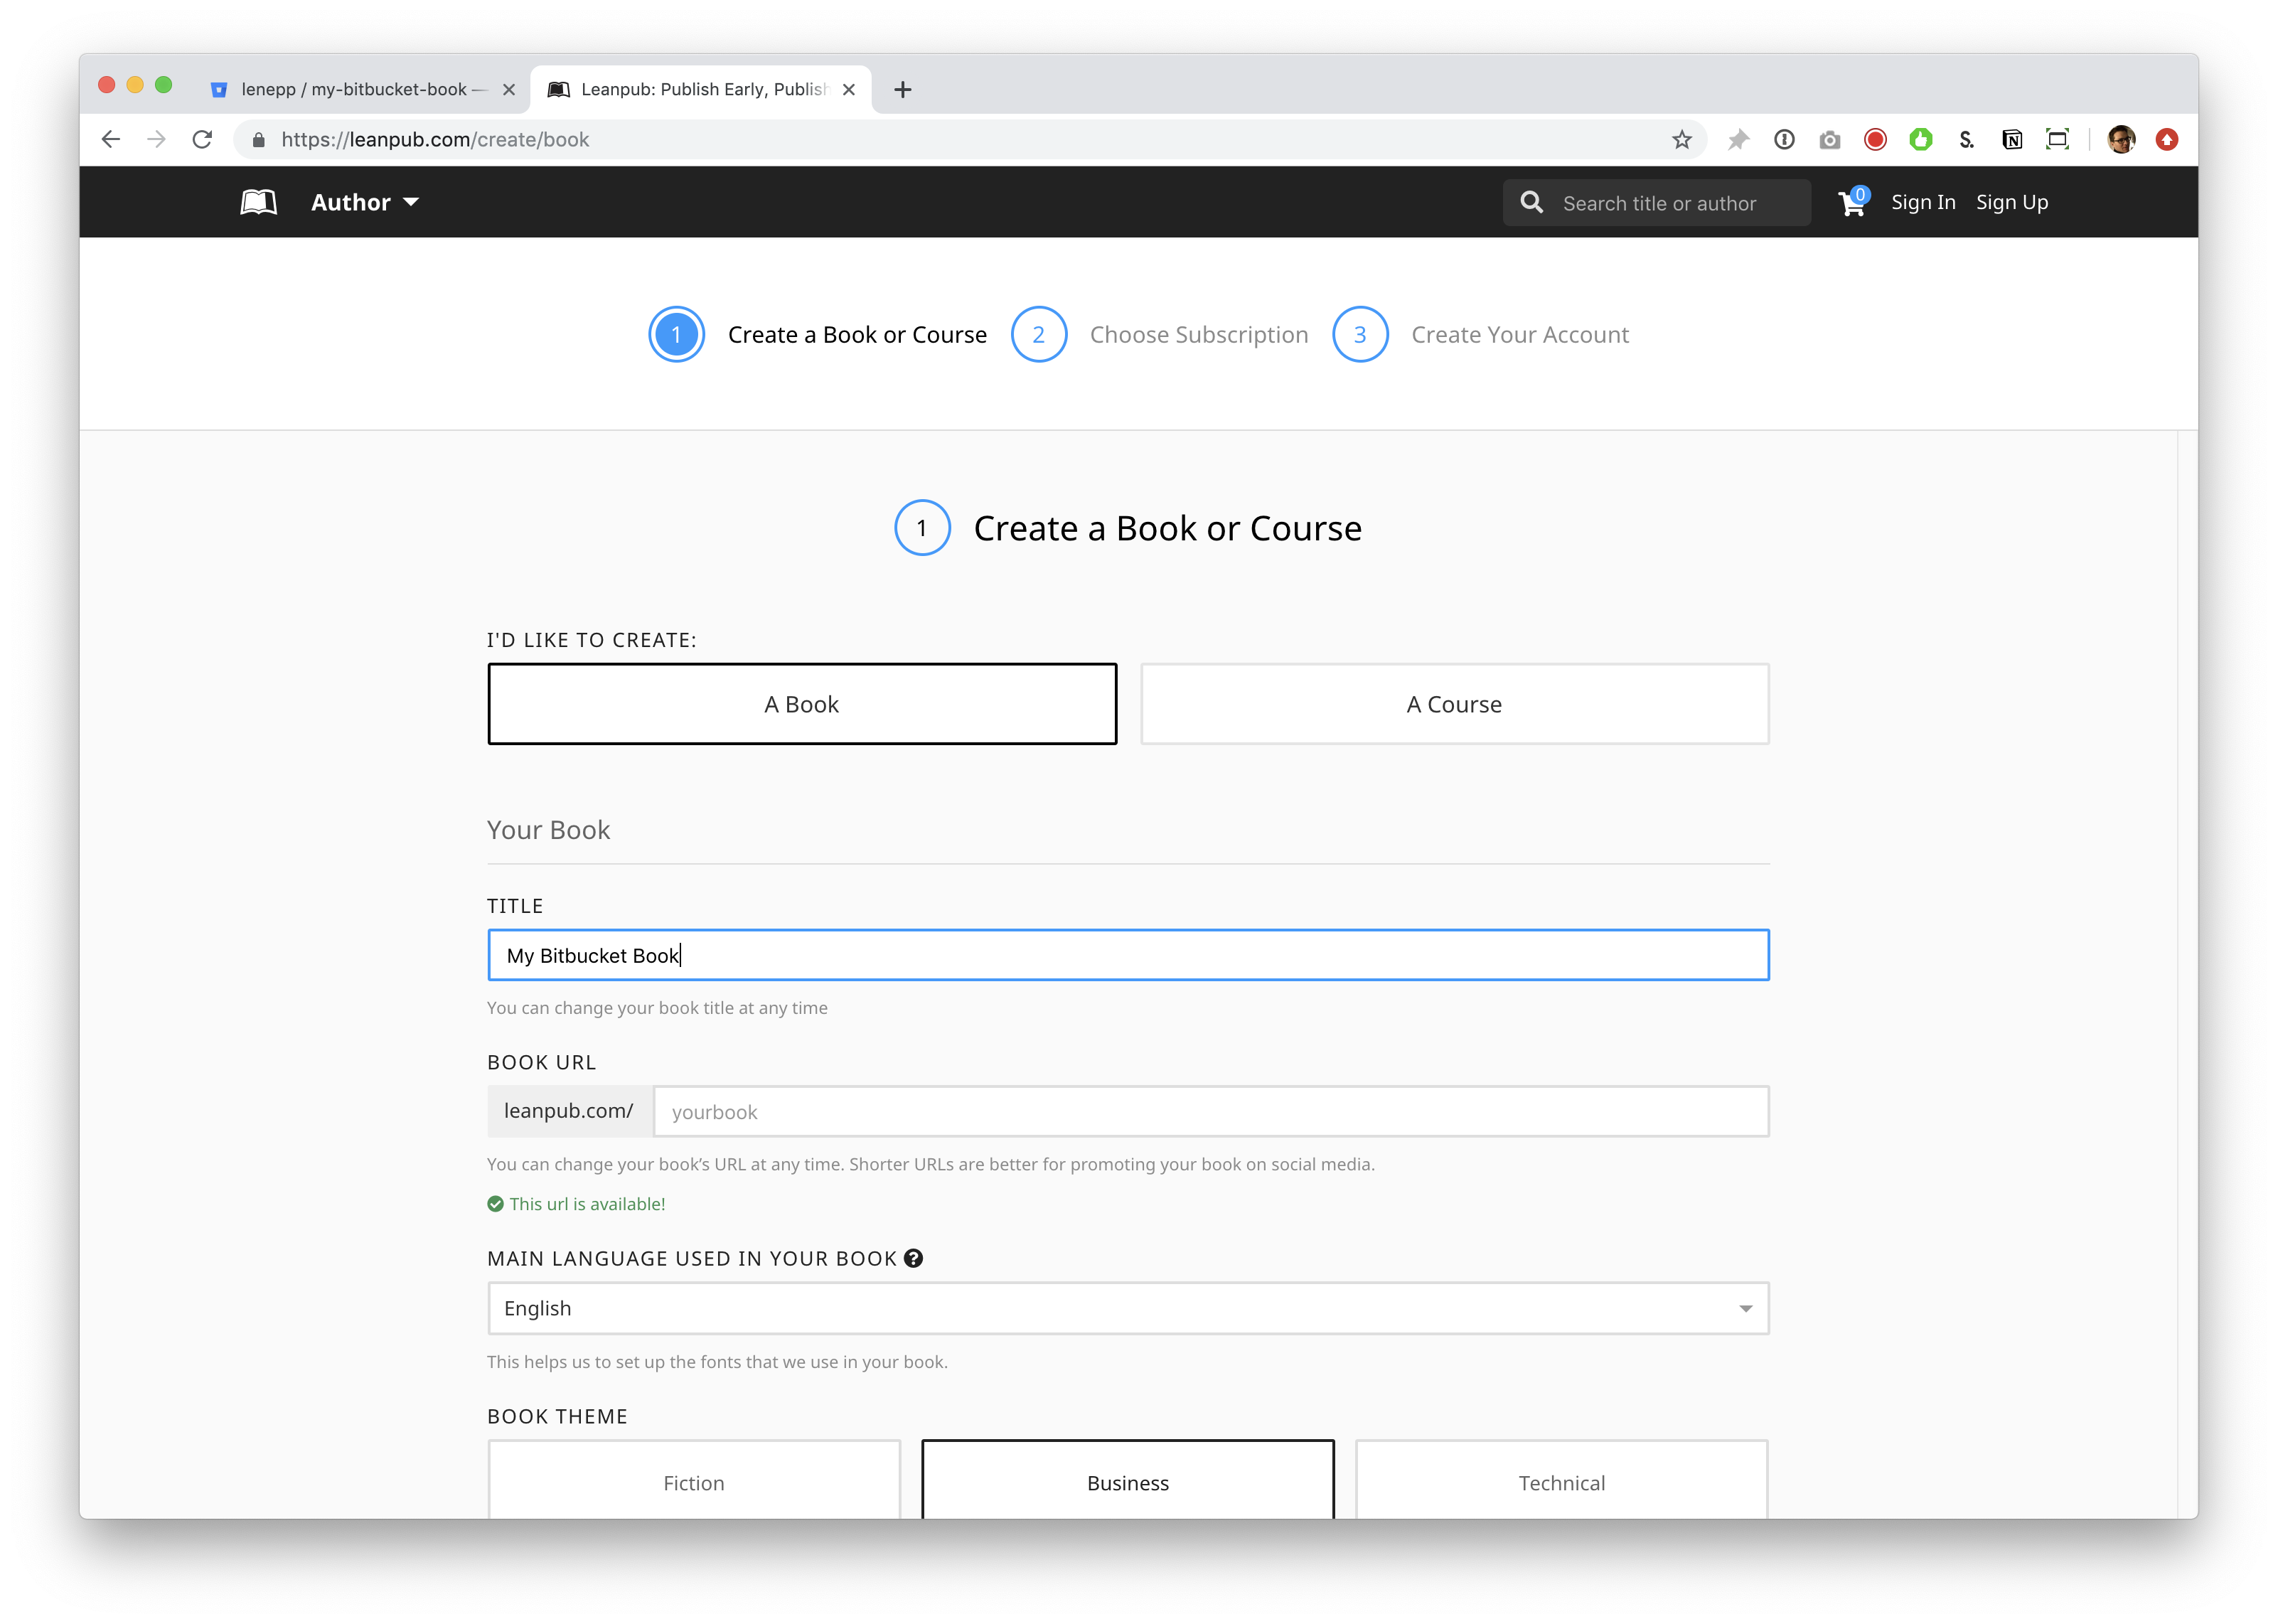
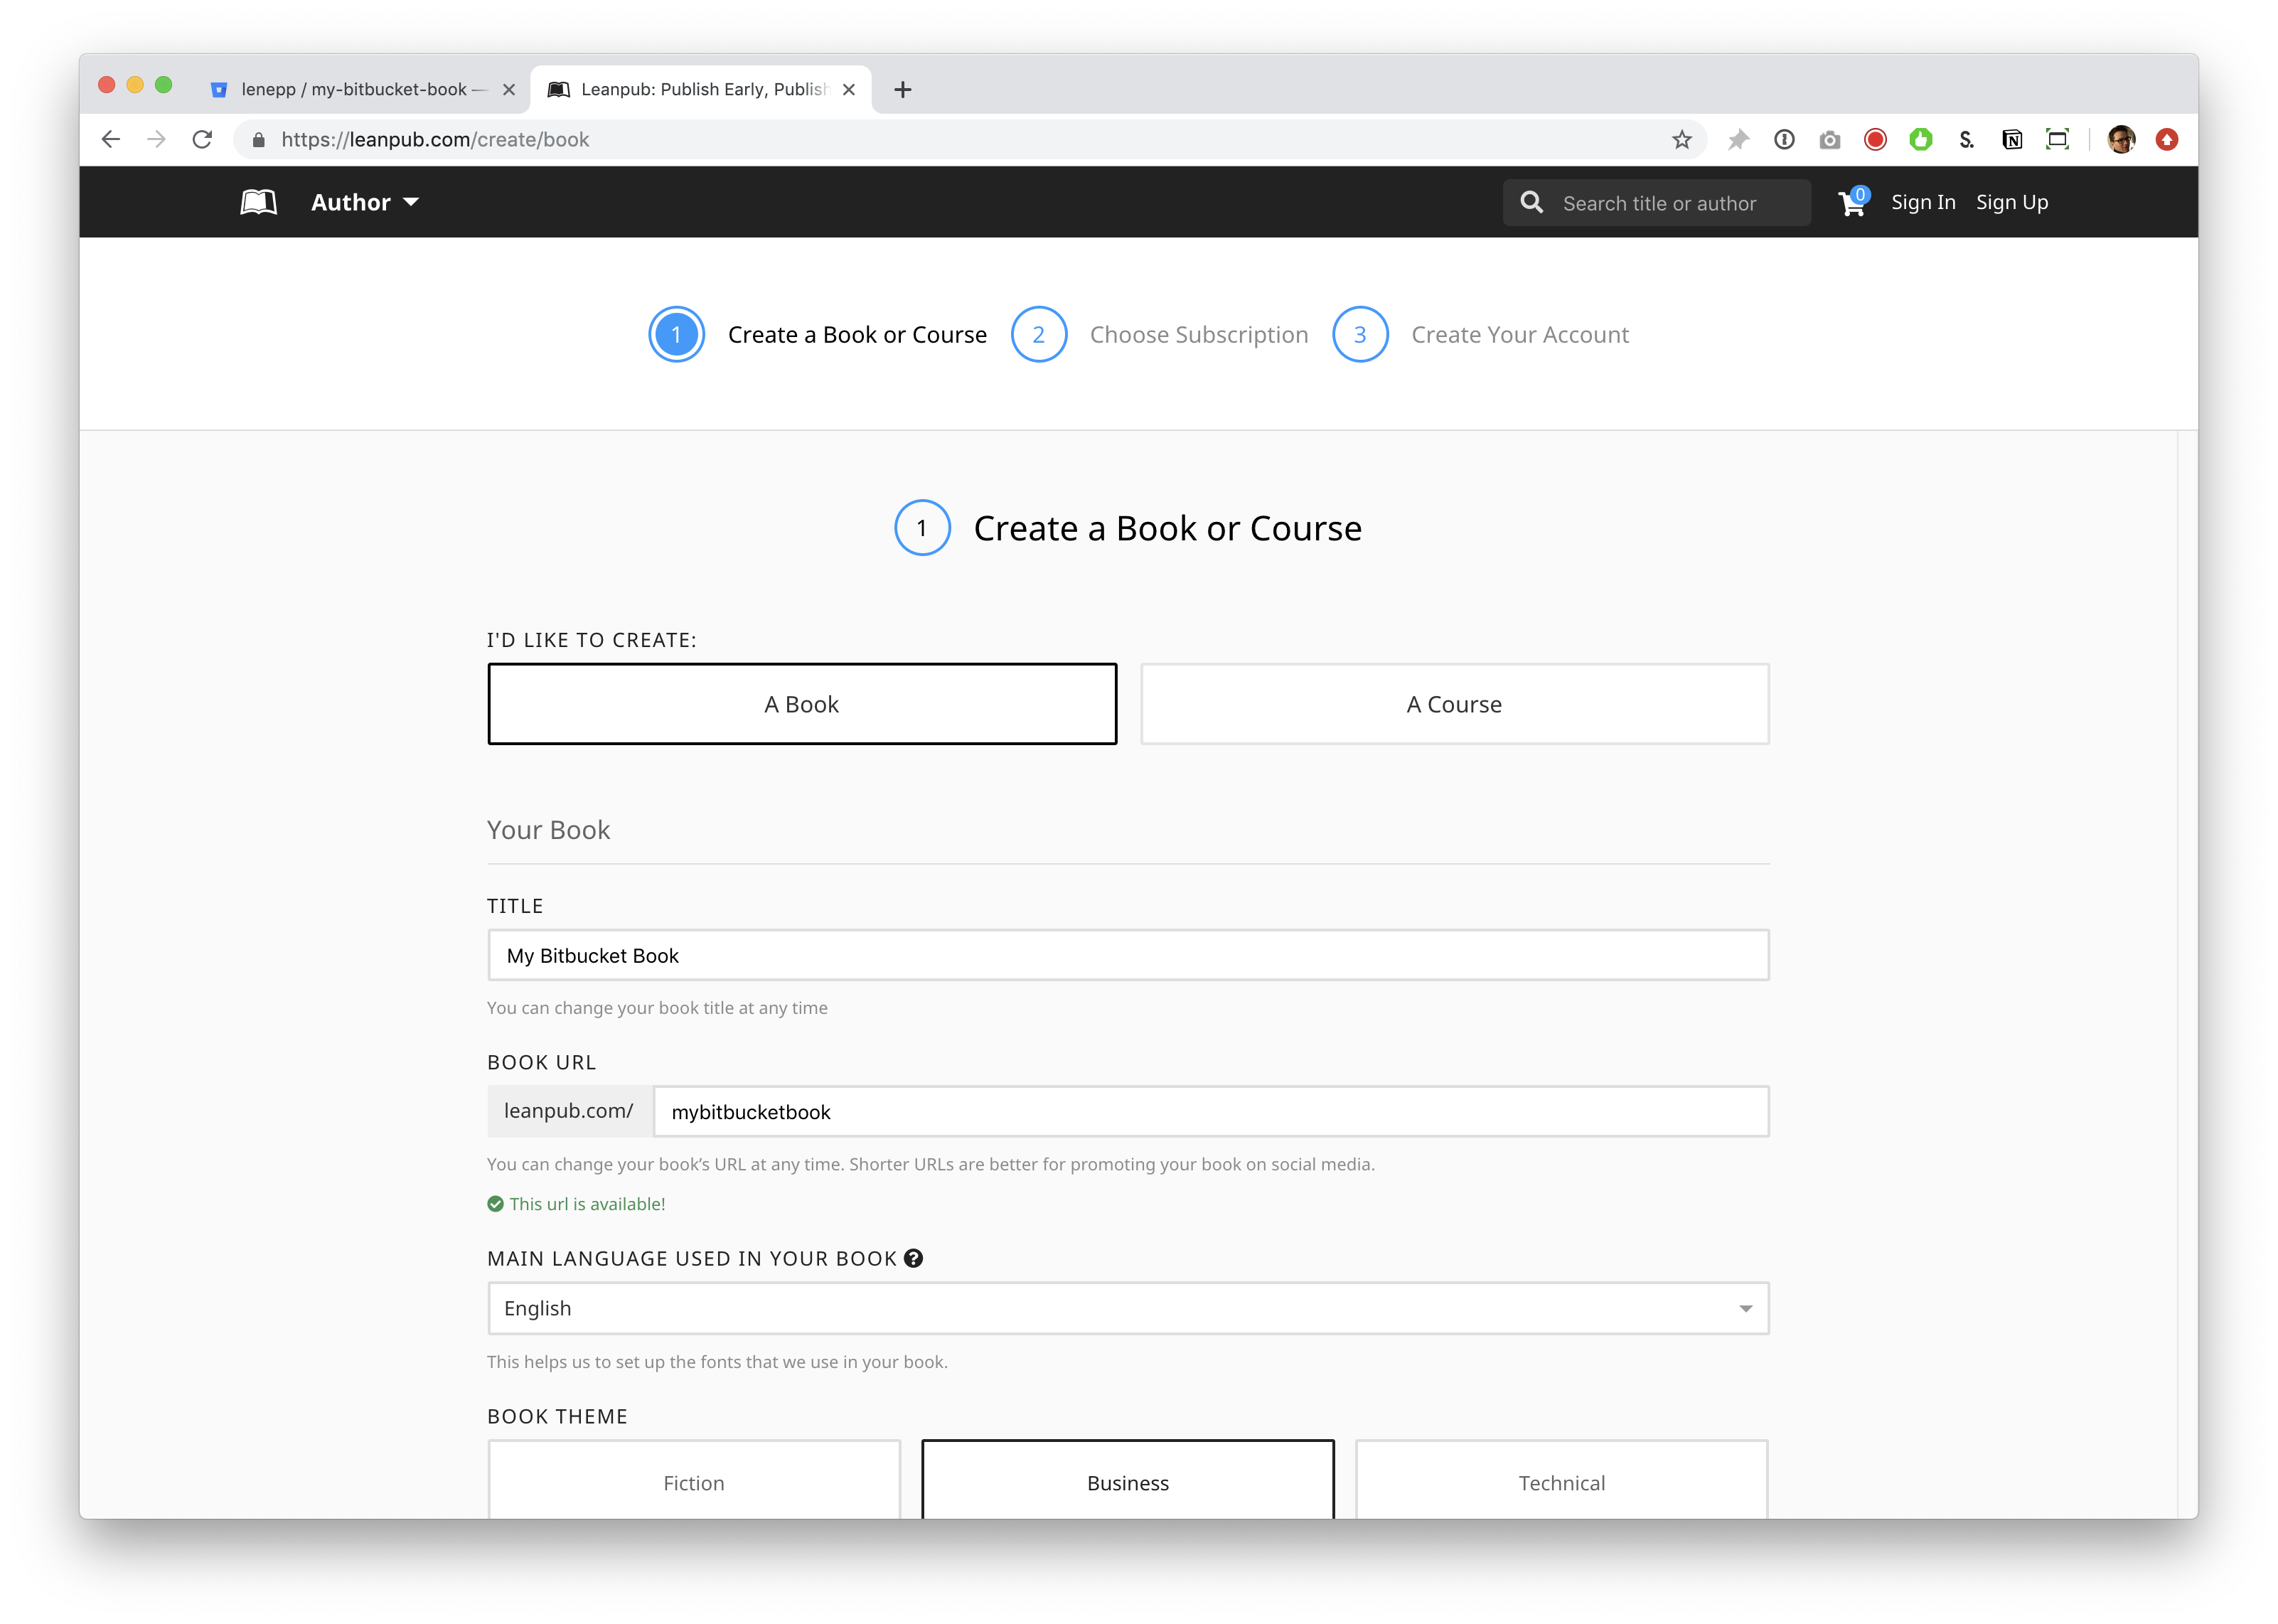
Click in the “BOOK URL” box. Leanpub will automatically suggest a URL for your book’s web page on Leanpub. You can change this URL at any time.
Scroll down and you will see “MAIN LANGUAGE USED IN YOUR BOOK.” You can select a language from the drop-down. Like the other settings, you can change this at any time.
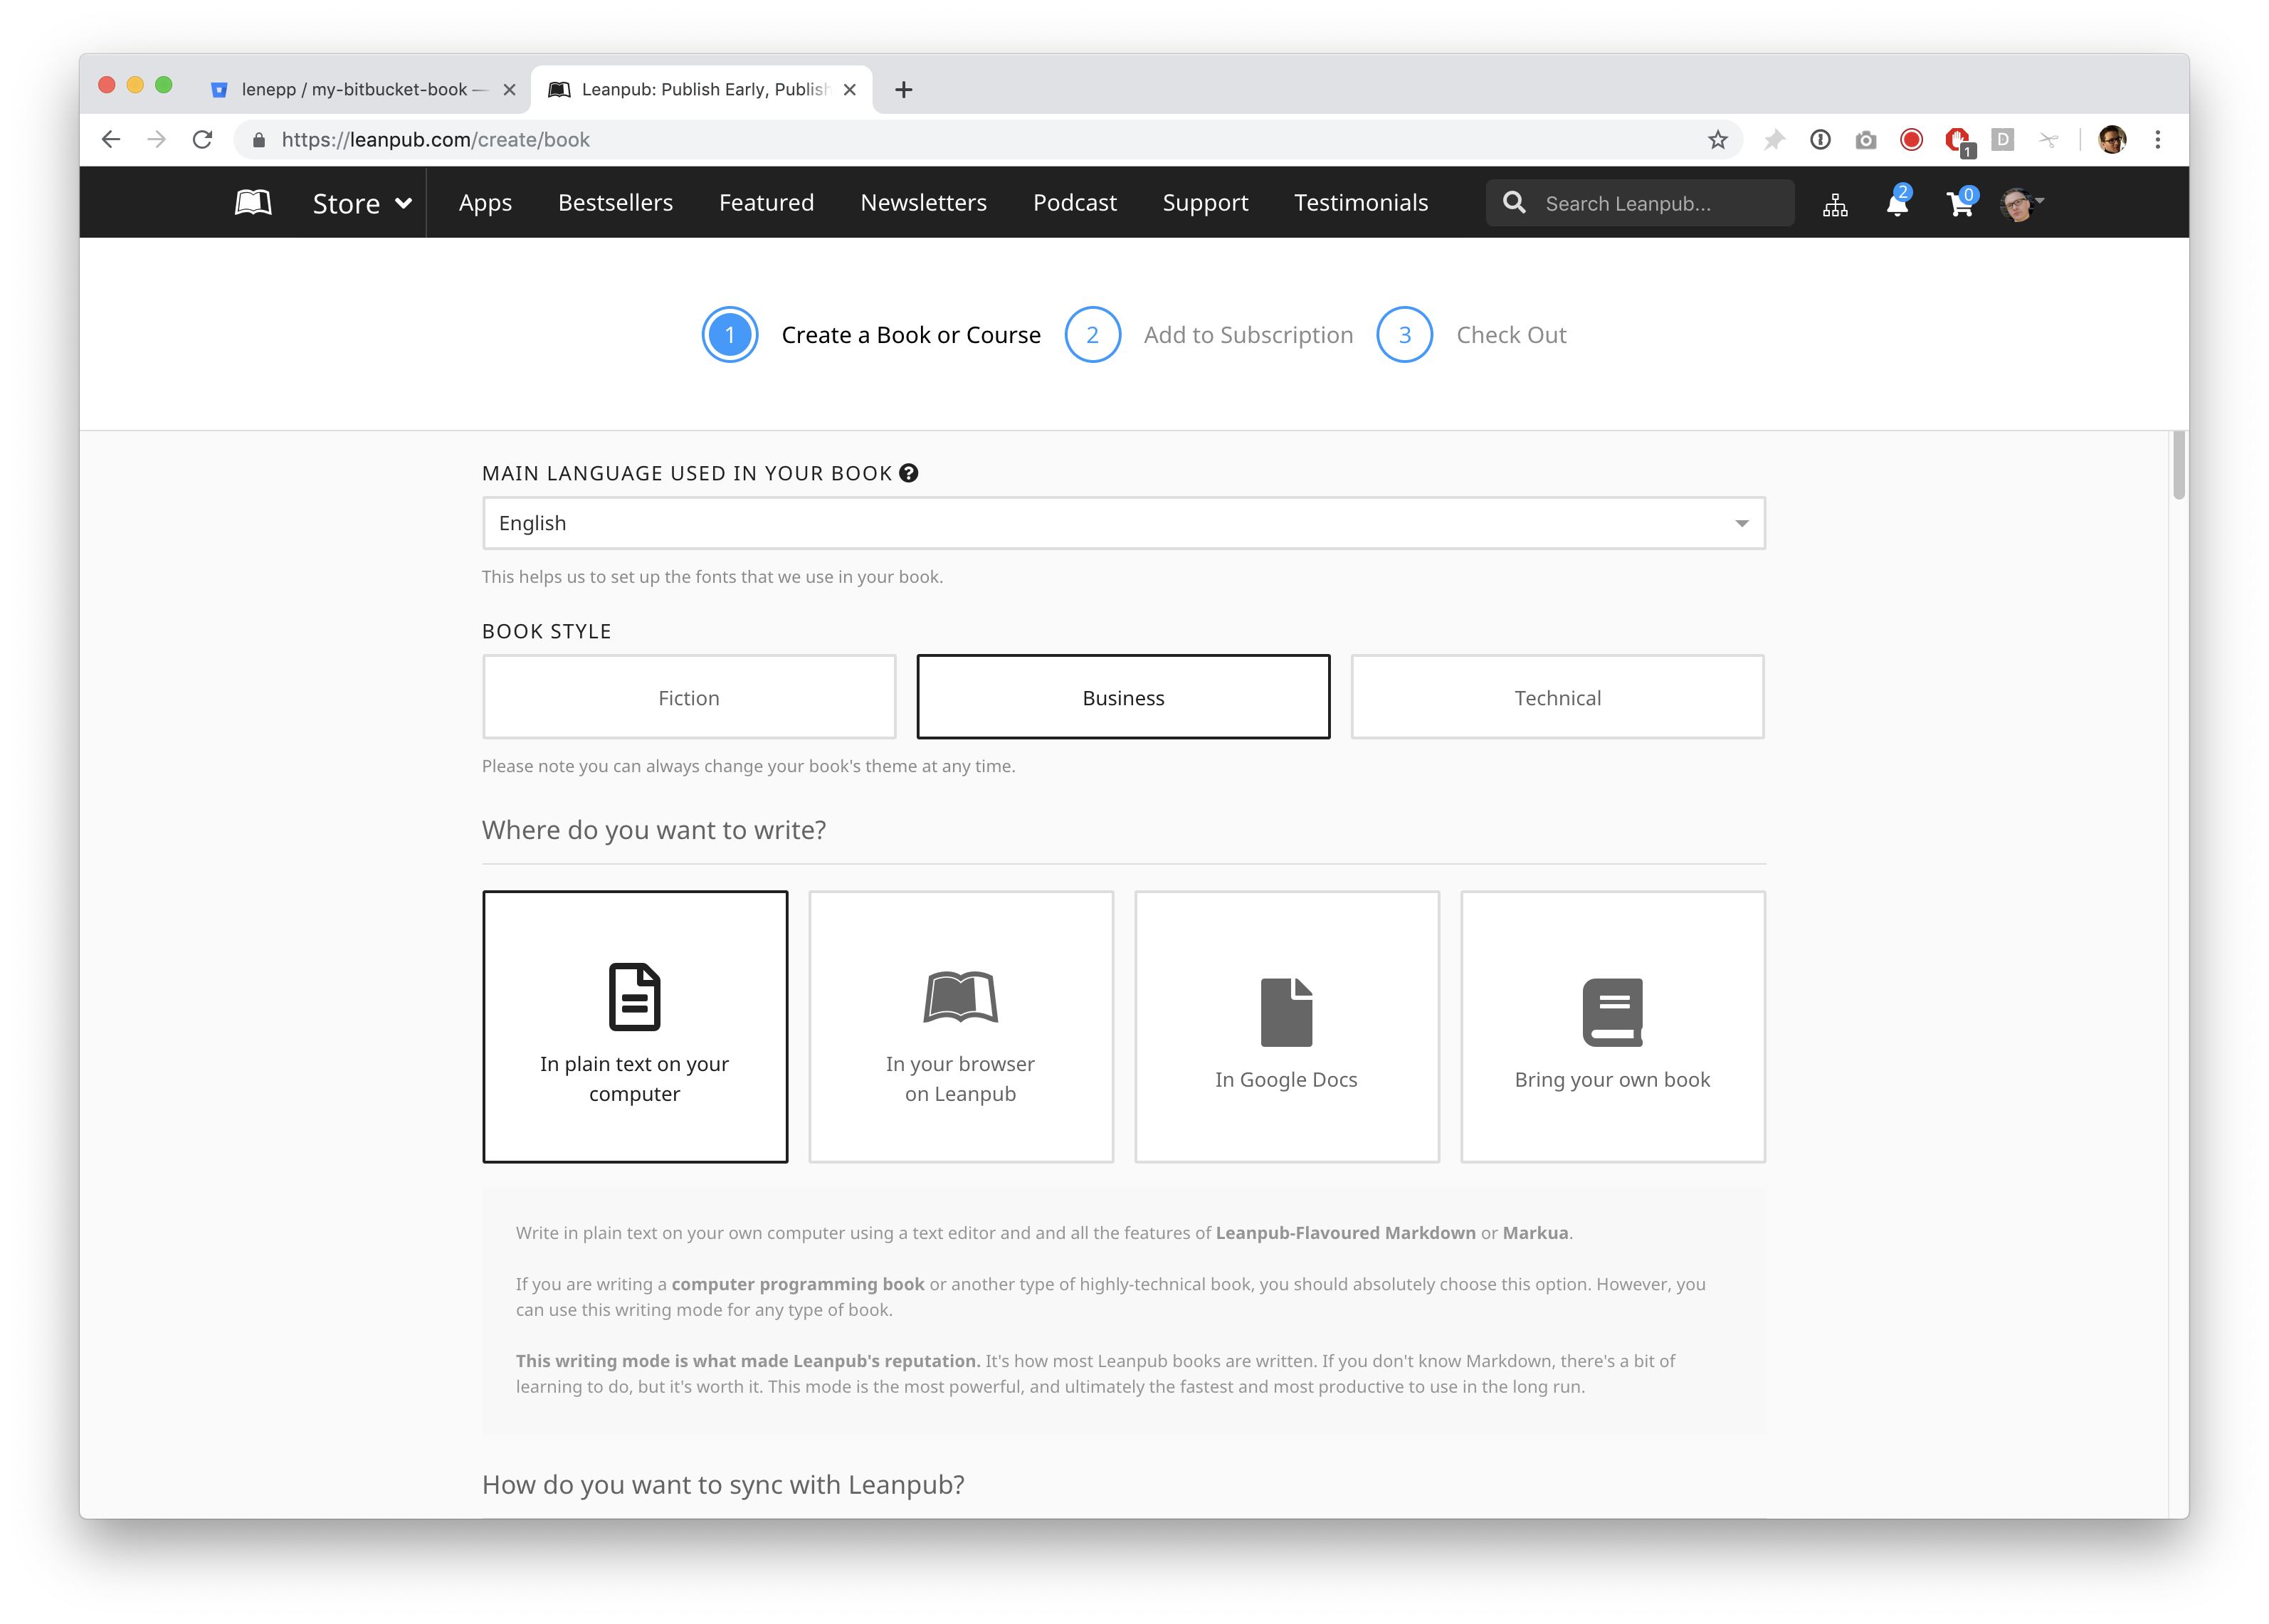
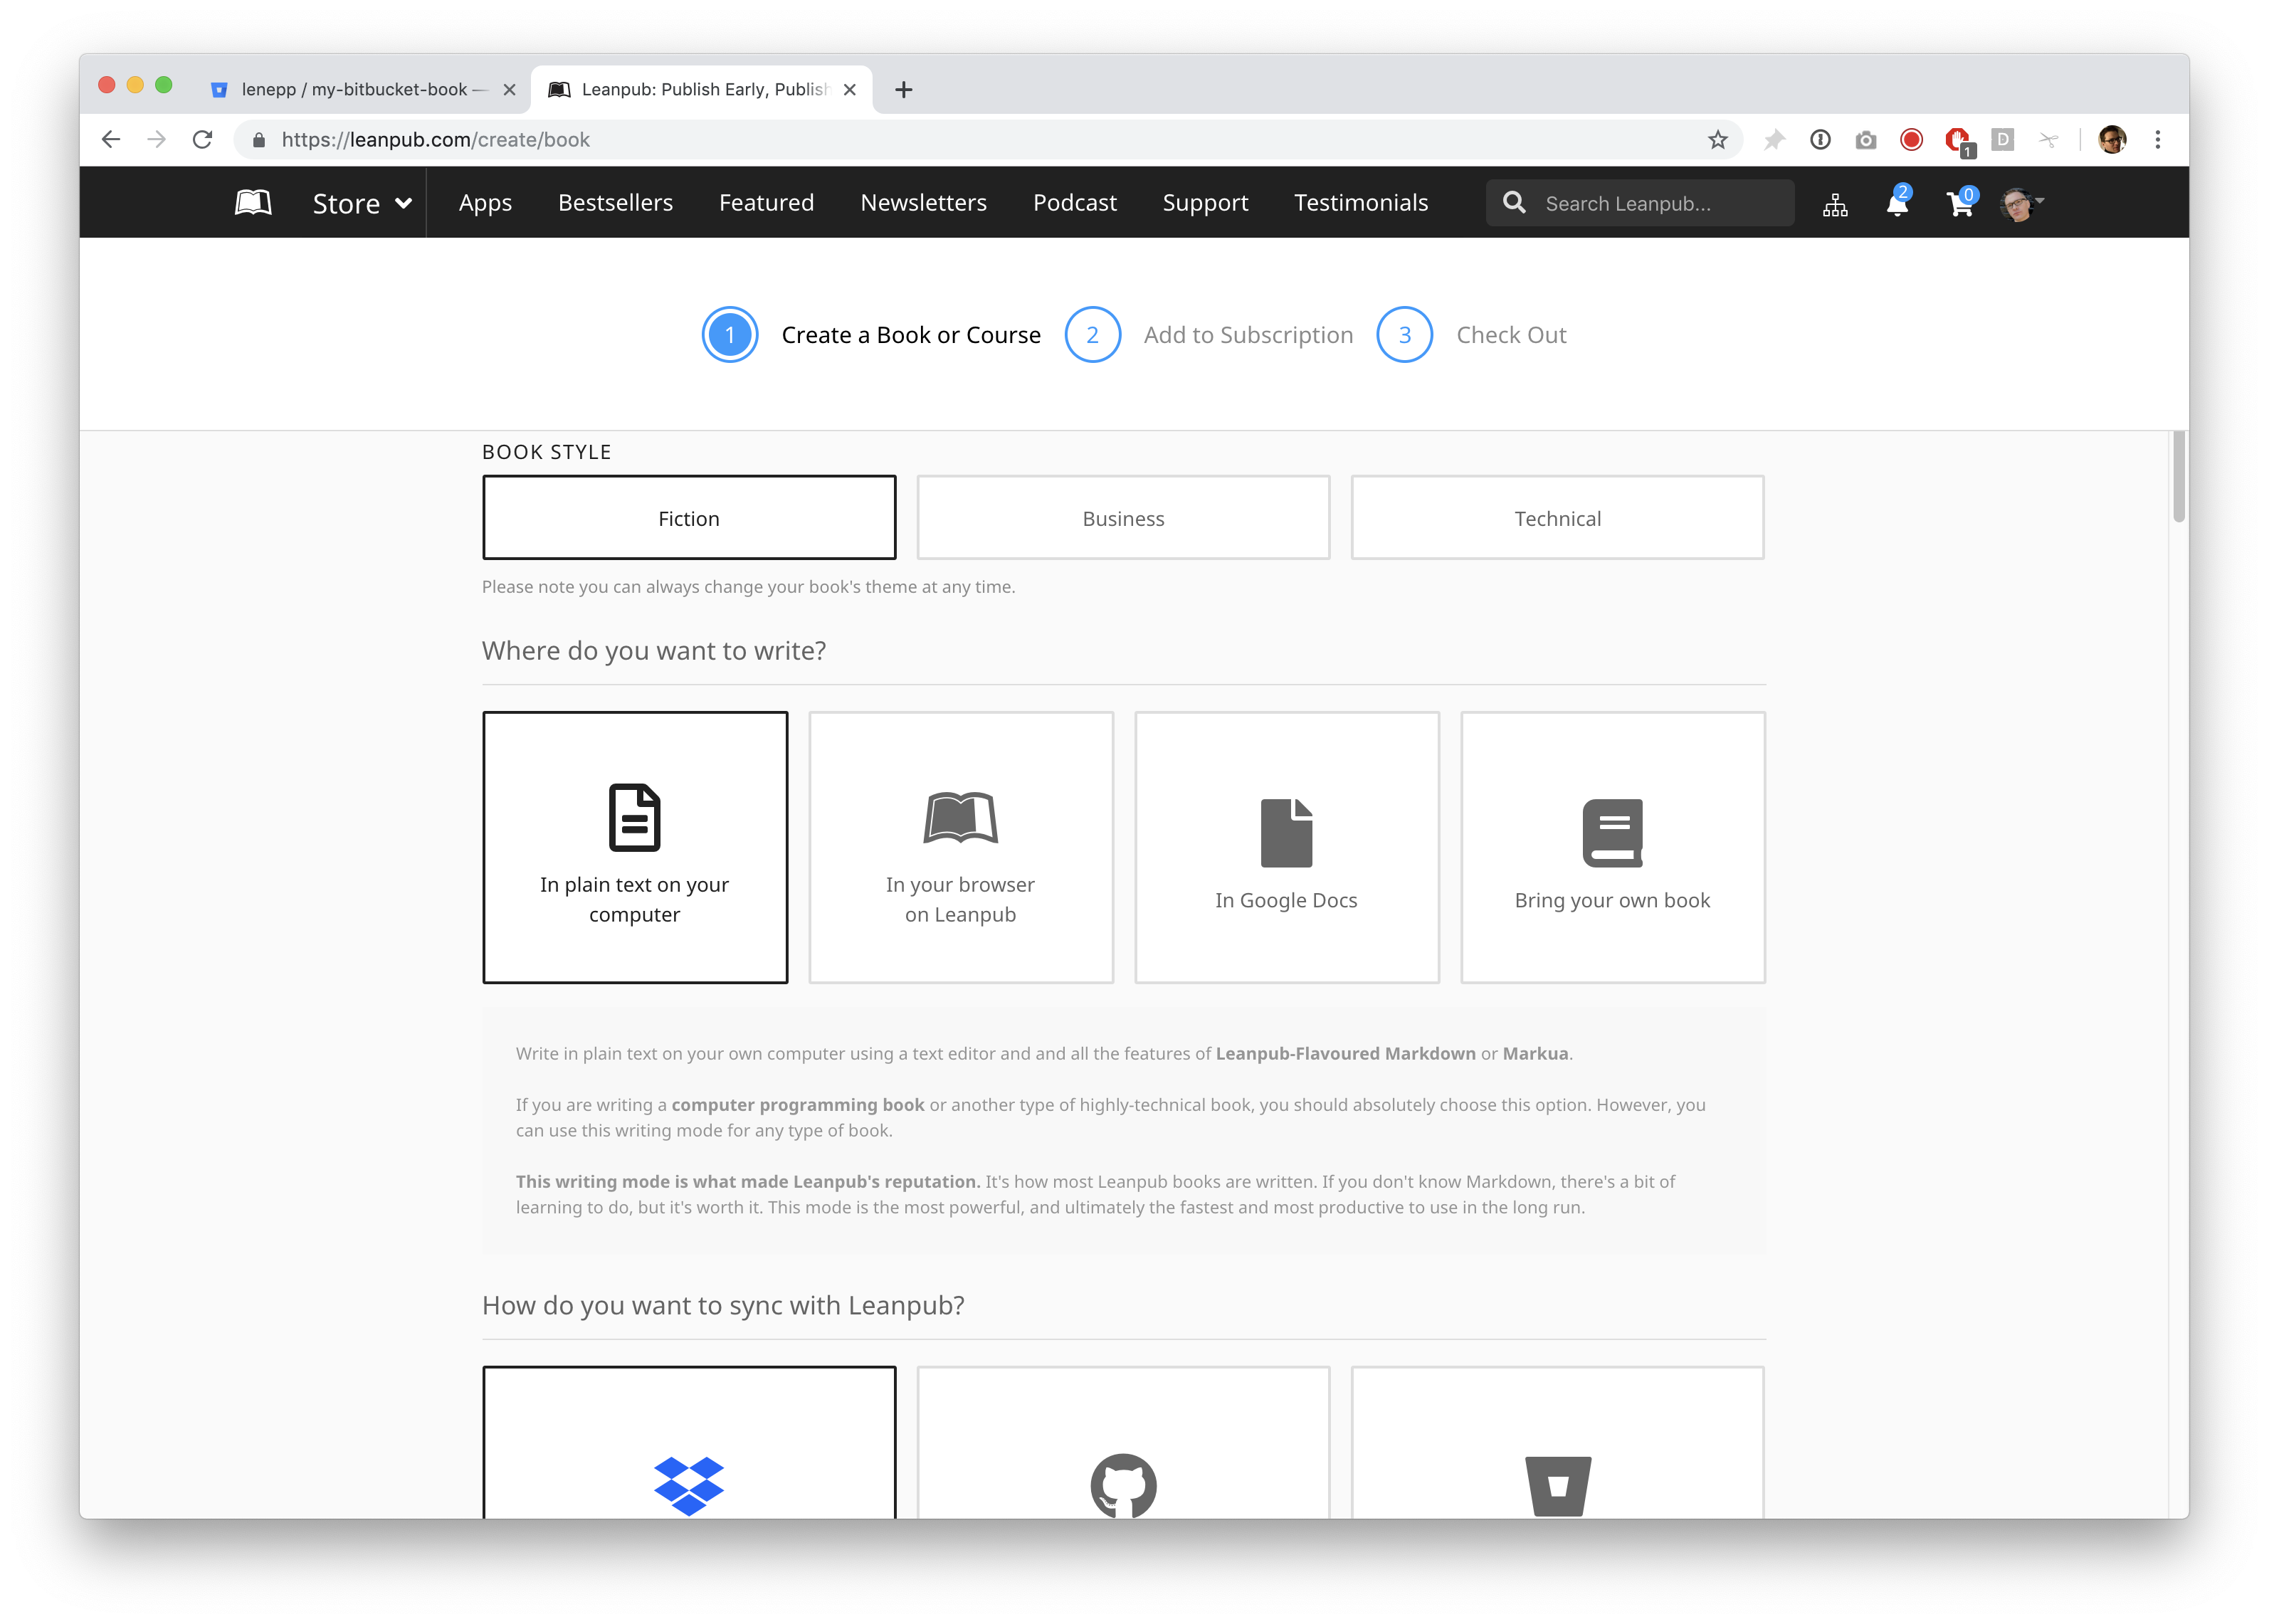
Scroll down and you will see the “BOOK THEME” options. “Business” will be selected by default. The Book Theme is just a set of standard formatting options conventional for books on these subjects. You are not required to choose any particular option. You can change your Book Theme at any time.
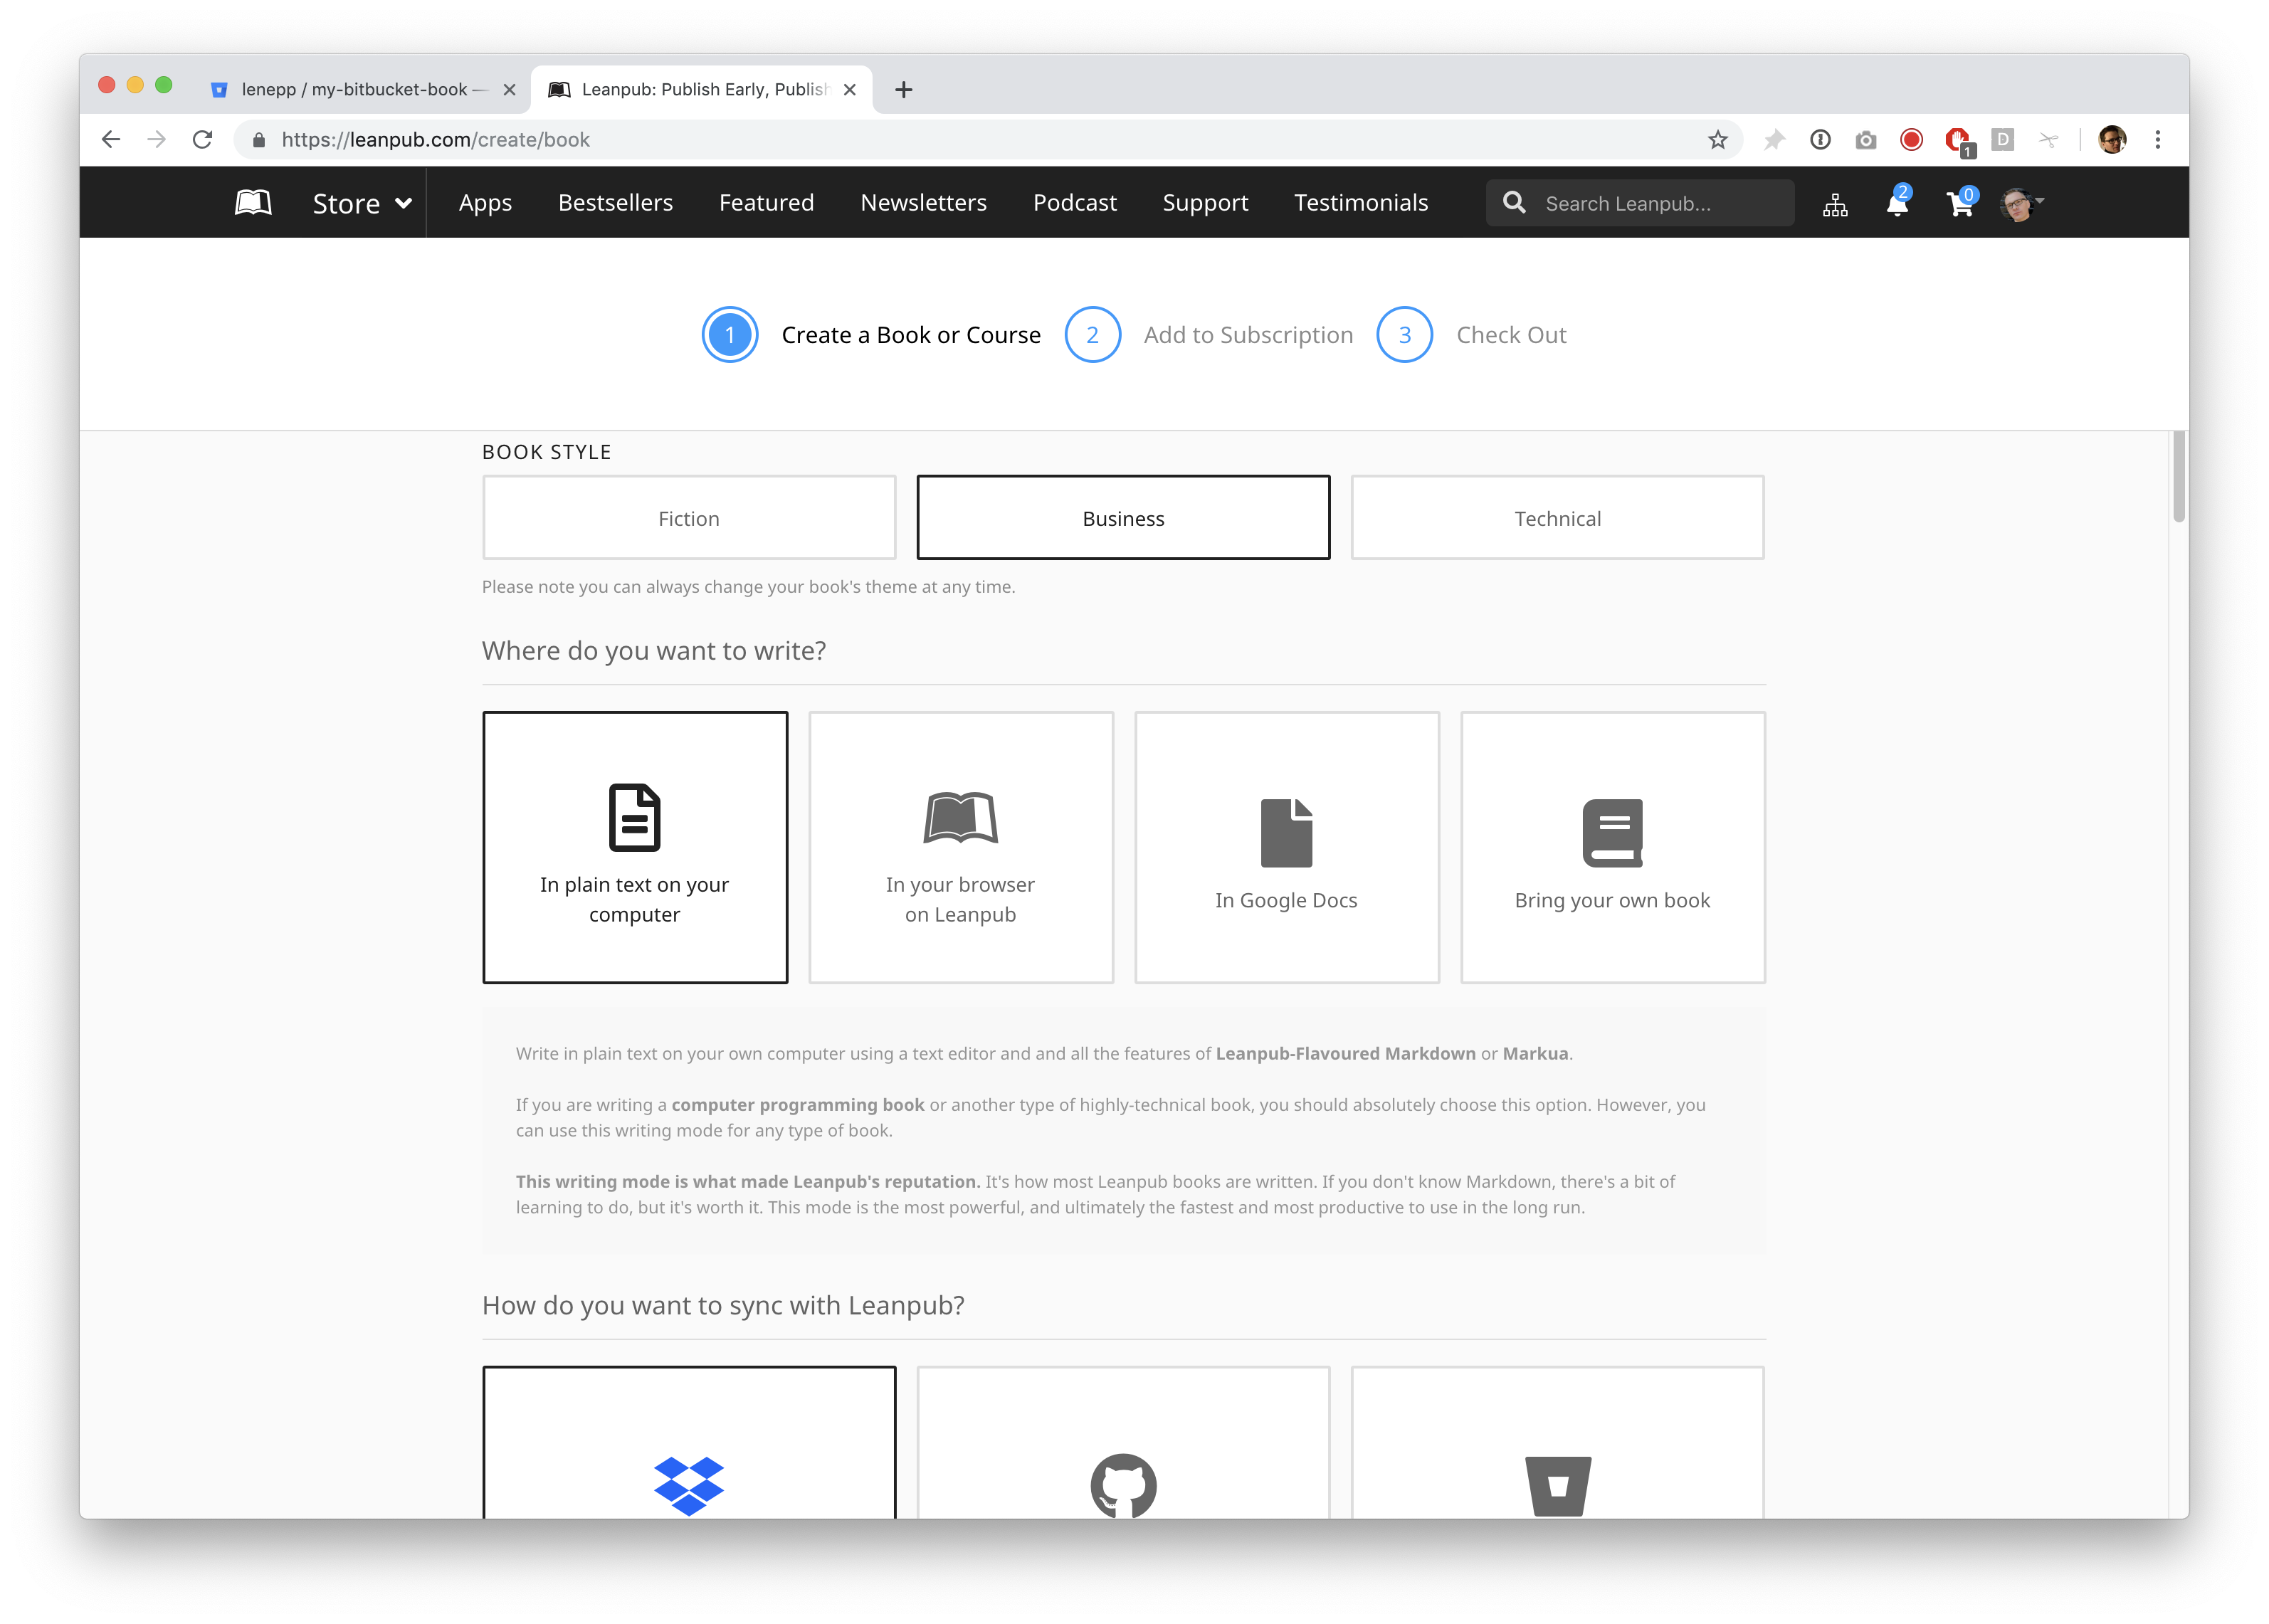
For this tutorial, we selected the “Fiction” Book Theme.
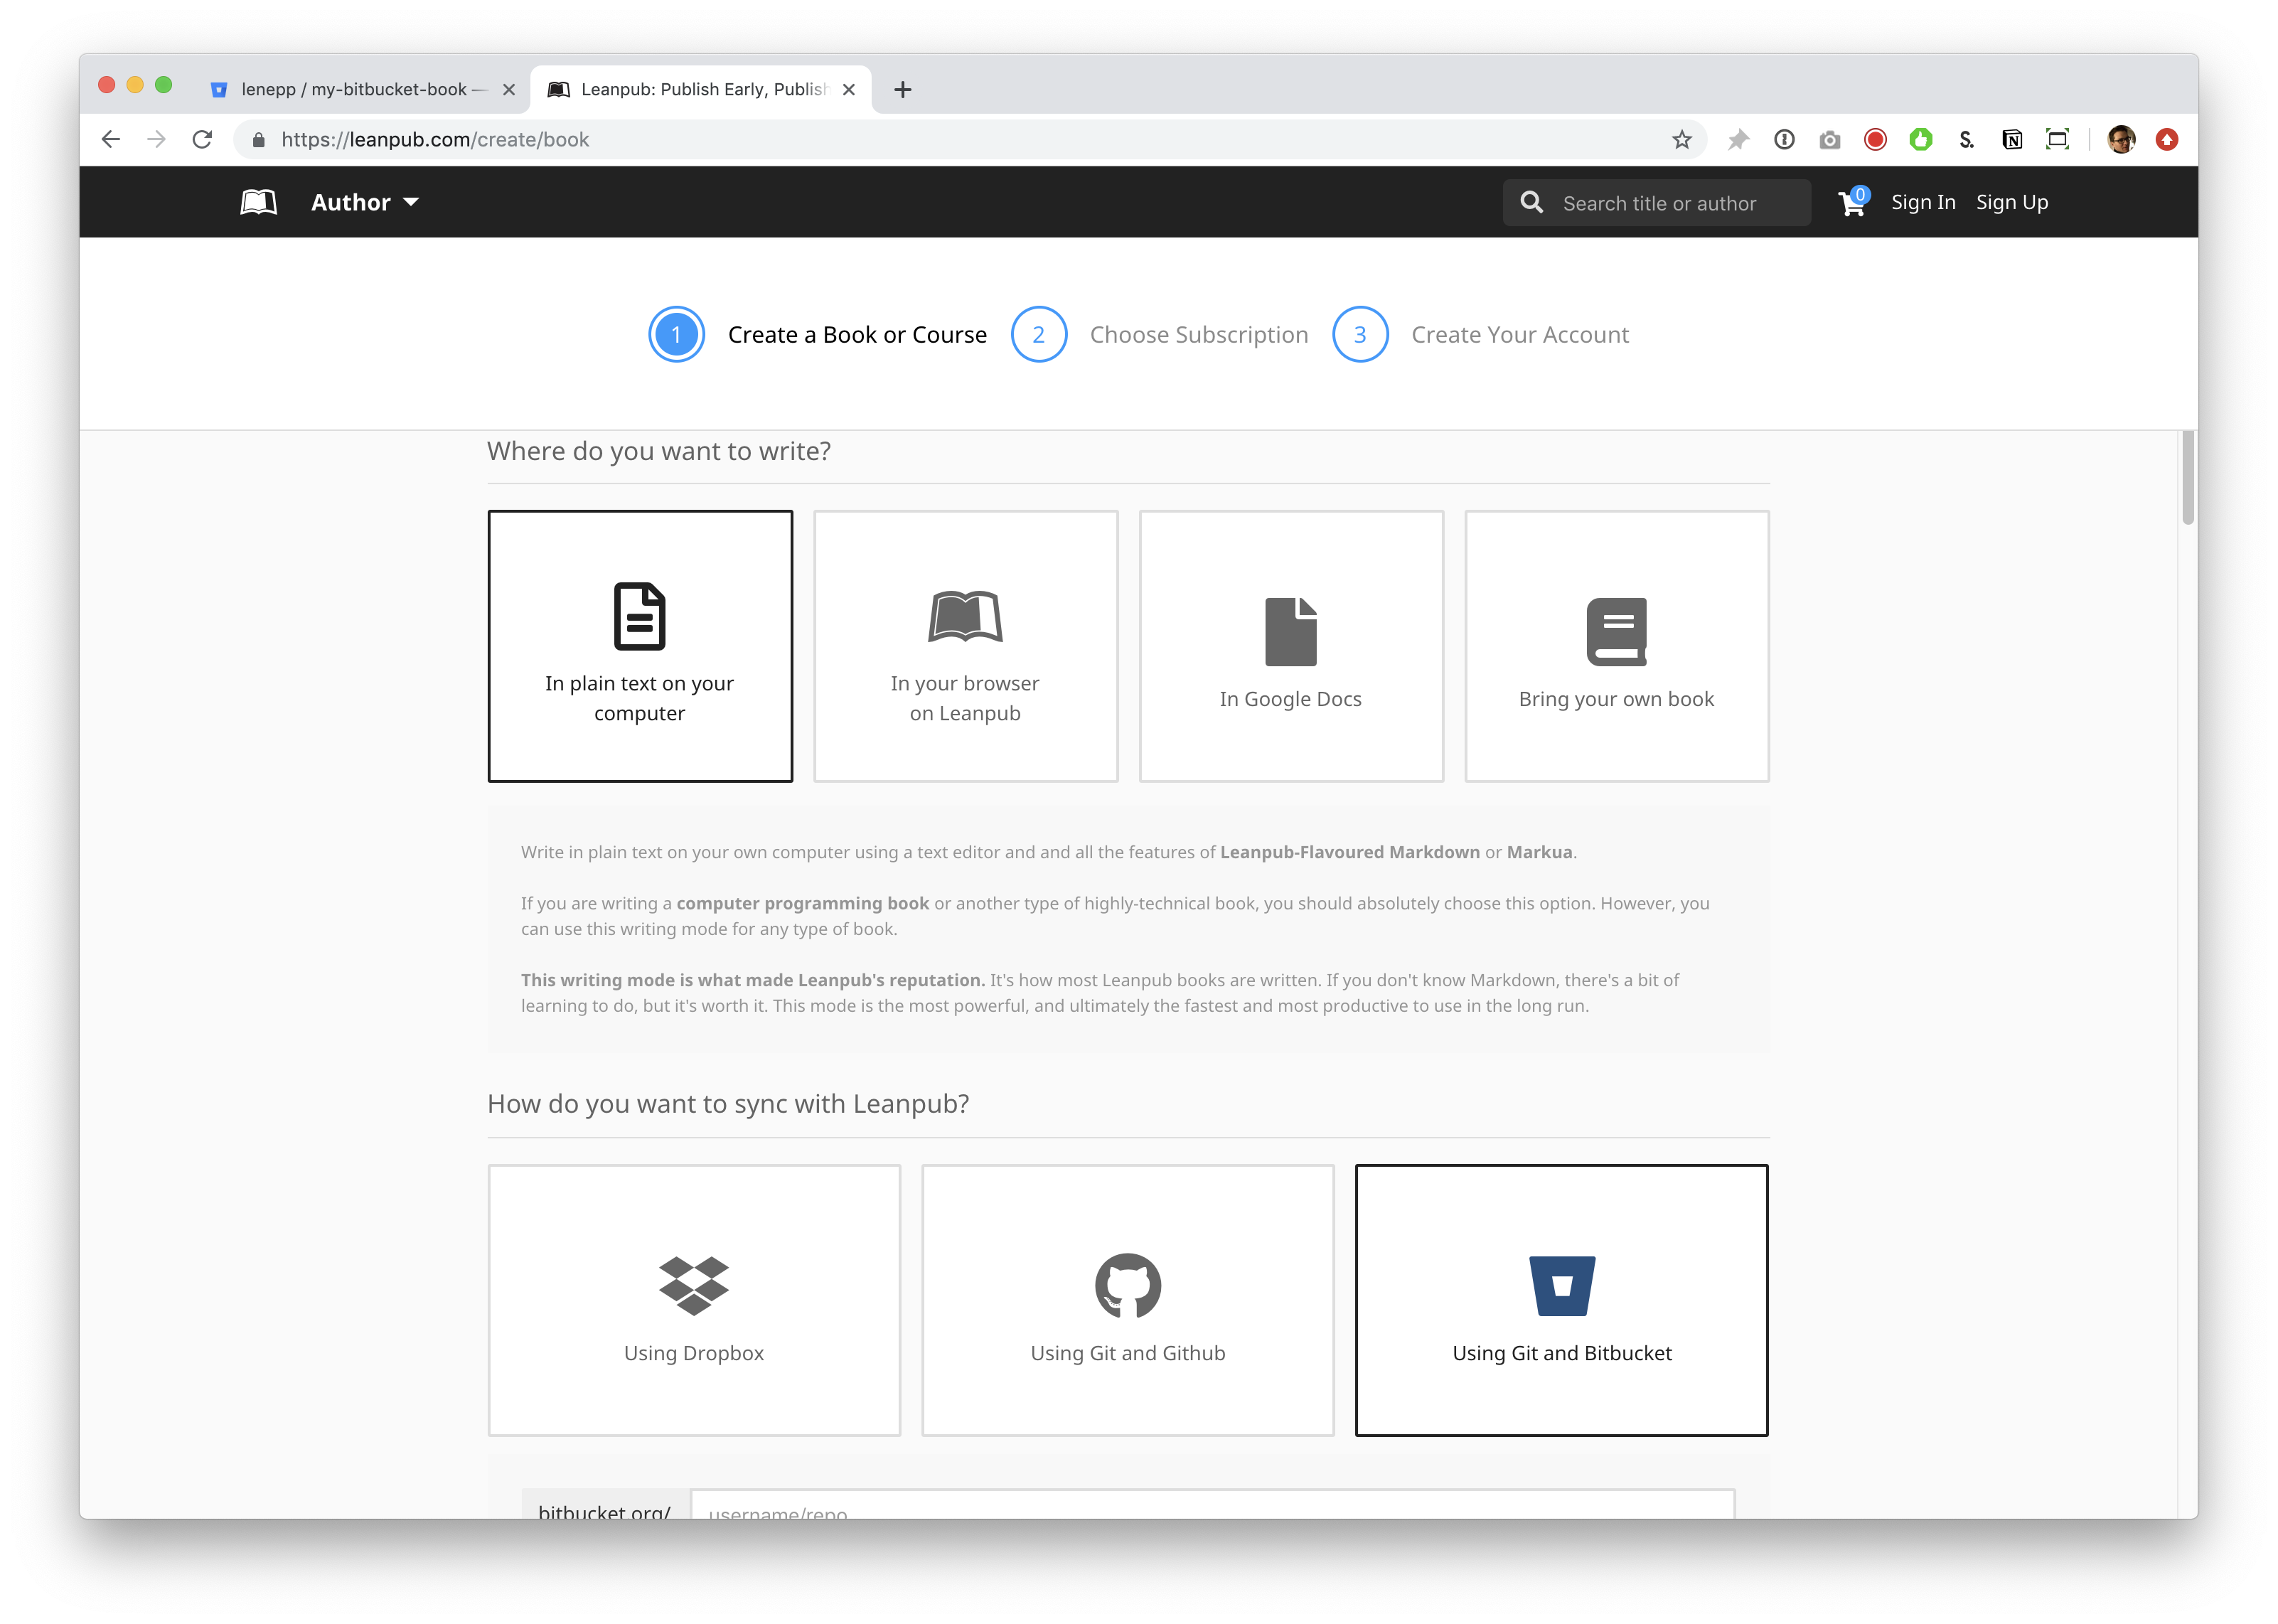
In the section below, you will be presented with various Writing Mode options. For this tutorial, select “Using Git and Bitbucket.”
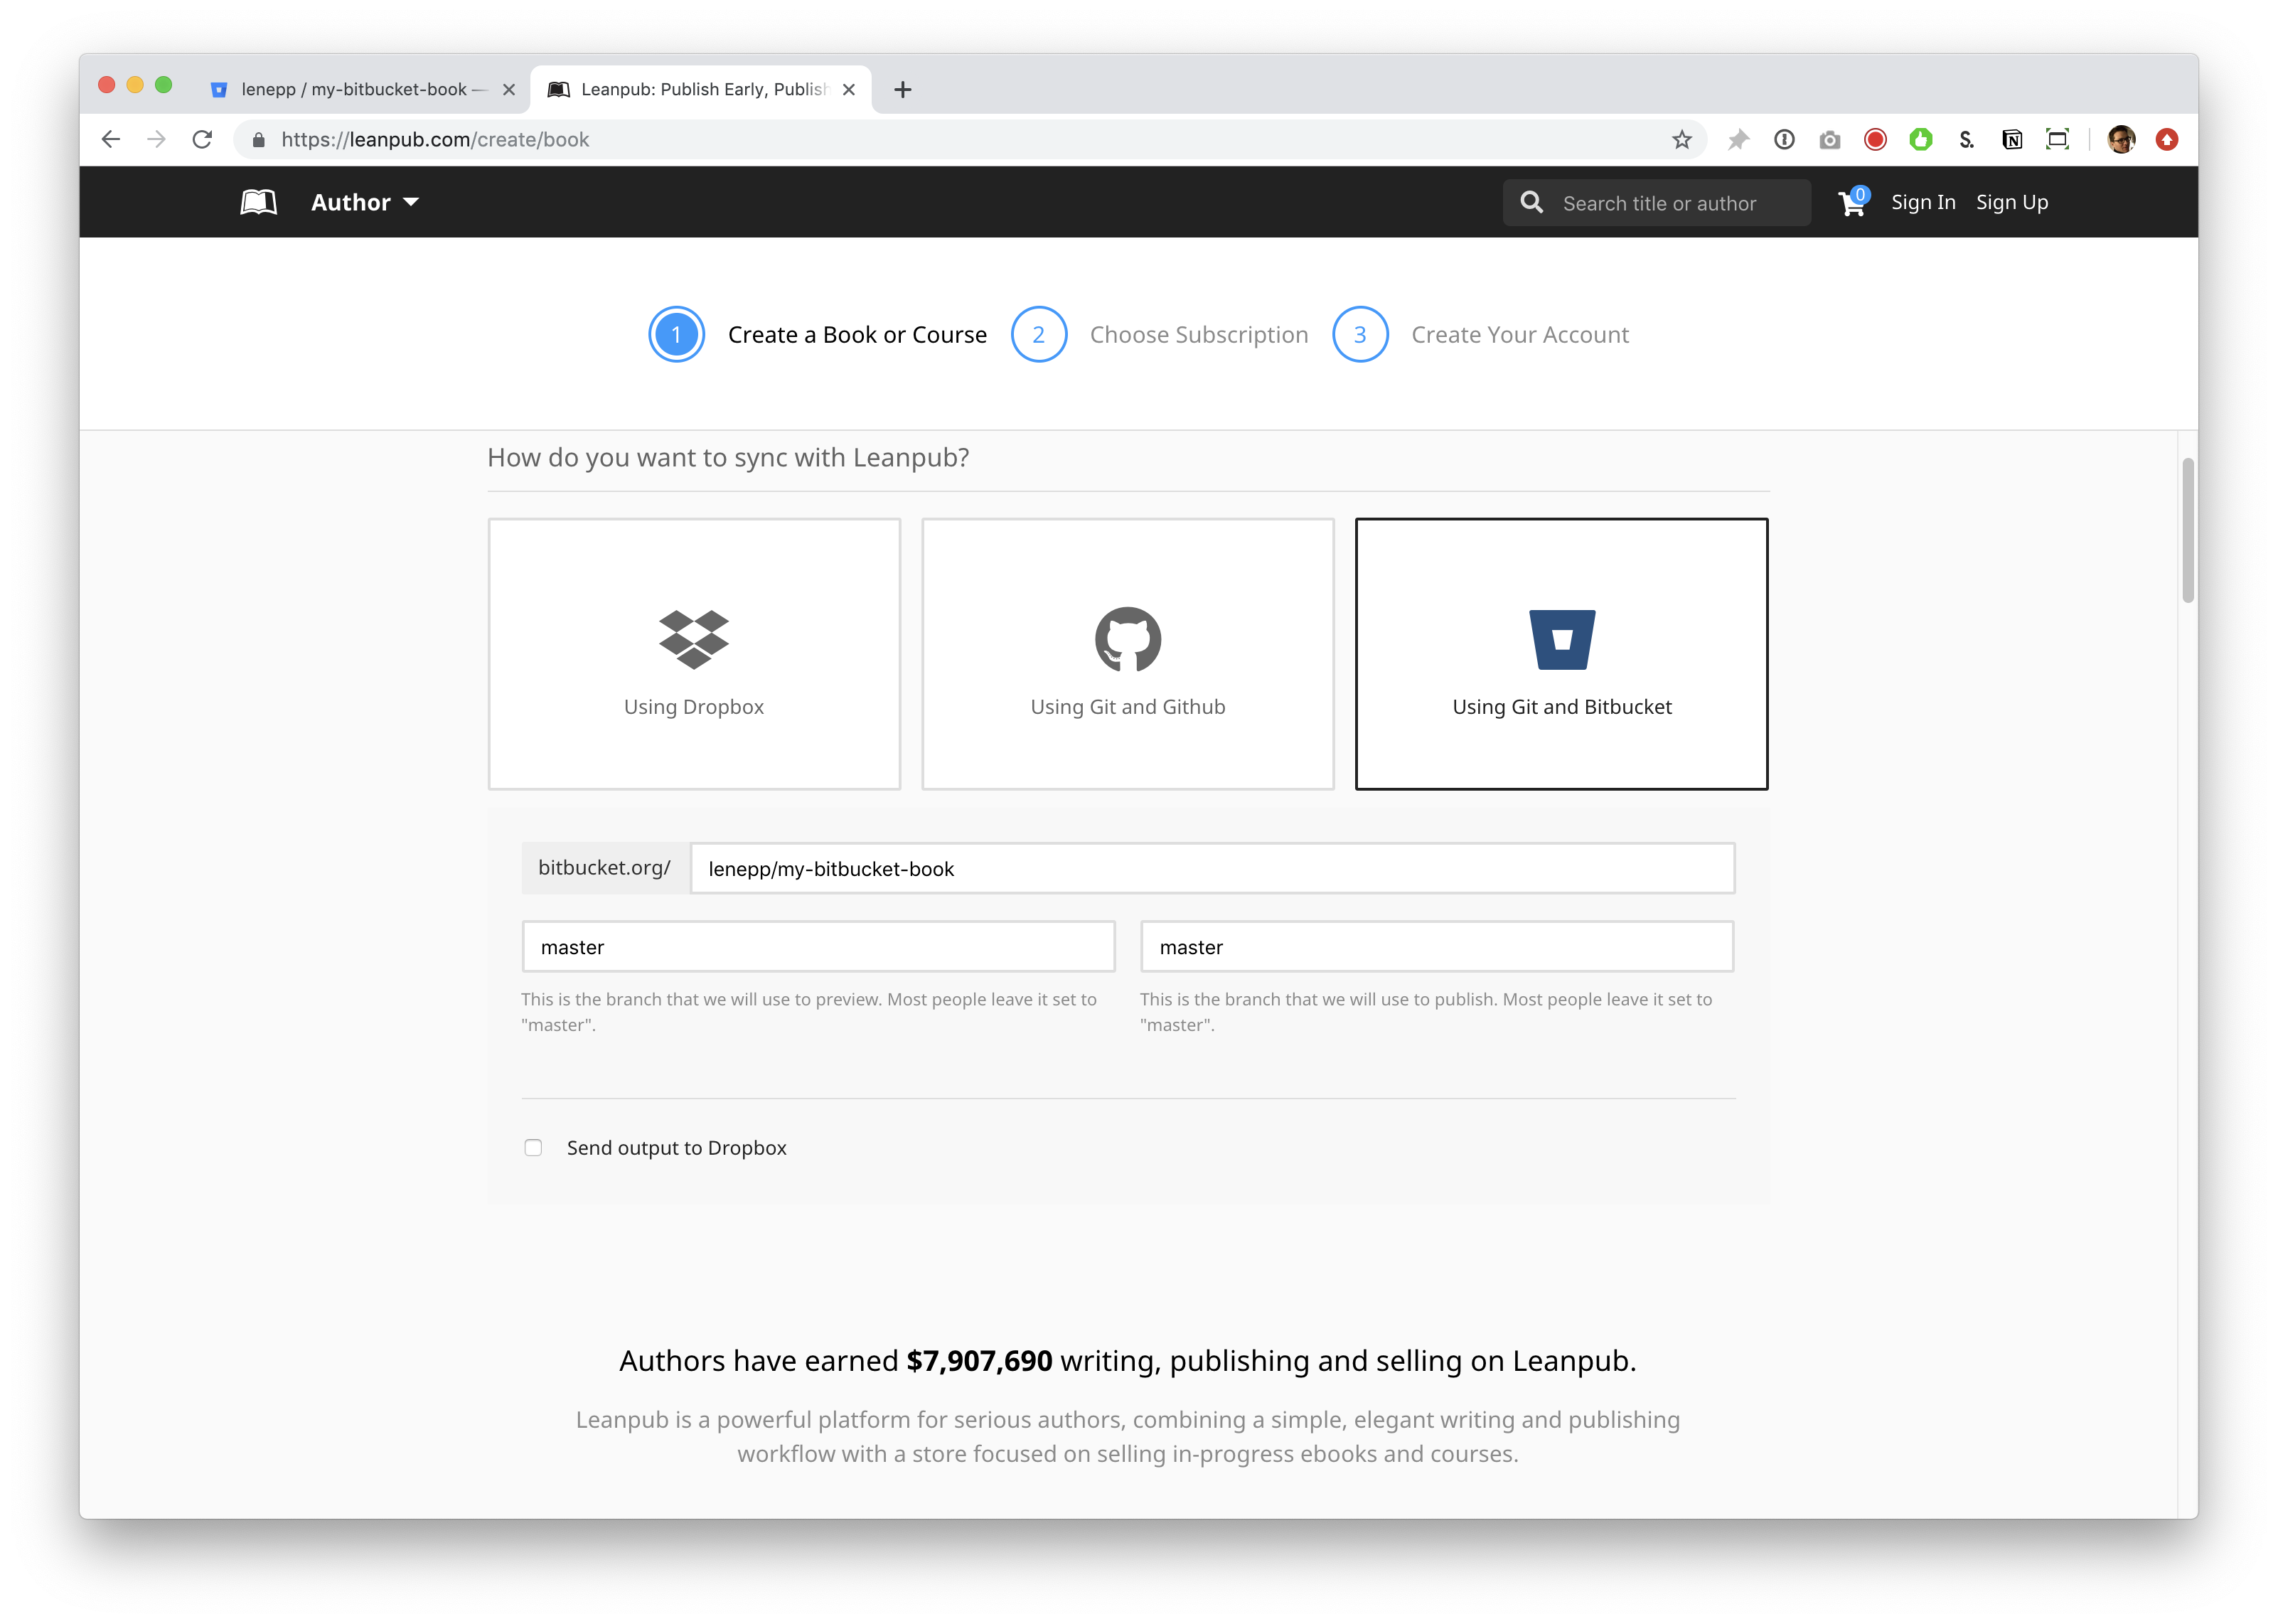
Scroll down and you will see a box to enter your Bitbucket username, followed by a forward slash / and your Bitbucket repo name.
Enter your Bitbucket username, followed by a forward slash / and your Bitbucket repo name.
When you scroll down further, you will see the subscription plan options. By default, “Free” will be selected. If you have a paid Leanpub account already, you will see that plan selected automatically.
Select a plan.
Scroll down and, if you are not signed in to a Leanpub account, you will see an option to enter information to create a new account. You will also see an option to sign in, if you already have a Leanpub account.
To create a new account, fill in the relevant information.
Finally, click the blue button to finish creating your new Bitbucket book.
You will now see that you are on the Getting Started page for your book.
If you use bookmarks in your web browser, we recommend you bookmark this page in your web browser in a bookmark folder for your book, but this is not required.
Look at the Author “breadcrumb” menu at the top of the screen. This is how you will navigate to the web pages you will be using in Leanpub to work on your book and see all the features we provide, like uploading a book cover, or setting a price for your book.
When you are finished this tutorial, we recommend you explore the various Author options.
Adding Leanpub As A Collaborator on Your Book’s Bitbucket Repository
Go back to the Bitbucket page for your book’s Bitbucket repository.
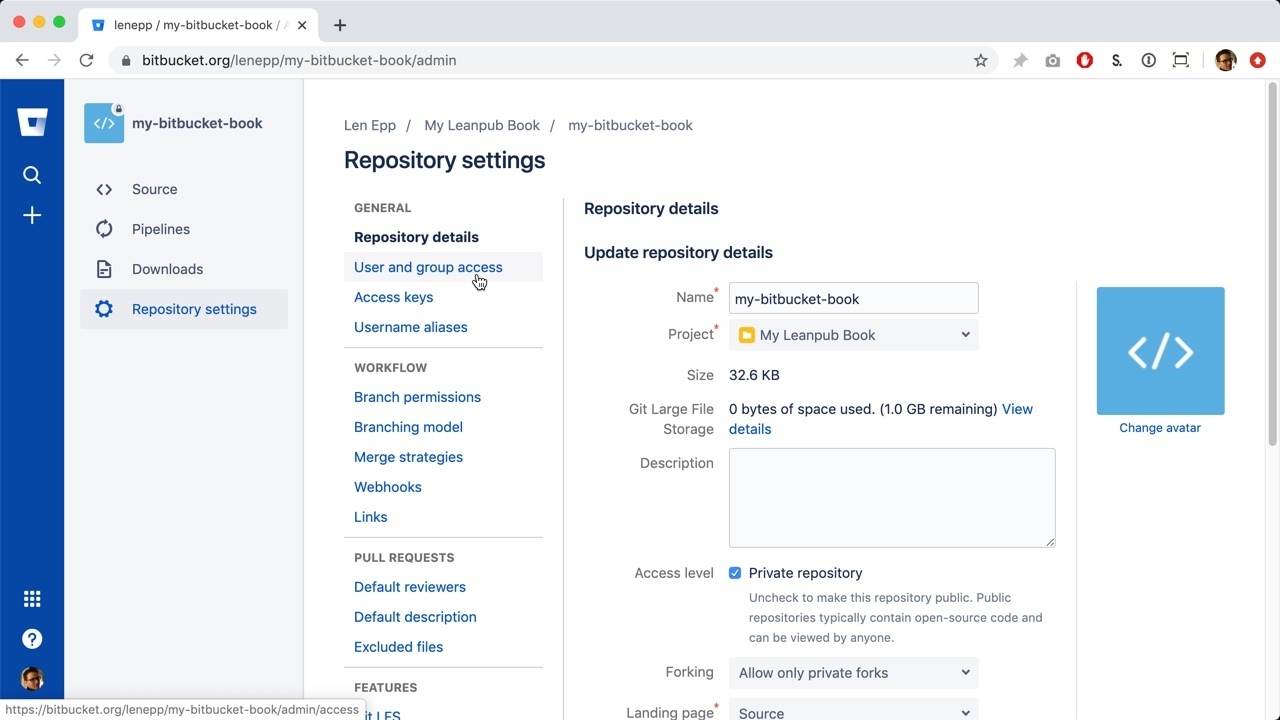
Click on “Repository Settings” in the menu to the left:
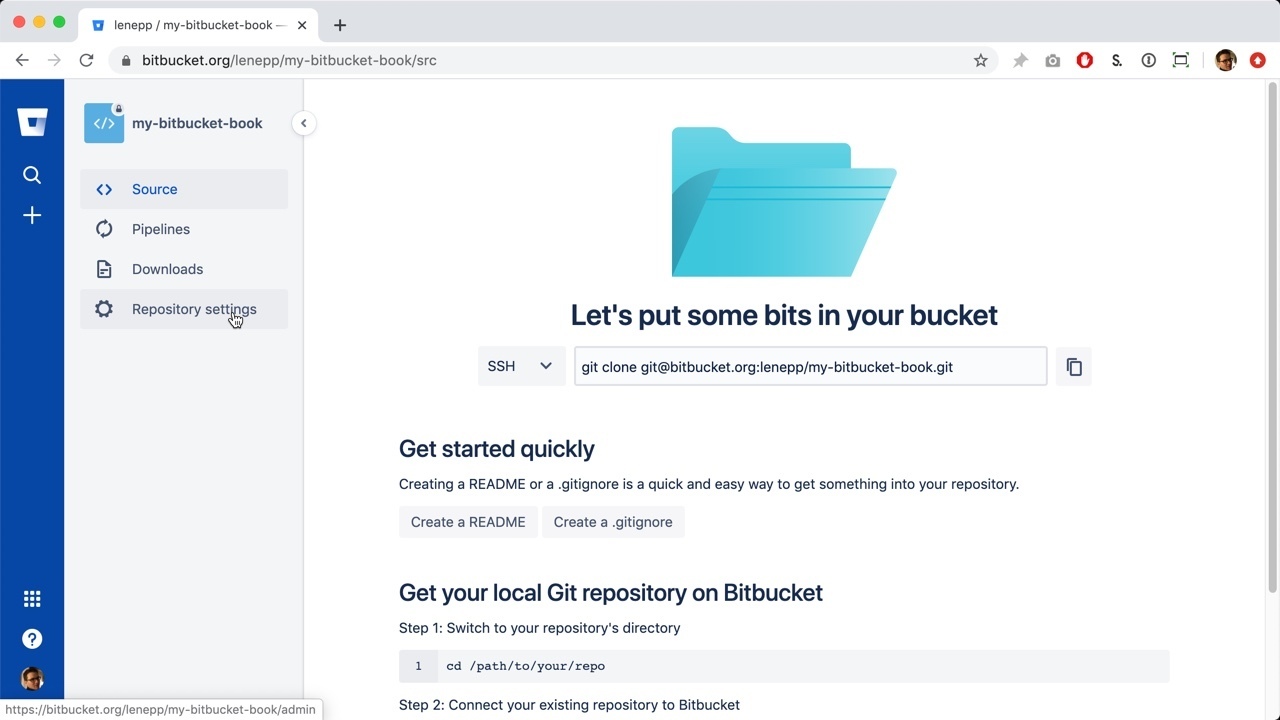
This will take you to the “Repository settings” page:
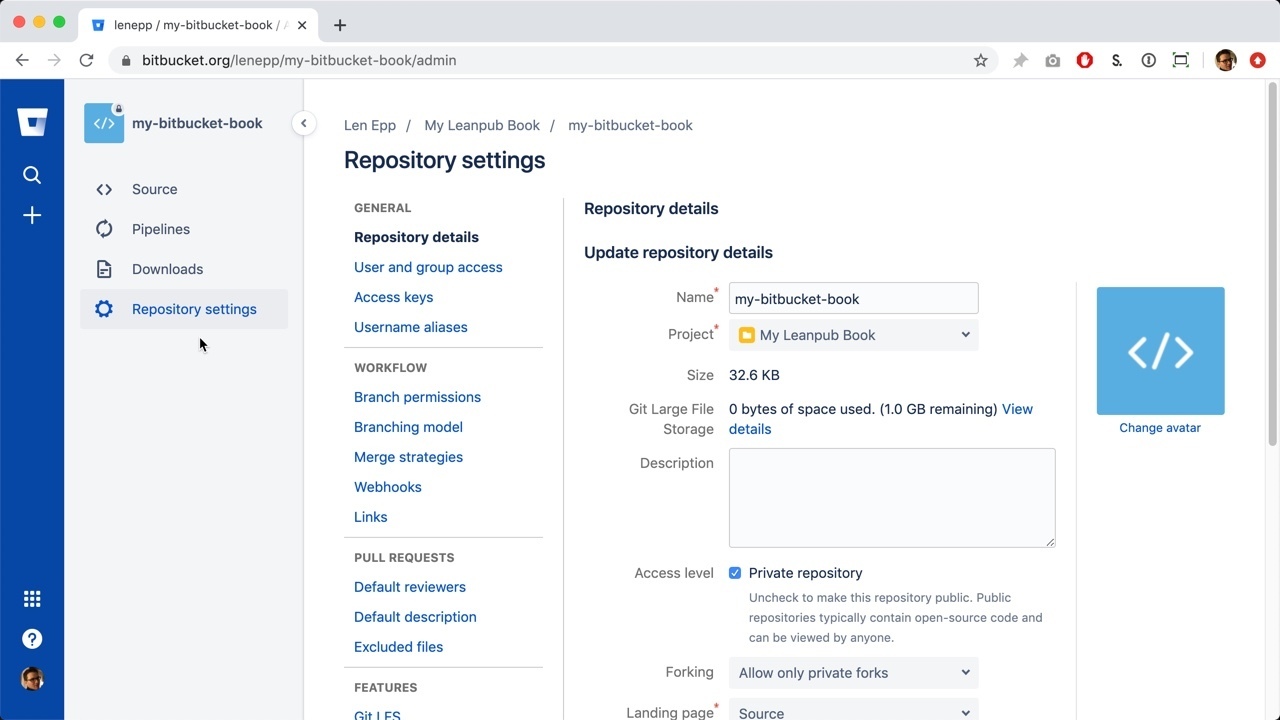
Click on “User and group access” in the menu, under “Repository details”:
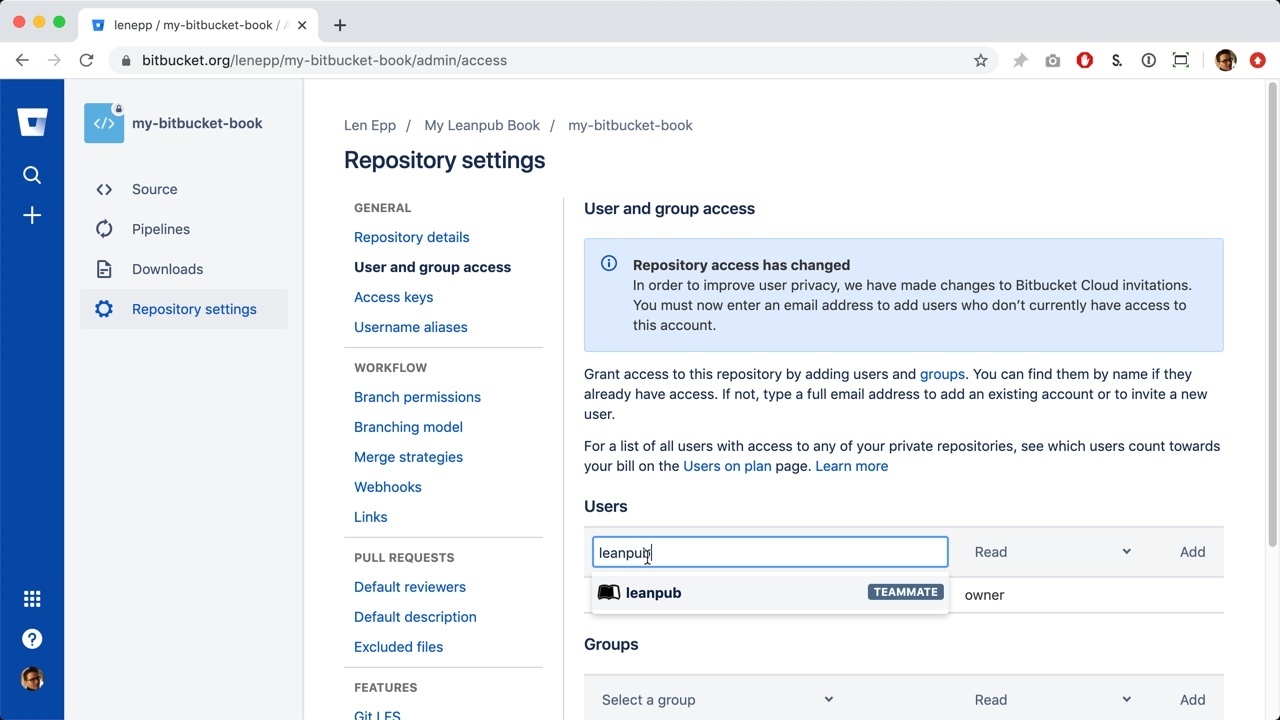
This will take you to the “User and group access” page:

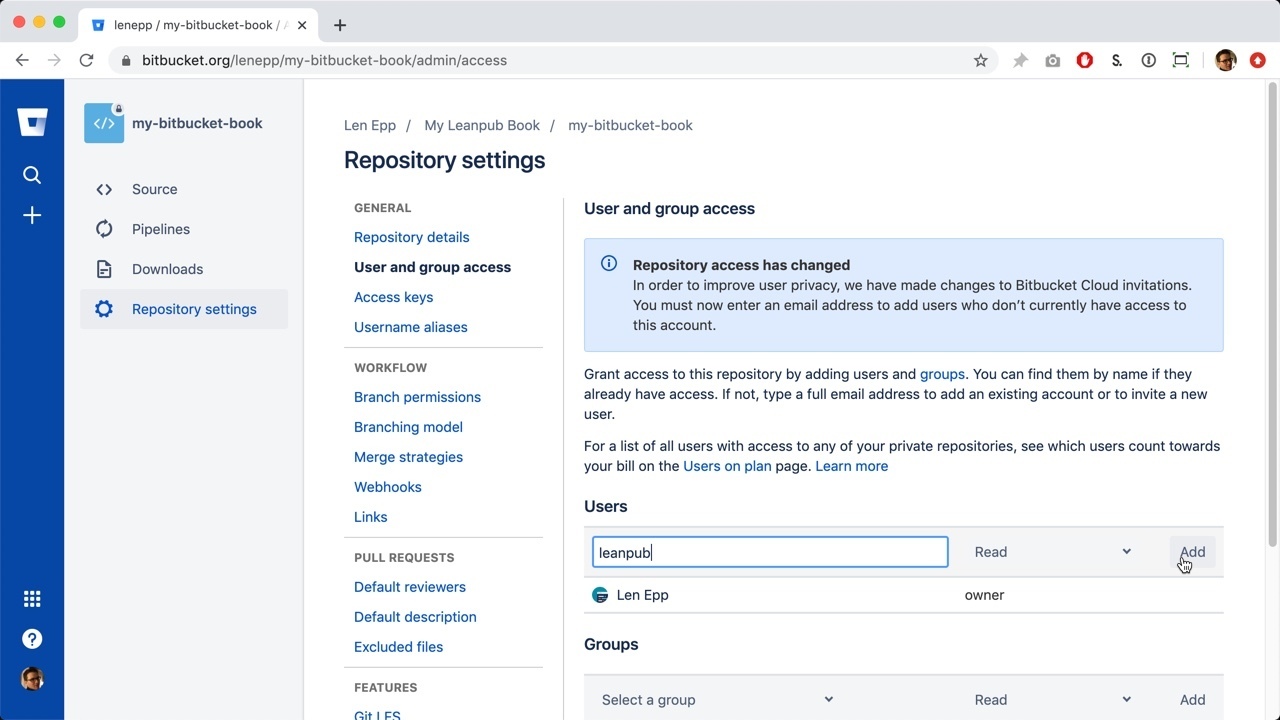
Type “leanpub” in the search box.
Click the “Add” button to the right:
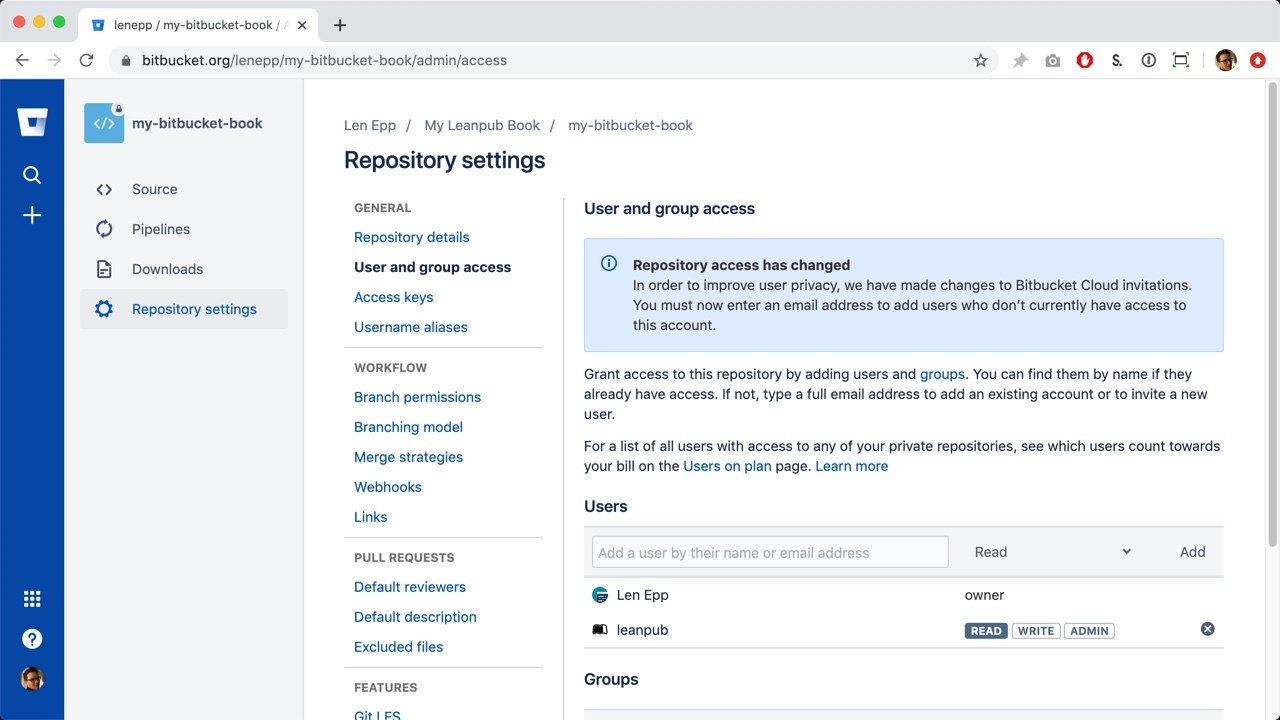
You will see that Leanpub has been added as a collaborator on the repository.
Adding Default Content to Your Bitbucket Repository
Next, you need to add some content to your Bitbucket repository. (Leanpub NEVER commits to your Bitbucket repository, since we do not want to cause merge conflicts.)
Go back to the Getting Started page for your book.
Scroll down to Step 2 and click the this zip file link, or click the link in this sentence in the tutorial. This will download the default content to your computer.
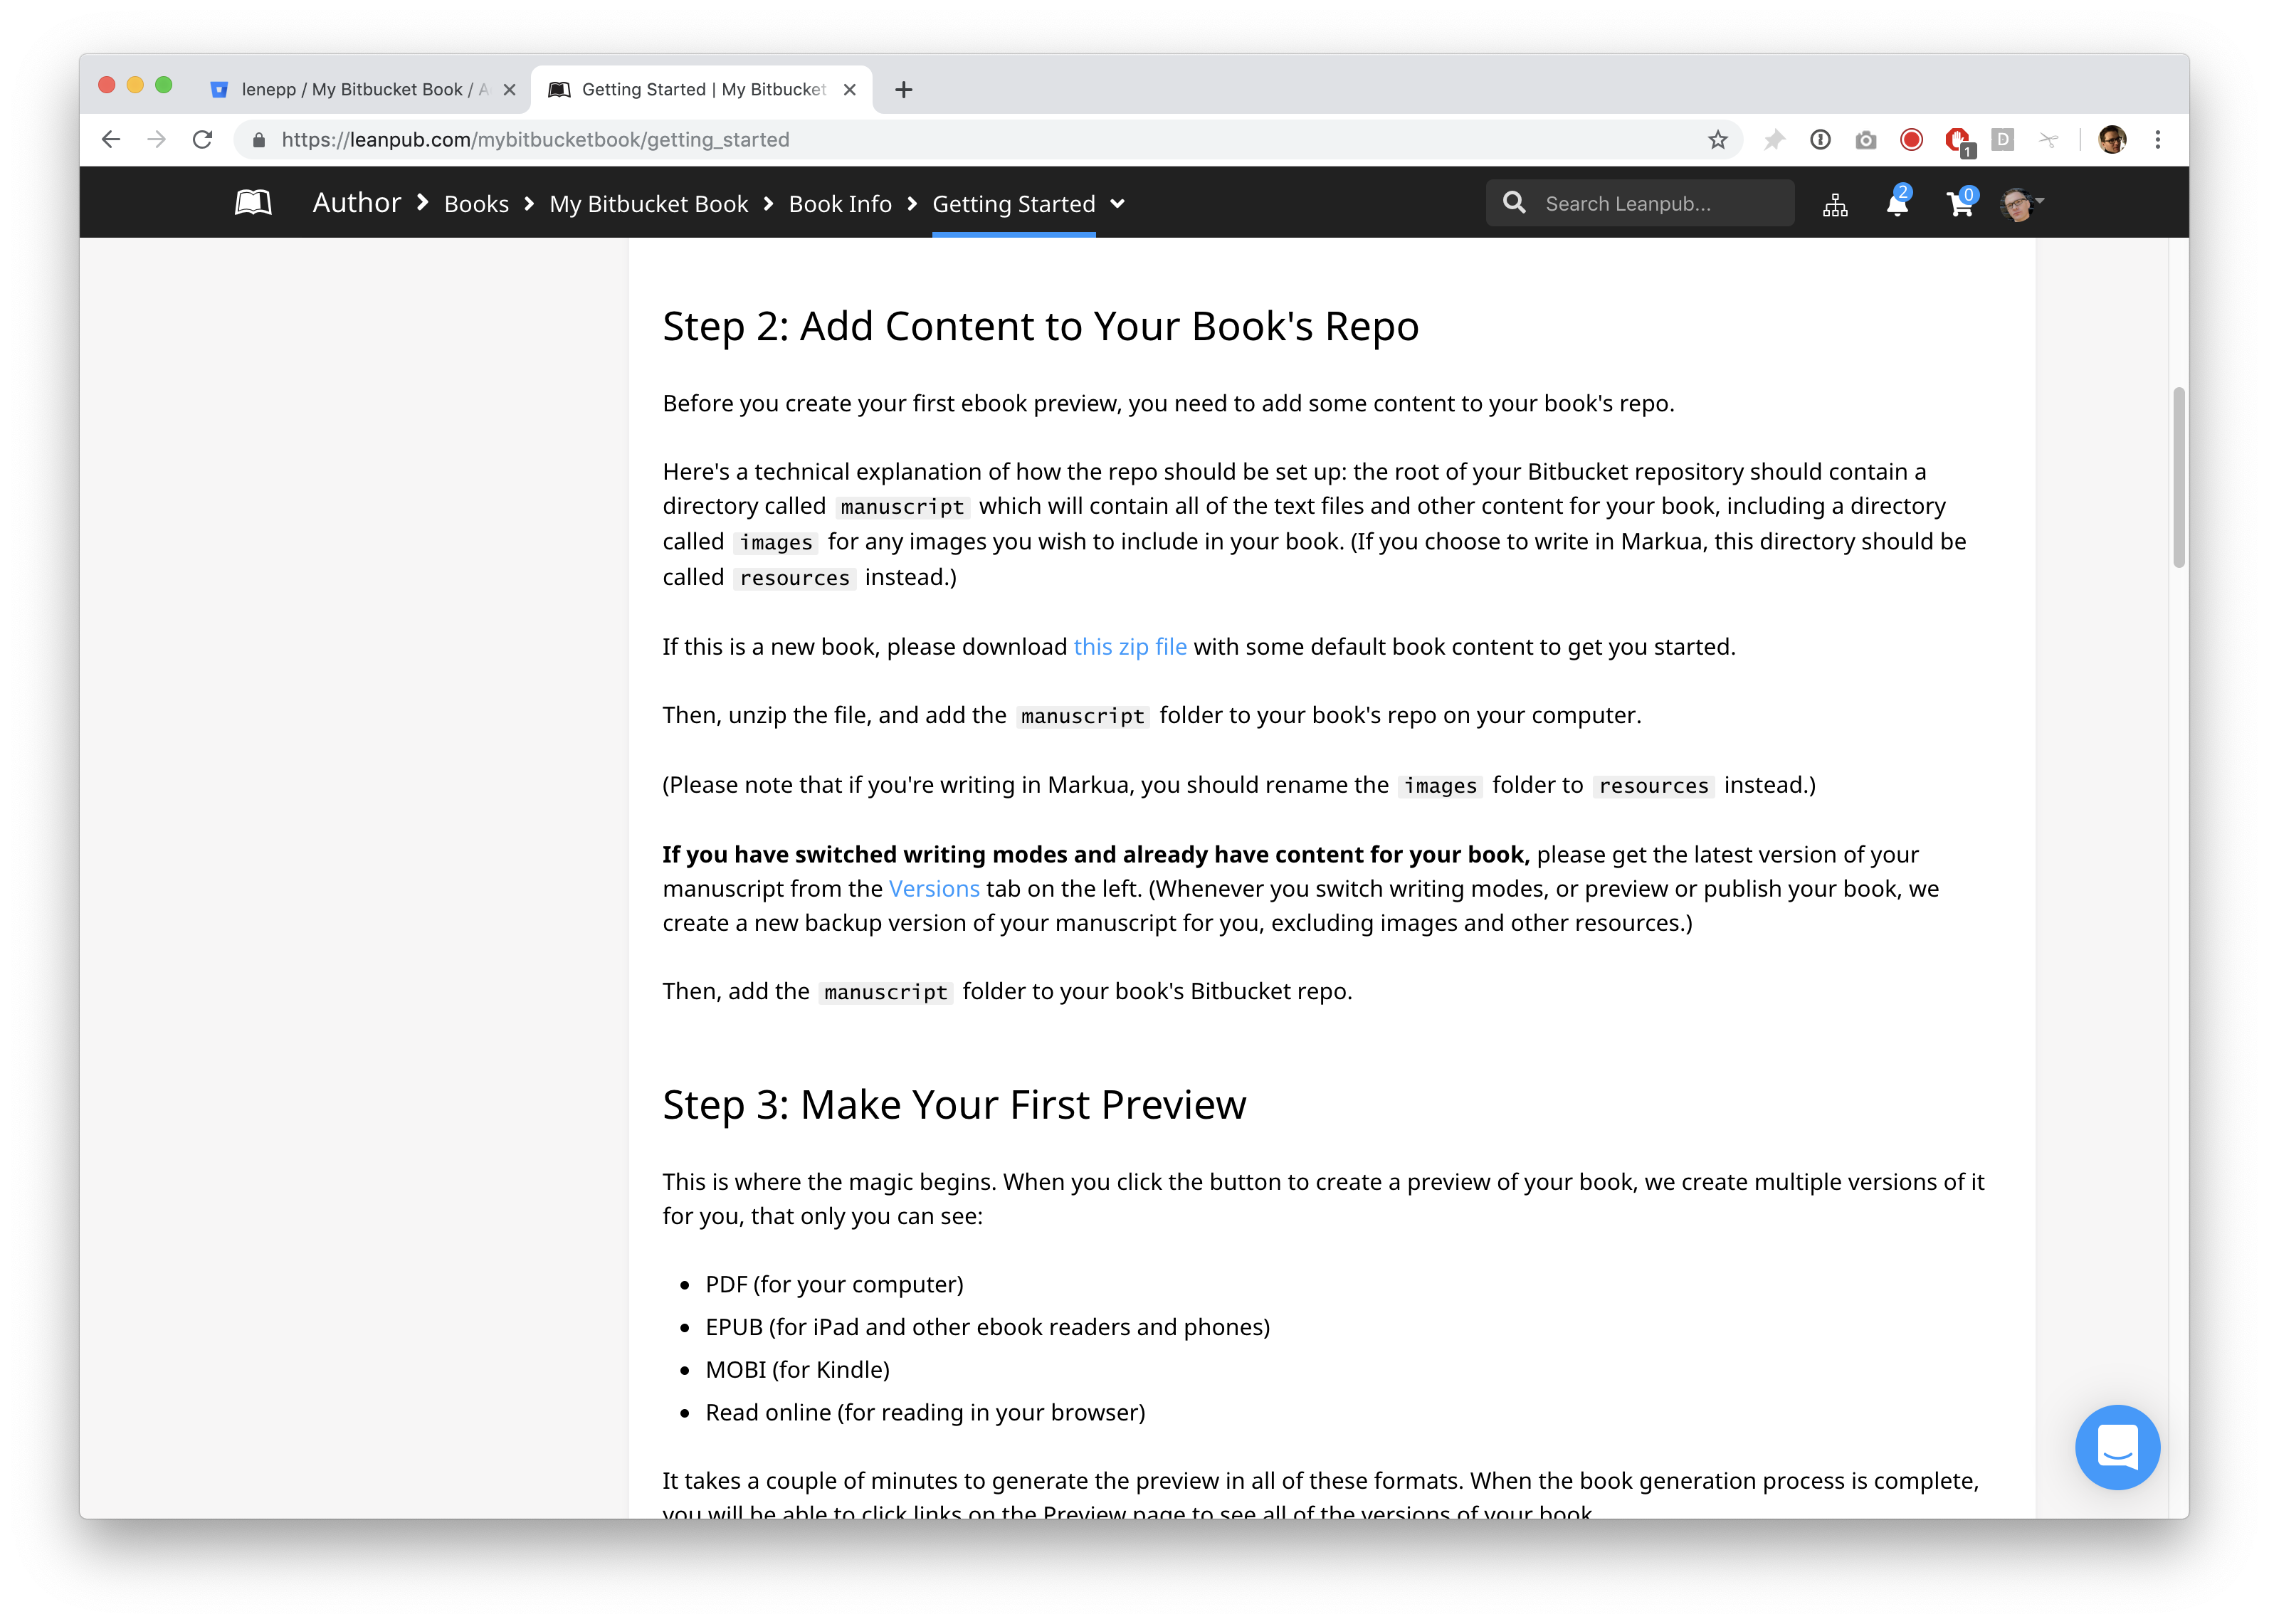
You will now find the file wherever you store downloads on your computer.
Double-click the folder to unzip it.
Copy the “manuscript” folder. Then, go to the cloned Bitbucket repository on your computer, and paste the “manuscript” folder into the repository.
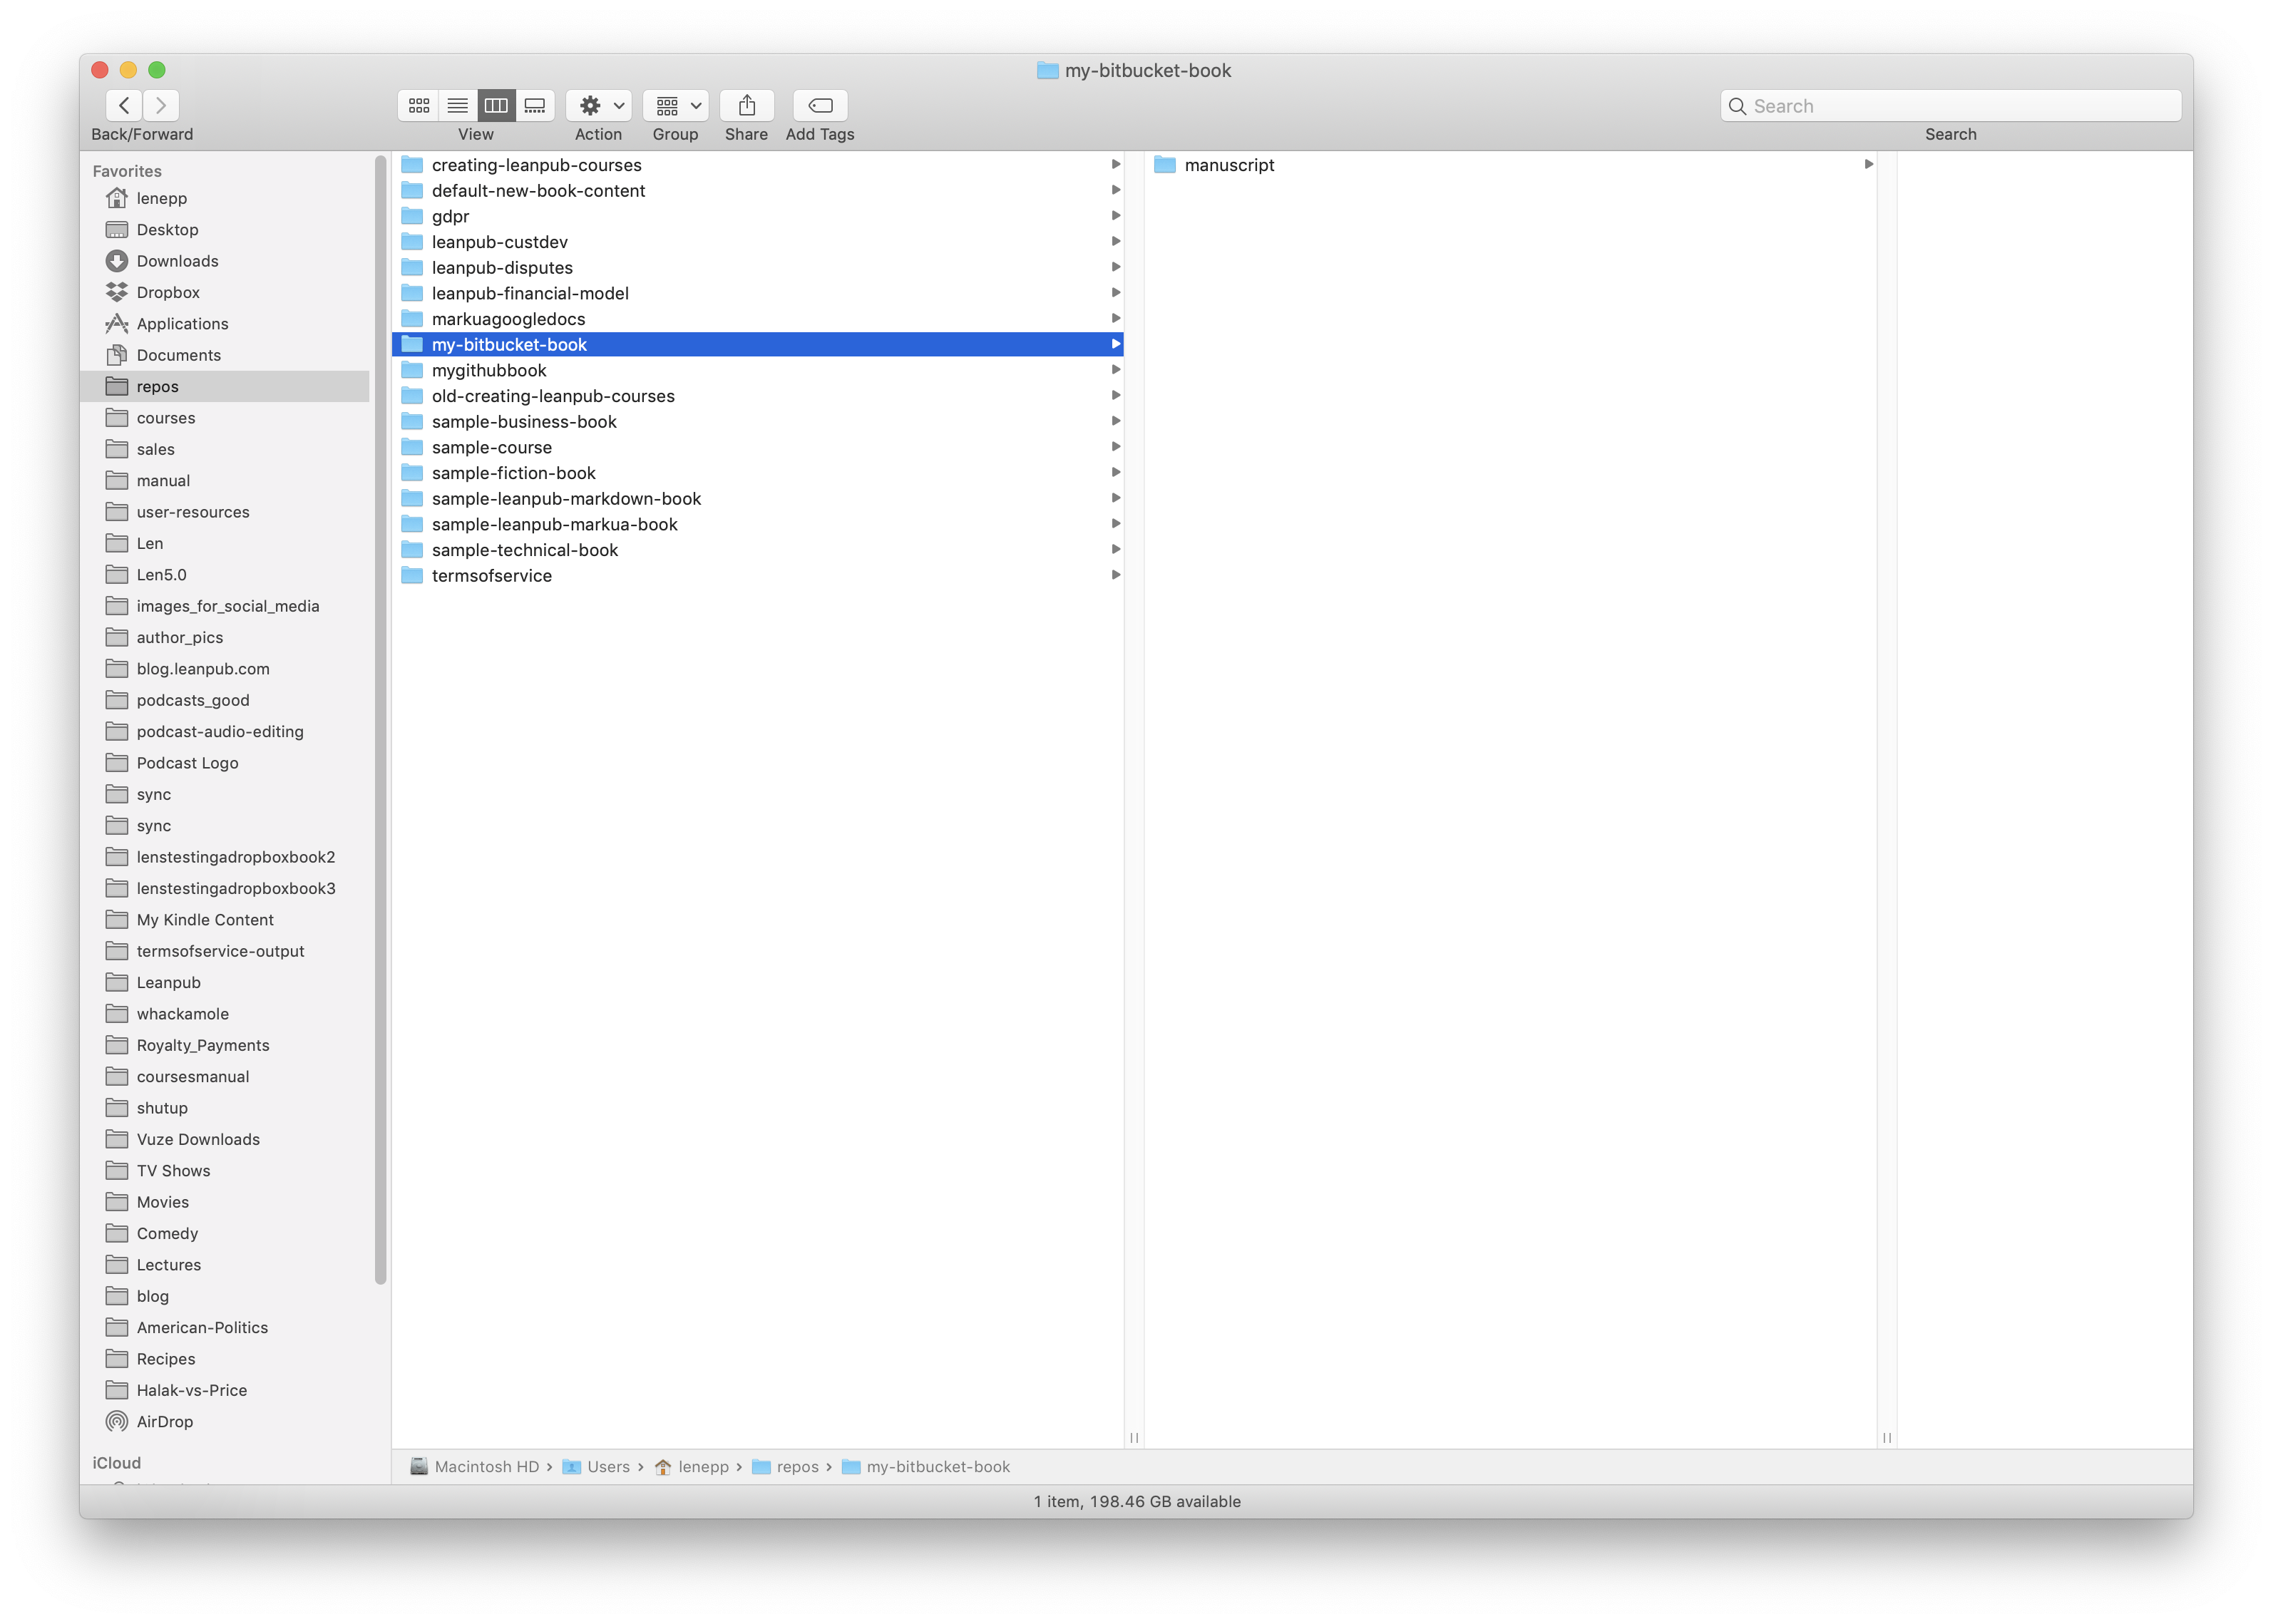
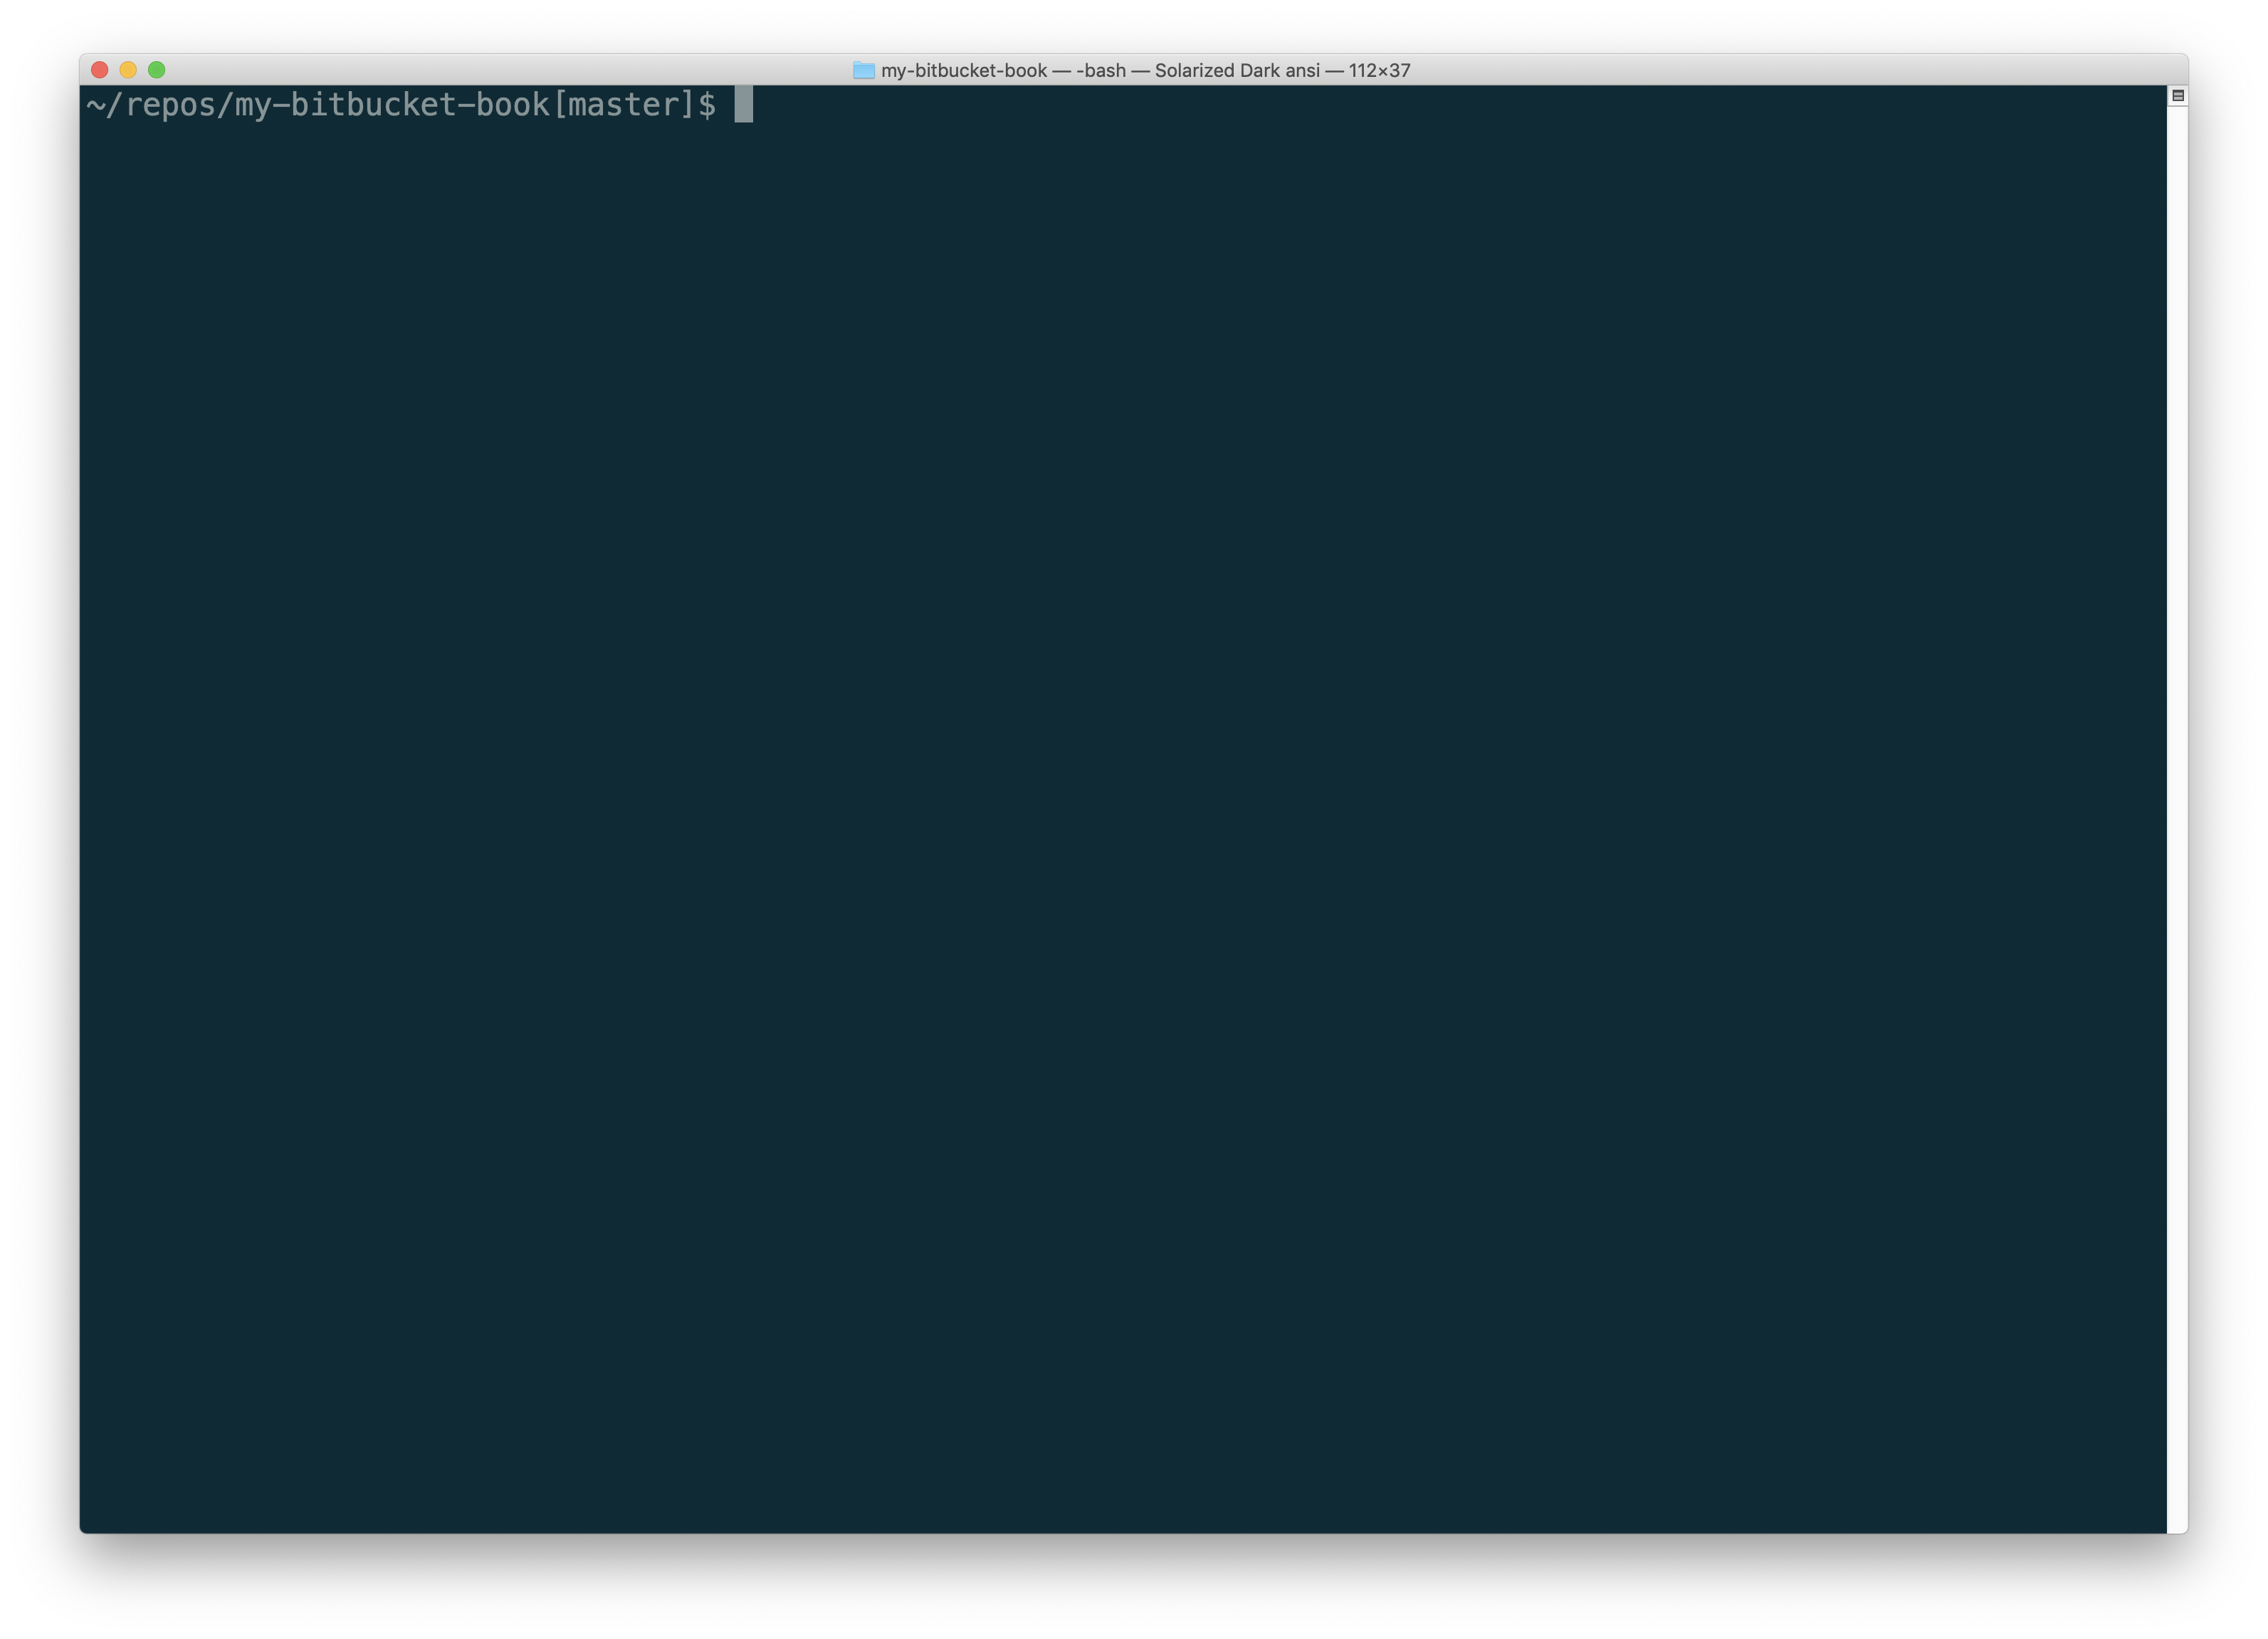
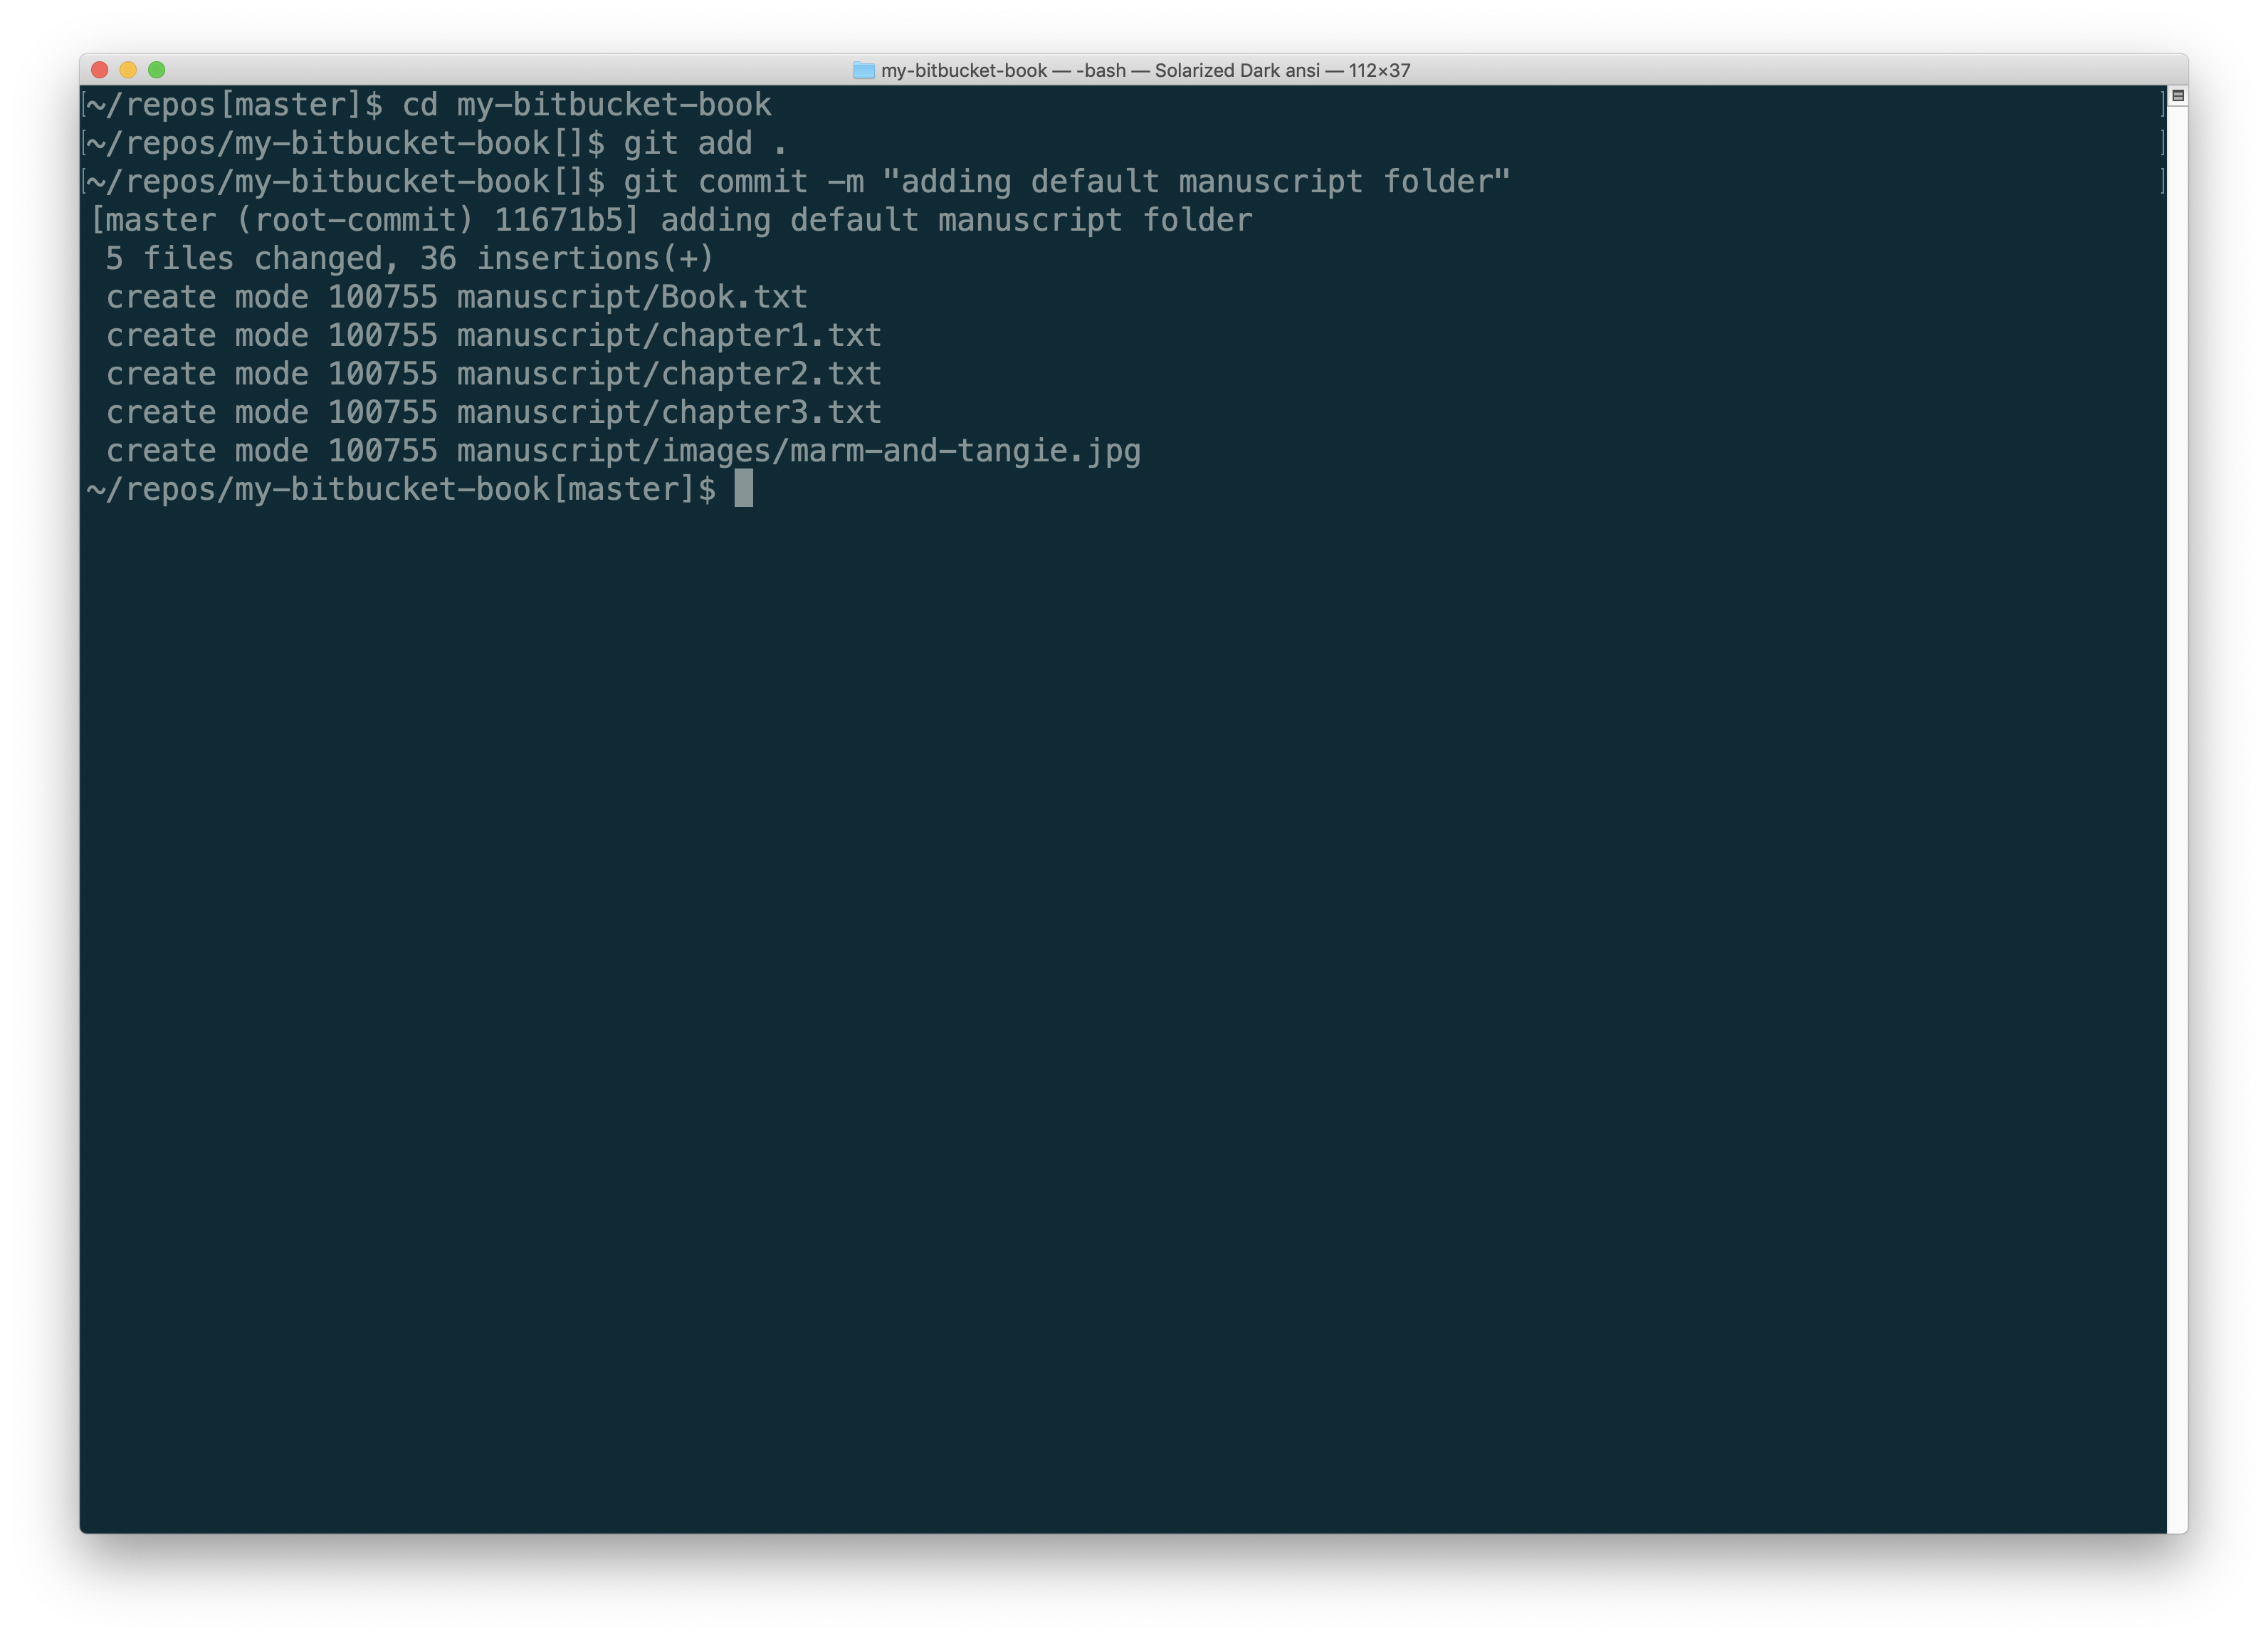
Go back to the command line on your computer and change to the Bitbucket repository for your book.
Type git add . to the content using Git.
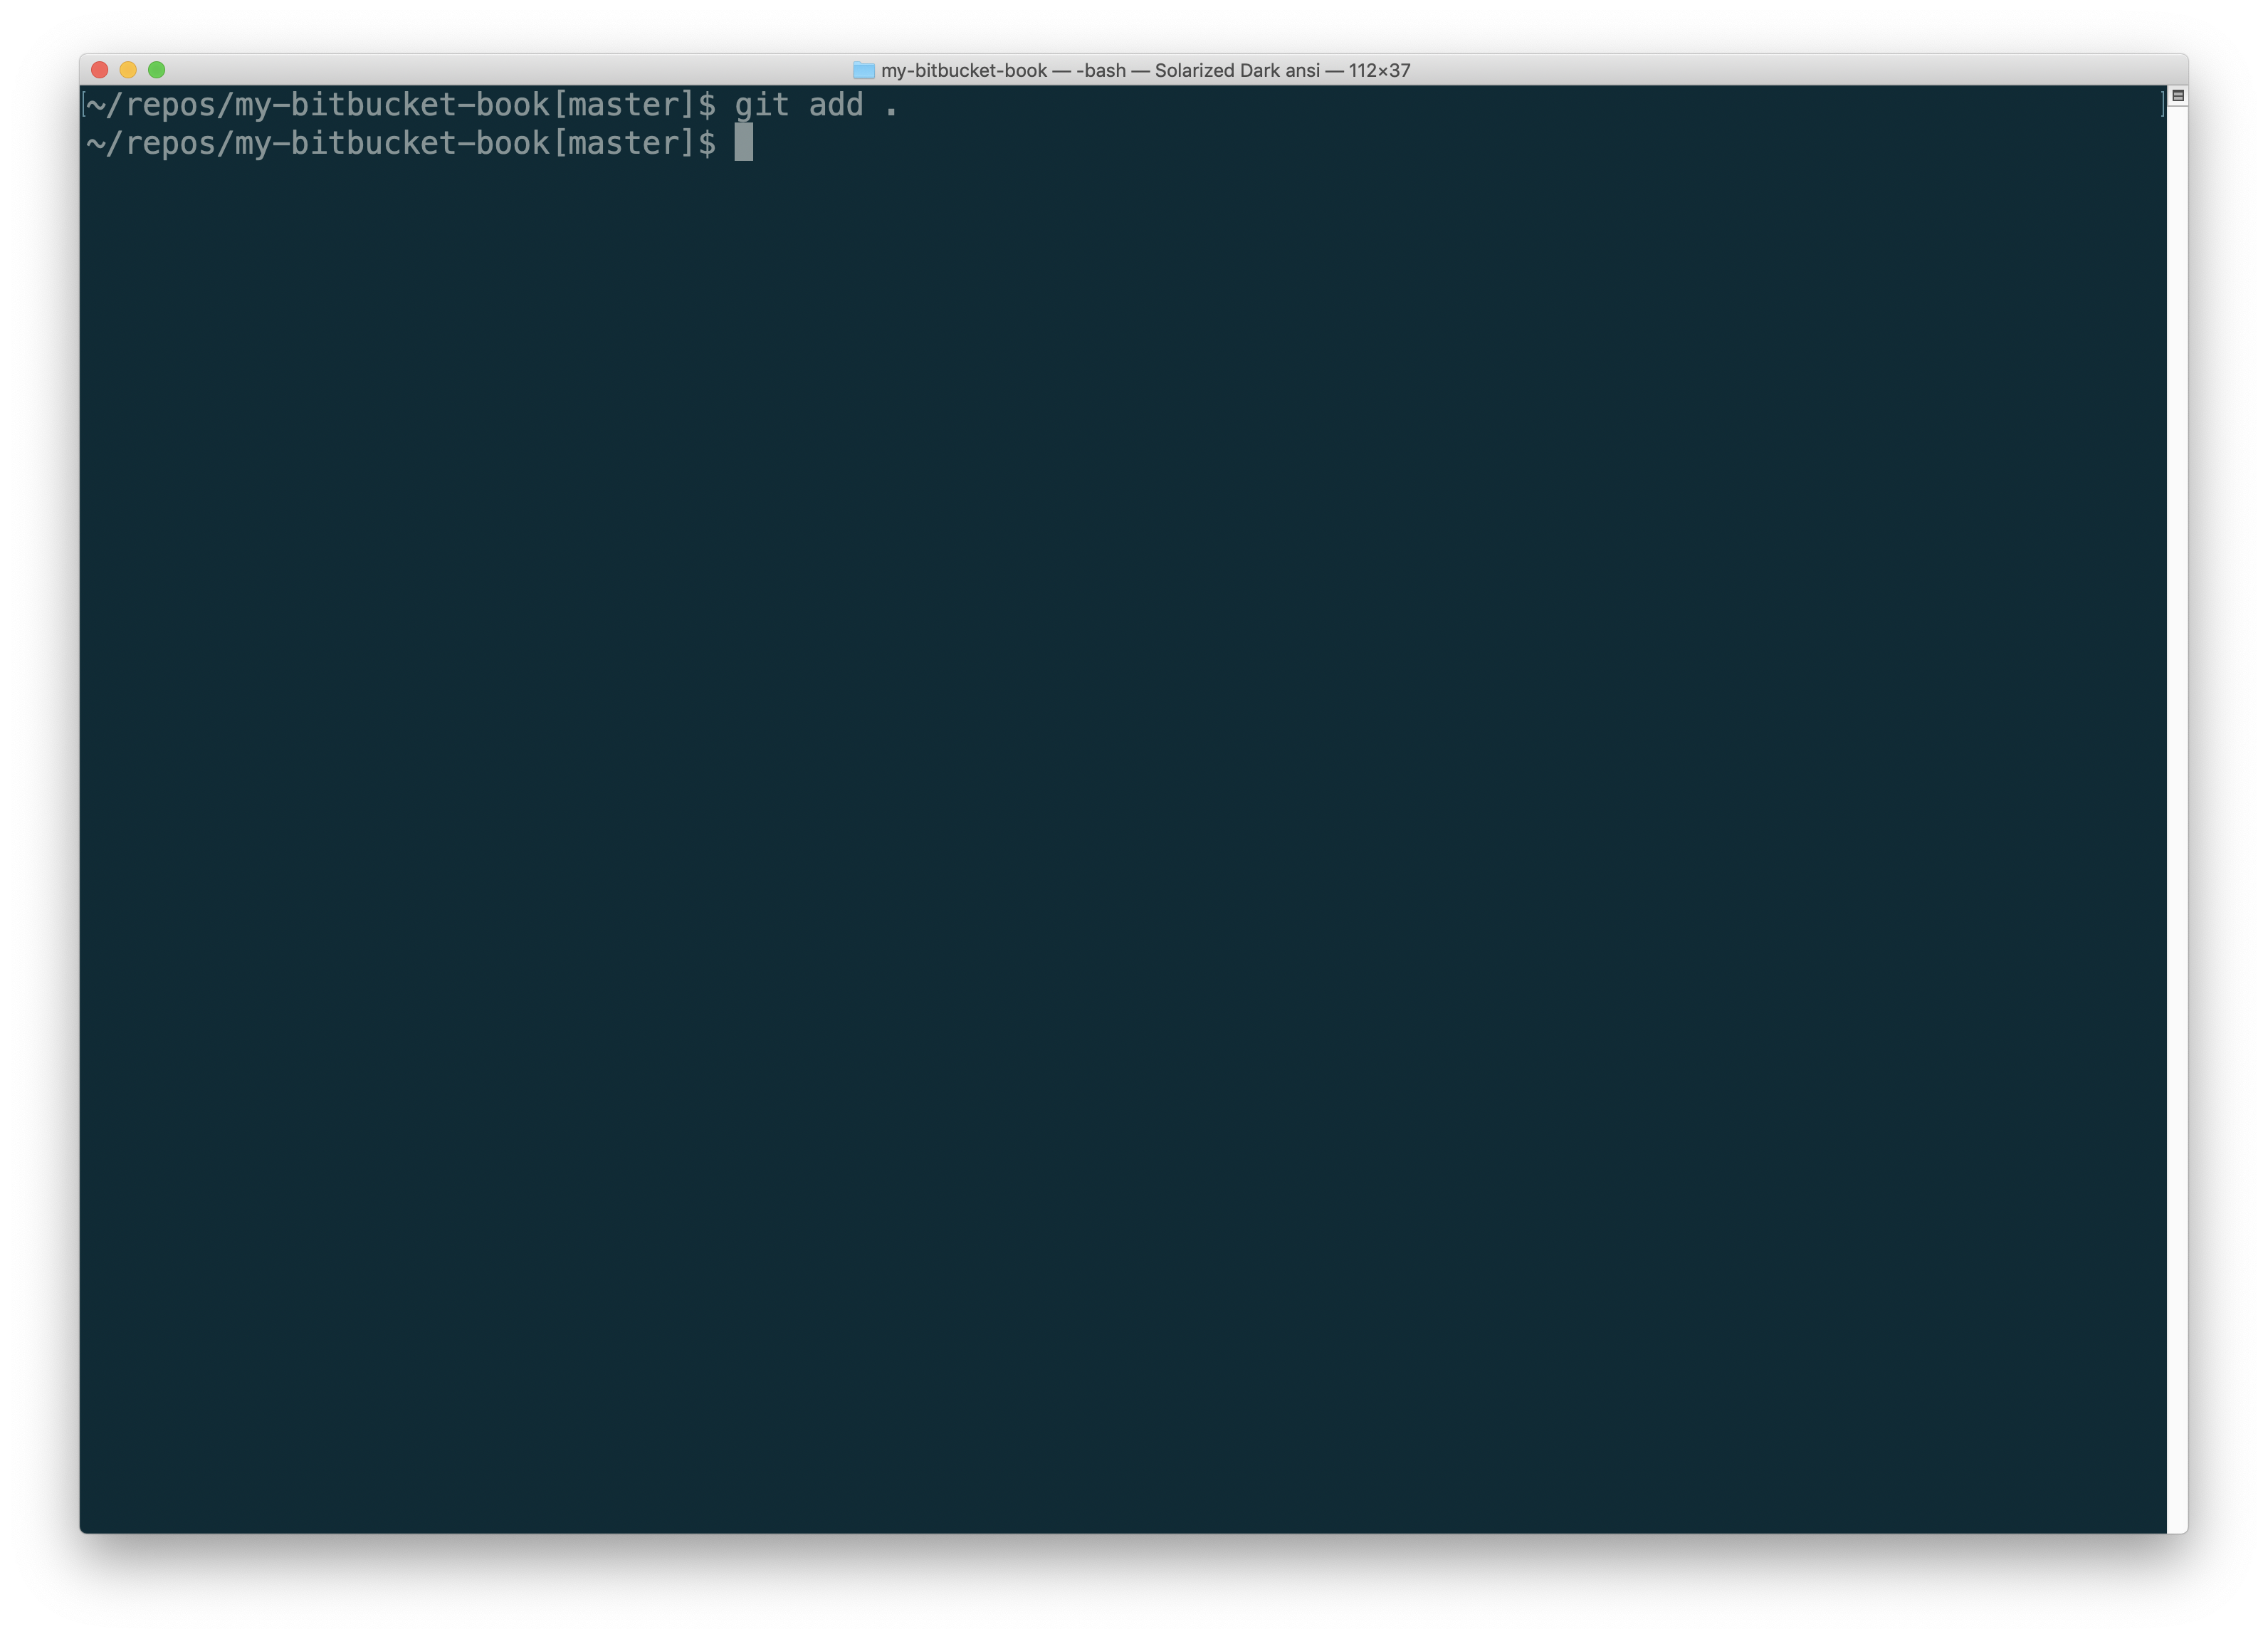
Type git commit -m "adding default manuscript folder". You will see messages indicating that the content has been committed.
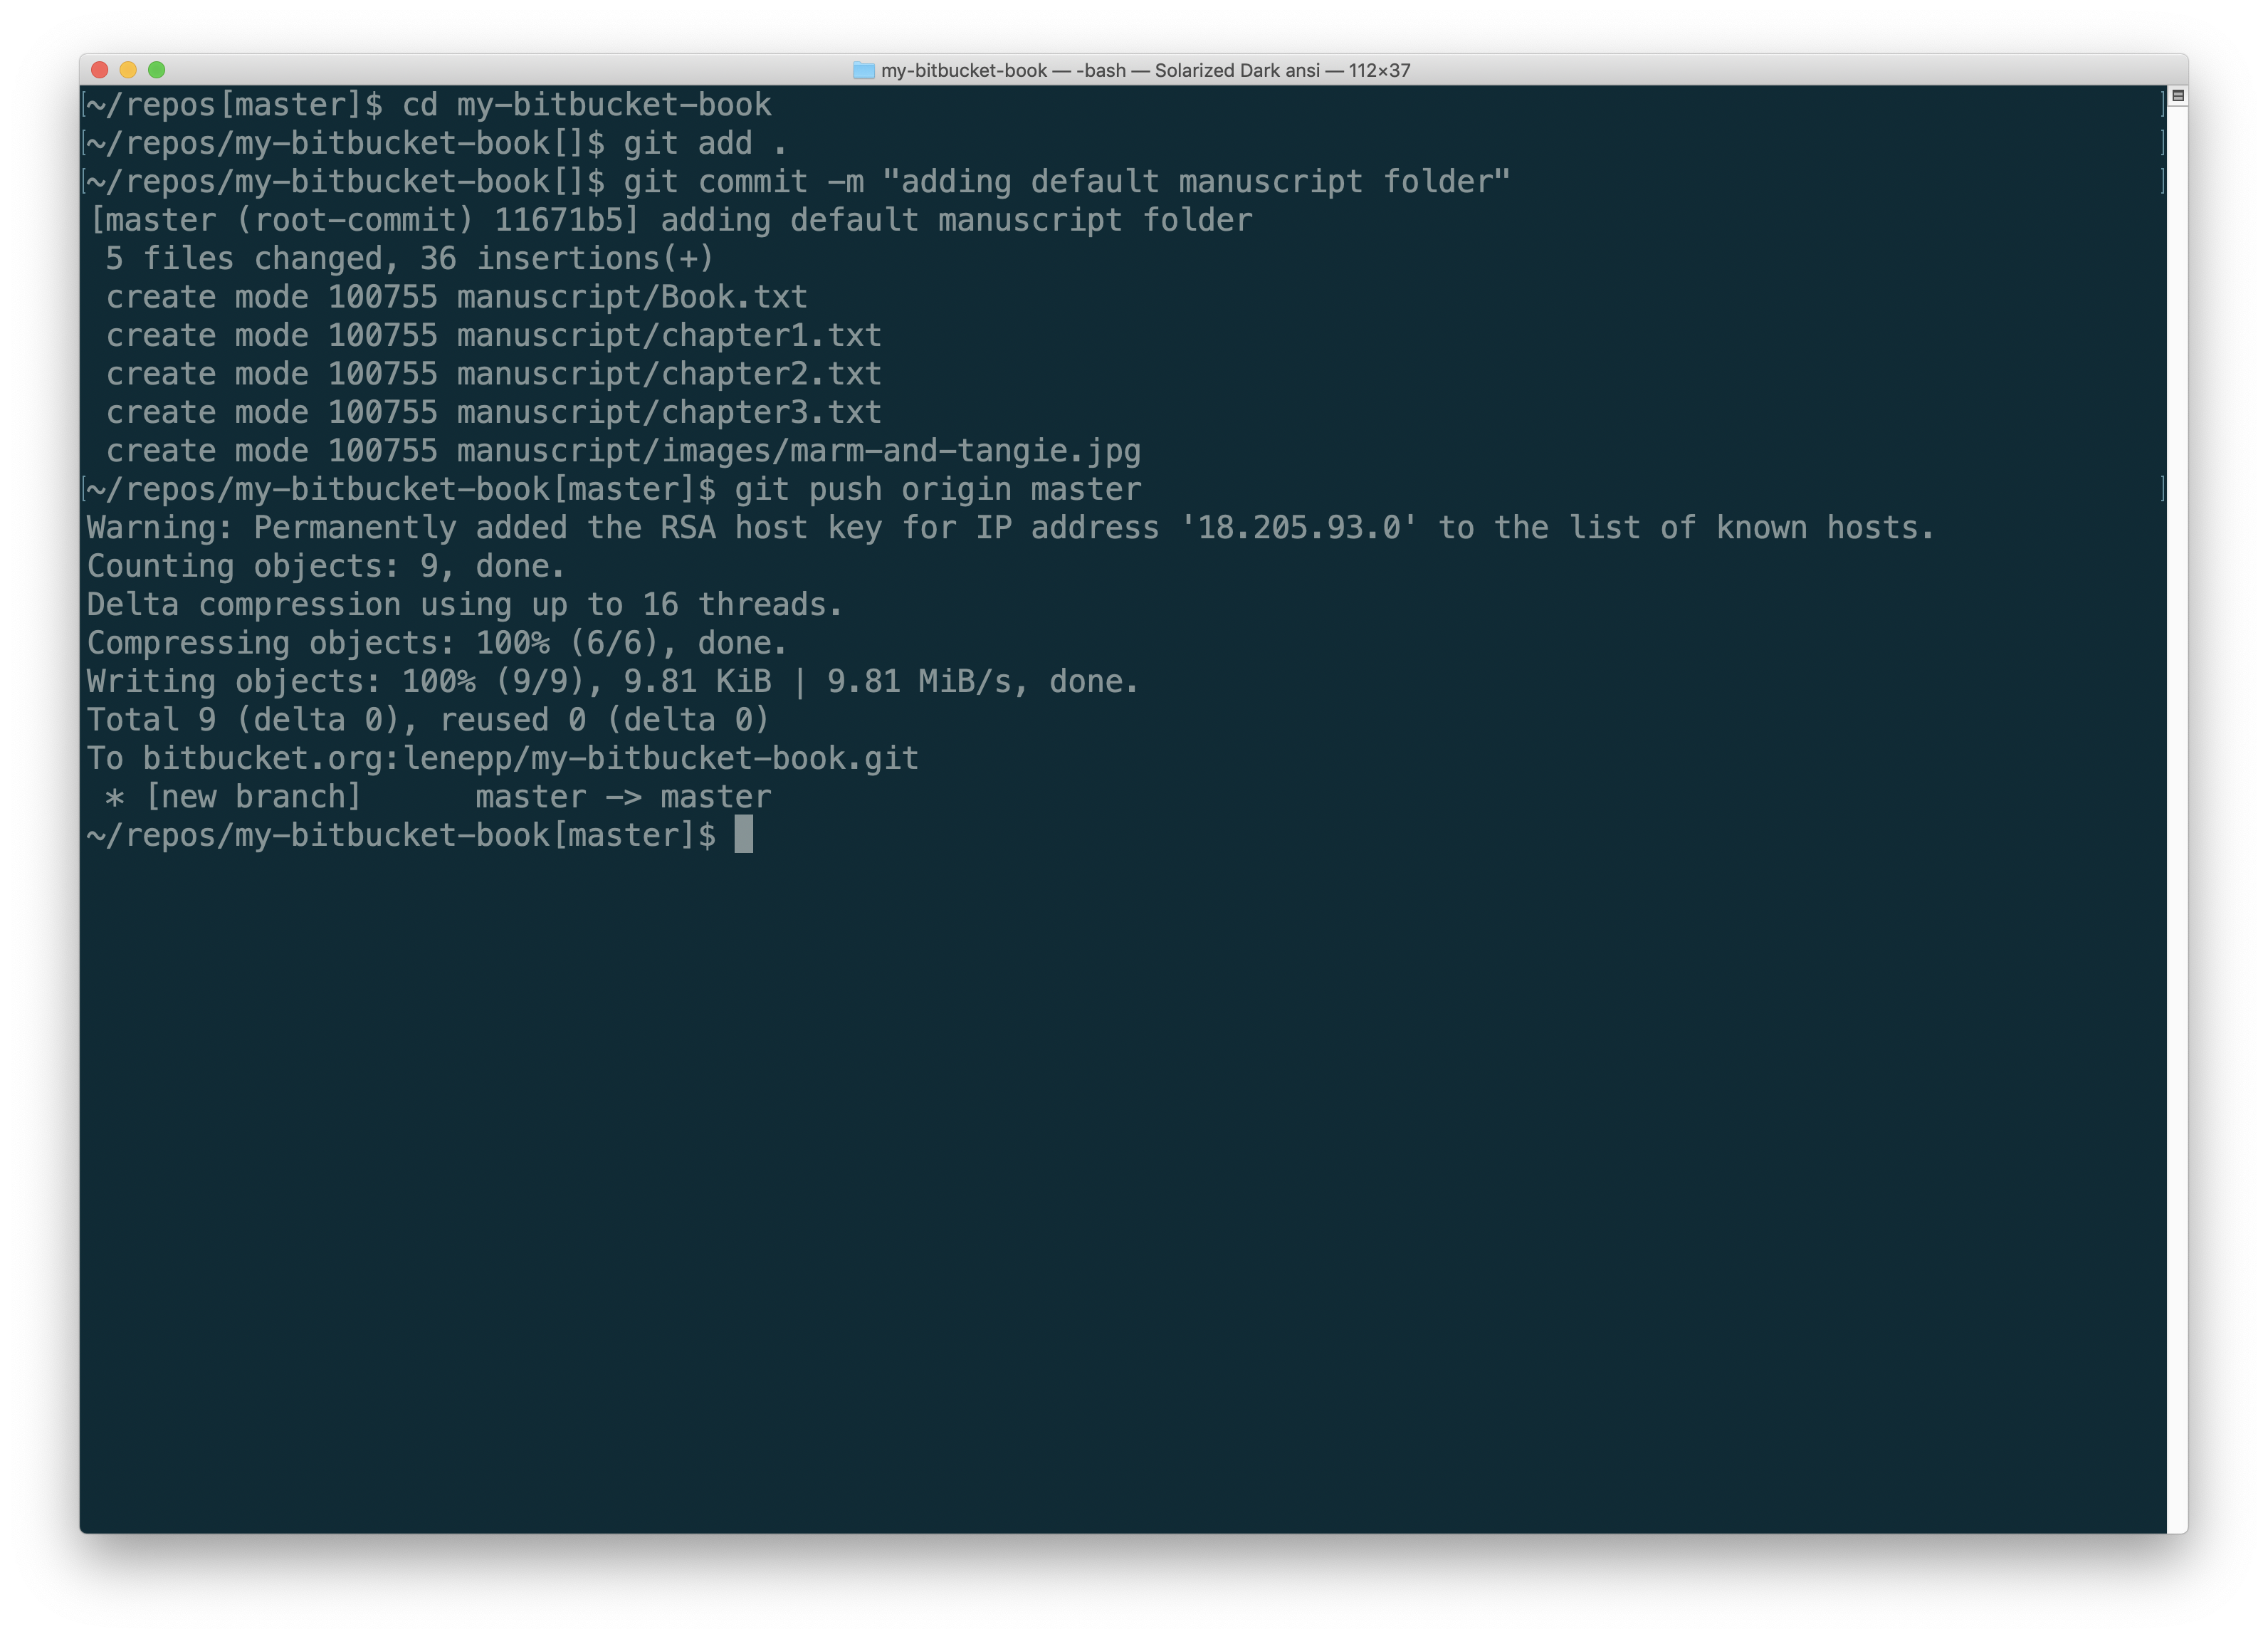
Type git push origin master to push the commit to the repository on Bitbucket.
Creating a Preview
To create your first preview, using the default content we included in your new book, go back the Getting Started page for your book:
Click on “Getting Started” at the top, and you will see your the Author menu. It will look something like this:
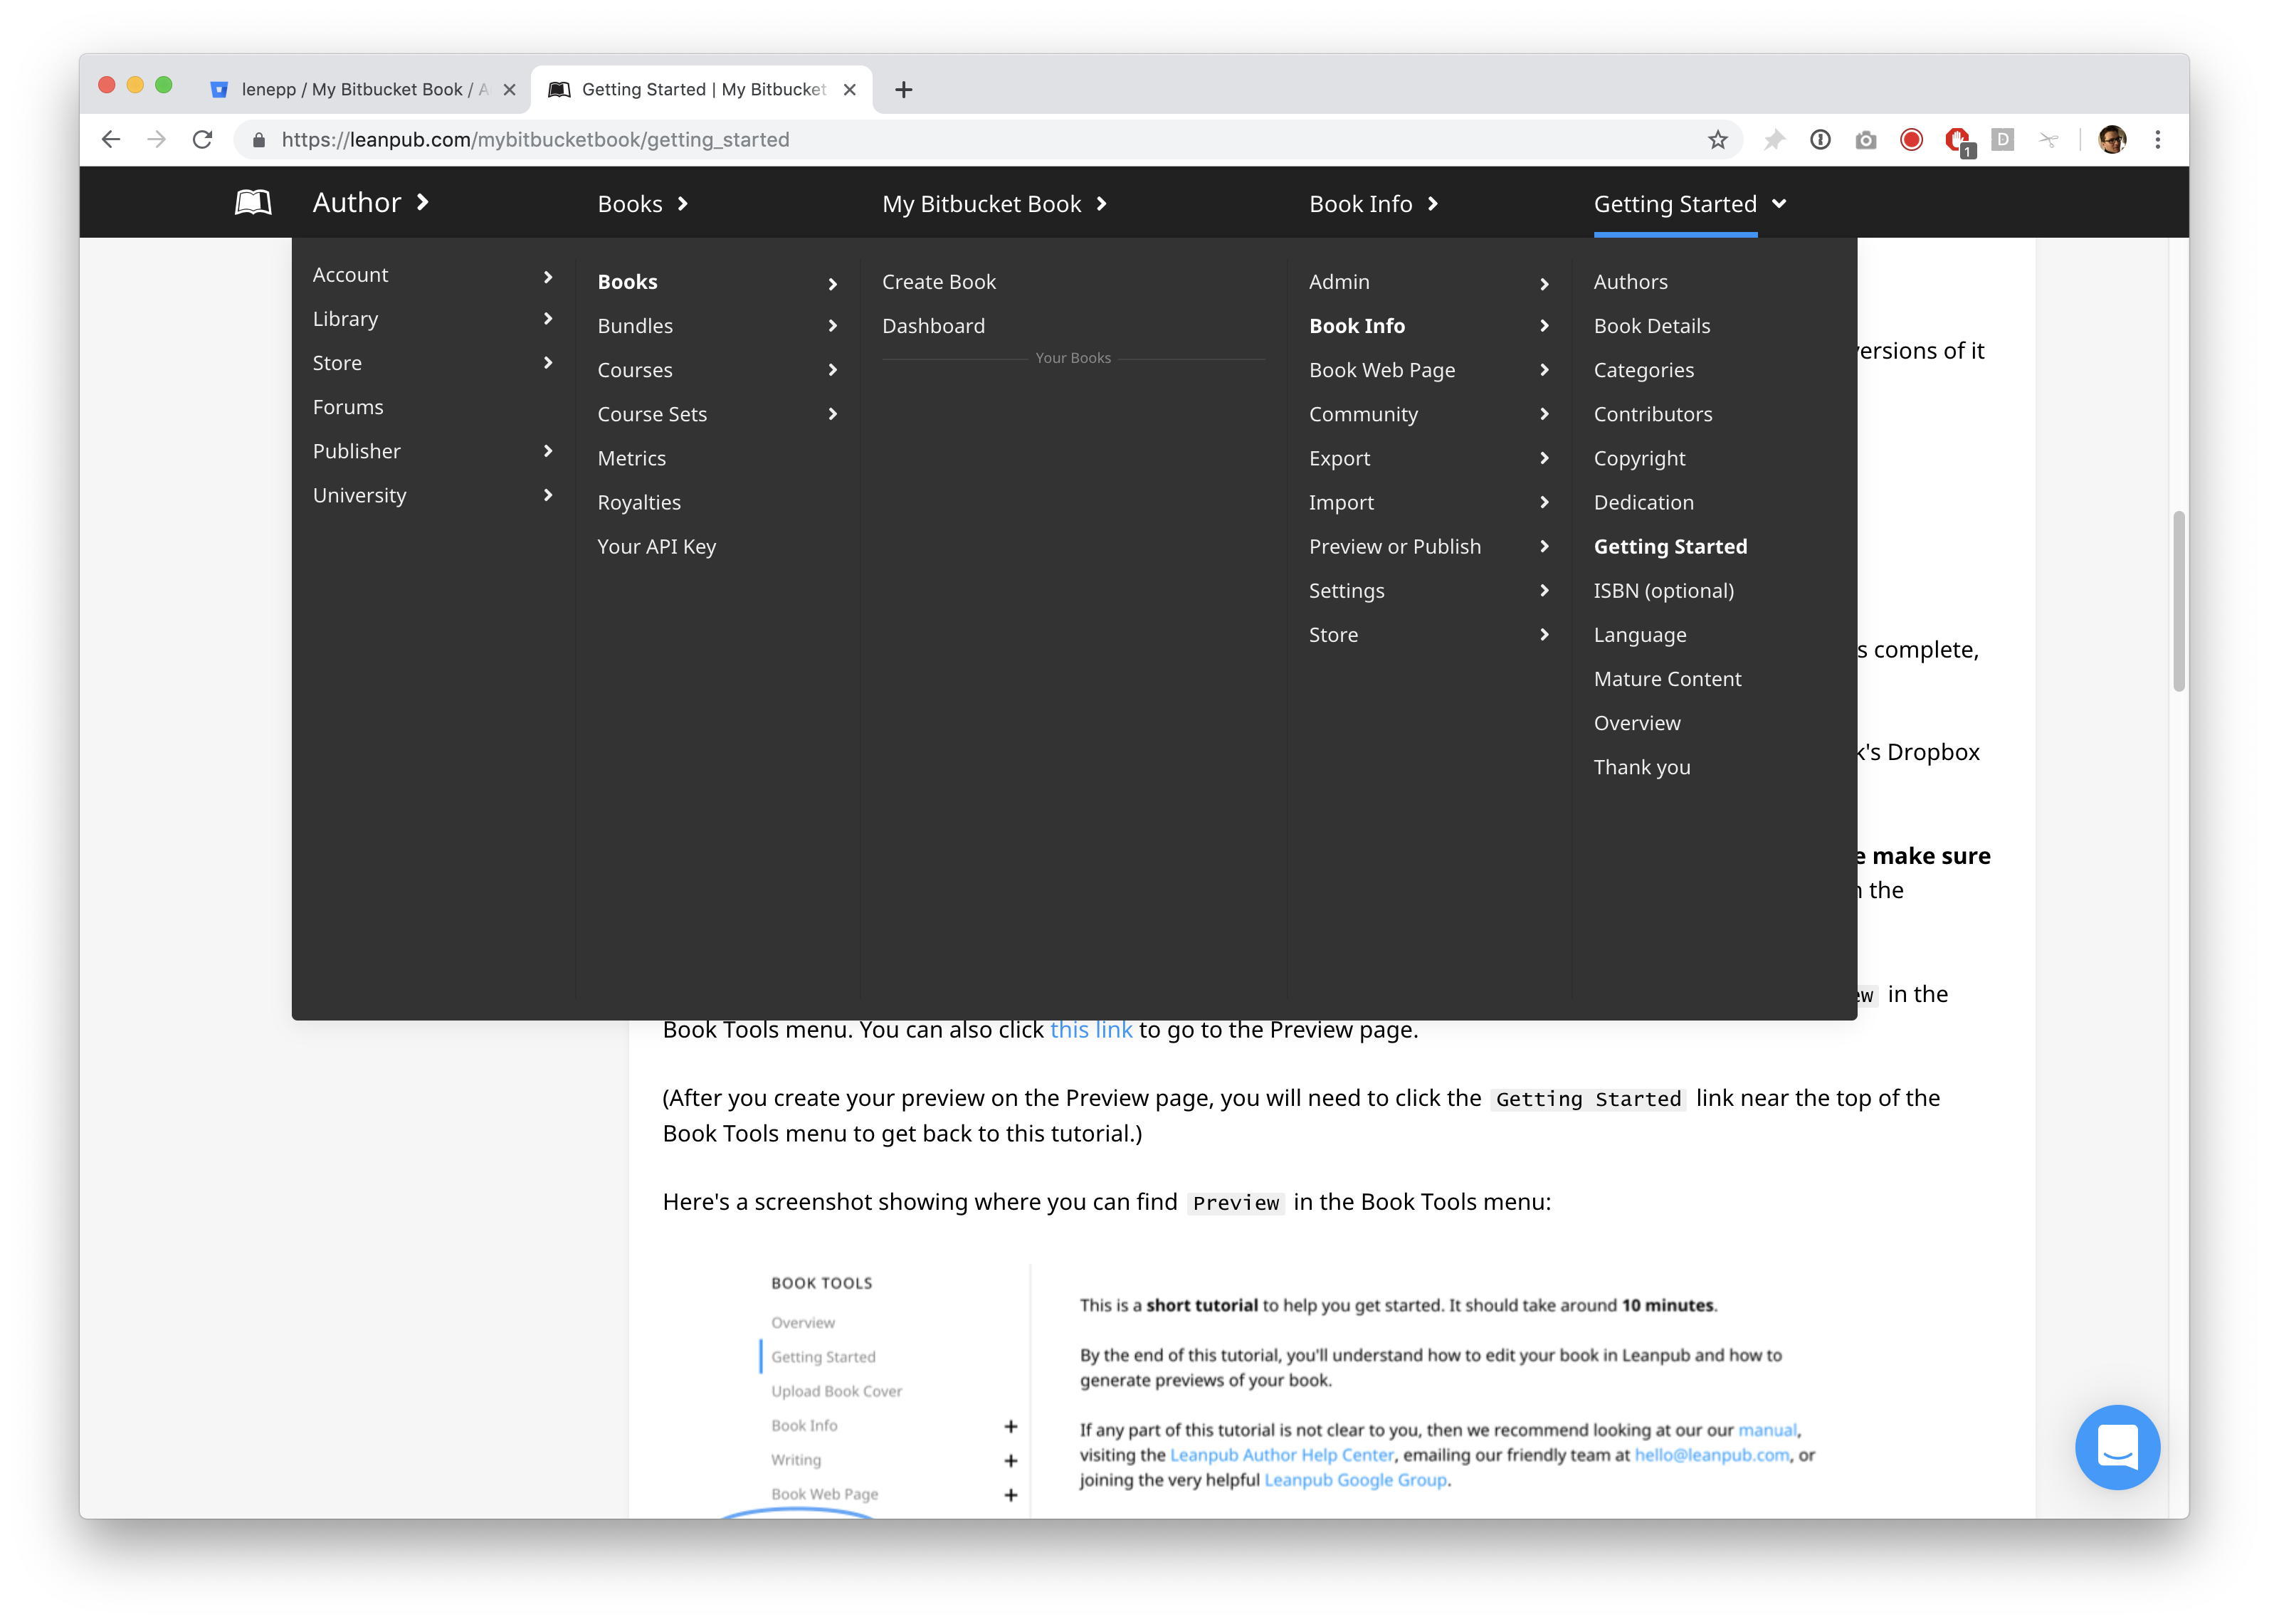
Click on “Preview or Publish” under the “Book Info” column, and you will see something like this:

Select “Preview’ in the column to the right, and you will go to the “Preview” page for your book:

Click the “Create Preview” button. You will go to a page like this, where you will see a progress bar at the top:
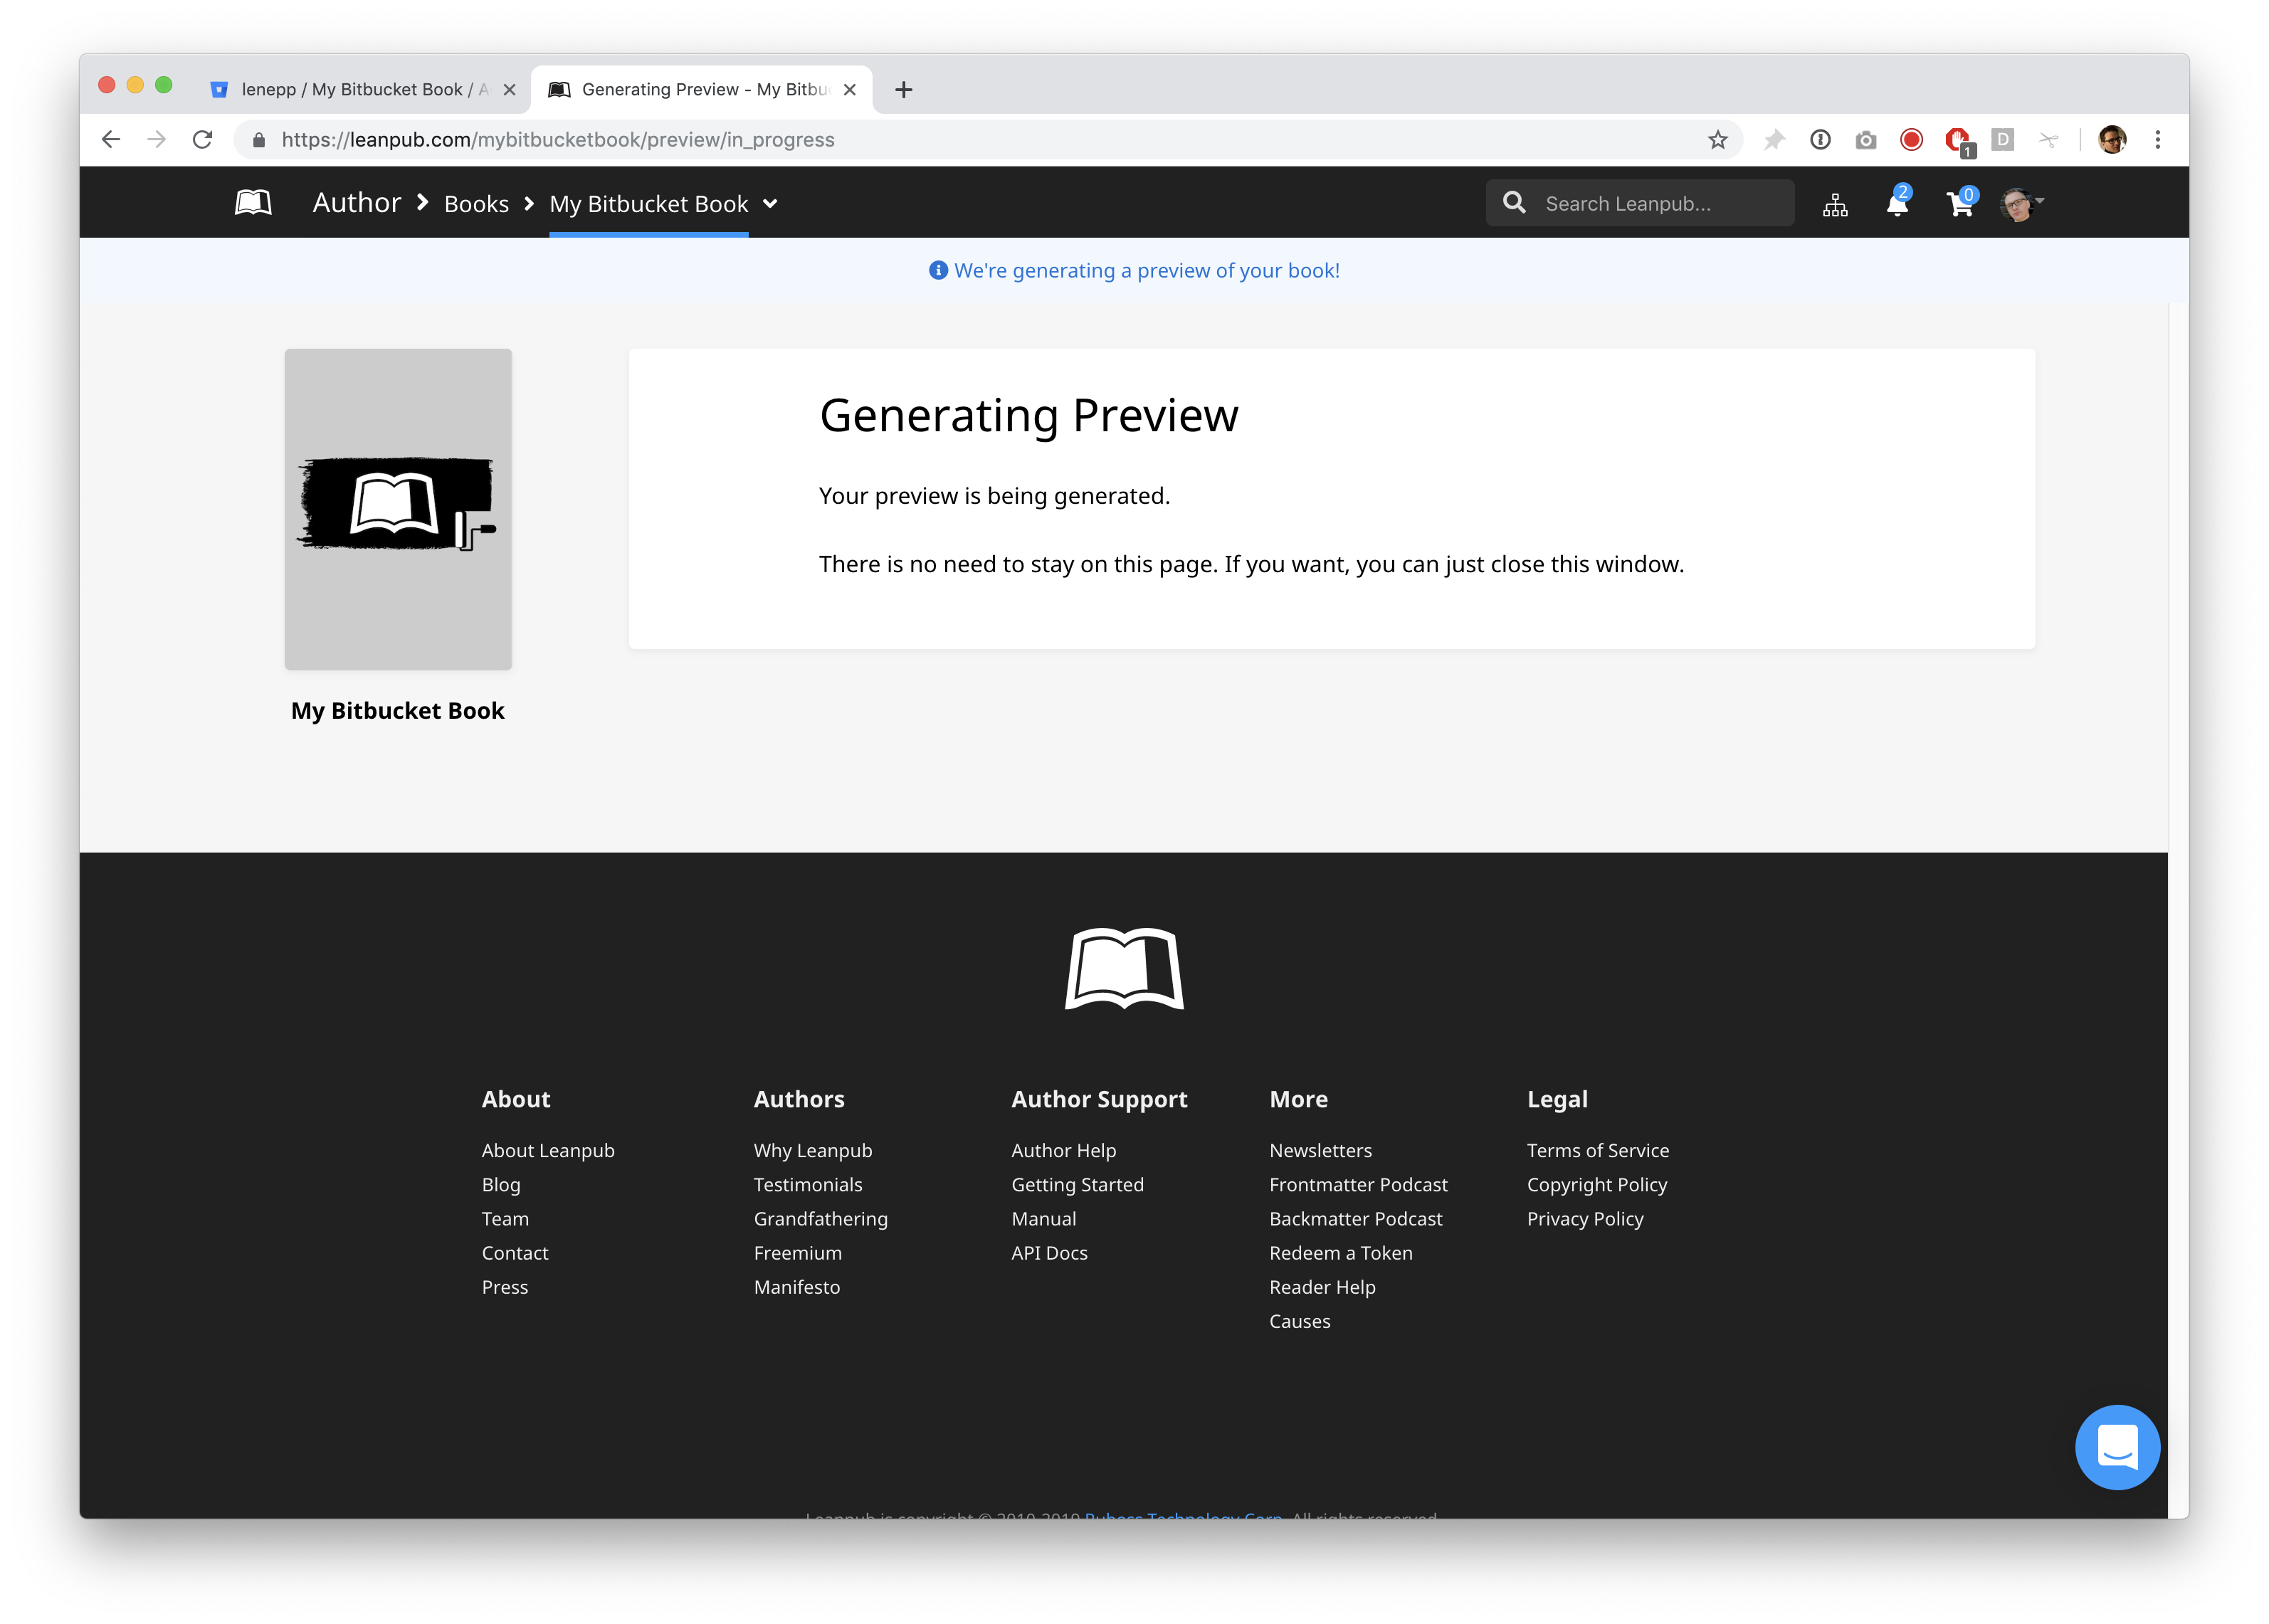
When the preview process is complete, you will see download links for the preview, in a variety of formats:
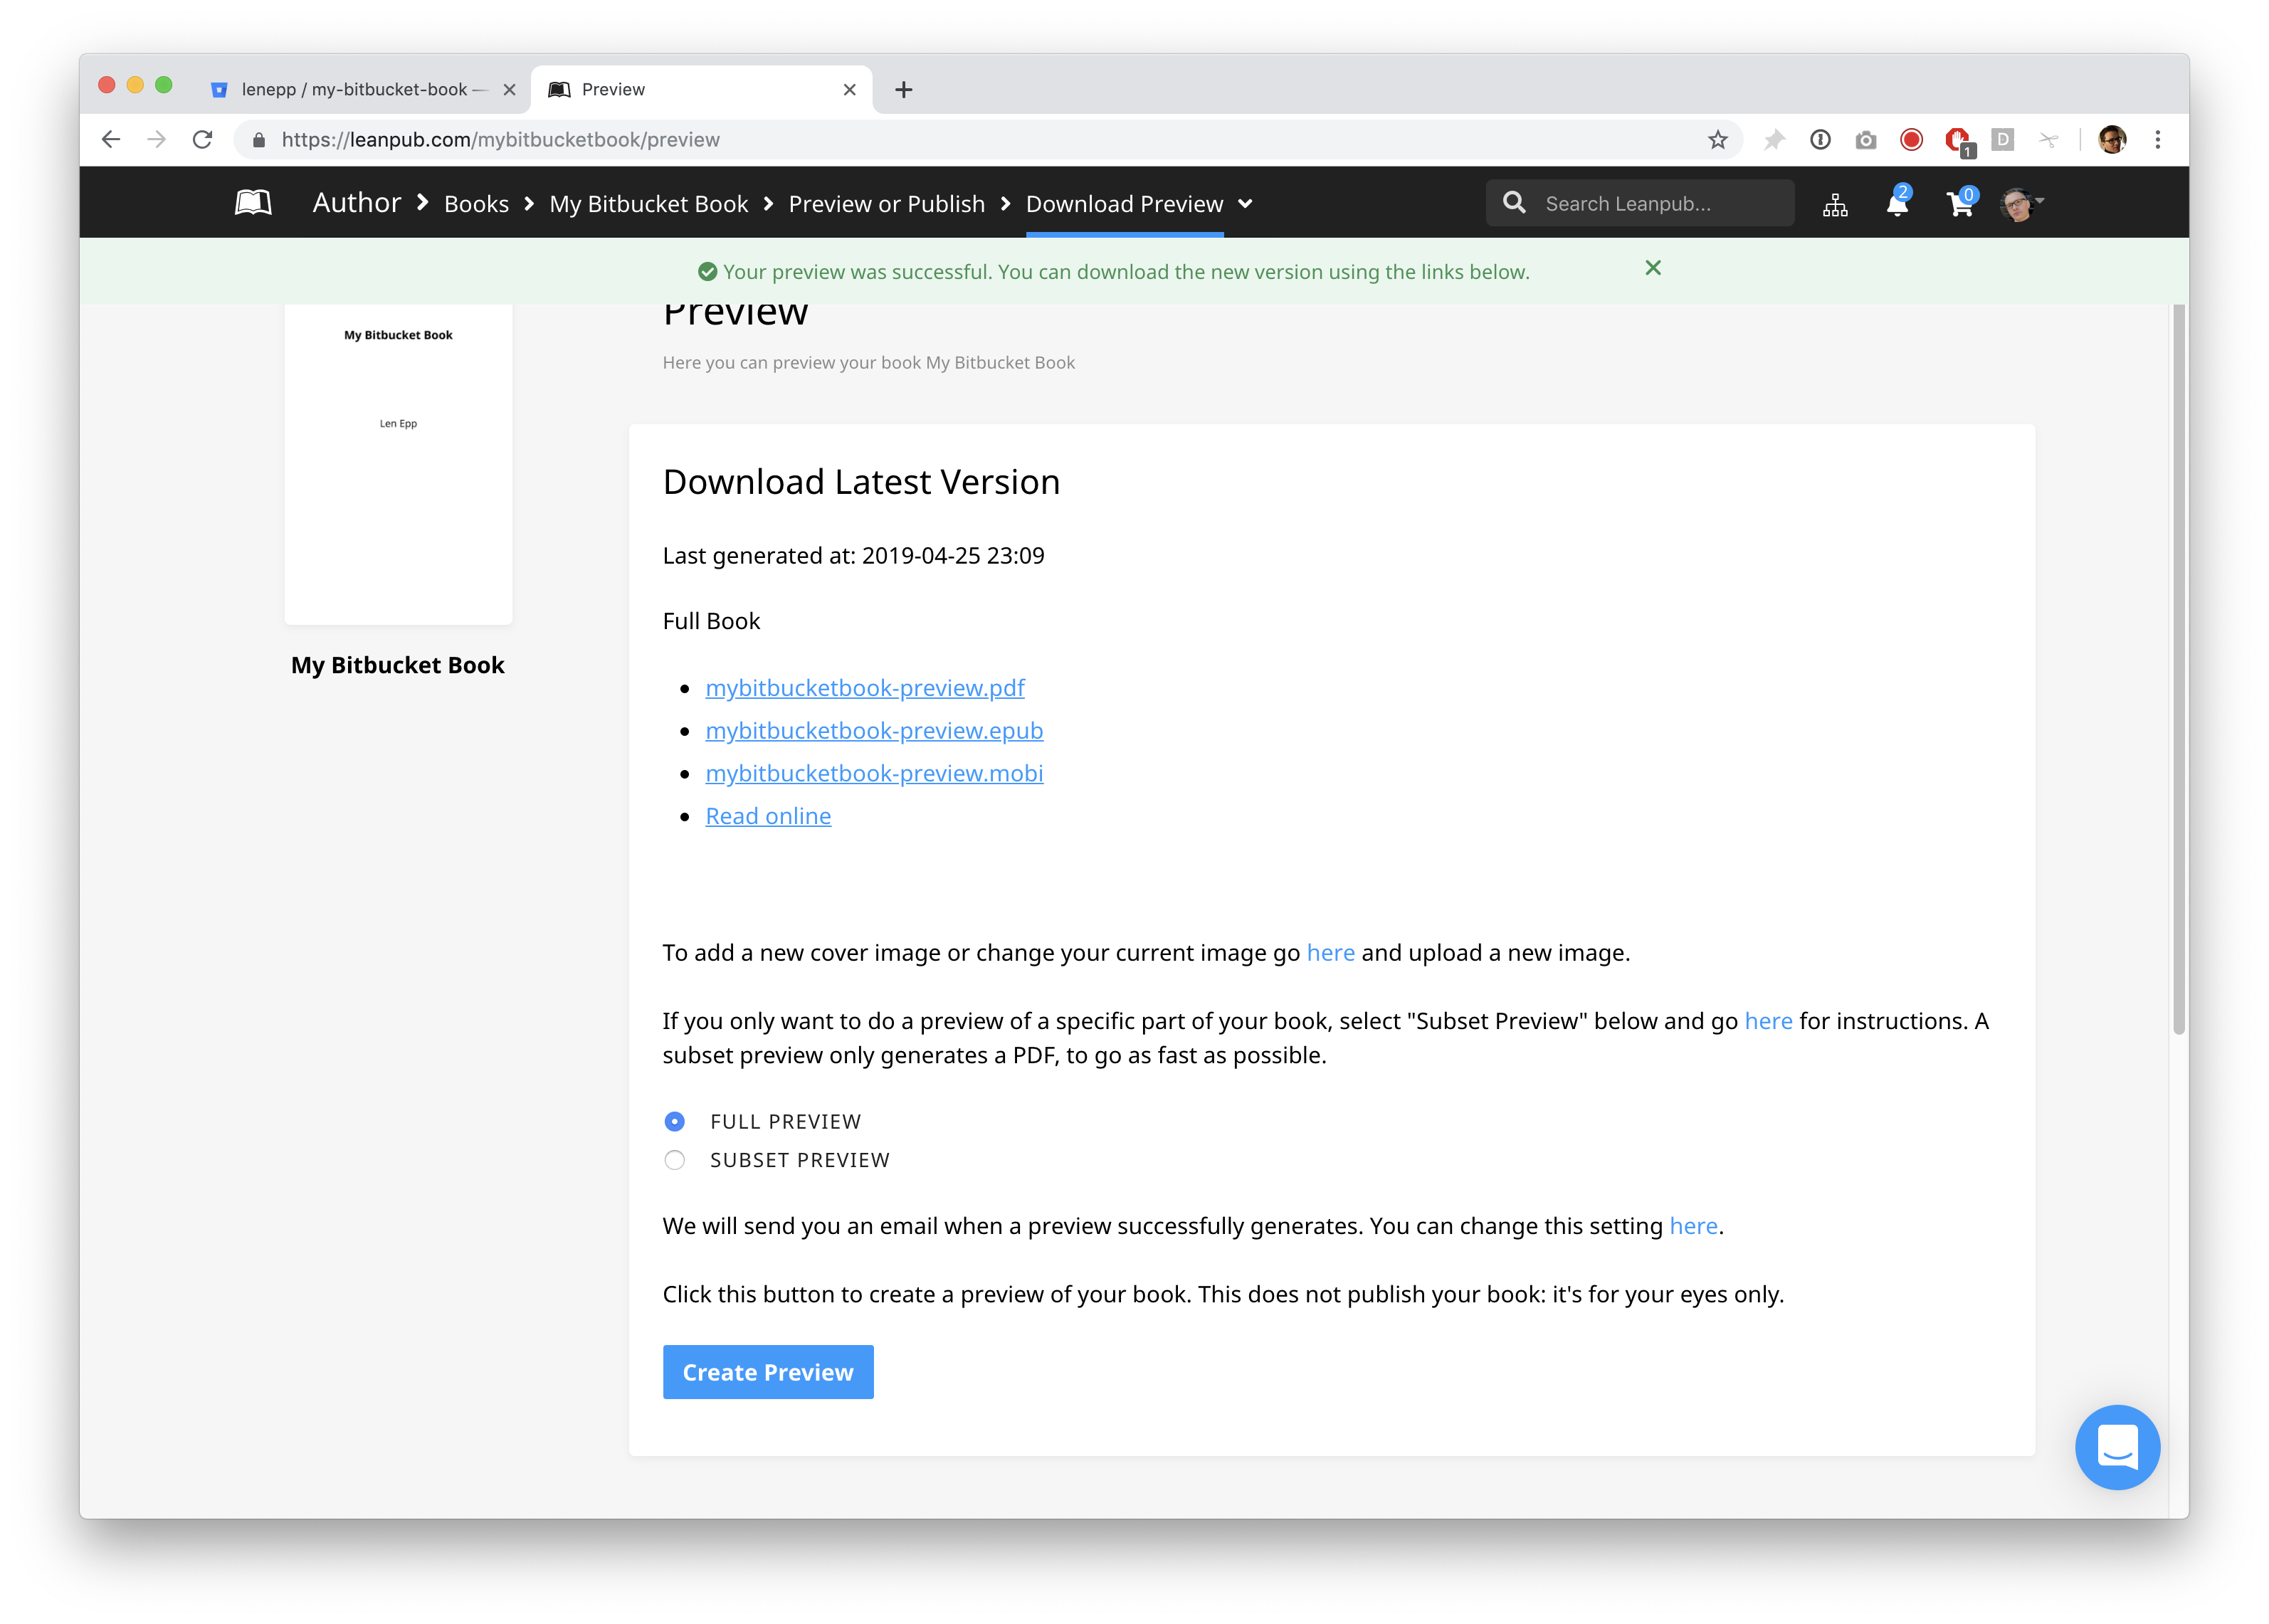
Click on the links to see what your book looks like in the various formats.
Writing in Your Book
Open your book folder in Bitbucket. You’ll see a folder named manuscript inside it. This is where you write your book.
If you have just created a new book, the manuscript folder will contain four files with the file name extension .txt. There will also be a folder called resources:
Open the file called chapter1.txt by double-clicking on it. You can also open the file in any specific text editing software you prefer.
Next, delete the contents of the file and type:
In your text editor, save this change.
Make a New Preview of Your Book
Next, you need to commit your changes and push them to Bitbucket.
On the command line, type git commit -m "first tutorial steps" and hit the return key.
Next, type ‘git push’ and hit the return key.
The next time you create a preview of your book, you will see that Chapter One has changed, and it now says “Hello, world!”
To create a new preview, repeat what you did when you made your first preview, by using the Author menu in Leanpub to go to:
Author > Books > [Your Book Title] > Preview or Publish > Preview
How the List of Files in Book.txt Works
When you create a preview, you may not want our book generators to use all of the files in your manuscript folder. Also, you may want the contents of your book to reflect a different order than the order they are presented in, in your manuscript folder.
So, whenever you create a preview, our friendly bookbots generate your book using only the files that you have listed in the Book.txt file that is in your book’s manuscript folder, and they use those files in the order that you have listed them.
Let’s see how this works.
First, delete a file. In your book’s manuscript folder, select the file named chapter3.txt and delete it.
Now, let’s rename a file. The files listed in Book.txt can have any name you want to give them. (To be clear, the files do not have to include the word “chatper” in the file name.)
In your book’s manuscript folder, select the file chapter2.txt.
Now, change the file name to conclusion.txt by right-clicking on the file and selecting “Rename.” **(Your computer might show a different word than “Rename,” but there should be an option to change any file’s name if you right-click on the file.)
Now that we have changed the files in the manuscript folder, we need to update the list of files in the Book.txt file.
Using your text editor, open the Book.txt file.
In the Book.txt file, you will see this list of files, like this:
First, delete chapter2.txt. Then, delete chapter3.txt.
Next, on the second line, type conclusion.txt.
Now, your list of files in Book.txt will look like this:
Next, open the file conclusion.txt.
Now, delete everthing in the file, and type this:
Finally, save this change your text editor.
Next, you need to commit your changes and push them to Bitbucket.
On the command line, type git commit -m "finishing tutorial" and hit the return key.
Next, type ‘git push’ and hit the return key.
Now, go back to the preview page for your book at:
Author > Books > [Your Book Title] > Preview or Publish > Preview
The next time you create a preview, it will reflect the changes you have made.
Congratulations! You’ve completed the Getting Started tutorial for writing a book in Leanpub using Bitbucket.
Next Steps
Next, we recommend you explore the Overview page for your book:
Author > Books > [Your Book Title] > Book Info > Overview
On the Overview page, you can see all the pages you need to get your book set up on Leanpub, like “Upload Book Cover” and the “Book Details” page, where you can explain what your book is about to potential readers.
If you have any questions or can’t find anything, please search our Help Center for authors here: http://help.leanpub.com/author-help.
Happy writing!
Getting Started with Bring Your Own Book Writing Mode
You can write a Leanpub book using the Bring Your Own Book writing mode. In this chapter we’ll show you how to create a book and generate your first preview.
We also have a video, if you prefer to learn that way! You can watch the video here: https://youtu.be/QC8Utbrc9MM.
Once you have successfully generated your first preview, you’ll know everything you know to get started writing in the Bring Your Own Book writing mode.
You’ll find more information and detailed instructions on the “Getting Started” page for your book, which you’ll go to automatically when you create your book.
Creating a Book in Bring Your Own Book Writing Mode
Go to https://leanpub.com/create/book to create a book in Bring Your Own Book.
Next, type a title for your book into the “TITLE” box. You can change your title later.

Click in the “BOOK URL” box. Leanpub will automatically suggest a URL for your book’s web page on Leanpub. You can change this URL at any time.
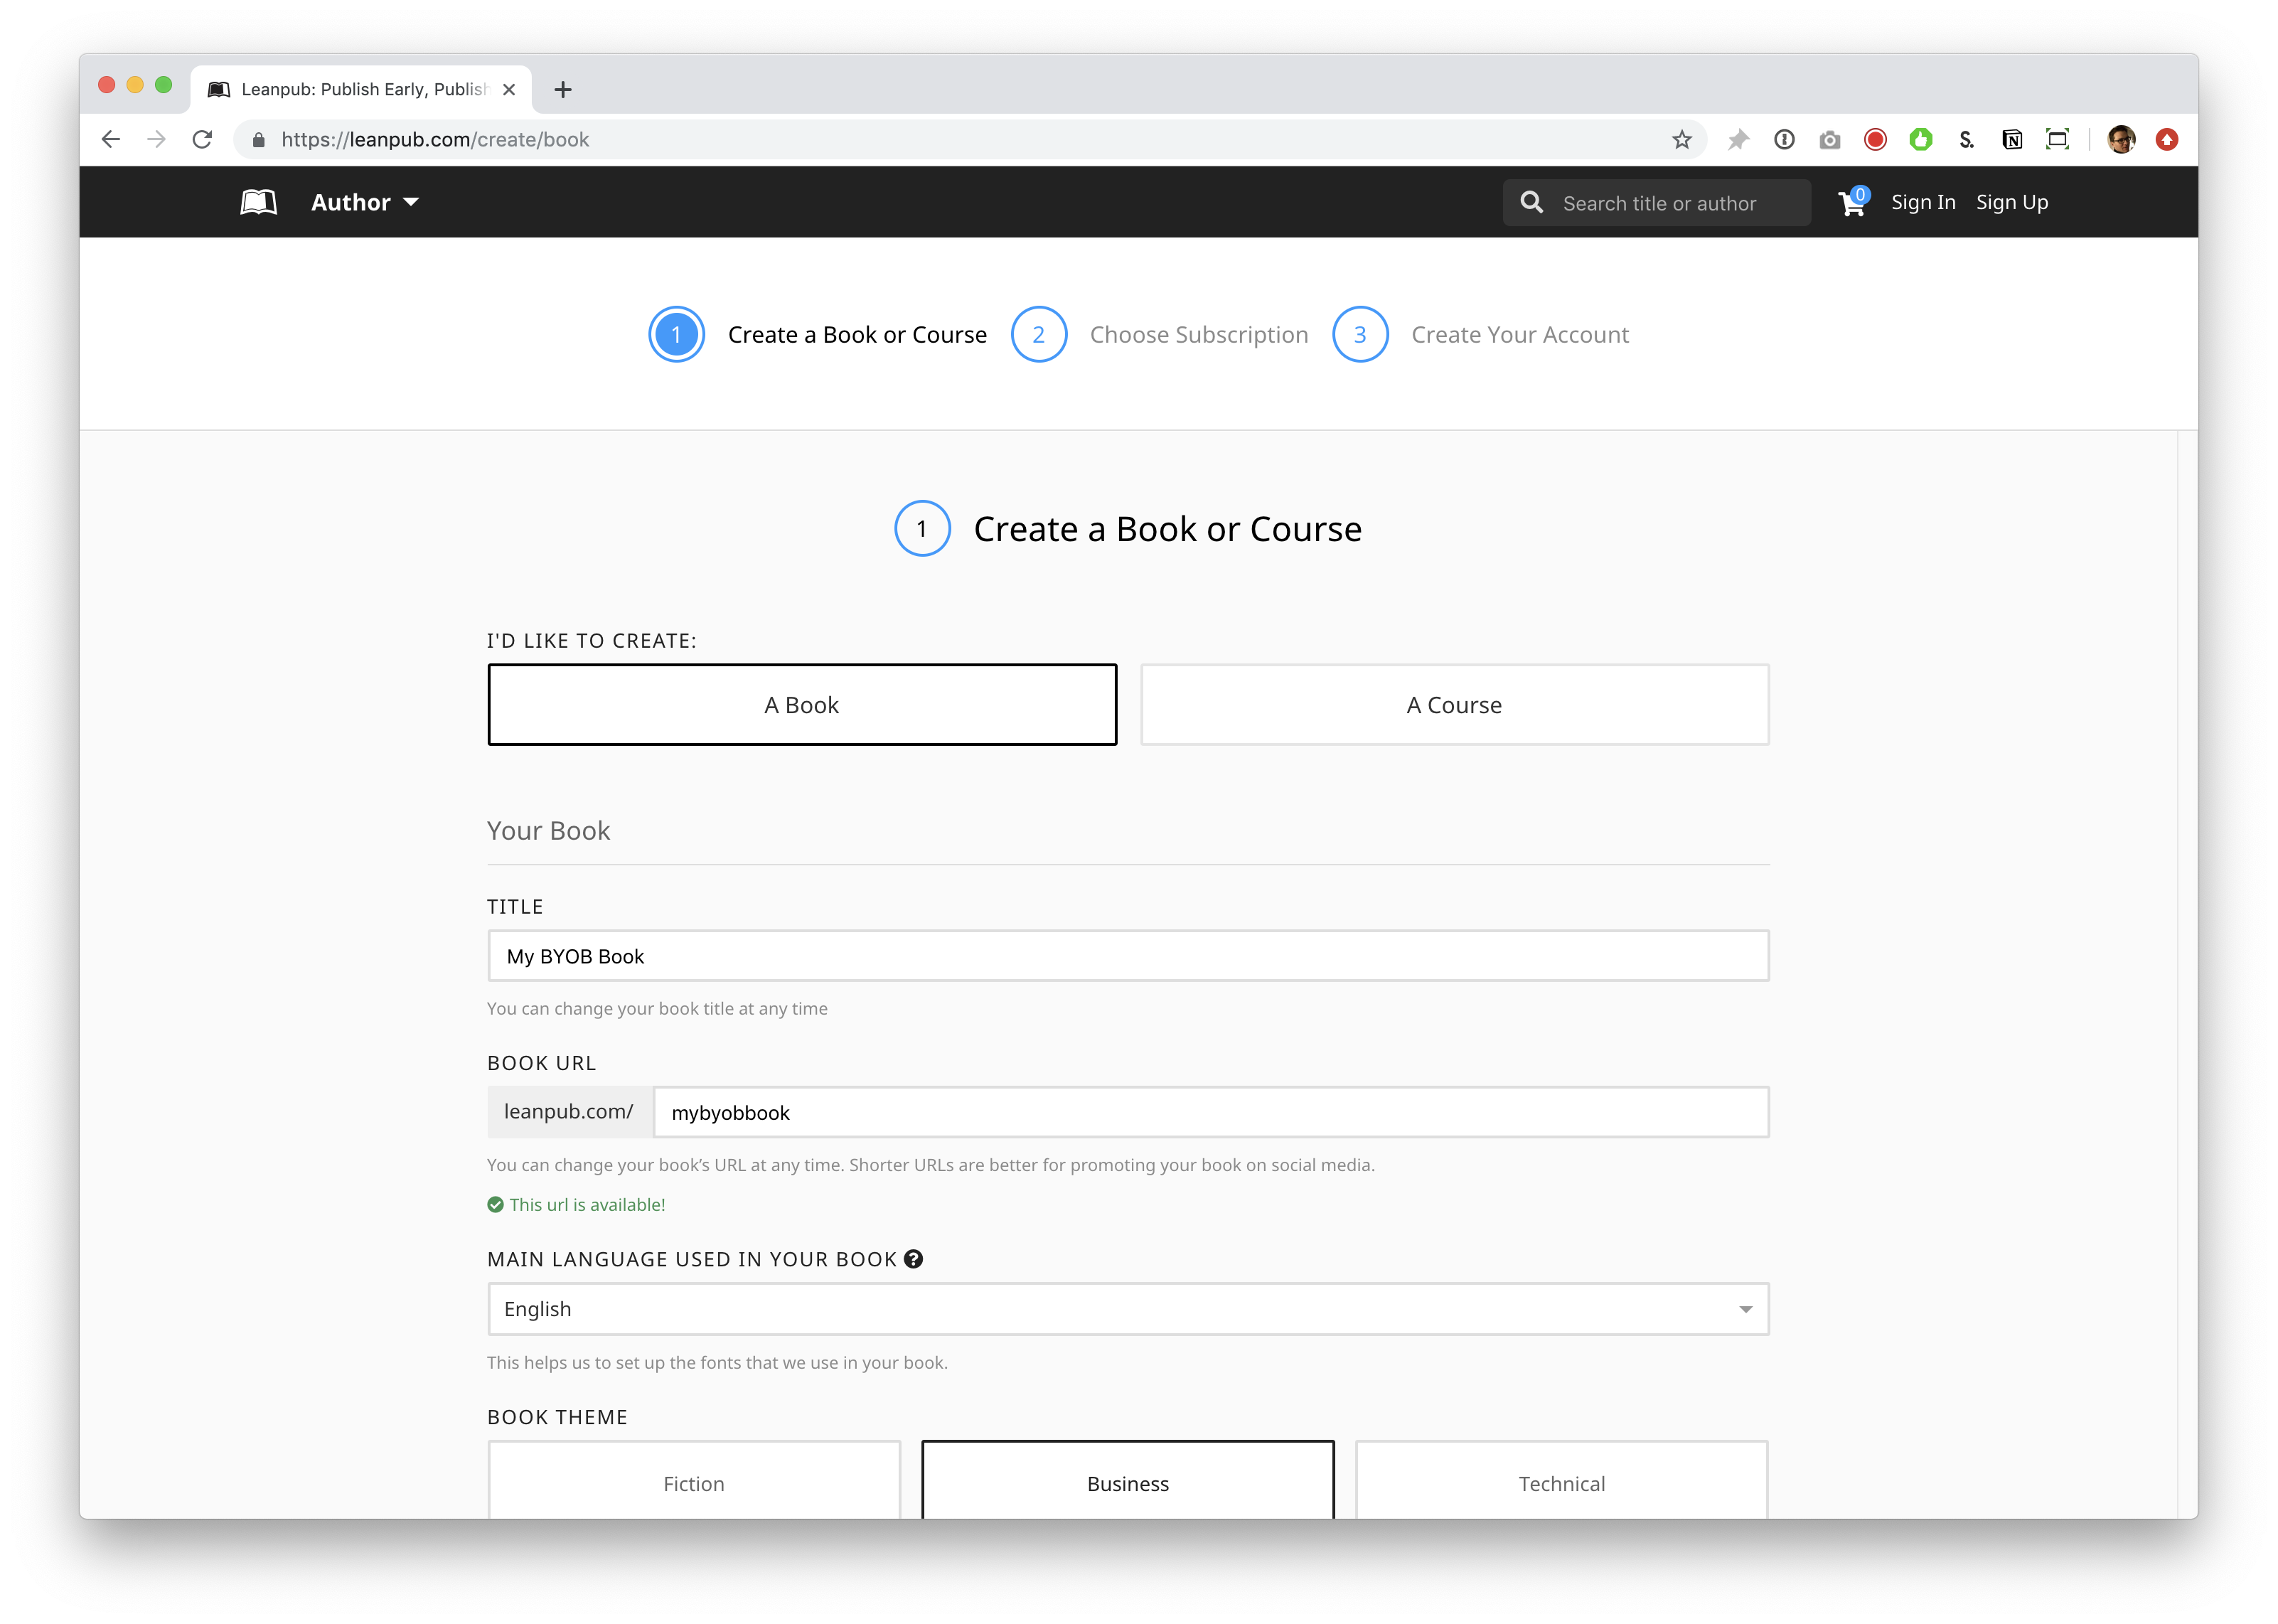
Scroll down and you will see “MAIN LANGUAGE USED IN YOUR BOOK.” You can select a language from the drop-down. Like the other settings, you can change this at any time.
Scroll down and you will see the “BOOK THEME” options. “Business” will be selected by default. The Book Theme is just a set of standard formatting options conventional for books on these subjects. You are not required to choose any particular option. You can change your Book Theme at any time.
For this tutorial, we selected the “Fiction” Book Theme.
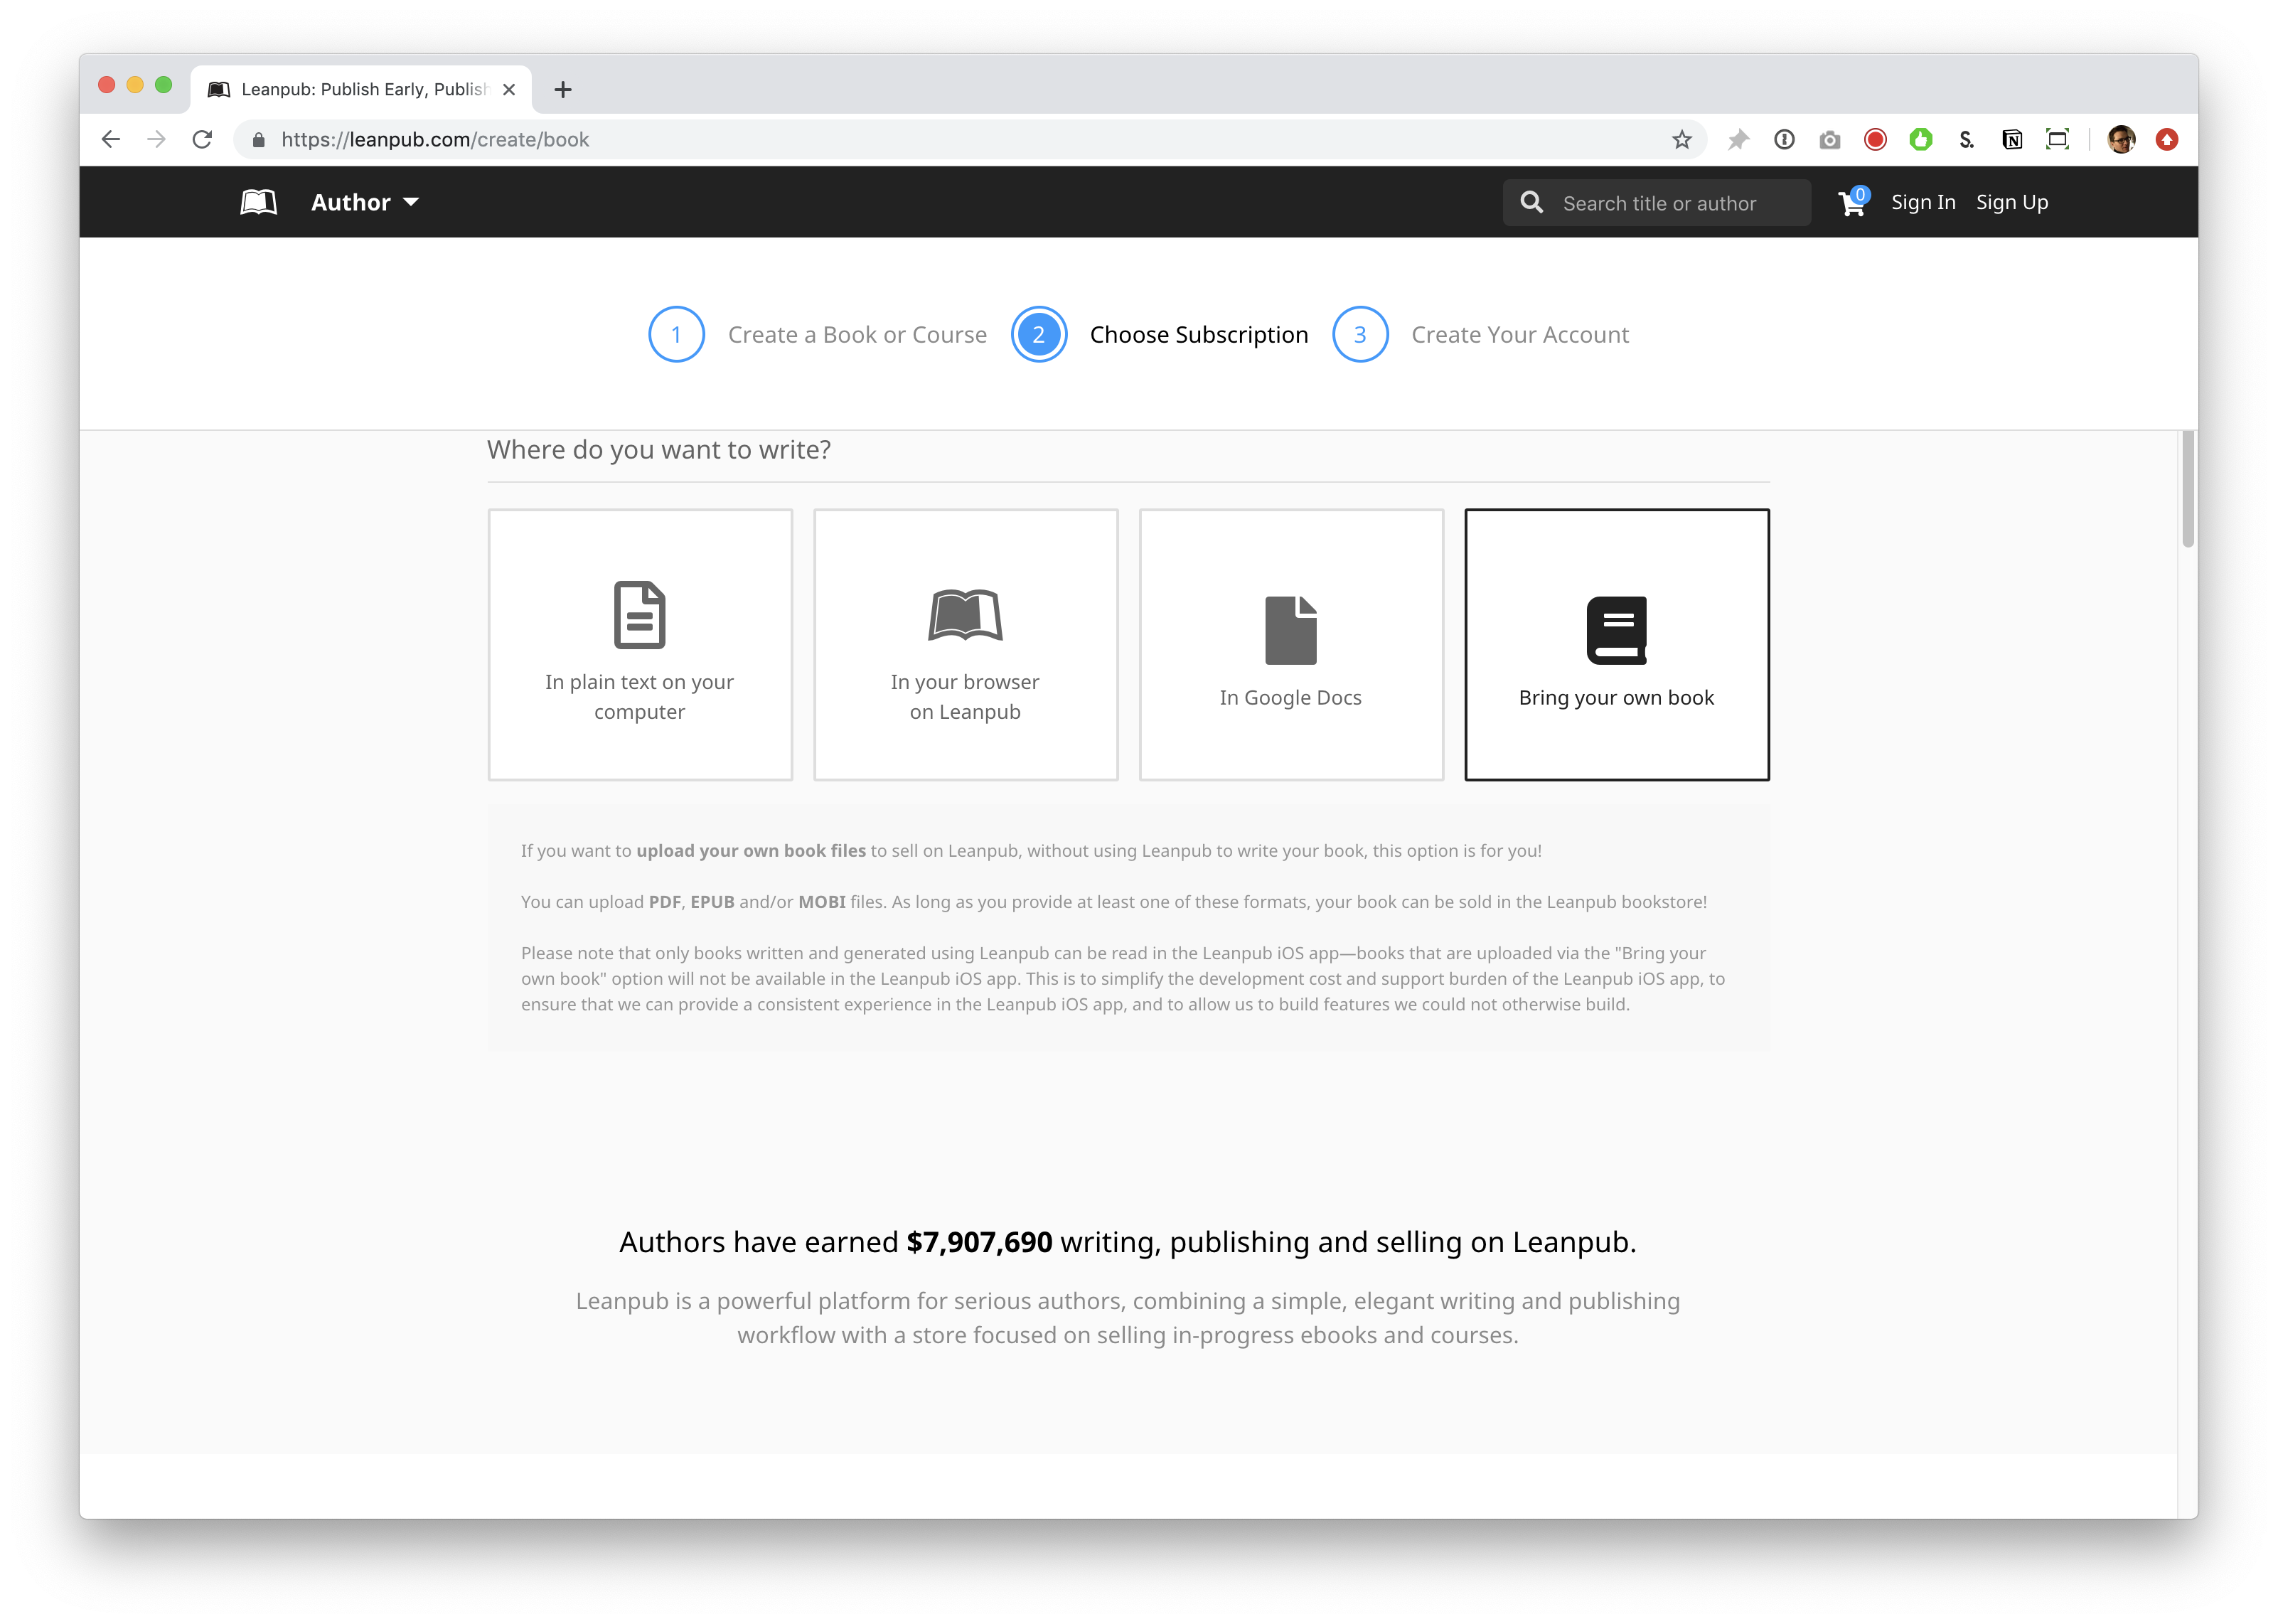
In the section below, you will be presented with various Writing Mode options. For this tutorial, select “Bring your own book.”
When you scroll down, you will see the subscription plan options. By default, “Free” will be selected. If you have a paid Leanpub account already, you will see that plan selected automatically.
Select a plan.
Scroll down and, if you are not signed in to a Leanpub account, you will see an option to enter information to create a new account. You will also see an option to sign in, if you already have a Leanpub account.
To create a new account, fill in the relevant information.
Finally, click the blue button to finish creating your new Bring Your Own Book book.
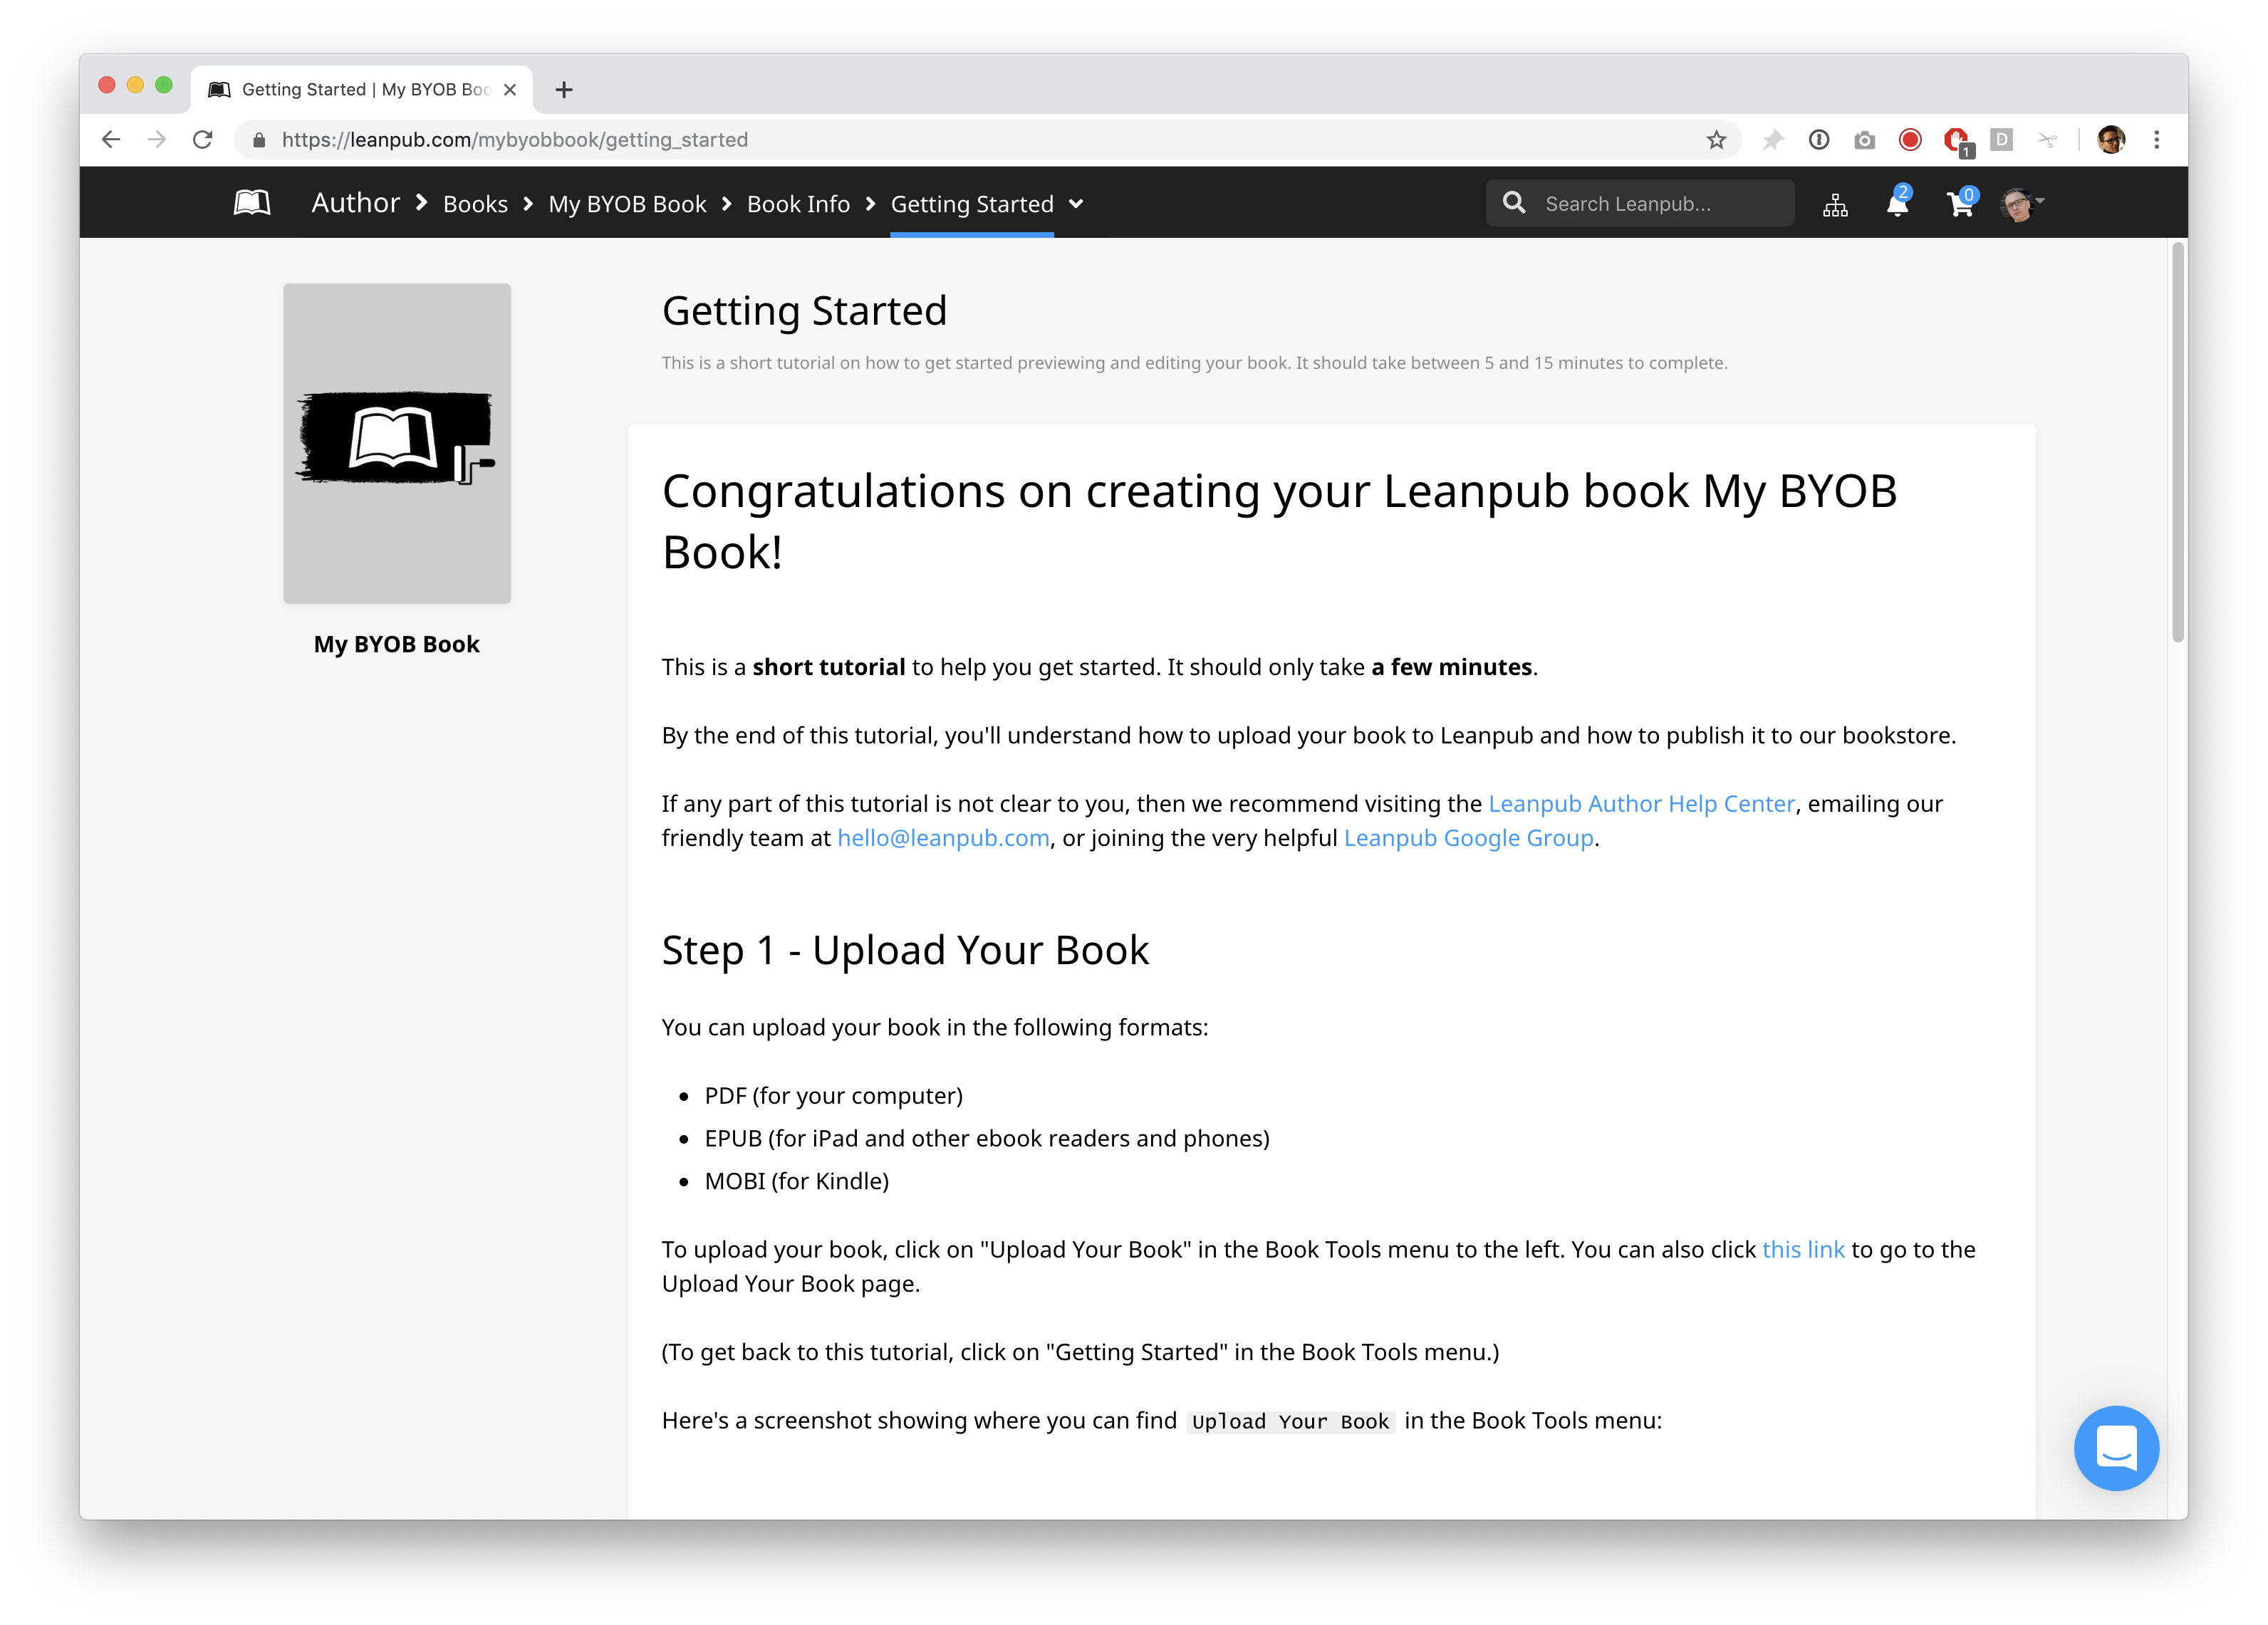
You will now see that you are on the Getting Started page for your book.
If you use bookmarks in your web browser, we recommend you bookmark this page in your web browser in a bookmark folder for your book, but this is not required.
Look at the Book Tools “breadcrumb” menu at the top of the screen. This is how you will navigate to the web pages you will be using in Leanpub to work on your book and see all the features we provide, like uploading a book cover, or setting a price for your book.
When you are finished this tutorial, we recommend you explore the various Book Tools options.
Uploading Your Book In Bring Your Own Book
Click on “Getting Started” at the top, and you will see your the Book Tools menu. It will look something like this:

Click on “Preview or Publish” in the menu, and you will see something like this:
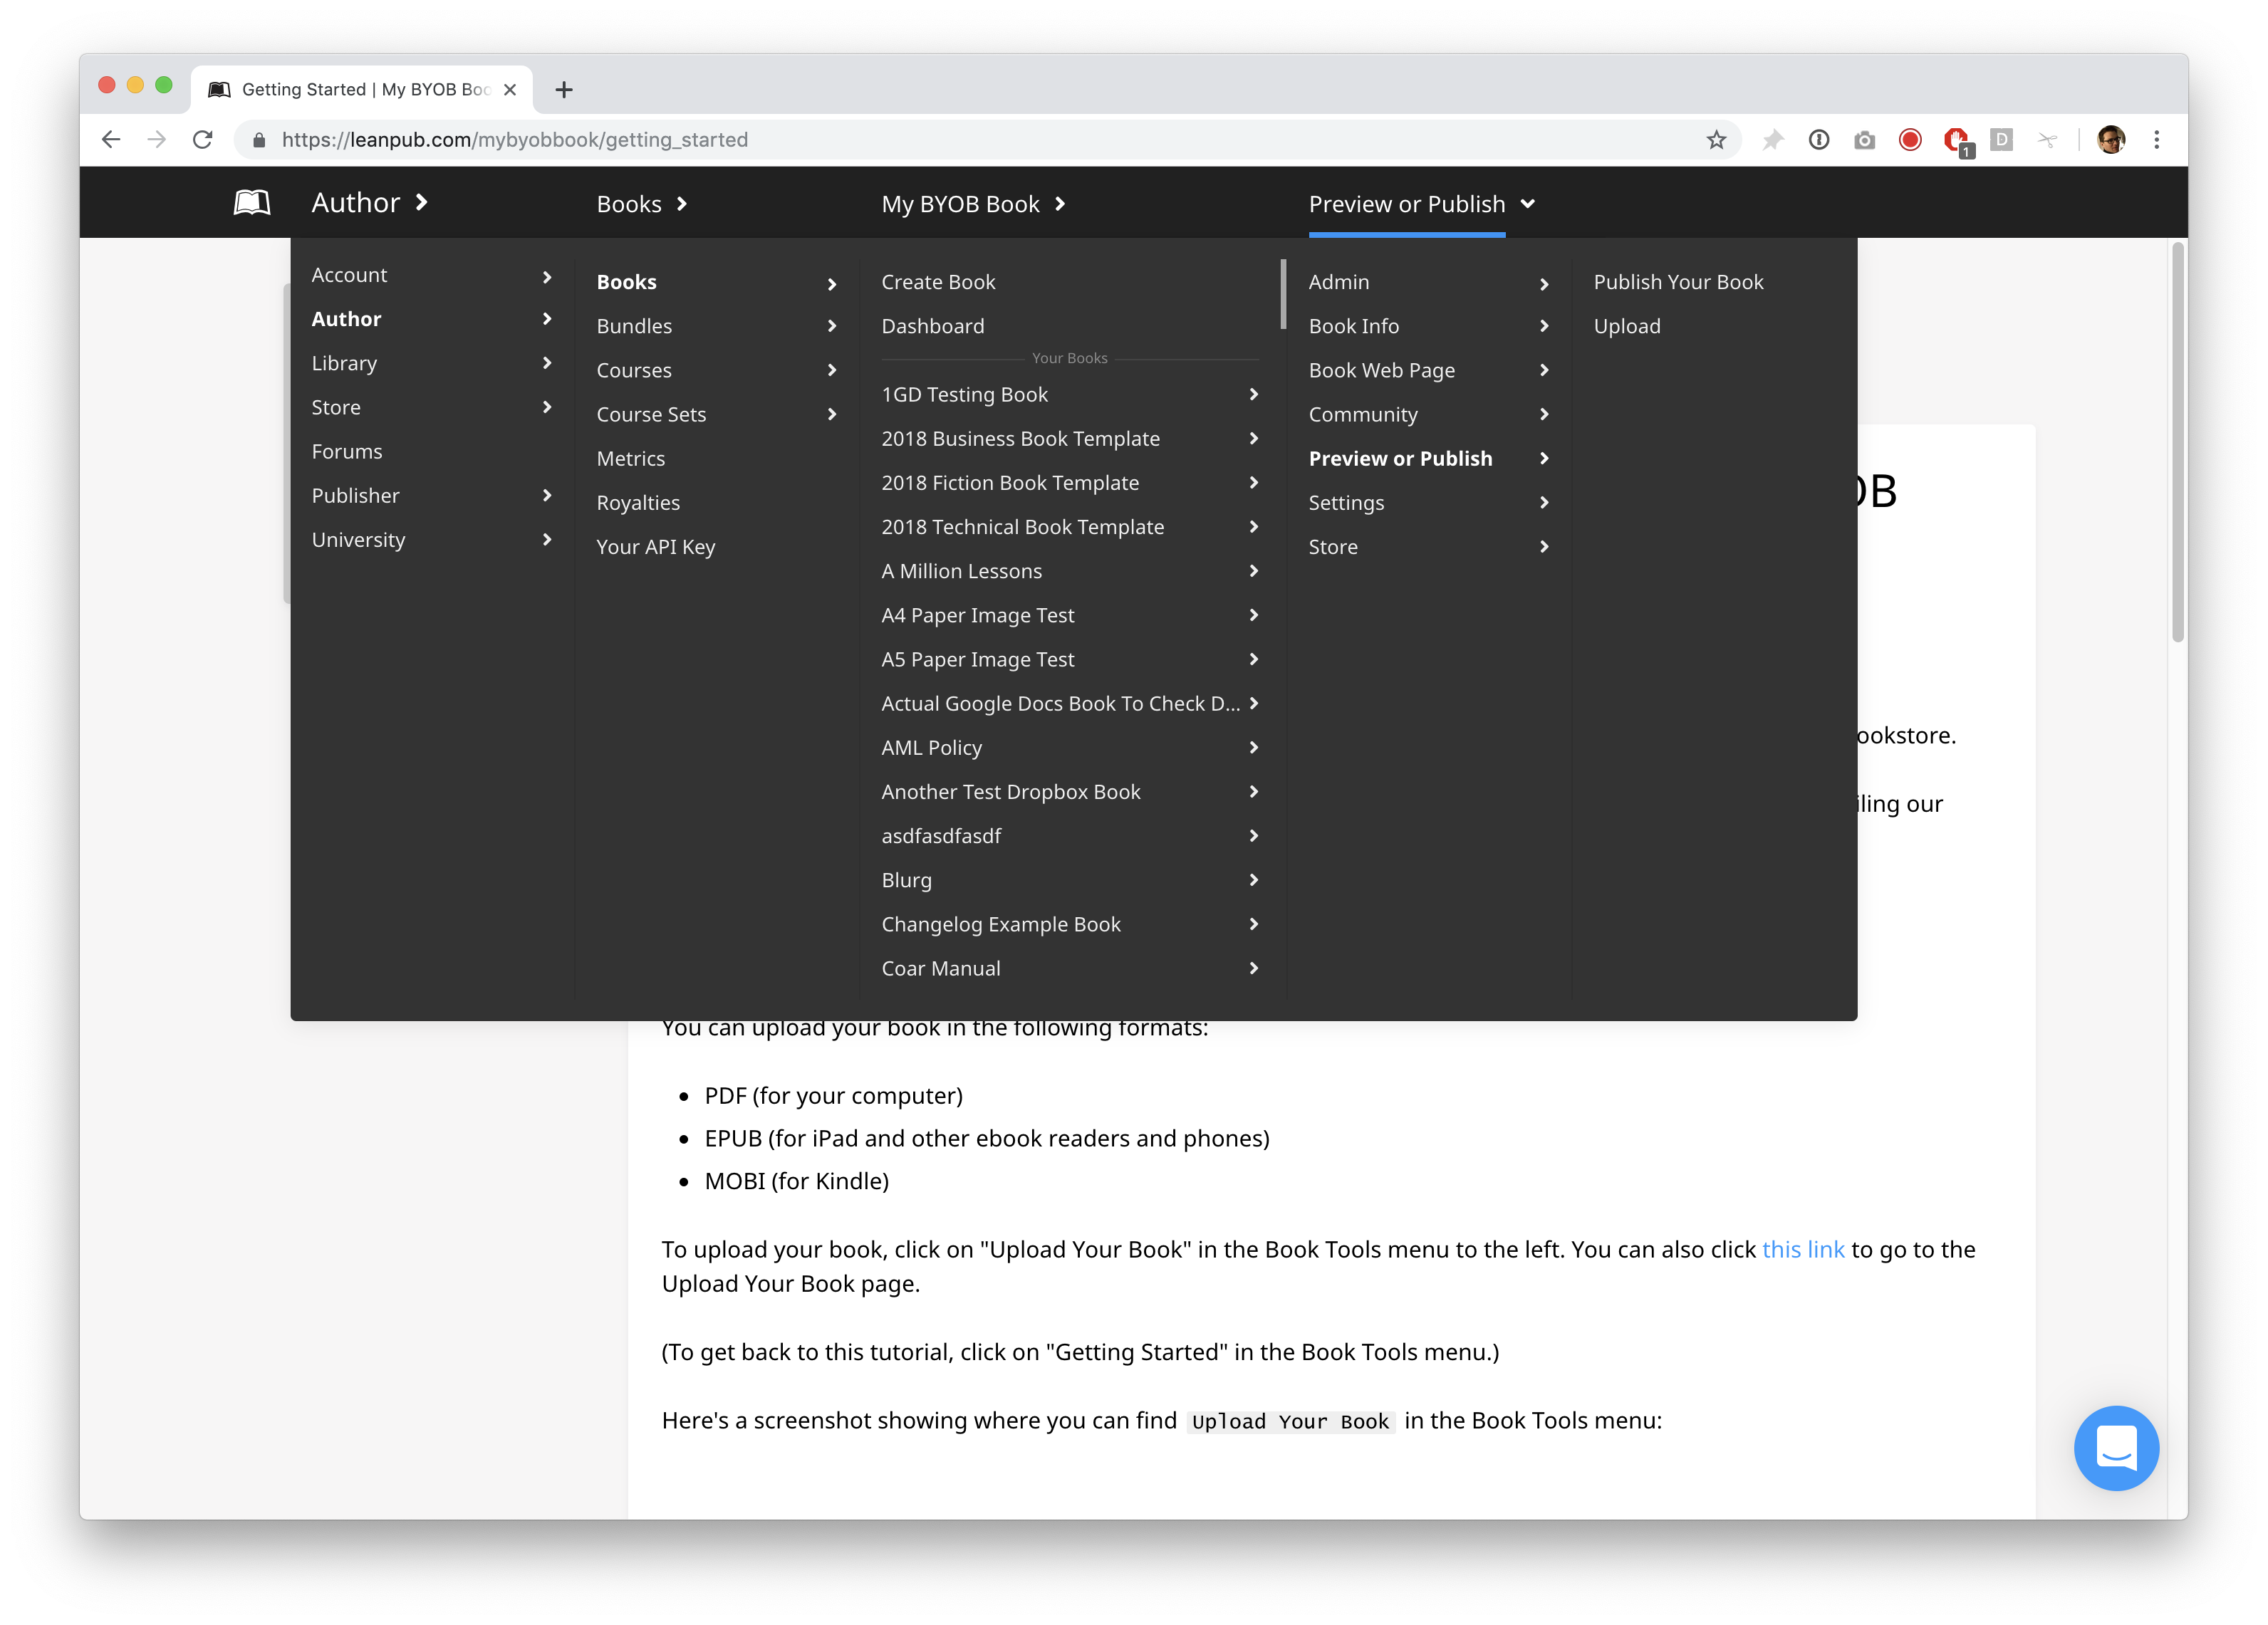
Select “Upload” in the column to the right:
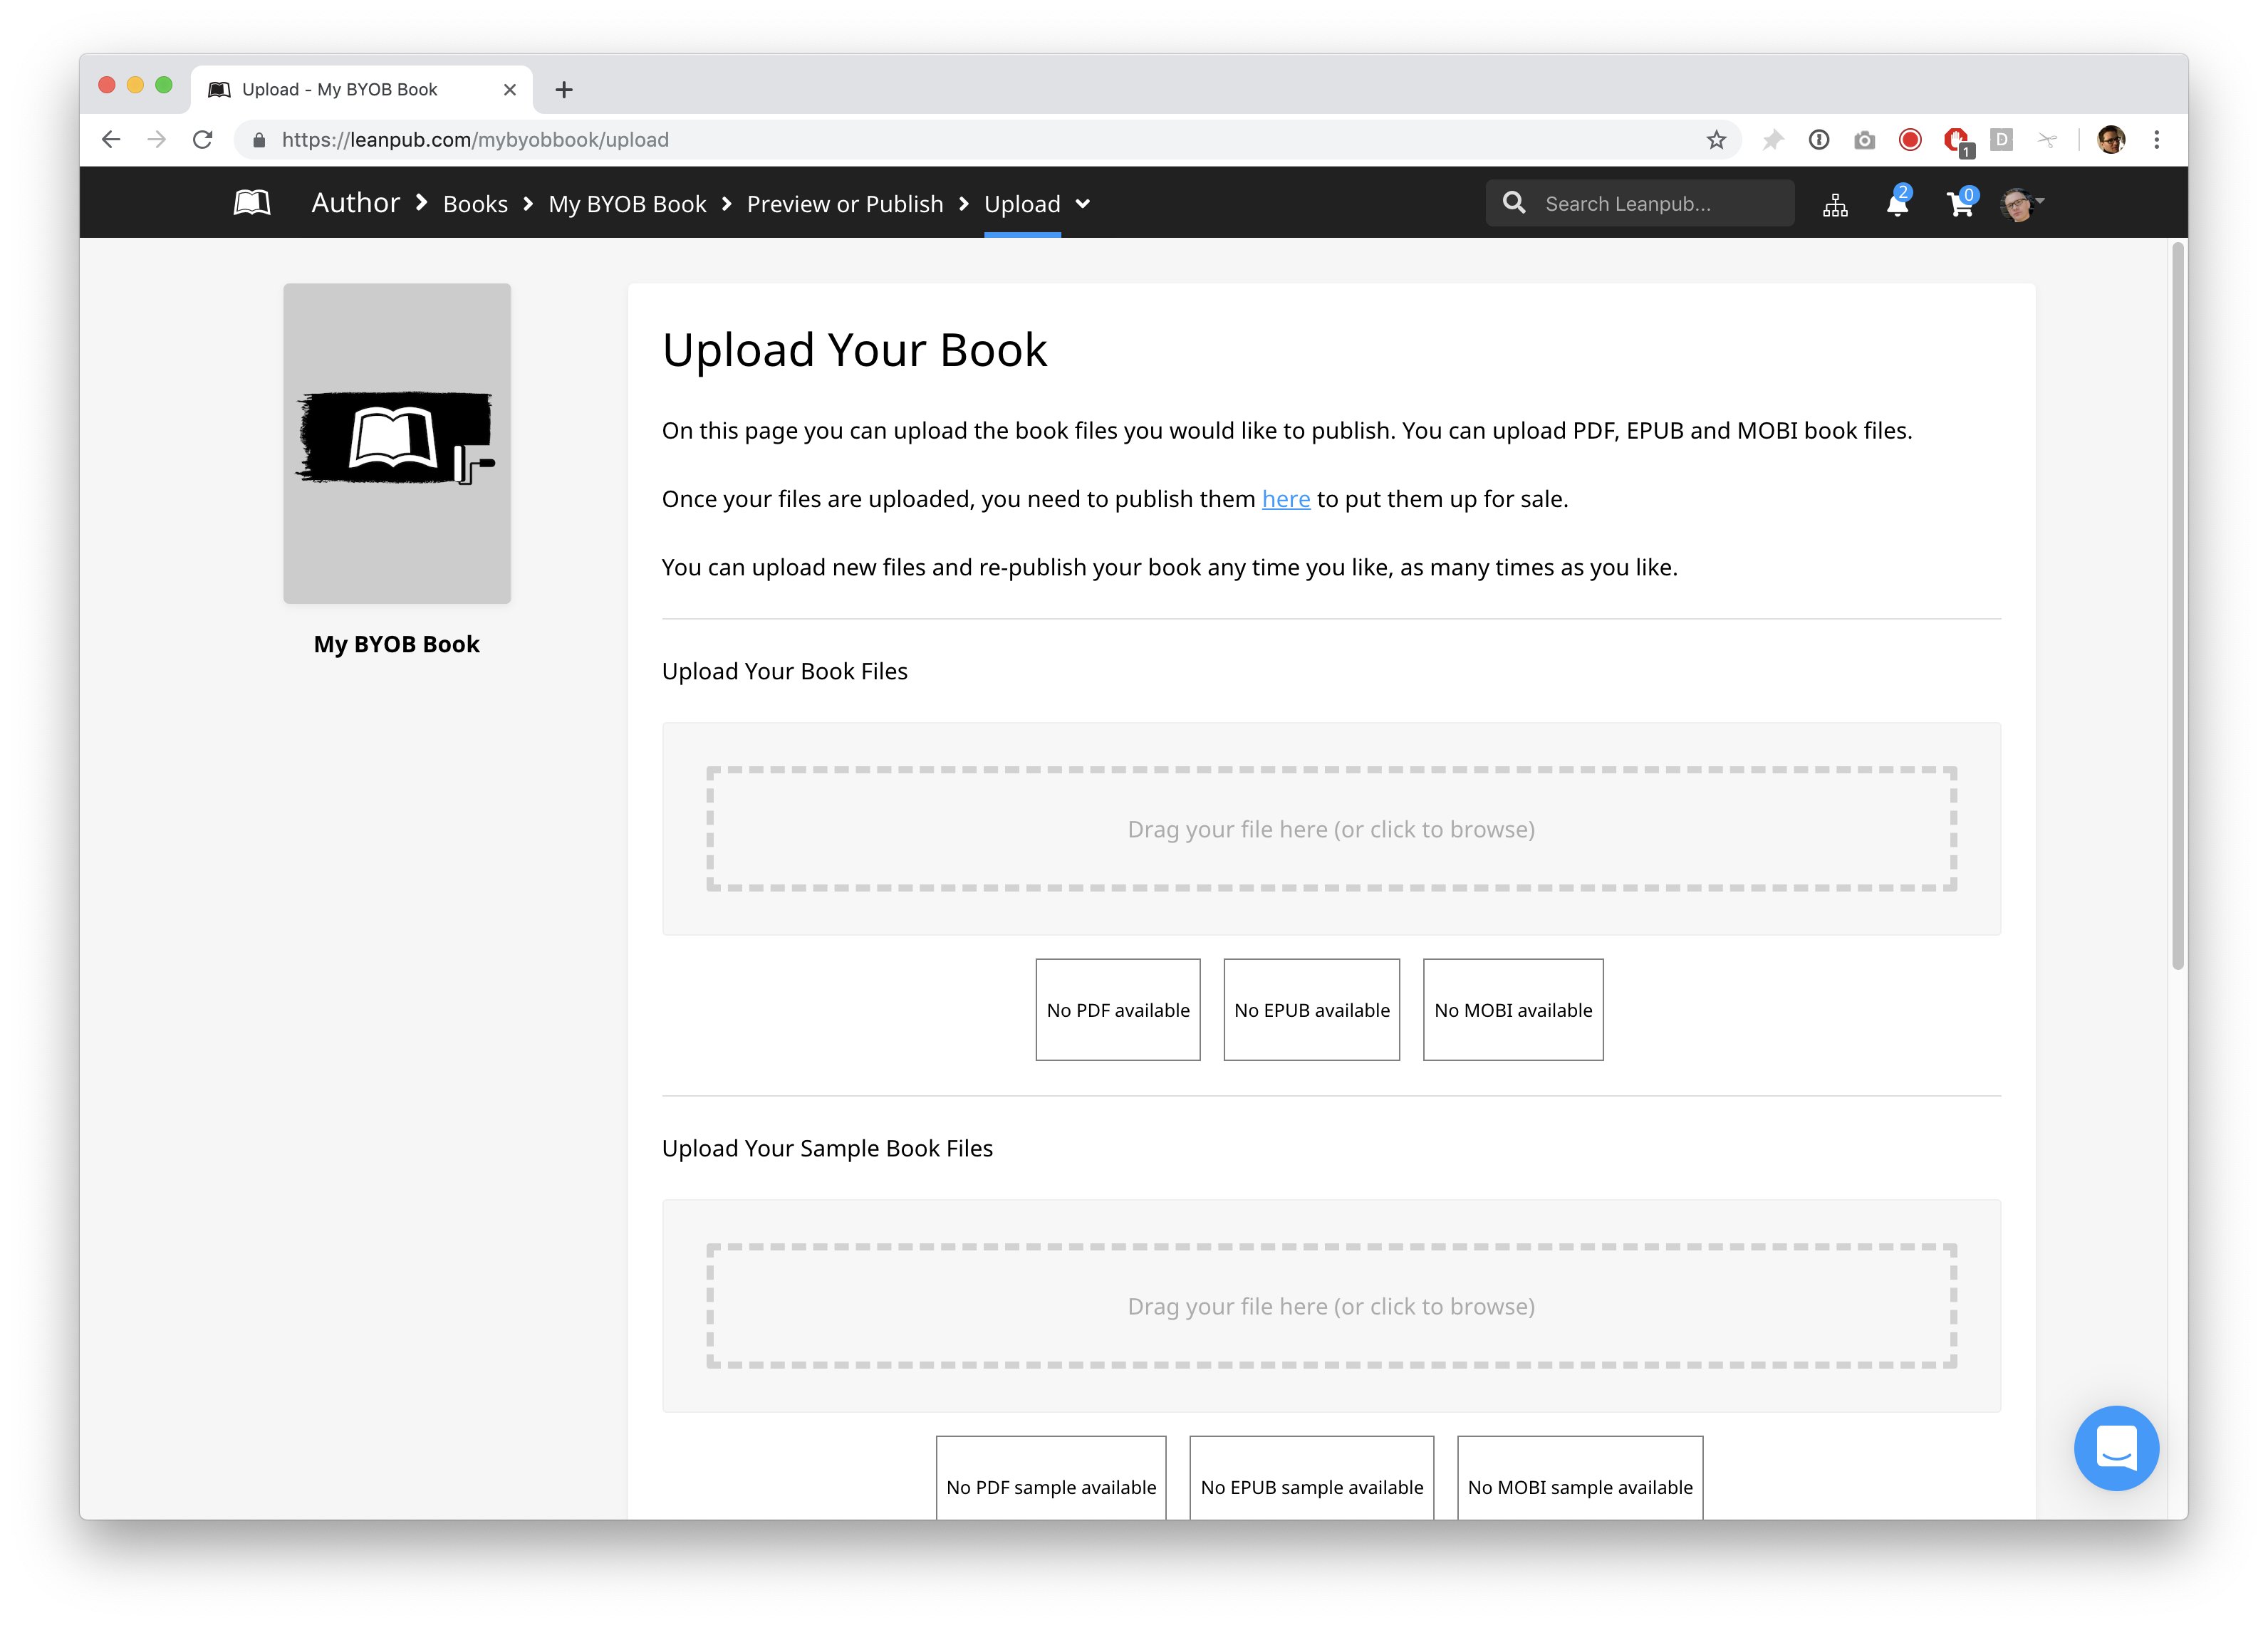
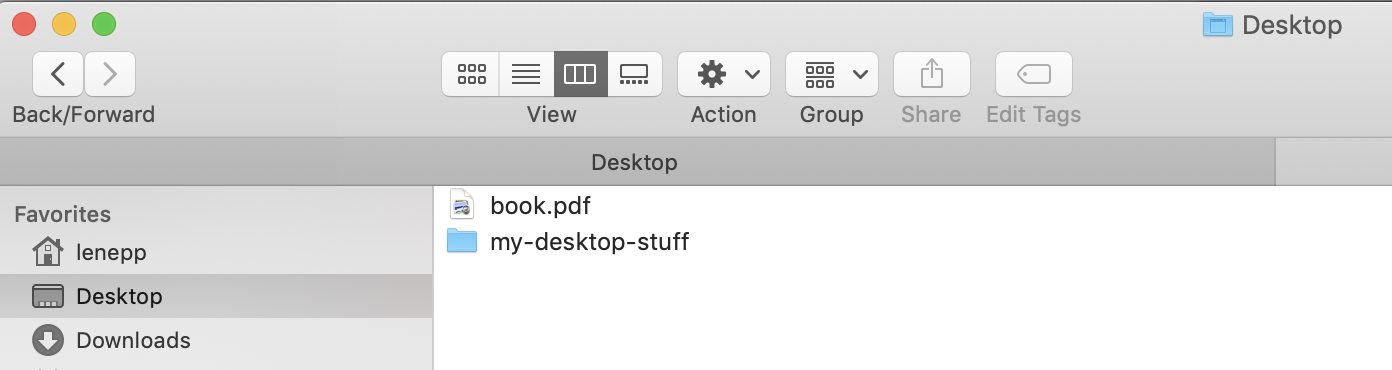
On your computer, find the book file or files you would like to upload. (The file does not have to named “book.pdf”; you can use any file name you prefer.)
Drag the file onto the top box that under “Upload Your Book Files.” You will see a progress bar as the file uploads:
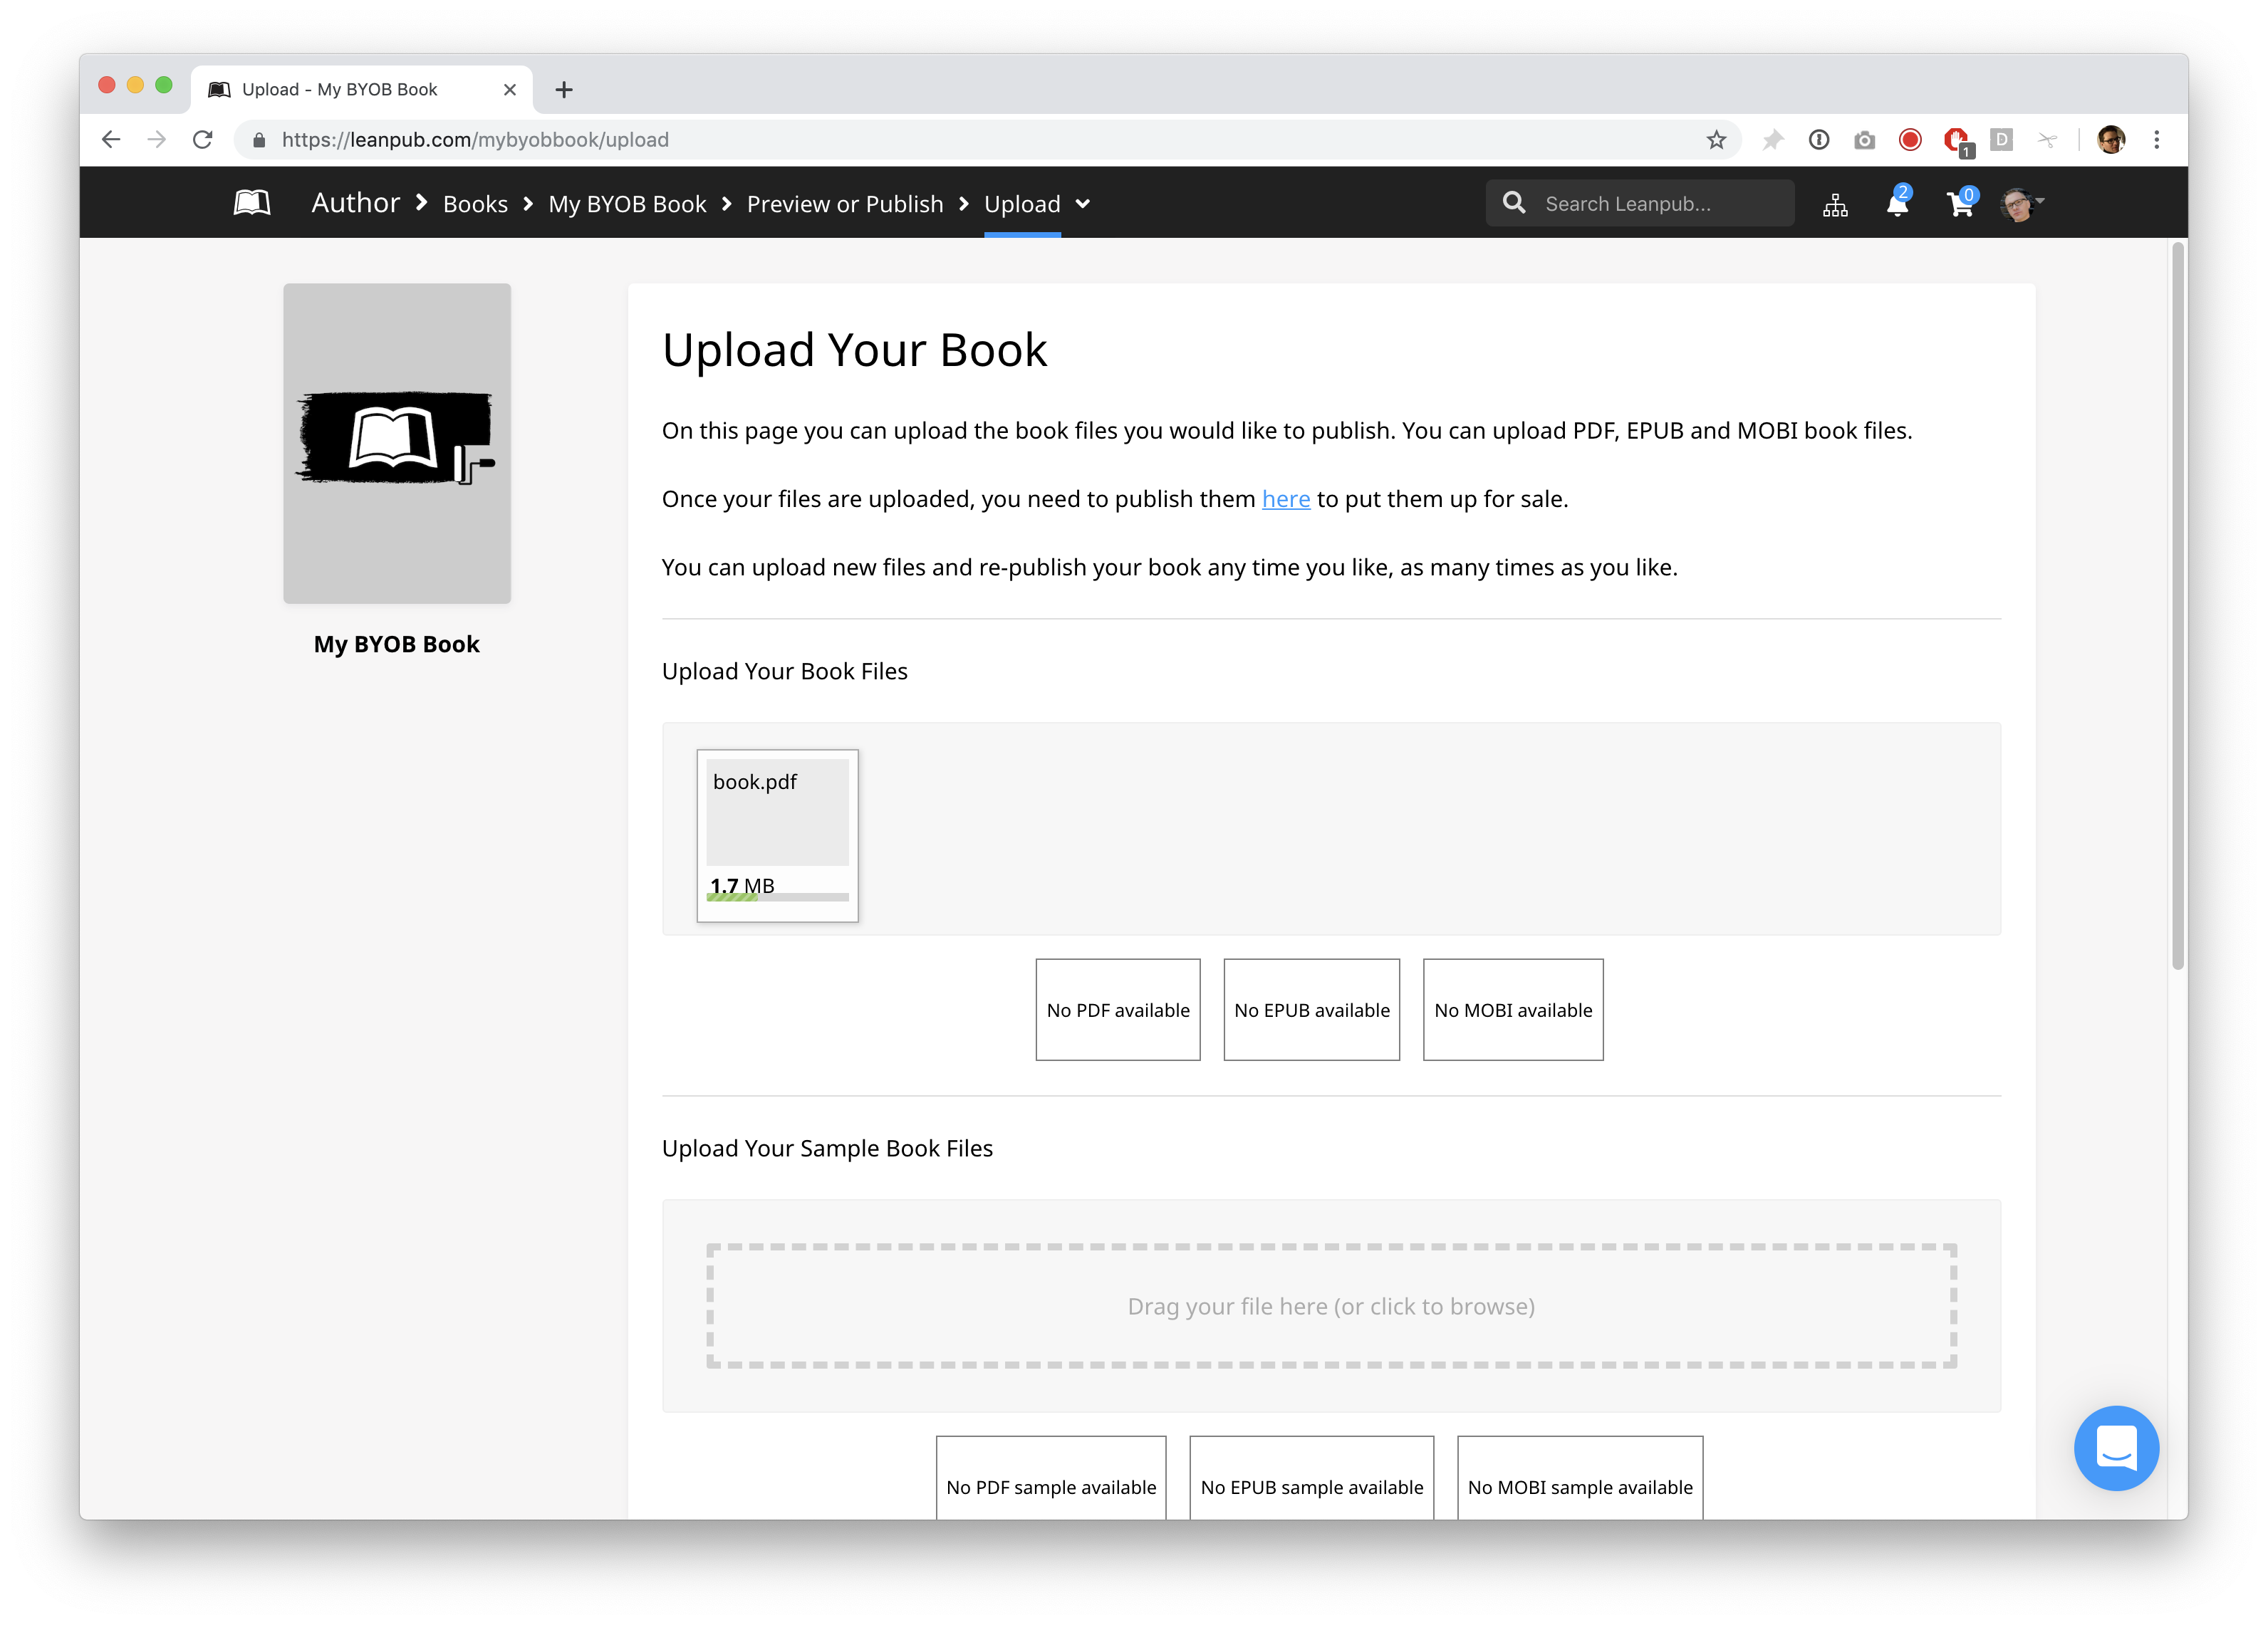
When the file is uploaded, you will see a check mark:
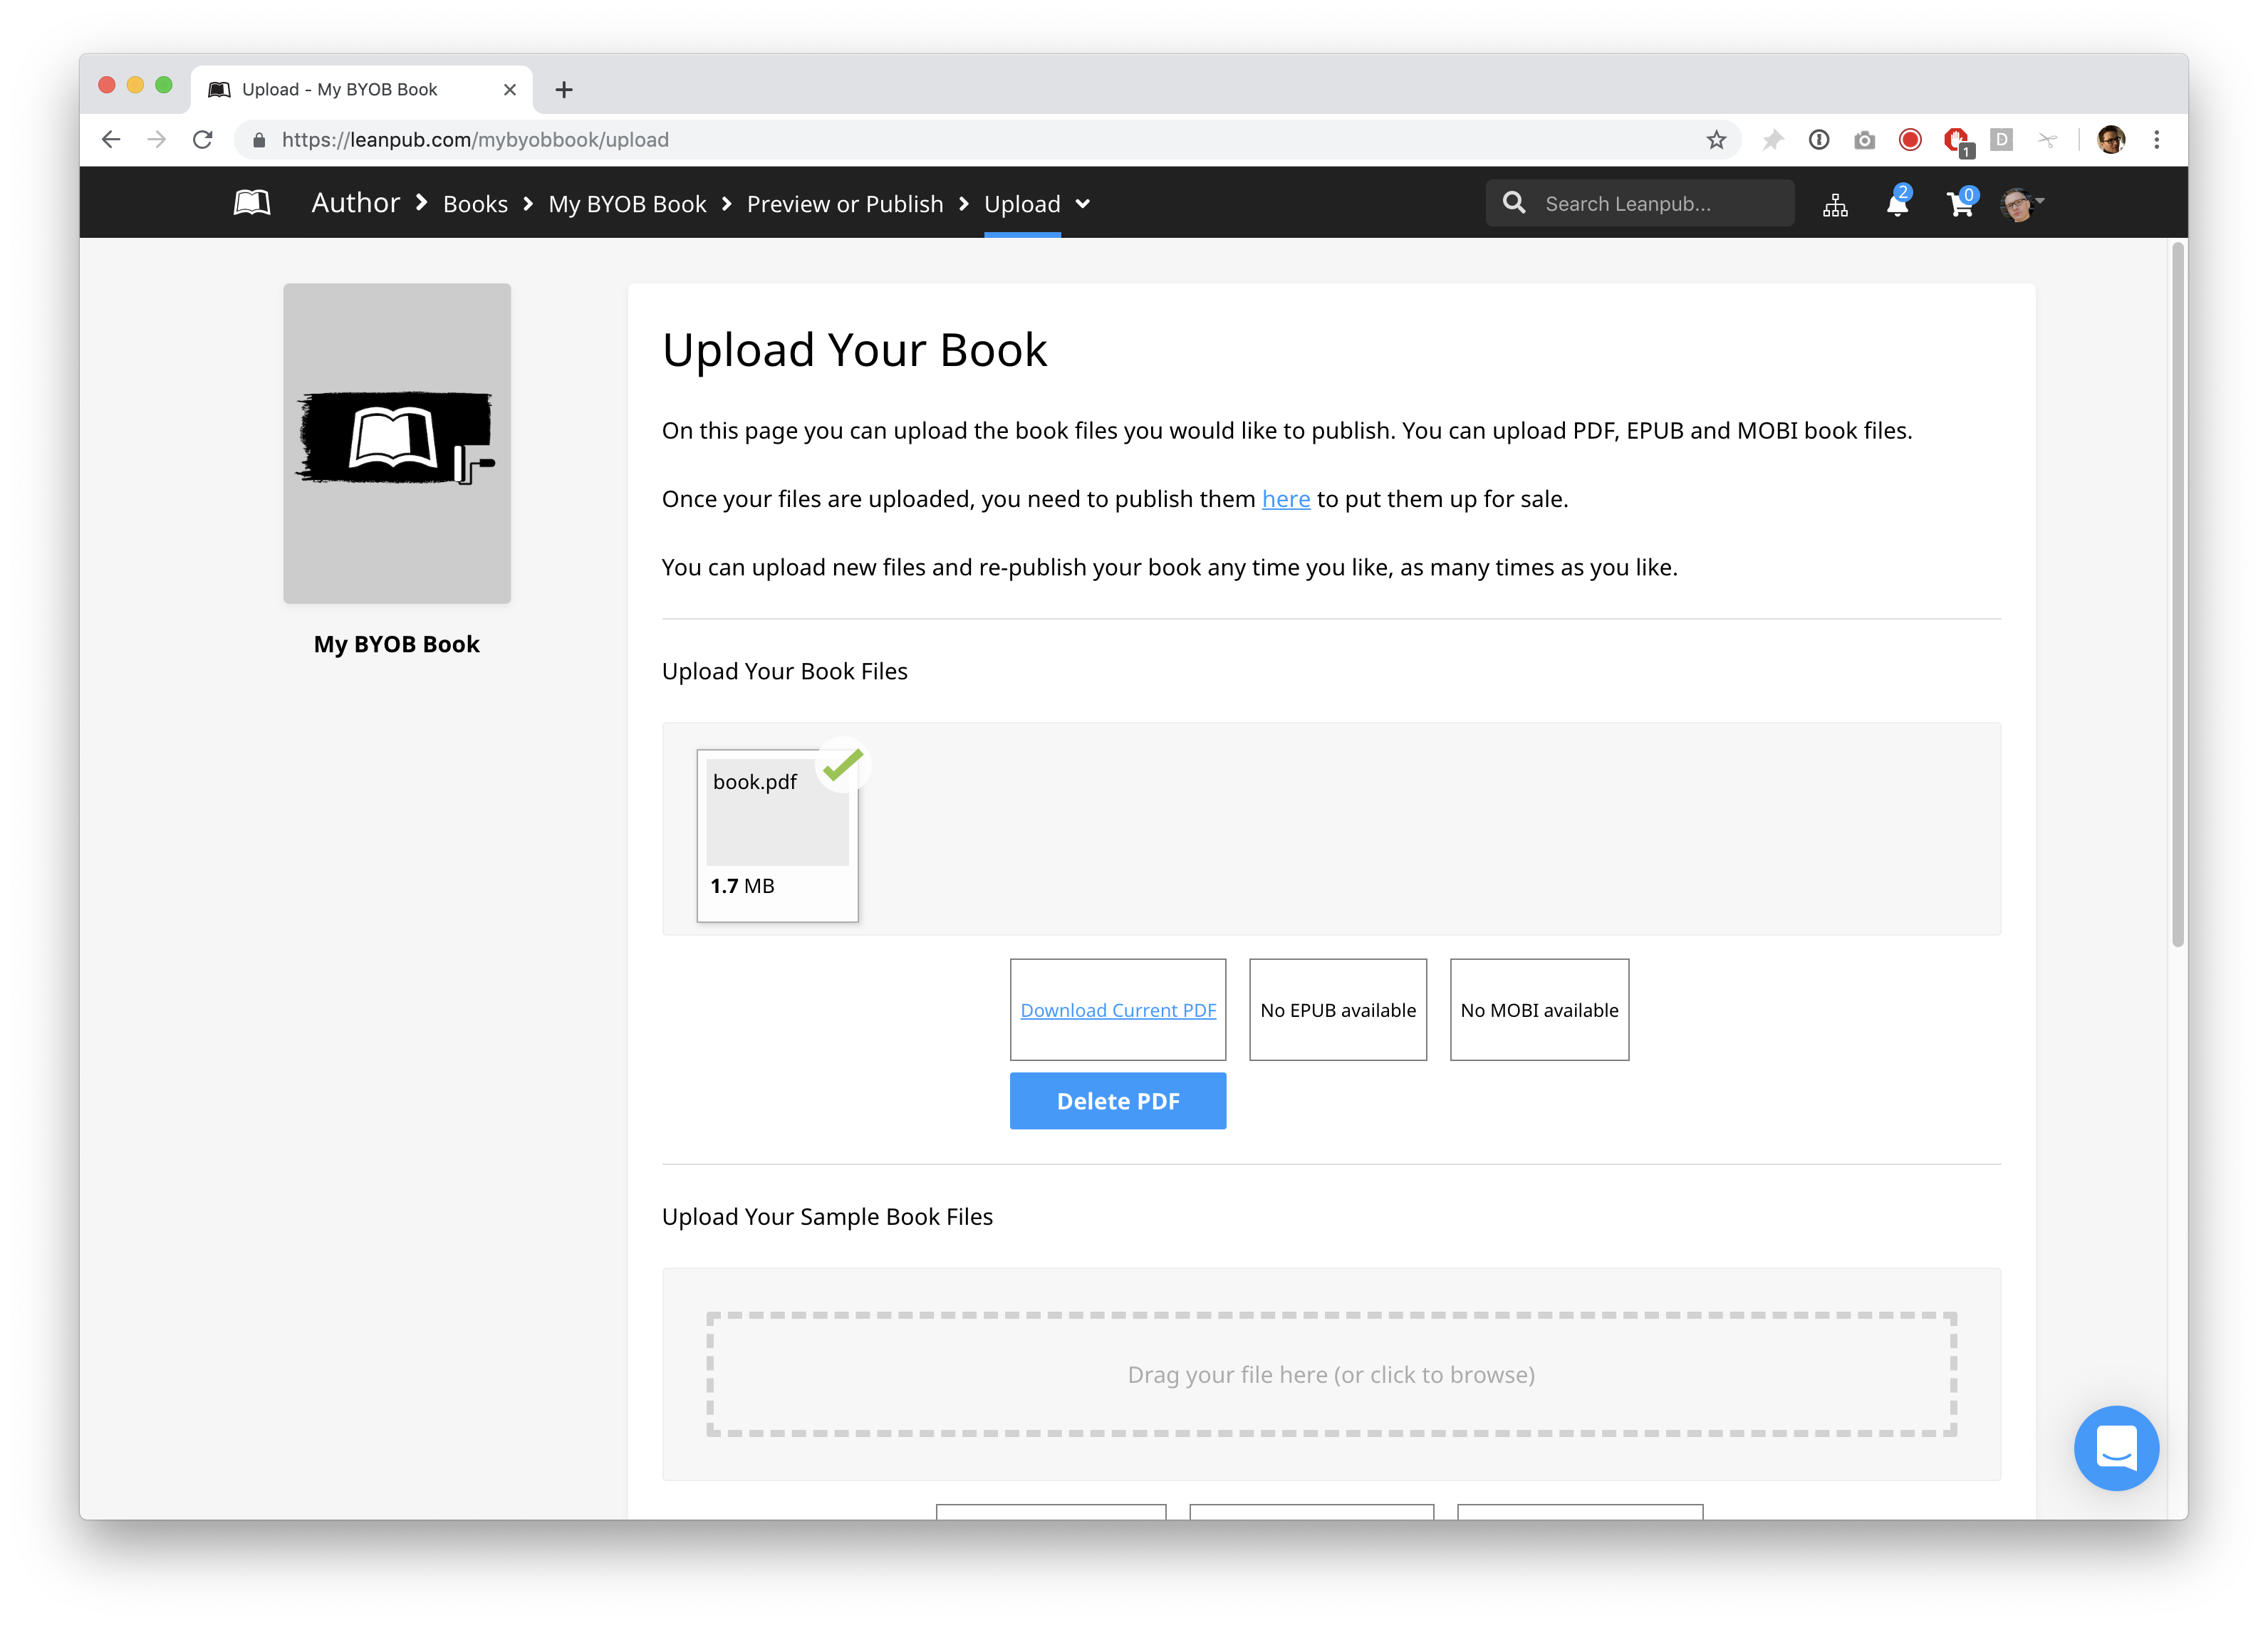
That’s it, you’re done uploading your file! After you have added information about your book to Leanpub, then all you have to do is click the Publish button.
Adding Your Profile and Your Book Information
Here is an article on what to do next:
http://help.leanpub.com/en/articles/2627439-things-to-do-before-publishing-your-leanpub-book
If you have all your materials ready, like your profile picture and your book cover, this should only take a few minutes, and you’ll be ready to publish your book!
Publishing Your Book
To do this, click on “Upload” in the menu at the top:
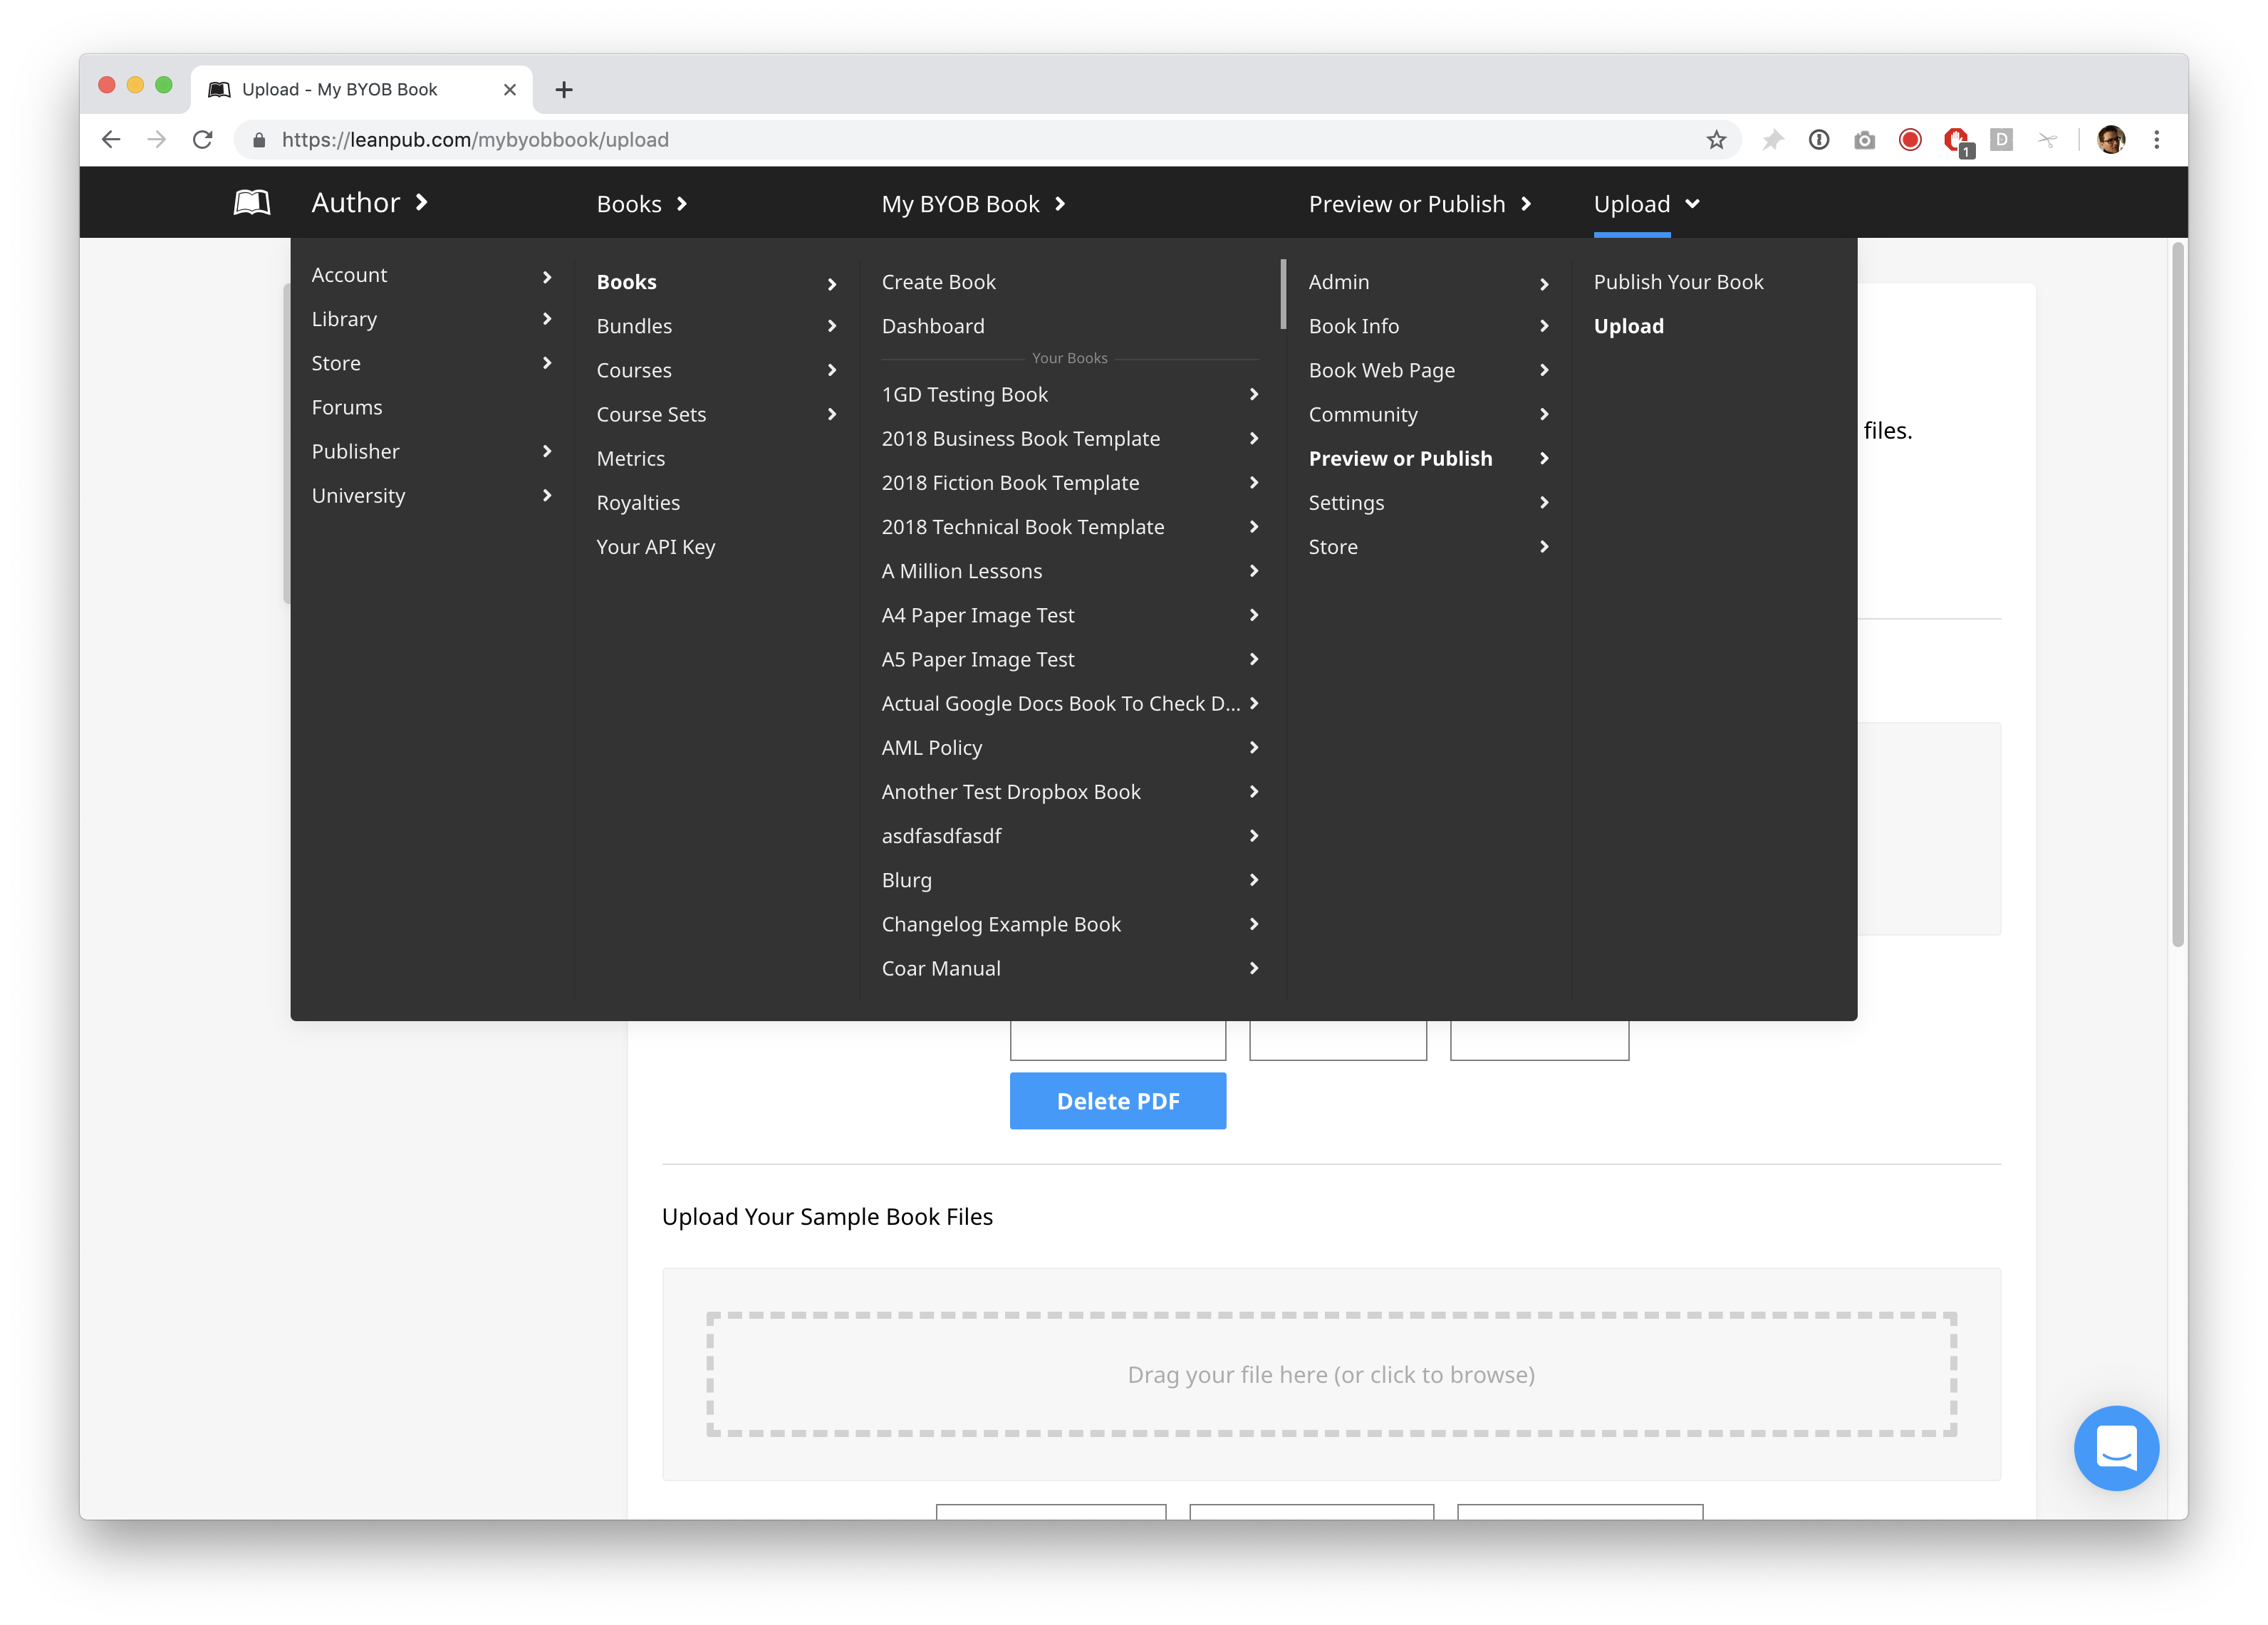
Select “Publish Your Book” at the top right, to go to the Publish page for your book.
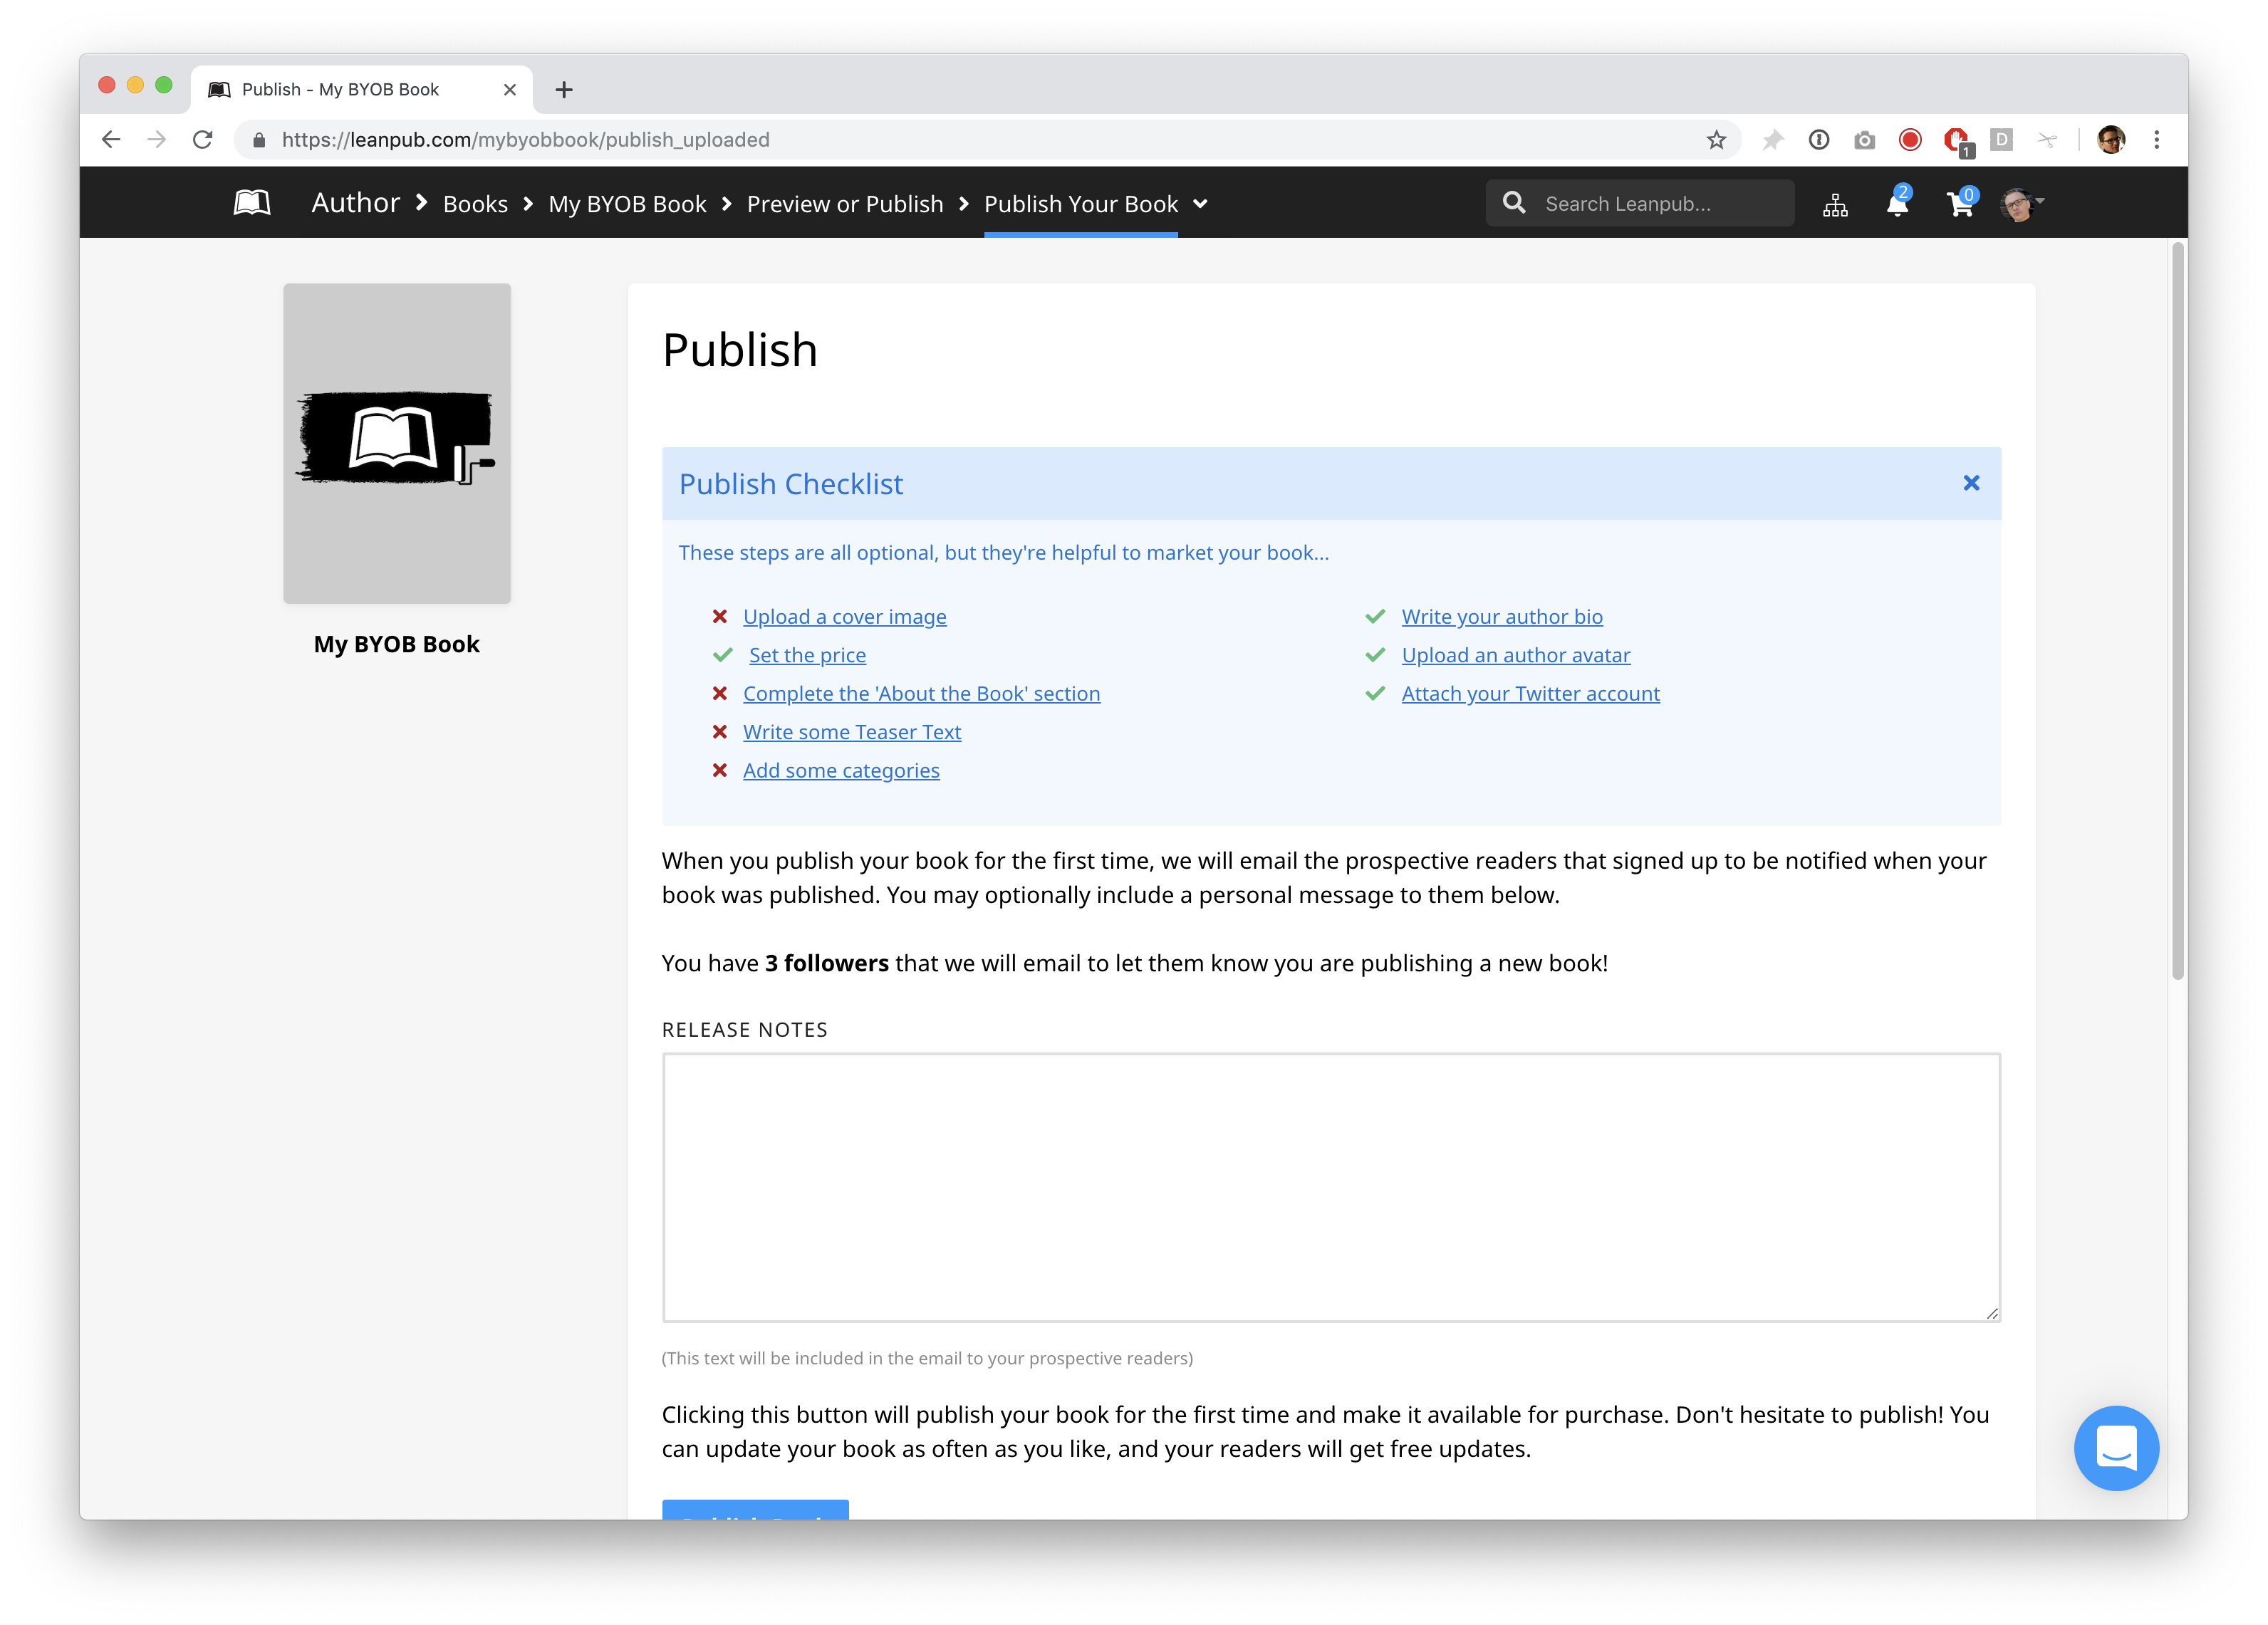
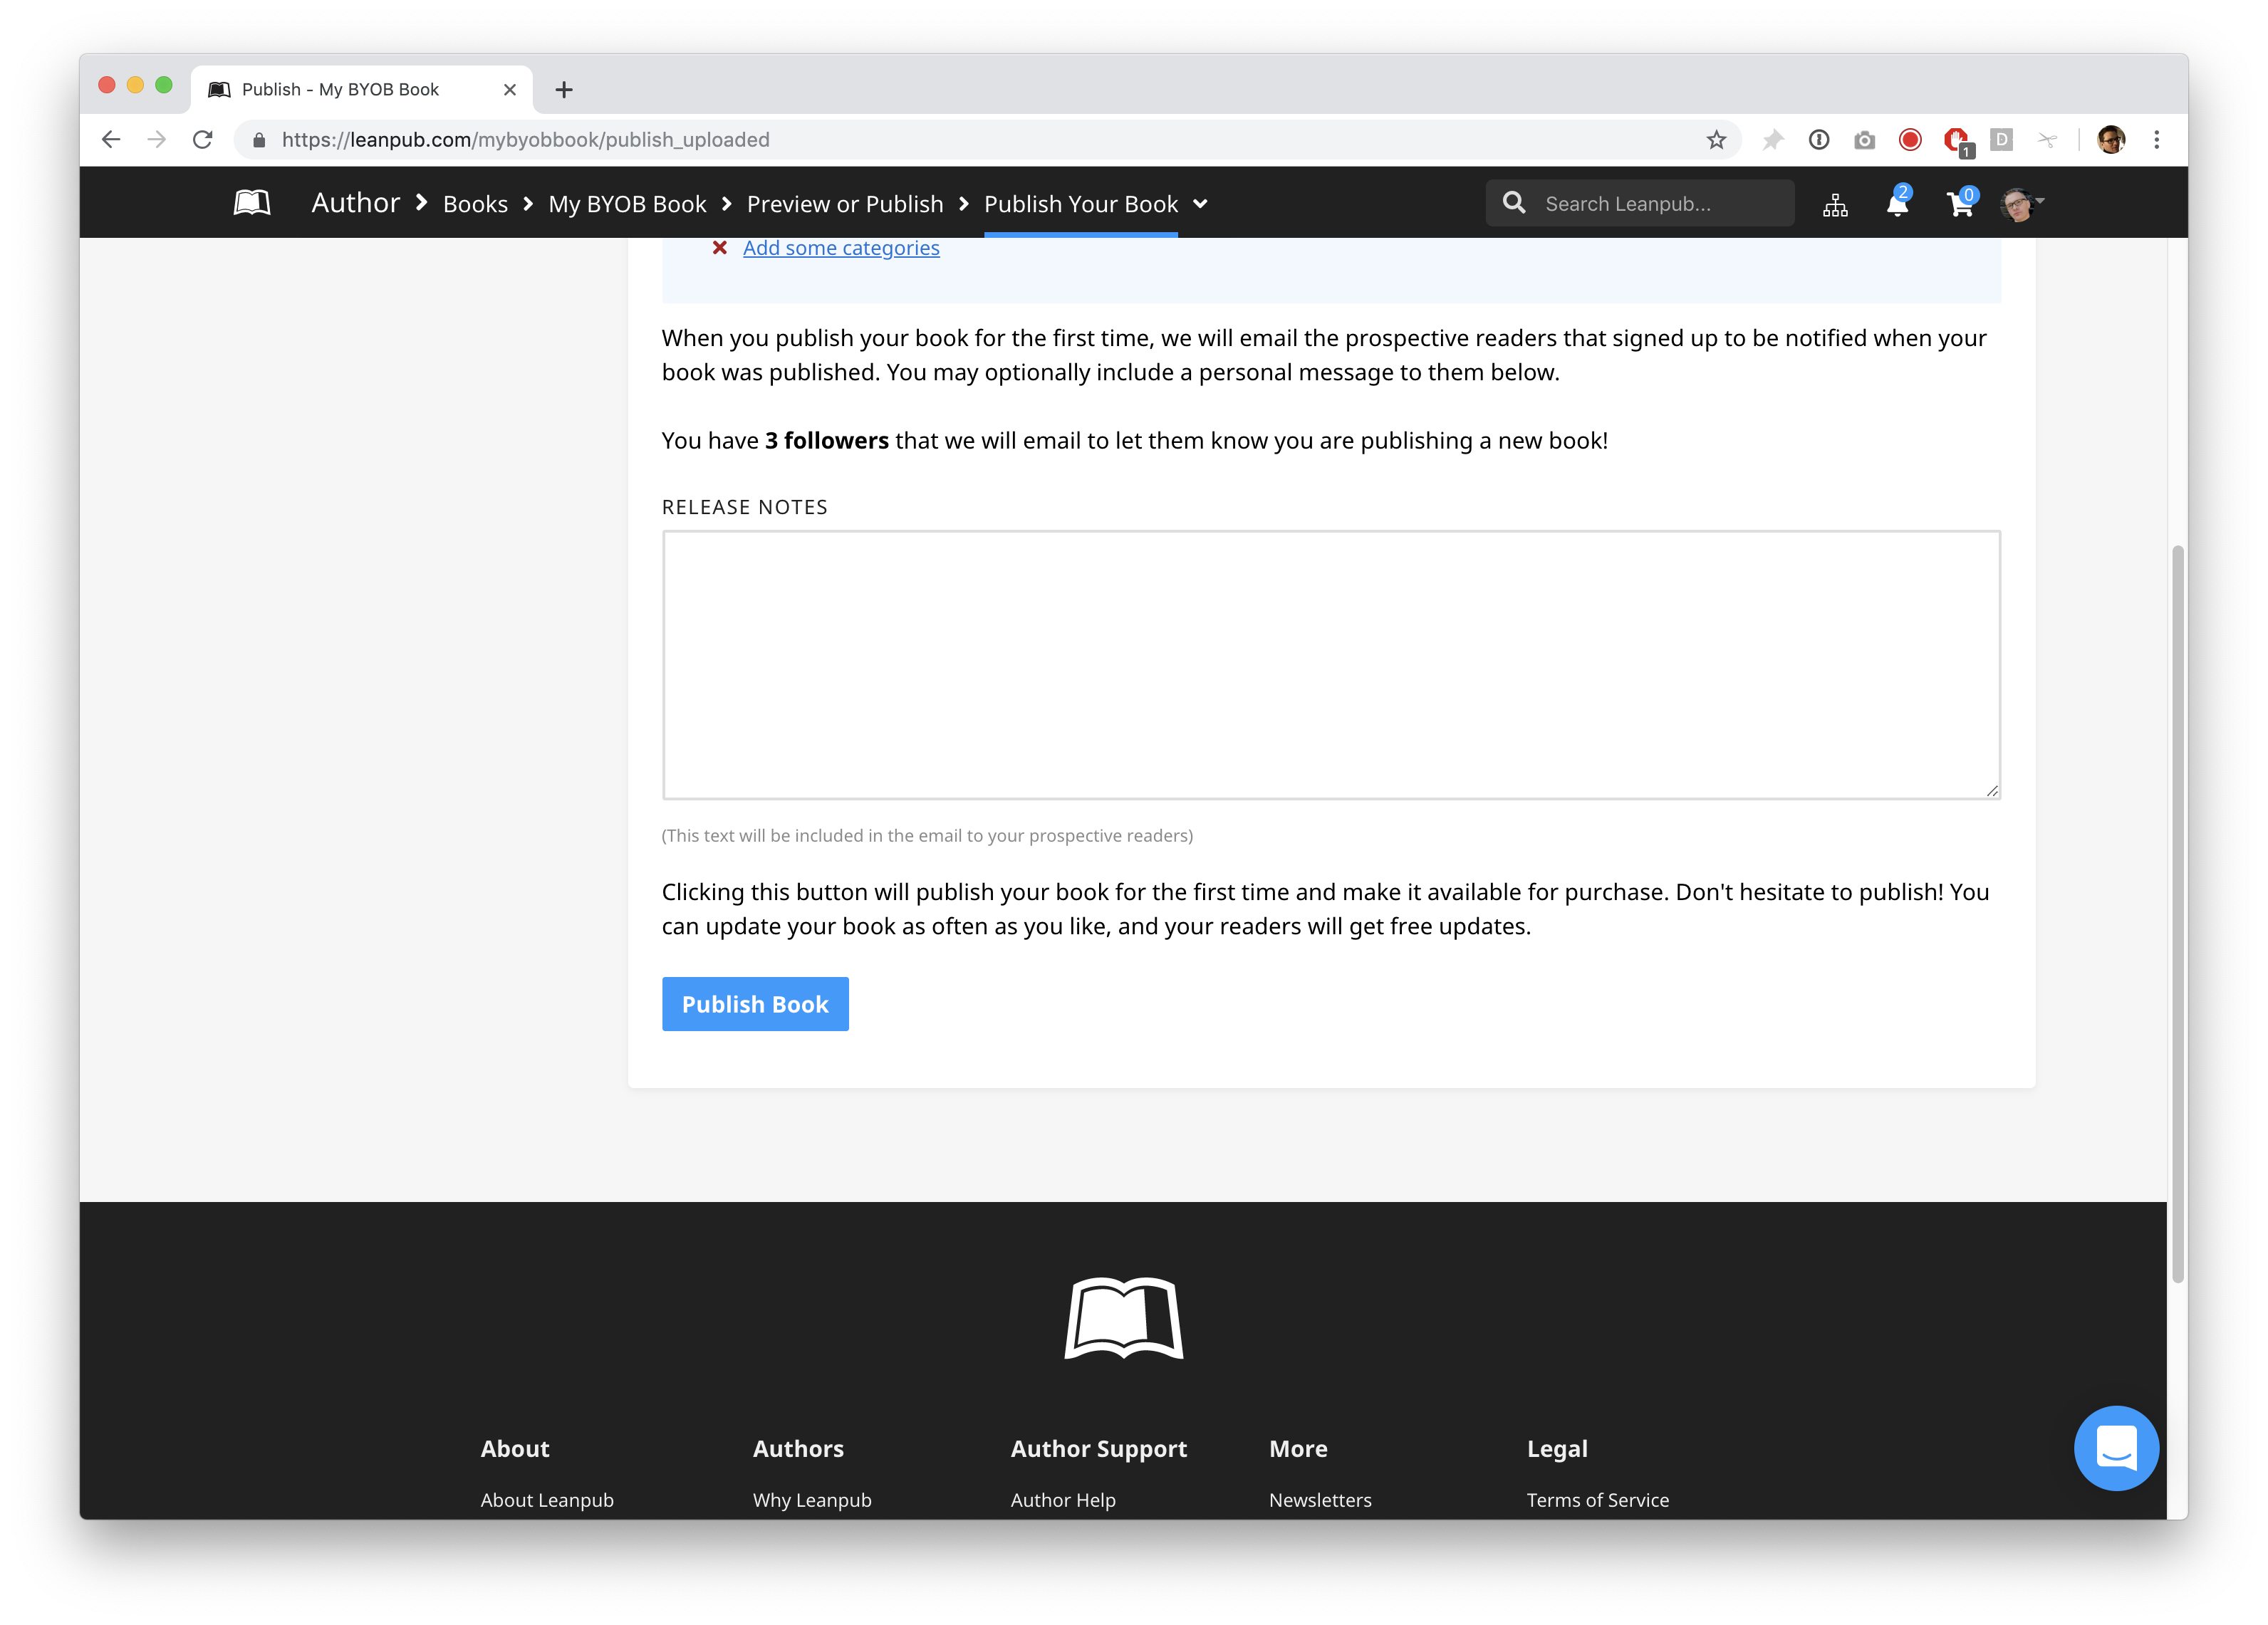
Scroll down and you will see the blue “Publish Book” button.
Next Steps
Next, we recommend you explore the Overview page for your book:
Author > Books > [Your Book Title] > Book Info > Overview
On the Overview page, you can see all the pages you need to get your book set up on Leanpub, like “Upload Book Cover” and the “Book Details” page, where you can explain what your book is about to potential readers.
Leanpub has some features that are pretty unique in the world of self-publishing platforms. We recommend you read the following article if you’re interested in learning more:
http://help.leanpub.com/en/articles/1587118-tips-for-self-publishing-and-selling-books-using-leanpub
If you have any questions or can’t find anything, please search our Help Center for authors here: http://help.leanpub.com/author-help.
Good luck!