Table of Contents
- About Me
- Introduction
-
Configuration
- Using Bintray JCenter as Repository
- Add Banner to Grails Application
- Add Banner To Grails 3.1 Application
- Set Log Level for Grails Artifacts
- Add Some Color to Our Logging
- Save Application PID in File
- Saving Server Port In A File
- Log Startup Info
- Changing Gradle Version
- Adding Health Check Indicators
- Add Git Commit Information To Info Endpoint
- Adding Custom Info To Info Endpoint
- Passing System Properties With Gradle
- Update Application With Newer Grails Version
- Access Grails Application in BootStrap
- Using Spring Cloud Config Server
- Multiple BootStraps
- Cleaning Up Before WAR Creation
- Logging Service Method Calls with Dynamic Groovy
- Multiple Environments
- Execute Code for Current Environment
- Use Different External Configuration Files
- Using External Configuration Files Per Environment
- Change Base Name For External Configuration Files
- Using Random Values For Configuration Properties
- Pass Configuration Values Via Environment Variables
- Pass JSON Configuration Via Command Line
- One WAR to Rule Them All
- Customize the URL Format
- Add Additional Web Application to Tomcat
- Use a Different jQuery UI Theme with Resources Plugin
- Use A Different Logging Configuration File
- Add a DailyRollingFileAppender to Grails Logging
- Use Log4j Extras Companion RollingFileAppender
- Use TimeAndSizeRollingAppender for Logging
- Change Context Path of a Grails Application for Jetty
- Change Version For Dependency Defined By BOM
-
The Command Line
- Script Name Abbreviation
- Shortcut to Open Test Reports in Interactive Console
- Run Gradle Tasks In Grails Interactive Mode
- See Information About Plugins
- Get List Of Application Profiles
- Getting More Information About A Profile
- Using Features When Creating An Application
- Create Report of URL Mappings
- Compiling GSP from the Command-Line
- Profile Script Tasks
- No More Questions
- Create New Application without Wrapper
- Enable Hot Reloading For Non-Development Environments
- Generate ANT Build Script
- Generate Default .gitignore Or .hgignore File
- Extending IntegrateWith Command
- Using Wrapper for Running Grails Commands Without Grails Installation
- Cleaning Up
- Using Aliases as Command Shortcuts
- Run Groovy Scripts in Grails Context
- Add More Paths to the Stats Report
- Access Configuration in Grails Scripts
- Simple Script to Create WAR Files for Each Environment
- Grails Object Relational Mapping (GORM)
- Validation and Data Binding
-
Controllers
- Type Conversion on Parameters
- Get Values from Parameters with Same Name
- Get Request Parameters with Default Values
- Date Request Parameter Value Conversions
- Binding Method Arguments in Controller Methods
- Controller Properties as Model
- Using the header Method to Set Response Headers
- Render Binary Output with the File Attribute
- Exception Methods in Controllers
- Namespace Support for Controllers
- Grouping URL Mappings
-
Groovy Server Pages (GSP)
- Change Scaffolding Templates in Grails
- Use the GSP Template Engine in a Controller
- The Template Namespace
- Templates Can Have a Body
- The Link Namespace
- Format Boolean Values with the formatBoolean Tag
- Encode Content with the encodeAs Tag
- Set Application Wide Default Layout
- Applying Layouts in Layouts
- Applying Layouts in Layouts Revisited
- Access Action and Controller Name in GSP
- Get GrailsApplication and ApplicationContext in GSP
- Use Services in GSP with g:set Tag
- Generating Raw Output with Raw Codec
- Using Closures for Select Value Rendering
-
REST
- Customize Resource Mappings
- Pretty Print XML and JSON Output
- Include Domain Version Property in JSON and XML Output
- Enable Accept Header for User Agent Requests
- Custom Controller Class with Resource Annotation
- Change Response Formats in RestfulController
- Register Custom Marshaller Using ObjectMarshallerRegisterer
- Using Converter Named Configurations with Default Renderers
- Rendering Partial RESTful Responses
- Customize Root Element Name Collections for XML Marshalling
- The Service Layer
-
Grails and Spring
- Injecting Grails Services into Spring Beans
- Conditionally Load Bean Definitions from resources.groovy
- Using Spring Bean Aliases
- Use Constructor Argument Based Dependency Injection
- Set Property Values of Spring Beans in resources.groovy
- Setting Property Values through Configuration
- Defining Spring Beans With doWithSpring Method
- Use Spring Java Configuration
- Conditionally Load Beans in Java Configuration Based on Grails Environment
- Don’t Invalidate Session After Logout with Spring Security Plugin
-
Testing
- See Test Output on the Command Line
- Invoking a Single Test Method
- Cleaning Before Running Tests
- Rerun the Latest Failed Test
- Running Tests Continuously
- Testing for Chain Result in Controller
- Checking Results from Forward Action in Controller Unit Tests
- Using Codecs in Test Classes
- Unit Testing Render Templates from Controller
- Testing Views and Templates
- Passing Objects to Attributes of Tags in Unit Tests
- Set Request Locale in Unit Tests
- Using MetaClass with Testing
- Mocking the Configuration in Unit Tests
- Use Random Server Port In Integration Tests
- Internationalization (i18n)
- IDE
- Miscellaneous
- Converted Files
About Me
I am born in 1973 and live in Tilburg, the Netherlands, with my beautiful wife and three gorgeous children. I am also known as mrhaki, which is simply the initials of his name prepended by mr. The following Groovy snippets shows how the alias comes together:
(How cool is Groovy that we can express this in a simple code sample ;-) )
I studied Information Systems and Management at the Tilburg University. After finishing my studies I started to work at a company which specialized in knowledge-based software. There I started writing my first Java software (yes, an applet!) in 1996. Over the years my focus switched from applets, to servlets, to Java Enterprise Edition applications, to Spring-based software.
In 2008 I wanted to have fun again when writing software. The larger projects I was working on were more about writing configuration XML files, tuning performance and less about real development. So I started to look around and noticed Groovy as a good language to learn about. I could still use existing Java code, libraries, and my Groovy classes in Java. The learning curve isn’t steep and to support my learning phase I wrote down interesting Groovy facts in my blog with the title Groovy Goodness. I post small articles with a lot of code samples to understand how to use Groovy. Since November 2011 I am also a DZone Most Valuable Blogger (MVB); DZone also posts my blog items on their site.
I have spoken at the Gr8Conf Europe and US editions about Groovy, Gradle, Grails and Asciidoctor topics. Other conferences where I talked are Greach in Madrid, Spain, JavaLand in Germany and JFall in The Netherlands.
I work for a company called JDriven in the Netherlands. JDriven focuses on technologies that simplify and improve development of enterprise applications. Employees of JDriven have years of experience with Java and related technologies and are all eager to learn about new technologies. I work on projects using Grails and Java combined with Groovy and Gradle.
Introduction
When I started to learn about Grails I wrote done little code snippets with features of Grails I found interesting. To access my notes from different locations I wrote the snippets with a short explanation in a blog: Messages from mrhaki. I labeled the post as Grails Goodness, because I thought this is good stuff, and that is how the Grails Goodness series began.
A while ago I bundled all my blog Groovy Goodness blog posts in a book published at Leanpub. Leanpub is very easy to use and I could use Markdown to write the content, which I really liked as a developer. So it felt natural to also bundle the Grails Goodness blog posts at Leanpub.
In this book the blog posts are bundled and categorized into sections. Within each section blog posts that cover similar features are grouped. The book is intended to browse through the subjects. You should be able to just open the book at a random page and learn more about Grails. Maybe pick it up once in a while and learn a bit more about known and lesser known features of Grails.
I hope you will enjoy reading the book and it will help you with learning about Groovy, so you can apply all the goodness in your projects.
Configuration
Using Bintray JCenter as Repository
Bintray JCenter is the next generation (Maven) repository. The repository is already a superset of Maven Central, so it can be used as a drop-in replacement for Maven Central. To use Bintray JCenter we only use jcenter() in our repositories configuration block in BuildConfig.groovy. This is the same as we would use in a Gradle build.
We can also set the update and checksum policies by applying a configuration closure to the jcenter method:
Code written with Grails 2.4.2.
Original blog post written on August 05, 2014.
Add Banner to Grails Application
Grails 3 is based on Spring Boot. This means we get a lot of the functionality of Spring Boot into our Grails applications. A Spring Boot application has by default a banner that is shown when the application starts. The default Grails application overrides Spring Boot’s behavior and disables the display of a banner. To add a banner again to our Grails application we have different options.
First we can add a file banner.txt to our classpath. If Grails finds the file it will display the contents when we start the application. Let’s add a simple banner with Grails3 in Ascii art in the file src/main/resources/banner.txt. By placing the file in src/main/resources we can assure it is in the classpath as classpath:/banner.txt:
Let’s run our application with the bootRun task:
To have more information in the banner we can implement the org.springframework.boot.Banner interface. This interface has a printBanner method in which we can write the implementation for the banner. To use it we must create an instance of the GrailsApp class and set the banner property:
Now we run the bootRun task again:
Written with Grails 3.0.1.
Ascii art is generated with this website.
Original blog post written on April 15, 2015.
Add Banner To Grails 3.1 Application
In a previous post we learned how to add a banner to a Grails 3.0 application. We used the Spring Boot support in Grails to show a banner on startup. The solution we used doesn’t work for a Grails 3.1 application. We need to implement a different solution to show a banner on startup.
First of all we create a new class that implements the org.springframework.boot.Banner interface. We implement the single method printBanner and logic to display a banner, including colors:
Next we must override the GrailsApp class. We override the printBanner method, which has no implementation in the GrailsApp class. In our printBanner method we use GrailsBanner:
Finally in the Application class we use BannerGrailsApp instead of the default GrailsApp object:
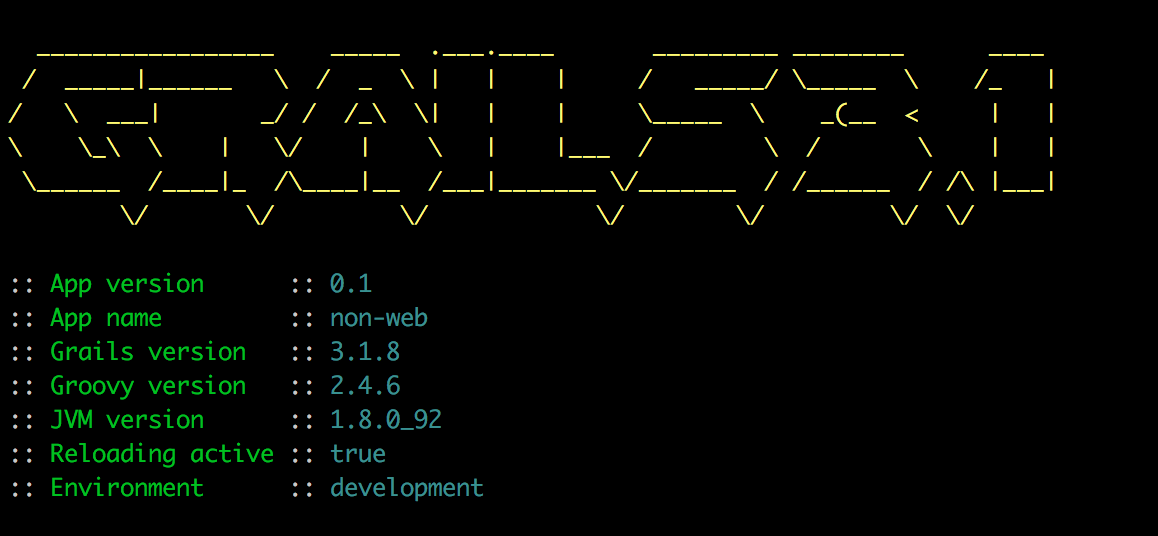
When we start our Grails application on a console with color support we see the following banner:
Written with Grails 3.1.8.
Original blog post written on June 20, 2016.
Set Log Level for Grails Artifacts
A good thing in Grails is that in Grails artifacts like controllers and services we have a log property to add log statements in our code. If we want to have the output of these log statements we must use a special naming convention for the log names. Each logger is prefixed with grails.app followed by the Grails artifact. Valid artifact values are controllers, services, domain, filters, conf and taglib. This is followed by the actual class name. So for example we have a controller SampleController in the package mrhaki.grails then the complete logger name is grails.app.controllers.mrhaki.grails.SampleContoller.
The following sample configuration is for pre-Grails 3:
In Grails 3 we can use a common Logback configuration file. In the following part of the configuration we set the log levels:
Written with Grails 2.5.0 and 3.0.1.
Original blog post written on April 15, 2015.
Add Some Color to Our Logging
Grails 3 is based on Spring Boot. This means we can use a lot of the stuff that is available in Spring Boot now in our Grails application. If we look at the logging of a plain Spring Boot application we notice the logging has colors by default if our console supports ANSI. We can also configure our Grails logging so that we get colors.
First we need to change our logging configuration in the file grails-app/conf/logback.groovy:
Normally when we would run our application Grails should check if the console support ANSI colors. If the console supports it the color logging is enabled, otherwise we still get non-colored logging. On my Mac OSX the check doesn’t work correctly, but we can set an environment property spring.output.ansi.enabled to the value always to force colors in our logging output. The default value is detect to auto detect the support for colors. We can set this property in different ways. For example we could add it to our application configuration or we could add it as a Java system property to the JVM arguments of the bootRun task. In the following build file we use the JVM arguments for the bootRun task:
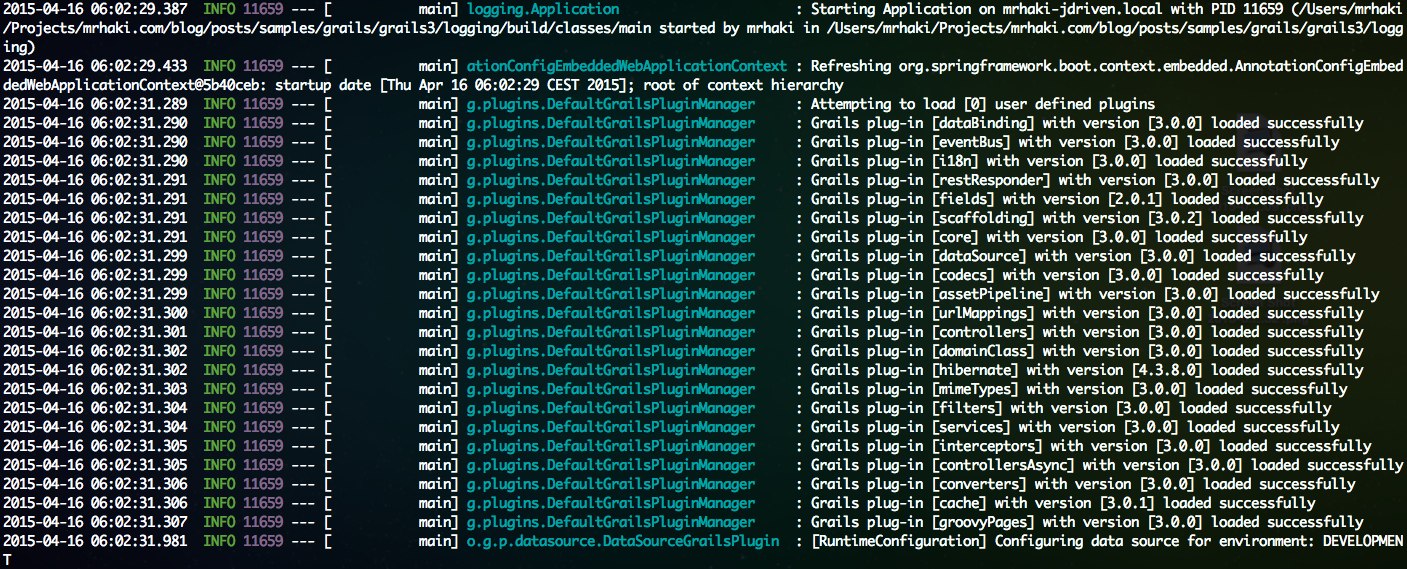
When we run the Grails application using bootRun we get for example the following output:
Written with Grails 3.0.1.
Original blog post written on April 16, 2015.
Save Application PID in File
Since Grails 3 we can borrow a lot of the Spring Boot features in our applications. If we look in our Application.groovy file that is created when we create a new Grails application we see the class GrailsApp. This class extends SpringApplication so we can use all the methods and properties of SpringApplication in our Grails application. Spring Boot and Grails comes with the class ApplicationPidFileWriter in the package org.springframework.boot.actuate.system. This class saves the application PID (Process ID) in a file application.pid when the application starts.
In the following example Application.groovy we create an instance of ApplicationPidFileWriter and register it with the GrailsApp:
So when we run our application a new file application.pid is created in the current directory and contains the PID:
From another console we read the contents of the file with the PID:
The default file name is application.pid, but we can use another name if we want to. We can use another constructor for the ApplicationPidFileWriter where we specify the file name. Or we can use a system property or environment variable with the name PIDFILE. But we can also set it with the configuration property spring.pidfile. We use the latest option in our Grails application. In the next example application.yml we set this property:
When we start our Grails application we get the file sample-app.pid with the application PID as contents.
Written with Grails 3.0.1.
Original blog post written on April 22, 2015.
Saving Server Port In A File
In a previous post we learned how to save the application PID in a file when we start our Grails application. We can also save the port number the application uses in a file when we run our Grails application. We must use the class EmbeddedServerPortFileWriter and add it as a listener to the GrailsApp instance. By default the server port is saved in a file application.port. But we can pass a custom file name or File object to the constructor of the EmbeddedServerPortFileWriter class.
In the following example we use the file name application.server.port to store the port number:
When the application is started we can find the file application.server.port in the directory from where the application is started. When we open it we see the port number:
Written with Grails 3.1.
Original blog post written on February 05, 2016.
Log Startup Info
We can let Grails log some extra information when the application starts. Like the process ID (PID) of the application and on which machine the application starts. And the time needed to start the application. The GrailsApp class has a property logStartupInfo which is true by default. If the property is true than some extra lines are logged at INFO and DEBUG level of the logger of our Application class.
So in order to see this information we must configure our logging in the logback.groovy file. Suppose our Application class is in the package mrhaki.grails.sample.Application then we add the following line to see the output of the startup logging on the console:
When we run our Grails application we see the following in our console:
If we want to add some extra logging we can override the logStartupInfo method:
If we run the application we see in the console:
Written with Grails 3.0.1.
Original blog post written on April 23, 2015.
Changing Gradle Version
Since Grails 3 Gradle is used as the build tool. The Grails shell and commands use Gradle to execute tasks. When we create a new Grails 3 application a Gradle wrapper is added to our project. The Gradle wrapper is used to download and use a specific Gradle version for a project. This version is also used by the Grails shell and commands. The default version (for Grails 3.0.12) is Gradle 2.3, which is also part of the Grails distribution. At the time of writing this blog post the latest Gradle version is 2.10. Sometimes we use Gradle plugins in our project that need a higher Gradle version, or we just want to use the latest version because of improvements in Gradle. We can change the Gradle version that needs to be used by Grails in different ways.
Grails will first look for an environment variable GRAILS_GRADLE_HOME. It must be set to the location of a Gradle installation. If it is present is used as the Gradle version by Grails. In the following example we use this environment variable to force Grails to use Gradle 2.10:
Another way to set the Gradle version is by change the Gradle wrapper version. In our build.gradle file there is a task wrapper. This creates a Gradle wrapper for our project with the version that is specified in the file gradle.properties with the property gradleWrapperVersion. Let’s change the value of gradleWrapperVersion to 2.10 and execute the wrapper task. We can change the value in the grade.properties file, the build.gradle file or pass it via the command line:
It could be that we get an org/gradle/mvn3/org/apache/maven/model/building/ModelBuildingException exception after upgrading to a newer version. This is because the io.spring.dependency-management plugin is set to a version not supported by the newer Gradle version. If we change the version of the plugin to the latest version (0.5.4.RELEASE at the time of writing this blog post) the error is solved.
It also important to notice that Grails will look for Gradle wrapper defined for the base project if we use our Grails project in a multi-module project. So the directory that contains the settings.gradle file is then used to look for a Gradle wrapper. If it is not found the default Gradle version that is defined by the Grails distribution is used.
Written with Grails 3.0.12.
Original blog post written on January 27, 2016.
Adding Health Check Indicators
With Grails 3 we also get Spring Boot Actuator. We can use Spring Boot Actuator to add some production-ready features for monitoring and managing our Grails application. One of the features is the addition of some endpoints with information about our application. By default we already have a /health endpoint when we start a Grails (3+) application. It gives back a JSON response with status UP. Let’s expand this endpoint and add a disk space, database and url health check indicator.
We can set the application property endpoints.health.sensitive to false (securing these endpoints will be another blog post) and we automatically get a disk space health indicator. The default threshold is set to 10MB, so when the disk space is lower than 10MB the status is set to DOWN. The following snippet shows the change in the grails-app/conf/application.yml to set the property:
If we invoke the /health endpoint we get the following output:
If we want to change the threshold we can create a Spring bean of type DiskSpaceHealthIndicatorProperties and name diskSpaceHealthIndicatorProperties to override the default bean. Since Grails 3 we can override doWithSpring method in the Application class to define Spring beans:
Spring Boot Actuator already contains implementations for checking SQL databases, Mongo, Redis, Solr and RabbitMQ. We can activate those when we add them as Spring beans to our application context. Then they are automatically picked up and added to the results of the /health endpoint. In the following example we create a Spring bean databaseHealth of type DataSourceHealthIndicator:
To create our own health indicator class we must implement the HealthIndicator interface. The easiest way is to extend the AbstractHealthIndicator class and override the method doHealthCheck. It might be nice to have a health indicator that can check if a URL is reachable. For example if we need to access a REST API reachable through HTTP in our application we can check if it is available.
In our Application class we create a Spring bean for this health indicator so it is picked up by the Spring Boot Actuator code:
Now when we run our Grails application and access the /health endpoint we get the following JSON:
Notice that the URL health check fails so the complete status is set to DOWN.
Written with Grails 3.0.1.
Original blog post written on April 24, 2015.
Add Git Commit Information To Info Endpoint
We know Grails 3 is based on Spring Boot. This means we can use Spring Boot features in our Grails application. For example a default Grails application has a dependency on Spring Boot Actuator, which means we have a /info endpoint when we start the application. We add the Git commit id and branch to the /info endpoint so we can see which Git commit was used to create the running application.
First we must add the Gradle Git properties plugin to our build.gradle file. This plugin create a git.properties file that is picked up by Spring Boot Actuator so it can be shown to the user:
And that is everything we need to do. We can start our application and open the /info endpoint and we see our Git commit information:
Written with Grails 3.1.8.
Original blog post written on June 17, 2016.
Adding Custom Info To Info Endpoint
In a previous post we learned how to add Git commit information to the /info endpoint in our Grails application. We can add our own custom information to this endpoint by defining application properties that start with info..
Let’s add the Grails environment the application runs in to the /info endpoint. We create the file grails-app/conf/application.groovy. To get the value we must have a piece of code that is executed so using the application.groovy makes this possible instead of a static configuration file like application.yml:
We also want to have information available at build time to be included. Therefore we write a new Gradle task in our build.gradle that create an application.properties file in the build directory. The contents is created when we run or build our Grails application. We just have to make sure the properties stored in application.properties start with info.:
Let’s run our Grails application:
And we look at the output of the /info endpoint:
Written with Grails 3.1.8.
Original blog post written on June 17, 2016.
Passing System Properties With Gradle
In a other post we learned how to pass Java system properties from the command-line to a Java process defined in a Gradle build file. Because Grails 3 uses Gradle as the build tool we can apply the same mechanism in our Grails application. We need to reconfigure the run task. This task is of type JavaExec and we can use the method systemProperties to assign the system properties we define on the command-line when we invoke the run task.
We have a simple Grails 3 application with the following controller that tries to access the Java system property sample.message:
Next we configure the run and bootRun tasks and use System.properties with the Java system properties from the command-line as argument for the systemProperties method:
Now we can invoke the run or bootRun tasks with Gradle:
Or we can execute the run-app command with the grails command:
Written with Grails 3.0.7.
Original blog post written on September 22, 2015.
Update Application With Newer Grails Version
In this blog post we see how to update the Grails version of our application for a Grails 3 application. In previous Grails versions there was a special command to upgrade, but with Grails 3 it is much simpler. To update an application to a newer version in the Grails 3.0.x range we only have to change the value of the property grailsVersion in the file gradle.properties.
After we have changed the value we run the clean and compile tasks so all dependencies are up-to-date.
Written with Grails 3.0.8.
Original blog post written on September 28, 2015.
Access Grails Application in BootStrap
Accessing the Grails application object in BootStrap.groovy is easy. We only have to define a variable named grailsApplication and Spring’s name based injection takes care of everything.
Code written with Grails 1.1.2.
Original blog post written on January 14, 2010.
Using Spring Cloud Config Server
The Spring Cloud project has several sub projects. One of them is the Spring Cloud Config Server. With the Config Server we have a central place to manage external properties for applications with support for different environments. Configuration files in several formats like YAML or properties are added to a Git repository. The server provides an REST API to get configuration values. But there is also a good integration for client applications written with Spring Boot. And because Grails (3) depends on Spring Boot we can leverage the same integration support. Because of the Spring Boot auto configuration we only have to add a dependency to our build file and add some configuration.
Before we look at how to use a Spring Cloud Config server in our Grails application we start our own server for testing. We use a local Git repository as backend for the configuration. And we use the Spring Boot CLI to start the server. We have the following Groovy source file to enable the configuration server:
Next we create a new local Git repository with $ git init /Users/mrhaki/config-repo. We use the Spring Boot CLI and our Groovy script to start a sample Spring Cloud Config Server:
Next we create a YAML configuration file with a configuration property app.message. The name of the configuration file must start with the application name that want to use the configuration. It is best to not use hyphens in the name. Optionally we can use a Spring profile name to override configuration properties for a specific profile. The profile maps to the Grails environment names so we can use the pattern also for our Grails configuration. To learn about even more possibilities we must read the Spring Cloud Config documentation.
Here are two configuration files with a default value and a override property for the development environment:
We add and commit both files in our local Git repository.
Let’s configure our Grails application so it uses the configuration from our Spring Cloud Config Server. First we change build.gradle and add a dependency on spring-cloud-starter-config. We also add an extra BOM for the Spring Cloud dependencies so the correct version is automatically used.
Next we need to define the URL for our configuration server. We can set the system property spring.cloud.config.uri when we start our Grails application or we can add the file grails-app/conf/bootstrap.yml with the following contents:
Finally we set our application name to grails_cloud_config which is used to get the configuration properties from the Config server:
That is it, we can now use properties defined in the configuration server in our Grails application. Let’s add a controller which reads the configuration property app.message:
When we start our application with the development environment we get the following message:
And when in production mode we get:
Written with Grails 3.0.11
Original blog post written on January 13, 2016.
Multiple BootStraps
In Grails we can execute code when the application starts and stops. We just have to write our code in grails-app/conf/BootStrap.groovy. Code that needs to be executed at startup must be written in the closure init. In the destroy closure we can write code that needs be executed when the application stops. But we are not limited to one BootStrap class. We can create multiple BootStrap classes as long as it is placed in the grails-app/conf directory and the name ends with BootStrap.
And we can create another bootstrap class:
Code written with Grails 2.3.7.
Original blog post written on March 26, 2014.
Cleaning Up Before WAR Creation
Grails provides a mechanism where we can execute a closure to do stuff before we create a WAR file. Technically speaking we can change the contents of the staging directory. So when we run the application as an exploded WAR file or we create a WAR file in both cases the closure is executed.
The closure is very useful to delete files we don’t want to be in the final WAR file, but are copied by default. We define the closure in conf/BuildConfig.groovy and it must be named grails.war.resources. The closure has a parameter which is the staging directory. The context of the closure is AntBuilder, so all methods we define in the closure are executed for an AntBuilder object. For example if we normally would use the following statement: ant.echo(message: 'Hello'), we must now use echo(message: 'Hello'). The ant object is implicit for the context of the closure.
In the following sample we want to delete the Thumbs.db files Windows generates from the application:
Code written with Grails 1.1.2.
Original blog post written on December 16, 2009.
Logging Service Method Calls with Dynamic Groovy
Because Grails is a Groovy web application framework we can use all the nice features of Groovy, like dynamic programming. Suppose we want to log all method invocation of Grails services. We have to look up the Grails services and override the invokeMethod() for the classes. Here we invoke the original method, but also add logging code so we can log when we enter and exit the method.
The best place to put our code is in grails-app/conf/BootStrap.groovy of our Grails application. Here we use the init closure to first look up the Grails service classes. Next we override the invokeMethod().
Code written with Grails 1.2.
Original blog post written on January 18, 2010.
Multiple Environments
Grails supports different environments for configuring properties. Default we get a development, test and production environment, but we are free to add our own environments. We can define the new environment in for example grails-app/conf/Config.groovy. Next we can use the environment from the command line with the -Dgrails.env= option. Here we must use our newly created environment.
To create a new WAR file with the settings for the testserver2 environment we type the following command:
Code written with Grails 1.2.
Original blog post written on January 23, 2010.
Execute Code for Current Environment
In Grails we can use the Environment class to execute code for specific environments. The method executeForCurrentEnvironment() takes a closure with the different environments and the code to be executed. This provides an elegant way to execute different blocks of code depending on the current environment.
The following sample is a simple controller where we set the value of the result variable depending on the environment. Besides the default environments - development, test, production - we can define our own custom environments. In the controller we provide the custom environment myenv.
We we run the Grails application with $ grails run-app and go to the URL http://localhost:8080/app/execute, we get the following output: Running in DEV mode.. When we run $ grails -Dgrails.env=myenv run-app we get the following output in our browser: Running in custom "myenv" mode..
Code written with Grails 1.2.2.
Original blog post written on May 25, 2010.
Use Different External Configuration Files
A Grails 3 application uses the same mechanism to load external configuration files as a Spring Boot application. This means the default locations are the root directory or config/ directory in the class path and on the file system. If we want to specify a new directory to search for configuration files or specify the configuration files explicitly we can use the Java system property spring.config.location.
In the following example we have a configuration application.yml in the settings directory. The default base name for a configuration file is application, so we use that base name in our example. In this sample we use a YAML configuration file where we override the property sample.config for the Grails production environment.
Next we need to reconfigure the run and bootRun tasks, both of type JavaExcec, to pass on Java system properties we use from the command line when we use the Grails commands:
Now we can start our Grails application with the Java system property spring.config.location. We add the settings directory as a search location for configuration files. We add both the directory as a local directory as well as a root package name in the class path:
In the following example we have a configuration config.yml in the root of our project:
Now we start Grails and use the explicit file name as a value for the Java system property spring.config.location:
We could specify multiple files separated by comma’s. Or even combine it with directories like we used in the first example.
Written with Grails 3.0.8.
Original blog post written on September 28, 2015.
Using External Configuration Files Per Environment
Grails 3 is build on top of Spring Boot and this adds a lot of the Spring Boot features to our Grails application. For example in Spring Boot we can store configuration properties in an external file. A default Grails application already adds application.yml in the grails-app/conf directory. If we want to specify different values for a configuration property for each environment (like development, test and production) we can use environment section in application.yml. We know this from previous Grails versions with a Groovy configuration file Config.groovy. But we can also create different configuration files per environment and set the value for the configuration property in each file. We can use the following naming pattern for the file: application-{env}.yml or application-{env}.properties. These files need be in:
- a
configdirectory in the directory the application is running from - the root of the directory the application is running from
- in a
/configpackage on the classpath - in the root of the classpath
The order is important, because properties defined in the first locations override the properties in the last locations. When we place the files in grails-app/conf they get on the root of the classpath. We could also use for example src/main/resources/config to place extra configuration files on the classpath.
Let’s see this in action with a simple Grails application. We write an implementation of the CommandLineRunner interface to show the value of the sample.conf configuration property when the application starts:
We define the configuration property in grails-app/conf/application.yml:
Next we create a file grails-app/conf/application-development.yml which should be used when we run our Grails application in development mode:
Besides YAML format we can also use the plain old properties format files. We create grails-app/conf/application-production.properties with a value for sample.config used when Grails runs in production mode:
Finally we add a configuration file for a custom Grails environment:
Now let’s run the Grails application with different environments and see what value the sample.config property has:
Written with Grails 3.0.7.
Original blog post written on September 24, 2015.
Change Base Name For External Configuration Files
With Grails 3 we get the Spring Boot mechanism for loading external configuration files. The default base name for configuration files is application. Grails creates for example the file grails-app/conf/application.yml to store configuration values if we use the create-app command. To change the base name from application to something else we must specify a value for the Java system property spring.config.name.
In the following example we start Grails with the value config for the Java system property spring.config.name. So now Grails looks for file names like config.yml, config.properties, config-{env}.properties and config-{env}.yml in the default locations config directory, root directory on the filesystem and in the class path.
To pass the system properties when we use Grails commands we must change our build.gradle and reconfigure the run tasks so any Java system property from the command line are passed on to Grails:
Remember that if we use this system property the default grails-app/conf/application.yml is no longer used.
Written with Grails 3.0.8.
Original blog post written on September 28, 2015.
Using Random Values For Configuration Properties
Since Grails 3 we can use a random value for a configuration property. This is because Grails now uses Spring Boot and this adds the RandomValuePropertySource class to our application. We can use it to produce random string, integer or lang values. In our configuration we only have to use ${random.<type>} as a value for a configuration property. If the type is int or long we get a Integer or Long value. We can also define a range of Integer or Long values that the generated random value must be part of. The syntax is ${random.int[<start>]} or ${random.int[<start>,<end>}. For a Long value we replace int with long. It is also very important when we define an end value that there cannot be any spaces in the definition. Also the end value is exclusive for the range.
If the type is something else then int or long a random string value is generated. So we could use any value after the dot (.) in ${random.<type>} to get a random string value.
In the following example configuration file we use a random value for the configuration properties sample.random.password, sample.random.longNumber and sample.random.number:
Next we have this simple class that used the generated random values and displays them on the console when the application starts:
When we run our Grails application we can see the generated values:
Written with Grails 3.0.8.
Original blog post written on September 28, 2015.
Pass Configuration Values Via Environment Variables
Since Grails 3 is based on Spring Boot we can re-use many of the Spring Boot features in our Grails application. For example in a Spring Boot application we can use environment variables to give configuration properties a value. We simply need to follow some naming rules: the name of the configuration property must be in uppercase and dots are replaced with underscores. For example a configuration property feature.enabled is represented by the environment variable FEATURE_ENABLED.
We create the following controller in a Grails 3 application with a message property. The value is set with the @Value annotation of the underlying Spring framework. With this annotation we tell the application to look for an (external) configuration property sample.message and assign it’s value to the message property. If it cannot be set via a configuration property the default value is “gr8”.
If we run the application with grails run-app or gradle run the result of opening http://localhost:8080/sample is Grails is gr8!.
Now we use the environment variable SAMPLE_MESSAGE to assign a new value to the message property:
Now when we access http://localhost:8080/sample we get Grails is great!. If we use Gradle to start our Grails application we can use $ SAMPLE_MESSAGE=great gradle run.
Written with Grails 3.0.7.
Original blog post written on September 22, 2015.
Pass JSON Configuration Via Command Line
We can use the environment variable SPRING_APPLICATION_JSON with a JSON value as configuration source for our Grails 3 application. The JSON value is parsed and merged with the configuration. Instead of the environment variable we can also use the Java system property spring.application.json.
Let’s create a simple controller that reads the configuration property app.message:
Next we start Grails and set the environment variable SPRING_APPLICATION_JSON with a value for app.message:
When we request the sample endpoint we see the value of app.message:
If we want to use the Java system property spring.application.json with the Grails command we must first configure the bootRun task so all system properties are passed along:
With the following command we pass the configuration as inline JSON:
Written with Grails 3.1.8.
Original blog post written on June 27, 2016.
One WAR to Rule Them All
If we work on a Grails project and we want to deploy our application as Web Application Archive (WAR) it is easy to create the file. To create a WAR file of our Grails application we simply invoke the command: $ grails war. Suppose we want to put our WAR file first on a system test application server, then a user acceptance test application server and finally the production server. We want this WAR file to be self contained and all code and configuration must be in the WAR file. We don’t want to generate a WAR file for each environment separately, but a single WAR must be passed through the different environments. In this post we see how we can do this.
Suppose we have a Grails application and we define a systemTest and userAcceptanceTest environment next to the default development, test and production environments. We add these new environments to the environments block in grails-app/conf/Config.groovy and set a simple property runningMode with a different value for each environment.
Next we are going to change our grails-app/views/index.gsp and add a little code to show the value of the property runningMode. This way we can show which environment is used by the running WAR.
Let’s package the application in a WAR file:
Next we can deploy the WAR file to our application servers. But how can we set the environment for our application, so we can see the right value of our configuration property runningMode? Answer: We need to set the system property grails.env with the correct value before we start the application server. The Grails application determines in which environment the application is running by looking at the system property grails.env.
Suppose we use Tomcat as our servlet container for the Grails application. We defined separate Tomcat instances for each environment (system test, user acceptance test and production). Before we start an instance we can use the environment variable CATALINA_OPTS to set the system property grails.env. For example for the system test Tomcat intance we define CATALINA_OPTS as:
After we have defined the correct value we can install our single WAR file to the three Tomcat instances and start them. If we then open the index page of our application we can see in the left column the value or our configuration property runningMode:
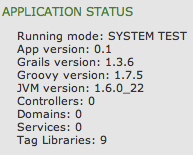
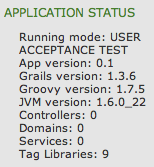
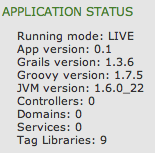
And we see the different values for the different servers. So it is very easy to create a single WAR file, but with different configuration settings for different environments, because of the environments support in Grails. We only have to tell the application server via system property grails.env which environment settings need to be used.
All configuration settings are part of the application code and if we want to change a value we must rebuild the WAR file again. But what if we want to set configuration options for different environments outside of the application code? So if we want to set a configuration property for a specific environment we don’t have to rebuild the WAR file? In this post we learn how to achieve this for a Grails application.
In Grails we can add extra configuration files by setting the grails.config.locations property in grails-app/conf/Config.groovy. We can assign a list of files available in the classpath or file system. Besides Groovy configuration scripts we can also define plain old Java property files. If we start with a new fresh Grails application we can see at the top of grails-app/conf/Config.groovy the code for this functionality in a comment block. To define the location of our environment specific configuration file per application server we read in the file location from a system property value. So we leave the placement of the configuration file up to the administrators of the application server, because we don’t want to hard-code the file location in our application code. At the top of the grails-app/conf/Config.groovy file we set the value of grails.config.locations:
We change our index view and add extra code to show the value of a new configuration property: nodeName. The value for this property needs to be defined in the configuration file we assign via the system property sample.app.config.location.
Our application code changes are done and we can package the application as WAR file:
Next we create a Groovy script which sets the property nodeName. For each application server or environment we create a file. For example we create a file sample-config.groovy for the system test Tomcat instance of our previous post:
Before we start our application servers we must set the system property sample.app.config.file. We must reference our Groovy script which set the nodeName property.
After we have defined the correct value we can install our single WAR file to the three Tomcat instances and start them. If we then open the index page of our application we can see in the left column the value or our configuration property nodeName:
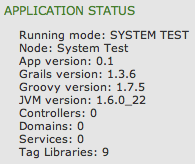
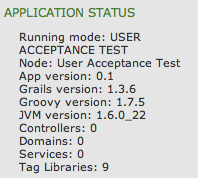
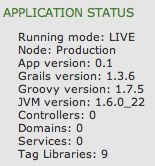
We see the correct value for each environment. Grails has built-in support for adding external configuration files to the application configuration. This makes it very easy to set configuration properties for separate environments and their values can be changed without building a new WAR file.
The goal is to have a single WAR file that can be deployed to several environments and still contains configuration properties per environment. We use $ grails war to create the WAR file and if we deploy this WAR file to for example Tomcat we see the display name of our Grails application is set to /sample-production-0.1:
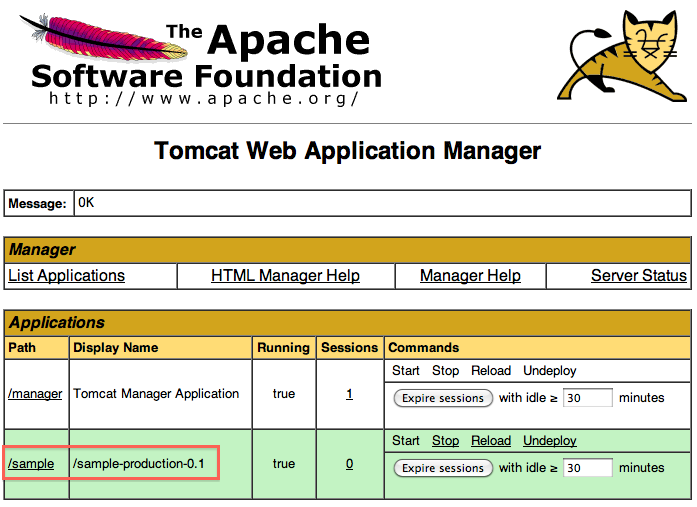
The name consists of our application name, environment used to create the WAR file (by default Grails uses production when creating a WAR file) and the application version. Grails automatically sets this value when we package the application as WAR file. It can be confusing to see the environment production in the display name, so we set the value of the display name to a another value.
We first get the template web.xml Grails uses and set the value of display-name to a new value.
We open src/templates/war/web.xml and look for the display-name element. The value is /@grails.project.key@. Grails uses the ANT replace task when building the WAR file to replace @grails.project.key@ with application name, environment and application version. We want a custom value so we change the display-name:
We use the @…@ syntax, because we will use the ANT replace task, to add the application name and version to the generated web.xml. Next we create scripts/_Events.groovy and listen to the WebXmlStart event. Here we get a hold on the web.xml and use the ANT replace task to inject the application name and version.
We are ready to create the WAR file ($ grails war) and deploy it to our Tomcat instance. If we look at the display name we see our custom display name Sample Application:: sample-0.1:
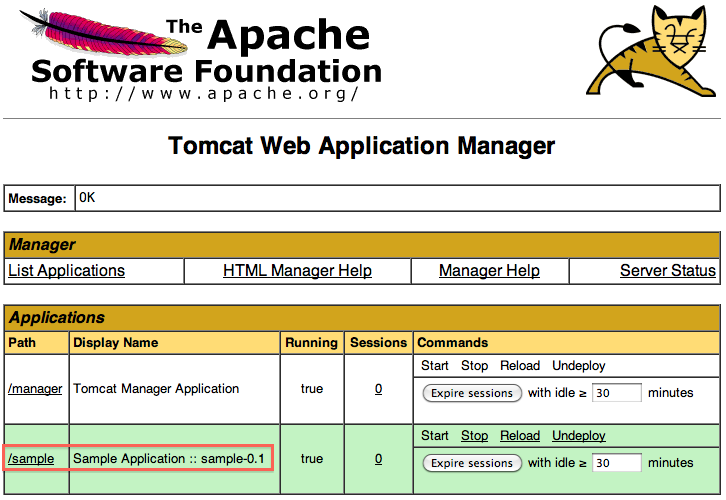
Original blog post written on February 04, 2011. Original blog post written on February 04, 2011. Original blog post written on February 04, 2011.
Customize the URL Format
Starting from Grails 2.0 we can change the URL format in our application. Default a camel case convention is used for the URLs. For example a controller SampleAppController with an action showSamplePage results in the following URL /sampleApp/showSamplePage.
We can change this convention by creating a new class that implements the grails.web.UrlConverter interface. Grails already provides the custom UrlConverter grails.web.HyphenatedUrlConverter. This converter will add hyphens to the URL where there are uppercase characters and the uppercase character is converted to lowercase. Our sample controller and action result in the following URL with the HyphenatedUrlConverter: /sample-app/show-sample-page.
Because Grails already provides this UrlConverter it is very easy to configure. We only need to change our configuration in grails-app/conf/Config.groovy. We add the key grails.web.url.converter with the value hyphenated:
But we can implement our own class with the grails.web.UrlConverter interface to define our own URL format to be used in the Grails application. The interface only has one method String toUrlElement(String) we need to implement. The input argument is the name of the controller or action that needs to be converted. We cannot see if the value is a controller or action value, the conversion rules will be applied to both controller and action values. The following class is a sample implementation. The controller or action name is first converted to lowercase. Next we add the extension -grails to the controller or action. We make sure the conversion is not already done by checking if the extension is not already in place. This check is necessary because Grails will invoke our UrlConverter several times to map it to the correct controller and action names. And without the check the extension would be added again and again and again, resulting in a 404 page not found error.
We have our custom UrlConverter. Now we need to configure our Grails application to use it. This time we don’t change the configuration grails-app/conf/Config.groovy, but we add our custom implementation to the Spring configuration in grails-app/conf/spring/resources.groovy. If we use the name with the value of the constant grails.web.UrlConverter.BEAN_NAME for our implementation then Grails will use our custom UrlConverter. We can remove any grails.web.url.converter from Config.groovy, because it will not be used.
We are done. If we start our application then we use the URL /sampleapp-grails/showsamplepage-grails to access the controller SampleAppController and the method showSamplePage() in the controller.
Code written with Grails 2.0.
Original blog post written on December 27, 2011.
Add Additional Web Application to Tomcat
In this post we learn how to add an additional WAR file to the Tomcat context when we use $ grails run-app. Recently I was working on a Alfresco Web Quick Start integration with Grails (current progress on GitHub). Alfresco offers inline editing of the web content with the help of an extra Java web application. This web application needs to be accessible from the Grails application, so at development time I want to deploy this web application when I use $ grails run-app at web context /awe. But this scenario is also applicable if for example we use SoapUI to create a WAR file with mocked web services and we want to access it from our Grails application.
I found two sources via Google: Grails, Tomcat and additional contexts and Run a Java web application within grails. It turns out Grails fires a configureTomcat event when we use $ grails run-app, with a Tomcat instance as argument. We can configure this Tomcat instance with additional information. With the addWebapp() method we can add an additional context to Tomcat. We can use a directory or WAR file and we must define the context name we want to use. And furthermore we can add extra directories that are added to the classpath of the additional web application. We must create a WebappLoader instance from Tomcat’s classloader and then we can use the addRepository() method to add directories to the classpath.
For my use case I had a web application packaged as a WAR file: awe.war and it must be deployed with the context /awe. Furthermore extra configuration for the web application is done with a XML file found in the classpath, so we add an extra directory to the classpath of the web application.
We start our development Grails environment with $ grails run-app and the web application is available at http://localhost:8080/awe/, next to the Grails’ application path.
Code written with Grails 1.3.7.
Original blog post written on April 05, 2011.
Use a Different jQuery UI Theme with Resources Plugin
The resources plugin is a great way to manage resources in our Grails application. We define our resources like Javascript and CSS files with a simple DSL. The plugin will package the resources in the most efficient way for us in the final application.
The jQuery UI library has support for theming. We can use the default theme(s), but we can also create our own custom theme with for example the jQuery UI ThemeRoller site.
If we use the jQuery UI plugin and want to use a different than the default theme we must change our configuration for the resources plugin. We override the theme that is set by default and point it to our new custom theme. We can change grails-app/conf/Config.groovy or a separate resources artifact file. We add an overrides section and use the same id attribute value as set by the jQuery UI plugin. The url attribute points to the location of the custom jQuery UI ThemeRoller CSS file.
Code written with Grails 1.3.7.
Original blog post written on October 25, 2011.
Use A Different Logging Configuration File
Since Grails 3 the logging configuration is in a separate file. Before Grails 3 we could specify the logging configuration in grails-app/conf/Config.groovy, since Grails 3 it is in the file grails-app/conf/logback.groovy. We also notice that since Grails 3 the default logging framework implementation is Logback. We can define a different Logback configuration file with the environment configuration property logging.config. We can set this property in grails-app/conf/application.yml, as Java system property (-Dlogging.config=<location>) or environment variable (LOGGING_CONFIG). Actually all rules for external configuration of Spring Boot apply for the configuration property logging.config.
In the following example configuration file we have a different way of logging in our Grails application. We save it as grails-app/conf/logback-grails.groovy:
We use this configuration file with the following command:
Written with Grails 3.0.8.
Original blog post written on September 28, 2015.
Add a DailyRollingFileAppender to Grails Logging
In Grails we can add new Log4J appenders to our configuration. We must add the new appender definition in the log4j closure in conf/Config.groovy. We define new appenders with the appenders() method. We pass in a closure where we define our appenders. The name of the appender is an identifier we can use when we want to define the log level and packages that need to be logged by the appender.
In the following sample configuration we create a DailyRollingFileAppender so each day a new log file is created and old log files are renamed with the date in the filename. Then we use the root() method to pass a closure telling we want to log all messages at level INFO to the appender.
Code written with Grails 1.1.2.
Original blog post written on December 13, 2009.
Use Log4j Extras Companion RollingFileAppender
Apache Extras Companion for Log4j contains a RollingFileAppender, which can be configured to automatically compress old log files. We can even save the old, archived log files to another directory than the active log file. In this post we learn how we can add and configure the RollingFileAppender in our Grails application.
First we must define our dependency on the Log4j Extras Companion libary.
We open BuildConfig.groovy in the directory grails-app/conf/ and add to the dependencies section the following code:
Next we can configure the appender in grails-app/conf/Config.groovy:
We use TimeBasedRollingPolicy, which is quite powerful. We can configure the rollover period using a date/time pattern. If the fileNamePattern ends with .gz the contents of the log file is compressed. Finally we decouple the active log file name from the location where the archived log files are saved with the property activeFileName.
Code written with Grails 1.3.6.
Original blog post written on February 17, 2011.
Use TimeAndSizeRollingAppender for Logging
In a previous post we learned how to use the Log4j Extras Companion RollingFileAppender. In this post we learn how to use TimeAndSizeRollingAppender. This appender has a lot of nice features among rolling over the log file at a time interval and we can limit the number of rolled over log files. With this combination we can keep a history of log files, but limit how many log files are saved.
First we must download the JAR file with the appender and save it in the lib directory of our Grails application. Next we can configure the appender in grails-app/conf/Conf.groovy:
We configured the appender to rollover daily, compress the contents of the archived log files after 2 rollovers, and only save 7 archived log files.
Code written with Grails 1.3.6.
Original blog post written on February 17, 2011.
Change Context Path of a Grails Application for Jetty
By default a Grails application context path is set to the application name. The context path is the bold part in the following URL: http://localhost:8888/appname/index. We can change the context path with properties for when we use $ grails run-app to run the application. We can run $ grails -Dapp.context=/app run-app to change the context path to /app. Or we can set the property app.context = /app in application.properties. Or we can add grails.app.context = '/app' to our conf/Config.groovy configuration file. These properties will all affect the context path when we run $ grails run-app.
But what if we want to deploy our application to Jetty on a production server and use a custom context path? We have to add an extra file to web-app/WEB-INF with the name jetty-web.xml. Here we can configure Jetty specific settings for the application and one of the settings is the context path. If the application is deployed to Jetty or we run the application with $ grails run-app the context path is used that we set in jetty-web.xml.
Code written with Grails 1.1.2.
Original blog post written on December 14, 2009.
Change Version For Dependency Defined By BOM
Since Grails 3 we use Gradle as the build system. This means we also use Gradle to define dependencies we need. The default Gradle build file that is created when we create a new Grails application contains the Gradle dependency management plugin via the Gradle Grails plugin. With the dependency management plugin we can import a Maven Bill Of Materials (BOM) file. And that is exactly what Grails does by importing a BOM with Grails dependencies. A lot of the versions of these dependencies can be overridden via Gradle project properties.
To get the list of version properties we write a simple Gradle task to print out the values:
When we run the task we get an overview of the properties:
For example if we want to change the version of the PostgreSQL JDBC driver that is provided by the BOM we only have to set the Gradle project property postgresql.version either in our build file or in the properties file gradle.properties:
Another way to change the version for a dependency defined in the BOM is to include a dependency definition in the dependencyManagement configuration block. Let’s see what it looks like for our example:
To see the actual version that is used we can run the task dependencyInsight:
This is just another nice example of the good choice of the Grails team to use Gradle as the build system.
Written with Grails 3.1.6
Original blog post written on May 11, 2016.
The Command Line
Script Name Abbreviation
During Gr8Conf 2012 Europe I discovered Grails supports script name abbreviation. This means we don’t have to type a complete script name, but only enough to make the script identifiable by Grails. It is inspired by Gradle’s task name abbreviation feature. For example if we want to invoke the help script we only have to type the letter h. Or to invoke run-app we type rA. Notice we use uppercase characters for the letters after a hyphen in a script name. To invoke create-tag-lib we can type cTL.
If Grails cannot find a unique script name for the abbreviation we use we get a list of possible script names. We select the correct one to invoke the script. For example in the following output we see the options Grails shows when we type gen as a script name abbreviation:
This feature also works for script that we create ourselves or are added by plugins. For example if we create a script GrailsGoodness with the following content:
On the command-line or at the Grails prompt we can now use gG as a script name abbreviation and Grails will invoke the GrailsGoodness script:
Code written with Grails 2.04.
Original blog post written on June 14, 2012.
Shortcut to Open Test Reports in Interactive Console
We can use the open command in the interactive console in Grails to open files. For example to edit the default layout view we can typ in the console:
The application associated with GSP files starts and opens the file main.gsp.
So normally we have to pass actual filename with the complete path to the open command to open them. But Grails provides two shortcuts: test-report and dep-report. To see the output of our tests we can simply type open test-report:
Grails now opens the file target/test-reports/html/index.html.
The dep-report shortcut open the dependency report after we have run the dependency-report command:
Code written with Grails 2.0.
Original blog post written on March 08, 2012.
Run Gradle Tasks In Grails Interactive Mode
To start Grails in interactive mode we simply type grails on the command line. This starts Grails and we get an environment to run Grails commands like compile and run-app. Since Grails 3 the underlying build system has changed from Gant to Gradle. We can invoke Gradle tasks in interactive mode with the gradle command. Just like we would use Gradle from the command line we can run the same tasks, but this time when Grails is in interactive mode. Grails will use the Gradle version that belongs to the current Grails version.
We even get TAB completion for Gradle tasks.
In the next example we start Grails in interactive mode and run the Gradle task components:
Next we invoke gradle compile followed by TAB. We get all the Gradle tasks that start with compile:
Written with Grails 3.0.8.
Original blog post written on September 28, 2015.
See Information About Plugins
In Grails we can use the list-plugins command to get a list of all available plugins. The list returns only the plugins that are available for the Grails version we are using. So if we invoke this command in Grails 3 we get a different list than a Grails 2.x version. To get more detailed information, like website, source code URL and dependency definition we use the plugin-info command.
Let’s run the plugin-list command for Grails 3:
If we want more information about the spring-security-core plugin we invoke the following command:
If we would invoke the command in for example Grails 2.5.1 we get different results:
In Grails versions before Grails 3 we also have the command list-plugin-updates. This command will display if there are any version updates for the plugins installed in our application:
Written with Grails 3.0.7.
Original blog post written on September 22, 2015.
Get List Of Application Profiles
Grails 3 introduced the concept of application profiles to Grails. A profile contains the application structure, dependencies, commands and more to configure Grails for a specific type of application. The profiles are stored on the Grails Profile repository on Github. We can go there and see which profiles are available, but it is much easier to use the list-profiles command. With this command we get an overview of all the available profiles we can use to create a new application or plugin.
The list-profiles task is only available when we are outside a Grails application directory. So just like the create-app and create-plugin we can run list-profiles from a non-Grails project directory.
Once we know which profile we want to use we can use the name as value for the --profile option with the create-app command:
Written with Grails 3.0.8.
Original blog post written on September 28, 2015.
Getting More Information About A Profile
Since Grails 3.1 we can use the profile-info command to get more information about a profile. We see which commands are added to our project by the profile and which features can be chosen when we create a new application with the profile.
Suppose we want to know more about the rest-api profile then we invoke the profile-info command:
Written with Grails 3.1.
Original blog post written on January 29, 2016.
Using Features When Creating An Application
With the release of Grails 3.1 we can use features, defined in a profile, when we create a new application. Features will add certain dependencies to our Grails project, so we can start quickly. To see which features are available we use the profile-info command. This command lists available features for an application. We can choose the features we want to be included and pass them via the --features command line option of the create-app command.
When we look at the features available for the rest-api profile we see the following list:
Let’s create a new Grails application with the rest-api profile and use the mongodb, json-views and security features:
When we look at the contents of the generated build.gradle we can see dependencies for the features we have selected:
Written with Grails 3.1.
Original blog post written on January 29, 2016.
Create Report of URL Mappings
Since Grails 2.3 we can use the url-mappings-report command to get a nice report of the URL mappings we have defined in our application. Also implicit mappings created for example by using the resources attribute on a mapping definition are shown in the report. This report is very useful to see which URLs are exposed by your application and how they map to controllers.
Suppose we have the following grails-app/conf/UrlMappings.groovy with a couple of mappings:
When we run the following command $ grails url-mappings-report we get the following output:
Notice also mappings added by plugins like the mappings to dbdoc controller are shown.
Code written with Grails 2.3.
Original blog post written on November 18, 2013.
Compiling GSP from the Command-Line
Normally Groovy Server Pages (GSP) are compiled to class files when we create a WAR file of our application. If we want to compile the GSP without creating a WAR file we use the command-line argument ---gsp. Grails will compile the source code of our application and also the Groovy Server Pages. This way we can detect for examples faulty import statements in the GSP source code.
Code written with Grails 2.2.2.
Original blog post written on June 03, 2013.
Profile Script Tasks
If we want to know how long the execution of a Grails task takes we can enable profiling. If we enable profiling we can see for example how long it takes to compile the source code. We can enable the profiling information by setting the system property grails.script.profile with the value true.
Another way to enable profiling of the Grails tasks is to set the property grails.script.file with the value true in grails-app/conf/BuildConfig.groovy.
If we run a Grails script and profiling is enabled we see the information in the console output:
Code written with Grails 1.3.7.
Original blog post written on February 23, 2011.
No More Questions
Sometimes when we run Grails commands we get asked questions via user prompts. For example if we invoke $ grails create-domain-class Simple we get a message that it is good practice to use package names and the question “Do you want to continue? (y,n)”. We need to answer this question to continue, but what if we are not able to answer the question, for example if the script is run on a continuous integration server? We pass the argument --non-interactive to the grails command and now we don’t get a question and the script continues by using the default value for the answer. So in our example we can run $ grails create-domain-class Simple --non-interactive.
Written with Grails 1.2.
Original blog post written on March 12, 2010.
Create New Application without Wrapper
Since the latest Grails versions a Grails wrapper is automatically created when we execute the create-app command. If we don’t want the wrapper to be created we can use the command argument --skip-wrapper. If later we changed our mind and want the Grails wrapper we can simply run the wrapper command from our Grails application directory.
Let’s run the create-app command with the --skip-wrapper argument. If we check the contents of the created directory we see that the wrapper files are not created:
Written with Grails 2.4.4.
Original blog post written on November 25, 2014.
Enable Hot Reloading For Non-Development Environments
If we run our Grails 3 application in development mode our classes and GSP’s are automatically recompiled if we change the source file. We change our source code, refresh the web browser and see the results of our new code. If we run our application with another environment, like production or a custom environment, then the reloading of classes is disabled. But sometimes we have a different environment, but still want to have hot reloading of our classes and GSP’s. To enable this we must use the Java system property grails.reload.enabled and reconfigure the Gradle bootRun task to pass this system property.
Let’s change our Gradle build file and pass the Java system property grails.reload.enabled to the bootRun task if it is set. We use the constant Environment.RELOAD_ENABLED to reference the Java system property.
Suppose we have extra Grails environment with the name custom. We can still have hot reloading if we use the following command:
Or we use the Gradle bootRun task:
Written with Grials 3.0.9.
Original blog post written on November 20, 2015.
Generate ANT Build Script
In versions of Grails before version 1.2 we got an ANT script with Ivy support when we created a new application. With Grails 1.2 we don’t get the ANT script anymore automatically. But we can still generate the build file and Ivy configuration files, but we have to use a separate command: integrateWith. The complete command is:
Code written with Grails 1.2.
Original blog post written on March 19, 2010.
Generate Default .gitignore Or .hgignore File
We can use the integrateWith command with Grails to generate for example IDE project files and build system files. We specify via an extra argument the type of files to be generated. We can use this command also to create a .gitignore file with some default settings for files to be ignored in Grails projects.
In the root of our project we have now have a .gitignore file with the following contents:
If we would use Mercurial then we can generate a .hgignore file with the argument --hg:
The .hgignore file has the following contents:
Samples written with Grails 2.3.7.
Original blog post written on April 16, 2014.
Extending IntegrateWith Command
We can extend the integrate-with command in Grails to generate files for a custom IDE or build system. We must add a _Events.groovy file to our Grails projects and then write an implementation for the eventIntegrateWithStart event. Inside the event we must define a new closure with our code to generate files. The name of the closure must have the following pattern: binding.integrate_CustomIdentifier_. The value for CustomIdentifier can be used as an argument for the integrate-with command.
Suppose we want to extend integrate-with to generate a simple Sublime Text project file. First we create a template Sublime Text project file where we define folders for a Grails application. We create the folder src/ide-support/sublimetext and add the file grailsProject.sublimetext-project with the following contents:
Next we create the file scripts/_Events.groovy:
We are done and can now run the integrate-with command with the new argument sublimeText:
If we open the project in Sublime Text we see our folder structure for a Grails application:

Code written with Grails 2.3.7.
Original blog post written on April 16, 2014.
Using Wrapper for Running Grails Commands Without Grails Installation
Since Grails 2.1 we can create a Grails wrapper. The wrapper allows developer to run Grails commands in a project without installing Grails first. The wrapper concept is also available in other projects from the Groovy ecosystem like Gradle or Griffon. A wrapper is a shell script for Windows, OSX or Linux named grailsw.bat or grailsw and a couple of JAR files to automatically download a specific version of Grails. We can check in the shell scripts and supporting files into a version control system and make it part of the project. Developers working on the project simply check out the code and execute the shell script. If there is no Grails installation available then it will be downloaded.
To create the shell scripts and supporting files someone on the project must run the wrapper command for the first time. This developer must have a valid Grails installation. The files that are generated can then be added to version control and from then one developers can use the grailsw or grailsw.bat shell scripts.
In the root of the project we have two new files grailsw and grailsw.bat. Windows users can uss grailsw.bat and on other operating systems we use grailsw. Also a new directory wrapper is created with three files:
When we run the grailsw or grailsw.bat scripts for the first time we see how Grails is downloaded and installed into the $USER_HOME/.grails/wrapper directory. The following output shows that the file is downloaded and extracted when we didn’t run the grailsw script before:
When we want to use a new version of Grails one of the developers needs to run to run $ grails upgrade followed by $ grails wrapper with the new Grails version. Notice this developer needs to have a locally installed Grails installation of the version we want to create a wrapper for. The newly generated files can be checked in to version control and all developers on the project will have the new Grails version when they run the grails or grailsw.bat shell scripts.
We can change the download location of Grails to for example a company intranet URL. In the wrapper/ directory we see the file grails-wrapper.properties. The file has one property wrapper.dist.url, which by default refers to http://dist.springframework.org.s3.amazonaws.com/release/GRAILS/. We can change this to another URL, add the change to version control so other developers will get the change automatically. And when the grailsw shell script is executed the download location will be another URL. To set a different download URL when generating the wrapper we can use the command-line option –distributionUrl:
If we don’t like the default name for the directory to store the supporting files we can use the command-line option –wrapperDir. The files are then stored in the given directory and the grailsw and grailsw.bat shell scripts will contain the given directory name.
Written with Grails 2.2.0 and 2.2.1
Original blog post written on March 29, 2013.
Cleaning Up
When we use for example the compile or war command Grails will create files and stores them by default in the project’s working directory. The location of the project working directory can be customized in our grails-app/conf/BuildConfig.groovy configuration file. We remove the generated files with the Grails clean command. This command will remove all compiled class files, the WAR file, cached scripts and test reports. But this doesn’t remove all files in the project working directory. For example plugins or a temporary web.xml file, which are stored in the project working directory are not removed. We must use the clean-all command to also remove those files from the project working directory completely.
Let’s take a look at the default settings in our grails-app/conf/BuildConfig.groovy configuration file when we create a new Grails application:
After we run the war command we see the following contents in our target directory:
Let’s first run the clean command and check the contents of the target directory again:
Notice the target/work directory still exists. We now run clean-all and examine the contents of the target directory:
Now the work directory is removed as well.
We can also write our own scripts to for example only remove the generated WAR file with a clean command. With the following script we add the command clean-war to our application, which will delete the generated WAR file from our project:
We can use the targets cleanCompiledSources, cleanTestReports and cleanWarFile in our own scripts.
Code written with Grails 2.3.5
Original blog post written on February 03, 2014.
Using Aliases as Command Shortcuts
In Grails we can add aliases for standard Grails commands with the alias command. For example we want to use another name for a command or combine a command with arguments to a single alias. With the following command we create a start-app alias for the standard run-app command:
Now we can invoke $ grails start-app as an alternative for run-app. All aliases are stored in the file userHome/.grails/.aliases. This means the aliases we create are available for all Grails versions and applications of the current user. It is also good to notice than command arguments that start with - or -- are not saved as part of an alias. But for example the unit: argument for test-app can be part of an alias:
We can even specify test class patterns to be part of the alias. We then invoke the new alias with extra arguments -echoOut and -echoErr:
To delete an alias we can remove it from the file userHome/.grails/.aliases or use $ grails alias --delete=_alias_.
We can see which aliases are defined with the --list argument:
Code written with Grails 2.3.8.
Original blog post written on May 01, 2014.
Run Groovy Scripts in Grails Context
We can use the run-script command to run Groovy scripts within the context of a Grails application. We can pass one or more Groovy scripts as argument to the run-script command. The Grails environment will be configured and we can access the Spring application context, domain classes, Grails services and more. Basically everything we can do in the Grails console or shell can be saved as a Groovy script and run with the run-script command.
The following Groovy script shows some stats for a Grails application:
We can invoke the script with the following command:
Code written with Grails 2.4.0.
Original blog post written on May 22, 2014.
Add More Paths to the Stats Report
If we invoke $ grails stats for our Grails project we get to see the number of files and lines of code (LOC) for several Grails artifacts. For example we can see how many controllers, services and taglibs are in our project and how many lines of code is written for each.
We can add new source directories to the report. When the stats report is generated the StatsStart event is triggered. The default list of paths is passed as the argument of the event. We can subscribe to this event in our own Grails application. Because we get the list of paths as an argument, we can define our own path info and add it to the list. We add the paths grails-app/conf and grails-app/utils to be included in the stats report.
Now we can run the stats command again and we see the new paths in our report:
Code written with Grails 1.3.7.
Original blog post written on February 19, 2011.
Access Configuration in Grails Scripts
We can create our own scripts in Grails that can be executed from the command-line. To access values from the properties we have defined in grails-app/conf/Config.groovy we must start with adding the following line to the top of our script:
With this include we get access to the checkConfig task.
Next we must execute this task after the compile task to get a config variable in our script. The script variable config contains the values of our configuration defined in the Grails configuration files.
The following script contains some sample configuration properties for different environments.
Let’s create a new script Sample.groovy with the following command: $ grails create-script sample. We open the file and add:
If we execute our task with $ grails sample we get the following output:
And if we run $ grails test sample we get:
The original source for this information is Grails mailing list.
Code written with Grails 1.3.7.
Original blog post written on March 28, 2011.
Simple Script to Create WAR Files for Each Environment
We can create a new WAR file with the following Grails command:
This will make a new WAR file in the dist directory with the name test.war. We use the test environment for the settings.
With the following Groovy script we create a WAR file in the dist for each environment. We use application.properties to get the application name and version and use it to create the WAR filename.
Code written with Grails 1.2.
Original blog post written on January 24, 2010.
Grails Object Relational Mapping (GORM)
Getting First or Last Instance of Domain Classes
Since Grails 2 we can get the first or last instance of a domain class with the first() and last() method on domain classes. We can optionally use an argument to set the column name to sort by. If we don’t specify a column name the id column is used.
Code written with Grails 2.2.4.
Original blog post written on September 09, 2013.
Using Hibernate Native SQL Queries
Sometimes we want to use Hibernate native SQL in our code. For example we might need to invoke a selectable stored procedure, we cannot invoke in another way. To invoke a native SQL query we use the method createSQLQuery() which is available from the Hibernate session object. In our Grails code we must then first get access to the current Hibernate session. Luckily we only have to inject the sessionFactory bean in our Grails service or controller. To get the current session we invoke the getCurrentSession() method and we are ready to execute a native SQL query. The query itself is defined as a String value and we can use placeholders for variables, just like with other Hibernate queries.
In the following sample we create a new Grails service and use a Hibernate native SQL query to execute a selectable stored procedure with the name organisation_breadcrumbs. This stored procedure takes one argument startId and will return a list of results with an id, name and level column.
In the sample code we use the addEntity() method to map the query results to the domain class Organisation. To transform the results from a query to other objects we can use the setResultTransformer() method. Hibernate (and therefore Grails if we use the Hibernate plugin) already has a set of transformers we can use. For example with the org.hibernate.transform.AliasToEntityMapResultTransformer each result row is transformed into a Map where the column aliases are the keys of the map.
Finally we can execute a native SQL query and handle the raw results ourselves using the Groovy Collection API enhancements. The result of the list() method is a List of Object[] objects. In the following sample we use Groovy syntax to handle the results:
Code written with Grails 2.3.7.
Original blog post written on March 18, 2014.
Using Groovy SQL
In a previous post we learned how we can use Hibernate native SQL queries in our Grails application. We can also execute custom SQL with Groovy SQL. We must create a new instance of groovy.sql.Sql in our code to execute SQL code. The easiest way is to use a javax.sql.DataSource as a constructor argument for the groovy.sql.Sql class. In a Grails application context we already have a DataSource and we can use it to inject it into our code. We must use the name dataSource to reference the default datasource in a Grails application.
In the following sample we invoke a custom query (for Firebird) using Groovy SQL. Notice we define a property dataSource in the Grails service PersonService and Grails will automatically inject a DataSource instance.
We can even make the groovy.sql.Sql instance a Spring bean in our Grails application. Then we can inject the Sql instance in for example a Grails service. In grails-app/conf/spring/resources.groovy we define the Sql bean:
Now we can rewrite our previous sample and use the bean groovySql:
Code written with Grails 2.3.7.
Original blog post written on March 19, 2014.
Refactoring Criteria Contents
Grails adds a Hibernate criteria builder DSL so we can create criteria’s using a builder syntax. When we have criteria with a lot of restrictions or conditional code inside the builder we can refactor this easily. We look at a simple criteria to show this principle, but it can be applied to more complex criteria’s.
Code written with Grails 1.2.2.
Original blog post written on June 18, 2010.
Validation and Data Binding
Add Extra Valid Domains and Authorities for URL Validation
Grails has a built-in URL constraint to check if a String value is a valid URL. We can use the constraint in our code to check for example that the user input http://www.mrhaki.com is valid and http://www.invalid.url is not. The basic URL validation checks the value according to standards RFC1034 and RFC1123. If want to allow other domain names, for example server names found in our internal network, we can add an extra parameter to the URL constraint. We can pass a regular expressions or a list of regular expressions for patterns that we want to allow to pass the validation. This way we can add IP addresses, domain names and even port values that are all considered valid. The regular expression is matched against the so called authority part of the URL. The authority part is a hostname, colon (:) and port number.
In the following sample code we define a simple command object with a String property address. In the constraints block we use the URL constraint. We assign a list of regular expression String values to the URL constraint. Each of the given expressions are valid authorities, we want the validation to be valid. Instead of a list of values we can also assign one value if needed. If we don’t want to add extra valid authorities we can simple use the parameter true.
Code written with Grails 2.2.4
Original blog post written on October 13, 2013.
Combining Constraints with Shared Constraints
In our Grails applications we might have fields that need the same combination of constraints. For example we want all email fields in our application to have a maximum size of 256 characters and must apply to the email constraint. If we have different classes with an email field, like domain classes and command objects, we might end of duplicating the constraints for this field. But in Grails we can combine multiple constraints for a field into a single constraint with a new name. We do this in grails-app/conf/Config.groovy where we add the configuration property grails.gorm.default.constraints. Here we can define global constraints with can be used in our Grails application.
Let’s add a custom email constraint in our application:
To use the constraint in a domain class, command object or other validateable class we can use the shared argument for a field in the constraints configuration. Suppose we want to use our customEmail constraint in our User class:
Code written with Grails 2.3.7.
Original blog post written on March 17, 2014.
Custom Data Binding with @DataBinding Annotation
Grails has a data binding mechanism that will convert request parameters to properties of an object of different types. We can customize the default data binding in different ways. One of them is using the @DataBinding annotation. We use a closure as argument for the annotation in which we must return the converted value. We get two arguments, the first is the object the data binding is applied to and the second is the source with all original values of type SimpleMapDataBindingSource. The source could for example be a map like structure or the parameters of a request object.
In the next example code we have a Product class with a ProductId class. We write a custom data binding to convert the String value with the pattern {code}-{identifier} to a ProductId object:
The following specification shows the data binding in action:
If we would have a controller with the request parameters productId=OFFCSPC-103910ab24&name=Swingline%20Stapler the data binding of Grails can create a Product instance and set the properties with the correct values.
Written with Grails 2.5.0 and 3.0.1.
Original blog post written on April 27, 2015.
Controllers
Type Conversion on Parameters
With Grails we get a lot of extra support for handling request parameters. We can convert a request parameter value to a specific type with a simple method invocation. Grails adds for example the method int() to the parameter so we can return the request parameter value converted to an int. Grails adds several methods like byte(), long(), boolean() we can use in our code. And since Grails 2.0 also support for dates.
Update: it is also possible to get the values from request parameters with the same name.
We can run the following testcase to test the various parameter types and values.
Code written with Grails 1.2.
Original blog post written on February 22, 2010.
Get Values from Parameters with Same Name
Grails supports type conversion on request parameters. But it is also easy to handle multiple request parameters with the same name in Grails. We use the list() method on the params and we are sure we get back a list with values. Even if only one parameter with the given name is returned we get back a list.
Code written with Grails 1.2.
Original blog post written on March 10, 2010.
Get Request Parameters with Default Values
In Grails we can convert a request parameter to a type directly. We must then use the int(), short(), byte(), long(), double(), float(), boolean() or list() methods that are added to the params object available in our controllers.
Since Grails 2.3 we can also pass a default value, which is used when the request parameter is not set. In the following controller we use the double() method and define a default value of 42.0.
The following test shows that the default value is returned if the request parameter is not set, otherwise the value of the request parameter is returned:
We can use the same methods now also to get attribute values in a tag library. So we can do a type conversion and provide a default value if we want to. In the following tag library we use this in the tag sample:
With the following Spock specification we can see that the default value 42.0 is used if the attribute v is not set. Otherwise the value of the attribute is returned:
Code written with Grails 2.3.
Original blog post written on November 19, 2013.
Date Request Parameter Value Conversions
Grails has great support for type conversion on request parameters. And since Grails 2.0 the support has been extended to include dates. In our controller we can use the date() method on the params object to get a date value. The value of a request parameter is a String, so the String value is parsed to a Date object.
The default expected date format is yyyy-MM-dd HH:mm:ss.S. If we don’t specify a specific date format in the date() method then this format is used. Or we can add a format to our messages.properties with the key date.<param-name>.format. Grails will first try the default format, but if the request parameter cannot be parsed to a valid Date object then Grails will do a lookup of the date format in messages.properties. Technically Grails uses the MessageSource bean to get the format, so we even can define the format per language or country.
Alternatively we can pass a date format or multiple date formats to the date() method. Grails will use these date formats to parse the request parameter into a valid Date object.
Let’s show the different options we have in a simple sample controller:
In messages.properties we define the format for the request parameter defaultFormatNameDate:
To show that the date parsing works we write a little integration test. We need this to be an integration test, because then the lookup of the key via the MessageSource bean works.
Code written with Grails 2.0.
Original blog post written on January 11, 2012.
Binding Method Arguments in Controller Methods
Since Grails 2.0 we can use methods instead of closures to define actions for our controllers. We already could pass a command object to a method as argument, but we can also use primitive typed arguments in our method definition. The name of the argument is the name of the request parameter we pass to the controller. Grails will automatically convert the request parameter to the type we have used in our method definition. If the type conversion fails then the parameter will be null.
Let’s create a method in a controller with three arguments: a String typed argument with the names author and book. And an argument with type Long with the name id.
If we invoke our controller with serverUrl/sample?id=100&book=It&author=Stephen%20King we get the following output:
Suppose we don’t provide a valid long value for the id parameter we see in the output id is null. We use the following URL serverUrl/sample?id=1a&book=The%20Stand&author=Stephen%20King.
After reading this blog post and looking at the Grails documentation I learned we can even change the name of the argument and map it to a request parameter name with the @RequestParameter annotation. So then the name of the argument and the request parameter don’t have to be the same.
Let’s change our sample method and see what the output is:
Now we need the following URL to see correct output: serverUrl/sample?bookTitle=It&identifier=200&author=Stephen%20King.
Code written with Grails 2.0.
Original blog post written on February 27, 2012.
Controller Properties as Model
To pass data from a controller to a view we must return a model. The model is a map with all the values we want to show on the Groovy Server Page (GSP). We can explicitly return a model from an action, but if we don’t do that the controller’s properties are passed as the model to the view. Remember that in Grails a new controller instance is created for each request. So it is save to use the properties of the controller as model in our views.
Code written with Grails 1.3.7.
Original blog post written on February 25, 2011.
Using the header Method to Set Response Headers
Grails adds a couple of methods and properties to our controller classes automatically. One of the methods is the header() method. With this method we can set a response header with a name and value. The methods accepts two arguments: the first argument is the header name and the second argument is the header value.
In the following controller we invoke the header() method to set the header X-Powered-By with the Grails and Groovy version.
We can test this with the following Spock specification:
Code written with Grails 2.2.4
Original blog post written on August 14, 2013.
Render Binary Output with the File Attribute
Since Grails 2 we can render binary output with the render() method and the file attribute. The file attribute can be assigned a byte[], File, InputStream or String value. Grails will try to determine the content type for files, but we can also use the contentType attribute to set the content type.
In the following controller we find an image in our application using grailsResourceLocator. Then we use the render() method and the file and contenType attributes to render the image in a browser:
The following screenshots shows the output of the index() action in a web browser:

We can use the fileName attribute to set a filename for the binary content. This will also set a response header with the name Content-Disposition with a the filename as value. Most browser will then automatically download the binary content, so it can be saved on disk. Grails will try to find the content type based on the extension of the filename. A map of extensions and content type values is defined in the grails-app/conf/Config.groovy configuration file. We can add for example for png a new key/value pair:
In our controller we can change the code so we use the fileName attribute:
Code written with Grails 2.2.4
Original blog post written on September 05, 2013.
Exception Methods in Controllers
Since Grails 2.3 we can define exception methods in our controllers to handle exceptions raised by code invoked in the action methods of the controllers. Normally we would write a try/catch statement to handle an exception or let it continue up the stack until a 500 error page is shown. But with exception methods we can write code to handle exceptions in a controller without a try/catch statement. An exception method should define the type of exception it handles as the method argument. We can have multiple exception methods for different exception types. Also subclasses of a controller will use the exception methods if applicable.
In the following controller we have a couple of action methods: index and show. And we have two exception methods: connectException and notFoundException. The connectException method has a single argument of type ConnectException. This means that any code in the controller that will raise a ConnectException will be handled by this method. And any ResourceNotFoundException thrown in the controller will be handled by the notFoundException method, because the argument type is ResourceNotFoundException.
Code written with Grails 2.4.0.
Original blog post written on May 23, 2014.
Namespace Support for Controllers
In a Grails application we can organize our controllers into packages, but if we use the same name for multiple controllers, placed in different packages, then Grails cannot resolve the correct controller name. Grails ignores the package name when finding a controller by name. But with namespace support since Grails 2.3 we can have controllers with the same name, but we can use a namespace property to distinguish between the different controllers.
We can add a new static property to a controller class with the name namespace. The value of this property defines the namespace. We can then write new URL mappings in the grails-app/conf/UrlMappings.groovy file and use the namespace value as a mapping attribute.
Suppose we have two ReportController classes in our application. One is defined in package com.mrhaki.grails.user and the other in com.mrhaki.grails.common. The following code samples show sample implementations for both controllers:
And the second controller:
In our UrlMappings.groovy file we can now add two extra mappings for these controllers and we use the new namespace attribute to point the mapping to the correct controller implementation.
The namespace support is also useful in building RESTful APIs with Grails. We can use the namespace attribute to have different versions for the same controller. For example in the following UrlMappings.groovy configuration we have two mappings to a controller with the same name, but the namespace attribute defines different version values:
To create links to controllers with a namespace we can use the new namespace attribute in the link and createLink tags. The following GSP page part shows how we can set the namespace so a correct link is generated:
We get the following HTML:
Code written with Grails 2.3.2.
Original blog post written on November 15, 2013.
Grouping URL Mappings
We can group URL mappings defined in grails-app/conf/UrlMappings.groovy using the group() method defined for the URL mapping DSL. The first argument is the first part of the URL followed by a closure in which we define mappings like we are used to.
Suppose we have defined the following two mappings in our UrlMappings.groovy file, both starting with /admin:
We can rewrite this and use the group() method to get the following definition:
When we use the createLink and link tags the group is taken into account. For example when we use <g:createLink controller="userAdmin"/> we get the following URL if the application name is sample: /sample/admin/users.
Code written with Grails 2.3.
Original blog post written on November 18, 2013.
Groovy Server Pages (GSP)
Change Scaffolding Templates in Grails
The scaffolding feature in Grails is impressive, especially when we want to show off Grails to other developers. Seems like magic is happening with only a minimal of code. But what if we don’t like the default pages Grails generates for us. Of course there is a way to have another layout for the dynamically generated pages.
First we start with a simple, one domain object application:
We open grails-app/domain/Message.groovy and add the following simple attribute with a small constraint:
Next we add the magic code to the grails-app/controllers/MessageController.groovy:
We are ready to run the application and we are able to view, add, update or delete messages:

We see the default layout we get from Grails. To see which GSP files Grails uses to generate these pages we only have to invoke one command:
After the script is finished we have a new directory src/templates. In this directory we find the scaffolding directory with a couple of GSP files. To change the layout of the pages we only have to make our changes here. Every controller which uses scaffolding will get these changes. Let’s create a new CSS file and use it in the create.gsp, edit.gsp, list.gsp and show.gsp files.
We create a new file scaffold.css in the web-app/css directory:
We open the files create.gsp, edit.gsp, list.gsp and show.gsp and add the following line in the HTML head section:
Now when we run the application again we see that the dynamically generated pages are using the new CSS file:

Besides a simple change like this, we can of course do anything we want with the GSP files that are used for scaffolding. In the above screenshot we can see for example we have removed the default Grails logo and replaced it with our own text.
Code written with Grails 1.1.
Original blog post written on July 28, 2009.
Use the GSP Template Engine in a Controller
The GSP TemplateEngine used to render the GSP pages in Grails is also available as standalone service in for example our controllers, taglibs or services. In the Spring application context the template engine is loaded with the name groovyPagesTemplateEngine. This means we only have to define a new variable in our controller with this name and the Spring autowire by name functionality will automatically insert the template engine in our class. See the following code sample where we use the template engine, notice we even can use taglibs in our template code.
We get the following HTML output:
Code written with Grails 1.2.2.
Original blog post written on May 06, 2010.
The Template Namespace
To have clean and re-usable Groovy Server Pages (GSP) we can use templates on our pages. A template contains HTML and code that we can maintain separately. In this post we learn about the template namespace to include a template on our page.
Suppose we have a page in our application that display a list of products. Each product has several properties we show. The template for a product is:
We can use the template with the g:render tag and template attribute on our page:
But we can also use the template namespace feature in Grails. We define a tag with the namespace tmpl and the tagname is our template name. We pass the model for the template through the attributes. Each attribute name/value pair is passed as model to the template.
Code written with Grails 1.3.7.
Original blog post written on February 19, 2011.
Templates Can Have a Body
To create a more modular Groovy Server Page we can use Grails’ template support. We use <g:render template="..." ... /> or <tmpl:templateName ... /> tags to render the template content. These tags can have a body. The body of the tag is then available in the template code. We use the expression ${body()} in our template to output the body content.
Suppose we have the following template code:
We can use the template with different body contents:
If the content of the body has HTML tags and we have set in grails-app/conf/Config.groovy the property grails.views.default.codec to html we get escaped HTML. Instead of using ${body()} we must then use <%= body() %>.
Code written with Grails 1.3.7.
Original blog post written on February 19, 2011.
The Link Namespace
Grails supports named URL mappings. We can define a name for a URL mapping and use that name when we generate links in our application. In this post we see how we can use the link namespace to use a named mapping.
We start with a simple named URL mapping for viewing product details on our site:
We can use the <g:link mapping="..." .../> tag in our code to use this named URL mapping:
outputs for product with identifier ‘901’:
But we can also use the special link namespace in our code. We start a new tag with link as namespace. The name of the tag is the name of the URL mapping we have created. The attributes we specify are all converted to parameters for the link. If we add the attrs attribute we can specify attribute key/value pairs that need to be applied to the generated link as is.
Code written with Grails 1.3.7.
Original blog post written on February 20, 2011.
Format Boolean Values with the formatBoolean Tag
If we want to display something else than true or false for a boolean value on our Groovy Server Page (GSP) we can use the formatBoolean tag. We can specify a value for true with the true attribute and for false with the false attribute. If we don’t specify a true or false attribute Grails will look for the key boolean.true and boolean.false in the i18n resource bundle. If those are not found than the keys default.boolean.true and default.boolean.false are used. And the last fallback are the values True for true and False for false boolean values.
Code written with Grails 1.3.7.
Original blog post written on February 21, 2011.
Encode Content with the encodeAs Tag
Encoding and decoding values is easy in Grails. We can invoke the dynamic methods encodeAs...() and decodeAs...() for several codecs. If we have a large block of content on our Groovy Server Page (GSP) we want to encode we can use the <g:encodeAs codec="..."/> tag. The body of the tag is encoded with the codec we specify with the codec attribute.
If we look at the generated HTML source we see:
Code written with Grails 1.3.7.
Original blog post written on February 22, 2011.
Set Application Wide Default Layout
Grails uses Sitemesh as the layout and decoration framework. Layouts are defined in the grails-app/views/layouts directory. There are several conventions Grails uses to determine which layout file must be applied. We can set a default layout for our application by setting the property grails.sitemesh.default.layout in grails-app/conf/Config.groovy. The value of the property maps to the filename of the layout. For example if we set the value to main then Grails will use grails-app/views/layouts/main.gsp.
Another way is to create a layout with the name application.gsp and save it in grails-app/views/layouts. Grails will use this layout if the layout cannot be determined in another way.
Code written with Grails 1.3.7.
Original blog post written on February 24, 2011.
Applying Layouts in Layouts
Grails uses Sitemesh to support view layouts. A layout contains common HTML content that is reused on several pages. For example we can create a web application with a common header and footer. The body of the HTML pages is different for the pages in the web application. But the body can also have a common layout for certain pages. For example some pages have a body with two columns, others have a single column. To reuse these layouts we can use the <g:applyLayout .../> tag. This means we can apply layouts in layouts, which provides a very flexible solution with optimal reuse of HTML content.
Update: another way to apply layouts in layouts based on the comments by Peter Ledbrook.
Let’s see how this works with a small sample application. All pages have a header with a logo, search form and main menu. Each page also has a footer with some copyright information. The homepage has a body with five blocks of information, we have product list page with a one column body and finally a product details view with a two column body.
The following diagrams shows the structure of the pages:
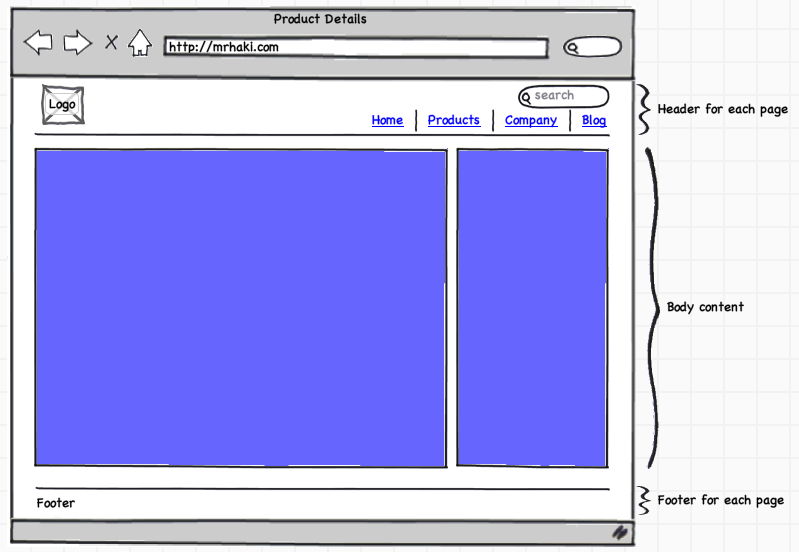
First we create the main layout with the header and footer HTML content. The body content is variable for the pages, so we use <g:layoutBody/> in our main layout.
For our homepage we define a layout with five blocks. We use Sitemesh content blocks in our layout. This way we can define content blocks in the pages and reference these components in the layouts. To reference a content block we use the <g:pageProperty .../> tag. The name attribute contains the name of the content block we want to reference. Notice we reference our main layout page with <meta name="layout" content="page"/>.
And in the homepage Groovy server page we can use the <g:applyLayout .../> tag and define the content for our Sitemesh content blocks.
We also define a layout with one block:
And a layout with two columns:
Then we use these layouts in the product list and details views:
Because this is only a small sample application this might seem like overhead, but for a bigger application it is really useful to have reusable layouts. The following screenshots show the layouts in action for a Grails application.
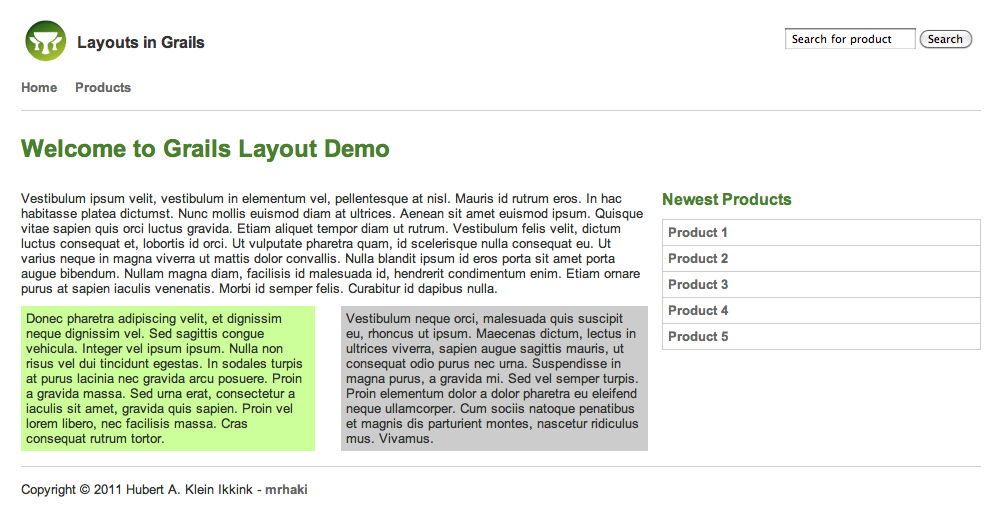
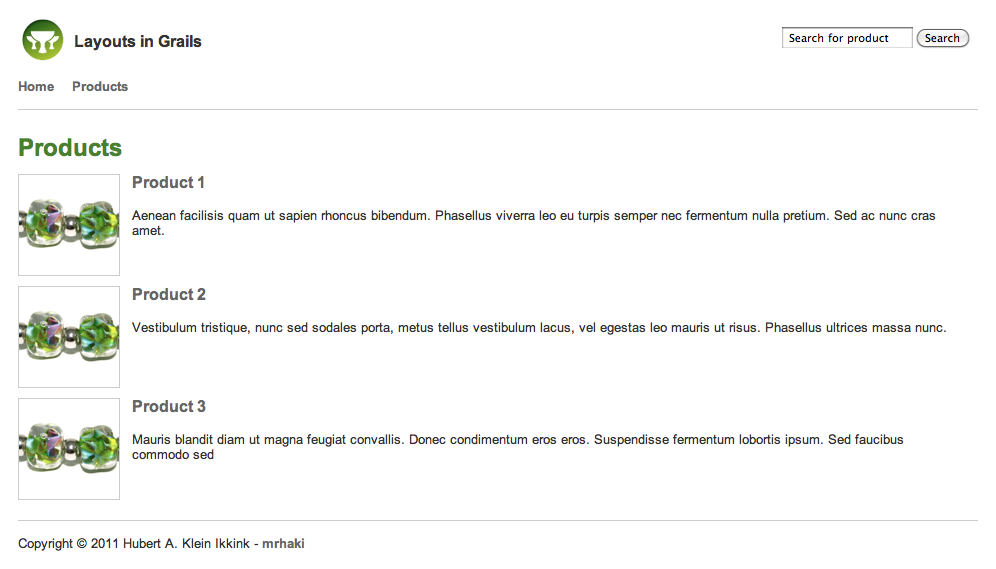
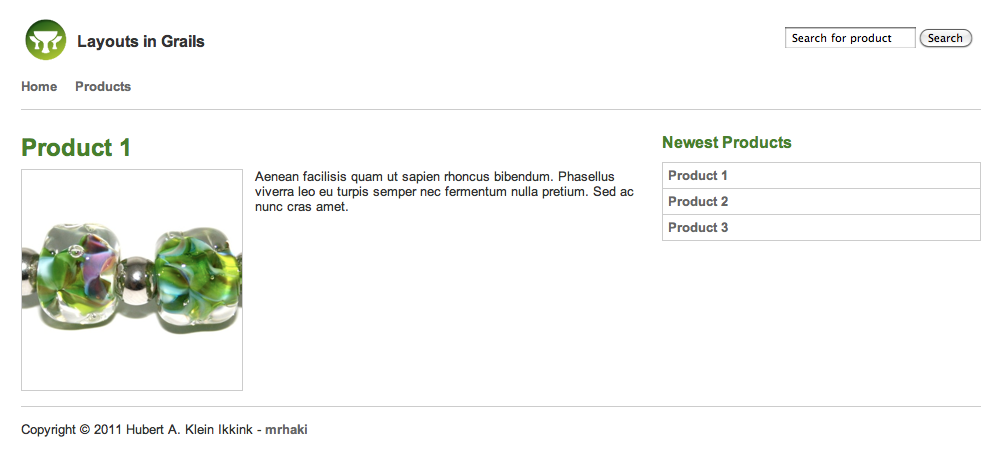
Sources of the sample Grails application can be found at GitHub.
Code written with Grails 1.3.7.
Original blog post written on March 31, 2011.
Applying Layouts in Layouts Revisited
In the blog post Applying Layouts in Layouts we learned how to reuse layouts in a Grails application. Peter Ledbrook added a comment suggesting to use the <g:applyLayout/> in the Groovy Server Pages in the layouts directory instead of in the views. So this way we can use the default method of applying layouts in our views (using for example the <meta/> tag) and keep all <g:applyLayout/> tags in the layout pages. In this post we see how we can support this for our applications and still reuse the layouts like before.
Please read the previous blog post to see the layout structure of our sample Grails application. The main layout page is still grails-app/views/layouts/page.gsp and doesn’t need to be changed:
The layout for the homepage is defined by fiveblocks.gsp in the layouts directory. We change this file and use <g:applyLayout/> to apply the main page layout instead of using <meta name="layout" content="page"/>:
And now we use <meta name="layout" content="fiveblocks"/> in the homepage Groovy server page and define the content for our Sitemesh content blocks.
We notice the changes aren’t big compared to the previous solution, but using <meta name=”layout” content=”…”/> in the views is more compliant to what we already learned when using layouts in views.
Also keep in mind Peter Ledbrook’s warning about having layouts nested more than one deep:
Finally, if you do have layouts nested more than one deep (not necessarily a good idea, but that’s what grails.org is currently doing) then it’s worth noting that every layout must have the <g:layout*/> and <g:pageProperty/> tags, otherwise the contents don’t propagate properly.
Sources of the sample Grails application can be found at GitHub.
Code written with Grials 1.3.7.
Original blog post written on April 13, 2011.
Access Action and Controller Name in GSP
In our GSP views we can see the name of the action and controller that resulted in the view. We can use this for example to show or hide certain information based on the values for the action and controller name. Grails injects the variables actionName and controllerName automatically and sets the values based on the action and controller.
When we open the GSP we get the following output:

Code written with Grails 1.3.7.
Original blog post written on November 25, 2011.
Get GrailsApplication and ApplicationContext in GSP
Several variables are injected to Groovy Server Pages (GSP) in a Grails application. Two of them are the ApplicationContext and GrailsApplication objects. They are bound to the variables applicationContext and grailsApplication.
When we have access to the ApplicationContext we could for example load resources or get references to beans in the context. Via the grailsApplication variable we have access to for example the configuration values and metadata of the application.
When we open this GSP in our browser we get the following output:
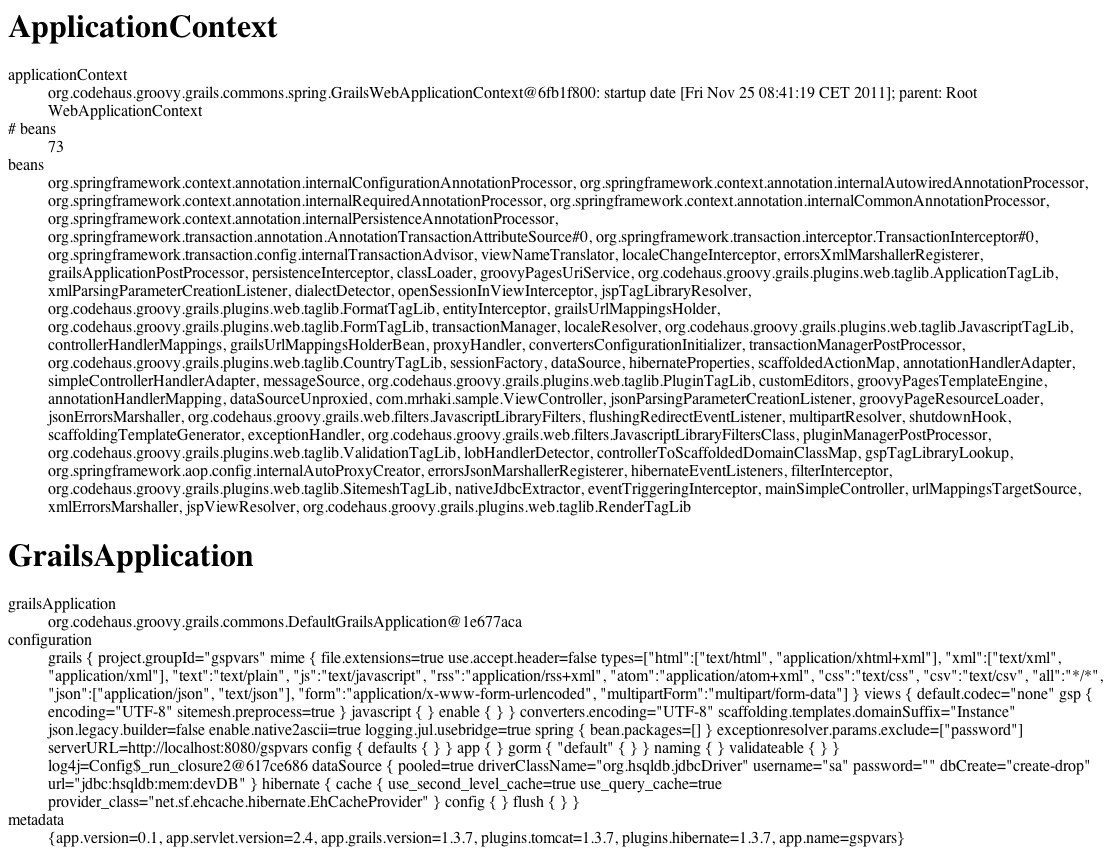
Code written with Grails 1.3.7.
Original blog post written on November 28, 2011.
Use Services in GSP with g:set Tag
In Grails we can use the set tag to define a variable with a value on a GSP. But we can also use the same tag to access a Grails service on a GSP. We must use the bean attribute with the name of the Grails service. We can even pass the name of any Spring managed bean in the application context of our application.
In the following sample GSP we access a Grails service with the name BlogService. We invoke the method allTitles() and use the result.
Code written with Grails 2.2.4.
Original blog post written on August 28, 2013.
Generating Raw Output with Raw Codec
Since Grails 2.3 all ${} expression output is automatically escaped on GSPs. This is very useful, because user input is now escaped and any HTML or JavaScript in the input value is escaped and not interpreted by the browser as HTML or JavaScript. This is done so our Grails application is protected from Cross Site Scripting (XSS) attacks.
But sometimes we do want to output unescaped HTML content in the web browser. For example we generate the value ourselves and we know the value is safe and cannot be misused for XSS attacks. In Grails 2.3 we can use a new raw() method in our GSPs, tag libraries or controllers. The method will leave the content unchanged and return the unescaped value to be displayed. Alternatively we can use encodeAsRaw() on the content we want to leave unescaped. Finally the encodeAs tag accepts Raw or None as values for the attribute codec and will return the unescaped value.
In the following sample GSP we display the value of the content model property passed to the page. The value is set by a controller and is <em>sample</em> content.
In our web browser we see the following output:
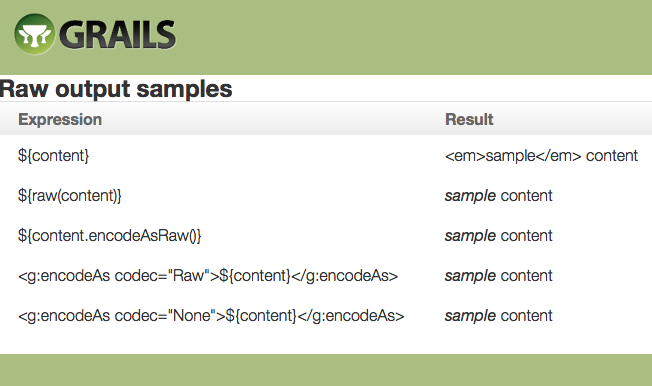
Code written with Grails 2.3.
Original blog post written on November 18, 2013.
Using Closures for Select Value Rendering
To generate an HTML select we can use the Grails tag <g:select .../>. We use the optionValue attribute to specify a specific property we want to be used as the value. But we can also define a closure for the optionValue attribute to further customize the value that is shown to the user.
Suppose we have a simple domain class Book with a couple of properties. We want to combine multiple properties as the text for the HTML select options. In the following GSP we define first a <g:select .../> tag where we simply use the title property. In the next <g:select .../> tag we use a closure to combine multiple properties.
We can also pass the closure as model property to the GSP from a controller. In a controller we define the transformation in a closure and pass it along to the GSP page. On the GSP we can use this closure as a value for the optionValue attribute of the <g:select .../> tag. The following GSP shows all three scenarios.
Here is a sample controller which passes the transformation to the GSP:
When we run the application and open the page in a web browser we get the following HTML source:
The optionKey attribute also allows closures as arguments.
Code written with Grails 2.3.2.
Original blog post written on December 09, 2013.
REST
Customize Resource Mappings
Since Grails 2.3 it is very easy to define RESTful URL mappings for a controller. We can use the resources and resource attribute and use a controller name as the value. Grails will then automatically create a couple of URL mappings. Suppose we use the following mapping in grails-app/conf/UrlMappings.groovy: "/api/users"(resources: 'user'), then the following mappings are automatically created:
When we use the resource attribute to define a mapping like "/api/user"(resource: 'user') the following mappings are created by Grails:
Well there are a lot of mappings created for us! But maybe we don’t need all created mappings in our application. For example the mappings with /create and /edit are created by Grails to support also a UI variant for the controller actions, but we might want to leave them out when we only deal with JSON or XML payloads. We can use the includes and excludes attributes on the mapping to explicitly define which actions we want to support in our controller.
In the following sample UrlMappings.groovy configuration we exclude the create and edit actions in the first mapping. In the second mapping we only include the show and index actions:
Code written with Grails 2.3.
Original blog post written on November 15, 2013.
Pretty Print XML and JSON Output
If our Grails application renders XML or JSON output we can set configuration properties to enable pretty printing. This can be useful in for example in the development environment where we enable pretty printing and disable it for other environments. We set the configuration property grails.converters.default.pretty.print with the value true to enable pretty printing for both XML and JSON output. If we only want to pretty print XML we use the property grails.converters.xml.pretty.print and for JSON we use grails.converters.json.pretty.print.
First we look at the XML and JSON output when we don’t enable pretty printing for a simple book resource:
Now we get the same book resource but with the following grails-app/conf/Config.groovy snippet:
The following output shows how the representation is formatted nicely:
Code written with Grails 2.3.2.
Original blog post written on November 20, 2013.
Include Domain Version Property in JSON and XML Output
We can include the version property of domain classes in rendered JSON or XML output. By default the version property is not included in generated XML and JSON. To enable inclusion of the version property we can set the configuration property grails.converters.domain.include.version with the value true. With this property for both XML and JSON the version property is included in the output. To only enable this for XML we use the property grails.converters.xml.domain.include.version and for JSON we use the property grails.converters.json.domain.include.version.
The following snippet is from grails-app/conf/Config.groovy where the properties are defined:
The following samples show a representation of a book resources, which is a domain class and we see the version property as attribute of the book XML tag.
In JSON the version is included as property.
Code written with Grails 2.3.2.
Original blog post written on November 20, 2013.
Enable Accept Header for User Agent Requests
Especially when we use Grails to create a RESTful API we want to enable the request header Accept, so Grails can do content negotiation based on the value in the header. For example we could use the request header Accept: application/json to get a JSON response. Grails will look at the boolean configuration property grails.mime.use.accept.header to see if the Accept header must be parsed. The default value is true so the Accept header is used. But there is another property which determines if the Accept header is used: grails.mime.disable.accept.header.userAgents. The value must contain a list or a regular expression pattern of user agents which are ignored for the Accept header. The default value is ~/(Gecko(?i)|WebKit(?i)|Presto(?i)|Trident(?i))/. So for any request from these user agents, mostly our web browser, the Accept header is ignored.
If we use REST web services test tools from our browser, for example Postman, then any Accept header we set in the tool is ignored by Grails. We must change the value of the configuration property grails.mime.disable.accept.header.userAgents to for example an empty list. Then we know for every request send to our Grails application, either from a web browser or command-line tool like curl, the Accept header is interpreted by Grails.
The following sample shows how we make sure the Accept header is always used:
Written with Grails 2.4.1.
Original blog post written on July 08, 2014.
Custom Controller Class with Resource Annotation
In Grails we can apply the @Resource AST (Abstract Syntax Tree) annotation to a domain class. Grails will generate a complete new controller which by default extends grails.rest.RestfulController. We can use our own controller class that will be extended by the @Resource transformation. For example we might want to disable the delete action, but still want to use the @Resource transformation. We simply write a new RestfulController implementation and use the superClass attribute for the annotation to assign our custom controller as the value.
First we write a new RestfulController and we override the delete action. We return a HTTP status code 405 Method not allowed:
Next we indicate in the @Resource annotation with the superClass attribute that we want to use the NonDeleteRestfulController:
When we access the resource /users/{id} with the HTTP DELETE method we get a 405 Method Not Allowed response status code.
Written with Grails 2.4.2.
Original blog post written on July 09, 2014.
Change Response Formats in RestfulController
We can write a RESTful application with Grails and define our API in different ways. One of them is to subclass the grails.rest.RestfulController. The RestfulController already contains a lot of useful methods to work with resources. For example all CRUD methods (save/show/update/delete) are available and are mapped to the correct HTTP verbs using a URL mapping with the resource(s) attribute.
We can define which content types are supported with the static variable responseFormats in our controller. The variable should be a list of String values with the supported formats. The list of supported formats applies to all methods in our controller. The names of the formats are defined in the configuration property grails.mime.types. We can also use a Map notation with the supportedFormats variable. The key of the map is the method name and the value is a list of formats.
We can also specify supported formats per action using the respond method in our controller. We can define the named argument formats followed by a list of formats when we invoke the respond method. In the following controller we override the index and show methods and use the formats attribute when we use the respond method:
Code written with Grails 2.4.2.
Original blog post written on July 09, 2014.
Register Custom Marshaller Using ObjectMarshallerRegisterer
When we convert data to JSON or XML (or any other format actually) in our Grails application we can register custom marshallers. These marshallers must contain the logic to convert an input object to a given format. For example we could have a book class and we want to convert it to our own JSON format. We have different options in Grails to achieve this, but for now we will create a custom marshaller class CustomBookMarshaller. This class must implement the ObjectMarshaller<C> interface. The generic type is the converter the marshaller is for and is in most cases either grails.converters.XML or grails.converters.JSON.
Next we must make sure Grails uses our custom marshaller and we must register it. In the Grails documentation is explained how to do this via grails-app/conf/Bootstrap.groovy where we invoke for example JSON.registerMarshaller(new CustomBookMarshaller()). Or via resources.groovy in the directory grails-app/conf/spring where we must write an extra component with a method annotated @PostConstruct where JSON.registerMarshaller(new CustomBookMarshaller()) is invoked.
But there is also another way using ObjectMarshallerRegisterer. We can find this class in the package org.codehaus.groovy.grails.web.converters.configuration. This is a Spring bean just for configuring extra marshallers. The bean has a priority property we can use to define the priority for this marshaller. Grails will use a marshaller with the highest priority if for the same class multiple marshallers are defined. We can assign a marshaller to the marshaller property. And finally we must set the converter class, for example grails.converters.XML or grails.converters.JSON with the converter property.
In our grails-app/conf/spring/resources.groovy file we define a new instance of ObjectMarshallerRegisterer and assign the appropriate property values. The name of the bean in resources.groovy is not important, but we must make sure there is no name class with other Spring configured beans. Grails looks for all beans of type ObjectMarshallerRegisterer during marshaller configuration and use the information we provide.
Code written with Grails 2.3.2
Original blog post written on November 21, 2013.
Using Converter Named Configurations with Default Renderers
Sometimes we want to support in our RESTful API a different level of detail in the output for the same resource. For example a default output with the basic fields and a more detailed output with all fields for a resource. The client of our API can then choose if the default or detailed output is needed. One of the ways to implement this in Grails is using converter named configurations.
Grails converters, like JSON and XML, support named configurations. First we need to register a named configuration with the converter. Then we can invoke the use method of the converter with the name of the configuration and a closure with statements to generate output. The code in the closure is executed in the context of the named configuration.
The default renderers in Grails, for example DefaultJsonRenderer, have a property namedConfiguration. The renderer will use the named configuration if the property is set to render the output in the context of the configured named configuration. Let’s configure the appropriate renderers and register named configurations to support the named configuration in the default renderers.
In our example we have a User resource with some properties. We want to support short and details output where different properties are included in the resulting format.
First we have our resource:
Next we register two named configurations for this resource in our Bootstrap:
Now we must register custom renderers for the User resource as Spring components in resources:
We have defined some new mime types in grails-app/conf/spring/resources.groovy, but we must also add them to our grails-app/conf/Config.groovy file:
Our application is now ready and configured. We mostly rely on Grails content negotiation to get the correct renderer for generating our output if we request a resource. Grails content negotiation can use the value of the request parameter format to find the correct mime type and then the correct renderer. Grails also can check the Accept request header or the URI extension, but for our RESTful API we want to use the format request parameter.
If we invoke our resource with different formats we see the following results:
Code written with Grails 2.4.2.
Original blog post written on July 11, 2014.
Rendering Partial RESTful Responses
Grails 2.3 added a lot of support for RESTful services. For example we can now use a respond() method in our controllers to automatically render resources. The respond() method accepts a resource instance as argument and a map of attributes that can be passed. We can use the includes and excludes keys of the map to pass which fields of our resources need to be included or excluded in the response. This way we can render partial responses based on a request parameter value.
First we start with a simple domain class Book:
Next we create a controller BookApiController, which we extend from the RestfulController so we already get a lot of basic functionality to render an instance of Book. We overwrite the index() and show() methods, because these are used to display our resource. We use the request parameter fields to define a comma separated list of fields and pass it to the includes attribute of the map we use with the respond() method. Notice we also set the excludes attribute to remove the class property from the output.
Next we define a mapping to our controller in UrlMappings.groovy:
We are now almost done. We only have to register a new Spring component for the collection rendering of our Book resources. This is necessary to allow the usage of the includes and excludes attributes. These attributes are passed to the so-called componentType of the collection. In our case the componentType is the Book class.
Now it is time to see our partial responses in action using some simple cURL invocations:
Code written with Grails 2.3.2
Original blog post written on December 09, 2013.
Customize Root Element Name Collections for XML Marshalling
When we convert a List or Set to XML using the Grails XML marshalling support the name of the root element is either <list> or <set>. We can change this name by extending the CollectionMarshaller in the package org.codehaus.groovy.grails.web.converters.marshaller.xml. We must override the method supports() to denote the type of collection we want to customize the root element name for. And we must override the method getElementName() which returns the actual name of the root element for the List or Set.
Let’s first see the default output of a collection of Book domain classes. In a controller we have the following code:
The XML output is:
To change the element name list to books we add the following code to the init closure
in grails-app/app/BootStrap.groovy:
Now when we render a list of Book instances we get the following XML:
To customize the XML marshaling output for Map collections we must subclass MapMarshaller in the packag org.codehaus.groovy.grails.web.converters.marshaller.xml.
Code written with Grails 2.3.2
Original blog post written on February 06, 2014.
The Service Layer
Generate Links Outside Controllers or Tag Libraries
In Grails we can create a link to a controller with the link() method. This works in the context of a request, like in a controller, tag library or Groovy Server Page (GSP). But since Grails 2.0 we can also generate links in services or any other Spring bean in our project. To create a link we need to inject the grailsLinkGenerator bean into our class. The grailsLinkGenerator bean has a link() method with the same argument list as we are already used to. We can define for example the controller, action and other parameters and the method will return a correct link.
We can also create the link for a resource with the resource() method. And to get the context path and server base URL we use the methods getContextPath() and getServerBaseURL().
The following service uses the link generator to create links in a Grails service.
Code written with Grails 2.0.
Original blog post written on January 12, 2012.
Render GSP Views And Templates Outside Controllers
In a Grails application we use Groovy Server Pages (GSP) views and templates to create content we want to display in the web browser. Since Grails 2 we can use the groovyPageRenderer instance to render GSP views and templates outside a controller. For example we can render content in a service or other classes outside the scope of a web request.
The groovyPageRenderer instance is of type grails.gsp.PageRenderer and has a render() method like we use in a controller. We can pass a view or template name together with a model of data to be used in the GSP. The result is a String value.
The class also contains a renderTo() method that can be used to generate output to a Writer object. For example we can generate files with the output of the GSP rendering by passing a FileWriter instance to this method.
In the following sample we create a GSP view confirm.gsp and a GSP template _welcome.gsp. We also create a Grails service with two methods to use the GSP view and template.
Next we create a integration test to see if our content is rendered correctly:
We can run our test and everything is okay:
We can use tags from tag libraries in our GSP views and templates. The Sitemesh layouts cannot be used. The PageRenderer works outside of the request scope, which is necessary for the Sitemesh layouts. Because we are outside of the web request scope we cannot generate absolute links in the GSP view directly. If we change the confirm GSP view and add a tag to create an absolute link we get an UnsupportedOperationExeption with the message You cannot read the server port in non-request rendering operations.
But we can simply workaround this issue. Remember that since Grails 2 we can use the grailsLinkGenerator to generate links in for example a service. So we create our absolute link with the grailsLinkGenerator and pass it as a model attribute to our GPS view.
Code written with Grails 2.0.
Original blog post written on March 05, 2012.
Accessing Resources with Resource and ResourceLocator
Grails uses Spring and we can piggyback on the Spring support for resource loading to find for examples files in the classpath of our application. We can use the Spring org.springframework.core.io.Resource or org.springframework.core.io.ResourceLoader interface to find resources in our application.
And since Grails 2.0 we can also use the org.codehaus.groovy.grails.core.io.ResourceLocator interface. In our code we can use the grailsResourceLocator service which implements the ResourceLocator interface. We must inject the grailsResourceLocator service into our code and we use the method findResourceForURI(String) to find a resource. The advantage of the grailsResourceLocator service is that it knows about a Grails application. For example resources in plugins can also be accessed.
First we look at a sample Grails service with a Resource property with the name template. In our code we get the actual resource using the getURL() method. The value of the Resource property we set in grails-app/conf/Config.groovy. We rely on the automatic conversion of properties of Spring so we can use a value like classpath:filename.txt and it will be converted to a Resource implementation.
In grails-app/conf/Config.groovy we define:
If we use the grailsResourceLocator we get the following service implementation:
Code written with Grails 2.2.4
Original blog post written on September 04, 2013.
Grails and Spring
Injecting Grails Services into Spring Beans
One of the underlying frameworks of Grails is Spring. A lot of the Grails components are Spring beans and they all live in the Spring application context. Every Grails service we create is also a Spring bean and in this blog post we see how we can inject a Grails service into a Spring bean we have written ourselves.
The following code sample shows a simple Grails service we will inject into a Spring bean:
We only have one method, languages(), that returns a list of JVM languages. Next we create a new Groovy class in the src/groovy directory which will be our Spring bean that will have the LanguageService injected. We use Spring annotations to make sure our class turns into a Spring bean. With the @Component we indicate the component as a Spring bean. We use the @Autowired annotation to inject the Grails service via the constructor:
The Shorten class will use the list of JVM languages from the LanguageService and return the first letter of each language in the firstLetter() method.
We can instruct Spring to do package scanning and look for Spring beans in for example resources.groovy, but in Config.groovy we can also set the property grails.spring.bean.packages. We define a list of packages for this property and Grails will scan those packages and add any Spring beans to the Spring context. The complete definition in Config.groovy is now:
With the following integration test we can see the Shorten class is now a Spring bean and we can invoke the firstLetter() method that uses the Grails service LanguageService:
Code written with Grails 2.2.1
Original blog post written on February 27, 2013.
Conditionally Load Bean Definitions from resources.groovy
We can define new bean definitions in several ways with Grails. One of them is via the resources.groovy file in the directory grails-app/conf/spring . This file is parsed and bean definitions are added to the Spring application context. The good thing is we can add Groovy code to this file to conditionally load bean definitions.
First we specify different bean definitions for different environments. Grails already has a development, test and production environment, but we can also use a custom environment. In the following sample we set the property of the Sample bean based on the environment the application is running in. We use the method Environment.executeForEnviroment() where we can use a DSL to indicate the name of the environment and the code we want to execute for that environment. First the code for the Sample class:
Next we change the resources.groovy file and set the property environment to a different value for each environment:
We can also use configuration properties to conditionally load bean definitions. In our resources.groovy the grailsApplication object is automatically injected. We can use this variable and get to the configuration properties. So we can define a configuration property in our grails-app/conf/Config.groovy file and use the value in resources.groovy in a condition to load a bean definition.
Let’s add a new boolean property to our configuration sample.load and use it in our resources.groovy:
We could have achieved the same thing in this samples with changing bean properties via configuration, because in the sample we only change the property value. But we can do much more than simply change property values and for example load extra beans conditionally based on the Grails environment or a configuration property, which we cannot do with just changing properties via configuration.
Code written with Grails 2.2.1
Original blog post written on March 05, 2013.
Using Spring Bean Aliases
Grails uses dependency injection by convention. This means if we have a property messageService then a Spring bean or Grails service with the name messageService is injected. Grails will automatically use the name of a Grails service as the name of the Spring bean definition (applying Java Bean conventions and start with a lowercase). So if we have a Grails service MessageService the resulting Spring bean definition will have the name messageService. Any Spring bean that wants to use the service only has to create the property messageService and dependency injection by convention makes sure the Grails service is injected.
We can change the Spring bean definition name using Spring bean aliases. With an alias we provide an extra name for a Spring bean. In our Grails application we can add an alias in the resources.groovy file in the directory grails-app/conf/spring. In the following sample we add the alias message for the MessageService Grails service:
We can use aliases to provide different service implementations and conditionally (for example based on environment) activate an implementation. The class that wants to use the service only has to use the dependency injection by convention and define a property with a name. In the resources.groovy file we can then set the alias with the correct name to the implementation we need.
Let’s see how this works with an example. Suppose we have a controller that depends on a service with the name messageService. We use an interface to define the type of the service in our sample, but that is not necessary, we could do the same thing without interfaces:
Let’s create the interface, which is very simple in our sample:
Next we create two Grails services that implement the MessageService interface: MessageRemoteService and MessageLocalService:
If we run the Grails application we don’t have a Spring bean definition with the name messageService, but we do have two bean definitions with the names messageRemoteService and messageLocalService. To make sure the MessageController will have the correct service injected we need to add aliases to resources.groovy. By default we want to use the messageRemoteService as messageService, but during development we want to use messageLocalService:
So with aliases it is easy to swap service implementations, based on some condition. This can be very useful if we have a service and want to use a mocked or simplified version during development and test for example. This post is based on the presentation Under the hood: Using Spring in Grails and blog post by Burt Beckwith
Code written with Grails 2.2.1
Original blog post written on March 06, 2013.
Use Constructor Argument Based Dependency Injection
We can define extra Spring beans for our Grails application in grails-app/conf/spring/resources.groovy using a DSL. For example we want to use third-party classes as Spring components. Then we can define the bean in resources.groovy and use dependency injection to use it in Grails controllers, services or other classes. If the class is defined so dependencies need to be injected via constructor arguments we must use a special DSL syntax. Normally we define a bean using the following syntax: beanName(BeanClass). To pass constructor arguments we must add those as method arguments after BeanClass. For example if the constructor has a single argument of type String we can use the following syntax: beanName(BeanClass, '42')
We have an alternative way and that is via a closure we can use for the bean definition. The closure will have one argument which is a BeanDefinition object. The BeanDefinition object has a constructorArgs property that takes a list of constructor arguments. So our previous example would become: beanName(BeanClass) { it.constructorArgs = ['42'] }.
Let’s see how this works with an example. First we create a simple Grails service, this service will be injected into a Groovy class we will configure via constructor arguments.
Next we create a Groovy class LanguageProvider. This class will use the Grails service and a search pattern to find a language, but those are set via the constructor arguments:
To configure the LanguageProvider class as Spring bean we add the bean definition to resources.groovy:
Or we can use the BeanDefinition that is passed to the closure:
Grails 2.2.1 is used to write this blog post.
Original blog post written on March 10, 2013.
Set Property Values of Spring Beans in resources.groovy
We can configure Spring beans using several methods in Grails. We can for example add them to resources.xml in the directory grails-app/conf/spring using Spring’s XML syntax. But we can also use a more Groovy way with resources.groovy in the directory grails-app/conf/spring. We can use a DSL to define or configure Spring beans that we want to use in our Grails application. Grails uses BeanBuilder to parse the DSL and populate the Spring application context.
To define a bean we use the following syntax beanName(BeanClass). If we want to set a property value for the bean we use a closure and in the closure we set the property values. Let’s first create a simple class we want to configure in the Spring application context:
Next we configure the bean in resources.groovy:
There is also an alternative syntax using Groovy’s support for named method arguments. In Groovy named arguments are all grouped into a Map object and passed as the first argument. The BeanBuilder DSL supports this feature. When we define a bean we can use named arguments for the property names and values, use the BeanClass argument and automatically this will be converted to Map and BeanClass type arguments.
Written with Grails 2.2.1
Original blog post written on March 12, 2013.
Setting Property Values through Configuration
In Grails we can define properties for services, controller, taglibs, Spring components and other components in the Spring application context through configuration. This is called property overriding in Spring terminology. This feature is very useful to define or override property values on components in the application context. We can define the property values in a beans{} block in Config.groovy. We can also load external configuration files, like property files and define property values in those.
With property overriding we don’t have to look for property values via an injected GrailsApplication object and the config property of GrailsApplication. The code using the property value is now much cleaner and easier to test.
In the following sample configuration we override a message property value for the SampleService, the controller SampleController, tag library SampleTagLib and a Spring component MessageProvider:
The information can also be included in an externalized configuration file. In the following Config.groovy we load the the file beans-config.properties to set the value of the message property.
The property file has the following content:
The following code sample shows the implementation of the Grails service SampleService to see how we define the property and use the value defined in the configuration:
Code written with Grails 2.2.4
Original blog post written on October 07, 2013.
Defining Spring Beans With doWithSpring Method
Grails 3 introduces GrailsAutoConfiguration as the base class for a Grails application. We can extend this class, add a main method and we are ready to go. By default this class is the Application class in the grails-app/init directory. We can override several Grails lifecycle methods from the GrailsAutoConfiguration base class. One of them is doWithSpring. This method must return a closure that can be used by the Grails BeanBuilder class to add Spring beans to the application context. The closure has the same syntax as what we already know for the grails-app/conf/spring/resources.groovy file, we know from previous Grails versions.
We start with a simple class we want to use as a Spring bean:
Next we create a class that implements the CommandLineRunner interface. Grails will pick up this class, if we configure it as a Spring bean, at startup and executes the code in the run method.
Now we are ready to register these classes as Spring beans using the doWithSpring method in our Application class:
Now we can run our Grails application and in our console we see the message:
Written with Grails 3.0.7.
Original blog post written on September 22, 2015.
Use Spring Java Configuration
A Grails application uses Spring under the hood, which means we can also use all of Spring’s features in a Grails application. For example we can use the Spring Java configuration feature with our Grails application. The Java configuration feature allows us to write a Java or Groovy class to define beans for our application. Of course in Grails we have the nice bean builder syntax when we define beans in the grails-app/conf/spring/resources.groovy file, but maybe we must include a Java configuration from an external library or we just want to write a configuration class ourselves.
This post is very much inspired by this blog post by Andres Steingress.
First we create a simple Groovy class that we want to be instantiated via our Java configuration class:
Next we create a new Groovy class and apply the @Configuration annotation so Spring knows this is a class that is used to define beans. Inside the class we define public methods annotated with the @Bean annotation. By default the name of the method is also the name of the bean in the application context. We can specify a different name as an attribute of the @Bean annotation. We can inject other beans into our configuration class, for example GrailsApplication to access the configuration of our application.
The last step is to make sure our configuration class is picked up by Spring so the sample bean is configured. We use the Grails configuration property grails.spring.bean.packages to indicate the package our configuration class is in. When Grails starts all classes in the package and sub-packages are scanned to see if they are Spring components.
Code written with Grails 2.4.2.
Original blog post written on August 05, 2014.
Conditionally Load Beans in Java Configuration Based on Grails Environment
In a previous post we saw that we can use Spring’s Java configuration feature to load beans in our Grails application. We can use the @Profile annotation to conditionally load beans based on the currently active Spring profile. We can for example use the Java system property spring.profiles.active when we start the Grails application to make a profile active. But wouldn’t it be nice if we could use the Grails environment setting to conditionally load beans from a Java configuration? As it turns out Grails already set the current Grails environment name as the active profile for the Grails application. So we can simply use @Profile in our configuration or component classes, like in a non-Grails Spring application.
We can use the @Profile annotation in a Spring Java configuration class. The following sample shows different values for the @Profile annotation. The annotation is applied to methods in the sample code, but can also be applied to a class.
We can also use the annotation for classes that are annotated with the @Component annotation:
Code written with Grails 2.4.2.
Original blog post written on August 05, 2014.
Don’t Invalidate Session After Logout with Spring Security Plugin
The Spring security plugin makes it easy to add authentication and autorization to our Grails application. The underlying Spring security framework is still accessible using Spring configuration and as a matter of fact the plugin uses a lot of the Spring security components. When we choose the logout action so-called logout handlers are configured and we can customize them in the Spring configuration of our Grails application.
One of the logout handlers is a Spring bean with the name securityContextLogoutHandler of type org.springframework.security.web.authentication.logout.SecurityContextLogoutHandler. This handler will clear the security context and invalidate a HTTP session if it is available. If we don’t want to invalidate the session we must reconfigure this Spring bean. The good thing is we can override bean definitions in our Grails application. For example we can define a bean in grails-app/conf/spring/resources.groovy with the same name securityContextLogoutHandler and type, but use different property values. In our sample we must set the property invalidateHttpSession of org.springframework.security.web.authentication.logout.SecurityContextLogoutHandler to false. Now our session is not invalidated, but the security context is still cleared.
Sample written with Grails 2.2.1 and Spring security core plugin 1.2.7.3
Original blog post written on March 11, 2013.
Testing
See Test Output on the Command Line
As from Grails 1.2 we can see the output from test scripts directly on the console. We must use the arguments -echoOut and -echoErr when we run the tests.
Code written with Grails 1.2.1.
Original blog post written on March 16, 2010.
Invoking a Single Test Method
When we use $ grails test-app to test our code all tests are run. We can specify a single test class as an argument for the test-app script. So for example if we have a HelloWorldControllerTests class we use the following command $ grails test-app HelloWorldController. Grails supports wildcards for defining the test class, so we can also use $ grails test-app Hello* for example.
But we can even specify the method in our HelloWorldControllerTests class we want to be tested. If the test class has the method testSayHello() we use the following command $ grails test-app HelloWorldController.sayHello and only the testSayHello().
Code written with Grails 1.2.
Original blog post written on April 15, 2010.
Cleaning Before Running Tests
If we want to first clean our Grails project before we are running our test code we can pass the -clean argument. This way all source files will be recompiled so the tests are started from a clean slate.
Code written with Grails 1.2.
Original blog post written on April 21, 2010.
Rerun the Latest Failed Test
We can test our Grails application with $ grails test-app. But if one or more test fail we can easily rerun only the failed tests with the following command:
Code written with Grails 1.2.
Original blog post written on January 21, 2010.
Running Tests Continuously
When we write software it is good practice to also write tests. Either before writing actual code or after, we still need to write tests. In Grails we can use the test-app command to execute our tests. If we specify the extra option -continuous Grails will monitor the file system for changes in class files and automatically compiles the code and executes the tests again. This way we only have to start this command once and start writing our code with tests. If we save our files, our code gets compiled and tested automatically. We can see the output in the generated HTML report or on the console.
Suppose we have our Grails interactive shell open and we type the following command:
Written with Grails 3.1.6.
Original blog post written on May 12, 2016.
Testing for Chain Result in Controller
Testing a controller in Grails in easy with the ControllerUnitTestCase. If we extend our test class from the ControllerUnitTestCase we get a lot of extra functionality to write our tests. For example the controller is extended with a parameters map so we can set parameter values in our test case. Suppose we the following controller and want to test it:
By extending the ControllerUnitTestCase the mockController(SimpleController) method is invoked. This will add (among other things) the map chainArgs to the controller. The map is filled with the attributes of our chain() method. And we can use this map in our test to check for correct results:
Code written with Grails 1.2.2.
Original blog post written on May 02, 2010.
Checking Results from Forward Action in Controller Unit Tests
In Grails we can write unit tests for controllers. We can check for example the results from a redirect() or render() method. To check the result from a forward() action we can use the forwardedUrl property of the mock response object. The format of the URL is very basic and has the following form: /grails/(controller)/(action).dispatch?(queryParameters). So we get the servlet representation of a Grails controller request. We can use this format to check if our forward() method is correct in the unit test.
First we create a simple controller with a index() action which invokes the forward() method with a action and parameters:
Now we write a test (with Spock of course) to check the values from the forward() method in the mock response. The following specification contains code to parse the forwardedUrl property. We get the /controller/action as String and the parameters as Map object. Using Groovy syntax we can check for the values with forwardedUrl and forwardedParams:
Code written with Grails 2.2.2 and Spock 0.7-groovy-2.0
Original blog post written on May 16, 2013.
Using Codecs in Test Classes
When we run Grails a lot of metaClass information is added to the classes of our application. This also include the support for encoding and decoding String values. For example in our Grails application we can use "<b>Grails</b>".encodeAsHTML() and we get "<b>Grails</b>". But if we want to use the encodeAsHTML() method in our class we get an exception, because the method is not available. To make a Grails encoder/decoder available in our test class we must use the loadCodec() method. See the following example:
Code written with Grails 1.2.2.
Original blog post written on May 07, 2010.
Unit Testing Render Templates from Controller
In a previous blog post we learned how we can unit test a template or view independently. But what if we want to unit test a controller that uses the render() method and a template with the template key instead of a view? Normally the view and model are stored in the modelAndView property of the response. We can even use shortcuts in our test code like view and model to check the result. But a render() method invocation with a template key will simply execute the template (also in test code) and the result is put in the response. With the text property of the response we can check the result.
In the following sample controller we use the header template and pass a username model property to render output.
With this Spock specification we test the index() action:
Suppose we don’t want to test the output of the actual template, but we only want to check in our test code that the correct template name is used and the model is correct. We can use the groovyPages or views properties in our test code to assign mock implementation for templates. The groovyPages or views are added by the ControllerUnitTestMixin class, which is done automatically if we use the @TestFor() annotation. The properties are maps where the keys are template locations and the values are strings with mock implementations for the template. For example the template location for our header template is /sample/_header.gsp. We can assign a mock String implementation with the following statement: views['/sample/_header.gsp'] = 'mock implementation'
We can rewrite the Spock specification and now use mock implementations for the header template. We can even use the model in our mock implementation, so we can check if our model is send correctly to the template.
Code written with Grails 2.2.4
Original blog post written on September 12, 2013.
Testing Views and Templates
Grails has great support for testing. We can unit test controllers, taglibs, services and much more. One of the things we can unit test are views and templates. Suppose we have a view or template with some (hopefully simple) logic (a view/template should not contain complex logic), for example an if-else statement to display some content conditionally. We can write a test in Grails to see if the logic is correctly implemented.
Let’s first create a template in our Grails application:
The template checks if there is a username attribute and shows the value is there is, otherwise a simple “Welcome” message is shown.
We can test this with the following Spock specification. We use Spock for writing the test, because it makes writing tests so much easier and more fun! We must make sure we use the GroovyPageUnitTestMixin, because this will add a render() method to our tests. The render() method accepts a Map arguments where we can set the template or view and optionally the model with attributes.
Let’s also write a simple Grails view GSP, which shows a list of items if items are set or otherwise show a message using the <g:message/> tag.
The following specification will check the output dependent on if there are elements in the model attribute items. Because we use GroovyPageUnitTestMixin we have access to a messageSource object where we can define values for keys that are used by the <g:message/> tag.
Code written with Grails 2.2.1
Original blog post written on May 13, 2013.
Passing Objects to Attributes of Tags in Unit Tests
Unit testing tag libraries in Grails is easy. We can use the applyTemplate() method to execute a tag and check the output. We pass the HTML string representing the tag to applyTemplate() as we would use it in a GSP. Attribute values of a tag can be String values, but also any other type. To pass other types in our test as attribute values we must add an extra argument to applyTemplate(). The argument is a Map with model values which are used to pass as value to the tag library attributes.
Let’s see this in action with an example. First we create a tag library with a tag that will show the value of the title property of a Book instance. The Book instance is passed to the tag as attribute value for the attribute book:
We can test this tag with the following Spock specification. Notice we use the applyTemplate() method and pass an instance of Book using a Map as the second argument:
Code written with Grails 2.2.2 and Spock 0.7-groovy-2.0.
Original blog post written on May 14, 2013.
Set Request Locale in Unit Tests
There is really no excuse to not write unit tests in Grails. The support for writing tests is excellent, also for testing code that has to deal with the locale set in a user’s request. For example we could have a controller or taglib that needs to access the locale. In a unit test we can invoke the addPreferredLocale() method on the mocked request object and assign a locale. The code under test uses the custom locale we set via this method.
In the following controller we create a NumberFormat object based on the locale in the request.
If we write a unit test we must use the method addPreferredLocale() to simulate the locale set in the request. In the following unit test (written with Spock) we use this method to invoke the index() action of the SampleController:
Code written with Grails 2.2.4
Original blog post written on August 19, 2013.
Using MetaClass with Testing
We can use the metaClass property of classes to define behavior we want to use in our tests. But if we do, the change is not only for the duration of a test method, but for the entire test run. This is because we make a change at class level and other tests that use the class will get the new added behavior. To limit our change to a test method we first use the registerMetaClass() method. Grails will remove our added behavior automatically after the test method is finished.
Let’s see this with an example. We have a domain class User which uses the Searchable plugin. This plugin will add a search() and we want to use in our test case.
Code written with Grails 1.2.1.
Original blog post written on March 15, 2010.
Mocking the Configuration in Unit Tests
When we write a unit test for our Grails service and in the service we use ConfigurationHolder.config to get the Grails configuration we get null for the config object when we run the unit test. Which is fine for a unit test, because we want to provide values for the configuration in our test. This is easy to do: we use the mockConfig method to set configuration values for the unit test. The method accepts a String that is a configuration script.
Code written with Grails 1.1.2.
Original blog post written on December 01, 2009.
Use Random Server Port In Integration Tests
Because Grails 3 is based on Spring Boot we can use a lot of the functionality of Spring Boot in our Grails applications. For example we can start Grails 3 with a random available port number, which is useful in integration testing scenario’s. To use a random port we must set the application property server.port to the value 0. If we want to use the random port number in our code we can access it via the @Value annotation with the expression ${local.server.port}.
Let’s create a very simple controller with a corresponding integration test. The controller is called Sample:
We write a Spock integration test that will start Grails and we use the HTTP Requests library to access the /sample endpoint of our application.
Finally we add the server.port to the application configuration:
Let’s run the integration test: $ grails test-app mrhaki.SampleControllerIntSpec -integration. When we open the test report and look at the standard output we can see that a random port is used:
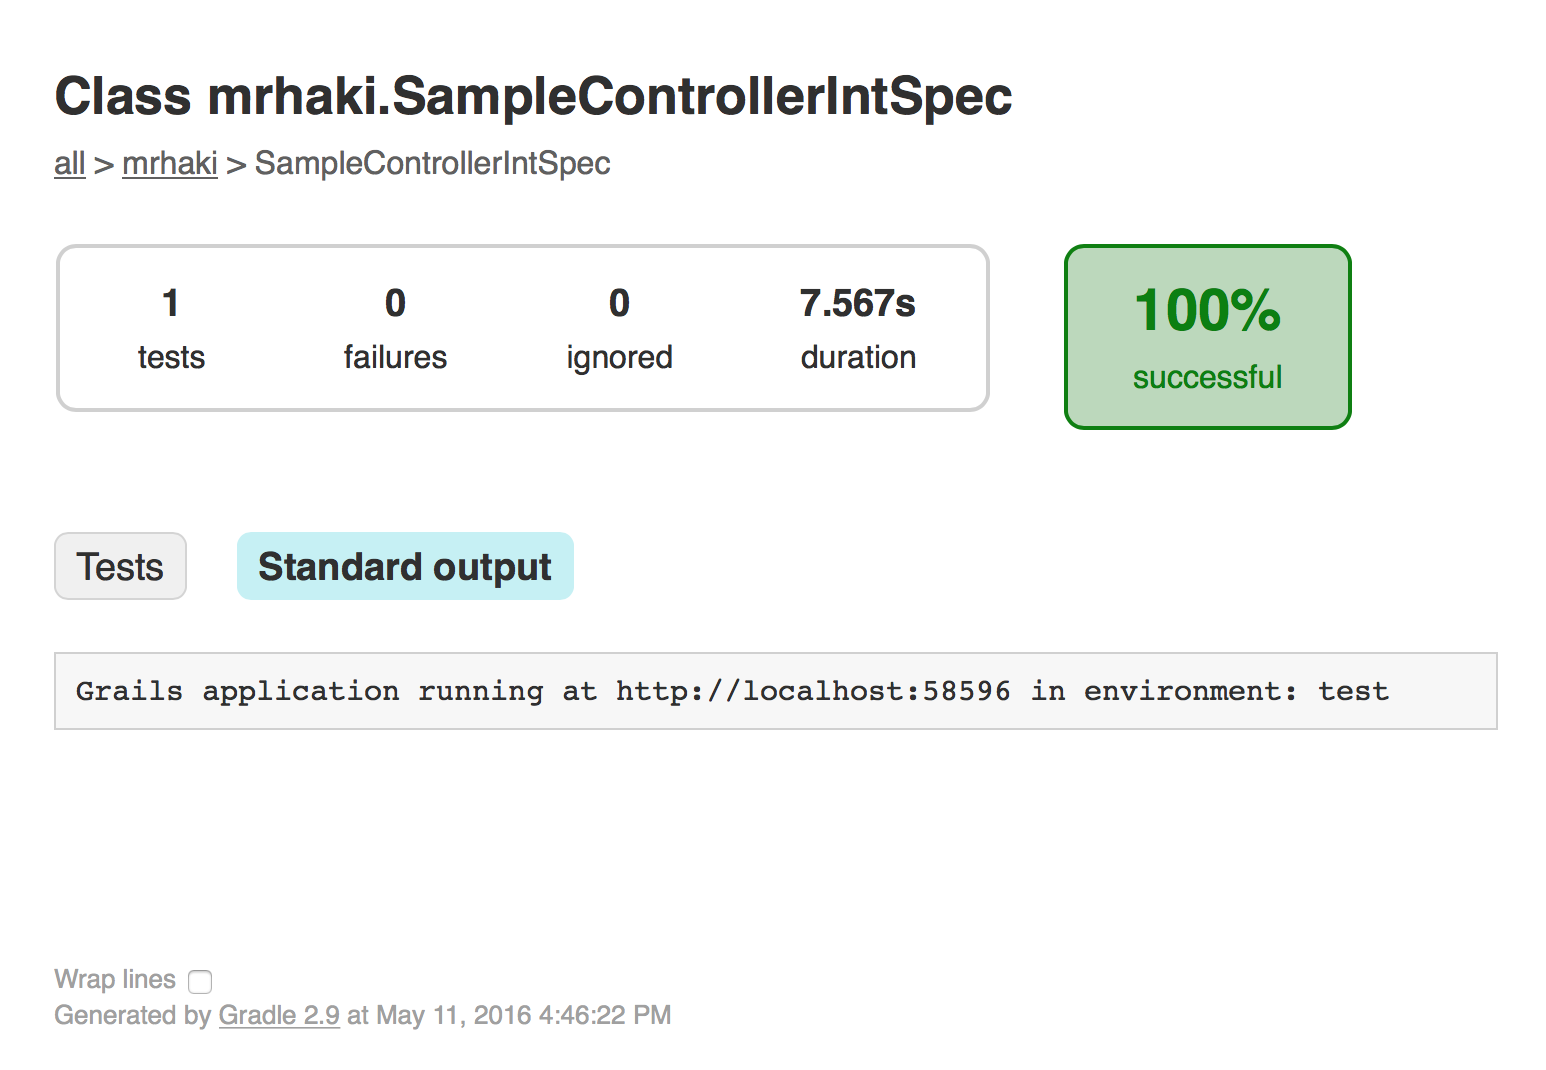
Written with Grails 3.1.6.
Original blog post written on May 11, 2016.
Internationalization (i18n)
Define Date Format in i18n ResourceBundle
The Grails formatDate tag supports the formatName attribute. The value of this property is the lookup key for the date format defined in the i18n properties files. So we can define a custom date format in grails-app/i18n/messages.properties and use it with the formatDate tag.
If we don’t specify a value for the format and formatName attributes Grails will look for the keys date.format or default.date.format for a date format. If those keys cannot be found then the default pattern yyyy-MM-dd HH:mm:ss z' is used.
Code written with Grails 1.3.7
Original blog post written on February 18, 2011.
Splitting i18n Message Bundles
Grails supports internationalization out of the box. In the directory grails-app/i18n we find a messages.properties with default Grails messages. We only have to make a new properties file where the name ends with the locale to add messages for another locale to our application.
But we are not restricted to the basename messages for our message bundles. We can use any name as long as we place the file in the grails-app/i18n directory. For example we can create a file views.properties to store messages related to the Groovy Server Pages and a file validation.properties with messages related to validation of domain objects. And if we want specific messages for the Dutch locale for example we create views_nl.properites and validation_nl.properties.
Code written with Grails 1.3.7.
Original blog post written on March 29, 2011.
Change Locale With Request Parameter
Grails has internationalisation (i18n) support built-in. It is very easy to add messages for different locales that can be displayed to the user. The messages are stored in properties files in the directory grails-app/i18n. Grails checks the request Accept-Language header to set the default locale for the application. If we want to force a specific locale, for example for testing new messages we added to the i18n property files, we can specify the request parameter lang. We specify a locale value and the application runs with that value for new requests.
The following screenshot shows a scaffold controller for a Book domain class with a default locale en:
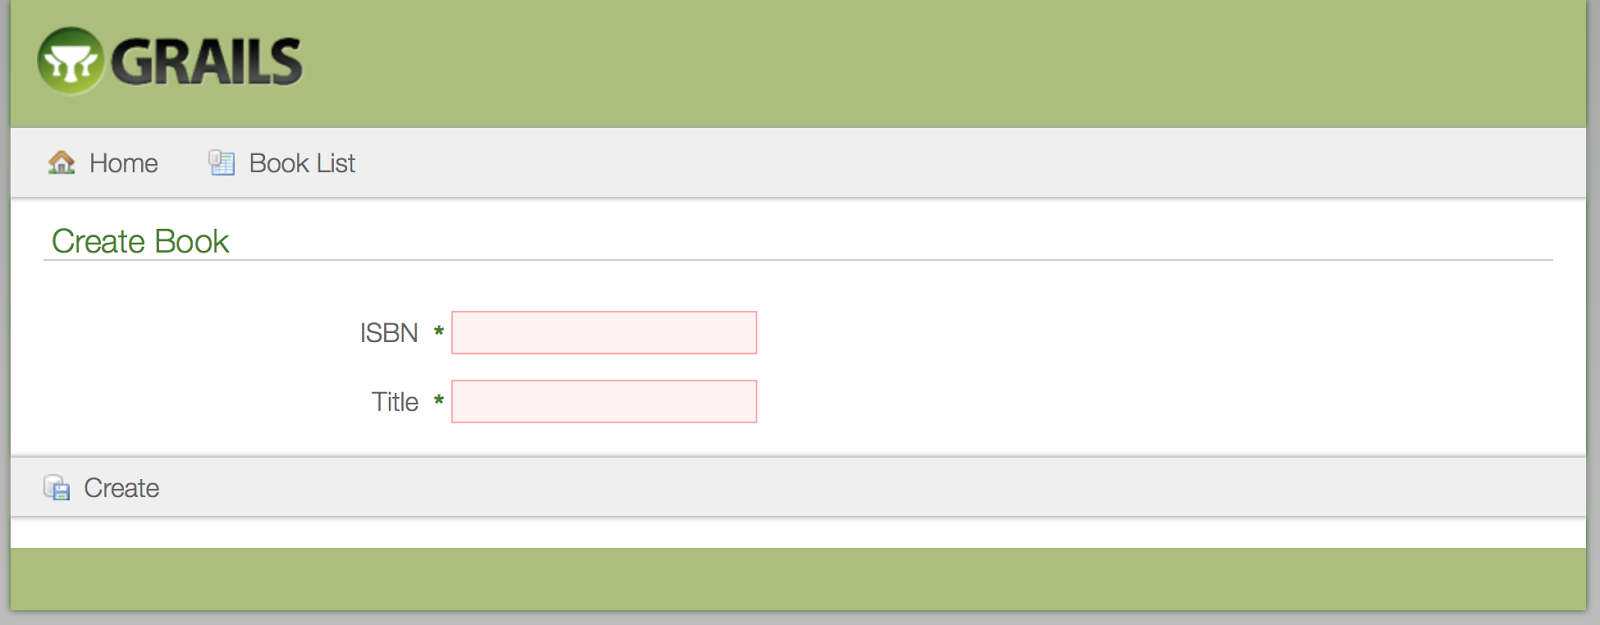
To see a dutch version we invoke the controller with the lang request parameter: http://localhost:8080/book/create?lang=nl:
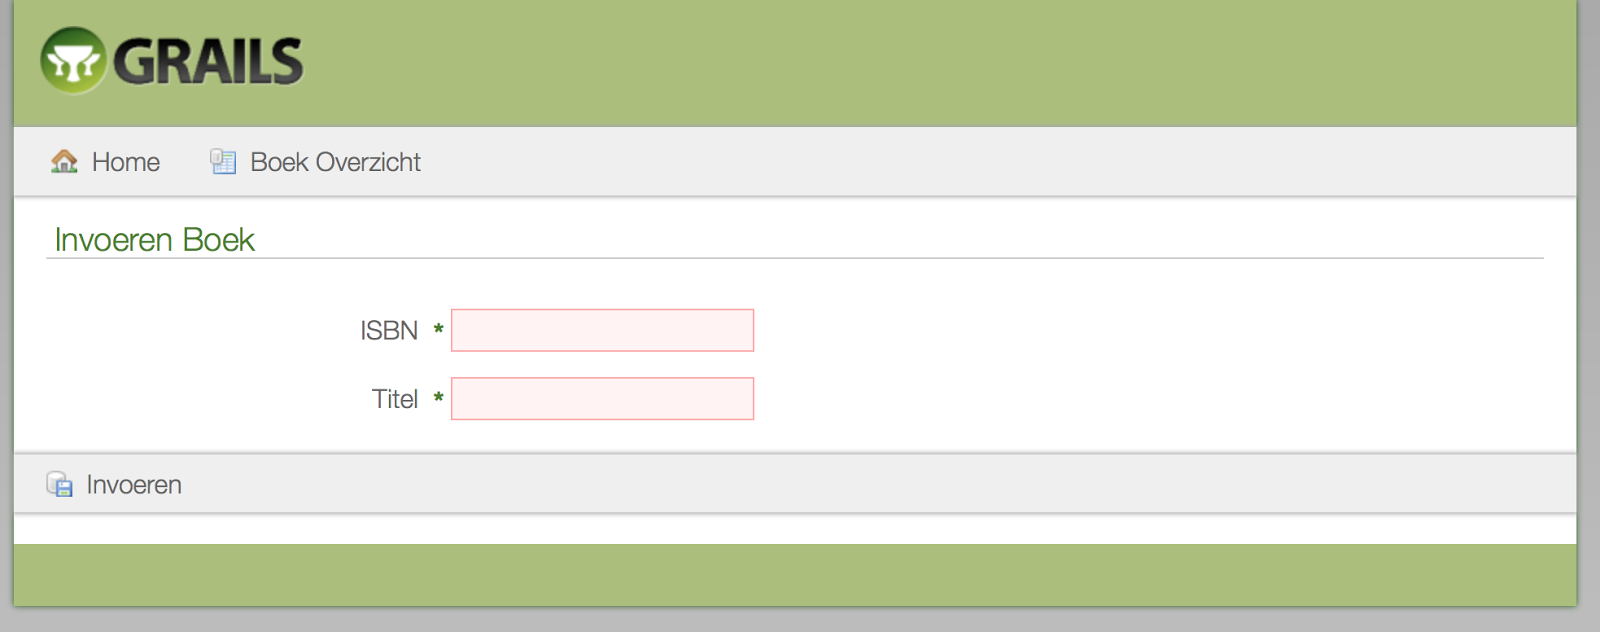
We can change the name of the request parameter by redefining the Spring bean localeChangeInterceptor in for example grails-app/conf/spring/resources.groovy:
Written with Grails 3.0.10
Original blog post written on December 10, 2015.
Internationalize Javascript Messages with JAWR Plugin
Grails has great builtin support for internationalization (i18n). The underlying Spring support for i18n is used. We can easily change for example text on views based on the user’s locale. But this only applies for the server side of our code. So we can generate the correct messages and labels based on the user’s locale on the server, but not in our Javascript code. What if we want to display a localized message in a bit of Javascript code, that is not created on the server? Why do I add this extra information ‘not created on the server’? Because we can still generate Javascript code in a view or use the gsp-resources plugin to create Javascript on the server. This code can contain the output of a localized message and can be used in Javascript. But that is not what we want for this blog post. Here we are going to reference our i18n messages from plain, non-generated Javascript code.
We can achieve this with the JAWR plugin. The plugin provides roughly the same functionality as the resources plugin for bundling resources efficiently in a Grails application. We are not interested in that part, but the JAWR library used by the plugin also has a i18n messages generator. And we are going to use that in our Grails application to get localized Javascript messages.
First we must install the JAWR plugin: $ grails install-plugin jawr. Next we can configure the plugin. We open our grails-app/conf/Config.groovy file and add:
At line 6 we define a mapping. If we don’t define a mapping the JAWR plugin will also act as a resource and bundling plugin, but for this example we only want to use the i18n messages generator.
Line 14 defines which resource in the classpath contains the messages that need to be accessible in Javascript. For our Grails application we want the messages from messages.properties (and the locale specific versions) so we define grails-app.i18n.messages.
With Grails it is easy to switch to a specific user locale by adding the request parameter lang to a request. At line 20 we add a resolver that will use the Grails locale resolver to determine a user’s locale.
It it time to see our Javascript in action. First we create two new message labels in messages.properties. One without variables and one with a variable placeholder to show how the JAWR plugin supports this:
Let’s add a Dutch version of these messages in grails-app/i18n/messages_nl.properties:
Now it is time to create a GSP view with a simple controller (only request through a controller will be able to use the locale resolver we defined in our configuration).
At line 4 we inlude the Javascript i18n messages generated by the JAWR plugin. And at line 5 we include an external Javascript file that will use the generated messages:
Notice how we can access the i18n messages in Javascript. The plugin will convert the messages to Javascript functions to return the message. And even variable substitution is supported (see line 9).
The following screenshots show the alert messages for the default locale and for a request with the Dutch locale:
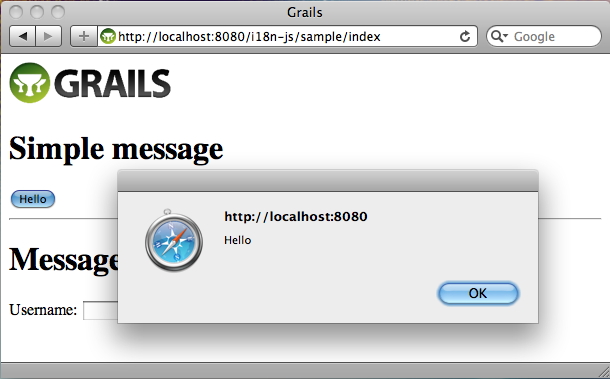
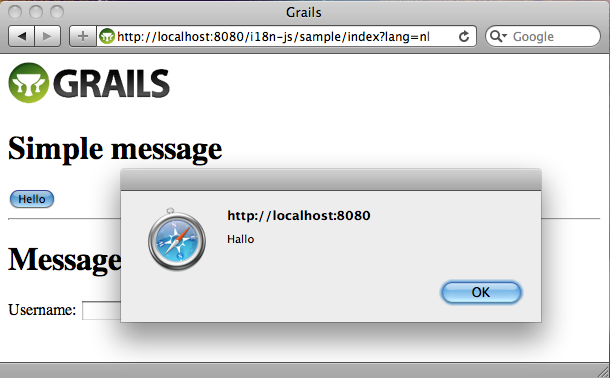
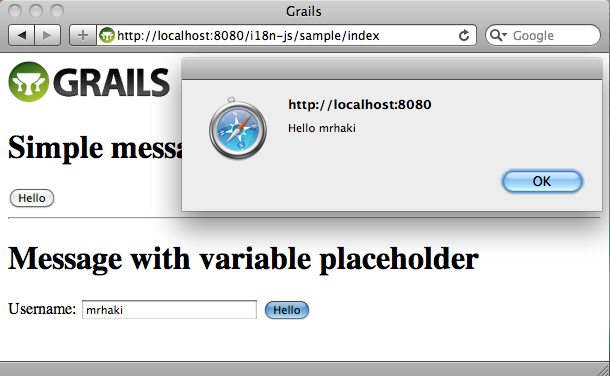
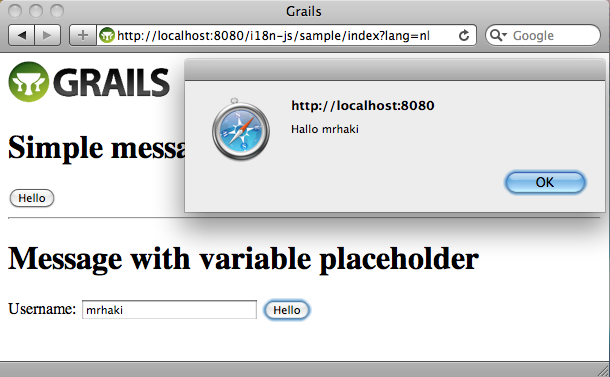
With the current configuration of the JAWR plugin all messages in the messages.properties (and locale versions) will be exported to Javascript messages. But maybe this is too much and we only want to include a subset of the messages in the generated Javascript. In the configuration we can define a prefix for the messages to be exported or we can even define a separate properties file with only messages necessary for Javascript:
In our Javascript we reference the messages by prefixing messages. to the message properties. We can change this as well in our JAWR plugin configuration. If for example we want to use i18n we must define our plugin as follows:
With the use of the JAWR plugin and the i18n messages generator we can easily use localized messages in our Javascript code.
Code written with Grails 1.3.7.
Original blog post written on November 14, 2011.
IDE
Quickly Create GSP From Controller In IntelliJ IDEA
If we have a action method in our controller and we want to create a corresponding GSP we can press Alt+Enter when the cursor is on the action method. IDEA shows the intention actions and one of them is Create view (GSP page).
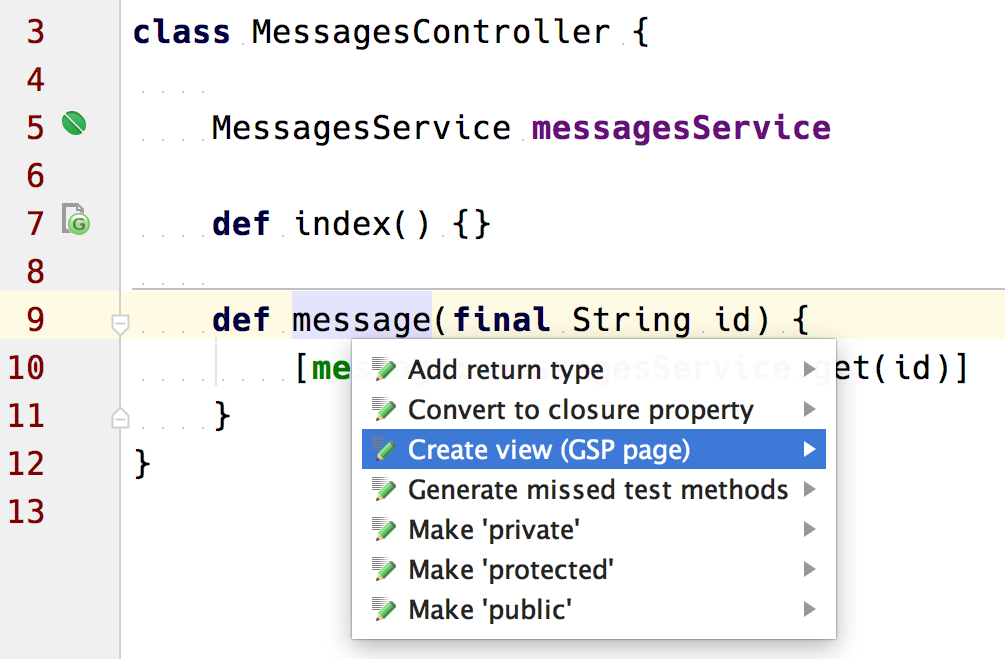
We select this option and IntelliJ IDEA creates a view with the name of our action in the directory grails-app/views/{controllerName}:
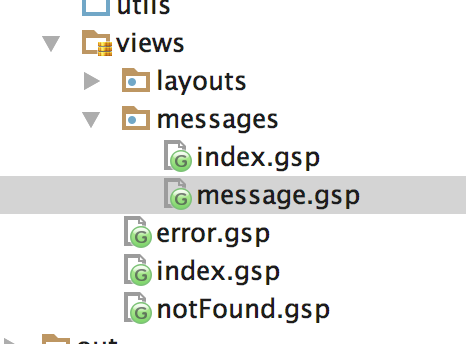
Written with Grails 3.0.10 and IntelliJ IDEA 15.
Original blog post written on December 13, 2015.
Go To Related Classes In IntelliJ IDEA
Normally in a Grails application we have classes that are related to each other, but are located in different directories. For example a controller with several views. Or a Grails service with corresponding specifications. In IntelliJ IDEA we can use Choose Target and IDEA will show classes, files and methods that are relevant for the current file we are editing. The keybinding on my Mac OSX is Ctrl+Cmd+Up, but can be different on your computer and operating system. We can also choose the menu option Navigate | Related symbol….
In the following example we are editing the file MessagesController. We select the action Choose Target, IntelliJ IDEA shows a popup menu with the views for this controller and the specification class:
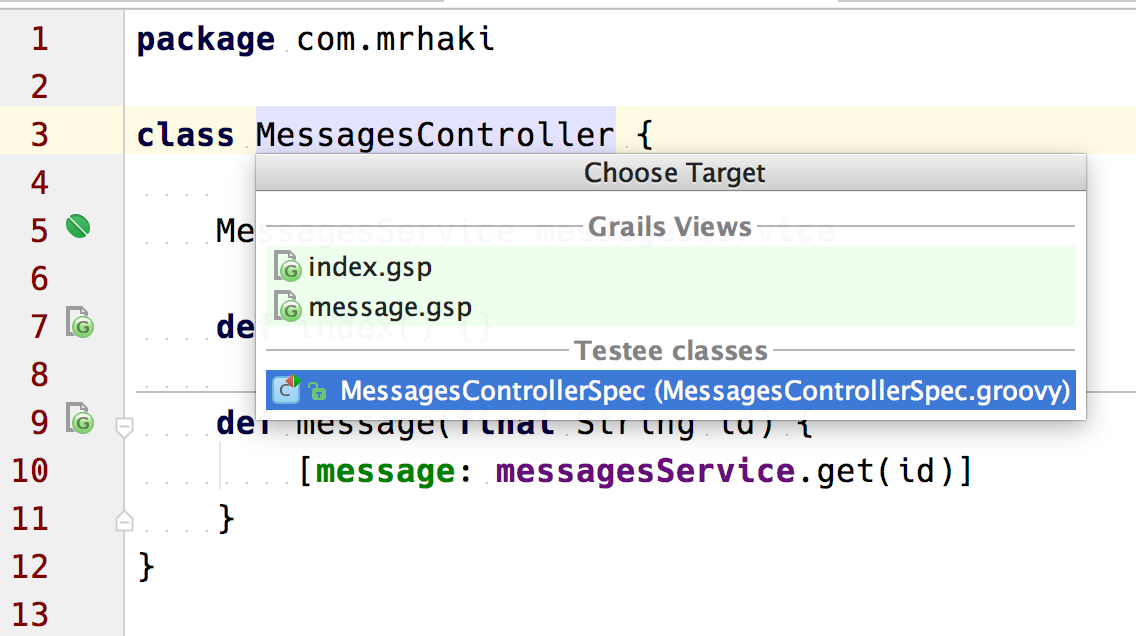
Or if we are editing a view and select the menu option Navigate | Related symbol…. Now we can navigate to the controller, method in the controller and other views:
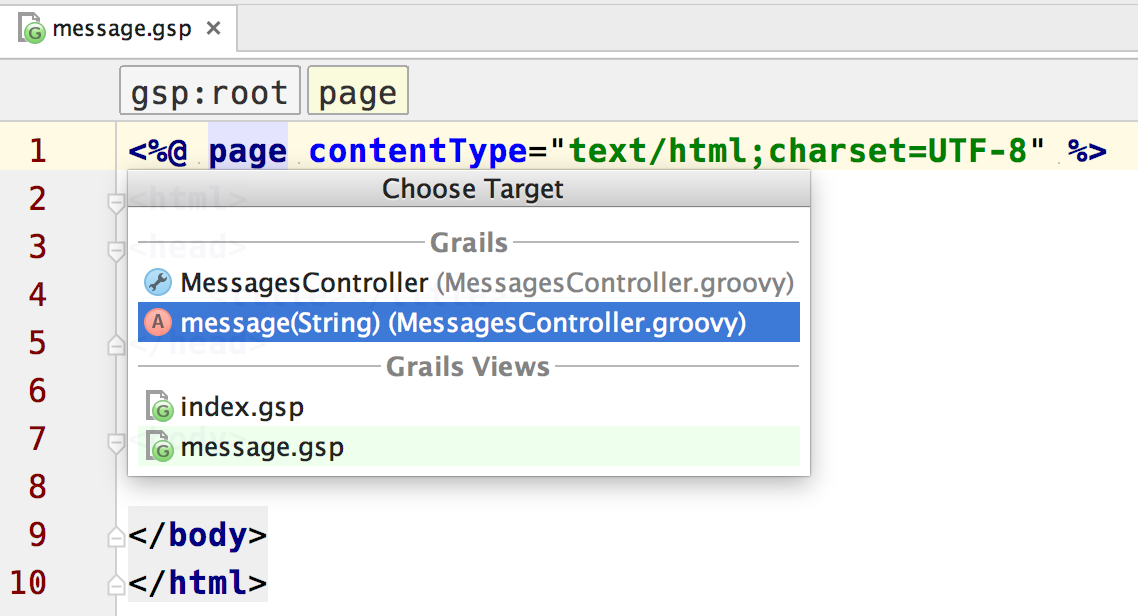
Written with Grails 3.0.10 and IntelliJ IDEA 15.
Original blog post written on December 13, 2015.
Debugging App in Forked Mode
Since Grails 2.2 by default the run-app command will launch the Grails application in a separate Java Virtual Machine. This is called forked Tomcat execution in Grails. This way the class path of the Grails build system and the application will not intervene and also both processes will have their own memory settings. We can see the settings in grails-app/conf/BuildConfig.groovy where we find the configuration property grails.project.fork.run. When we want to debug our application in an IDE like IntelliJ IDEA we cannot use the Debug command, because this will only allow us to debug the Grails build system. We will not reach breakpoints in our source code. But Grails 2.3 introduces an extra argument for the run-app command: --debug-fork. If we use this extra argument the JVM running the Grails application will stop and listen for a debug session to be attached and then continue. We can configure a Debug configuration in IntelliJ IDEA (or another IDE) to attach to the waiting Grails application and use breakpoints and other debugging tools like we are used to.
Suppose we have a Grails application named forked-debug and we have created a project in IDEA for this application. We click on the Select Run/Debug Configuration button and select Edit Configurations…:

IDEA opens a dialog where we can change the Grails command and set JVM options. We add the option --debug-fork to the Command Line field in this dialog:
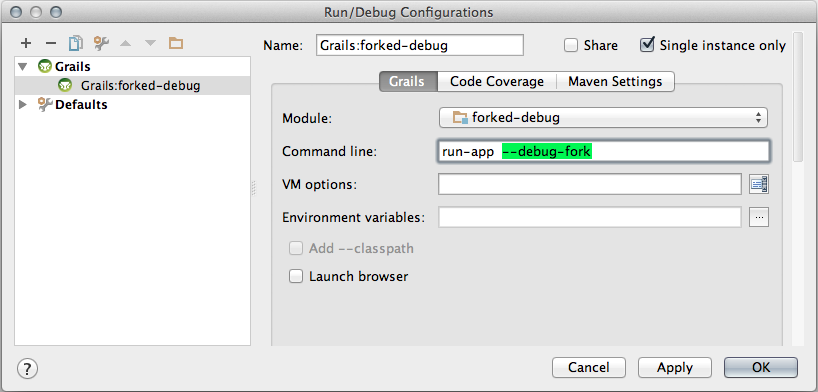
We click the OK button to save our change and close the dialog window. Next we can run our Grails application using our changed run configuration:

IDEA starts our application in the console window we can see Listening for transport dt_socket at address: 5005:
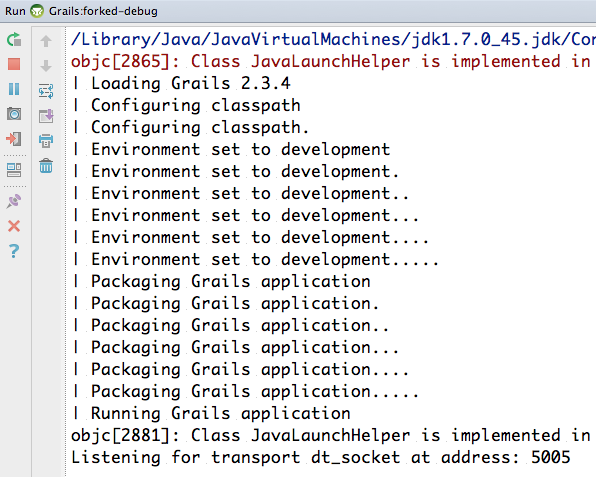
Now it is time to create a new debug configuration. We click on the Select Run/Debug Configuration button again and select Edit Configurations…. We add a new type of configuration, so we click on the + sign and type Remote:
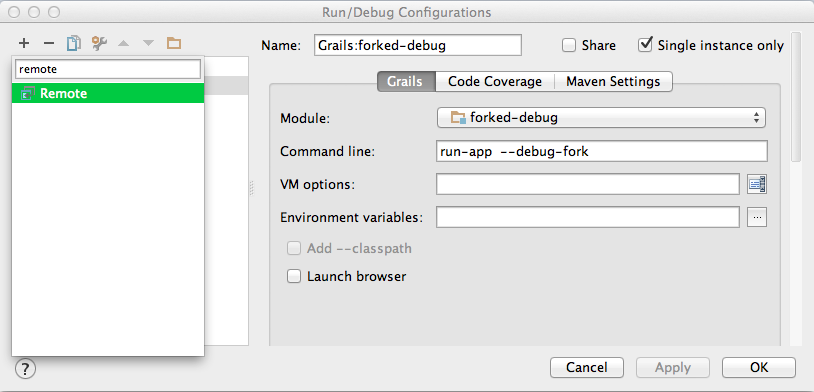
We select the Remote type and the dialog window shows now a lot of input fields which we can leave to the default values. It is good to given this configuration a new name, for example Grails:forked-debug (debug):
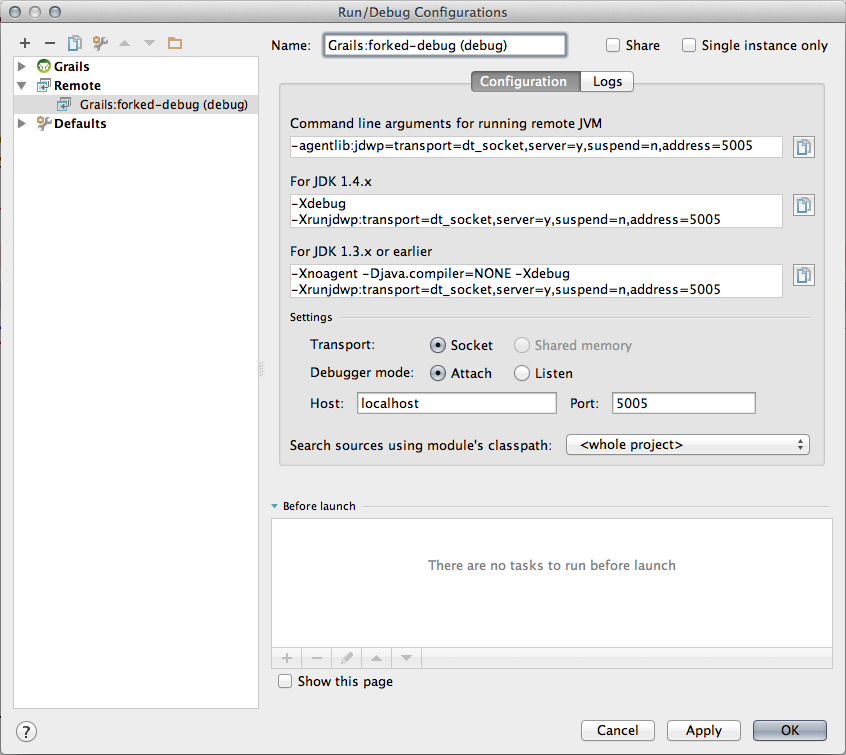
We click the OK button to close the dialog window. Our Grails application is still waiting for a debug session to be attached, so we use our new configuration with the Debug button:

In the console window of our Grails application we can see the application is not continuing to start and finally we can reach the appellation via web browser. We can now place breakpoints in our source code and when we hit them we can use all debugging tools from IDEA:
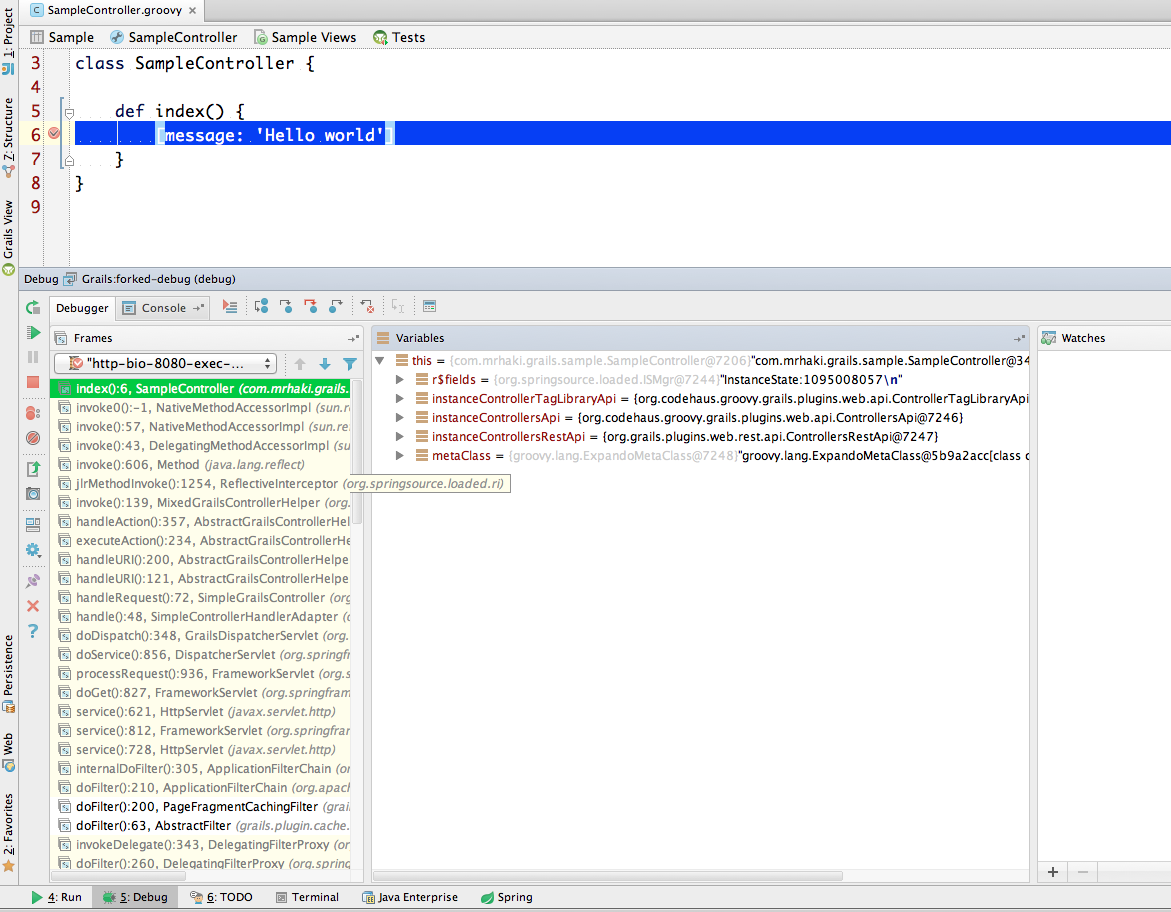
We could also have used the argument --debug-fork from a command-line and then use the IDEA debug configuration to attach to that instance of the Grails application.
Code written with Grails 2.3.4 and IntelliJ IDEA 13 is used.
Original blog post written on December 11, 2013.
Run Forked Tests in IntelliJ IDEA
In the latest Grails releases we can execute our tests in so-called forked mode. This means a separate JVM is started with an isolated classpath from the Grails build system. When we want to run our tests in forked mode from within IntelliJ IDEA we get the following error: Error running forked test-app: Could not load grails build listener class (Use --stacktrace to see the full trace). To make running tests in forked mode work with IntelliJ IDEA we must add one of the IntelliJ IDEA supplied JAR files to the Grails classpath.
We need to search for the file grails-rt.jar in the directory where we installed IntelliJ IDEA. For example on Mac OSX this would be Applications/IntelliJ IDEA 13.app/plugins/Grails/lib/grails-rt.jar. We need to copy this file to the lib directory of our Grails project. On *nix systems we can actually define a soft link to this location in the lib directory. For example with the following command $ ln -s /Applications/IntelliJ\ IDEA\ 13.app/plugins/Grails/lib/grails-rt.jar lib/intellij-grails-rt.jar.
Now we can run our Grails forked tests from within IntelliJ IDEA. To debug our tests we must add the option --debug-fork to the Run Configuration of the test.
We could also disable the forked mode for tests to run them in IntelliJ IDEA. We must then set grails.project.fork.test = false in grails-app/conf/BuildConfig.groovy. In non-forked mode we don’t need to copy the file grails-rt.jar.
Tested with IntelliJ IDEA 13 and Grails 2.3.5.
Original blog post written on February 10, 2014.
Miscellaneous
Creating A Runnable Distribution
Grails 3.1 allows us to build a runnable WAR file for our application with the package command. We can run this WAR file with Java using the -jar option. In Grails 3.0 the package command also created a JAR file that could be executed as standalone application. Let’s see how we can still create the JAR with Grails 3.1.
First we use the package command to create the WAR file. The file is generated in the directory build/libs. The WAR file can be run with the command java -jar sample-0.1.war if the file name of our WAR file is sample-0.1.war. It is important to run this command in the same directory as where the WAR file is, otherwise we get an ServletException when we open the application in our web browser (javax.servlet.ServletException: Could not resolve view with name '/index' in servlet with name 'grailsDispatcherServlet').
Instead of using the Grails package command we can use the assemble task if we use Gradle: $ ./gradlew assemble
To create a runnable JAR file we only have to remove the war plugin from our Gradle build file. The package command now creates the JAR file in the directory build/libs.
Alternatively we can use the Gradle task assemble instead of the Grails package command.
Written with Grails 3.1.
Original blog post written on February 08, 2016.
Creating A Fully Executable Jar
With Grails 3 we can create a so-called fat jar or war file. To run our application we only have to use java -jar followed by our archive file name and the application starts. Another option is to create a fully executable jar or war file, which adds a shell script in front of the jar or war file so we can immediately run the jar or war file. We don’t have to use java -jar anymore to run our Grails application. The fully executable JAR file can only run on Unix-like systems and it is ready to be used as service using init.d or systemd.
To create a fully executable jar file for our Grails application we must add the following lines to our build.gradle file:
Next we execute the Gradle assemble task to create the fully executable archive:
We can find the executable archive file in the build/libs directory. Suppose our Grails application is called grails-full-executable-jar and has version 0.1 we can execute the jar file grails-full-executable-jar-0.1.jar:
The launch script that is prepended to the archive file can be changed by defining a new launch script with the springBoot property embeddedLaunchScript. The default launch script that is used has some variable placeholders we can change using the embeddedLaunchScriptProperties property. For example the launch script can determine if the script is used to run the application standalone or as a Linux/Unix service and will act accordingly. We can also set the mode property to service so it will always act like a Linux/Unix service. Furthermore we can set some meta information for the launch script with several properties. To learn more about the different options see the Spring Boot documentation.
After we have recreated the archive file we can check the launch script that is created:
Written with Grails 3.1.8.
Original blog post written on June 20, 2016.
Run Grails Application As Docker Container
Docker is a platform to build and run distributed applications. We can use Docker to package our Grails application, including all dependencies, as a Docker image. We can then use that image to run the application on the Docker platform. This way the only dependency for running our Grails applications is the availability of a Docker engine. And with Grails 3 it is very easy to create a runnable JAR file and use that JAR file in a Docker image. Because Grails 3 now uses Gradle as build system we can even automate all the necessary steps by using the Gradle Docker plugin.
Let’s see an example of how we can make our Grails application runnable as Docker container. As extra features we want to be able to specify the Grails environment as a Docker environment variable, so we can re-use the same Docker image for different Grails environments. Next we want to be able to pass extra command line arguments to the Grails application when we run the Docker container with our application. For example we can then specify configuration properties as docker run ... --dataSource.url=jdbc:h2:./mainDB. Finally we want to be able to specify an external configuration file with properties that need to be overridden, without changing the Docker image.
We start with a simple Grails application and make some changes to the grails-app/conf/application.yml configuration file and the grails-app/views/index.gsp, so we can test the support for changing configuration properties:
Next we create a new Gradle build file gradle/docker.gradle. This contains all the tasks to package our Grails application as a runnable JAR file, create a Docker image with this JAR file and extra tasks to create and manage Docker containers for different Grails environment values.
We also must add a supporting shell script file to the directory src/main/docker with the name docker-entrypoint.sh. This script file makes it possible to specify a different Grails environment variable with environment variable GRAILS_ENV. The value is transformed to a Java system property -Dgrails.env={value} when the Grails application starts. Also extra commands used to start the Docker container are appended to the command line:
Now we only have to add an apply from: 'gradle/docker.gradle' at the end of the Gradle build.gradle file:
When we invoke the Gradle tasks command we see all our new tasks. We must at least use Gradle 2.5, because the Gradle Docker plugin requires this (see also this issue):
Now we are ready to create a Docker image with our Grails application code:
We can check with docker images if our image is created:
We can choose to create and run new containers based on this image with the Docker run command. But we can also use the Gradle tasks createContainerDevelopment and createContainerProduction. These tasks will create containers that have predefined values for the Grails environment, a command line argument --app.dockerContainerName and directory binding on our local computer to the container volume /app/config. The local directory is src/main/config/development or src/main/config/production in our project directory. Any files placed in those directories will be available in our Docker container and are picked up by the Grails application. Let’s add a new configuration file for each environment to override the configuration property app.welcome.header:
Now we create two Docker containers:
First we start the container with the development configuration:
In our web browser we open the index page of our Grails application and see how the current Grails environment is development and that the app.welcome.header configuration property is used from our application.properties file. We also see that the app.dockerContainerName configuration property set as command line argument for the Docker container is picked up by Grails and shown on the page:

If we stop this container and start the production container we see different values:

The code is also available as Grails sample project on Github.
Written with Grails 3.0.9.
Original blog post written on October 21, 2015.
Converted Files
20161019-grails-goodness-skip-bootstrap-code
Skip Bootstrap Code
Grails normally will run any *Bootstrap classes at startup. A Bootstrap class has a init and destroy closure. The init closure is invoked during startup and destroy when the application stops. The class name must end with Bootstrap and be placed in the grails-app/init folder. Since Grails 3.2 we can skip the execution of Bootstrap classes by setting the Java system property grails.bootstrap.skip with the value true.
In the following example Bootstrap class we simply add a println to see the effect of using the system property grails.bootstrap.skip:
// File: grails-app/init/mrhaki/Bootstrap.groovy
package mrhaki
class Bootstrap {
def init = { servletContext ->
println "Run Bootstrap"
}
def destroy = {
}
}
First we build the application and than start it from the generated WAR file:
22.235 secs
$ java -jar build/libs/sample-app-0.1.war
Run Bootstrap
Grails application running at http://localhost:8080 in environment: production
Next we use the Java system property grails.bootstrap.skip:
=true -jar build/libs/sample-app-0.1.war
Grails application running at http://localhost:8080 in environment: production
Notice the println statement from Bootstrap.groovy is not invoked anymore.
Written with Grails 3.2.1
Original blog post written on October 19, 2016.
20161118-grails-goodness-notebook-is-updated
Grails Goodness Notebook Is Updated
Grails Goodness Notebook has been updated with the latest blog posts. If you have purchased the book before you can download the latest version of the book for free.
- Saving Server Port In A File
- Creating A Runnable Distribution
- Change Version For Dependency Defined By BOM
- Use Random Server Port In Integration Tests
- Running Tests Continuously
- Add Git Commit Information To Info Endpoint
- Adding Custom Info To Info Endpoint
- Add Banner To Grails 3.1 Application
- Creating A Fully Executable Jar
- Pass JSON Configuration Via Command Line
Original blog post written on November 18, 2016.
20161123-gails-goodness-enabling-grails-view-in
Enabling Grails View In IntelliJ IDEA For Grails 3
IntelliJ IDEA 2016.3 re-introduced the Grails view for Grails 3 applications. Grails 2 applications already were supported with a Grails view in IDEA. Using this view we get an overview of all the Grails artifacts like controller, services, views and more. We can easily navigate to the the class files we need. Now this view is also available for Grails 3 applications.
To enable the view we must click on the view selector in the project view:
[](https://3.bp.blogspot.com/-t5FNLZg3Cic/WDVLkWg13xI/AAAAAAAALrw/HuGJ7s4sj8UQ-DgW950luKESZnqDR16dQCPcB/s1600/idea-grails3-1.png)
We select the Grails option and we get an nice overview of our Grails project in the Grails view:
[](https://3.bp.blogspot.com/-yMZxTTfkTqo/WDVOhFayh2I/AAAAAAAALr8/8d88K3fXoOoKOj1cCfHWYcpLzmnsS3cqQCPcB/s1600/idea-grails3-2.png)
Also the New action is context sensitive in the Grails view. If we right click on the Services node we can see the option to create a new service class:
[](https://3.bp.blogspot.com/-rsrh7hJbK_Q/WDVPsveDYYI/AAAAAAAALsE/TUgYIQ0JTIgU5DfmM2tD6aSh15I8SothACLcB/s1600/idea-grails3-4.png)
If we right click on the root node we get the option to create Grails artifacts:
[](https://1.bp.blogspot.com/-d4pwd496vQk/WDVPTlHUr1I/AAAAAAAALsA/5R2q9CbSBusM-HrM9719-ww1xbmueA-wwCPcB/s1600/idea-grails3-3.png)
Written with IntelliJ IDEA 2016.3 and Grails 3.2.2
Original blog post written on November 23, 2016.
20161209-grails-goodness-writing-log-messages
Writing Log Messages With Grails 3.2 (Slf4J)
Grails 3.2 changed the logging implementation for the log field that is automatically injected in the Grails artefacts, like controllers and services. Before Grails 3.2 the log field was from Jakarta Apache Commons Log class, but since Grails 3.2 this has become the Logger class from Slf4J API. A big difference is the fact that the methods for logging on the Logger class don’t accepts an Object as the first argument. Before there would be an implicit toString invocation on an object, but that doesn’t work anymore.
In the following example we try to use an object as the first argument of the debug method in a controller class:
When we invoke the index action we get an exception:
...2016-12-09 14:59:20.283 ERROR --- [nio-8080-exec-1] o.g.web.errors.GrailsExceptionResolver : Missing\MethodException occurred when processing request: [GET] /sample/indexNo signature of method: ch.qos.logback.classic.Logger.debug() is applicable for argument types: (groov\y.util.Expando) values: [{action=index}]Possible solutions: debug(java.lang.String), debug(java.lang.String, [Ljava.lang.Object;), debug(java.\
lang.String, java.lang.Object), debug(java.lang.String, java.lang.Throwable), debug(org.slf4j.Marker, \
java.lang.String), debug(java.lang.String, java.lang.Object, java.lang.Object). Stacktrace follows:
java.lang.reflect.InvocationTargetException: null
at org.grails.core.DefaultGrailsControllerClass$ReflectionInvoker.invoke(DefaultGrailsControll\
erClass.java:210)
at org.grails.core.DefaultGrailsControllerClass.invoke(DefaultGrailsControllerClass.java:187)
at org.grails.web.mapping.mvc.UrlMappingsInfoHandlerAdapter.handle(UrlMappingsInfoHandlerAdapt\
er.groovy:90)
at org.springframework.web.servlet.DispatcherServlet.doDispatch(DispatcherServlet.java:963)
at org.springframework.web.servlet.DispatcherServlet.doService(DispatcherServlet.java:897)
at org.springframework.web.servlet.FrameworkServlet.processRequest(FrameworkServlet.java:970)
at org.springframework.web.servlet.FrameworkServlet.doGet(FrameworkServlet.java:861)
at org.springframework.web.servlet.FrameworkServlet.service(FrameworkServlet.java:846)
at org.springframework.boot.web.filter.ApplicationContextHeaderFilter.doFilterInternal(Applica\
tionContextHeaderFilter.java:55)
at org.grails.web.servlet.mvc.GrailsWebRequestFilter.doFilterInternal(GrailsWebRequestFilter.j\
ava:77)
at org.grails.web.filters.HiddenHttpMethodFilter.doFilterInternal(HiddenHttpMethodFilter.java:\
67)
at java.util.concurrent.ThreadPoolExecutor.runWorker(ThreadPoolExecutor.java:1142)
at java.util.concurrent.ThreadPoolExecutor$Worker.run(ThreadPoolExecutor.java:617)
at java.lang.Thread.run(Thread.java:745)
Caused by: groovy.lang.MissingMethodException: No signature of method: ch.qos.logback.classic.Logger.d\
ebug() is applicable for argument types: (groovy.util.Expando) values: [{action=index}]Possible solutions: debug(java.lang.String), debug(java.lang.String, [Ljava.lang.Object;), debug(java.\lang.String, java.lang.Object), debug(java.lang.String, java.lang.Throwable), debug(org.slf4j.Marker, \java.lang.String), debug(java.lang.String, java.lang.Object, java.lang.Object) at mrhaki.grails3.SampleController.index(SampleController.groovy:6) ... 14 common frames omitted...When we change the log statement to log.debug new Expando(action: 'index').toString() it works.
Another time saver and great feature is the use of placeholders {} in the logging message. This allows for late binding of variables that are used in the logging message. Remember when we used the Apache Commons Logging library we had to enclose a logging statement in a if statement to check if logging was enabled. Because otherwise the logging message with variable references was always evaluated, even though the logging was disabled. With Slf4J Logger we don’t have to wrap logging statements with an if statement if we use the {} placeholders. Slf4J will first check if logging is enabled for the log message and then the logging message is created with the variables. This allows for much cleaner code.
In the following example we use the placeholders to create a logging message that included the variable id:
package mrhaki.grails3
class SampleController {
def show(final String id) {
// Before Grails 3.2 we should write:
// if (log.debugEnabled) {
// log.debug "Invoke show with id [$id]"
// }
// With Grails 3.2 it is only the debug method and
// String evaluation using {}.
log.debug 'Invoke show with id [{}]', id
[id: id]
}
}
Written with Grails 3.2.3
Original blog post written on December 09, 2016.
20170221-grails-goodness-using-domain-classes
Using Domain Classes Without Persistence
Normally when we create a domain class in Grails we rely on GORM for all the persistence logic. But we can use the static property mapWith with the value none to instruct Grails the domain class is not persisted. This can be useful for example if we want to use a RestfulController for a resource and use the default data binding support in the RestfulController. The resource must be a domain class to make it work, but we might have a custom persistence implementation that is not GORM. By using the mapWith property we can still have benefits from the RestfulController and implement our own persistence mechanism.
In the following example we have a simple Book resource. We define it as a domain class, but tell Grails the persistence should not be handled by GORM:
// File: grails-app/domain/mrhaki/sample/Book.groovy
package mrhaki.sample
import grails.rest.Resource
@Resource(uri = '/books', superClass= BookRestfulController)
class Book {
static mapWith = 'none'
String title
String isbn
static constraints = {
title blank: false
isbn blank: false
// Allow to set id property directly in constructor.
id bindable: true
}
}
The application also has a Grails service BookRepositoryService that contains custom persistence logic for the Book class. In the following RestfulController for the Book resource we use BookRepositoryService and override methods of RestfulController to have a fully working Book resource:
// File: grails-app/controllers/mrhaki/sample/BookRestfulController.groovy
package mrhaki.sample
import grails.rest.RestfulController
class BookRestfulController extends RestfulController<Book> {
BookRepositoryService bookRepositoryService
BookRestfulController(final Class<Book> resource) {
super(resource)
}
BookRestfulController(final Class<Book> resource, final boolean readOnly) {
super(resource, readOnly)
}
@Override
protected Book queryForResource(final Serializable id) {
bookRepositoryService.get(Long.valueOf(id))
}
@Override
protected List<Book> listAllResources(final Map params) {
bookRepositoryService.all
}
@Override
protected Integer countResources() {
bookRepositoryService.total
}
@Override
protected Book saveResource(final Book resource) {
bookRepositoryService.add(resource)
}
@Override
protected Book updateResource(final Book resource) {
bookRepositoryService.update(resource)
}
@Override
protected void deleteResource(final Book resource) {
bookRepositoryService.remove(resource.id)
}
}
Written with Grails 3.2.6.
Original blog post written on February 21, 2017.
20170227-grails-goodness-custom-json-and-markup
Custom JSON and Markup Views For Default REST Resources
In Grails we can use the @Resource annotation to make a domain class a REST resource. The annotation adds a controller as URL endpoint for the domain class. Values for the domain class properties are rendered with a default renderer. We can use JSON and markup views to customize the rendering of the domain class annotated with a @Resource annotation. First we must make sure we include views plugin in our build configuration. Then we must create a directory in the grails-app/views directory with the same name as our domain class name. Inside the directory we can add JSON and markup views with names that correspond with the controller actions. For example a file index.gson or ` index.gml for the index action. We can also create a template view that is automatically used for a resource instance by adding a view with the name of the domain class prefixed with an underscore (_`).
In the next example application we create a custom view for the Book domain class that is annotated with the @Resource annotation:
// File: grails-app/domain/mrhaki/sample/Book.groovy
package mrhaki.sample
import grails.rest.Resource
@Resource(uri = '/books')
class Book {
String title
String isbn
static constraints = {
title blank: false
isbn blank: false
}
}
Next we must make sure the Grails views code is available as a dependency. In our build.gradle file we must have the following dependencies in the dependencies {} block:
// File: build.gradle
...
dependencies {
....
// Support for JSON views.
compile "org.grails.plugins:views-json:1.1.5"
// Support for markup views.
compile "org.grails.plugins:views-markup:1.1.5"
....
}
...
It is time to create new JSON views for JSON responses. We create the directory grails-app/views/book/ and the file _book.gson. This template file is automatically used by Grails now when a Book instances needs to be rendered:
// File: grails-app/views/book/_book.gson
import grails.util.Environment
import mrhaki.sample.Book
model {
Book book
}
json {
id book.id
version book.version
title book.title
isbn book.isbn
information {
generatedBy 'Sample application'
grailsVersion Environment.grailsVersion
environment Environment.current.name
}
}
We also create the file index.gson to support showing multiple Book instances:
// File: grails-app/views/book/index.gson
import mrhaki.sample.Book
model {
List<Book> bookList
}
// We can use template namespace
// method with a Collection.
json tmpl.book(bookList)
If we also want to support XML we need to create extra markup views. First we a general template for a Book instance with the name _book.gml:
// File: grails-app/views/book/_book.gml
import grails.util.Environment
import mrhaki.sample.Book
model {
Book book
}
xmlDeclaration()
book {
id book.id
title book.title
isbn book.isbn
information {
generatedBy 'Sample application'
grailsVersion Environment.grailsVersion
environment Environment.current.name
}
}
Next we create the file index.gml to show Book instances. Note we cannot use the template namespace in the markup view opposed to in the JSON view:
// File: grails-app/views/book/_book.gml
import grails.util.Environment
import mrhaki.sample.Book
model {
List<Book> bookList
}
xmlDeclaration()
books {
bookList.each { bookInstance ->
book {
id bookInstance.id
title bookInstance.title
isbn bookInstance.isbn
information {
generatedBy 'Sample application'
grailsVersion Environment.grailsVersion
environment Environment.current.name
}
}
}
}
We start our Grails application and use cUrl to invoke our REST resource:
<?xml version='1.0' encoding='UTF-8'?>
<books>
<book>
<id>1</id><title>Gradle Dependency Management</title><isbn>978-1784392789</isbn><information>
<generatedBy>Sample application</generatedBy><grailsVersion>3.2.6</grailsVersion><environm\
ent>development</environment>
</information>
</book><book>
<id>2</id><title>Gradle Effective Implementation Guide</title><isbn>978-1784394974</isbn><info\
rmation>
<generatedBy>Sample application</generatedBy><grailsVersion>3.2.6</grailsVersion><environm\
ent>development</environment>
</information>
</book>
</books>
$ curl -H Accept:application/xml http://localhost:8080/books/1
<?xml version='1.0' encoding='UTF-8'?>
<book>
<id>1</id><title>Gradle Dependency Management</title><isbn>978-1784392789</isbn><information>
<generatedBy>Sample application</generatedBy><grailsVersion>3.2.6</grailsVersion><environment>\
development</environment>
</information>
</book>
$ curl -H Accept:application/json http://localhost:8080/books
[
{
"id": 1,
"version": 0,
"title": "Gradle Dependency Management",
"isbn": "978-1784392789",
"information": {
"generatedBy": "Sample application",
"grailsVersion": "3.2.6",
"environment": "development"
}
},
{
"id": 2,
"version": 0,
"title": "Gradle Effective Implementation Guide",
"isbn": "978-1784394974",
"information": {
"generatedBy": "Sample application",
"grailsVersion": "3.2.6",
"environment": "development"
}
}
]
$ curl -H Accept:application/json http://localhost:8080/books/1
{
"id": 1,
"version": 0,
"title": "Gradle Dependency Management",
"isbn": "978-1784392789",
"information": {
"generatedBy": "Sample application",
"grailsVersion": "3.2.6",
"environment": "development"
}
}
$
Written with Grails 3.2.6.
Original blog post written on February 27, 2017.
