Source code
Change Source Code Indentation
Writing documentation and including source files is made very easy in Asciidoc and Asciidoctor. We can use the include macro to include a source file in our documentation. This way we can write source code, test the code (preferable automated) and the code in our documentation always works and will be up to date. We can use the indent attribute when we include source code to change the indentation. Tab characters are replaced with 4 spaces when we use the indent attribute. We can specify the number of spaces the code needs to be indented with a value of 0 or greater.
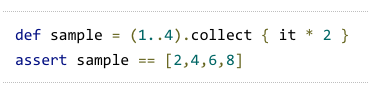
The following sample Asciidoc markup will remove all indentation of the original code block which is indented with 4 spaces, because we use the value 0:
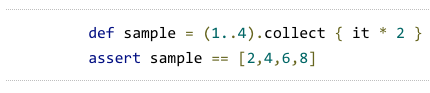
If we generate HTML we get the following result:
The code still looks indented, but that is done via CSS styling. The padding is set to a value greater than 0, but we can change that of course with our own CSS stylesheet.
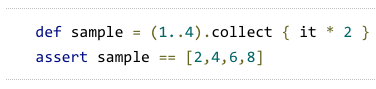
In the following sample we set the indent attribute with the value 8:
We get the following result:
In the final sample we use the include macro to include source code. We can still use the indent attribute like we did with the inline code samples:
Here is the resulting HTML:
Code written with Asciidoctor 0.1.4.
Original post written on June 10, 2014
Adding Line Numbers to Source Code Listings
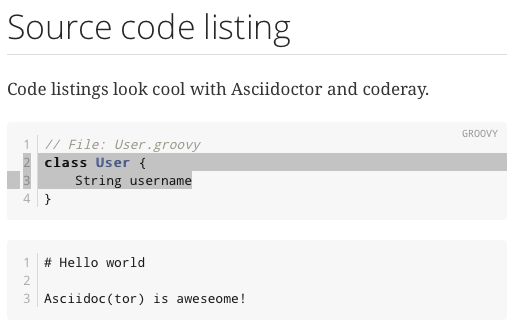
When we write technical documentation with Asciidoctor we can easily include source code listings. When we use the coderay or pygments source code highlighter we can also include line numbers. We must add the attribute linenums to the listing block in our markup. This attribute is used by the source highlighters to create and format the line numbers. We can specify that the line numbers must be generated in table mode or inline mode. When the line numbers are in table mode we can select the source code without the line numbers and copy it to the clipboard. If we use inline mode the line numbers are selectable and are copied together with the selected source code to the clipboard. To specify which mode we want to use for the line numbers we use the document attribute coderay-linenums-mode or pygments-linenums-mode depending on the source highlighter we use. We can use the values table (default) or inline.
Let's generate HTML output from this markup and use different values for the source-highlighter and ...-linenums-mode attributes. First we use the Coderay source highlighter in table mode:
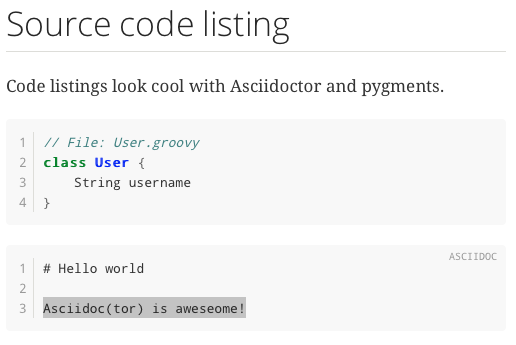
If we use inline mode (:coderay-linenums-mode: inline), we can see the line numbers are selected as well when we select the source code:
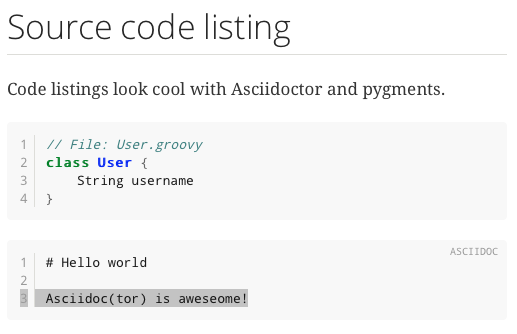
The following screenshots use the Pygments source highlighter with first a table mode for the line numbers and then inline mode:
Written with Asciidoctor 1.5.0.
Original post written on August 13, 2014
Include Partial Parts from Code Samples
Writing technical documentation with Asciidoc and Asciidoctor is so much fun. Especially the include macro makes inserting changing content, like source files, a breeze. We only need to maintain the original source file and changes will automatically appear in the generated documentation. We can include only a part of source file using tags. In the source file we add a comment with the following format tag::tagName[] to start the section. We end the section with end::tagName[]. Now in our Asciidoc document we can indicatie the tags we want to include with include::sourceFile[tags=tagName].
Suppose we have the following Groovy source file Sample.groovy. We want to include the method hello() in our technical documentation:
In our Asciidoc document we use the following syntax to include only the hello() method:
This will result in the following HTML if we use Asciidoctor with the pretty-print syntax highlighter:
Written with Asciidoctor 0.1.4.
Original post written on April 30, 2014
Include Only Certain Lines from Included Files
In a previous post we learned how to include partial content from included files. We needed to enclose the content we want to include between start and end tags and reference those tags in our documentation markup. But Andres Almiray already mentioned in a tweet we can use line numbers as well:
@marcovermeulen @rfletcherew @mrhaki you can also use -1 in the include range, like this https://t.co/J4tohY4cp3
— Andres Almiray (@aalmiray) June 6, 2014
\
Let's see this in action in our Asciidoc markup. We can use the include macro and specify the lines we want to include with the lines attribute. We can include multiple lines by specifying a range (1..10), or separate different line sections with a ;. To indicate we want to include lines from a starting line up until the end of the file we can use -1 to indicate the end of the file.
Here is the source of the file we want to include:
And when we generate an HTML version of our markup we see that only part of the original source file is included in the output:
Written with Asciidoctor 0.1.4.
Original post written on August 5, 2014
Explain Code with Callouts
Writing documentation with Asciidoc is such a treat. We can add markers to our code where we want to explain something in our code. The markers have numbers and are enclosed in < and > brackets. The explanation for the markers follows a code listing in a callout list. Here we use the same marker and add extra text to explain the code. We can put the markers in comments in our code so we can use the markers in existing code.
Suppose we have the following piece of documentation where we add two markers (in comments) to some Groovy source code:
When we generate this into an HTML document with the prettify syntax highlighter and icon font we get the following output:

Original post written on May 5, 2014
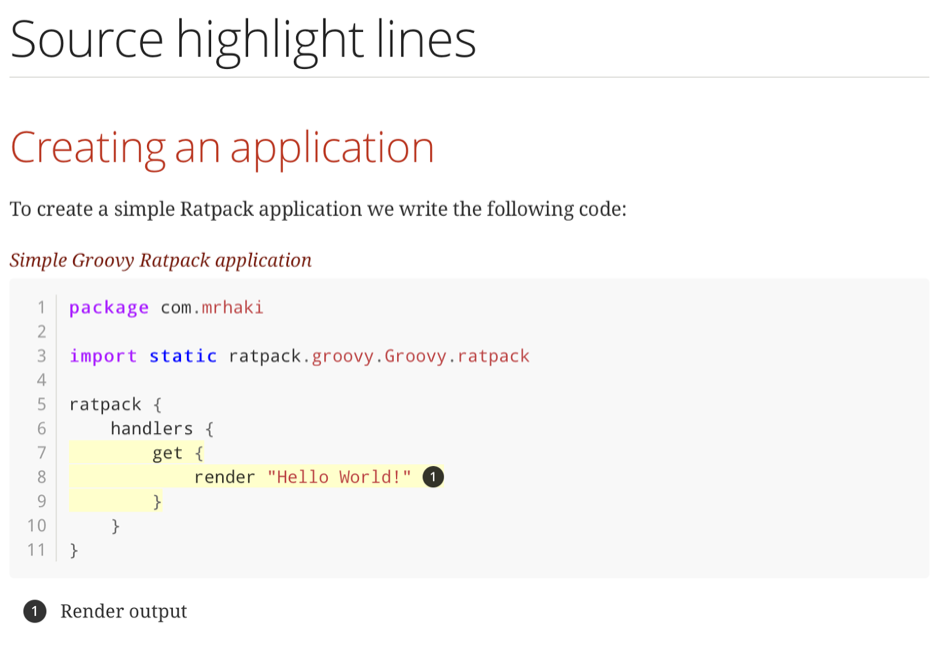
Highlight Lines In Source Code Listings
In Asciidoctor we can configure syntax highlighting for our source code listings. We can choose from the built-in support for Coderay, Pygments, highlight.js and prettify. The syntax highlighter libraries Coderay and Pygments support extra highlighting of lines, so we can add extra attention to those lines. In this post we see how to use the line highlighting feature in Asciidoctor.
First we must add the document attribute source-highlighter and use the value coderay or pygments. When we use Coderay we must also enable the line numbers for the source code listing, because Coderay will highlight the line numbers in the output. Pygments highlight the whole line, with or without line numbers in the output. Therefore we choose Pygments in our example. To highlight certain lines in the source code output we use the highlight attribute for the source code block. We can specify single line numbers separated by a comma (,) or semi colon (;). If we use a comma we must enclose the value of the highlight attribute in quotes. To define a range of line numbers we can define the start and end line numbers with a hyphen in between (eg. 5-10 to highlight lines 5 to 10). To unhighlight a line we must prefix it with a exclamation mark (!). For example the following value for the highlight attribute highlights the lines 2, 3 to 7 and not 5: [source,highlight=1;3-7;!5].
In the following example markup we have a source code block where we highlight the lines 7 to 9. We use Pygments as syntax highlighter:
If we look at the generated HTML we can see lines 7, 8 and 9 are differently styled:
Written with Asciidoctor 1.5.4.
Original post written on October 5, 2016
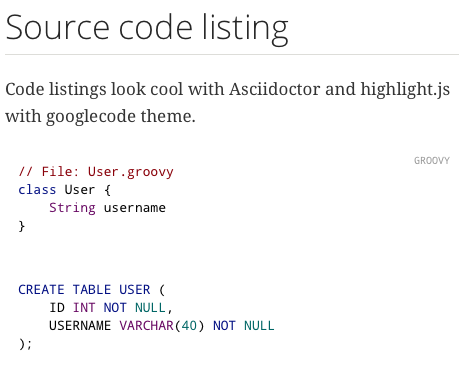
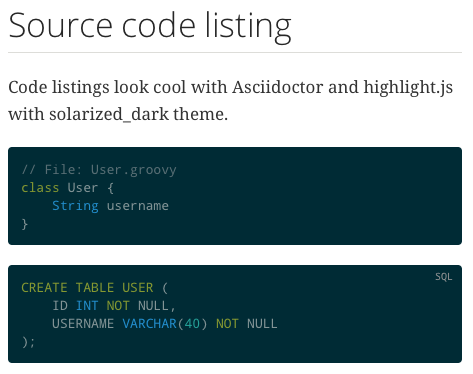
Changing Highlight.js Theme
Asciidoctor is a great tool for writing technical documentation. If we have source code in the Asciidoc markup we can set the document attribute source-highlighter to pygments, coderay, prettify and highlightjs. When we use highlight.js we can also add an extra document attribute highlightjs-theme with the value of a highlight.js theme. If we do not specify the highlightjs-theme the default theme github is used.
We use the following Asciidoc markup to see how the HTML output is when we transform the markup using the HTML backend:
The following screenshots show the result of applying different themes:
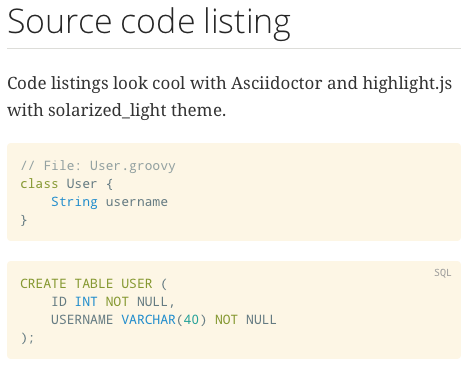
For a complete list of all available themes checkout highlight.js on Github.\
If we use the Prettify source code highlighter we must use the prettify-theme document attribute.
Written with Asciidoctor 1.5.0.
Original post written on August 13, 2014
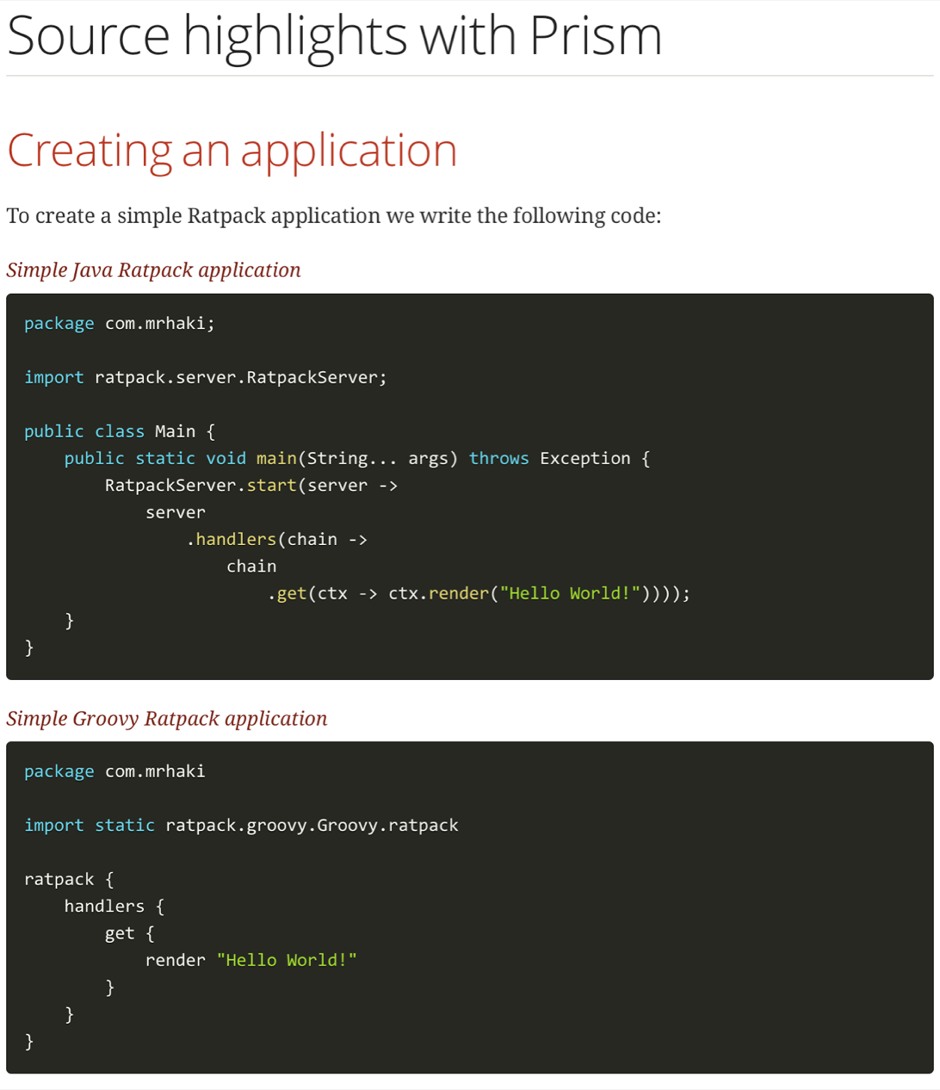
Source Syntax Highlighting With Prism
Asciidoctor has built-in support for a couple of source syntax highlighting libraries like Coderay, Pygments, highlight.js and prettify. In this post we learn how to use the Javascript library Prism to do the syntax highlighting for our source blocks. Because Prism is a Javascript library we must remember this only works for the HTML backend of Asciidoctor.
In the following markup we have two source code listings in Java and Groovy:
Each source listing is transformed to HTML with the following structure:
This fits perfectly with Prism. Prism expects this format to apply the syntax highlighting. So we only have to add the Prism Javascript and CSS files to the generated HTML file. We download the Prism Javascript and CSS file from the Prism download site. We save the Javascript file as prism.js and the CSS file as prism.css. Next we create a docinfo.html to include a reference to the prism.css file:
We also create the file docinfo-footer.html to reference prism.js:
In our markup we have the document attribute docinfo1 set. This means the files docinfo.html and docinfo-footer.html are included in the generated HTML output. Let's see the result in a web browser:
Written with Asciidoctor 1.5.4.
Original post written on October 4, 2016