Extensions
Use Asciidoctor Diagram with Gradle
Since Asciidoctor 1.5.0 we can use extensions when we write AsciiDoc documents. These extensions can be written in Ruby or any JVM language. If we use Gradle and the Asciidoctor Gradle plugin to transform our documents we can use both extensions. Of course an extension written in for example Java or Groovy can be included as a regular dependency in our build configuration. As the extension is on the classpath of the asciidoctor task then it can be used. When the extension is a Ruby extension and available as a Ruby gem we need some more configuration in our build file. To use an Asciidoctor extension written in Ruby in our build we must first make sure that we can download the extension. Then we can configure the asciidoctor task from the Asciidoctor Gradle plugin to use the extension.
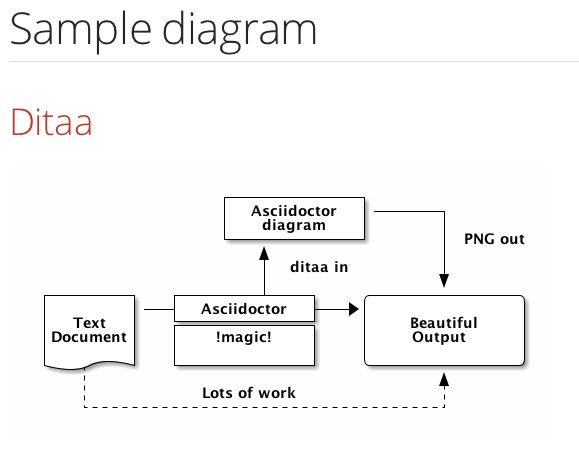
Let's start with a sample Asciidoctor document which uses the Asciidoctor Diagram extension. With this extension we can embed diagrams as text in our document and get graphical images as output.
Next we create our Gradle build file. We must apply the Asciidoctor Gradle plugin so we can transform our AsciiDoc documents. And we must apply the JRuby Gradle plugin so we can download Ruby gems and use them from the asciidoctor task. The JRuby plugin adds a gems dependency configuration, which we can use to define the Ruby gems we need. The task jrubyPrepareGems is also added by the plugin and this task will download the gems and extract them in our project build directory. In our asciidoctor task that is added by the Asciidoctor plugin we use the requires property to specify which gem is needed. We also set the gemPath property to the directory which contains the downloaded and extracted Ruby gems. The following build file defines the plugins and configures the tasks we need so we can use Asciidoctor Diagram:
To generate our sample document we only have to run $ gradle from the command line. After the documents are generated we can the result in the build/asciidoc directory of our project. The following screenshot shows the generated HTML:
Written with Asciidoctor 1.5.1 and Gradle 2.1.
Original post written on November 12, 2014
Use Diagram Block Macro To Include Diagrams
With the Asciidoctor diagram extension we can include diagrams that are written in plain text. For example PlantUML or Ditaa diagrams. The extension offers a block processor where we include the diagram definitions in our Asciidoctor document. But there is also a block macro processor. With the block macro processor we can refer to an external file. The file is processed and the resulting image is in our output document.
In the following example we see how to use the block macro for a Ditaa diagram:
The contents of sample.ditaa:
When we create a HTML document from this Asciidoctor markup we get the following output:
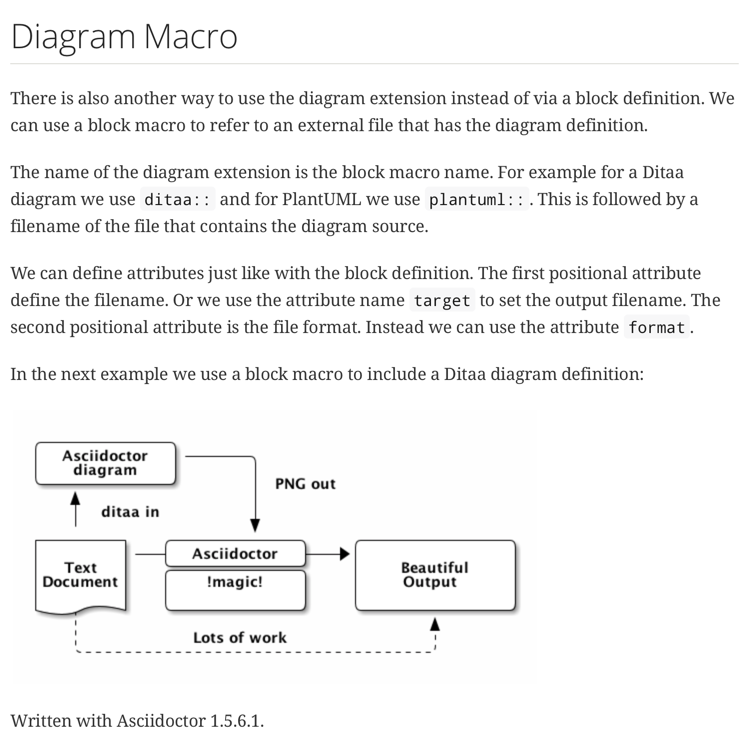
Written with Asciidoctor 1.5.6.1.
Original post written on October 30, 2017
Write Extensions Using Groovy (or Java)
We can write extension for Asciidoctor using the extension API in Groovy (or any other JVM language) if we run Asciidoctor on the Java platform using AsciidoctorJ. Extensions could also be written in Ruby of course, but in this post we see how to write a simple inline macro with Groovy.
The extension API has several extension points (Source):\
- Preprocessor: Processes the raw source lines before they are passed to the parser\
- Treeprocessor: Processes the Document (AST) once parsing is complete\
- Postprocessor: Processes the output after the Document has been rendered, before it's gets written to file\
- Block processor: Processes a block of content marked with a custom style (i.e., name) (equivalent to filters in AsciiDoc)\
- Block macro processor: Registers a custom block macro and process it (e.g., gist::12345[])\
- Inline macro processor: Registers a custom inline macro and process it (e.g., btn:[Save])\
- Include processor: Processes the include::[] macro\
To write an extension in Groovy (or Java) we must write our implementation class for a specific extension point and we must register the class so AsciidoctorJ knows the class can be used. Registering the implementation is very simple, because it is using the Java Service Provider. This means we have to place a file in the META-INF/services directory on the classpath. The contents of the file is the class name of the implementation class.
Let's start with the Asciidoc markup and then write an implementation to process the inline macro twitter that is used:
To implement an inline macro we create a new class and extend InlineMacroProcessor. We override the process method to return the value that needs to replace the inline macro in our Asciidoc markup.
We have the implementation class so now we can register the class with Asciidoctor. To register our custom extensions we need to implement the ExtensionRegistry interface. We implement the register method where we can couple our extension class to Asciidoctor.
The class that registers our extension must be available via the Java Service Provider so it is automatically registered within the JVM used to run Asciidoctor. Therefore we need to create the file META-INF/services/org.asciidoctor.extension.spi.ExtensionRegistry with the following contents:
We have taken all steps necessary to have our inline macro implementation. We must compile the Groovy classes and add those with the Java Service Provider file to the classpath. We can package the files in a JAR file and define a dependency on the JAR file in our project. If we use Gradle and the Gradle Asciidoctor plugin we can also add the source files to the buildSrc directory of our project. The files will be compiled and added to the classpath of the Gradle project.
With the following Gradle build file we can process Asciidoc markup and execute the twitter inline macro. We store the source files in the buildSrc directory.
The build file in the buildSrc directory has a dependency on AsciidoctorJ. This module makes it possible to run Asciidoctor on the JVM.
Let's see part of the HTML that is generated if we transform the Asciidoc markup that is shown at the beginning of this blog post. The twitter inline macro is transformed into a link to the Twitter page of the user:
Andres Almiray also wrote about writing extensions with Gradle.
Written with Asciidoctor 1.5.0 and Gradle 2.0.
Original post written on August 28, 2014
Use Inline Extension DSL with Gradle
One of the great features of Asciidoctor is the support for extensions. If we want to have some special feature we want to use, but is not supported by Asciidoctor, we can add our own extension. On the Java platform we can write those extensions in for example Java and Groovy. When we use Gradle as the build tool with the Asciidoctor plugin we can write the code for the extension in our Gradle build file with the Groovy extension DSL.
Suppose we want to write a new inline macro that will transform the following markup issue:PRJ-100[] into a link that points to the web page for issue PRJ-100. First we create our Asciidoctor source document:
Now we write the following Gradle build file. First we include the Gradle Asciidoctor plugin. Then we can use the extensions configuration method to add our code for the inline macro. If we would write another type of extension we could still use the same place to add it, but then we don't use inlinemacro.
Let's transform our sample Asciidoctor markup to HTML. We see the following result:
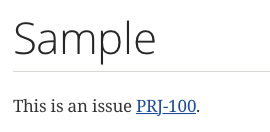
The link that is generated is http://issue-server/browse/PRJ-100.
Written with Gradle 2.3 and Asciidoctor 1.5.2.
Original post written on March 4, 2015
Using Ruby Extensions With Asciidoctor Gradle Plugin
Asciidoctor is a Ruby tool, but luckily we can use AsciidoctorJ to use Asciidoctor in Java code. The Asciidoctor Gradle plugin relies on AsciidoctorJ to run. AsciidoctorJ allows us to write custom extensions in Java (or Groovy), but we can still use Asciidoctor extensions written in Ruby with the Gradle plugin.
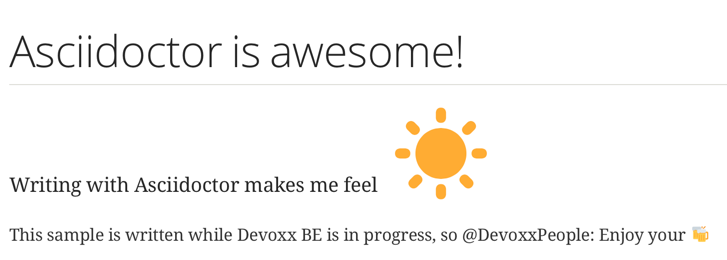
In the following example we use the emoji-inline-macro from Asciidoctor extensions lab. This is an extension written in Ruby. We create a new directory for our sample and create a lib folder. Inside the lib directory we copy the file emoji-inline-macro.rb and the supporting directory emoji-inline-macro. These files are all in the Asciidoctor extensions lab repository. After we have copied the files we should have the following structure:
In our build file we configure the asciidoctor task and use the requires method to define a dependency on the Ruby emoji-inline-macro.rb file:
We are done. Next we create a sample Asciidoc markup document with the following content:
We get the following HTML5 output when we run the asciidoctor task:
Written with Asciidoctor Gradle plugin 1.5.3.
Original post written on November 8, 2016