Miscellaneous
Using Comments
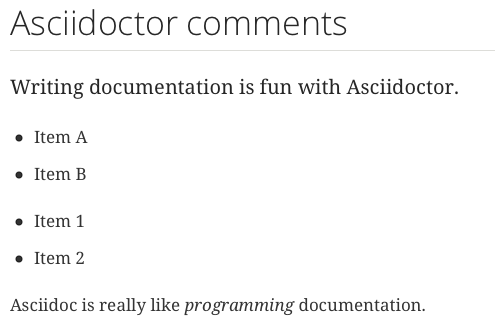
We can add comments to our Asciidoc markup. The comments will not be added to generated output. We can add both single and multiline comments in the markup. Single line comments start with a double slash (//). Multiline comments are enclosed in a block of four forward slashes (////).
The following sample markup defines Asciidoc markup with comments:
When we generate HTML output we don't see any of the comments, not even in the HTML source:
Written with Asciidoctor 1.5.0.
Original post written on August 12, 2014
Which Asciidoctor Version is Used?
When we create documentation using Asciidoc and Asciidoctor we can access the built-in attribute asciidoctor-version to see which version of Asciidoctor is used to generate the documentation.
We can reference built-in attributes like any other attributes, so we enclose the name of the attributes with curly braces ({attributeName}). In the following sample we simply print out the Asciidoctor version that was used to generate the content:
And we get the following HTML content once we have generated HTML from our Asciidoc source code:

Code written Asciidoctor 0.1.4.
Original post written on June 4, 2014
Disable Last Updated Text in Footer
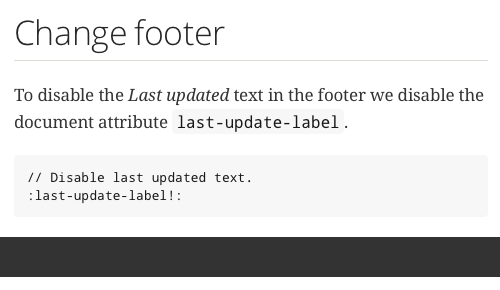
When we transform our Asciidoc source files to HTML Asciidoctor will print the date and time the document was last updated in the footer. If we want to disable the Last updated text we disable the document attribute last-update-label.
In the following example Asciidoc file we disable the Last update label in the footer:\
When we transform this to HTML we get the following output:
Written with Asciidoctor 1.5.1.
Original post written on November 26, 2014
Adding Custom Content to Head and Footer
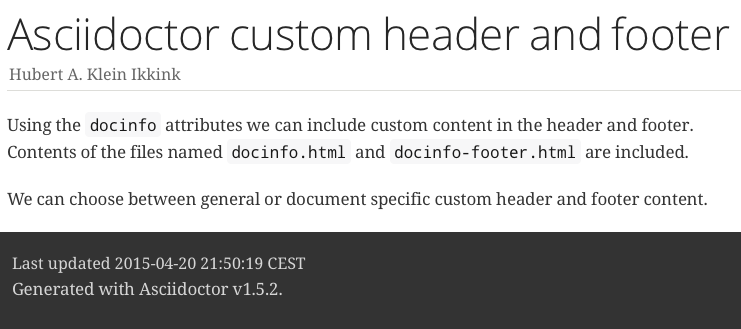
When we convert our Asciidoctor markup to HTML we automatically get a head and footer element. We can add custom content to the HTML head element and to the HTML div with id footer. We must set a document attribute and create the files that contain the HTML that needs to be added to the head or footer. We have three different document attributes we can set to include the custom content files:
-
:docinfo:include document specific content. Files to be included must be named<docname>-docinfo.htmlforheadelement and<docname>-docinfo-footer.htmlfor footer content.\ -
:docinfo1:include general custom content. Files to be included must be nameddocinfo.htmlforheadelement anddocinfo-footer.htmlfor footer content.\ -
:docinfo2:include document specific and general custom content. Files to be included must be named<docname>-docinfo.htmlanddocinfo.htmlforheadelement and<docname>-docinfo-footer.htmlanddocinfo-footer.htmlfor footer content.\
In this sample we create the files docinfo.html and docinfo-footer.html we want to include in the generated output from the following Asciidoctor source file:
Our docinfo.html looks like this:
For the custom footer we create the file docinfo-footer.html:
The following screenshot shows the generated HTML page:
And here is part of the generated head element:
Written with Asciidoctor 1.5.2.
Original post written on April 20, 2015
Include Raw HTML
If we use the HTML backend with Asciidoc we can use a passthrough block to include raw HTML in the output. The contents of a passthrough block is untouched and will be put literally in the generated output. A passthrough block is enclosed in four plus signs (++++).
In the following sample Asciidoc markup we include some Javascript:
The generated HTML will execute the Javascript and we get the following output:

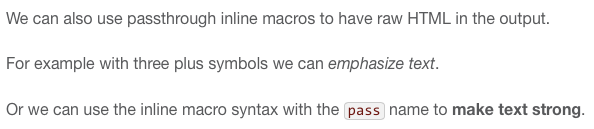
We can also add raw HTML inline in our Asciidoc markup. We can enclose the HTML in triple plus signs (+++) or use the pass:[] macro. The following sample shows the markup where both methods are used:
The generated HTML looks like this:
Code written with Asciidoctor 0.1.4.
Original post written on June 11, 2014
Use Inline Icons
Asciidoctor adds the icon: macro to the Asciidoc markup. With the macro we can insert an icon in our text. We specify the name of the icon after the macro name. If we use an HTML backend together with the document attribute icons set to the value font we can use Font Awesome Icons. If we want to use icon images the icon is looked up in the directory specified by the attribute iconsdir. For example the Docbook backend will use this to insert an icon.
In the following markup we use the icon macro to insert a comment and file icon:
We get the following result:
And the following HTML is generated:
We can specify CSS classes using the role attribute for the macro. But together with the HTML backend and font-based icons we can also use other attributes: size, rotate and flip. The size attribute can specified without the attribute name if we use it as the first attribute:
When we generate HTML we get the following result:
When we want to use an inline icon as a link we can use the attributes link and window:
Image based icons have the following attributes, like an image: alt, width, height, title, role.
Code written and generated with Asciidoctor 0.1.4.
Original post written on June 19, 2014
Changing the FontAwesome CSS Location
To use font icons from FontAwesome we set the document attribute icons with the value font. The default link to the CSS location is https://cdnjs.cloudflare.com/ajax/libs/font-awesome/4.1.0/css/font-awesome.min.css. We can change the location for the FontAwesome CSS with document attributes.
If we want to use a different CDN to serve the CSS we can set the document attribute iconfont-cdn and set the URI as a value:
To reference the FontAwesome CSS from a relative location from our generated HTML page we can first unset the attribute iconfont-remote and set the attribute iconfont-name:
In the generated HTML source we see the following link element:
Written with Asciidoctor 1.5.0.
Original post written on August 15, 2014
Change URI Scheme for Assets
When we define the document attribute icons with the value font the FontAwesome fonts are loaded in the generated HTML page. In the head section of the HTML document a link element to the FontAwesome CSS on https://cdnjs.cloudflare.com/ajax/libs is added. Also when we use the highlight.js or Prettify source highlighter a link to the Javascript files on the cdnjs.cloudflare.com server is generated. We can change the value of the scheme from https to http by setting the attribute asset-uri-scheme to http. Or we can leave out the scheme so a scheme-less URI is generated for the links. A scheme-less URI provides the benefit that the same protocol of the origin HTML page is used to get the CSS or Javascript files from the cdnjs.cloudflare.com server. Remember this might provide a problem if the HTML page is opened locally.
In the next sample Asciidoc markup we change the scheme to http:
In the generated HTML we see the new scheme value:
Now we leave the value of the asset-uri-scheme attribute empty:
The generated HTML now contains a link to the FontAwesome CSS with a scheme-less URI:
Written with Asciidoctor 1.5.0.
Original post written on August 15, 2014
Replacements For Text To Symbols
With Asciidoctor we can use text to describe a symbol in our markup. The text is automatically transformed to a Unicode replacement. For example if we use the text (C) it is converted to © which is the copyright symbol: ©.
In the following sample we see all the symbol replacements:
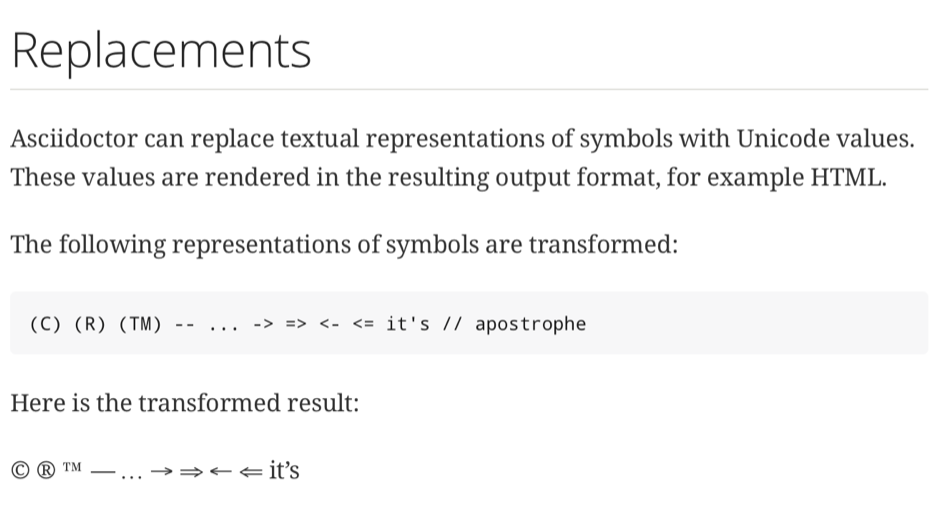
Written with Asciidoctor 1.5.2.
Original post written on September 15, 2016
Turn Section Titles Into Links
When we use Asciidoctor to write and generate our documentation we can use the document attributes sectanchors or sectlinks to turn section titles into link references. This can be useful if we want for example to bookmark a section.
The sectanchors attribute will show a section icon in front of the section title when we hover over the title. The icon itself is the link to the section.

Section title in generated HTML output.

Hover over section title and icon is shown.

Section icon is link reference.
With the sectlinks attribute the section title itself is the link. So we don't get an icon if we hover of the title, but the title text itself is now the link.

The section title is now a link.
Original post written on May 23, 2014
Leave Section Titles Out of Table Of Contents
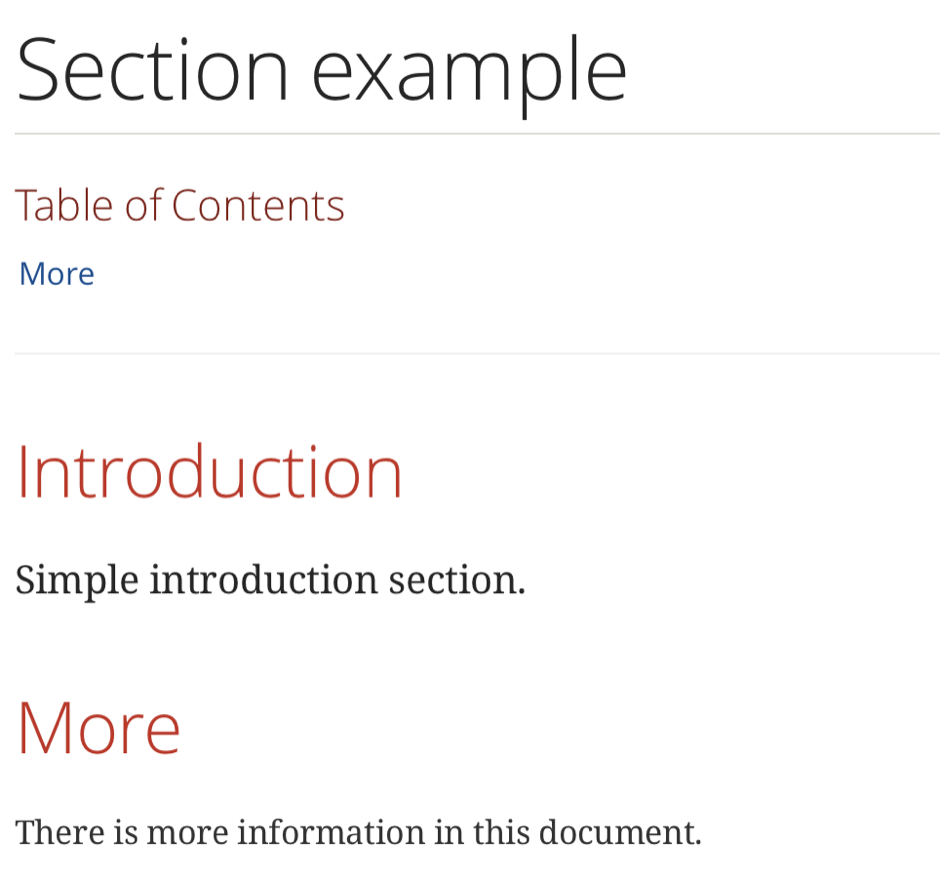
Section titles in our document (titles start with two or more equals signs) are part of the document hierarchy and therefore can be used in a generated table of contents. If we don't want to include a section title in the table of contents we must make the title discrete. The title is styled like a normal section title, but it is no longer part of the document structure as title. Therefore the section title will not be generated in the table of contents. To make a title discrete we must use the attribute discrete for the title.
In the following document we first have a simple document with two section titles. When we generate the HTML for this document we see both titles in the table of contents.
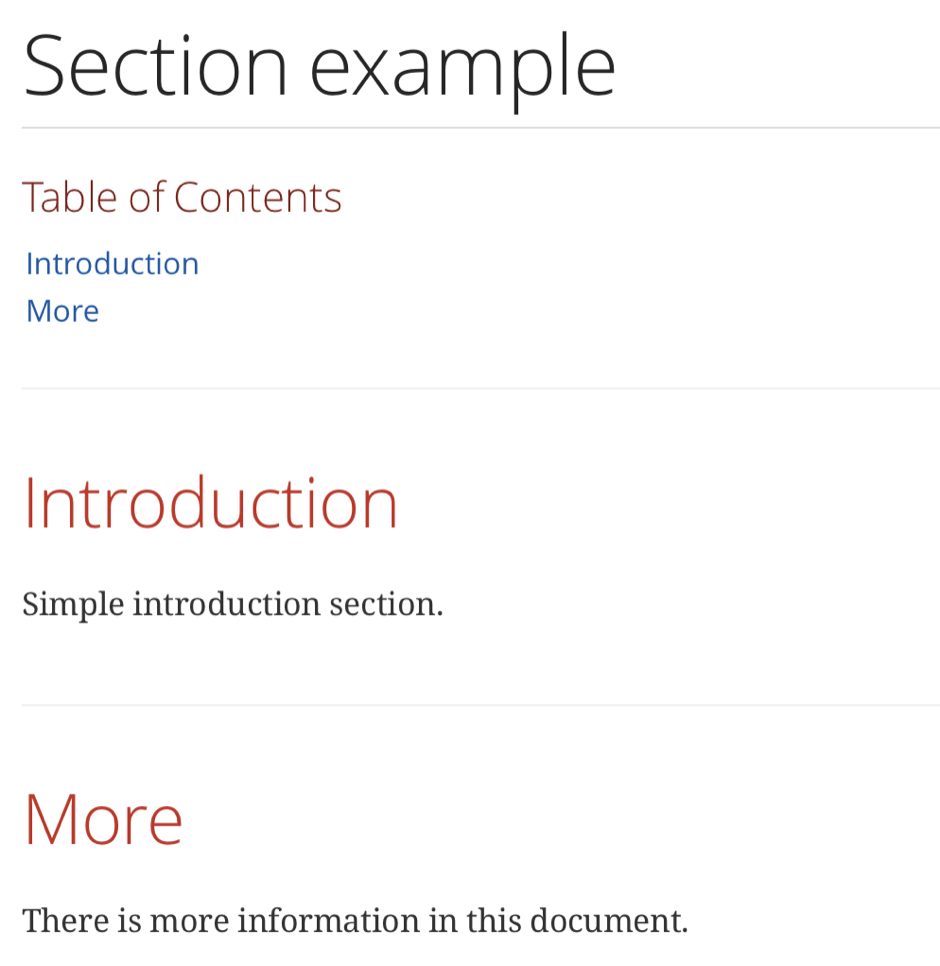
Now we make the first section title discrete by applying the discrete attribute:
We generate the document again as HTML and this time we see the section title is no longer in the table of contents:
Written with Asciidoctor 1.5.2.
Original post written on September 10, 2015
Change Level Offset For Included Documents
When we use the include directive to include another document we can must make sure the included document fits the levels of our main document. For example the included document shouldn't have level 0 headings if the main document already contains a level 0 heading. We can change the level offset in the main document before including another document. This will change the heading levels for the included document so all heading rules are okay.
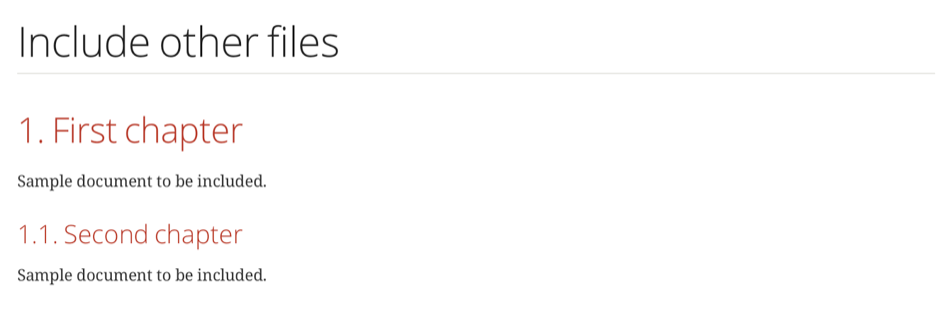
To change the level offset we use the document attribute leveloffset. It is best to use a relative value, so if the included document also contains included document the output will still be okay and the heading rules still apply. Alternatively we can use the leveloffset attribute for the include directive. In the following sample document we include other files with a level 0 heading:
Here is the source for the included files:
When we transform book.adoc to HTML with Asciidoctor we get the following result:
 \
\
Written with Asciidoctor 1.5.4.
Original post written on September 20, 2016
Use Counters in Markup
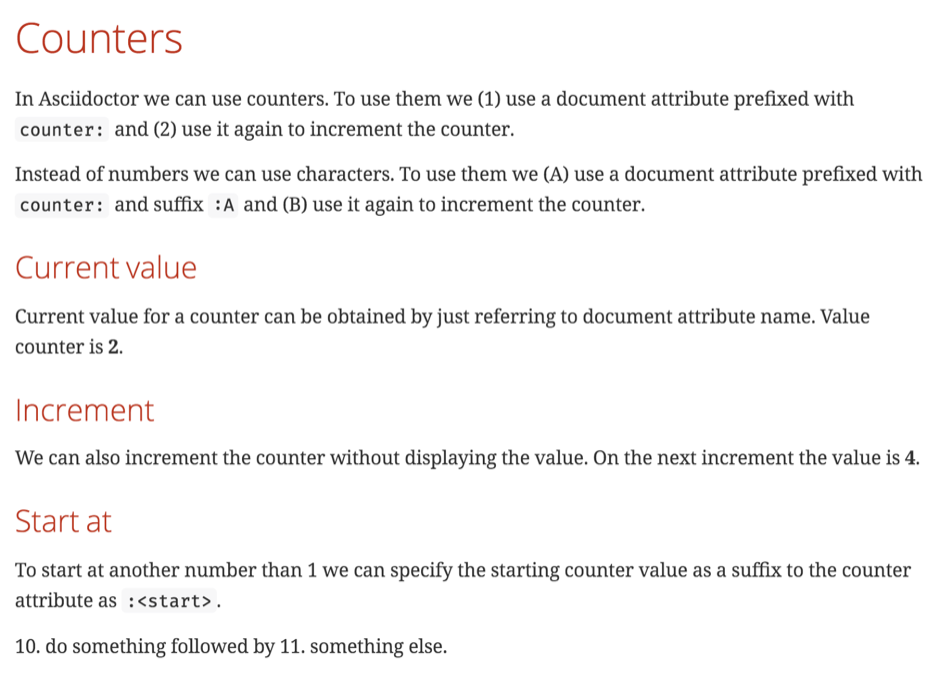
In Asciidoctor we can create a document attribute as a counter attribute. The attribute is automatically incremented each time we use it in our markup. We can choose to use numbers or characters. Only latin characters from 'a' to 'z' or 'A' to 'Z' are allowed. By default the counter will start at 1, but we can define another start value when we use the counter attribute for the first time.
To define a counter attribute we must prefix the attribute name with counter:. Each time we use this syntax with the counter: prefix the value is incremented and displayed. To only display the current value, without incrementing, we simply refer to the document attribute without the counter: prefix. For example if we want to add a counter attribute with the name steps we would use the following markup in Asciidoctor: {counter:steps}.
To increment the counter without display it we must replace counter: with counter2:. The value of the attribute is incremented but not displayed. So to increment our steps attribute we would use the syntax: {counter2:steps}. To get the current value without incrementing we simply use {steps}.
To start with a different value than 1 we can suffix the attribute name with :<:start-value>. Let's look at how we would create the steps counter attribute starting from 100: {counter:steps:100}. To have a counter with letters we define the start value as a letter from which we want to count: {counter:steps:A}.
In the following example markup we see different usages of the counter support in Asciidoctor:
When we transform this to HTML with Asciidoctor we get the following result:
 \
\
Written with Asciidoctor 1.5.4.
Original post written on September 16, 2016
Image As Link Reference
To make an image linkable in Asciidoctor when formatted to HTML we must use the link attribute when we use the image macro. The value of the link attribute is the address where the user goes when clicking on the image. We can also specify extra link attributes like window to specify the target window for the link to open in.
In the following example we use the link attribute for a block and inline image, with and without an extra window attribute:
When we transform this markup to HTML we get the following HTML for the images:
Written with Asciidoctor 2.0.9.
Original post written on April 23, 2020
Links Without URI Scheme
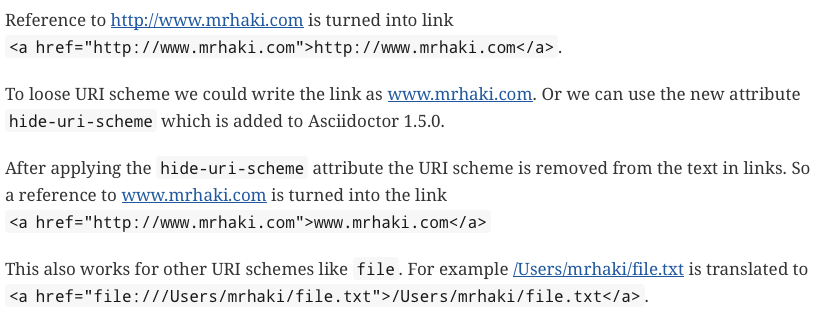
Since Asciidoctor 1.5.0 we can use the document attribute hide-uri-scheme to turn URLs into links, where the link text is displayed without the URI scheme. This can save typing when we simply want to add a URL without any special description.
In the next Asciidoc syntax we first define URLs without the hide-uri-scheme attribute, followed by URLs after the attribute is set:
When we generate output using the HTML backend we see the following output:
Written with Asciidoctor 1.5.0.
Original post written on August 12, 2014
Use Link Attributes
To define a link in Asciidoc markup we only have to type the URL followed by an optional text for the link in square brackets ([text link]). With Asciidoctor we can add extra attributes that can be used when the content is generated. We have to set the document attribute :linkattrs: to make sure Asciidoctor will process the attributes.
In the following sample Asciidoc markup we define links with attributes like window and role:
The following HTML is generated when we use Asciidoctor with the HTML backend:
Code written with Asciidoctor 0.1.4.
Original post written on June 13, 2014
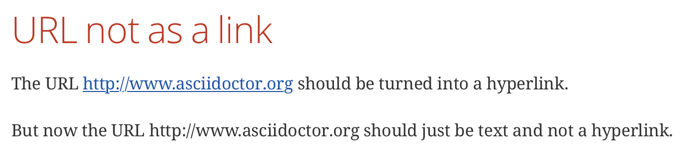
Prevent Transformation of URL to Hyperlink
Normally if we type an URL in Asciidoctor that starts with a scheme Asciidoctor knows about, the URL is turned into a hyperlink. The following schemes are recognized by Asciidoctor:
- http
- https
- ftp
- irc
- mailto
- email@email.com
If we want to keep our URL as text and not a link we must prepend our URL with a backslash (\). This way Asciidoctor will not transform the URL to a hyperlink in our output.
In the following example we have URL that is transformed to a link, followed by the same URL but with a backslash (\) before it, that is not transformed:
If we transform our document to HTML with Asciidoctor we get the following result:
Written with Asciidoctor 1.5.6.1.
Original post written on October 12, 2017
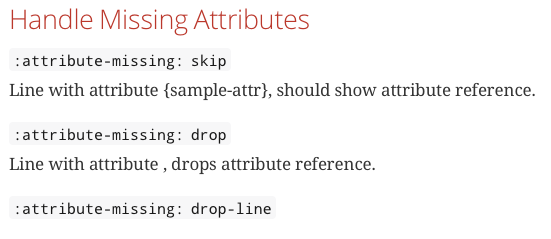
Customize How Missing Attributes Are Handled
Document attributes are like variables for your Asciidoctor document. Normally when we reference an attribute that is not set in our Asciidoctor markup the reference is still in the output. This is very handy, because we immediately see that a document attribute is not set. But we can customize this behavior with the document attribute attribute-missing. We can use the default value skip, which leaves the reference in the output. Another option is drop, which means the reference is dropped from the output. Finally we can set the value to drop-line, where the complete line with the attribute reference is dropped from the output.
In the following sample Asciidoctor markup we set the three values for the attribute attribute-missing:
When we transform this to HTML5 we get the following output:
Written with Asciidoctor 1.5.2.
Original post written on February 25, 2015
Substitute Attribute in Listing Block
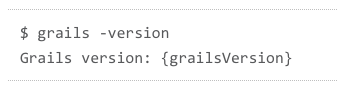
To write a listing block where the contents of the block is generated in a monospace font and line breaks are preserved is easy with Asciidoc. We can use ---- or [listing] or indent the paragraph with one space to define a listing block. All content in a listing block is processed as is, but special characters and callouts are processed. This means if we have an attribute in our block the attribute is not substituted with the actual value. To enable the replacement of the attribute with the attribute value we must set the subs attribute for our listing block.
Suppose we have the following listing block in our documentation with the attribute grailsVersion in the content:
When we generate HTML output we get the following result:
We add now the subs attribute to our listing and use the value attributes+ to instruct Asciidoctor to replace attributes with their values:
The generated HTML now shows that the attribute value is used:
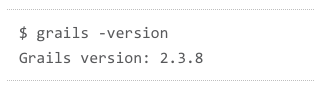
Alternative ways to define the listing block with the subs attribute. These will render the same result:
Written with Asciidoctor 0.1.4.
Original post written on May 23, 2014
Escape Attribute References
One of the many cool features of Asciidoc is attribute substitution. We can define attributes with values and in our Asciidoc markup we reference those attributes between curly braces. For example we could include the value of the attribute customAttr like this in Asciidoc: {customAttr}. But sometimes we simply want to include some text between curly braces without any attribute value substitution. We need to put an escape character (\) before the first brace and Asciidoc will not replace the attribute with a value.
Suppose we have the following Asciidoc, where we want to explain some Groovy syntax ("${sampleValue}"). Asciidoc will try to substitute the attribute sampleValue with a value if set.
If we generate HTML with Asciidoctor we get the following output and notice that attrValue is changed to attrvalue (lower case v):

If we add the escape character no attribute substitution will take place, even if we assign a value to the attribute attrValue:
Now we get the output we expect:

Written with Asciidoctor 0.1.4.
Original post written on July 3, 2014
Document Attributes With Styling
Document attributes in Asciidoctor are very powerful. We can assign values to a document attributes and reference the attribute name in our document enclosed between curly braces. Asciidoctor will fill in the value when the document is transformed. Instead of a plain value we can also use styling markup in the document attribute definition. We must use the passthrough macro and allow for quote substitution.
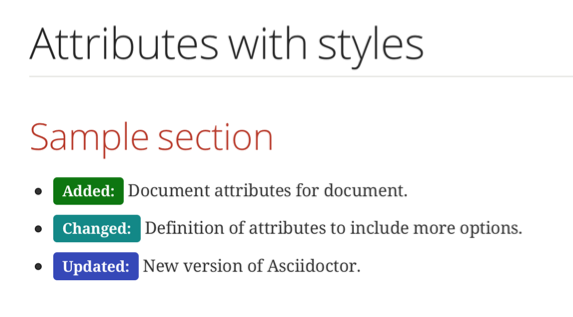
In the following example document we define three document attributes: cl-added, cl-updated and cl-changed. We use the passthrough macro, quotes substation to assign CSS classes:
Notice we need a file docinfo.html with the CSS style definitions:
When run Asciidoctor to get HTML output we see the following:
Written with Aciidoctor 1.5.7.1.
Original post written on September 2, 2018
Using Conditional Directives
In Asciidoc markup we can include or exclude text based on the existence of document attributes or based on the value of a document attribute. Therefore we use the macros ifdef, ifndef and ifeval. If we want to include some content if the document attribute sample is set we can use the following syntax:
If we want to include some content if the attribute is not set we use ifndef:
We can even use multiple attributes for these macros. If the attribute names are , separated only one of the attributes need to be set to include the content. If we use the + separator all attributes must be set to include the content.
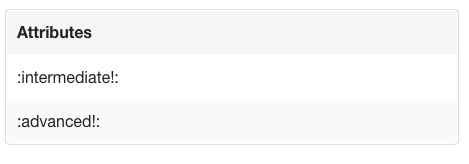
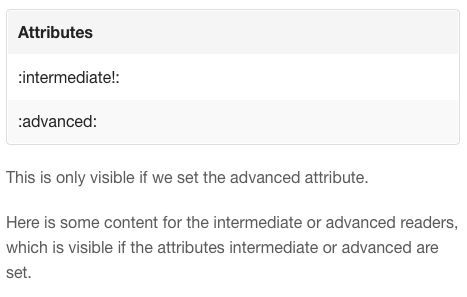
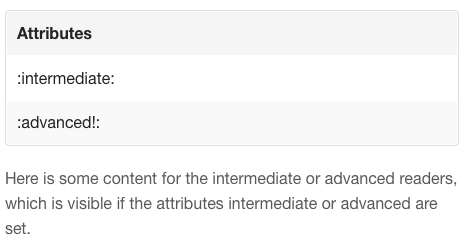
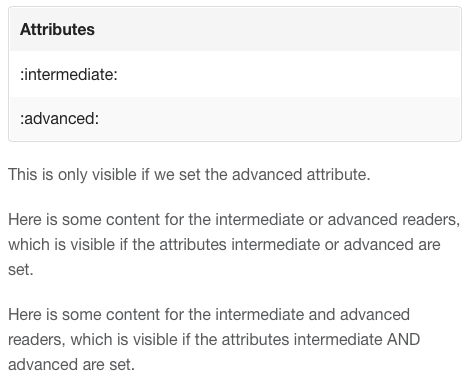
In the following sample Asciidoc markup we see several usages of the ifdef and ifndef macros:
If we generate HTML output and set and unset the intermediate and advanced document attributes we see that content is included or not:
\
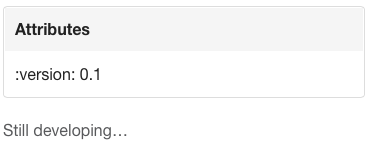
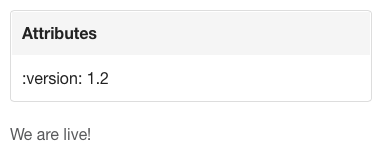
Finally with Asciidoctor we can use the ifeval macro to evaluate the value of attributes. If the expression evaluates to true the content is included otherwise it is skipped. The following sample evaluate the version document attribute and shows different content based on the value:
Let's generate HTML with different values for the version attribute:
Written with Asciidoctor 0.1.4.
Original post written on August 5, 2014
Conditional Directive to Check If Document is On GitHub
In a previous blog post we learned about the conditional directives in Asciidoctor. Dan Allen mentioned a conditional directive that we can use to see if the document is used on GitHub. The conditional directive is called env-github.
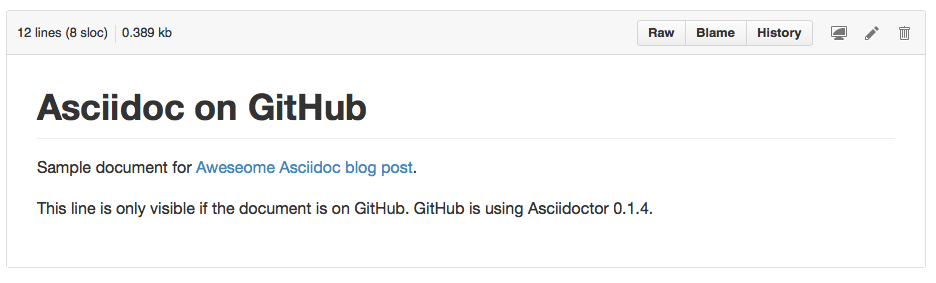
We have the following Asciidoc markup for a document stored on GitHub:
To see what is rendered we can view the document on GitHub.
Written with Asciidoctor 1.5.0.
Original post written on August 26, 2014
Using Document Fragments
Normally all Asciidoc files are processed and transformed to output files by Asciidoctor. But if we start the file name with an underscore (_) the file is not transformed to an output file. This is very useful, because we can define some Asciidoc document fragments and include them in other Asciidoc files, but in the output directory the document fragment is not generated.
Let's create two Asciidoc files. One is _attrs.adoc which is a document fragment file that is used in sample.doc:
From the command line we can invoke the asciidoctor command. We also check the directory and see there is only the file sample.html:
The following screenshot shows how the sample.html looks like in a web browser:
Written with Asciidoctor 1.5.1.
Original post written on November 25, 2014
Keep Line Breaks in Paragraphs
Normally when we write a paragraph in Asciidoc markup the line breaks are not preserved. Multiple lines are combined into a paragraph until an empty line is found to separate paragraphs. If we want to keep line breaks we must add the plus sign (+) at the end of the line. If we generate HTML from the Asciidoc markup a line break is inserted with a <br> tag. We can also use the hardbreaks document attribute to enable or disable line breaks in paragraphs without the addition of the + symbols.
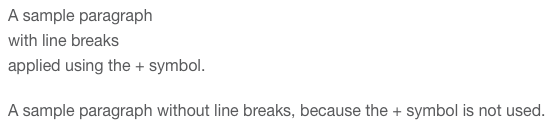
In the following Asciidoc sample we use the + sign to keep line breaks in a paragraph:
We get the following result if we use the HTML backend:
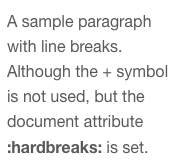
We can also use the hardbreaks attribute:
If we generate HTML we get the following result:
Samples written with Asciidoctor 0.1.4.
Original post written on June 25, 2014
Auto Number Callouts
In a previous post we learned about callouts in Asciidoctor to add explanation to source code. While surfing the Internet I came upon the following blog post by Alex Soto: Auto-numbered Callouts in Asciidoctor. I turns out that since Asciidoctor 1.5.8 we can use a dot (.) instead of explicit numbers to have automatic increasing numbering for the callouts.
Let's take our example from the earlier blog post and now use auto numbered callouts:
When we convert this markup to HTML we get the following result:
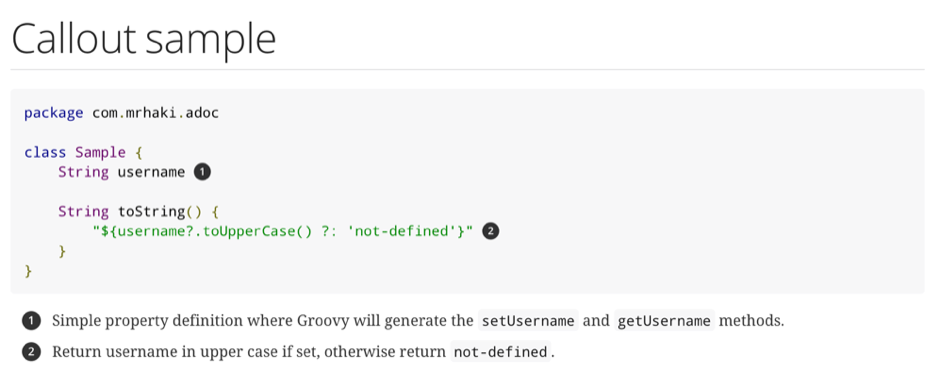
This makes it very easy to add new callouts without having to change all numbers we first typed by hand.
Written with Asciidoctor 2.0.9
Original post written on December 10, 2019
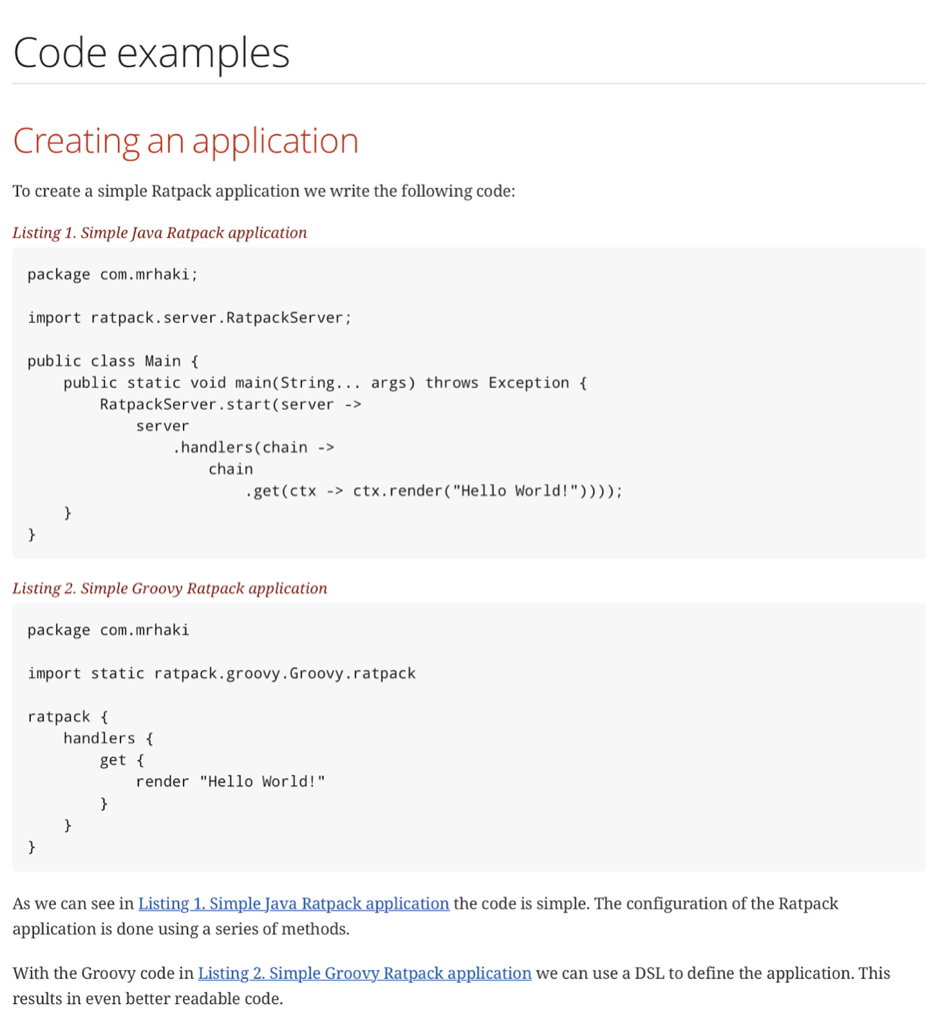
Apply Custom Styling to Blocks
To define a listing block to display for example source code in Asciidoc is easy. We can use ---- delimiter or explicitly use [listing] and include the source code. If we use the HTML backend to generate HTML the result will be a pre block enclosed in some div sections with a couple CSS classes applied. If we want to add our own CSS classes to the generated output we can apply so-called roles to our block.
In the following Asciidoc markup we apply a role with the name console to a listing block. Remember we can use the same syntax for other types of blocks as well.
If we generate HTML we get the following HTML code. Notice the class attribute of the first div contains console:
We can use an alternate syntax which resembles CSS classes closely. We can use dot (.) followed by the role name.
If we want to apply multiple roles (CSS classes) we can specify the names separated by spaces in the role attribute or chain the names with .:
By specifying role values we can customize how the output looks with different implementation for the CSS classes that we want.
Code generated by Asciidoctor 0.1.4.
Original post written on June 16, 2014
Customize the Figure Captions
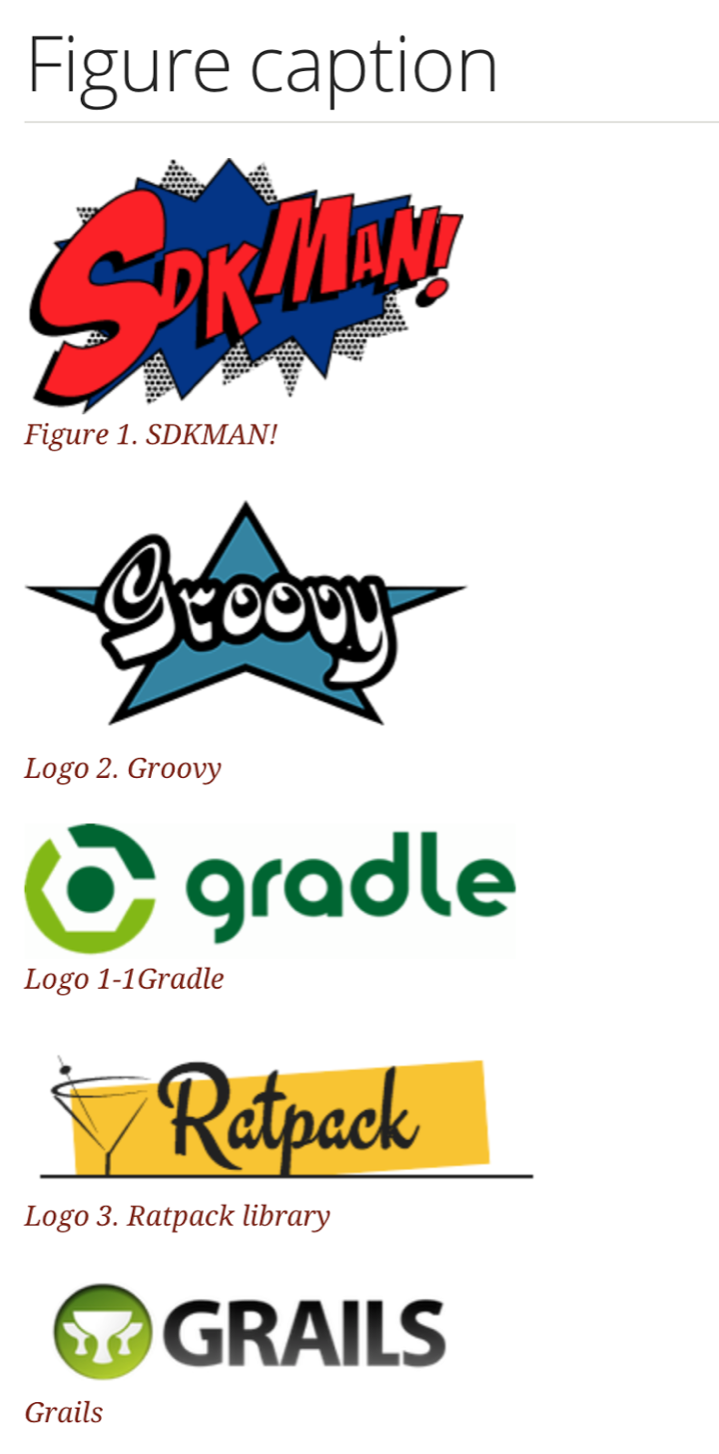
With Asciidoctor we can use images in our documents with the image directive. When the document is converted each image gets a caption. By default the caption label is Figure followed a number for the position of the image in the document. So the first image has a caption Figure 1.. If we add a block title (text prefixed with a .) to the image then that text is used in the caption as well. We can customize the caption label, figure counter, caption text or disable the figure caption using a combination of document and image attributes.
We have the following Asciidoctor markup. We include several images and customize the figure caption settings. To change the caption label (Figure) we set a different value for the document attribute figure-caption. In our example we use the value Logo. Any captions following this definition will have the label Logo.
To use a separate counter we can use a counter attribute inside the caption attribute for our image. In our example we use this for the Gradle logo. If we want to use another caption text instead of the block title we can use the title attribute for an image.
Finally to disable all figure captions we negate the figure-caption document attribute.
When we transform this markup to HTML we get the following output:
 \
\
Written with Asciidoctor 1.5.4.
Original post written on September 26, 2016
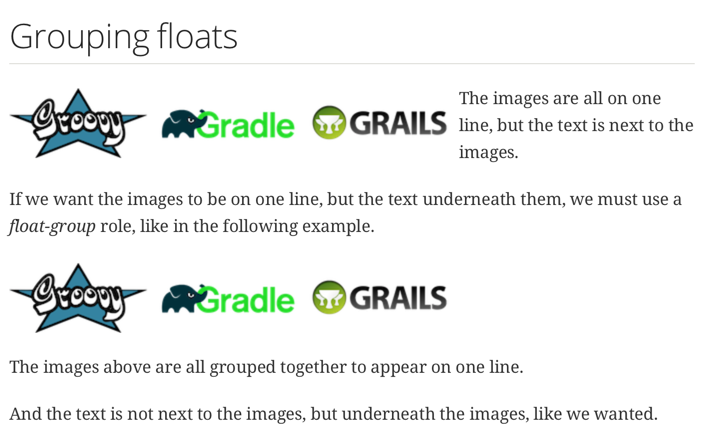
Grouping Floating Images
With Asciidoctor markup we can position images in our document. We can even float images, so text can next to an image, inside only below or about the image. We can also define multiple images to float, so the images are displayed on the same line next to each other. Any text that follows these images is also displayed next to the images. If we want only to have floating images, but the text starting under the images we can place the images inside an open block and assign the block the role float-group.
In the next example we first define three images that all have roles to float left. In the second part we group these images using the role float-group, so the text will not be displayed next to the images, but under the images:
When we create a HTML document from the Asciidoctor markup we get the following result:
Written with Asciidoctor 1.5.6.1.
Original post written on October 4, 2017
Trick To Use Caption Labels And Numbers In References
In Asciidoctor we can add an anchor with an ID to a section or title and then reference it in a link. The title of the section is used as link text. We can alter that when we define the link, but if we rely on the default behaviour we create a title for our section including the caption label and number. This way the created link points to the correct section and the text contains the caption text and number for that section.
In the following example markup we can see how we can use the caption label and section counter as attributes in the title. We do this with the title attribute of a section. By using the single quotes we tell Asciidoctor to interpret the attributes. We must also make sure we set the caption attribute to an empty string value. This disables the default caption creation of Asciidoctor for our section. Finally we need to provide an ID for the section using the #ID syntax:
When we generate a HTML version of this markup we get the following result:
Written with Asciidoctor 1.5.4.
Original post written on September 26, 2016
Changing Values for Default Captions
Asciidoctor has several captions and labels that can be overridden with document attributes. We need to define a document attribute and assign a new value to override a default caption or label. We can use UTF-8 characters as the value. The following list shows captions and labels we can override:
:appendix-caption::caution-caption::example-caption::figure-caption::important-caption::last-update-label::manname-title::note-caption::table-caption::tip-caption::toc-title::untitled-label::version-label::warning-caption:
In the next example Asciidoctor document we override caution-caption and last-update-label:
We get the following HTML output:
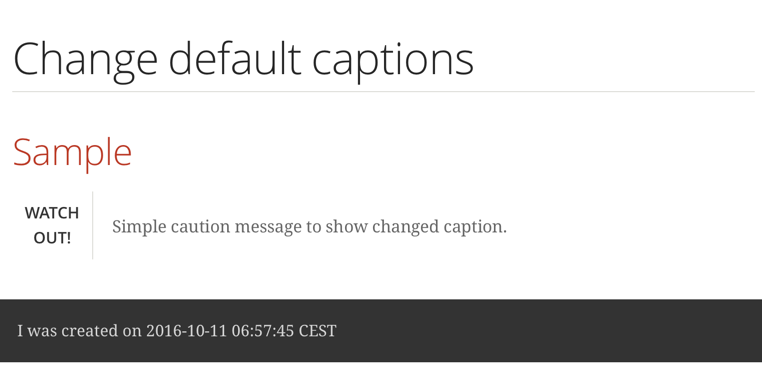
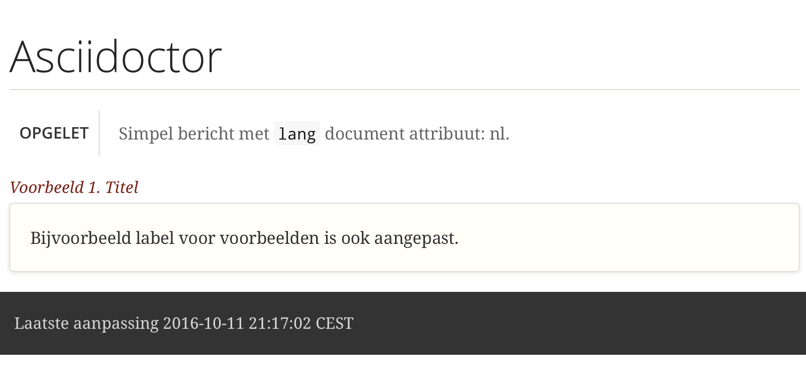
This mechanism can be used to provide messages for other languages than English. The Asciidoctor Github repository contains a file with already translated values for a lot of languages. We include this document in our own Asciidoctor markup and we set the document attribute lang with the value we want, eg. nl. In the following example document we include the file https://raw.githubusercontent.com/asciidoctor/asciidoctor/v1.5.5/data/locale/attributes.adoc.
When we invoke Asciidoctor via the command line we must add the option -a allow-uri-read to the remote document is included. The following screenshot shows the output:
Written with Asciidoctor 1.5.5.
Original post written on October 11, 2016
Display Keyboard Shortcuts
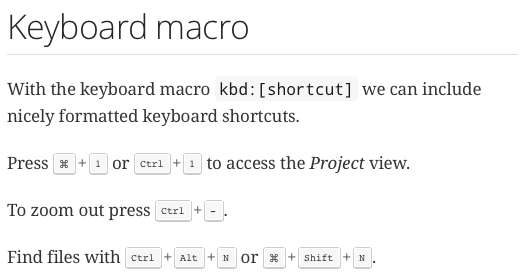
When we want to explain in our documentation which keys a user must press to get to a function we can use the keyboard macro in Asciidoctor. The macro will output the key nicely formatted as a real key on the keyboard. The syntax of the macro is kbd:[key]. To get the desired output we must set the document attribute experimental otherwise the macro is not used.
In the next Asciidoctor example file we use the keyboard macro:
When we transform this to HTML with the built-in HTML5 templates we get the following output:
Written with Asciidoctor 1.5.2.
Original post written on April 22, 2015
Exclude Parts From Included Files
In a previous post we learned how to include parts of a document in the generated output. The included parts are defined using tags. The start of a tag is defined in a comment with the format tag::tagName[] and the end has the format end::tagName[]. Next we must use the tags attribute for the include macro followed by the tagName. If we don't want to include a tag we must prefix it with an exclamation mark (!).
Suppose we have an external Java source we want to include in our Asciidoctor document.
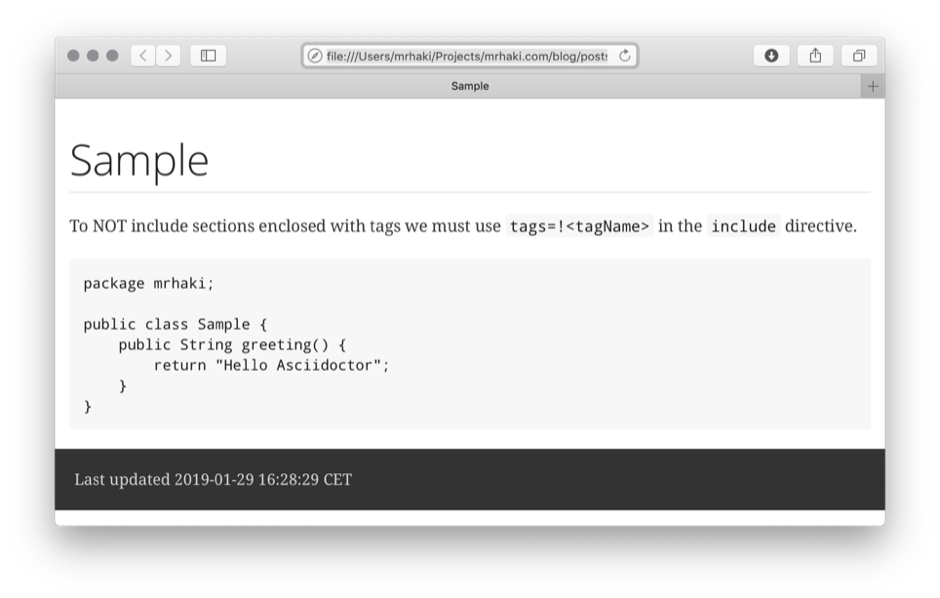
In the following sample Asciidoctor document we include Sample.java, but we don't want to include the text enclosed with the singletonAnnotation tag. So we use tags=!singletonAnnotaion with the include macro:
When we transform our Asciidoctor markup to HTML we get the following result:
Written with Asciidoctor 1.5.6.1.
Original post written on January 29, 2019
Using Asciidoctor In Javadoc Comments
Asciidoctor is a great tool for writing technical documentation. The documentation to our Java source is what we write in Javadoc comments. Wouldn't it be nice if we could use Asciidoctor in our Javadoc comments? Of course! We can achieve this with the Asciidoclet Javadoc doclet. The doclet processes the Javadoc comments as Asciidoctor source and generates HTML in the final Javadoc documentation. We can use all of Asciidoc syntax like tables, lists, include directives, styling and more. We can even use Asciidoctor extensions like asciidoctor-diagram.
In the following Java source code we have Javadoc comments with Asciidoctor syntax. We have document attributes, list, styling, include macro, table and asciidoctor-diagram code in our Javadoc. Notice that we don't have the clutter of HTML tags we normally we would have if we write Javadoc.
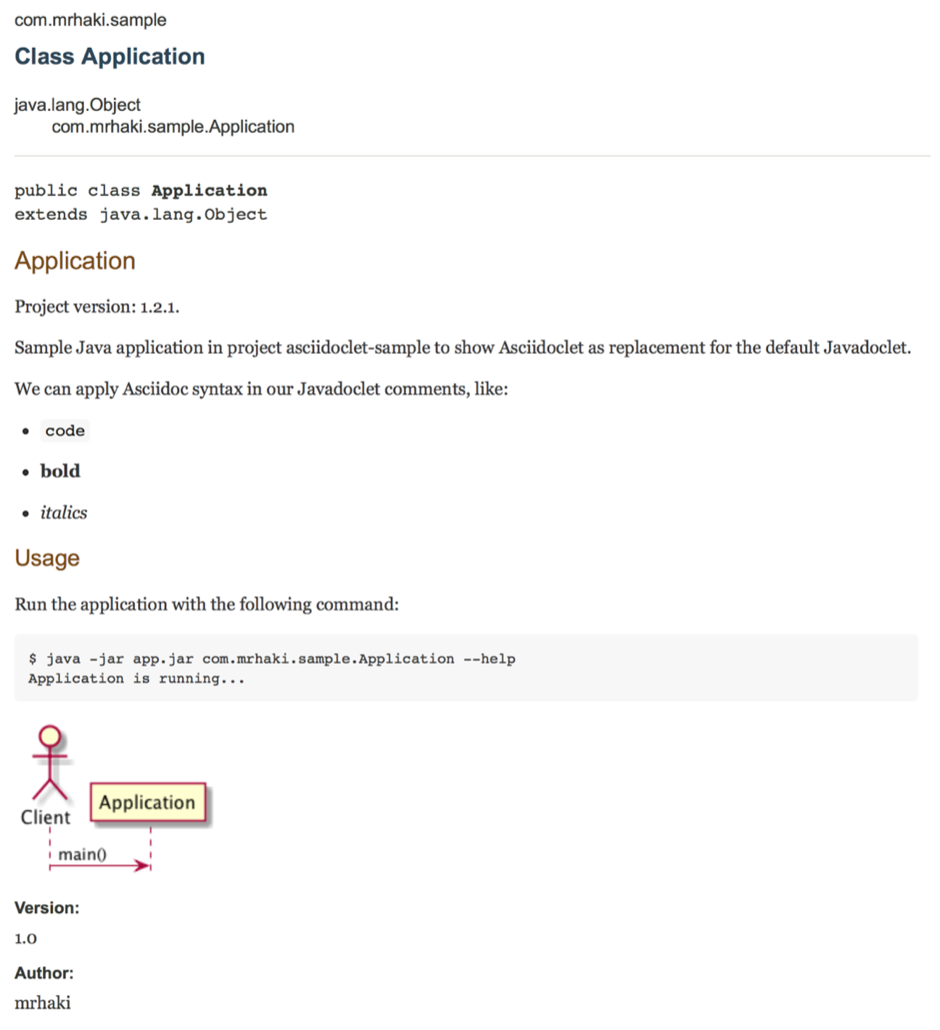
Next we create a Gradle build file and configure the javadoc task to use the Asciidoclet Javadoc doclet. In our Java class we also used the asciidoctor-diagram support and therefore we also need to set up the Gradle jruby plugin.
When we run the javadoc task we get the generated output. For example part of the generated documentation for our Application class looks like this:
Documentation for the main method:
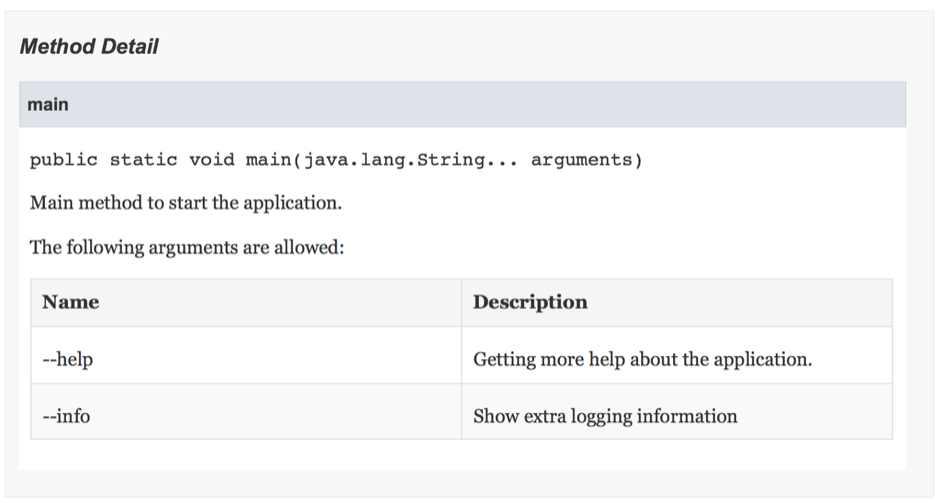
Remember this only applies to Javadoc. If we write Groovy code and use Groovydoc to generate documentation we cannot use Asciidoclet.
Written with Asciidoclet 1.5.2 and Gradle 2.7.
Original post written on October 12, 2015