Lists
Change Number Style For Ordered Lists
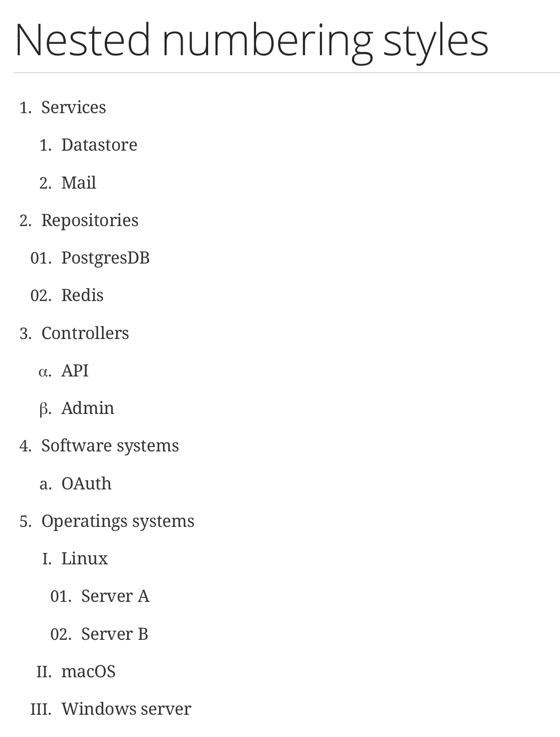
To write a (nested) ordered lists in Asciidoctor is easy. We need to start the line with a dot (.) followed by a space and the list item text. The number of dots reflects the levels of nesting. So with two dots (..) we have a nested list item. By default each nested level has a separate numbering style. The first level has arabic numbering, the second lower case alphanumeric, the third upper case alphanumeric, the fourth lower case roman and the fifth (which is maximum depth of nested levels in Asciidoctor) has style upper case roman. But we can change this by setting a block style for each nested level block. The name of the block style is arabic, loweralpha, upperalpha, lowerromann or upperroman. With the HTML5 backend we can also use decimal and lowergreek.
In the following example we have an ordered list where we set different block styles for the nested level:
When we create the HTML output we have the following result:
Written with Asciidoctor 1.5.4.
Original post written on December 13, 2016
Creating a Checklist
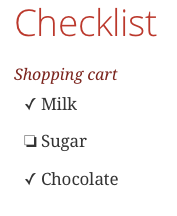
Creating a list with Asciidoctor markup is easy. To create an unordered we need to start a line with an asterisk (*) or hypen (-). We can add some extra markup to create a checked list. If we add two square brackets ([]) to the list item we have a checklist. To have an unchecked item we use a space, for a checked item we can use a lowercase x (x) or an asterisk (*).
In the next example we define a shopping cart list with Asciidoctor markup:
When we create the HTML file we get the following output:
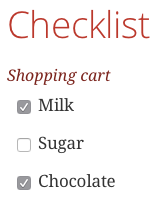
If we use font-based icons with the document attribute :icons: font the checkboxes are rendered using fonts:
The checkboxes are now simply output in the HTML file. We can add an options attribute to our list to make the checkboxes interactive:
If we transform this markup to HTML we see the following in our web browser:
Written with Asciidoctor 1.5.2.
Original post written on March 2, 2015
Change Start Number for Numbered List
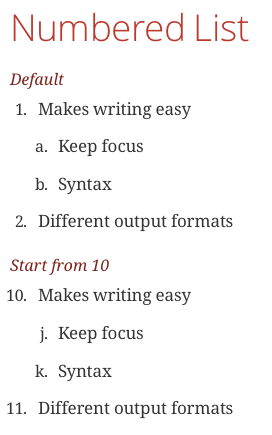
With Asciidoctor we can create numbered lists easily. When we want to change the number the list starts with we use the start attribute when we define the list.
We get the following HTML output when we transform the document:
Written with Asciidoctor 1.5.2.
Original post written on February 26, 2015
Using Paragraphs in Lists With List Item Continuation
When we write a list in Asciidoctor we can simply create a list item by starting the line with a dot (.). To create a another list item we simply start a new line with a dot (.). But what if we want to add a list item with multiple paragraphs, or text and a source code block element. We can use the list item continuation (+) to indicate to Asciidoctor we want to keep these together for a single list item.
In the following example we have a list in Asciidoctor markup. The second list item has multiple paragraphs , the third item has an extra admonition block and the fourth item contains a source code block:
Let's generate this Asciidoctor markup to HTML and we see the following result:
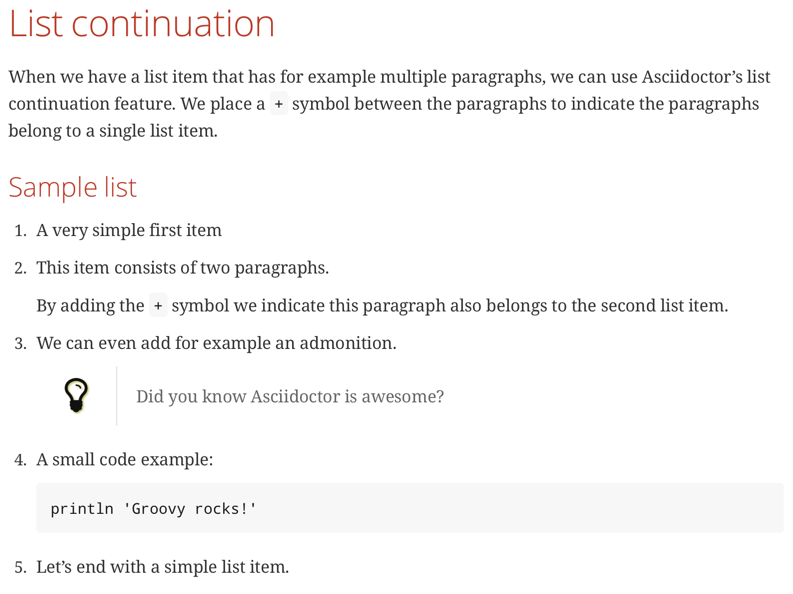
We see how the extra paragraph, admonition and source code are part of a single list item.
Written with Asciidoctor 1.5.6.1.
Original post written on October 3, 2017
Use Only Block As List Item
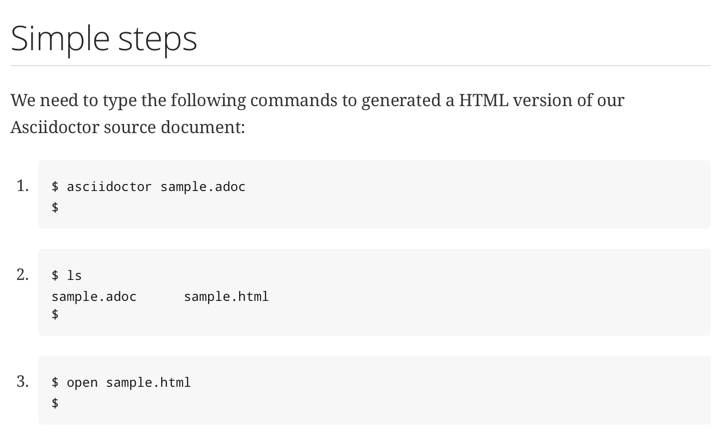
When we define a list in Asciidoctor we usually have a list item that is a paragraph. But if we want to have a block as list item we need to add an extra {blank} element to make sure the block is parsed correctly as list item. Because a list item starts with a . or a * at the beginning of a line and a block also is defined on the beginning of the line, we must add the extra {blank} element. Together with the list item continuation (+) we can have a list with blocks.
In the following example we define a numbered list with three listing blocks:
When we generate a HTML version we get the following result:
Written with Asciidoctor 1.5.6.1.
Original post written on October 16, 2017