Practicing for Linux Deployment
It’s not expensive to practice using a VPS - VPSs are rented for a few cents an hour while some services line Amazon just require a credit card for using their free-tier. However, to avoid potentially expensive accidents like forgetting to destroy a VPS after practice, we will be asking you, the beginner, to practice on Virtual Machines (VM) running on your computer.
Setting up a practice VirtualBox Virtual Machine
Download the following:
- VirtualBox - get version 4.3.28 or higher for your OS
- Ubuntu Server 14.04 LTS - the download button should give you the latest LTS version (14.04.2) that can be used by your machine (i.e. 64-bit). You can also download a BitTorrent torrent file at the Alternative Downloads page
Install VirtualBox after downloading. It will install a couple of drivers but overall it should be a smooth installation process.
Creating a new Virtual Machine
Once VirtualBox is installed, you can now create your practice server. Click the “New” button to start the process.

- Name and Operating System - this step is just for labeling purposes. Choose any name you want and set the Type/Version to Linux/Ubuntu (64 bit).
- Memory Size - 512 MB is enough for a practice server. Properly tuned, it may even be good enough for small to medium sized sites. But for this practice, I suggest going for 1 GB to give you some extra leeway.
- Hard Drive - The first 3 defaults (“Create a virtual hard drive now”, “VDI”, “Dynamically allocated”) are fine. You may choose to change the location of your virtual hard drive and increase its size in the “File location and size” step. Note that by choosing dynamically allocated storage, the full hard drive space will not be allocated initially, saving you space in your real hard drive.
Your practice server VM has now been created. We still have to modify some settings before we can continue. Highlight the VM and click the Settings button.
- Network - you have two main choices for networking: NAT and Bridged Adapter
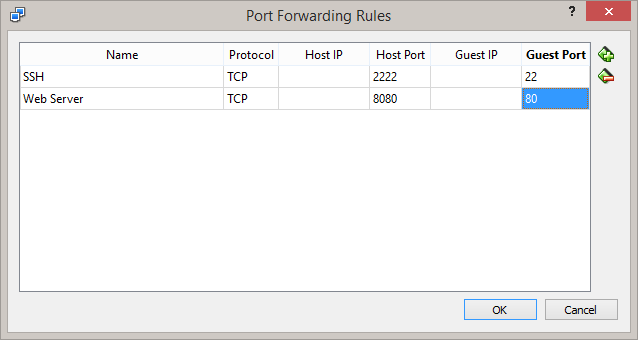
In NAT mode, the VM connects to its own virtual router which uses the internet connection of the host OS. The downside to this is that the VM is invisible to the network and you have to set Port Forwarding settings to allow you to connect to it. Here are the port forwarding settings to use if you prefer NAT:
In Bridged Adapter mode, the VM directly uses an attached network adapter on the host OS to connect to the internet. This means that it will also retrieve its own IP address from the router’s DHCP server and in turn be visible in the local network so there’s no need for port forwarding. Just choose the adapter connected to the network and you’re good to go.
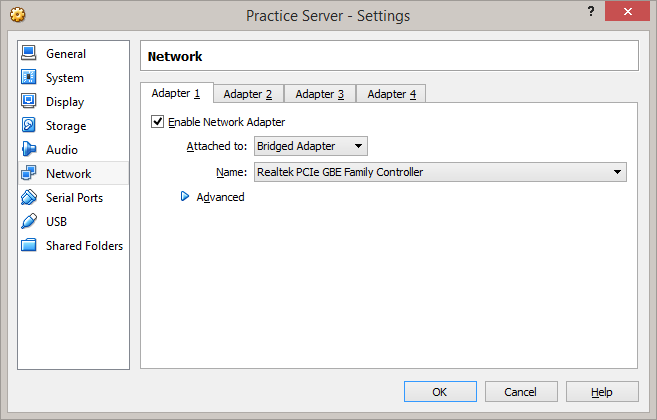
I suggest using Bridged Adapter since it simulates what you’ll get from VPSs (i.e. just an IP address for access) but we’ll provide instructions for both setups so you can choose either of the two.
- Storage - Select the Empty CD and click the CD icon to find the .iso file for Ubuntu Server. The default boot order is Floppy, CD, Hard Drive so there’s no need to change that setting.
We should now be ready to install Ubuntu Server but there’s one optional setting you can change:
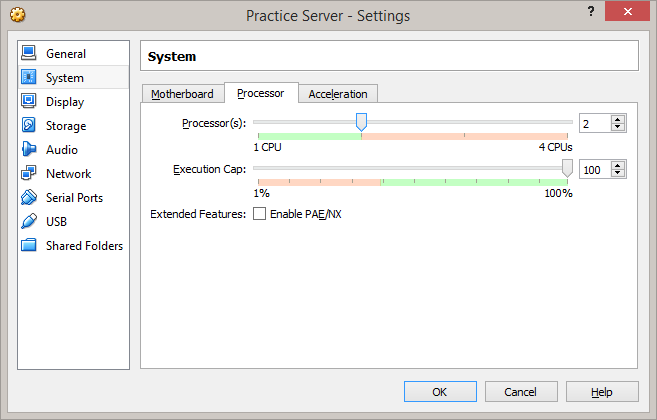
Increasing Processor count not going to improve performance that much, but it may help later when we go into version managers that compile Ruby.
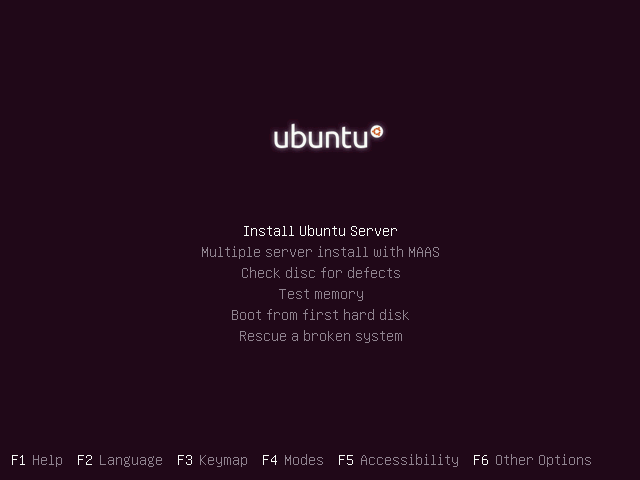
Install Ubuntu Server 14.04
Start the virtual machine and wait for the installer to load. Select your language and proceed to “Install Ubuntu Server”.
Arrow keys and Tab moves the cursor, Enter activates the buttons, and Space selects options.
The mouse pointer may be captured by the VM preventing you from switching to this document. When that happens, press the Host key (Right Ctrl by default) to release the pointer.
- Select a language - choose your preferred language
- Select your location - this affects the server used for downloading packages so choose your country
- Configure your keyboard - unless you’re using a localized keyboard, just choose “No”, “English (US)”, “English (US)”
- Configure the network - hostname can be anything. For this tutorial we’ll use “server” to make it obvious in the examples
- Set up users and passwords - full name, user name, and password can also be anything. For this tutorial, our default user will be “user”. Also, choose not to encrypt your home directory.
- Configure the clock - choose “No”, and scroll all the way down to choose “UTC”. This will simulate how some VPSs use UTC as default and will force you to think that servers can have different time zones than your local machine.
- Partition disks - this part may be daunting but just all about choosing the defaults and agreeing to prompts: “Guided - use entire disk and set up LVM”, “SCSI 3 (0, 0, 0)…”, “Yes”, “Continue”, “Yes”
- Configure the package manager - leave this blank unless you’re using an HTTP proxy
- Configuring tasksel - since this is just a practice server, leave it to “No automatic updates”
- Software selection - use Space to select “OpenSSH server” and press Enter to Continue
- Install the GRUB boot loader on a hard disk - choose “Yes”
- Finish the installation - select “Continue” to eject the installation disk and restart the server
Upon restarting, go ahead and check if you can log in using the user name and password that you provided earlier. If you can’t, it may be because you have the Caps Lock on or you may have forgotten your credentials. Do everything all over again if it’s the latter.
If you chose Bridged Adapter for your VM’s networking settings, enter the following command to determine the IP address of your server:
$ hostname -I
Remotely connect via SSH
From this point on, we will be accessing the VM remotely via Secure Shell (SSH) to simulate how to remotely administer a VPS.
Linux and Mac users can use the terminal, while Windows users can use Git Bash. As mentioned in the Introduction, this book assumes that you are familiar with these terminals, either as someone who has gone through a Rails tutorial, or as a SysAd.
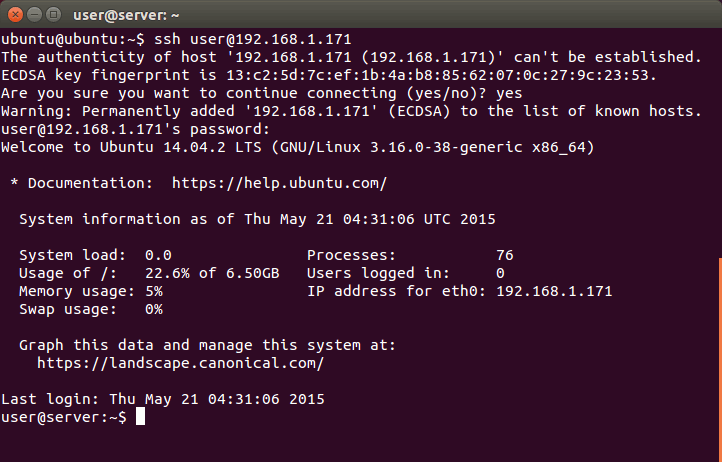
To connect to Bridged Adapter VMs via SSH, run “ssh [user name]@[server IP address]” e.g.:
$ ssh user@192.168.1.10
If you’re using NAT with ports forwarded as in the previous section, use “ssh [user name]@localhost -p 2222” e.g.
$ ssh user@localhost -p 2222
Either way, the server will ask you for the user’s password. It may also ask you to verify the authenticity of the host (it’s local so just say “yes”). Once logged in, you now have full remote control of the server.
Additional Sever Setup
We need to do a few more things before we can proceed with learning how to deploy Ruby and Rails applications.
Updating and Installing New Software
Fresh installs of Ubuntu are usually have packages that are out of date. Let’s update them now.
user@server:~$ sudo apt-get update
As briefly mentioned in the Command Line Crash Course, sudo lets you run commands as the root user, allowing you to do things that are not permitted for regular users. As an added precaution, using sudo requires you to enter the user’s password to proceed.
Ubuntu is derived from Debian so it also uses APT (Advanced Packaging Tool) for managing packages. Running apt-get update retrieves the latest package lists from the current sources (Ubuntu’s official software package repositories by default). It does not upgrade the packages, however. That is done by the next command:
user@server:~$ sudo apt-get dist-upgrade
This will show you a list of packages that will be updated and will prompt you to continue. Enter “y” or just press Enter (the capitalized letter is the default) to proceed. You can also add the “-y” option to automatically yes to all prompts e.g. “sudo apt-get dist-upgrade -y”.
The command “apt-get dist-upgrade” compares the recently retrieved package list with the currently installed packages and upgrades all packages that have new versions. We can also use “apt-get upgrade” if we only want to install new packages that don’t affect other existing packages (e.g. don’t install kernel updates because they uninstall old kernels), but we use the former here since we want to upgrade everything.
Upgrading will take a while to finish. When it’s done, let’s now install some of the software that we will be using in the apps that we will deploy:
user@server:~$ sudo apt-get install build-essential git-core nodejs postgresql libpq-dev -y
As the name implies, “apt-get install” installs new packages from Ubuntu’s repository and other repositories you may have added beforehand. Here’s a quick explanation for each of the packages:
-
build-essential- a package that contains all of the packages needed for compiling and building common applications (e.g. for C, C++) -
git-core- core Git packages which we will use later to pull code from repositories -
nodejs- NodeJS for Sprockets / Asset Pipeline. It’s not up to date, but it should be fine for our needs. -
postgresql- our database -
libpq-dev- when installing gems, they can sometimes require development libraries to compile against. This package contains the libraries for PostgreSQL and is required for installing thepggem.
Removing Password Login
Let’s add the bare minimum level of security to our server.
First off, let’s remove password login and replace it with public-key cryptography. That is, we’ll tell SSH to reject password logins (which can be brute-forced) and instead verify the user’s identity using their private-public key pair.
Start by copying over your public key to the user’s authorized keys list. Windows (Git Bash or minGW) users have to do this manually:
user@server:~$ mkdir .ssh
user@server:~$ nano .ssh/authorized_keys
These commands will create the .ssh folder and open the authorized_keys file in an editor, in this case nano. Open your public key (typically C:\Users\username\.ssh\id_rsa.pub) in a text editor (Notepad should be ok), copy it’s contents to clipboard, and in the terminal, right-click the window title -> Edit -> Paste. Press Ctrl-O and Enter to save then press Ctrl-X to quit nano.
We also need to reduce the permissions of the directory and the file. Otherwise, the SSH server will consider them insecure and ignore them.
user@server:~$ chmod 700 .ssh
user@server:~$ chmod 600 .ssh/authorized_keys
The chmod command changes file and directory permissions. We’re using octal mode here so it’s not obvious what 700 or 600 means, but basically chmod 600 means that only the user can read and write the file while chmod 700 means that only the user can read, write, and execute it.
Linux and Mac users have a shortcut that does the whole process. Open a new terminal or exit your current session and run the following:
$ ssh-copy-id user@[IP address]
If you’re using NAT and port forwarding:
$ ssh-copy-id user@localhost -p 2222
Mac users may have to first install ssh-copy-id via Homebrew i.e. “brew install ssh-copy-id”.
Now that you’ve added your public key to the server, open the SSH’s configuration file and change its settings.
user@server:~$ sudo nano /etc/ssh/sshd_config
There are two things we need to change. One is to disable root login:
# Authentication:
LoginGraceTime 120
PermitRootLogin without-password
PermitRootLogin no
And the other is to remove password authentication and force logging in via private-public key pair:
# Change to no to disable tunnelled clear text passwords
#PasswordAuthentication yes
PasswordAuthentication no
Once done, you can restart the SSH server daemon to apply the changes for all new connections:
user@server:~$ sudo service ssh restart
Adding a Regular User for Deployment
As another security precaution, we will be running our Ruby and Rails applications under a user without any administration rights. Enter the following command to create this user:
user@server:~$ sudo adduser --disabled-password --gecos 'Deploy User' deploy
This command creates the “deploy” user and its corresponding “deploy” user group. The options we added remove disables the deploy user’s password (but still allows login via private-public key) and sets the user information to “Deploy User” (otherwise we’ll be prompted to enter it). This command also creates the user’s home directory “/home/deploy/”.
To allow us to login via SSH, let’s copy over our ssh settings from our user user to the deploy user.
user@server:~$ sudo cp -r .ssh /home/deploy/.ssh
user@server:~$ sudo chown -R deploy:deploy /home/deploy/.ssh
The chown command changes the ownership of the folder; in this case, we changed the ownership of the folder and all of its contents (-R) to both the deploy user and user group.
If setup correctly, you should be able to login remotely to the deploy user e.g.:
$ ssh deploy@192.168.1.10
Or:
$ ssh deploy@localhost -p 2222
Wrap-up: Shutdown server and take a Snapshot
You should now be ready to start installing the software required for Ruby and Rails application servers. But before that, let’s take a snapshot
Start by shutting down the server:
user@server:~$ sudo poweroff
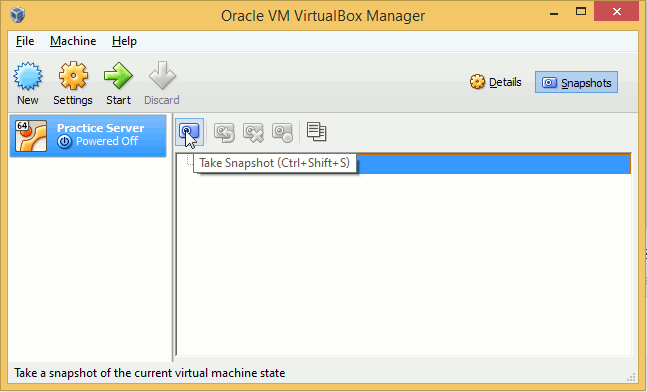
When the server has shutdown, go back to the VirtualBox Manager, select your practice VM, go to the Snapshots tab, then click the Take Snapshot button.
Choose a name for the snapshot and continue.
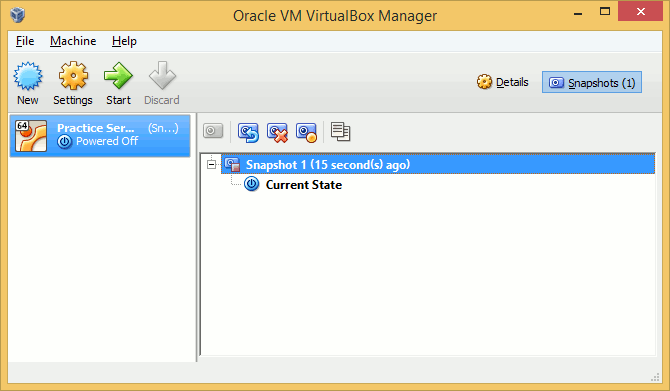
You now have a snapshot of the VM. You should now be able to roll back your server in case you mess up the installation process in the following chapters.