Deploying Ruby Web Applications to Passenger
In this chapter, we will be discussing how to configure nginx and Passenger to serve Ruby web applications. Before that, let’s look at how nginx is currently configured to serve static files.
A Quick Look at nginx Server Settings
The settings for the page we viewed in the browser are not present in the /etc/nginx/nginx.conf file. They are instead found in the /etc/nginx/sites-enabled/ directory and are included by the following line:
71 include /etc/nginx/sites-enabled/*;
Let’s look at the only file in that directory, default:
root@server:~# nano /etc/nginx/sites-enabled/default
##
# You should look at the following URL's in order to grasp a solid understanding
# of nginx configuration files in order to fully unleash the power of nginx.
# http://wiki.nginx.org/Pitfalls
# http://wiki.nginx.org/QuickStart
# http://wiki.nginx.org/Configuration
#
# Generally, you will want to move this file somewhere, and start with a clean
# file but keep this around for reference. Or just disable in sites-enabled.
#
# Please see /usr/share/doc/nginx-doc/examples/ for more detailed examples.
##

# Default server configuration
#
server {
        listen 80 default_server;
        listen [::]:80 default_server;

        # SSL configuration
...

        root /usr/share/nginx/html;

        # Add index.php to the list if you are using PHP
        index index.html index.htm index.nginx-debian.html;

        server_name _;
...
Read the links in the files comments when you have the time. For now, here’s a quick rundown of the settings (aka directives) in the above server block:
-
listen - sets the address and port that the current server is listening to:
listen 80 default_servermeans listen to port 80 (default HTTP port) and make this server block be the default server in case a request comes in that doesn’t match aserver_namein other server blocks. The secondlistenline is the same, but for IPv6 addresses. - root - the document root of the server
-
index - if the request asks for a folder, the files listed will be the ones displayed to the user. For example, when we requested for the “/” path, nginx returned to us the contents of
/usr/share/nginx/html/index.html. -
server_name - this line determines if the request is for this block by matching it with the
Hostheader. The dummy entry_is used here to allow thedefault_serversetting in thelistendirective to catch all non-handled requests.
One thing to note about this server configuration file is merely a symbolic link, a special file referencing another file:
root@server:~# ls -l /etc/nginx/sites-enabled/
total 0
lrwxrwxrwx 1 root root 34 May 31 20:41 default -> /etc/nginx/sites-available/default
As you can see, the real file is located at /etc/nginx/sites-available/.
This whole scheme (separating the server settings out of nginx.conf, storing those settings in a folder and symlinking it) is not necessary but it makes modifying the files easier later on, especially if you’re hosting many servers in a single nginx installation.
(The symlinking scheme is also for Apache users who are more familiar with setting up Virtual Hosts in that manner.)
Deploying a Simple Sinatra App
To better understand how Passenger is configured to start and serve Rack applications, we are not going to go directly to a Rails app. Instead, we will be practicing first on a Sinatra application.
Half of the things we will do in this section will be done as the deploy user. We recommend opening a new SSH session under the deploy user separate from the root.
Setting up and Creating the Sinatra Application
Let’s start by creating the project folders.
deploy@server:~$ mkdir -p sinatra_demo/public
Here sinatra_demo is our project folder. The minimal required for a Rack app in Passenger are the config.ru file and the public folder, the latter of which we created here.
Passenger can use Bundler if it sees a Gemfile. This is our preferred behavior since we do not want to install other gems on the system-level.
Change directories and create a new Gemfile
deploy@server:~$ cd sinatra_demo
deploy@server:~/sinatra_demo$ nano Gemfile
1 source "https://rubygems.org"
2
3 gem "sinatra"
And now let’s install the Sinatra gem and all required gems to the bundle folder using the --path option:
deploy@server:~/sinatra_demo$ bundle install --path=bundle
Now let’s create our Sinatra application. Sinatra apps are small so we’ll just put all of it inside our config.ru file:
deploy@server:~/sinatra_demo$ nano config.ru
 1 require 'rubygems'
 2 require 'sinatra'
 3
 4 set :environment, ENV['RACK_ENV'].to_sym
 5 disable :run, :reload
 6
 7 get "/" do
 8   "Hello World!"
 9 end
10
11 run Sinatra::Application
Modifying nginx Settings
Now that we’ve created our Sinatra application, let’s switch back to the root user to setup its settings.
First, let’s delete the default symlink:
root@server:~# rm /etc/nginx/sites-enabled/default
Then create the server config file:
root@server:~# nano /etc/nginx/sites-available/sinatra
1 server {
2         listen 80 default_server;
3         listen [::]:80 default_server;
4         server_name _;
5
6         root /home/deploy/sinatra_demo/public;
7         passenger_enabled on;
8 }
If you recall our previous lesson on web and application servers, we needed to point nginx and Passenger to the document root and the application respectively. For nginx, the root line does this. On the other hand, we didn’t need to tell Passenger where config.ru is - it can already guess that it’s in the parent directory of the public folder.
Overall, the settings here are not much different from the previous nginx static settings apart from the new passenger_enabled directive, which, as the name implies, enables Passenger.
All that’s left to do is create a symlink:
root@server:~# cd /etc/nginx/
root@server:/etc/nginx# ln -s ../sites-available/sinatra sites-enabled/sinatra
(We changed directories and tweaked the ln command so that the line will fit in this document. The full correct command is “ln -s /etc/nginx/sites-available/sinatra /etc/nginx/sites-enabled/sinatra”.)
And restart the server:
root@server:/etc/nginx# service nginx restart
Opening the browser should now give you the “Hello World” served from Sinatra.

Modifying and Restarting the Application
Let’s try modifying our application. What will happen if we added a new file to the public folder?
deploy@server:~/sinatra_demo$ echo "Hello again!" > public/hello.txt
Open hello.txt on your browser.
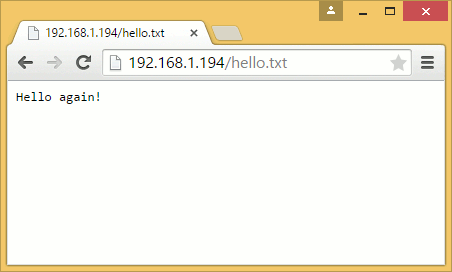
nginx was able to find the new file and served without problem. But what if we modified our Sinatra application to add a new path handler?
require 'rubygems'
require 'sinatra'

set :environment, ENV['RACK_ENV'].to_sym
disable :run, :reload

get "/" do
  "Hello World!"
end

get "/now" do
  Time.now.to_s
end

run Sinatra::Application
One might expect that the change will be applied immediately. Unfortunately we get this error:
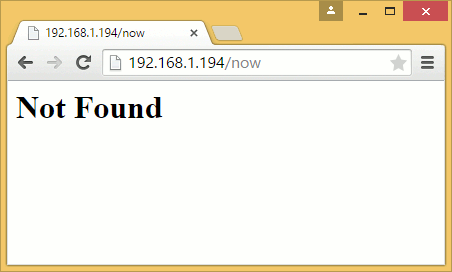
This happens because Passenger caches your entire application on startup to improve performance. This means that all changes to our Rack applications must require an application restart.
Our deploy user doesn’t have rights to restart nginx, but there is a way to restart Passenger on the application level: by creating or modifying the tmp/restart.txt file.
Let’s create the file now to restart our application:
deploy@server:~/sinatra_demo$ mkdir tmp
deploy@server:~/sinatra_demo$ touch tmp/restart.txt
The touch command either updates the timestamp of the file (i.e. touching the file) or creates a new file if it doesn’t exist.
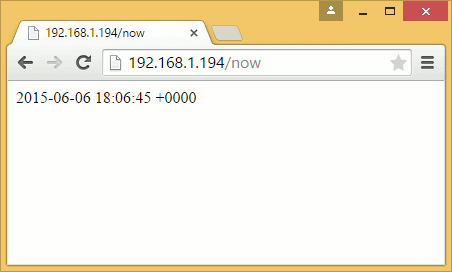
Try opening the /now page again:
Deploying a Simple Rails App
We finally get to the part most of you are here for: deploying a Rails application.
We will be using a sample application for this tutorial. This is be a very simple app, but the concepts that you will learn from it should prepare you for deploying your own app.
Setting up the PostgreSQL Database
Our first step in deploying would be to set up our database user.
In other tutorials, this part also includes setting the user’s password. But since we have our PostgreSQL database on the same machine as the application server, there is a simpler alternative, one that we can see in the database’s authentication settings:
root@server:~# cat /etc/postgresql/9.3/main/pg_hba.conf
# PostgreSQL Client Authentication Configuration File
# ===================================================
#

...

# Database administrative login by Unix domain socket
local   all             postgres                                peer

# TYPE  DATABASE        USER            ADDRESS                 METHOD

# "local" is for Unix domain socket connections only
local   all             all                                     peer
# IPv4 local connections:
host    all             all             127.0.0.1/32            md5
# IPv6 local connections:
host    all             all             ::1/128                 md5
The last two non-comment lines enable md5 password authentication, something that we expect in a database server. On the other hand, the first 2 lines enable “Peer” authentication (aka “Ident” authentication in older versions).
In peer authentication, the database checks the current user name if it is a database user name and allows access as that database user if it does. This authentication does not require a password for login.
One might think that this passwordless scheme is insecure, but it’s not that much different from password authentication - in the latter you’ll still have the database credentials visible to the current user. And since peer authentication is local-only, remote attacks on your database will require the attacker to have access to the user (if they do get access to your user, you’ve got worse problems than them getting into your database).
We first need to login as the postgres (which is essentially the top-level admin user) user in order for us to create our deploy database user.
root@server:~# su -l postgres
postgres@server:~$ createuser --superuser deploy
postgres@server:~$ createdb deploy
postgres@server:~$ exit
logout
root@server:~#
As the command implies, createuser --superuser creates our deploy user which is a superuser so it has rights to create databases.
Creating the deploy database is optional; we added it because many applications assume that a database with the same name as the user exists when using peer authentication.
We log out in the end to go back to our root user.
Initial Setup for the Rails App
Check out the whole app. It’s a public repository so we don’t need credentials yet. Later on we’ll discuss how to check out code from private repositories.
deploy@server:~/sinatra_demo$ cd ~
deploy@server:~$ git clone https://github.com/bryanbibat/sample_app.git
Next up is installing the required gems.
deploy@server:~$ cd sample_app
deploy@server:~/sample_app$ bundle install --without development test --deployment
The first option is self-explanatory: it doesn’t install gems in the development and test groups of the Gemfile.
The other option, --deployment, is slightly more complicated; it installs the gems for deployment i.e. production servers. More specifically:
- It requires a
Gemfile.lockto determine the exact versions of the gems to be installed - Install all the gems to the
vendor/bundlefolder. This is similar to how we installed the Sinatra-related gems to thebundlefolder.
Production Server Settings
Some application settings are intentionally left out of the code. Database credentials are one; other people should not be able to log in to your production database just because you put your app in a public git repository.
Other tutorials suggest storing sensitive information as environment variables to be accessed by your app on run time. Here we will be using a simpler file-based approach.
Start by creating a config/database.yml file:
deploy@server:~/sample_app$ nano config/database.yml
1 production:
2   adapter: postgresql
3   database: sample_app
4   username: deploy
5   encoding: unicode
6   pool: 5
Note the lack of password thanks to peer authentication.
Also note that the code has a config/database.yml.example file and the /config/database.yml entry in .gitignore. In development, the developer can just copy over the example template to config/database.yml and tweak its settings all the while being ignored by git on later commits.
Apart from database credentials, the only other production-specific settings we need to set in our simple app is the session secret. First generate a secret key using the rake secret task:
deploy@server:~/sample_app$ RAILS_ENV=production bin/rake secret
(We prefixed the environment variable RAILS_ENV=production to tell Rails to run the task in production. Otherwise, the task will run it in development and will throw an error due to missing development gems.)
Take note of the generated random key then overwrite the secrets.yml file:
deploy@server:~/sample_app$ nano config/secrets.yml
Remove everything and replace it with:
1 production:
2   secret_key_base: [rake secret output]
Setup Production Database and Precompile Assets
Now for the final steps in the deploy user side.
Create and migrate the database using rake db:create and rake db:migrate under production:
deploy@server:~/sample_app$ RAILS_ENV=production bin/rake db:create
deploy@server:~/sample_app$ RAILS_ENV=production bin/rake db:migrate
== 20150520151700 CreatePosts: migrating ======================================
-- create_table(:posts)
   -> 0.0241s
== 20150520151700 CreatePosts: migrated (0.0243s) =============================
Then precompile the assets using rake assets:precompile:
deploy@server:~/sample_app$ RAILS_ENV=production bin/rake assets:precompile
As mentioned in the previous chapter, this (Sprockets / Asset Pipeline) is the only reason why we installed NodeJS. If you don’t want to install NodeJS on your server, you can always add the therubyracer gem to your Gemfile. We will come back to this in a bit.
nginx/Passenger Settings
With the app fully set up, it’s time to change our nginx settings to serve the new app.
Create a new server configuration file:
root@server:~# nano /etc/nginx/sites-available/rails
1 server {
2         listen 80 default_server;
3         listen [::]:80 default_server;
4         server_name _;
5
6         root /home/deploy/sample_app/public;
7         passenger_enabled on;
8 }
Yes, it’s almost the same as our Sinatra app’s settings. This is because there’s really no difference from the two apps: both are Rack applications with public as the static file folder.
Next, replace the Sinatra entry from sites-enabled with our new Rails entry and restart the server.
root@server:~# cd /etc/nginx/
root@server:/etc/nginx# rm sites-enabled/sinatra
root@server:/etc/nginx# ln -s ../sites-available/rails sites-enabled/rails
root@server:/etc/nginx# service nginx restart
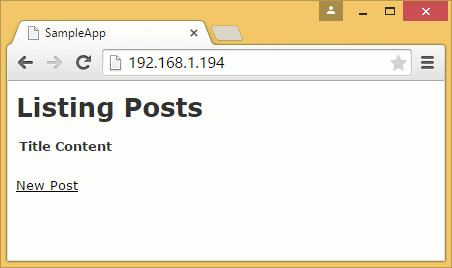
Open your browser and you should now see…
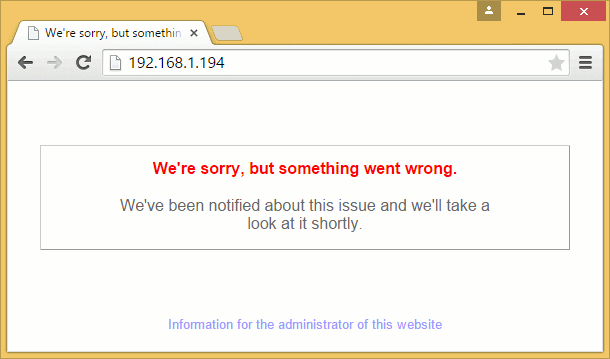
…an error.
What happened here? Let’s find out by opening the logs:
root@server:/etc/nginx# nano /var/log/nginx/error.log
Scroll up a bit to see the offending line:
[ 2015-06-03 21:00:05.9892 20894/7fbd7aab9700 App/Implementation.cpp:287 ]: Could not spawn process \
for application /home/deploy/sample_app: An error occured while starting up the preloader.
  Error ID: 3a7a406e
  Error details saved to: /tmp/passenger-error-eOEdZA.html
  Message from application: Could not find a JavaScript runtime. See https://github.com/rails/execjs\
 for a list of available runtimes. (ExecJS::RuntimeUnavailable)
  /home/deploy/sample_app/vendor/bundle/ruby/2.2.0/gems/execjs-2.5.2/lib/execjs/runtimes.rb:48:in `a\
utodetect'
It couldn’t find a JavaScript runtime. Which is weird since we installed NodeJS system-wide.
Thankfully the solution is simple.
root@server:/etc/nginx# nano nginx.conf
1 env PATH;
2 user www-data;
3 worker_processes 4;
By default, nginx removes almost all environment variables and this prevented ExecJS from finding the location of the NodeJS executable. Adding the env directive with the PATH environment variable allowed ExecJS to see the executable at /usr/bin/nginx.
Restart the server after adding the env line.
root@server:/etc/nginx# service nginx restart
You can now access the app in the browser.