Installing Phusion Passenger
In this chapter, we will install nginx (pronounced “engine x”) with Phusion Passenger, our combined web and application server. We will also install Ruby 2.2 which will be used by Passenger when spinning up the application workers.
Most of the commands here require sudo; we’ll work around this minor annoyance by switching to the root user.
user@server:~$ sudo -i
This will switch you from the user user to the root user and move you to root’s home directory, “/home/”.
Installing Ruby
First we’ll install Ruby. We’d like to install it via apt-get again, but unfortunately the version in Ubuntu’s official repository for Ubuntu 14.04 is out of date (version 1.9.3p484 as of this writing).
Good thing we can add third party repositories to APT, in this case Brightbox’s PPA in Launchpad.
root@server:~# apt-add-repository ppa:brightbox/ruby-ng -y
After adding the repository, we must retrieve the new package list by running apt-get update again:
root@server:~# apt-get update
Now to finally install install Ruby 2.2. We also include the development libraries since they are required when installing gems.
root@server:~# apt-get install ruby2.2 ruby2.2-dev -y
The Ruby installed via the Brightbox repository is separate from the one available in Ubuntu’s official repository but it will not be in conflict even when installed side by side: upon installation, the default behavior of both ruby and gem commands will be changed to use the newly installed version. If you want to use the old version, you can call the appropriate executable directly (e.g. /usr/bin/ruby1.9.1) or you can install and use the ruby-switch package also available in the Brightbox repository.
Our last step in installing Ruby would be to install Bundler:
root@server:~# gem install bundler --no-ri --no-rdoc
Why not use RVM, rbenv, etc?
Many tutorials out there will tell you to install a version manager of some sort for your production server. However, when you think about it, you’ll realize that you don’t need them.
Let’s look at the main reasons why we use version managers:
- System Rubies (e.g. from Ubuntu’s repos) are usually out of date and we need version managers to install them - not a problem since we can install the latest version of Ruby via 3rd party repositories like Brightbox’s
-
You can install gems without having root access - after installing Bundler, you can install gems on a non-root path via the
--pathoption and you run them usingbundle exec. And since binstubs are enabled by default in Rails 4, you don’t need to type outbundle execmuch anymore. - Version managers allow us to switch between Ruby versions - you usually only have one app installed per server in a production setting.
Version managers have their drawbacks; we just don’t realize them because they’re necessary in development environments:
- Compiling Ruby takes time - we have no choice in development but to let our version manager compile and install a new Ruby to our home directory, and this can take around 10 minutes for a decent computer. This may be a non-issue if you have a top of the line server, but I still doubt it can beat the less than one minute installation speed of installing via APT.
-
Path craziness - version managers use different techniques to modify the
PATHto avoid conflicting with the system Ruby and to auto-switch between versions. As mentioned above, we don’t need to switch Ruby versions and these techniques can complicate certain aspects of your system e.g. job scheduling viacron.
Of course, we cannot ignore that there are still use cases for version managers so we’ll cover how to use them in a latter chapter.
Installing nginx + Passenger
Next up is installing our web and application servers, nginx and Passenger. Like Ruby 2.2, we will install both using apt, but this time the setup will be slightly different.
The Passenger package is not hosted in Launchpad, so instead of apt-add-repository we’ll have to manually get the authentication key and add the URL of the Passenger repository.
Run the following command to get the key which will be used by apt to authenticate the Passenger packages:
root@server:~# apt-key adv --keyserver keyserver.ubuntu.com --recv-keys 561F9B9CAC40B2F7
Let’s then add the APT repository for Ubuntu 14.04 to apt’s sources:
root@server:~# echo "deb https://oss-binaries.phusionpassenger.com/apt/passenger trusty main" \
  > /etc/apt/sources.list.d/passenger.list
(We split the command to multiple lines with a backslash (\) because the command is too long for this document.)
The echo command outputs a string to the console, which is then redirected by > to the new file /etc/apt/sources.list.d/passenger.list. You can do the same by creating and editing the file via a text editor (e.g. nano /etc/apt/sources.list.d/passenger.list) but the command above has fewer steps.
And finally we install nginx and Passenger:
root@server:~# apt-get update

...

root@server:~# apt-get install nginx-extras passenger -y
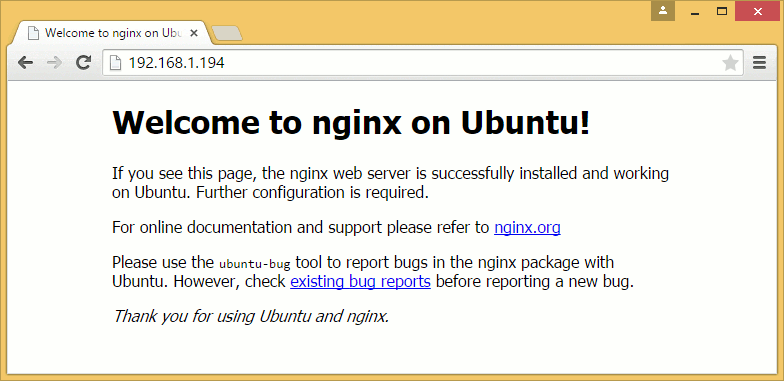
By now you should be able to verify that nginx is installed by opening your browser to the URL of your virtual machine (or http://localhost:8080/ if you’re using NAT and port forwarding).
Why not install via passenger gem (i.e. passenger-install-nginx-module)?
Same reason as why we’re installing Ruby via packages: it’s just more convenient especially for beginners. Installing via the passenger gem requires more commands to be entered, has a 2-5 minute compilation step, and needs more configuration to make it start automatically on startup. Not to mention that you have to go through all that again when you upgrade Passenger.
Install via packages whenever possible. Your SysAds will thank you for that later.
Wrap-up: Enable Passenger
Open nginx’s configuration file /etc/nginx/nginx.conf with your favorite editor e.g.
root@server:~# nano /etc/nginx/nginx.conf
You should see the default settings for nginx:
user www-data;
worker_processes 4;
pid /run/nginx.pid;

events {
        worker_connections 768;
        # multi_accept on;
}

http {

        ##
        # Basic Settings
        ##

        sendfile on;
        tcp_nopush on;
...
Note that most of the file is enclosed in a http { } block. This is how settings are applied in nginx - each setting is a line ending in a semicolon, settings are applied to the current enclosing block, and certain blocks can be nested within each other.
To enable Passenger within nginx, we must uncomment the following lines inside the http block.
        ##
        # Phusion Passenger config
        ##
        # Uncomment it if you installed passenger or passenger-enterprise
        ##

        # passenger_root /usr/lib/ruby/vendor_ruby/phusion_passenger/locations.ini;
        # passenger_ruby /usr/bin/passenger_free_ruby;
        passenger_root /usr/lib/ruby/vendor_ruby/phusion_passenger/locations.ini;
        passenger_ruby /usr/bin/passenger_free_ruby;
We don’t need to modify Ruby’s path because /usr/bin/passenger_free_ruby is practically an alias for the default Ruby i.e. the one we installed from Brightbox earlier.
Now let’s restart the server to apply the changes. As pointed out above, had we installed nginx and Passenger manually, we would have had to also manually install System V init scripts that will start the server for us on server startup. But since we installed via packages, the init script is already installed for us at /etc/init.d/nginx. We can call service to run this script and restart the server for us:
root@server:~# service nginx restart
Open the server again through your browser. You should see the same page again if you properly set the passenger_root and passenger_ruby settings and not an error page.
We will discuss how to configure the other blocks in the next chapter.