Creating a Foundation
To make controlling your hip muscles easier, it helps to understand that muscles, in order to contract, need a foundation to work from.
Since we’re mainly working with the hip joint we are either moving the pelvis relative to the thigh bone or vice versa.
- If moving the pelvis relative to the thigh then we can think of the thigh as the foundation. To make it more stable we can stabilize the knee, ankle and foot.
- If moving the leg relative to the pelvis then we can think of the pelvis as the foundation. To make it more stable we can stabilize the waist and ribcage.
In either case, we stabilize a part of the body by “locking” bones together at the joints (stabilizing the joint.)
When the thigh and lower leg are locked together, this combined unit has more mass than just the thigh. Likewise, locking the pelvis to the ribcage makes a more massive (and thus more stable) foundation than just the pelvis.
To stabilize a joint and lock together the bones that the joint connects, we add tension.
- To stabilize the knee we can use the muscles at the front of the thigh (the quadriceps) against the muscles that work on the back of the knee (the hamstrings and gastrocnemius/calf muscle.)
- To stabilize the waist we can use the abs (particularly rectus abdominus) against the spinal erectors (particularly those that work on the region of the spine from the sacrum up to the middle of the thoracic spine.)
We can also create stability by activating a muscle against gravity.
- As an example, in boat pose (in the next section), when we lean the torso back, we stabilize the mid section by activating the abs. In this case the abs are working against the weight of the ribcage and head to stabilize the waist.
The set of exercises below teaches you how to actively flex your hips (using the hip flexors) but also the difference between having the thighs move relative to the pelvis and vice versa.
Boat Pose Hip Flexing Variation
Boat pose (actually a variation of it) is one of the exercises that I use to teach “active” hip flexion. And I teach active hip flexion to make forward bending poses (hamstring stretches) easier.
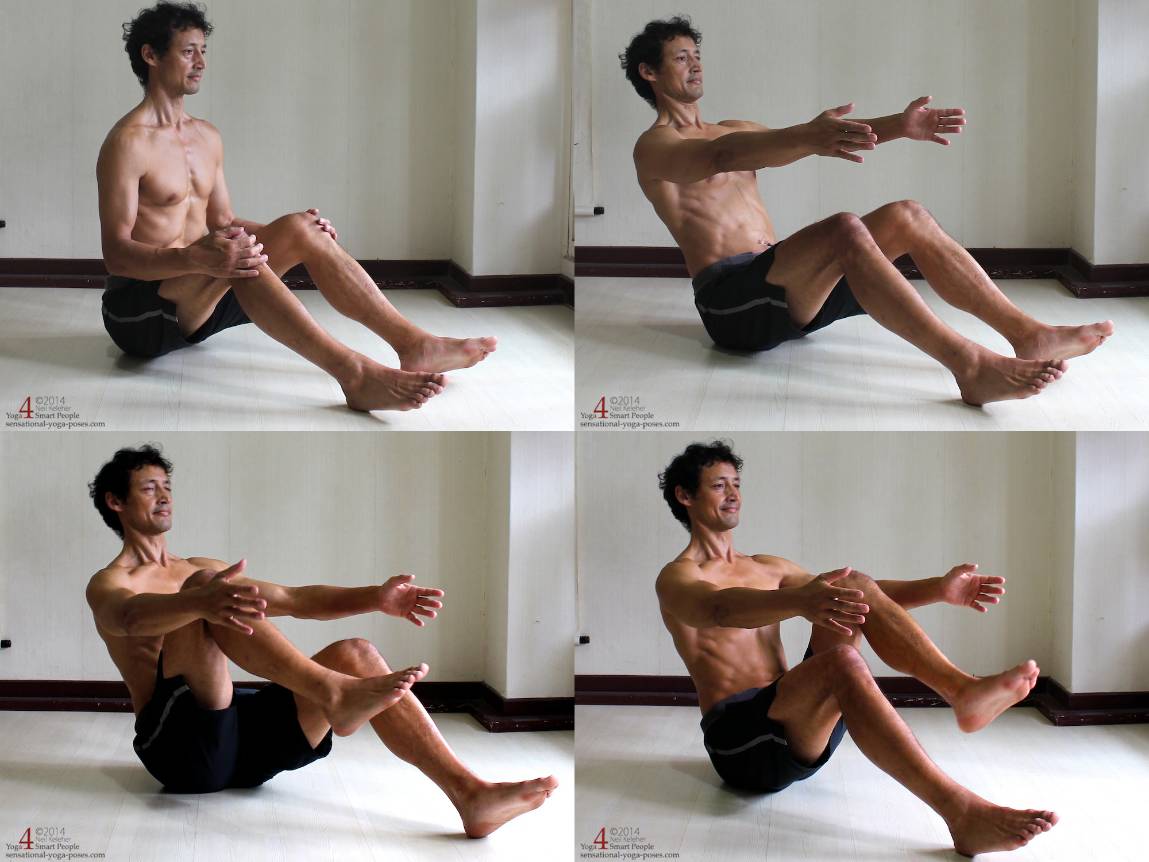
1. Sitting upright with chest lifted.
2. Leaning Back with arms reaching forward and heels on the floor.
3. Lifting one thigh.
4. Lifting the other thigh.
The first action is to lift and open the chest, moving it away from the front of the pelvis. Then lean the torso rearwards while keeping the heels on the floor.
The exercise is to pull up on one thigh so the heel comes off of the floor. Then lower the leg.
- Focus on creating an upward (and slightly rearward) pull on the thigh and/or knee that you are lifting.
- Keep the chest lifted as you lift the leg and lower it.
Repeat 4 to 8 times for each leg, changing sides each time.
Sit upright to rest and recover.
Boat Pose Hip Flexing 2
After resting for a few moments, a progression from the previous exercise is to straighten the knee after lifting the thigh.
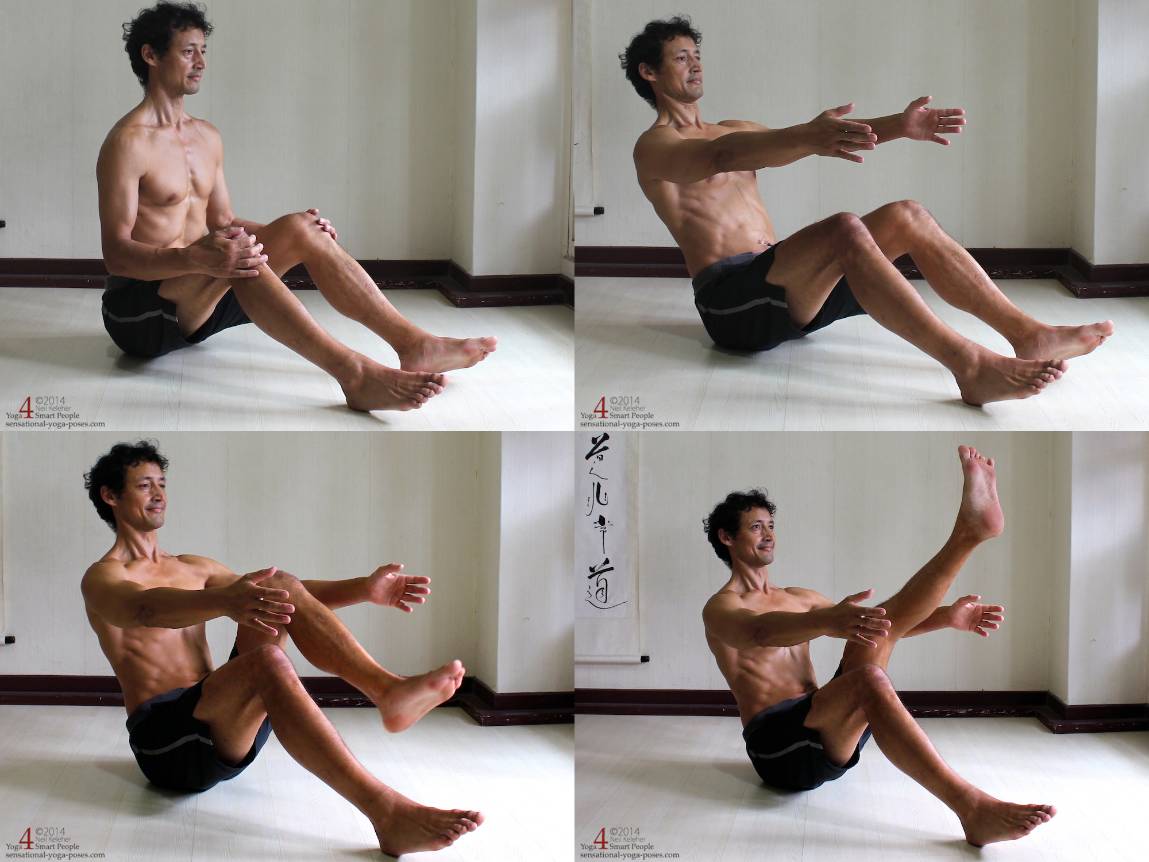
1. Sitting upright with chest lifted.
2. Leaning Back with arms reaching forward and heels on the floor.
3. Lifting one thigh.
4. Straightening the knee (thigh doesn’t move.)
As in the previous exercise, lift the chest, reach the arms forwards, then lean the torso back, keeping the heels on the floor.
Lift one thigh, then straighten the knee. Pause and then bend the knee and lower the heel to the floor.
- When straightening the knee try to maintain the position of the thigh.
- After straightening the knee try to “squeeze” the knee from all four sides.
Repeat 4 to 8 times for each leg, switching legs each time.
Seated Leg Lifts
The next progression is to do a similiar action with the torso upright.
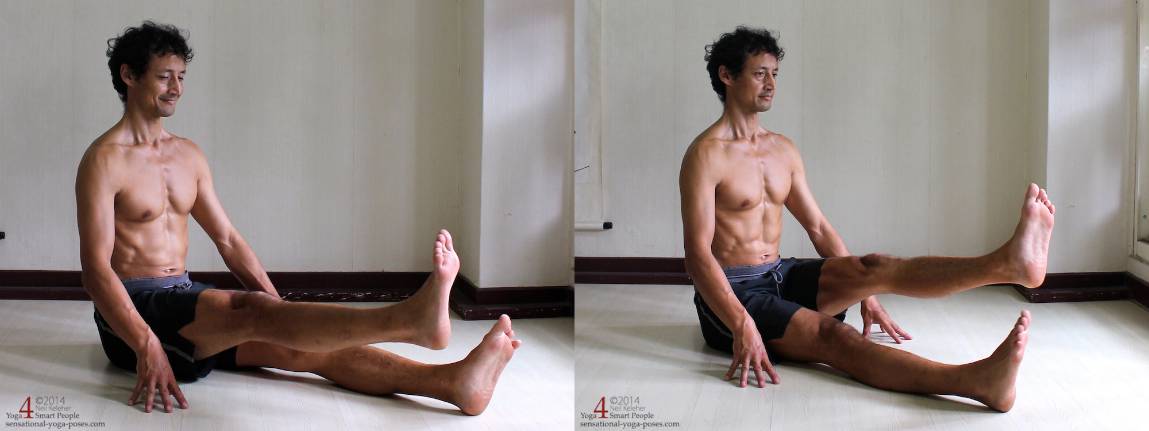
Sitting upright, lifting one thigh at a time with knee straight.
Sit upright with the knees straight and feet hip width apart. Position the hands on the floor beside your thighs.
Lift the chest (and lengthen your neck.) Keeping the knee straight pull up on one thigh. Then lower and relax. Repeat 4 to 8 times with each leg.
Rest for a few moments and then do the same action while slightly bent forwards.
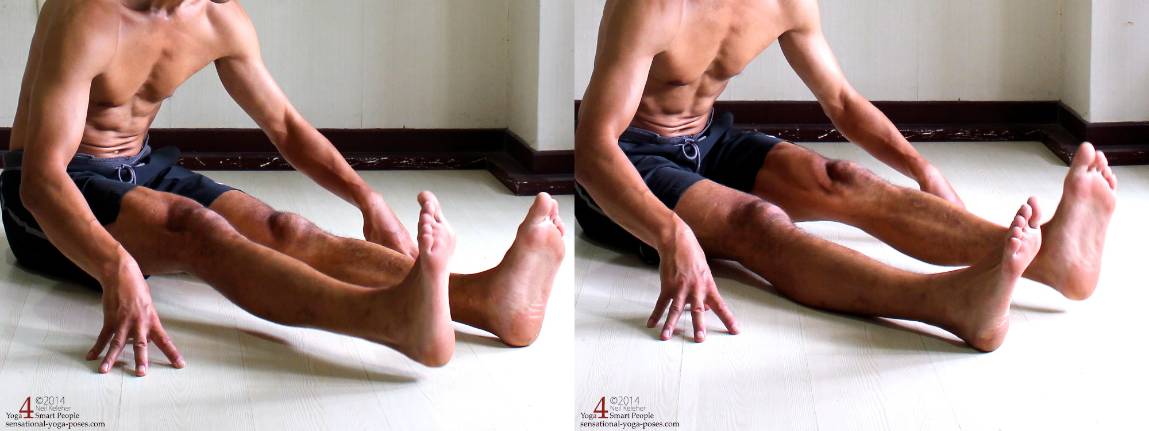
Slightly bent forwards, pulling upwards on one thigh at a time with knee straight.
If you can’t lift a leg while bent forwards, don’t worry . The more important action is that of creating an upward pull on the thigh.
Note if you do lift your leg you may find your thigh cramps. I’ve included some tips later in the hip control guide to help better recruit the hip muscles so as to help avoid cramping (which is possibly a result of not enough muscles being recuited to do the action.)
Reversing the Foundation (Seated Hip Flexion)
In the next exercise the idea is to create an upward pull on both thighs at the same time with the hands off of the floor and the arms reaching forwards.
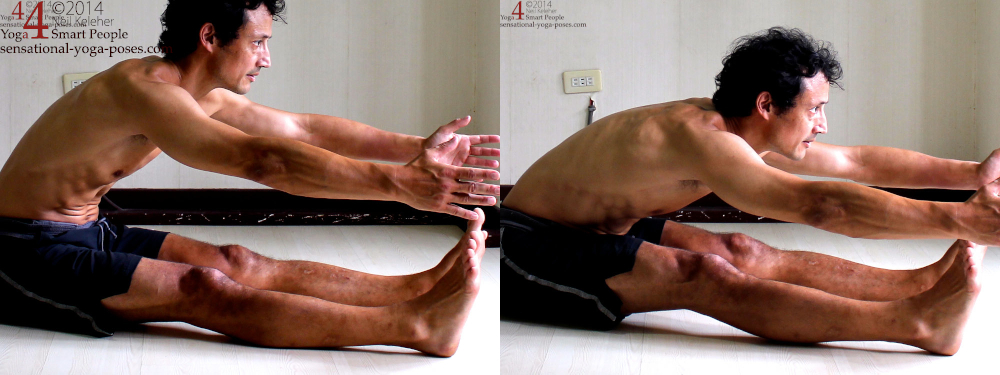
Bending forwards, lifting both thighs with knees straight and hands lifted.
Of course you won’t be able to lift the legs up (since you have no leverage.) However the feeling of the exercise is the same, with both legs being pulled up at the same time.
The previous set of exercises is mainly to teach the action of “lifting the thighs.”
Here the goal is to use the lifting action of the thighs to tilt the pelvis forwards relative to the thighs.
With feet hip width apart and knees straight bend forwards. Try to move your chest away from your pubic bone and make the sides of your neck feel long. Take your hands off of the floor and reach them forwards.
Recreate the feeling of lifting the thigh off of the floor with the knee straight but work on lifting both legs at the same time.
It’s not so much that you are trying to lift the legs. Instead think about using the same muscles that you used to lift the leg to tilt the pelvis forwards.
Table Top As a Counterpose for Hip Flexing
To rest and recover from the above set of exercises I like to use table top pose.
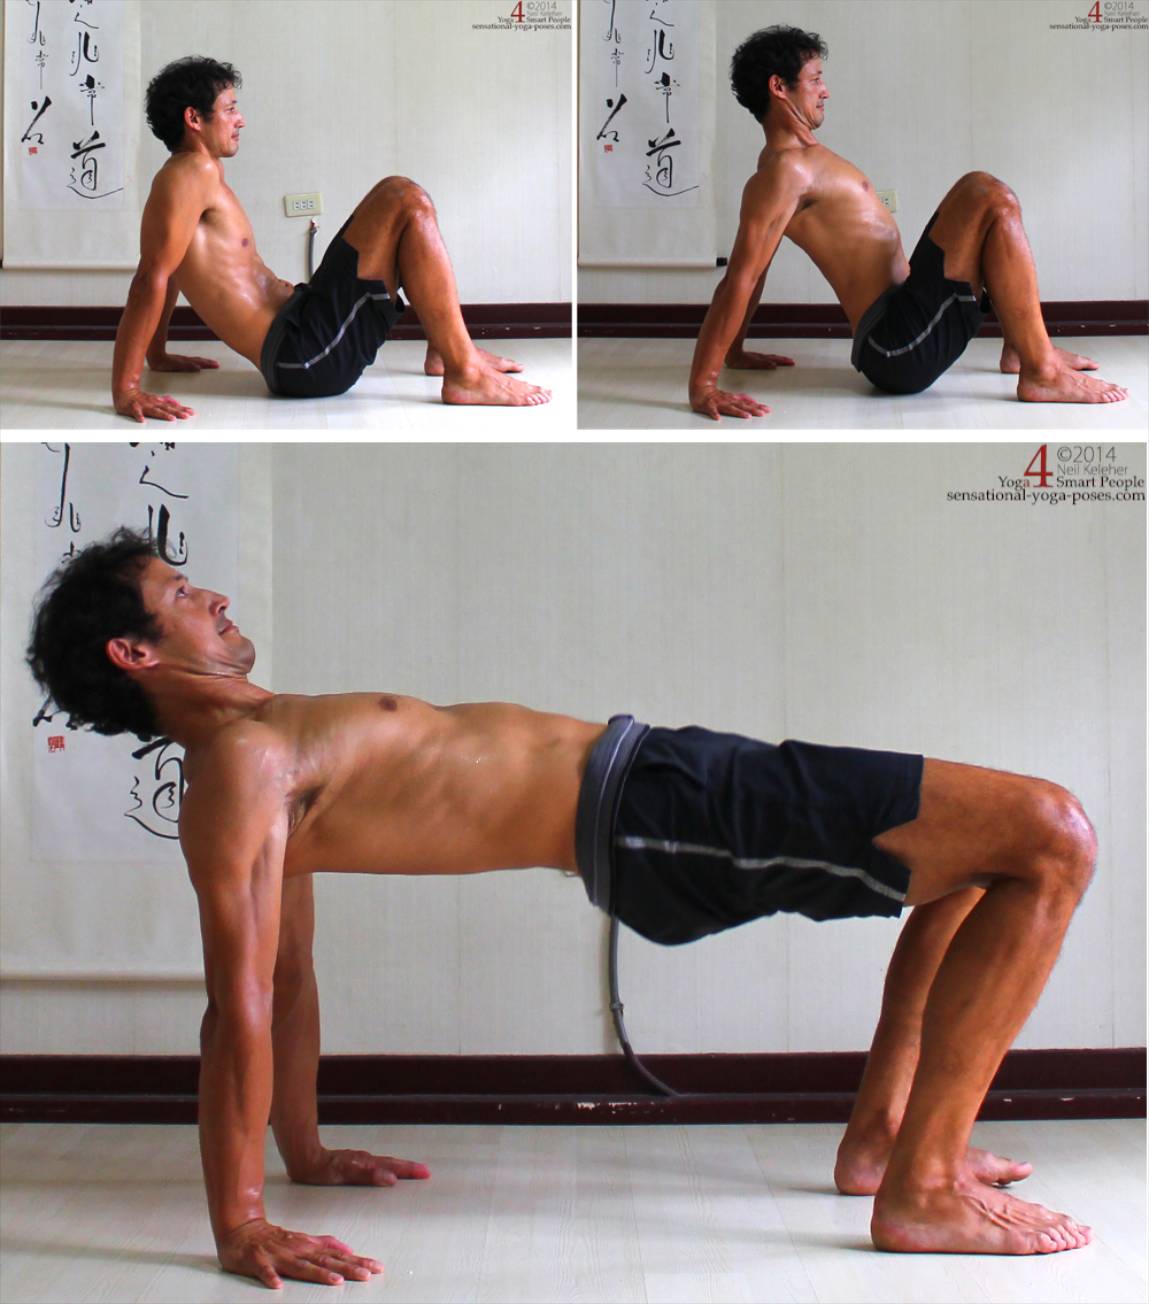
Table Top With Shoulders relaxed then active and then with hips lifted.
One way that I teach this exercise is to have my students gradually press their feet down and then relax (without lifting their pelvis.)
With respect to the arms in this pose, as you lift your pelvis higher:
- move your shoulder blades towards each other. Then
- squeeze your elbows. And additionally
- press the tips of your fingers into the floor so that your fingers feel strong.
Or, start with these arm actions before you lift your pelvis. In that case:
- first press your finger tips into the floor, then
- squeeze your elbows (make them feel strong) then
- move your shoulders back and then
- open the chest. Then
- lift your hips by pressing your feet down into the floor.
In this latter case you are stabilizing the arms so that the muscles of the shoulder have a foundation from which to help move the chest forwards relative to the shoulders. (This is when the pelvis is still on the floor.)
As you lift your pelvis higher and your torso becomes more horizontal you can focus on reaching your chest rearwards, towards your chin.