Dance of Shiva Posture Suggestions
I’ve actually done dance of shiva sitting. My intent was to make it easier to focus on the arms. However the feeling afterwards wasn’t so good. So I’d recommend doing it while standing when possible.
The standing position that I would recommend is with feet about hip or shoulder width apart, feet parallel and knees slightly bent. Point your knees in the same direction as your toes.
If you want to work on strengthening your legs while doing dance of shiva, then stand with feet wide, and turned out with knees bent. This is like the kung fu horse stance except the feet are turned out.
So that your spine feels long, move your ribs away from your pelvis so that your waist feels long. Then move your ears away from your shoulders so that your neck feels long. Or if you can feel the vertebrae of your spine, then focus on the vertebrae themselves and making your spinal column feel long.
Make Your Neck Feel Long
Since dance of shiva is a shoulder exercise (as well as an exercise for the arms and wrists) you may find it helpful, especially in the beginning to focus on keeping your neck long. To make the neck long pull the back of your head back and up and pull your chin in and down, towards your chest. Rather than trying to hold this position you can lengthen your neck with your inhale and relax it while exhaling.
If you inhale through your nose, you can pull your head back and up and at the same time pull the base of your nose back (as if your inhale pulls your head back and up.) The release this as you exhale. To combine the neck movements with the dance of shiva arm movements you can try the following:
- Inhale and lengthen your neck and do the movement at the same time.
- Then exhale and relax your neck while keeping the arms still.
Standing Positions, One Leg
One you are comfortable with the movements, you can then practice the movements while standing on one leg at a time.
If you have difficulty standing on one leg, you can work at gradually shifting more and more weight onto the standing leg. This “gradual shifting” can happen over the course of several practices, or over the course of weeks and months.
Stabilizing the Standing Leg
When standing on one leg, with the other foot resting on the floor, stability is important.
Prior to shifting to one foot, standing with weight even on both feet. With feet parallel and shoulder width apart, and knees slightly bent, rotate your shins inwards or outwards so that the base of your little toe and the base of your big toe press down with equal pressure. Rather than pressing the front of your foot into the floor with muscular effort, lean forwards slightly so that the fronts of your feet press into the floor. Once you are used to “activating your feet” you can then stand with feet turned out slightly.
With feet active and knees slightly bent, shift your weight onto one foot. To make it easier to keep your foot active, slowly shift your weight onto one foot.
How do you know when your weight is completely on one foot? The other leg will relax. You may also notice your the outer and inner edge of your standing foot having equal pressure. In addition, if all of your weight is on your left foot you should be able to lift your right foot without any movement of your upper body.
If standing on one foot and balancing is too challenging, work towards it gradually. Instead of having all of your weight on your standing foot, have most of your weight on it, or as much as is comfortable.
Gradually work towards having all of your weight on your standing foot and keeping it there for the duration of your set. Then return to center (weight even on both feet) to rest before doing the other side. Or rest by doing the other side.
To make standing on one leg easier, keep your spine, and particularly your waist, long. Lift (and open) your ribs at front and back to lengthen your waist. You can then “squeeze” your side glutes and inner thighs to make your standing leg more stable. You may also find it helpful to tighten the back of the standing leg thigh as well as the buttocks.
Reference Leg
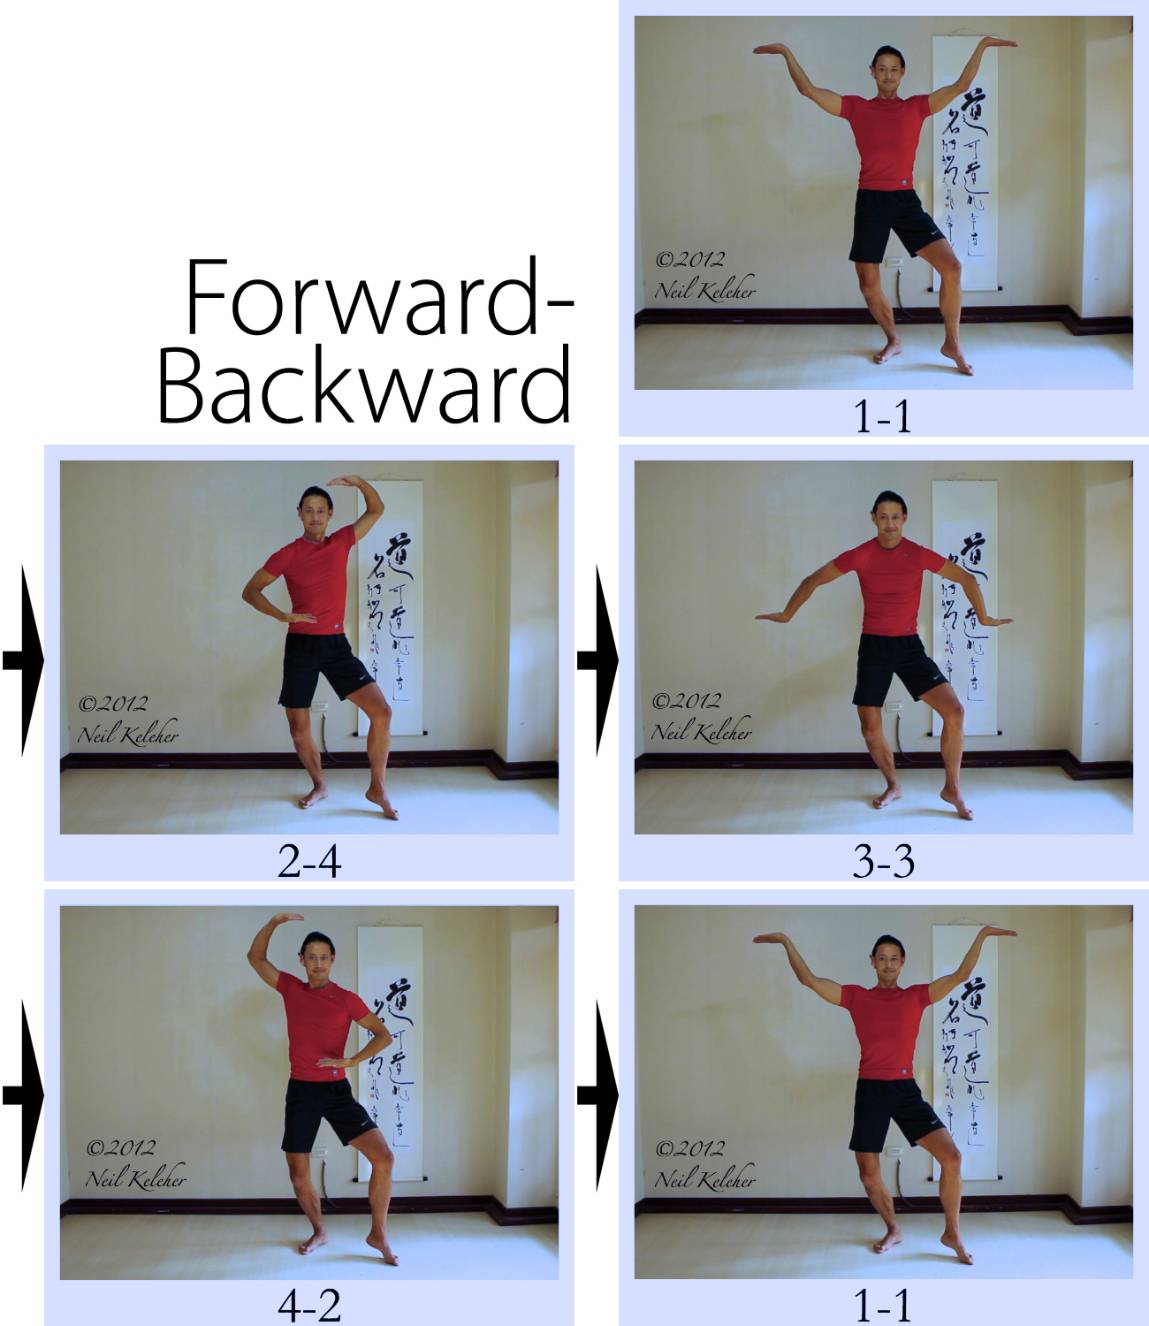
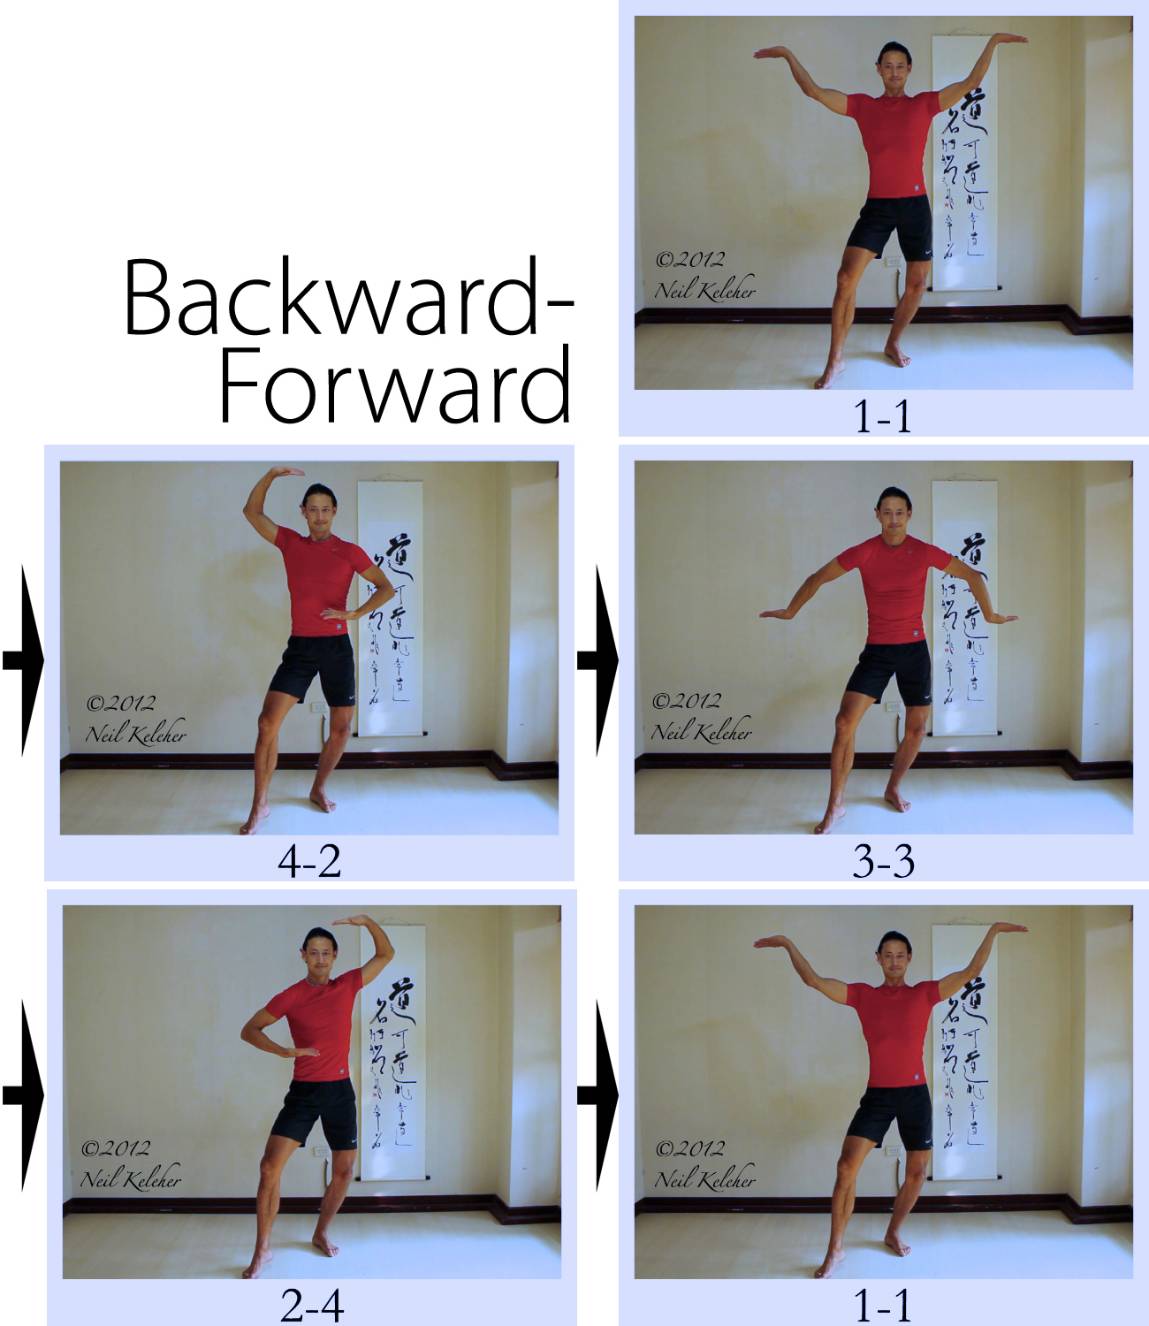
When standing on one leg, you do each set twice, once on one leg and then on the other. For each set, the standing leg is the reference leg. Doing the F-B move, first stand on the left leg. The left arm does the F move while the right arm does the B move. For symmetry, when standing on the right leg, the right arm does the F move. The movements are “mirrored,” however the set as a whole is called the F-B set.
Warm ups for the Arms
Because the arm positions can be challenging for the shoulders here are some warm up positions you can use. You can try these before you practice. Try to move in and out of each warm up position slowly and smoothly. Hold each for about 5 seconds and then rest. Repeat if desired.
- For position 1-1, warm up with the arms out to the sides, palms up. Roll the arms backwards/externally so that the pinky side of the hand moves up and back.
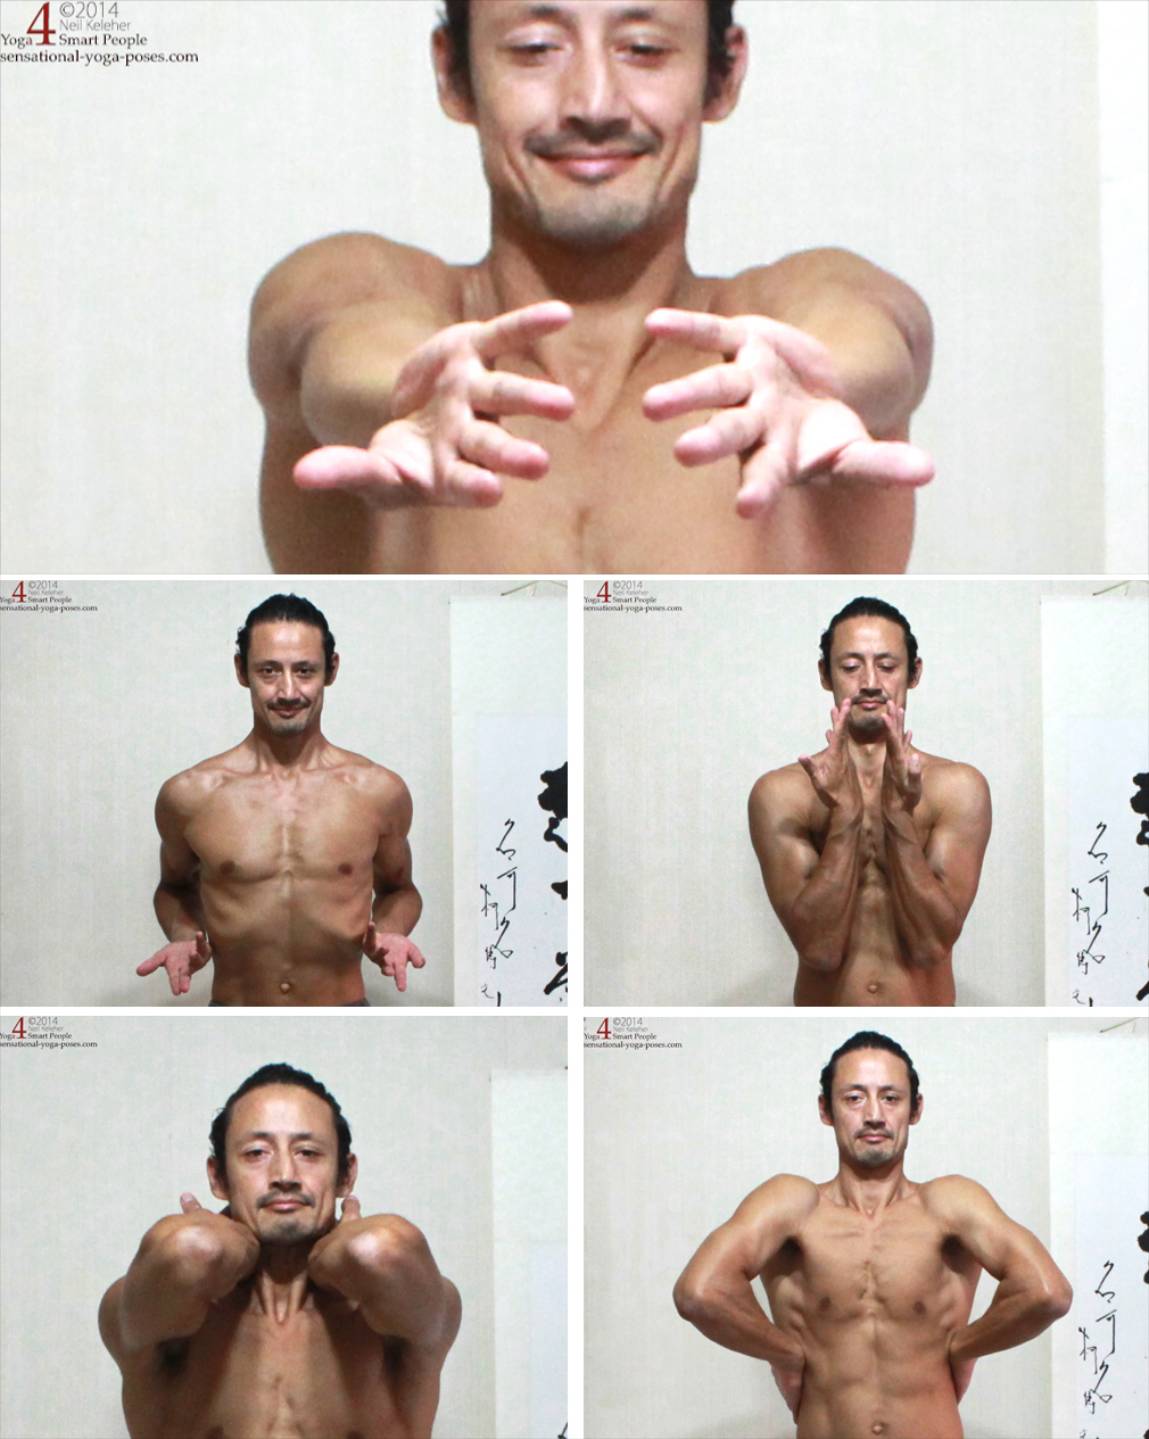
- For position 2-2, warm up with the hands in front of the waist, palms up, and roll the forearms forwards so that the pinky side of the hand moves up and the thumb side down
- For position 3-3 warm up with the arms out to the sides, elbows and palms up. Roll the arms forwards/internally so that the pinky side of the hand moves downwards and backwards.
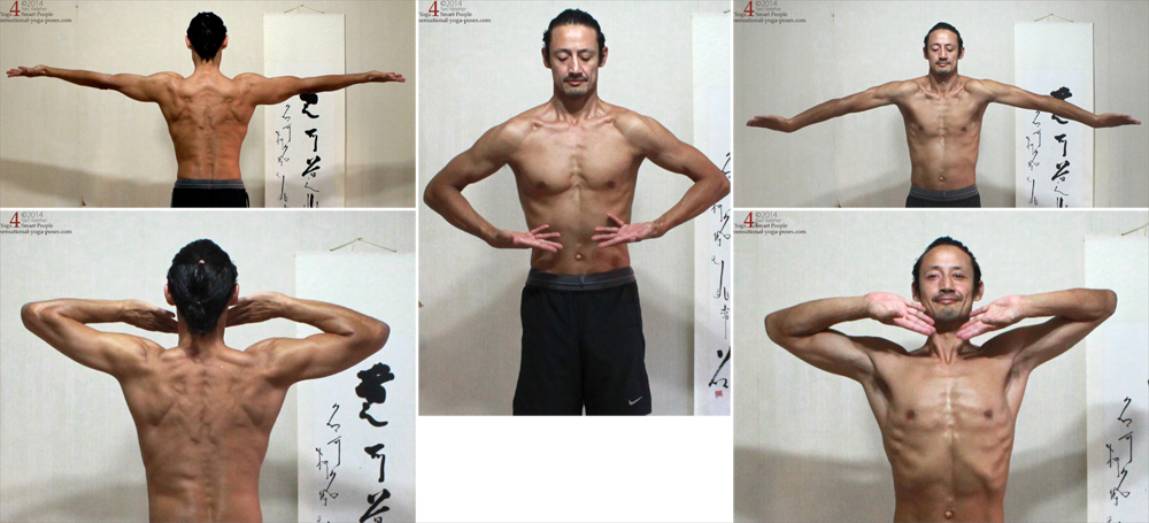
- For position 4-4 stand with the hands at the sides of the neck, palms up, elbows out to the sides. (Last two pictures above.) Try to roll the forearms so that the pinky side of the hand moves downwards.
- For position a-a, warm up by reaching the arms straight ahead, elbows and palms both facing outwards. Roll the arms inwards so that pinky side of each hand moves inwards.
- For position b-b, the first warm up position is with arms by the sides, elbows bent and pointing backwards. Starting with palms up, roll forearms outwards so that pinky side of hand moves upwards towards armpits. (Top left two pictures.)
- For b-b, the second warm up position is with forearms vertical in front of body. With palms facing towards you, roll forearms so that pinky side of each hand rolls towards you and palms face outwards.
- For the 3rd position b-b warm up, elbows forward with back of hands at sides of neck and palms downwards. Roll forearms so that pinky side of hand moves outwards, away from the neck.
- For the fourth warm up for position b-b, place backs of hands at sides of waist with elbows outwards. Move elbows forwards and inwards, towards each other.

- For position c-c, warm up by reaching arms forwards, palms up and elbows down. Roll the forearms so that pinky side of hands moves upwards.
- For d-d, arms by your sides, roll fronts of arms outwards.
- Next for d-d, arms by your sides, roll fronts of arms inwards.
- Next warm up for d-d, arms over head, palms outwards, roll arms so that pinky side of each hand move towards each other.
- Next for d-d, arms over head, palms face backwards and elbows forwards, roll arms so that pinky side of each hand moves backwards.
- Finally for d-d, arms out to sides, elbows face back, palms forwards, move arms backwards.