Operating Systems
An operating system is software that manages computer hardware and software resources for computer applications. For example Microsoft Windows could be the operating system that will allow the browser application Firefox to run on our desktop computer.
Variations on the Linux operating system are the most popular on our Raspberry Pi. Often they are designed to work in different ways depending on the function of the computer.
Linux is a computer operating system that is can be distributed as free and open-source software. The defining component of Linux is the Linux kernel, an operating system kernel first released on 5 October 1991 by Linus Torvalds.
Linux was originally developed as a free operating system for Intel x86-based personal computers. It has since been made available to a huge range of computer hardware platforms and is one of the most popular operating systems on servers, mainframe computers and supercomputers. Linux also runs on embedded systems, which are devices whose operating system is typically built into the firmware and is highly tailored to the system; this includes mobile phones, tablet computers, network routers, facility automation controls, televisions and video game consoles. Android, the most widely used operating system for tablets and smart-phones, is built on top of the Linux kernel. In our case we will be using a version of Linux that is assembled to run on the ARM CPU architecture used in the Raspberry Pi.
The development of Linux is one of the most prominent examples of free and open-source software collaboration. Typically, Linux is packaged in a form known as a Linux ‘distribution’, for both desktop and server use. Popular mainstream Linux distributions include Debian, Ubuntu and the commercial Red Hat Enterprise Linux. Linux distributions include the Linux kernel, supporting utilities and libraries and usually a large amount of application software to carry out the distribution’s intended use.
A distribution intended to run as a server may omit all graphical desktop environments from the standard install, and instead include other software to set up and operate a solution stack such as LAMP (Linux, Apache, MySQL and PHP). Because Linux is freely re-distributable, anyone may create a distribution for any intended use.
Welcome to Raspbian
The Raspbian Linux distribution is based on Debian Linux. At the time of writing there have been three different editions published. ‘Wheezy’, ‘Jessie’ and ‘Stretch’. Debian is a widely used Linux distribution that allows Raspbian users to leverage a huge quantity of community based experience in using and configuring software. The Wheezy edition is the earlier of the three and was the stock edition from the inception of the Raspberry Pi till the end of 2015. From that point Jessie was the default distribution until mid 2017 when Stretch took over.
Downloading
The best place to source the latest version of the Raspbian Operating System is to go to the raspberrypi.org page; http://www.raspberrypi.org/downloads/. We will download the ‘Lite’ version (which doesn’t use a desktop GUI). If you’ve never used a command line environment, then good news! You’re about to enter the World of ‘real’ computer users :-).
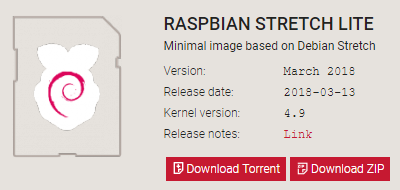
You can download via bit torrent or directly as a zip file, but whatever the method you should eventually be left with an ‘img’ file for Raspbian.
To ensure that the projects we work on can be used with either the B+, B2 or B3 models we need to make sure that the version of Raspbian we download is from 2015-01-13 or later. Earlier downloads will not support the more modern CPU of the B2 or B3. To support the newer CPU of the B3+ (and all the previous CPUs) we will need a version of Raspbian from 2018-03-13 or later.
We should always try to download our image files from the authoritative source!
Writing the Operating System image to the SD Card
Once we have an image file we need to get it onto our SD card.
We will work through an example using Windows 7 but the process should be very similar for other operating systems as we will be using the excellent open source software Etcher which is available for Windows, Linux and macOS.
Download and install Etcher and start it up.
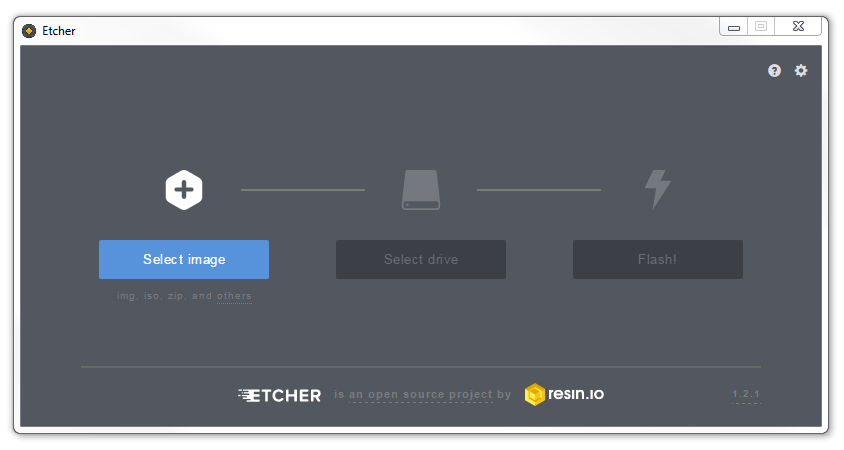
Select the img file that you want to install.
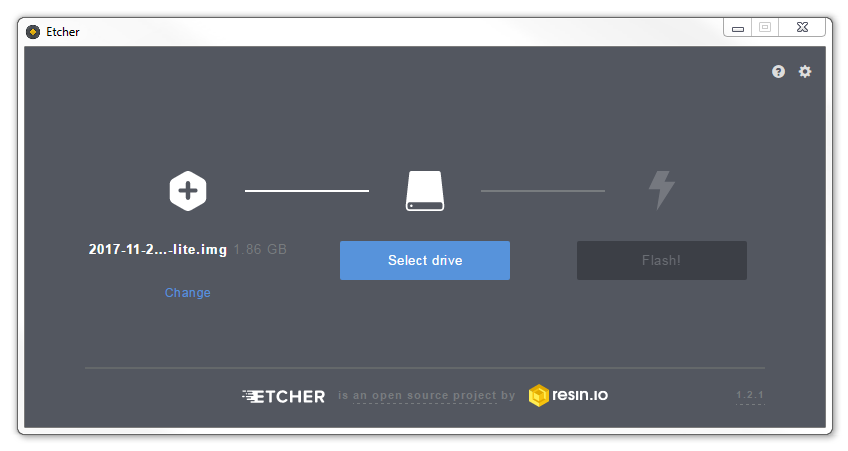
You will need an SD card reader capable of accepting your MicroSD card (you may require an adapter or have a reader built into your desktop or laptop). Place the card in the reader and you should see Etcher automatically select it for writing (Etcher is very good at presenting options for installing that are only SD cards).
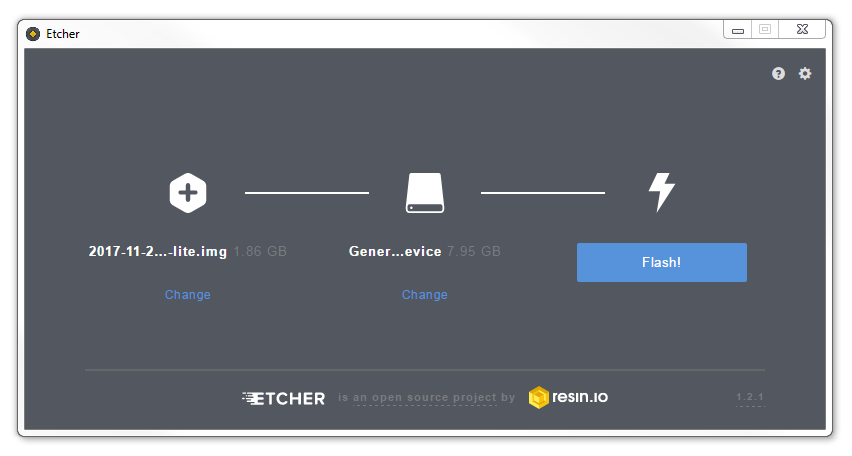
Then click on ‘Flash!’ to burn the card.
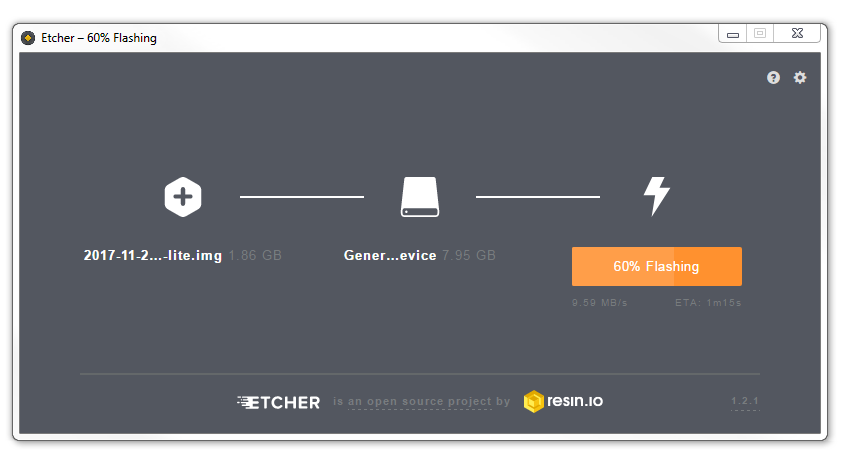
Etcher will write the image to the SD card. The time taken can vary a little, but it should only take about 3-4 minutes with a class 10 SD card.
Once written, Etcher will validate the write process (this can be disabled if desired).
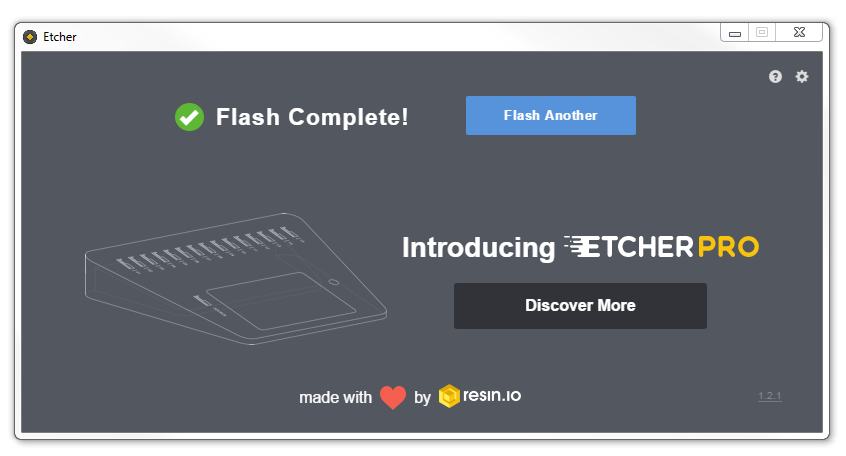
When the process is finished Etcher will automatically unmount the SD card.
Enabling Secure Shell Access
One of the awesome things when learning to use a Raspberry Pi comes when you begin to access it remotely from another computer. This is a bit of an ‘Ah Ha!’ moment for some people as they begin to appreciate just how networks and the Internet is built. We are going to enable and use remote access via what is called ‘SSH’. We’ll start using it later in the book, but for now we can take the opportunity to enable it for later use. We do this by creating a file called ‘ssh’ on our freshly written SD card. Then, when the Pi then boots up it sees the file and automatically knows to enable SSH.
SSH used to be enabled by default, but doing so presents a potential security concern, so it has been disabled by default as of the end of 2016. In our case it’s a feature that we want to use.
Eject the card from the computer and then re-insert it. When the computer recognises the card, open it and right-click in the folder to create a new file. This can be a simple txt file so long as the file prefix is ‘ssh’. It doesn’t need to have anything in it, there just needs to be a file there.
Now we can unmount the SD card and eject it again.
Powering On
Insert the card into the slot on the Raspberry Pi and turn on the power.
You will see a range of information scrolling up the screen before eventually being presented with a login prompt.
The Command Line interface
Because we have installed the ‘Lite’ version of Raspbian, when we first boot up, the process should automatically re-size the root file system to make full use of the space available on your SD card. If this isn’t the case, the facility to do it can be accessed from the Raspberry Pi configuration tool (raspi-config) that we will look at in a moment.
Once the reboot is complete (if it occurs) you will be presented with the console prompt to log on;
The default username and password is:
Username: pi
Password: raspberry
Enter the username and password.
Congratulations, you have a working Raspberry Pi and are ready to start getting into the thick of things!
Firstly we’ll do a bit of house keeping.
Raspberry Pi Software Configuration Tool
We will use the Raspberry Pi Software Configuration Tool to change the locale and keyboard configuration to suit us. This can be done by running the following command;
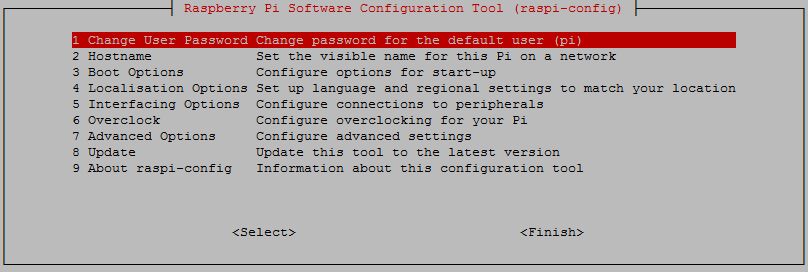
Use the up and down arrow keys to move the highlighted section to the selection you want to make then press tab to highlight the <Select> option (or <Finish> if you’ve finished).
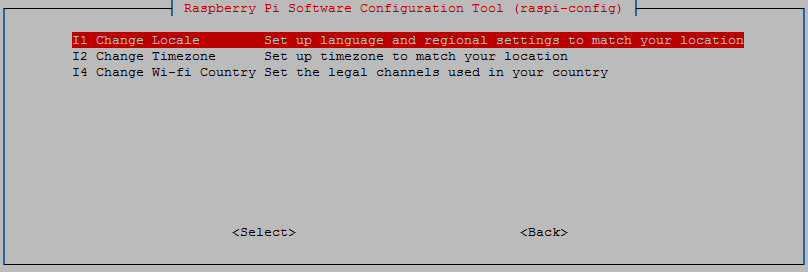
Lets change the settings for our operating system to reflect our location for the purposes of having the correct time, language and WiFi regulations. These can all be located via selection ‘4 Localisation Options’ on the main menu.
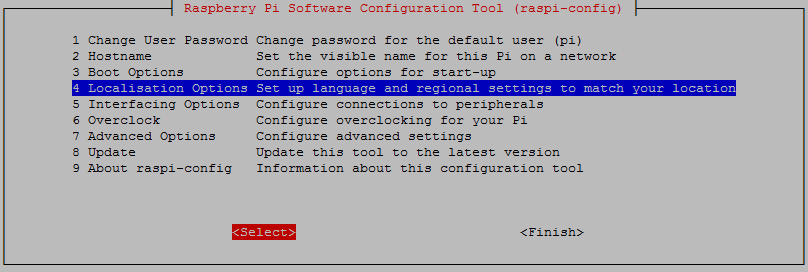
Select this and work through any changes that are required for your installation based on geography.
Once you exit out of the raspi-config menu system, if you have made a few changes, there is a probability that you will be asked if you want to re-boot the Pi. That’s a pretty good idea.
Once the reboot is complete you will be presented with the console prompt to log on again;
Software Updates
After configuring our Pi we’ll want to make sure that we have the latest software for our system. This is a useful thing to do as it allows any additional improvements to the software we will be using to be enhanced or security of the operating system to be improved. This is probably a good time to mention that we will need to have an Internet connection available.
Type in the following line which will find the latest lists of available software;
You should see a list of text scroll up while the Pi is downloading the latest information.
Then we want to upgrade our software to latest versions from those lists using;
The Pi should tell you the lists of packages that it has identified as suitable for an upgrade along with the amount of data that will be downloaded and the space that will be used on the system. It will then ask you to confirm that you want to go ahead. Tell it ‘Y’ and we will see another list of details as it heads off downloading software and installing it.