Chapter 5 | Additions to Our Houses

Scope of This Chapter

Cool beans! In the previous chapter, we were able to create a pure CSS koala image using React components. Moreover, we constructed these components in a hierarchy which have frequently referenced in this book as The React Village Design (village design for short).
Now, we should have a taste at the big picture of how component hierarchy works in React.
With this as the foundation, we are now ready to dive deeper into React components.
…
Up to this point, we have just been creating simple React components that just have JSX, the JavaScript syntax extension used to specify what we want our component to render as. In other words, we have just been creating React components that ultimately render as HTML.
Here’s an example:
1 class Head extends React.Component {
2   render() {
3     return (
4       <div className="head"></div>
5     )
6   }
7 }
In the code above, the Head component is ultimately render as:
<div class="head"></div>
By adding CSS magic, we can create a shape.

In a sense, we have encapsulated HTML into a React component.
While this is certainly cool, there’s a lot more awesome stuff that we can encapsulate into a component.
In the broadest sense, we can also encapsulate the following into React components:
Data
Methods
Lifecycles
The scope of this chapter is to cover those additional things which we can encapsulate in a component.
To be more precise, we will be covering the following:
Handling props
Managing state
Specifying event handlers
Using inline JSX styling
Implementing conditional rendering of components
Setting up lifecycle hooks
Data

Before we distinguish between ways to encapsulate data into a component, let’s do some explaining of what data is.
Data Types
In all programming languages, there are data types. In ES6 (the 6th edition of the standardized language used in JavaScript), there are seven JavaScript data types.
The seven data types are:
Boolean
Null
Undefined
Number
String
Symbol (new in ES6)
Object
Mozilla Developer Network has a good explanation for all of these here. I am only going to be focusing on Boolean, Number, String, and Object.
Boolean simply represents true or false. Depending if something is true or false, we can do something for that condition.
Usage in Plain English: “If sale is true, then buy. Else if sale is false, don’t buy.”
Usage in JavaScript:
1 //let is same as var for ES6
2 let flag = true
3 if(flag === false) {
4   //do something here
5 }
Without getting technical, a number is pretty straightforward. Unlike other programming languages, there aren’t distinguished into separate types (i.e. double and int).
1 let whole = 2
2 let decimal = 2.2
String refers to textual data.
1 let string = "Hey there! I am a string!"
Object refers to a collection of properties.
1 let myHonda = {color: 'red', wheels: 4}
2 //myHonda.color will equal 'red'
These data types can be encapsulated into React components. They can be encapsulated in two different ways, props and state.
Props
Let’s create an example of a component that renders two buttons and has props that specify the text for each button. As we create this example, we will explain how props work.
To start, go ahead and fork the pen from the previous chapter.
Go ahead and remove all the HTML, CSS, and JS so that we have an empty project.
Name it React for Visual Learners: Props.
First, let’s add the following HTML that will be the target for our component:
<div id="buttons"></div>
Next, let’s define a new React component called Buttons with some JSX that will render two buttons with breaks in between:
 1 class Buttons extends React.Component {
 2   render() {
 3     return (
 4       <div>
 5         <button></button>
 6         <br/><br/>
 7         <button></button>
 8       </div>
 9     )
10   }
11 }
Now, we can add the ReactDOM magic to inject our Buttons component into the HTML target:
1 //"inject" to DOM
2 ReactDOM.render(
3   <Buttons/>,
4   document.getElementById('buttons')
5 );
So far, this is nothing new to what we have done in previous chapters. We have a component that is just ultimately rendering HTML.
We are going to want to add some data in our example to specify the text for each button. This will be data of type string.
As previously mentioned, we can use props to do this.
It’s tempting to want to move on and complete this example since it is so trivial. However, we have to question that isn’t as obvious as it is often portrayed.
What in the world is props?
Props is short for properties.
If I asked you to look in the mirror and list some of your properties, one of them could be that you have brown hair.
Props is used to encapsulate properties of a certain data type.
If we had a component called Person, we could encapsulate a property called hair with a string value of brown.
So, how and where do we define props? We can define props like so:
<Person hair={"brown"}/>
In the code above, the hair prop is specified and assigned a value of brown within the component.
We assign a value just like any variable except we always wrap it around {…}.
This component could be found nested within another component within the hierarchy:
1 class People extends React.Component {
2   render() {
3     return (
4      <div>
5        <Person hair="brown" />
6      </div>
7     )
8   }
9 }
Or, it could be found in ReactDOM.render like so:
1 ReactDOM.render(
2   <Person hair="brown" />,
3   document.getElementById('person')
4 );
In short, anywhere the component is used, props could be specified.
If we wanted to do more props, we could so like this:
<Person name={"Mike"} hair={"brown"} age={17}/>
Again, props are forms of data. Therefore, we can use any of the data types we previously listed. In this example, we have string, string, and int (from left to right).
In order to use (or inject) our props in a component, we do the following:
 1 class Person extends React.Component {
 2   render() {
 3     return (
 4      <div>
 5        <h1>Person Info</h1>
 6        <ul>
 7          <li>{this.props.name}</li>
 8          <li>{this.props.hair}</li>
 9          <li>{this.props.age}</li>
10        </ul>
11      </div>
12     )
13   }
14 }
We use the syntax of {this.props.insert prop name here} in order to use our prop.
If we had <li>{this.props.name}</li>, it will ultimately render as the following:
<li>Mike</li>
This example would then display the following:
](https://cdn-images-1.medium.com/max/1600/1*KNFPFaqQDsna3Grm9eo-XA.png)
Let’s take some time to explain why we have this.props.___.
We previously had an object as an example data type. There was this example:
1 let myHonda = {color: 'red', wheels: 4}
The object is myHonda which has properties, color and wheels.
If we wanted to access the value of wheels, we would do the following:
let four = myHonda.wheels //four now equals 4
It’s the same thing when we want to access the value of a property encapsulated in a React component.
That explains the props.___ part of it.
However, what’s up with this in this.props.___?
this is a keyword used to specify that we are accessing a prop defined in context of the current component.
Think of it this way, props are like items in a cabinet that belong to a component.

If I was asking someone to grab chips from a cabinet that was within my reach, I would say: “Hey man, can you grab me chips from this cabinet?” As I put my hand on the cabinet
If I was asking someone to grab chips from a cabinet out of my reach, I would say: “Hey man, can you grab me chips from that cabinet?” As I point at the cabinet
In a similar way, this in this.props.__* is like saying: “Hey React, I’d like to use *this* property I have defined called __.” *this notes that it is within our reach to access in our component class.
Someone might then ask: “If our props are defined outside of the class like so:
<Example name={"Example 1"}/>
How come I can say from within a class ‘this prop is in my reach’?”
The answer is that React does behind the scenes work. Even though props are defined within a class, it goes ahead and automatically says: “Hey class! They defined some props for this component. Please let them be within the reach of this class so they can use this.props___ and make things easier.”
Putting it all together, we have something like this:
1 <li>{this.props.name}</li>
2 //<Person name={"Mike"}/>
…
While the code for defining the props may look simple, it can be a bit difficult to conceptualize in your mind.
Why do I say that?
Well, when we define a component, we see code like this:
1 class Example extends React.Component {
2   render() {
3     return (
4      <div>
5        <button>Example Button</button>
6      </div>
7     )
8   }
9 }
We think of this as a definition of our component.
We then use our component elsewhere like so:
<Example/>
With props, the definition is in the use of the component:
<Example name={"Example 1"}/>
The use of the prop(s) is in the definition of the component:
1 class Example extends React.Component {
2   render() {
3     return (
4      <div>
5        <button>{this.props.name}</button>
6      </div>
7     )
8   }
9 }
This can be confusing as is often just assumed without explanation.
So, how do we understand this?
Let’s look at this example:
1 ReactDOM.render(
2   <Example name={"Example 1"}/>
3   document.getElementById('app')
4 );
What happens here when we use the Example component?
Eventually, ReactDOM will go “I see they’ve put this Example component here. What exactly do they want to render when using this component? Let’s check what they specified to return in the render function. Oh, I see they’ve specified the following:
1 class Example extends React.Component {
2   render() {
3     return (
4      <div>
5        <button>{this.props.name}</button>
6      </div>
7     )
8   }
9 }
Cool! I’ll render this to the DOM!”
My point is this. While you might think of the flow of the process as:
>Defining the component
Using the component
It’s helpful to think of the flow of the process as:
Defining the component
Using the component
ReactDOM goes about checking what was defined in the component
ReactDOM is the bridge to render the component to the DOM
Why is this important?
It is important because what is defined in a component is ultimately checked after the component is used.
Therefore, we can think of the ReactDOM.render process where props are in use as: “I see they’ve put this Example component here. What exactly do they want to render when using this component? Let’s check what they specified to return in the render function. Oh, I see they’ve specified the following:
1 class Example extends React.Component {
2   render() {
3     return (
4      <div>
5        <button>{this.props.name}</button>
6      </div>
7     )
8   }
9 }
Hmm… it’s saying there is a prop called name specified in this component they render. Let me see:
<Example name={"Example 1"}/>
Ah! Yup, there is a prop here called name with a value of “Example 1”.
Cool! I’ll render this to the DOM as:
<button>Example 1</button>
Awesome, all set!
Hopefully, working through the thought process like this is helpful.
…
Ok. I know we went off on some tangents, but let’s finally return to the pen we had started off with that had two buttons with text controlled by props.
So far, we have the following in our JavaScript:
 1 class Buttons extends React.Component {
 2   render() {
 3     return (
 4       <div>
 5         <button></button>
 6         <br/><br/>
 7         <button></button>
 8       </div>
 9     )
10   }
11 }
12 ReactDOM.render(
13   <Buttons/>,
14   document.getElementById('buttons')
15 );
Next, let’s define the props like so. We will have a prop that will contain the text for each button accordingly:
1 ReactDOM.render(
2   <Buttons text1="Button 1" text2="Button 2"/>,
3   document.getElementById('buttons')
4 );
Then, we can use the props in the component definition:
 1 class Buttons extends React.Component {
 2   render() {
 3     return (
 4       <div>
 5         <button>{this.props.text1}</button>
 6         <br/><br/>
 7         <button>{this.props.text2}</button>
 8       </div>
 9     )
10   }
11 }
We now have a completed example where we have two buttons containing different texts.
React for the Visual Learner: Props
…
Two more things to also mention about props as we wrap up.
The first thing I wanted to mention is that we can use props in a component hierarchy. I will simply provide an example so you can see this in action:
React for the Visual Learner: Props Hierarchy
The next thing I wanted to mention is important for distinguishing using props for data and using state.
Props is only used for data that is never updated.
For instance, let’s say we had a button component that ultimately displays this:
Let’s also say that this text is never changed dynamically. Meaning, it will always say “Take the tour” no matter what event we input as a user.
Since it never changes, we would use the text for this button as a prop.
State
No, state is not part of the village design where I’m going to come here and add to component inception and say a state is a collection of villages.
State is another way encapsulate data in a React component.
Unlike props, state is used for data that is updated.
For example, think of a weather app.

The current temperature is going to change over time. Therefore, we use state to control the data instead of props.
Also, state controls data fully within the class where the component is defined. The meaning of this will make more sense when we see the code.
Go ahead and fork the previous pen of our two buttons.
Name it React for Visual Learners: State.
Don’t erase the code as we will just make some edits from our props implementation.
First, go ahead and replace all the this.props.* with *this.state..
 1 class Buttons extends React.Component {
 2   render() {
 3     return (
 4       <div>
 5         <button>{this.state.text1}</button>
 6         <br/><br/>
 7         <button>{this.state.text2}</button>
 8       </div>
 9     )
10   }
11 }
Nothing too difficult here.
Next, remove the defined props when the Button component is used:
1 ReactDOM.render(
2   <Buttons/>,
3   document.getElementById('buttons')
4 );
Again, the data in a state implementation will be defined within the component class.
Now, we have to add an object called state within our class:
 1 class Buttons extends React.Component {
 2   state = {text1: "Button 1", text2: "Button 2"};
 3
 4   render() {
 5     return (
 6       <div>
 7         <button>{this.state.text1}</button>
 8         <br/><br/>
 9         <button>{this.state.text2}</button>
10       </div>
11     )
12   }
13 }
state is an object that contains the data that we want to encapsulate in our component.
This is why we were able to start off by switching wherever there was a this.props.* with *this.state..
{this.state.text1} and {this.state.text2} are being used in our render function within the class and will ultimately render as:
1 <button>Button 1</button>
2 <br/><br/>
3 <button>Button 2</button>
We should now have the same display as before except we are using state:

Now that we are using state, the data is being handled completely within the class.
Here, I want to interject with a possible question: “If state is an object defined within our class, it makes sense why I can do this.state.*. However, why does *this.props. work for our props if it is defined outside our class?”
As I noted in the section covering props, React does behind the scenes work so props defined where a component is used are accessible as if they were an object within our class.
For this reason, both props and state can be accessed using this.props and this.state accordingly even though the state is manually defined and controlled within a class.
…
Let me also answer a few more possible questions.
If you were curious, you might have asked: “Why can’t we just do props as an object in the class just like we do with state?”
Well, it won’t work. Props is a reserved thing in React. If you want proof, you can test out this code which won’t render the text:
 1 class Buttons extends React.Component {
 2   props = {text1: "Button 1", text2: "Button 2"};
 3
 4   render() {
 5     return (
 6       <div>
 7         <button>{this.props.text1}</button>
 8         <br/><br/>
 9         <button>{this.props.text2}</button>
10       </div>
11     )
12   }
13 }
The display of the code above is:

Going further in that line of thought, some of you may have also asked: “Ok. I get we can’t do props as an object since it is reserved, but what about something totally random?”
If we replace state with unicorn, everything will work. You can test this code out as well for proof:
 1 class Buttons extends React.Component {
 2   unicorn = {text1: "Button 1", text2: "Button 2"};
 3
 4   render() {
 5     return (
 6       <div>
 7         <button>{this.unicorn.text1}</button>
 8         <br/><br/>
 9         <button>{this.unicorn.text2}</button>
10       </div>
11     )
12   }
13 }
The above code displays as:
If that is the case, then why are we using state?
The simple answer is because it is the official, standard naming convention for React and we should stick to it.
More importantly, while there is no predefined magic for initializing and using state, there will be predefined magic for updating our state.
Therefore, it is not negotiable to use anything other than state if we are using data in a component that needs to be updated over time.
For that reason, our final JavaScript code for our pen should be:
React for the Visual Learner: State
…
At this point, our example should be working just like props except we are using state. Earlier, I mentioned that state is for data that can change dynamically. Let’s give that a shot as we discuss event handlers.
Event Handlers

Event handlers are methods that we can use to update the state of a component.
The event handlers will be defined within the class for our components.
Setup
First things first, go ahead and fork the previous pen where we controlled the text of our two buttons using state.
Name it React for Visual Learners: State w/ Event Handlers.
Setting Up Event Handlers
We will make some modifications to this app so that the button text will be a count of the number of clicks on each button.
Let’s start by changing up the names, values, and uses of the properties in our state:
 1 class Buttons extends React.Component {
 2   state = {clicks1: 0, clicks2: 0};
 3
 4   render() {
 5     return (
 6       <div>
 7         <button>{this.state.clicks1}</button>
 8         <br/><br/>
 9         <button>{this.state.clicks2}</button>
10       </div>
11     )
12   }
13 }
We should now see the following:

Next, let’s add the shell of two methods that will handle our events:
 1 class Buttons extends React.Component {
 2   state = {clicks1: 0, clicks2: 0};
 3   updateButton1() {
 4   }
 5
 6   updateButton2() {
 7   }
 8 render() {
 9     return (
10       <div>
11         <button>{this.state.clicks1}</button>
12         <br/><br/>
13         <button>{this.state.clicks2}</button>
14       </div>
15     )
16   }
17 }
18 //"inject" to DOM
19 ReactDOM.render(
20   <Buttons/>,
21   document.getElementById('buttons')
22 );
Within these methods, we are going to set a new state so we can increment clicks1 and clicks2 accordingly.
Next, we need to specify that we want these methods to be called on the event of a click:
 1 render() {
 2     return (
 3       <div>
 4         <button onClick={this.updateButton1}>                     {this.state.cl\
 5 icks1}
 6         </button>
 7         <br/><br/>
 8         <button onClick={this.updateButton2}>                     {this.state.cl\
 9 icks2}
10         </button>
11       </div>
12     )
13   }
We are essentially saying: “Just a heads up, I want to call a method in this class when the buttons are clicked.”
Note that we are using camelCase for our event (onClick not onclick).
The {this.updateButton1} isn’t anything too new since we have already discussed doing {this.props}* and *{this.state}.
However, we have to do a bit more work to get the this.___ part to work when it comes to event handling.
We have to do some extra work to confirm that the method is within our reach and that we can use this.
The reason for the extra work is that ES6 classes do not automatically confirm that the methods we want to handle an event and the element (i.e. button) where the method to handle an event is specified is within the same context.
There are a few different approaches to doing this. Each approach has tradeoffs of sacrificing readability for performance.
Because everything that we will do in this book is on a smaller scale than large, real-world applications, I prefer the most readable approach:
 1 render() {
 2     return (
 3       <div>
 4         <button onClick={this.updateButton1.bind(this)}>{this.state.clicks1}</bu\
 5 tton>
 6         <br/><br/>
 7         <button onClick={this.updateButton2.bind(this)}>{this.state.clicks2}</bu\
 8 tton>
 9       </div>
10     )
11   }
In the code above, the extra work is adding .bind(this). While it looks goofy and this is notoriously confusing in JavaScript, it simply is saying this: “Alright. On the click of this element (which is a button in our case), I want to call a method to handle the click that is within this class. Since you want confirmation that it is a method within this class, I’ve added .bind(this). Now, you have no choice but to allow me to access this method using this.
Completing the Methods to Update Our State on an Event
With this explanation out of the way, we just have to fill in the methods to update our state.
You might be thinking: “This is going to be so simple! I’ll just change the state like I would any object:”
1 updateButton1() {
2   this.state.clicks1++
3 }
4 updateButton2() {
5   this.state.clicks2++
6 }
Not so fast! This is React after all, did you expect it to be that easy!
With React, we do not modify our state directly. Instead, we modify our state using a predefined this.setState():
this.setState();
Let’s go ahead and update the state of clicks1 and clicks2 accordingly:
1 updateButton1() {
2   this.setState({clicks1: 1});
3 }
4 updateButton2() {
5   this.setState({clicks2: 1});
6 }
In the code above, you can think about it as if we are resetting our state. Inside this.setState(), we have object notation just like we have when we define our initial state.
In updateButton1, we are setting the value of clicks1 to 1. In updateButton2, we are setting the value of clicks2 to 1.
If we click each button once, we will now see the following:

Cool! However, we want this to be a counter app. Meaning, we want clicks1 and clicks2 to increment on each click and not just updated one time to a new value.
If we are writing updating the state using object notation within this.setState(), then how do we do this?
Could we just do this?
1 updateButton1() {
2   this.setState({clicks1: clicks1++});
3 }
4 updateButton2() {
5   this.setState({clicks2: clicks2++});
6 }
Nope, that won’t work.
The missing piece to this puzzle is the concept of prevState which is also some more React magic.
Within this.setState(), we are going to have a function:
 1  updateButton1() {
 2     this.setState(
 3       function(){
 4
 5       }
 6     );
 7   }
 8 updateButton2() {
 9     this.setState(
10       function(){
11
12       }
13     );
14   }
We can also pass in prevState to this function. prevState can be thought of as a copy of the state before it gets updated:
 1 updateButton1() {
 2     this.setState(
 3       function(prevState){
 4
 5       }
 6     );
 7   }
 8 updateButton2() {
 9     this.setState(
10       function(prevState){
11
12       }
13     );
14   }
Now, we can use prevState within this function as a normal object to update our state:
 1 updateButton1() {
 2     this.setState(function(prevState){
 3       prevState.clicks1 += 1
 4     });
 5   }
 6 updateButton2() {
 7     this.setState(function(prevState){
 8       prevState.clicks2 += 1
 9     });
10   }
This code is saying: “I want to take the previous state of clicks1 and clicks2 and do something with it. Let’s go ahead and increment them by 1.”
If clicks1 is currently 0 before being update, then prevState.clicks1 equals 0. If we do prevState.clicks1 += 1, then we have the same thing as the following:
1 function(prevState) {
2   0 + 1
3 }
What’s missing? We have to reassign this value to clicks1 (and clicks2).
Therefore, we can complete these methods with the following:
 1 updateButton1() {
 2     this.setState(function(prevState){
 3       clicks1: prevState.clicks1 += 1
 4     });
 5   }
 6 updateButton2() {
 7     this.setState(function(prevState){
 8       clicks2: prevState.clicks2 += 1
 9     });
10   }
We are still using object notation to reassign our state. However, we have to wrap it around a function that is passed prevState if we need what will soon be the previous state (can be thought of more as the current) in order to reassign the state.
With ES6, we can use a fat arrow function:
 1 updateButton1() {
 2     this.setState((prevState) => {
 3       clicks1: prevState.clicks1 += 1
 4     });
 5   }
 6 updateButton2() {
 7     this.setState((prevState) => {
 8       clicks2: prevState.clicks2 += 1
 9     });
10   }
Here’s a comparison between the syntax between a fat arrow function and a traditional function:
1 //traditional
2 function(*parameters go here*) {
3 }
4 //fat arrow
5 (*parameters go here*) => {
6 }
This makes things less wordy and is a nice feature of ES6 so let’s keep it with the fat arrow functions.
Now, we have functioning counters:
React for the Visual Learner: State w/ Event Handling
Perfect! While we only covered one type of event, we have learned the core principles behind event handlers in React.
Study Break

So far, we have covered the following in this chapter:
Handling props
Managing state
Specifying event handlers
We have yet to cover:
Using inline JSX styling
Implementing conditional rendering of components
Setting up lifecycle hooks
This chapter is already long enough despite just hitting the halfway mark. Feel free to take a break or save this for later.
Once you are ready, we are going to cover those last three topics.
Before that, I want to now switch over to using our Koala that we made with React in the previous chapter to help explain these concepts.
Switching to Our Koala

Initial Setup
Fork the React Koala pen we previously made.
| Name the new pen React for Visual Learners | 7 | Koala With Color Props. |
Adding Props
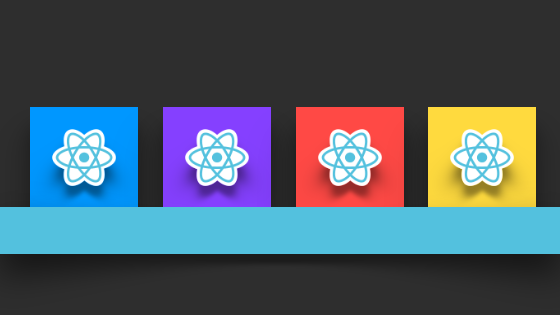
We talked about props being properties that never get updated. With our koala, we are going to add props to define the background colors (i.e. background: #000000) of our koala.
This begs the following question: “We can define styles in JavaScript?”
Yes, we will be able to override our CSS and have some styling done in React.
By doing this, we are going to learn about inline JSX styling. We will also get practice with how to use props in a component hierarchy.
Passing Down Props
Let’s start off by adding a constant (immutable) variable called colorsObject which will have a value of a JavaScript object. The JavaScript object will contain props for all the different colors used in our koala graphic:
1 //add this just above ReactDOM code
2 //props objects
3 const colorsObject = {
4   white: "#FFFFFF",
5   lightGray: "#A6BECF",
6   darkGray: "#819CAF",
7   brown: "#BE845F",
8   navy: "#27354A"
9 }
This object can be used in place of writing out all of our props within a component. Let’s add this object (like we would a prop) in our koala component which is used in the ReactDOM.render:
1 //"inject" to DOM
2 ReactDOM.render(
3   <Koala colors={colorsObject}/>,
4   document.getElementById('koala')
5 );
Alright. We have given our koala component props that contain all the colors used in our graphic. Now, we can pass these props down from our village to all the houses. The houses will then by able to use these color props for inline JSX styling.
How do we pass down our props?
Let’s answer this by working through the logic as we go from top to bottom of the component hierarchy.
If we needed to use the color props for our Koala component, how would we do that?
In the class for the Koala component, we could do:
1 this.props.colors.___
2 //___ can be filled in with any color
3 //we want to access from the colors object
Well, what is in our Koala component’s class? We have:
1 //village
2 class Koala extends React.Component {
3   render() {
4     return (
5       <Box/>
6     )
7   }
8 }
All the houses are children of the Box component as well. Remember, we define props wherever a component is being used.
Therefore, we can pass the colors props like so:
1 //village
2 class Koala extends React.Component {
3   render() {
4     return (
5       <Box colors={this.props.colors}/>
6     )
7   }
8 }
Note we do this.props.colors because we want to pass down all the colors.
Now, our Box component has the colors props defined and can be used within its class.
Let’s take a look at what we have in the Box component:
 1 //neighborhood
 2 class Box extends React.Component {
 3   render() {
 4     return (
 5      <div className="box">
 6        <EarLeft/>
 7        <EarRight/>
 8        <EyeLeft/>
 9        <EyeRight/>
10        <Head/>
11        <Nose/>
12        <HairLeft/>
13        <HairRight/>
14      </div>
15     )
16   }
17 }
In the Box component, we have some house components that are being used directly (Ears and Eyes) and some block components that are parents to house components (Head, Nose, Hair).
We want to pass all the colors until we get to our houses.
Therefore, the block components will be passed down the entire colors props. The house components will be passed down the specific color that they will need for styling (we will call this prop color instead of colors).
We can then do the following:
 1 //neighborhood
 2 class Box extends React.Component {
 3   render() {
 4     return (
 5      <div className="box">
 6        <EarLeft colors={this.props.colors}/>
 7        <EarRight colors={this.props.colors}/>
 8        <EyeLeft colors={this.props.colors}/>
 9        <EyeRight colors={this.props.colors}/>
10        <Head color={this.props.colors.lightGray}/>
11        <Nose color={this.props.colors.brown}/>
12        <HairLeft color={this.props.colors.lightGray}/>
13        <HairRight color={this.props.colors.lightGray}/>
14      </div>
15     )
16   }
17 }
Let’s pass down a color to the houses within the blocks. Then, we will demonstrate how to do inline JSX styling using our color prop for each house.
We can pass down a color to the houses within the blocks just like we did with the houses that were directly under the Box component.
Therefore, we will end up with the following code for our blocks:
 1 //blocks
 2 class EarLeft extends React.Component {
 3   render() {
 4     return (
 5       <div>
 6         <OuterEarLeft color={this.props.colors.lightGray}/>
 7         <InnerEarLeft color={this.props.colors.darkGray}/>
 8       </div>
 9     )
10   }
11 }
12 class EarRight extends React.Component {
13   render() {
14     return (
15       <div>
16         <OuterEarRight color={this.props.colors.lightGray}/>
17         <InnerEarRight color={this.props.colors.darkGray}/>
18       </div>
19     )
20   }
21 }
22 class EyeLeft extends React.Component {
23   render() {
24     return (
25       <div>
26         <OuterEyeLeft color={this.props.colors.white}/>
27         <PupilLeft color={this.props.colors.navy}/>
28       </div>
29     )
30   }
31 }
32 class EyeRight extends React.Component {
33   render() {
34     return (
35       <div>
36         <OuterEyeRight color={this.props.colors.white}/>
37         <PupilRight color={this.props.colors.navy}/>
38       </div>
39     )
40   }
41 }
Cool! All of our houses have been passed down the colors they will need to do inline JSX styling.
Inline JSX Styling

Let’s demonstrate using the color prop to do inline styling with our Head component.
To do inline JSX styling, we just have to add style={{…}} within the element(s) in the JSX. For example:
 1 class Example extends React.Component {
 2   render() {
 3     return (
 4       <div
 5         style={{background: "#000000"}}
 6         className="example"
 7       >
 8       </div>
 9     )
10   }
11 }
In the example above, we are setting the style for an element using JavaScript. The naming conventions for the attributes we want to style will be the same as CSS. The difference is that it is using object notation.
Also, note that we have double braces for the inline styling (style={{…}}).
We could do multiple inline JSX styles like this:
1 class Example extends React.Component {
2   render() {
3     return (
4       <div style={{ background: "#000000", color: "#FFFFFF"}}
5       className="example">
6       </div>
7     )
8   }
9 }
Note that we use a comma in between the styling because it is object notation and not inline CSS.
With all this being said, we can style our Head component using its color prop like so:
1 class Head extends React.Component {
2   render() {
3     return (
4       <div style={{background: this.props.color}}
5       className="head">
6       </div>
7     )
8   }
In the code above, we use this.props.color to use the color prop that was passed down for the background. Note that it does not have to be surrounded with curly braces since it is already within double braces.
Sweet, we now have the koala’s head color being controlled using JavaScript while learning how to pass down props!

To answer the possible curious reader, we can know that this is overriding our CSS. To prove it, you can use the following code:
1 class Head extends React.Component {
2   render() {
3     return (
4       <div style={{background: "white"}}
5       className="head">
6       </div>
7     )
8   }
9 }
We see the following which proves it is overriding our JavaScript:

It’s also worth mentioning that our koala’s head has maintained the same size, shape, and position. Meaning, inline JSX styling will only override what is specified and not the rest of the styling done in CSS. Also, if we had styling in JSX that was missing in our CSS, the JSX styling would add to our CSS styling.
If we repeated this same step to all of our houses, we get this for the final code:
React for Visual Learners: Koala With Color Props
Dynamic JSX Styling

I’m sure there are some who may be wondering: “Why would I use inline JSX styling if I have CSS?”
Well, you could do all your styling using JSX styling. Here’s an example:
 1 let Letter = React.createClass({
 2   render: function() {
 3       let letterStyle = {
 4         padding: 10,
 5         margin: 10,
 6         backgroundColor: "#ffde00",
 7         color: "#333",
 8         display: "inline-block",
 9         fontFamily: "monospace",
10         fontSize: "32",
11         textAlign: "center"
12       };
13
14       return (
15         <div style={letterStyle}>
16           {this.props.children}
17         </div>
18       );
19     }
20 });
In the example above, a JavaScript object is created within the render function (but above the return) containing all the styling:
 1 let letterStyle = {
 2         padding: 10,
 3         margin: 10,
 4         backgroundColor: "#ffde00",
 5         color: "#333",
 6         display: "inline-block",
 7         fontFamily: "monospace",
 8         fontSize: "32",
 9         textAlign: "center"
10       };
Then, the inline style can be that object within single braces:
1 <div style={letterStyle}>
2   {this.props.children}
3 </div>
The nice part about this approach is that the styling is now encapsulated within a component. This makes organization better than a CSS file that can sometimes get out of hand.
To be honest, this is more of a gray area and a matter of preference. I like to keep my styling out of JavaScript to remove clutter and use SCSS.
With that being said, there is one exception. If you style in JavaScript, you have the ability to make your styling dynamic.
We will do a quick example of this together so you can see what I mean.
| Fork the previous pen and name the new pen React for Visual Learners | 8 | Koala With Dynamic Styles. |
In this pen, we are just going to have the color of our head change on the click of it from light gray to dark gray.
First, let’s change up the props for our Head component so that we pass it all the colors as props:
 1 //neighborhood
 2 class Box extends React.Component {
 3   render() {
 4     return (
 5      <div className="box">
 6        <EarLeft colors={this.props.colors}/>
 7        <EarRight colors={this.props.colors}/>
 8        <EyeLeft colors={this.props.colors}/>
 9        <EyeRight colors={this.props.colors}/>
10        <Head colors={this.props.colors}/>
11        <Nose color={this.props.colors.brown}/>
12        <HairLeft color={this.props.colors.lightGray}/>
13        <HairRight color={this.props.colors.lightGray}/>
14      </div>
15     )
16   }
17 }
Now, we are going to have to control the color using state since we are now going to have data that is changing over time.
Therefore, we can add a state to our Head component that has a property called color and is set to the light gray color from the passed down colors props. We also update this.props.color to this.state.color for the inline JSX styling:
 1 class Head extends React.Component {
 2   state = {color: this.props.colors.lightGray};
 3 render() {
 4     return (
 5       <div style={{background: this.state.color}}
 6       className="head">
 7       </div>
 8     )
 9   }
10 }
Our Head component is now being controlled by the local state.
Using what we learned previously in this chapter, we can add a method that will update the state so that color is changed to dark gray:
 1 class Head extends React.Component {
 2   state = {color: this.props.colors.lightGray};
 3   updateColor() {
 4     this.setState({color: this.props.colors.darkGray});
 5   }
 6   render() {
 7     return (
 8       <div style={{background: this.state.color}}
 9       className="head">
10       </div>
11     )
12   }
13 }
Next, let’s have this method trigger on the click of the head element:
 1 class Head extends React.Component {
 2   state = {color: this.props.colors.lightGray};
 3 updateColor() {
 4     this.setState({color: this.props.colors.darkGray});
 5   }
 6 render() {
 7     return (
 8       <div onClick={this.updateColor.bind(this)}
 9       style={{background: this.state.color}}
10       className="head">
11       </div>
12     )
13   }
14 }
Now, our koala’s head changes to dark gray on the click of it:
React for the Visual Learner: Koala With Dynamic Styles
While a simple example, we could use our creativity to take advantage of dynamic styling in React.
Conditional Rendering

Cool beans! We have been able to learn about props, state, event handlers, and inline JSX styling. We also were just able to apply these things with our koala app to get a better visual.
The next thing to learn in this chapter is conditional rendering.
Conditional rendering refers to being able to toggle on and toggle off what components and elements to render using a Boolean flag.
We will learn how to do this and why we would do this in the next example.
Initial Setup
Fork the previous pen and name the new pen React for Visual Learners | 9 | Koala With Conditional Rendering.
Toggling Our Head
We are going to test out conditional rendering by doing an example where our Head component’s JSX will render a head element or not render a head element depending on a boolean flag in the local state.
First things first, let’s change our Head component to being styled with a color passed as a prop and not via state.
Go ahead and update the props definition for our Head component within the Box class:
 1 class Box extends React.Component {
 2   render() {
 3     return (
 4      <div className="box">
 5        <EarLeft colors={this.props.colors}/>
 6        <EarRight colors={this.props.colors}/>
 7        <EyeLeft colors={this.props.colors}/>
 8        <EyeRight colors={this.props.colors}/>
 9        <Head color={this.props.colors.lightGray}/>
10        <Nose color={this.props.colors.brown}/>
11        <HairLeft color={this.props.colors.lightGray}/>
12        <HairRight color={this.props.colors.lightGray}/>
13      </div>
14     )
15   }
16 }
Then, we can update our Head class to the following:
1 class Head extends React.Component {
2   render() {
3     return (
4       <div style={{background: this.props.color}}
5       className="head">
6       </div>
7     )
8   }
9 }
In the code above, we have removed the local state and all event handling as well as update our inline JSX styling to be done using a passed down prop.
Next, let’s add a local state that will have a boolean flag (true or false) as the data called showHead:
 1 class Head extends React.Component {
 2   state = {showHead: true};
 3 render() {
 4     return (
 5       <div style={{background: this.props.color}}
 6       className="head">
 7       </div>
 8     )
 9   }
10 }
Underneath the render function, let’s store this.state.showHead in a variable called showHead:
Now, we need to add if/else logic to return a different element in our JSX depending on whether showHead is true or false.
If showHead is true, we want our head to return as is. If it is false, we want nothing to return.
In order to add if/else logic in JSX, we have to wrap everything around an outermost div element. We also have to add braces around what we want to be rendered for our component like so:
 1 class Head extends React.Component {
 2   state = {showHead: true};
 3   render() {
 4     const showHead = this.state.showHead;
 5     return (
 6       <div>
 7       {
 8         <div style={{background: this.props.color}}
 9         className="head">
10         </div>
11       }
12       </div>
13     )
14   }
15 }
Finally, we can add if/else logic to have our head element only render if showHead is true:
 1 class Head extends React.Component {
 2   state = {showHead: true};
 3   render() {
 4     const showHead = this.state.showHead;
 5     return (
 6       <div>
 7       {showHead ? (
 8         <div style={{background: this.props.color}}
 9         className="head">
10         </div>
11       ) : (
12           <div></div>
13       )}
14       </div>
15     )
16   }
17 }
Note we have to use ES6 syntax for our if/else statement. ? is shorthand for if and : is shorthand for else.
If showHead is true, our code will return:
1 <div style={{background: this.props.color}}
2 className="head"></div>
Else, our code will return an empty div:
<div></div>
Currently, we can still see our koala.
However, try changing showHead to false in the state:
1 state = {showHead: false};

Now, our head component is not rendering.
Here’s the final code:
React for the Visual Learner: Koala With Conditional Rendering
Cool! Not only can we hide/show an element like in our example, but we use conditional rendering to just display something different:
 1 class Head extends React.Component {
 2   state = {grayHead: false};
 3   render() {
 4     const grayHead = this.state.showHead;
 5     return (
 6       <div>
 7       {grayHead ? (
 8         <div style={{background: this.props.color}} className="head">
 9         </div>
10       ) : (
11          <div style={{background: "yellow"}} className="head">
12         </div>
13       )}
14       </div>
15     )
16   }
17 }
In the code above, we could return a gray or yellow head depending on a boolean flag in our state.
If we were working with a component that is higher up than a house, we could do something like this to conditionally render different components based on the boolean flag:
 1 render() {
 2   const isLoggedIn = this.state.isLoggedIn;
 3   return (
 4     <div>
 5       {isLoggedIn ? (
 6         <LogoutButton onClick={this.handleLogoutClick} />
 7       ) : (
 8         <LoginButton onClick={this.handleLoginClick} />
 9       )}
10     </div>
11   );
12 }
Application in the Real-World
Conditional rendering has a lot of use cases where you just have to learn to get creative.
One possible example is with a navigation menu on a home page:

In the example above, there is an underlined and highlighted Sign up link in the navigation menu. We could have a flag in our state called isSignedUp.
If isSignedUp is true, we could not render the Sign Up link and have Sign In be the underlined and highlighted link. If it was false, we could have like we can see in the picture.
Lifecycle Hooks

Lifecycle hooks refer to methods where we can set up that do certain things within our React components depending on the lifecycle of the component.
There are 3 main lifecycles of a component:
Mounting
Updating
Unmounting
Mounting refers to the process of a component being inserted into the DOM. You can think of this as the magic that happens as a result of ReactDOM.
Unmounting, therefore, refers to a component being removed from the DOM. For instance, we toggled off a component using conditional rendering.
Updating refers to changes caused by props or state.
Mounting Lifecycle Hooks
There are 2 lifecycle hooks worth mentioning that fall within the mounting lifecycle:
componentWillMount()
componentDidMount()
The former can be used to do something before our component mounts. The latter can be used to do something after our component mounts.
Updating Lifecycle Hooks
There are 2 lifecycle hooks worth mentioning that fall within the updating lifecycle:
componentWillUpdate()
componentDidUpdate()
The former can be used to do something before our component updates. The latter can be used to do something after our component updates.
Unmounting Lifecycle Hooks
There is 1 lifecycle hook that falls within the updating lifecycle:
componentWillUnmount()
This can be used to do something before our component unmounts.
Quick Example
Lifecycle hooks are another feature for React components. They have more use cases with large-scale, dynamic web applications. For now, we can simply use the two mounting lifecycle hooks to change data without a user-triggered event (i.e. click).
In our example, we are going to have a local state controlling our inline JSX styling for our head like we did before. This time, we will have the local state change between the two lifecycle hooks. More specifically, we are going to have two different styles for our Head component within these two lifecycle hooks.
| Fork our 8th pen and name the new pen React for Visual Learners | 10 | Koala With Lifecycle Hooks. |
In your pen, click Settings then Behavior then disable Auto-Updating Preview.
Now, we can manually update our preview:

In our Head component, let’s add the shell of these two lifecycle hooks:
 1 class Head extends React.Component {
 2   state = {color: this.props.colors.lightGray};
 3 componentDidMount() {
 4
 5   }
 6 componentWillMount() {
 7
 8   }
 9 updateColor() {
10     this.setState({color: this.props.colors.darkGray});
11   }
12 render() {
13     return (
14       <div onClick={this.updateColor.bind(this)}
15       style={{background: this.state.color}}
16       className="head"></div>
17     )
18   }
19 }
Next, we can copy the line from the updateColor method and paste it into both lifecycle hooks:
1 componentDidMount() {
2     this.setState({color: this.props.colors.darkGray});
3   }
4 componentWillMount() {
5     this.setState({color: this.props.colors.darkGray});
6   }
Then, let’s update the componentWillUnmount so the a white color is applied in the setState:
1 componentDidMount() {
2     this.setState({color: this.props.colors.darkGray});
3   }
4 componentWillMount() {
5     this.setState({color: this.props.colors.white});
6   }
If you hit run, you probably still can’t see anything. Reason being, the component mounts so quickly that we can’t even see the styling for before it mounted.
To get around this, we can throw in a manual delay using setTimeout:
1 componentDidMount() {
2     setTimeout( () => {
3       this.setState({color: this.props.colors.darkGray});
4     }, 1000)
5   }
In the code above, we use a fat arrow function that is wrapped within:
setTimeout( , 1000)
1000 refers to 1000ms (1s). setTimeout will then run the code within out fat arrow function (this.setState…) with a 1 second delay.
Hit run and you will now be able to see the change of color for the head from white to dark gray:
React for the Visual Learner: Koala with Lifecycle Hooks
Awesome! We have gotten a taste of lifecycle hooks with React.
Concluding Thoughts
This chapter has been quite lengthy so I will keep this short.
Essentially, we have been able to go from understanding components on a very high level to diving into the main features they are capable of.
While all that we have learned in this chapter might seem trivial, learning those features really wraps up the major functionality of React.
I know that when it comes to learning web development, there always is this high amount of anticipation to finally get to the point where you feel comfortable saying: “I finally learned ___”
To relive this anticipation, we are going to take what we have learned so far and do a real-world application. In the next few chapters, we are going to work towards creating a user interface for a landing page using React. We will then add a chat bot demo on the landing page.
After we do all that, you can finally breathe and say: “I have learned React.”