Chapter 4 | Our First Village
Before we begin, make sure you are using Chromme or Firefox Developer.
Scope of This Chapter
Alright! In the previous chapter, we were able to create two simple components using React.js. First, we did a simple Hello React.js app. Following that, we were able to create a head component for our koala. In between, we learned about pure CSS images and created a koala together without React.
This might not seem like significant progress for some people, but given how overwhelming React can be, this deserves a pat on the back (plus learning pure CSS images is a cool bonus).
In this chapter, we are going to finish our koala pure CSS image using basic React components.
…
As you noticed when we made our head component, we just specified a simple div tag via a React class for ReactDOM to render to the DOM. The forming of the shape was handled with purely CSS.
Look at it again just to get a refresher.
Constructing the components for the rest of the shapes for our koala will be just like our head. The only new concept that we have to tackle is nesting components in a hierarchy by applying the concepts of The React Village Design discussed in Chapter 2 with React.
The scope of this chapter, therefore, is to take houses (the basic building blocks of our koala) and create a village (the completed koala).
Breaking Down the Koala Using The React Village Design

Houses
Houses are the basic building blocks of a user interface. In terms of a user interface, an example of a house is a button.
In terms of our koala, the houses are the basic building blocks of the graphic, which are the components that only return one shape.
Here is a complete list of the houses for our koala graphic:
Head
Nose
Hair Left
Hair Right
Outer Ear Left
Outer Ear Right
Inner Ear Left
Inner Ear Right
Outer Eye Left
Outer Eye Right
Pupil Left
Pupil Right
Cool. We have defined the first level of our component hierarchy.
Blocks
Next, we go up in the component hierarchy in terms of the village design, blocks.
Blocks in a user interface are collections of houses that work together to form a specific functionality/purpose to the view. An example is a navigation menu.
With our koala, the blocks are going to be the body parts that have multiple shapes such as:
Eye Left
Eye Right
Ear Left
Ear Right
Neighborhoods
The next level up on the component hierarchy of the village design is Neighborhoods.
Neighborhoods in a user interface are collections of blocks that work together to form a complete section of the view. An example is a header.
With our koala, the neighborhood is going to be the invisible box which is the container for the pure CSS image:
Box
Village
A village is the final user interface (synonymous with a view of a single page application).
The complete graphic of the koala is the village in our current example. The village will also be its own component where all other components are nested.
Given how we have broken things down, our koala is going to be made up of the following React components (indentation notes hierarchy):
 1  //React components to make our koala
 2 - Koala (village)
 3   - Box (neighborhood)
 4      - Head (house)
 5      - Nose (house)
 6      - Hair Left (house)
 7      - Hair Right (house)
 8      - Eye Left (block)
 9        - Outer Eye Left (house)
10        - Pupil Left (house)
11      - Eye Right (block)
12         - Outer Eye Right (house)
13       - Pupil Right (house)
14       - Ear Left (block)
15         - Outer Ear Left (house)
16         - Inner Ear Left (house)
17       - Ear Right (block)
18         - Outer Ear Right (house)
19         - Inner Ear Right (house)
Quick Clarification
One thing I do want to clarify is that The React Village Design is more suiting for a user interface. For that reason, the application of the village design to our koala graphic is not meant to be a perfect comparison.
However, I still think there are benefits of starting with the creation of our koala before diving into a user interface:
It gets us familiar with the concept of component hierarchy in a more underwhelming fashion.
It doesn’t require data, event handlers, etc.
Setting Up Our Village

Codepen Setup
Fork your previous pen (React for Visual Learners | 2).
| Rename it React for Visual Learners | Koala. |
Replace all your CSS with the following:
Rendering One Component to the DOM
Now that we have broken down our koala in terms of components in the village design, it’s time to start implementation.
Even though we break things down from house all the way up to village, we will construct things in the opposite direction.
Therefore, we will begin with setting up our village.
…
In our previous pen, we created a component called Head and rendered it via ReactDOM like so:
1 ReactDOM.render(
2   <Head/>,
3   document.getElementById('head-target')
4 );
This won’t work. We still want to use ReactDOM to render just one component. We want to render a Koala component to an element in our HTML called koala.
Replace your JS with the following:
 1 //village
 2 class Koala extends React.Component {
 3   render() {
 4     return (
 5     )
 6   }
 7 }
 8
 9 ReactDOM.render(
10   <Koala/>,
11   document.getElementById('koala')
12 );
Replace your HTML with the following:
<div id="koala"></div>
With these changes, we are now going to render a component called Koala to the DOM.
Instead of rendering multiple components like so:
1 ReactDOM.render(
2   <Village/>,
3   <Neighborhood/>
4 //and so on
5 document.getElementById('village')
6 );
We have to render all the components in their hierarchical order through nesting.
For example…
 1 class Village extends React.Component {
 2   render() {
 3     return (
 4
 5       <Neighborhood />
 6     )
 7   }
 8 }
 9 class Neighborhood extends React.Component {
10   render() {
11     return (
12
13       <Blocks/>
14     )
15   }
16 }
17 class Blocks extends React.Component {
18   render() {
19     return (
20
21       <HouseOne/>
22       <HouseTwo/>
23     )
24   }
25 }
We will render the village which nests the neighborhood. The neighborhood will render the blocks which nests houses.

Again, this is why React gets confusing for beginners. It becomes component inception.
Note:
We can use render ( … ) when rendering multiple components like so:
1 class Blocks extends React.Component {
2   render() {
3     return (
4
5       <HouseOne/>
6       <HouseTwo/>
7     )
8   }
9 }
Creating Our Neighborhood

Recall, our neighborhood is going to be the box which is the container for the pure CSS image.
Box Component
We will now create the Box component which we will nest underneath the Koala component we just created.
First, we can create the Box component:
1 //neighborhood
2 class Box extends React.Component {
3   render() {
4     return (
5      <div className="box">
6      </div>
7     )
8   }
9 }
This is going to return a simple div element with a class named box.
Nesting Underneath Koala
Next, we nest it underneath our Koala component like so:
1 //village
2 class Koala extends React.Component {
3   render() {
4     return (
5       <Box/>
6     )
7   }
8 }
Putting It All Together
In total, we should have the following in our JS:
 1 //village
 2 class Koala extends React.Component {
 3   render() {
 4     return (
 5       <Box/>
 6     )
 7   }
 8 }
 9 //neighborhood
10 class Box extends React.Component {
11   render() {
12     return (
13      <div className="box">
14      </div>
15     )
16   }
17 }
18 ReactDOM.render(
19   <Koala/>,
20   document.getElementById('koala')
21 );
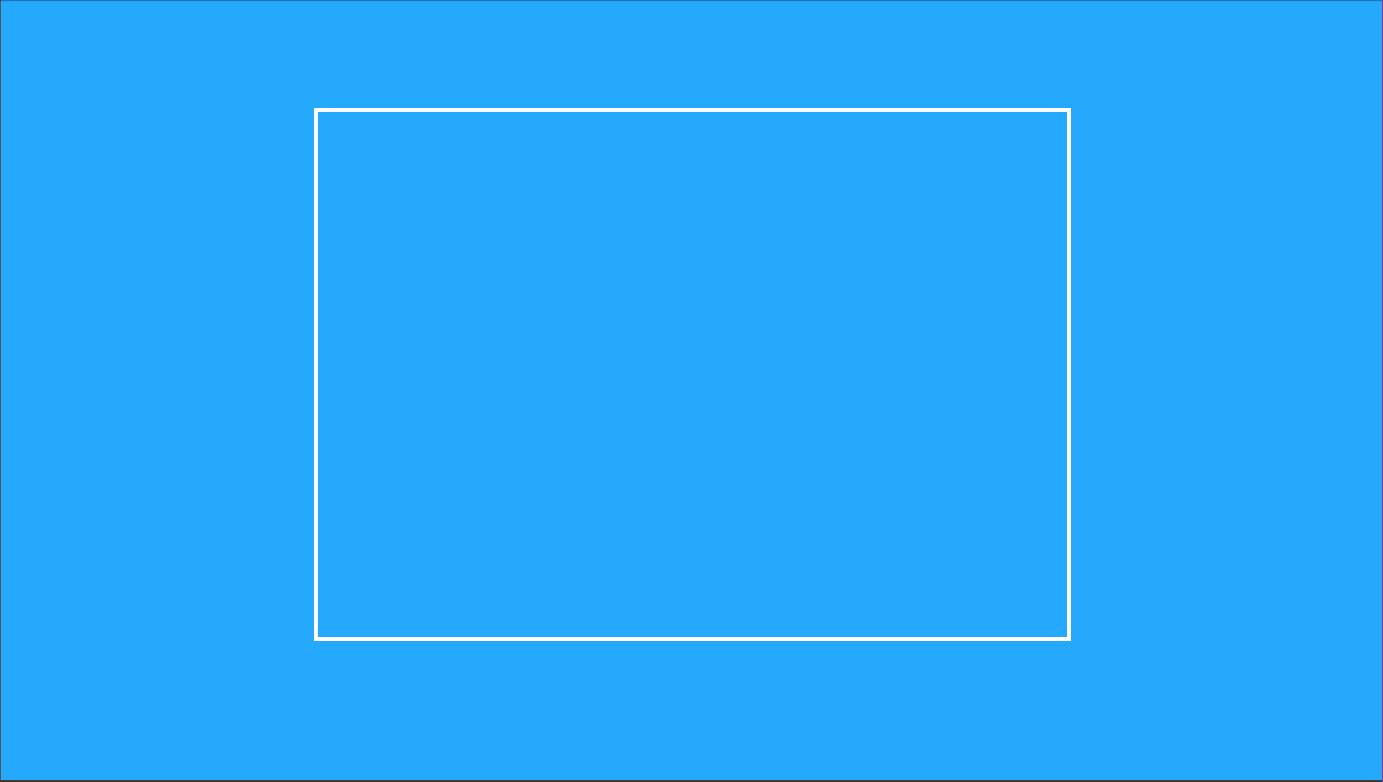
Because of how I styled the box class, we should see the following:
Defining Our Blocks

Working our way down the village design hierarchy, it’s time to implement the blocks.
The blocks are going to be the body parts that have multiple shapes such as:
Eye Left
Eye Right
Ear Left
Ear Right
These blocks will be nested within our Box component which is nested underneath our Koala component, I know…
Am I right?
Block Components
First, let’s create the shell of the blocks:
 1 //blocks
 2 class EarLeft extends React.Component {
 3   render() {
 4     return (
 5     )
 6   }
 7 }
 8 class EarRight extends React.Component {
 9   render() {
10     return (
11     )
12   }
13 }
14 class EyeLeft extends React.Component {
15   render() {
16     return (
17
18     )
19   }
20 }
21 class EyeRight extends React.Component {
22   render() {
23     return (
24     )
25   }
26 }
These are shells because they don’t have anything in the returns. In the next section of this chapter, we are going to create the houses which will eventually be nested here.
Nesting Underneath Box
Next, we can nest these blocks under our neighborhood component, Box:
 1 //neighborhood
 2 class Box extends React.Component {
 3   render() {
 4     return (
 5      <div className="box">
 6        <EarLeft/>
 7        <EarRight/>
 8        <EyeLeft/>
 9        <EyeRight/>
10      </div>
11     )
12   }
13 }
Putting It All Together
In total, we should now have the following in our JS:
 1 //village
 2 class Koala extends React.Component {
 3   render() {
 4     return (
 5       <Box/>
 6     )
 7   }
 8 }
 9 //neighborhood
10 class Box extends React.Component {
11   render() {
12     return (
13      <div className="box">
14        <EarLeft/>
15        <EarRight/>
16        <EyeLeft/>
17        <EyeRight/>
18      </div>
19     )
20   }
21 }
22 //blocks
23 class EarLeft extends React.Component {
24   render() {
25     return (
26     )
27   }
28 }
29 class EarRight extends React.Component {
30   render() {
31     return (
32     )
33   }
34 }
35 class EyeLeft extends React.Component {
36   render() {
37     return (
38
39     )
40   }
41 }
42 class EyeRight extends React.Component {
43   render() {
44     return (
45     )
46   }
47 }
48 ReactDOM.render(
49   <Koala/>,
50   document.getElementById('koala')
51 );
Nothing should have changed except an error for the fact that there is nothing being returned.
Don’t worry. We will fix that next.
Constructing Our Houses

Stand Alone vs. Block Houses
Alright. It’s time to knock out all the components that make up our houses. Some of these houses will stand alone and be nested directly under the Box component. Others will be nested within the blocks we got started with.
Here are the stand alone houses:
Head
Nose
Hair Left
Hair Right
Again, these will be directly nested underneath the Box component.
Here are the houses that will be nested underneath the blocks we set up in the previous step:
Outer Ear Left
Outer Ear Right
Inner Ear Left
Inner Ear Right
Outer Eye Left
Outer Eye Right
Pupil Left
Pupil Right
We will do one example of a stand alone house and one example of creating the houses to complete a block.
Once we do that, I will provide the rest of the code all at once.
Head Component
We have done this before, so it should be pretty straight forward.
First, we define the component:
1 class Head extends React.Component {
2   render() {
3     return (
4       <div className="head"></div>
5     )
6   }
7 }
Then, we will nest this underneath the Box component:
 1 //neighborhood
 2 class Box extends React.Component {
 3   render() {
 4     return (
 5      <div className="box">
 6        <EarLeft/>
 7        <EarRight/>
 8        <EyeLeft/>
 9        <EyeRight/>
10
11        <Head/>
12      </div>
13     )
14   }
15 }
Ear Right Component
That was pretty easy, hopefully. Now, let’s go ahead and create some houses for Ear Right and nest them. That way, we will have accomplished an entire block.
We have to first make two houses, Outer Ear Right and Inner Ear Right since there are two shapes for the ear on each side.
Again, we start by defining the components:
 1 //houses
 2 class Head extends React.Component {
 3   render() {
 4     return (
 5       <div className="head"></div>
 6     )
 7   }
 8 }
 9 class OuterEarRight extends React.Component {
10   render() {
11     return (
12       <div className="outer-ear-right"></div>
13     )
14   }
15 }
16 class InnerEarRight extends React.Component {
17   render() {
18     return (
19       <div className="inner-ear-right"></div>
20     )
21   }
22 }
Then, we have to nest these components underneath the Ear Right component (block):
 1 class EarRight extends React.Component {
 2   render() {
 3     return (
 4       <div>
 5        <OuterEarRight/>
 6        <InnerEarRight/>
 7       </div>
 8     )
 9   }
10 }
Note: There is a div tag surrounding the nested components. This is required.
Checking Our Progress
Before I provide the rest of the code, let’s make sure this is working correctly.
The empty blocks are going to cause an error, so let’s comment them out for now:
 1 //blocks
 2 /*
 3 class EarLeft extends React.Component {
 4   render() {
 5     return (
 6 )
 7   }
 8 }
 9 */
10 class EarRight extends React.Component {
11   render() {
12     return (
13       <OuterEarRight/>,
14       <InnerEarRight/>
15     )
16   }
17 }
18 /*
19 class EyeLeft extends React.Component {
20   render() {
21     return (
22
23     )
24   }
25 }
26 class EyeRight extends React.Component {
27   render() {
28     return (
29
30     )
31   }
32 }
33 */
Let’s also update our neighborhood so that it only has Ear Right and Head as nested components:
 1 //neighborhood
 2 class Box extends React.Component {
 3   render() {
 4     return (
 5      <div className="box">
 6        <EarRight/>
 7        <Head/>
 8      </div>
 9     )
10   }
11 }
In total, we should have the following in our JS:
 1 //village
 2 class Koala extends React.Component {
 3   render() {
 4     return (
 5       <Box/>
 6     )
 7   }
 8 }
 9 //neighborhood
10 class Box extends React.Component {
11   render() {
12     return (
13      <div className="box">
14        <EarRight/>
15        <Head/>
16      </div>
17     )
18   }
19 }
20 //blocks
21 /*
22 class EarLeft extends React.Component {
23   render() {
24     return (
25 )
26   }
27 }
28 */
29 class EarRight extends React.Component {
30   render() {
31     return (
32       <div>
33         <OuterEarRight/>
34         <InnerEarRight/>
35       </div>
36     )
37   }
38 }
39 /*
40 class EyeLeft extends React.Component {
41   render() {
42     return (
43
44     )
45   }
46 }
47 class EyeRight extends React.Component {
48   render() {
49     return (
50
51     )
52   }
53 }
54 */
55 //houses
56 class Head extends React.Component {
57   render() {
58     return (
59       <div className="head"></div>
60     )
61   }
62 }
63 class OuterEarRight extends React.Component {
64   render() {
65     return (
66       <div className="outer-ear-right"></div>
67     )
68   }
69 }
70 class InnerEarRight extends React.Component {
71   render() {
72     return (
73       <div className="inner-ear-right"></div>
74     )
75   }
76 }
77 ReactDOM.render(
78   <Koala/>,
79   document.getElementById('koala')
80 );
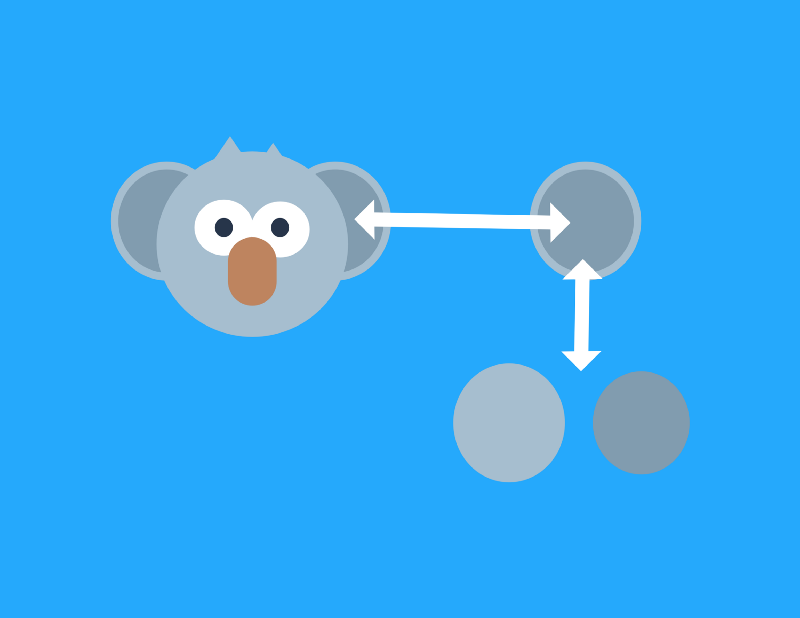
We should now see the following:
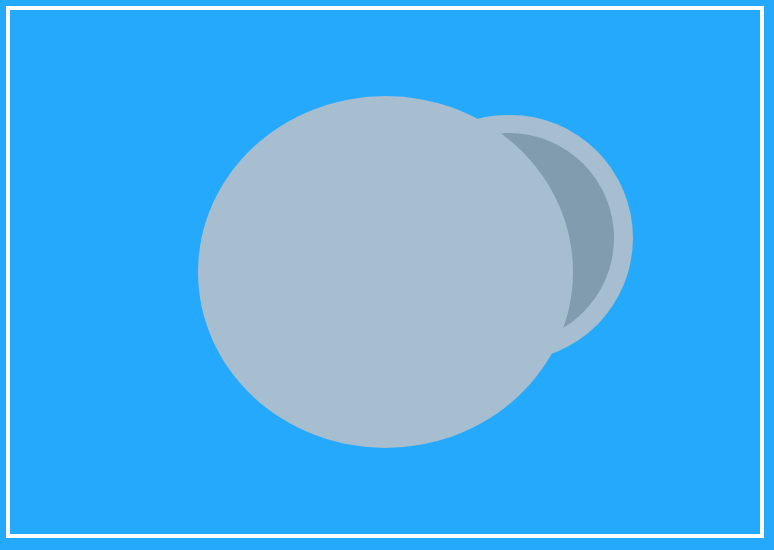
Awesome, we can see 3 houses: Outer Ear Right, Inner Ear Right, and Head.
However, we have set up a hierarchy of components so that Outer Ear Right and Inner Ear Right are combined into a block component called Ear Right.
Ear Right (block) and Head (house) are nested directly under our neighborhood component called Box.
Box (neighborhood) is nested under our village component called Koala which is injected (so to speak) into the DOM using ReactDOM:
1 ReactDOM.render(
2   <Koala/>,
3   document.getElementById('koala')
4 );
By doing all of this, we can get a taste of how hierarchy of components in Reacts work. I’ll provide a more in-depth conclusion in just a moment, but for now, take a look at the final code that fills in the koala with the rest of the components:
React for Visual Learners: Koala
Concluding Thoughts
As I mentioned before, The React Village Design is well suited for explaining the hierarchy of user interfaces. While the koala pure CSS image doesn’t fit perfectly with the village design, it has provided for us an underwhelming example of how to nest components in a hierarchy using React.
Not only were we able to learn how to implement nested components in a hierarchy, we also learned the order of how to approach it.
We first started by breaking down an existing koala graphic into our component hierarchy starting with houses and working our way up. When actually creating the classes, we went from a village and worked our way down. While the order of things may be more of a gray area, I still think our example has practical, real-world applications.
In the real-world, you might be given a mock-up of a user interface. You will have to break that user interface down into components and construct those components in a hierarchy using React. This is where The React Village Design is really beneficial and practical. We will get to the actual creation of a user interface in a few chapters, but again, what we have done is get a taste of that in a more underwhelming fashion.
When I was learning React, the hierarchy of components was really confusing. It was also taught to me after going through all the ins and outs of other features of components like managing the state (data), event handlers, conditional rendering, etc. In the koala example, we have been able to explain the big picture of understanding React components before getting lost in the features of components.
One last thing that I wanted to mention is that I understand that having all the components in one JavaScript column in Codepen might seem a bit jumbled. However, I still think this is the right move to start here.
We can organize things a lot better as we will see when we setup our project directory and do development locally. However, we didn’t have to get “lost in the sauce” (as a friend of mine would say) about setup because we used Codepen. Having all the components in one column also helps see how they are related, something that is often hard to grasp when you just start with an existing React project template.
We will be eventually switching to local development and dedicate an entire chapter just on the setup. Before that, however, we are going to use our React-fueled koala for visual learning of the ins and outs of React components.