Working with GitHub, Gist and bl.ocks.org
General stuff about bl.ocks.org
In the words of Mike Bostock on the bl.ocks.org main page;
“This is a simple viewer for code examples hosted on GitHub Gist. Code up an example using Gist, and then point people here to view the example and the source code, live!”
The whole idea is to take the information that you have in a gist (the pastebin area in Github) and to give it a viewer that will allow it to display in your browser.
The reason this works is that the files that make up a web page that can be displayed in your browser conform to a pretty well defined standard. If you can name your main web file index.html and put it in a gist, bl.ocks.org will not just render it to a browser, but since you can store your data files in the same gists, your visualization can use those as data sources as well since they shouldn’t violate any cross domain security restrictions.
Mike’s clever code allows a gallery type preview page to be generated (including a thumbnails if you follow the instructions in another part of this section).
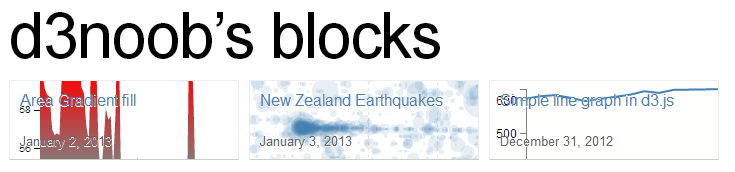
Thumbnails of examples for d3noob’s blocks
And if you include a readme file formatted using markdown you can have a nice little explanation of how your visualization works.
The front rendering page includes any markdown notes and the code (not the full screen) is optimised to accept visualizations of 960x500 pixels (although you can make them other sizes, it’s just that this is an ‘optimum’ size). Of course there is always the full screen mode to render your creation in its full glory if necessary.
If I was to pass on any advice when using bl.ocks.org, please consider others who will no doubt view your work and wonder how you achieved your magic. Help them along where possible with a few comments in the readme.md file because sharing is caring :-).
Installing the plug-in for bl.ocks.org for easy block viewing
This might sound slightly odd at first if you’re not familiar with using Gist or bl.ocks.org, but trust me, a) you should use them, b) if you get to the point where you are using these fantastic services, there’s a good chance that you will want to be able to quickly check out what your block looks like when you update or add in a Gist.
Here’s the scenario. You’re slaving away getting all your data and files into Gist, and then you’re switching - in some tiresome manner - to get to the block that bl.ocks.org generates.
Well, throw away that tiresome technique! It’s time to move into the 21st century with some plug-in goodness. Clever Mike Bostock has put together some handy dandy browser extensions that will add a button to your Chrome, Safari or Firefox browser to take you straight from your Gist to your block!
It will turn your Gist page from this…
Gist page without bl.ocks.org button
… to this …
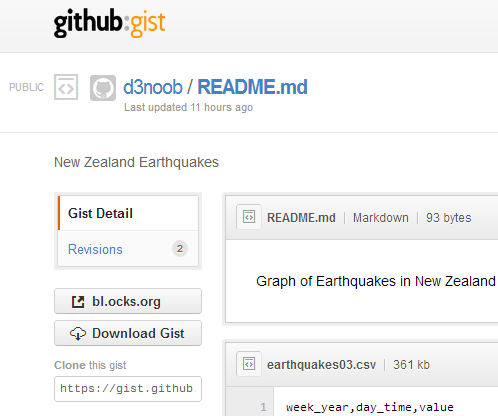
Gist page with bl.ocks.org button!
Check out the button!
It’s really handy and works like a charm. You can download it directly from the bl.ocks.org home page or from the Github page where the code is hosted (this also includes a quick couple of lines of instructions for installation if you’re unsure).
Loading a thumbnail into Gist for bl.ocks.org thumbnails
This description will start on the assumption that the user already has a GitHub / Gist account set up and running. It’s purpose is to demonstrate how to upload an image as a file named thumbnail.png to a Gist so that when viewing the users home page on bl.ocks.org you see a nice little preview of what a visitor can anticipate, when they go to look at your work :-). This description is a fleshed out version of the one provided by Christophe Viau on Google Groups.
Setting the scene:
There you are: a fresh faced leaflet.js user keen to share his/her work with the world. You set yourself up a GitHub / Gist account and put your code into a gist.
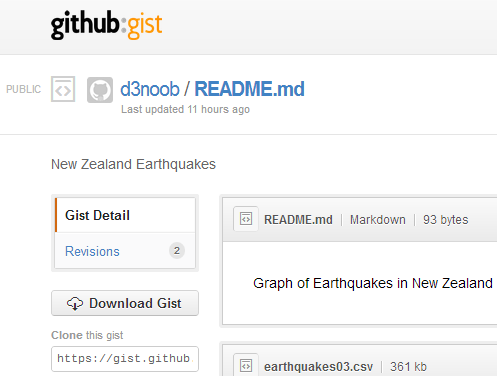
The gist web page
Your graph is a thing of rare beauty and the community needs to marvel at your brilliance. Of course this is a breeze with bl.ocks.org. Once you have all the code sorted out, and all data files made accessible, bl.ocks.org can display the graph with the code and can even open the graph in its own window. The person responsible for bl.ocks.org? Mike Bostock of course (wherever does he get the time?).
Clicking on the bl.ocks.org button on the gist page (load the extension available from the main page of bl.ocks.org) takes you to see your graph.
Your awesome graph ready to go
Wow! Impressive.
So you think that will make a fine addition to your collection of awesome graphs and if you click on your GitHub user name that is in the top left of the screen you go to a page that lays out all your graphs with a thumbnail giving a sneak preview of what the user can expect.
d3noob’s blocks, but no thumbnail!
Aww… Rats! There’s a nice place holder, but no pretty picture.
Hang on, what had Mike said on the bl.ocks.org main page?
“The main source code for your example should be named index.html. You can also include a README.md using Markdown, and a thumbnail.png for preview.”
Ahh.. you need to include a thumbnail.png file in your Gist!
So how to get it there? Well Gist is a repository, so what you need to do is to put the code in there somehow. Now from the Gist web page this doesn’t appear to be a nice (gui) way to do this. So from here you will need to suspend your noob status and hit the command line.
The good news (if you’re a windows user (and sorry, I haven’t done this in Linux or on a Mac)) is that, as part of the GitHub for windows installation, a command line tool was installed as well! Prepare yourself, you’re going to use the Git Shell.
The Windows GitHub and Git Shell icons
Enough of the scene setting. Let’s git going :-).
I’m going to describe the steps in a pretty verbose fashion with pretty pictures and everything else, but at the end I will put a simple set of steps in the form that Christophe Viau outlined on Google Groups.
First you will want to have your image ready. It needs to be a png with dimensions of 230 x 120 pixels. It should also be less than 50kB in size.
Go to your public Gist that you have already set up and copy the link in the “Clone this gist” box.
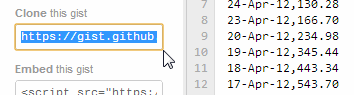
Copy the ‘Clone this gist’ link
(this should look something like https://gist.github.com/441443)
Now you’re going to clone this gist to a local repository using the Git Shell. Open it up from the desktop icon and you should see something like the following;

The Git Shell is open for business
You can clone the gist to a local folder with the command;
git clone https://gist.github.com/4414436.git

|
Or if you’re using OSX, the following command has been passed on by Alex Hornbake as an alternative (thanks Alex).
|
(The url is the one copied from the ‘Clone this gist’ box.)
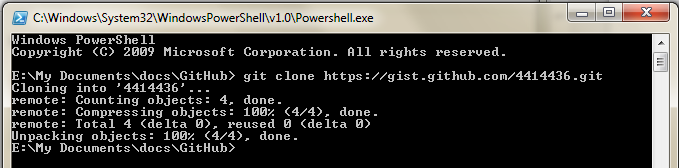
Running the command
This will create a folder with the id (the number) of the gist in your local GitHub working directory.
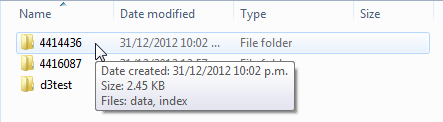
A folder is created for your gist
And there it is (Ooo… Look almost New Years!).
Copy your thumbnail.png file into this directory.
Back to the Git Shell and change into the directory (4414436) . We can now add the thumbnail.png file to the gist with the command;
git add thumbnail.png

Running the git add command
And now commit it to your gist with the following command in the Git Shell;
git commit -m "Thumbnail image added"

Running the git commit command
Now we need to push the commit to the remote gist (you may be asked for your GitHub user name and password if you haven’t done this before) with the following command;
git push

Push! Push!
OK, now you can go back to the web page for your gist and refresh it and scroll on down…
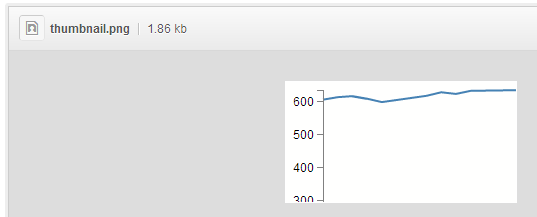
A thumbnail is born
Woo Hoo!
(I know it doesn’t look like much, but this is a VERY simple graph from D3 Tips and Tricks :-)).
Now for the real test. Go back to your home page for your blocks on bl.ocks.org and refresh the page.
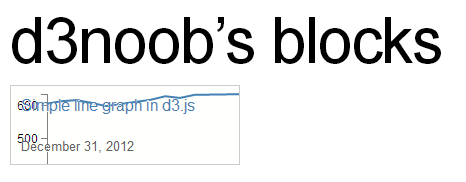
d3noob’s blocks complete with thumbnail
Oh yes. You may now bask in the sweet glow of victory. And as a little bit of extra fancy, if you move your mouse over the image it translates up slightly!
Wrap up.
The steps to get your thumbnail into the gist aren’t exactly point and click, but the steps you need to take are fairly easy to follow. As promised, here is the abridged list of steps that will avoid you going through the several previous pages.
- Create your public gist on https://gist.github.com/
- Get an image ready (230 x 120 pixels, named thumbnail.png)
- Under “Clone this gist”, copy the link (i.e., https://gist.github.com/4414436.git)
- If you have the command line git tools (Git Shell), clone this gist to a local folder:
git clone https://gist.github.com/4414436.git(orgit clone git@gist.github.com:4414436.gitfor OSX) It will add a folder with the gist id as a name (i.e., 4414436) under the current working directory. - Navigate to this folder via the command line in Git Shell:
cd 4414436(dir 4414436 on windows) - Navigate to this folder in file explorer and add your image (i.e., thumbnail.png)
- Add it to git from the command line:
git add thumbnail.png - Commit it to git:
git commit -m "Thumbnail added" - Push this commit to your remote gist (you may need your Github user name and password):
git push - Go back and refresh your Gist on https://gist.github.com/ to confirm that it worked
- Check your blocks home page and see if it’s there too. http://bl.ocks.org/<yourusername>
Just to finish off. A big thanks to Christophe Viau for the hard work on finding out how it all goes together and if there are any errors in the above description I have no doubt they will be mine.