2.- Basic administration
Once the system is installed and ready it’s time to start doing something useful with it. This is not a book about Linux basic administration, but we will try to explain briefly the most important commands a Linux Systems Administrator needs to know.
2.1.- Basic commands
Most of this chapter applies to both versions of CentOS covered in this book (6 and 7). There however some sections that differ depending on the version we’re working with. To avoid confusion in the reader, in these cases we’ll identify explicitly the version to which the section applies to.
2.1.1.- Directories and their contents(ls and cd)
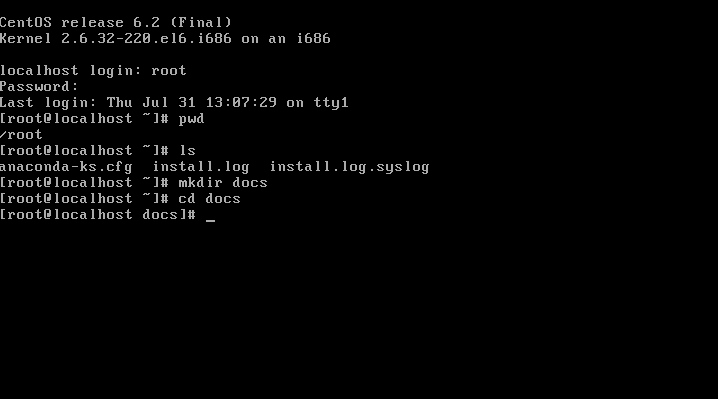
Once we log into the system as the root user, with the password we specified when installing the server, we are shown the prompt. Initially we will be located in the root home directory (/root), we can confirm it with the command pwd. If we want to list the files and subdirectories inside /root we can do it by typing ls.
As in real life we can have different folders to organize our documents, we can do the same thing in the server. Thus we can create directories with the command mkdir directory_name. Now, to access this directory we type cd directory_name. Later we can go back to the parent directory by adding two dots as a parameter to the cd command(Fig. 28).
2.1.2.- Creating users
Before, we have logged in as root, this is acceptable for a test system but it’s not advisable to do it on a production system. Instead, we should log in as a normal user and switch to the root account when performing administrative tasks. Let’s see how to do it.
First we should create the normal user with useradd, useradd can accept many parameters, but in this case we will only use -m in order to create the home directory of the user. If we are not sure about the list of parameters of any command we can (almost) always type command -h and a brief help text will appear.
So we type useradd -m antonio and create the user. Now we have to assign this user a new password. We do it with passwd username.
1 [root@delphos ~]# useradd -m antonio
2 [root@delphos ~]# passwd antonio
3 Changing password for user antonio.
4 New password:
5 BAD PASSWORD: it is based on a dictionary word
6 BAD PASSWORD: is too simple
7 Retype new password:
8 passwd: all authentication tokens updated successfully.
Now that we have created the normal user we log out with exit and log back in with the user we just created. From now on if we have to perform an administrative task we can switch to root with the su command. Once we’re done, we type exit to switch back to the normal account. If we are not sure about the user we are currently logged in as, we can use the whoami command at any time.
 1 [antonio@delphos ~]$ pwd
 2 /home/antonio
 3 [antonio@delphos ~]$ su root
 4 Password:
 5 [root@delphos antonio]# whoami
 6 root
 7 [root@delphos antonio]# exit
 8 exit
 9 [antonio@delphos ~]$ whoami
10 antonio
2.2.- Creating and editing files
When administering a server, one of the most repeated actions is editing configuration files. This is done by using text editors. Linux includes many of them, either in text or in graphic mode.
2.2.1.- vi
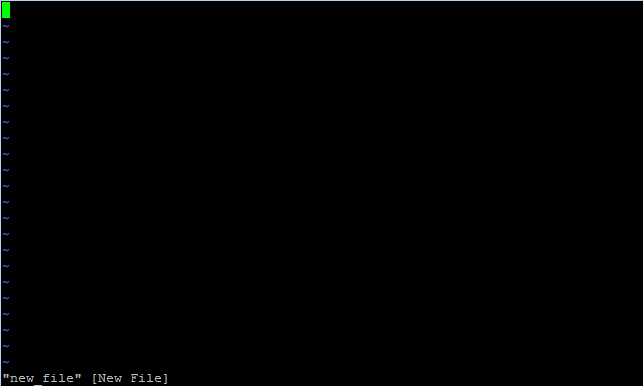
Perhaps the most widespread text editor in the Linux and Unix world is vi. For that reason it would be advisable for any Linux administrator to know at least the basics of the vi editor. To create a new text file or edit an existing one we pass the filename as a parameter. For instance, we could type vi new_file. A new blank screen will appear (Fig. 29). But before we type any text we have to press the “i” key. When doing this we switch from “command mode” into “insert mode”.
Once we enter into insert mode we can type the text (Fig 30).
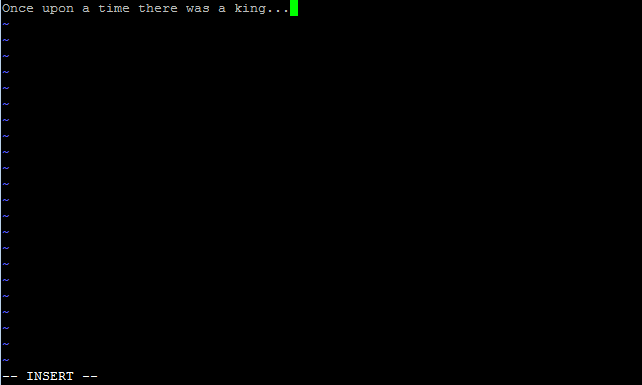
If we make a mistake or we want to delete or change something we must switch back to command mode by pressing the esc key. Now we can move the cursor with the arrow keys, and supress a character by hitting the ‘x’ key. For example, if we want to substitute the word ‘king’ for ‘queen’ we’ll place the cursor over the ‘k’ letter and press the ‘x’ key 4 times. Once we delete the word king we’ll have to type the new text. In order to do it, we shoud switch to insert mode again by pressing the ‘i’ key.
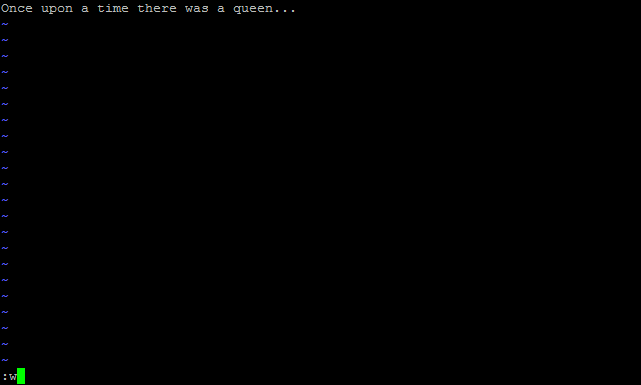
We’ll have to repeat the process whenever we want to change or delete something, navigating through the text with the cursor keys. And when we are done we save the file and leave vi. To save the file at any time we switch to command mode and type “:w” without the quotes (Fig. 31). To exit the program we do the same thing but instead of “:w” we type “:q”. It is also possible to save and exit at once with “:wq”. Finally, if we want to exit and discard the changes we type “:q!”.
2.2.2.- nano
Another well known text editor in the Linux world is nano, it is not as widespread as vi but, in the other hand, many people find it far more friendly than this one. Nano is usually not installed by default, so we’ll have to install it with yum (see section 2.3).
 1 [root@delphos ~]# nano
 2 -bash: nano: command not found
 3 [root@delphos ~]# yum provides nano
 4 Loaded plugins: fastestmirror
 5 Loading mirror speeds from cached hostfile
 6  * c6-media:
 7 nano-2.0.9-7.el6.i686 : A small text editor
 8 Repo        : c6-media
 9 Matched from:
10
11 [root@delphos ~]# yum install nano
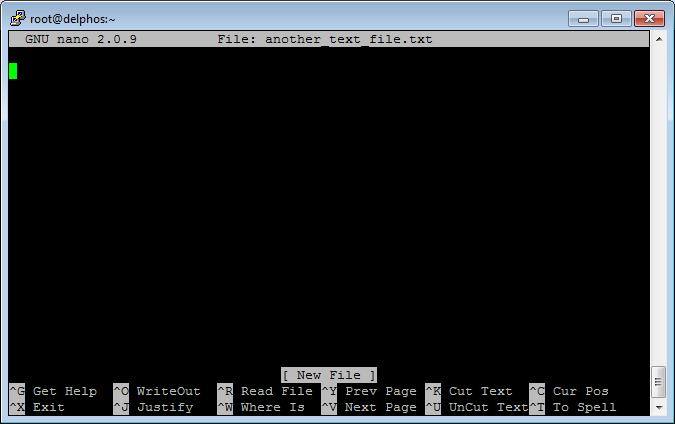
To open or create a file we just need to type “nano filename”. For example, nano another_text_file.txt. Once we launch nano (Fig. 32) we can type the text directly, using the keys as we’d do in any WYSIWYG word processor. Once we have finished, we press Ctrl-X to save the file.
2.2.3.- gedit
For those who prefer a graphical text editor CentOS, as well as most Linux distributions, includes gedit. Gedit is very easy to use, quite similar to Notepad from windows. Most admins find it much more user friendly than vi or nano.
It is usually not installed by default, so we’ll probably have to install it. In the upcoming section 2.4 we’ll see in detail how to install additional software in CentOS. Once installed it can be launched by typing “gedit”. However, as this is a graphical application is something we need to take into account.
The application needs to use a series of graphical libraries to work. If we have followed the instructions in the book so far, the graphical libraries won’t be installed yet in the server, so we won’t be able to execute gedit from the server itself. One solution would be to install the the graphical environment as described in the section 2.5. After that, we could execute gedit.
Another solution would be to connect to the server from a computer that already has a working graphical environment installed. This scenario will be covered in more detail in the 6th chapter “Remote Access”.
Anyway, after succesfully executing gedit we’ll see this screen:
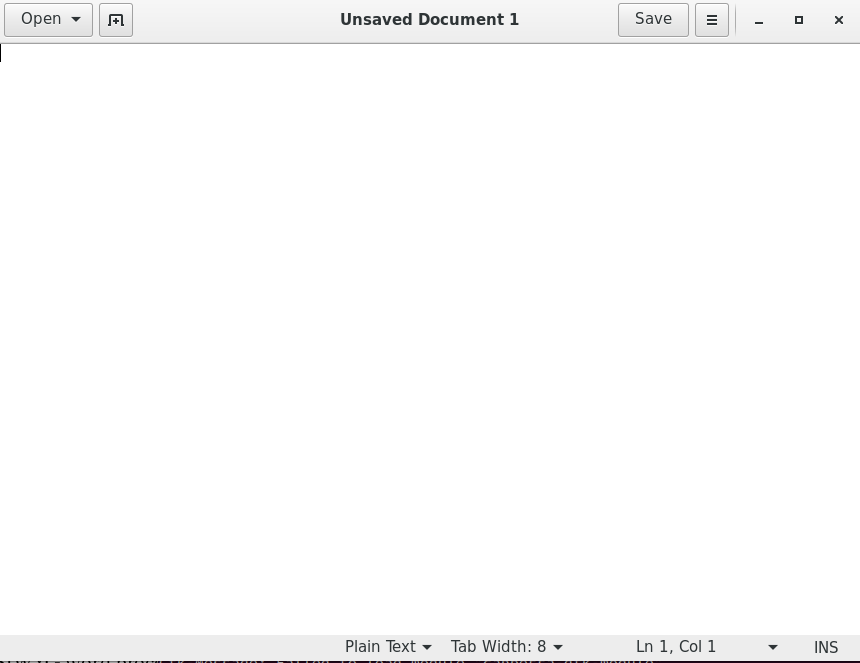
From this screen we can open a file, create a new document, save it, etc…
2.2.4.- cat
Another command we could use is cat, it will simply show in the screen the contents of the file passed as a parameter. For example if we wanted to see the contents of the /etc/group file we would type this:
 1 [root@localhost named]# cat /etc/group
 2 root:x:0:root
 3 bin:x:1:root,bin,daemon
 4 daemon:x:2:root,bin,daemon
 5 sys:x:3:root,bin,adm
 6 adm:x:4:root,adm,daemon
 7 tty:x:5:
 8 .
 9 .
10 .
2.2.5.- grep
This is one of the most useful commands for the admin. It receives a file or the output of a command as an input and shows only those lines that contain a certain pattern. For example, to see the contents of the /etc/passwd file we can use cat.
 1 [root@delphos ~]# cat /etc/passwd
 2 root:x:0:0:root:/root:/bin/bash
 3 bin:x:1:1:bin:/bin:/sbin/nologin
 4 daemon:x:2:2:daemon:/sbin:/sbin/nologin
 5 adm:x:3:4:adm:/var/adm:/sbin/nologin
 6 lp:x:4:7:lp:/var/spool/lpd:/sbin/nologin
 7 sync:x:5:0:sync:/sbin:/bin/sync
 8 shutdown:x:6:0:shutdown:/sbin:/sbin/shutdown
 9 halt:x:7:0:halt:/sbin:/sbin/halt
10 mail:x:8:12:mail:/var/spool/mail:/sbin/nologin
11 uucp:x:10:14:uucp:/var/spool/uucp:/sbin/nologin
12 operator:x:11:0:operator:/root:/sbin/nologin
13 games:x:12:100:games:/usr/games:/sbin/nologin
14 gopher:x:13:30:gopher:/var/gopher:/sbin/nologin
15 ftp:x:14:50:FTP User:/var/ftp:/sbin/nologin
16 nobody:x:99:99:Nobody:/:/sbin/nologin
17 dbus:x:81:81:System message bus:/:/sbin/nologin
18 vcsa:x:69:69:virtual console memory owner:/dev:/sbin/nologin
19 saslauth:x:499:76:"Saslauthd user":/var/empty/saslauth:/sbin/nologin
20 postfix:x:89:89::/var/spool/postfix:/sbin/nologin
21 qpidd:x:498:499:Owner of Qpidd Daemons:/var/lib/qpidd:/sbin/nologin
22 sshd:x:74:74:Privilege-separated SSH:/var/empty/sshd:/sbin/nologin
23 named:x:25:25:Named:/var/named:/sbin/nologin
24 ntp:x:38:38::/etc/ntp:/sbin/nologin
25 dhcpd:x:177:177:DHCP server:/:/sbin/nologin
26 tcpdump:x:72:72::/:/sbin/nologin
27 apache:x:48:48:Apache:/var/www:/sbin/nologin
28 antonio:x:500:500::/home/antonio:/bin/bash
But if we wanted to see only the line of the root user we could pass this output to the grep command. To do it, we need to connect the two commands with the symbol “|”, what is called, “a pipe”. We would type this:
1 [root@delphos ~]# cat /etc/passwd | grep root
2 root:x:0:0:root:/root:/bin/bash
The command now only shows the line that contains the word root.
Another useful option of grep is “-v”, what this option does is showing all the lines that DO NOT contain a certain word or pattern. For example, many configuration files have a lot of lines that start with a comment sign (#). In this cases is much clearer watching only the lines uncommented.
 1 [root@delphos ~]# cat /etc/ssh/sshd_config | grep -v "#"
 2
 3 .
 4 .
 5 .
 6 Protocol 2
 7 SyslogFacility AUTHPRIV
 8 .
 9 .
10 PasswordAuthentication yes
11 ChallengeResponseAuthentication no
12 .
13 .
2.2.6.- more
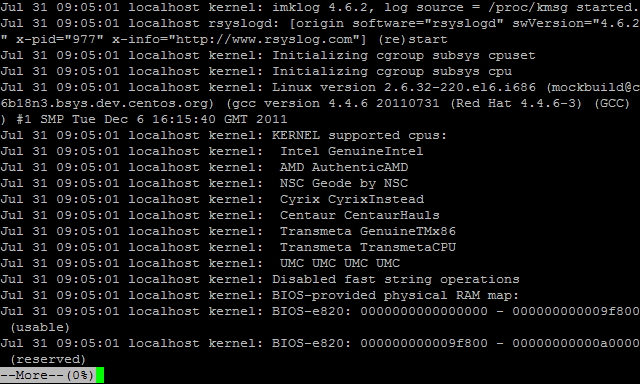
If the file we try to see with the cat command is too long, we won’t be able to see all the content in a single screen as the the text will inmediately scroll down. If we want to see the full content we can use the more command. This way, we’ll be able to see the whole text one screen at a time, manually passing to the next one.
1 [root@localhost ~]# more /var/log/messages
2.2.7.- less
Less is pretty similar to more, we can see a long file one screen at the time, the only difference is that less allows us to go back to a previous page. With more, once we advance to the next page we can’t go back (unless we exit more and execute it again).
2.2.8.- head
We’ve seen that we can use cat to see the content of a file. Nevertheless, if the file is too long, the content will fill many screens. We could use more or less to see one page at the time but maybe we just want to see the first lines, in this case we can simply type head filename and we’ll see the first 10 lines (by default) of the file.
 1 [root@localhost named]# head /etc/group
 2 root:x:0:root
 3 bin:x:1:root,bin,daemon
 4 daemon:x:2:root,bin,daemon
 5 sys:x:3:root,bin,adm
 6 adm:x:4:root,adm,daemon
 7 tty:x:5:
 8 disk:x:6:root
 9 lp:x:7:daemon,lp
10 mem:x:8:
11 kmem:x:9:
12 [root@localhost named]#
If we wanted to see just the first three lines we’d use -n 3. For example:
1 [root@localhost named]# head -n 3 /etc/group
2 root:x:0:root
3 bin:x:1:root,bin,daemon
4 daemon:x:2:root,bin,daemon
5 [root@localhost named]#
2.2.9.- tail
Tail is a command similar to head but it will show the last lines of the file instead of the first ones. So to see the last 4 lines of the file /etc/group we can do this:
1 [root@localhost named]# tail -n 4 /etc/group
2 qpidd:x:499:
3 sshd:x:74:
4 antonio:x:500:
5 named:x:25:
6 [root@localhost named]#
A really useful option of the tail command is -f. This will show on the screen the last lines of the file, and it will show in the screen the new lines added in real time. For instance, if we want to see what system events are taking place right now, we can open the /var/log/messages file with the -f option. Once we’re done we exit by pressing Ctrl-C.
2.3.- Redirecting output
When talking about the grep command, we saw we could associate the output of a program to the input of another program. When we typed “cat /etc/passwd | grep root” what we were actually doing was to pass the output data of the cat command as an input parameter for the grep program.
We could also redirect the output to a file. For instance, if we want to have a list with the content of the /etc folder we can redirect the output to the file cat.txt. Then , we only need to open the file with whatever tool we want.
 1 [root@delphos ~]# ls /etc/ > etc.txt
 2 [root@delphos ~]# cat etc.txt
 3 adjtime
 4 aliases
 5 aliases.db
 6 alternatives
 7 anacrontab
 8 .
 9 .
10 .
2.4.- Installing software
One of the main tasks an administrator has to deal with is installing new software. This is done mainly in CentOS with the rpm and yum utilities. This is valid for CentOS 6 as well as for CentOS 7. However, when working with yum we’ll see that there are some minor differences between the two CentOS versions, so we’ll study them in two different sub-sections (2.4.1 and 2.4.2).
The application rpm was developed by RedHat as a software package manager, it allows the user to install new packages very easily and it keeps a database with all the software installed in the system. The rpm file contains the binary code that will be installed as well as the scripts that need to be executed before or after the installation, to copy the files to the final destination, create directories, etc… For instance, if we have mounted the dvd in /media/cdrom we could install an rpm like this:
1 [root@delphos ~]# rpm -ivh /media/cdrom/Packages/gedit-2.28.4-3.el6.i686.rpm
2 Preparing...                ########################################### [100%]
3         package gedit-1:2.28.4-3.el6.i686 is already installed
We tell rpm to install (-i) the package gedit, to show us the progress of the installation (-h) and to show us as many information as possible (-v). At any moment we can check the software currently installed in the system with rpm.
 1 [root@delphos ~]# rpm -qa
 2 libnl-1.1-14.el6.i686
 3 ca-certificates-2010.63-3.el6_1.5.noarch
 4 python-iwlib-0.1-1.2.el6.i686
 5 centos-release-6-2.el6.centos.7.i686
 6 pciutils-3.1.4-11.el6.i686
 7 iwl5000-firmware-8.83.5.1_1-1.el6_1.1.noarch
 8 lsof-4.82-2.el6.i686
 9 xorg-x11-drv-ati-firmware-6.14.2-7.el6.noarch
10 libedit-2.11-4.20080712cvs.1.el6.i686
11 iwl4965-firmware-228.61.2.24-2.1.el6.noarch
12 libpcap-1.0.0-6.20091201git117cb5.el6.i686
13 .
14 .
15 .
If we want to check that the package named gedit is installed we can do it by combining the former command and grep.
1 [root@delphos ~]# rpm -qa | grep -i gedit
2 gedit-2.28.4-3.el6.i686
And finally, if we want to erase the new installed package, it is very easy too.
1 [root@delphos ~]# rpm -e gedit
2 [root@delphos ~]# rpm -qa | grep -i gedit
3 [root@delphos ~]#
Every rpm file also states the rpms it depends on, that is to say, the rpms that need to be installed before, so that the one we are installing right now will work. So it could happen, and it usually does, that a software depends on a certain library to work, which in turn depends on another component and so on. For example, if we try to install logwatch we’ll get the following message
1 [root@delphos ~]# rpm -ivh /media/cdrom/Packages/logwatch-7.3.6-49.el6.noarch.rp\
2 m
3 error: Failed dependencies:
4         mailx is needed by logwatch-7.3.6-49.el6.noarch
5         perl(Date::Manip) is needed by logwatch-7.3.6-49.el6.noarch
This has been called “dependency hell” and it’s been a nightmare for every Linux administrator during years. To solve this problem yum was created. Yum tries to check and solve automatically the dependencies every package has, so that software installation runs smoothly.
2.4.1.- Configuring yum in Centos 6
Yum can be configured to search for software packages in different repositories. By default it is configured to get the package from http://mirror.centos.org. If we are not connected to the Internet we’ll have to tell yum to use the local DVD as a repository. This repository is already configured, but it is disabled by default. In the /etc/yum.repos.d directory we can see the files associated with the yum repositories.
1 [root@delphos ~]# ls /etc/yum.repos.d/
2 CentOS-Base.repo  CentOS-Debuginfo.repo  CentOS-Media.repo
We can edit the CentOS-Media.repo file to enable the repository, but we can also use yum for this. If we type the yum command it will show us the different options associated on the screen. To see the current repositories we execute yum repolist.
 1 [root@delphos ~]# yum repolist
 2 Loaded plugins: fastestmirror
 3 Loading mirror speeds from cached hostfile
 4 Could not retrieve mirrorlist http://mirrorlist.centos.org/?release=6&arch=i386&\
 5 repo=os error was
 6 14: PYCURL ERROR 6 - "Couldn't resolve host 'mirrorlist.centos.org'"
 7 repo id                        repo name                                  status
 8 base                           CentOS-6 - Base                            0
 9 extras                         CentOS-6 - Extras                          0
10 updates                        CentOS-6 - Updates                         0
11 repolist: 0
To make sure that yum uses only the local dvd repository we’ll have to disable all the repositories and then enable the repository c6-media. We can do that with the –disablerepo and –enablerepo options. So the full command to list the software packages available in the local dvd would be this: yum –disablerepo=* –enablerepo=c6-media list.
Now, if we execute the yum list command, we will see all the packages available in this repository, as long as the dvd is mounted. If it is not, we can mount it at any time with the mount command. For instance to mount the cdrom in the directory /media/cdrom, we create the directory (if it doesn’t exist) and execute the mount /dev/cdrom /media/cdrom command.
1 [root@delphos ~]# mkdir /media/cdrom
2 [root@delphos ~]# mount /dev/cdrom /media/cdrom/
3 mount: block device /dev/sr0 is write-protected, mounting read-only
We can see part of the listing of available packages.
 1 [root@delphos ~]# yum --disablerepo=* --enablerepo=c6-media list
 2 Loaded plugins: fastestmirror
 3 Loading mirror speeds from cached hostfile
 4  * c6-media:
 5 Installed Packages
 6 ConsoleKit.i686                            0.4.1-3.el6                 @anaconda\
 7 -CentOS-201112130233.i386/6.2
 8 ConsoleKit-libs.i686                       0.4.1-3.el6                 @anaconda\
 9 -CentOS-201112130233.i386/6.2
10 GConf2.i686                                2.28.0-6.el6                @c6-media
11 MAKEDEV.i686                               3.24-6.el6                  @anaconda\
12 -CentOS-201112130233.i386/6.2
13 ORBit2.i686                                2.14.17-3.1.el6             @c6-media
14 acl.i686                                   2.2.49-6.el6                @anaconda\
15 -CentOS-201112130233.i386/6.2
16 aic94xx-firmware.noarch                    30-2.el6                    @anaconda\
17 -CentOS-201112130233.i386/6.2
18 alsa-lib.i686                              1.0.22-3.el6                @c6-media
19 apr.i686                                   1.3.9-3.el6_1.2             @c6-media
20 apr-util.i686                              1.3.9-3.el6_0.1             @c6-media
21 apr-util-ldap.i686                         1.3.9-3.el6_0.1             @c6-media
22 atk.i686                                   1.28.0-2.el6                @c6-media
23 atmel-firmware.noarch                      1.3-7.el6                   @anaconda\
24 -CentOS-201112130233.i386/6.2
25 attr.i686                                  2.4.44-7.el6                @anaconda\
26 -CentOS-201112130233.i386/6.2
27 audit.i686                                 2.1.3-3.el6                 @anaconda\
28 -CentOS-201112130233.i386/6.2
29 audit-libs.i686                            2.1.3-3.el6                 @anaconda\
30 -CentOS-201112130233.i386/6.2
31 authconfig.i686                            6.1.12-5.el6                @anaconda\
32 -CentOS-201112130233.i386/6.2
33 avahi-libs.i686                            0.6.25-11.el6               @c6-media
34 b43-openfwwf.noarch                        5.2-4.el6                   @anaconda\
35 -CentOS-201112130233.i386/6.2
36 basesystem.noarch                          10.0-4.el6                  @anaconda\
37 -CentOS-201112130233.i386/6.2
38 bash.i686                                  4.1.2-8.el6.centos          @anaconda\
39 -CentOS-201112130233.i386/6.2
40 .
41 .
42 .
2.4.2.- Configuring yum in Centos 7
In Centos 7 by default there isn’t any predefined repository to use the dvd. So we’ll have to create it by hand. In the /etc/yum.repo.d/ folder we’ll see this.
1 [root@Centos7 ~]# ls /etc/yum.repos.d/
2 CentOS-Base.repo  CentOS-Debuginfo.repo  CentOS-Sources.repo  CentOS-Vault.repo
3 [root@Centos7 ~]#
We have to create a new file named CentOS-Media.repo for this new repository. We can create it from scratch or we can use this nice example with comments from the Internet
1 [root@Centos7 yum.repos.d]# cat CentOS-Media.repo
2 [c7-media]
3 name=CentOS-$releasever - Media
4 baseurl=file:///media/cdrom/
5 gpgcheck=0
6 enabled=0
We’ll have to create the /media/cdrom directory and mount the cdrom too.
1 [root@Centos7 ~]# mkdir /media/cdrom
2 [root@CentOS7 ~]# mount /dev/cdrom /media/cdrom/
3 mount: block device /dev/sr0 is write-protected, mounting read-only
Now we can check whether this new repository works by listing the available packages.
 1 [root@Centos7 yum.repos.d]# yum --disablerepo=* --enablerepo=c7-media list
 2
 3 Installed Packages
 4 ModemManager-glib.x86_64               1.1.0-6.git20130913.el7         @anaconda
 5 NetworkManager.x86_64                  1:0.9.9.1-13.git20140326.4dba720.el7	@ana\
 6 conda
 7 NetworkManager-glib.x86_64             1:0.9.9.1-13.git20140326.4dba720.el7 @ana\
 8 conda
 9 NetworkManager-tui.x86_64              1:0.9.9.1-13.git20140326.4dba720.el7 @ana\
10 conda
11 acl.x86_64                             2.2.51-12.el7                   @anaconda
12 aic94xx-firmware.noarch                30-6.el7                        @anaconda
13 alsa-firmware.noarch                   1.0.27-2.el7                    @anaconda
14 alsa-lib.x86_64                        1.0.27.2-3.el7                  @anaconda
15 alsa-tools-firmware.x86_64             1.0.27-4.el7                    @anaconda
16 audit.x86_64                           2.3.3-4.el7                     @anaconda
17 audit-libs.x86_64                      2.3.3-4.el7                     @anaconda
18 authconfig.x86_64                      6.2.8-8.el7                     @anaconda
19 avahi.x86_64                           0.6.31-13.el7                   @anaconda
20 avahi-autoipd.x86_64                   0.6.31-13.el7                   @anaconda
21 avahi-libs.x86_64                      0.6.31-13.el7                   @anaconda
22 basesystem.noarch                      10.0-7.el7.centos               @anaconda
23 .
24 .
25 .
2.4.3.- Yum options
Yum is quite a versatile tool, we have seen how to list the packages but we can also list collections of packages called “groups”. To list these groups we could type yum –disablerepo=* –enablerepo=c6-media grouplist. After that, we will see on the screen a list with the groups already installed and those which are available to install. In this example there might be some differences between CentOS 6 and CentOS 7, as the yum versions are different. For instance, some groups might not appear by default in CentOS 7, in this case we should use the option “group list hidden”.
In CentOS 6:
 1 [root@delphos ~]# yum --disablerepo=* --enablerepo=c6-media grouplist
 2 Loaded plugins: fastestmirror
 3 Loading mirror speeds from cached hostfile
 4  * c6-media:
 5 Setting up Group Process
 6 Checking for new repos for mirrors
 7 Installed Groups:
 8    Client management tools
 9    E-mail server
10    Graphical Administration Tools
11    Messaging Client Support
12    Systems Management Messaging Server support
13 Installed Language Groups:
14    Arabic Support [ar]
15    Armenian Support [hy]
16    Georgian Support [ka]
17 .
18 .
19 .
In CentOS 7:
  1 [root@CentOS7 ~]# yum --disablerepo=* --enablerepo=c7-media group list
  2 Loaded plugins: fastestmirror
  3 Loading mirror speeds from cached hostfile
  4 Available environment groups:
  5    Minimal Install
  6    Infrastructure Server
  7    File and Print Server
  8    Basic Web Server
  9    Virtualization Host
 10    Server with GUI
 11    GNOME Desktop
 12    KDE Plasma Workspaces
 13    Development and Creative Workstation
 14 Installed groups:
 15    System Administration Tools
 16 Available Groups:
 17    Compatibility Libraries
 18    Console Internet Tools
 19    Development Tools
 20    Graphical Administration Tools
 21    Legacy UNIX Compatibility
 22    Scientific Support
 23    Security Tools
 24    Smart Card Support
 25    System Management
 26 Done
 27
 28 [root@CentOS7 ~]# yum --disablerepo=* --enablerepo=c7-media group list hidden
 29 Loaded plugins: fastestmirror
 30 Loading mirror speeds from cached hostfile
 31 Available environment groups:
 32    Minimal Install
 33    Infrastructure Server
 34    File and Print Server
 35    Basic Web Server
 36    Virtualization Host
 37    Server with GUI
 38    GNOME Desktop
 39    KDE Plasma Workspaces
 40    Development and Creative Workstation
 41 Installed groups:
 42    Core
 43    E-mail Server
 44    Network Infrastructure Server
 45    System Administration Tools
 46 Available Groups:
 47    Additional Development
 48    Anaconda Tools
 49    Backup Client
 50    Backup Server
 51    Base
 52    Compatibility Libraries
 53    Conflicts (Client)
 54    Conflicts (Server)
 55    Conflicts (Workstation)
 56    Console Internet Tools
 57    DNS Name Server
 58    Debugging Tools
 59    Desktop Debugging and Performance Tools
 60    Development Tools
 61    Dial-up Networking Support
 62    Directory Client
 63    Directory Server
 64    Emacs
 65    FTP Server
 66    File and Storage Server
 67    Fonts
 68    GNOME
 69    GNOME Applications
 70    Graphical Administration Tools
 71    Graphics Creation Tools
 72    Guest Agents
 73    Guest Desktop Agents
 74    Hardware Monitoring Utilities
 75    High Availability
 76    Identity Management Server
 77    Infiniband Support
 78    Input Methods
 79    Internet Applications
 80    Internet Browser
 81    Java Platform
 82    KDE
 83    KDE Applications
 84    KDE Multimedia Support
 85    Large Systems Performance
 86    Legacy UNIX Compatibility
 87    Legacy X Window System Compatibility
 88    Load Balancer
 89    Mainframe Access
 90    MariaDB Database Client
 91    MariaDB Database Server
 92    Multimedia
 93    Network File System Client
 94    Networking Tools
 95    Office Suite and Productivity
 96    PHP Support
 97    Performance Tools
 98    Perl Support
 99    Perl for Web
100    Platform Development
101    PostgreSQL Database Client
102    PostgreSQL Database Server
103    Print Server
104    Printing Client
105    Python
106    Remote Desktop Clients
107    Remote Management for Linux
108    Resilient Storage
109    Ruby Support
110    Scientific Support
111    Security Tools
112    Smart Card Support
113    System Management
114    Technical Writing
115    Virtualization Client
116    Virtualization Hypervisor
117    Virtualization Platform
118    Virtualization Tools
119    Web Server
120    Web Servlet Engine
121    X Window System
122 Done
If we wanted to install one of this groups, such as “Hardware monitoring utilities” we could get some more information about it with the groupinfo parameter.
 1 [root@delphos www]# yum --disablerepo=* --enablerepo=c6-media groupinfo "Hardwar\
 2 e monitoring utilities"
 3 Loaded plugins: fastestmirror
 4 Loading mirror speeds from cached hostfile
 5  * c6-media:
 6 Setting up Group Process
 7 Checking for new repos for mirrors
 8
 9
10 Group: Hardware monitoring utilities
11  Description: A set of tools to monitor server hardware
12  Default Packages:
13    smartmontools
14  Optional Packages:
15    edac-utils
16    lm_sensors
As we can see, the group consist of one default package and two optional packages. The default packages will be installed whenever we install the group, whereas the optional packages will be installed only if we specify it. So, to install the group with its additional package, we would use this command: ‘yum –disablerepo=* –enablerepo=c6-media –setopt=group_package_types=optional groupinstall “Hardware monitoring utilities”‘. An information screen will appear later asking for confirmation. We say yes (y).
 1 [root@delphos ~]# yum --disablerepo=* --enablerepo=c6-media --setopt=group_packa\
 2 ge_types=optional groupinstall "Hardware monitoring utilities"
 3 Loaded plugins: fastestmirror
 4 Loading mirror speeds from cached hostfile
 5  * c6-media:
 6 Setting up Group Process
 7 Checking for new repos for mirrors
 8 Resolving Dependencies
 9 --> Running transaction check
10 ---> Package edac-utils.i686 0:0.9-14.el6 will be installed
11 ---> Package lm_sensors.i686 0:3.1.1-10.el6 will be installed
12 --> Finished Dependency Resolution
13
14 Dependencies Resolved
15
16 ================================================================================
17  Package            Arch         Version                 Repository        Size
18 ================================================================================
19 Installing:
20  edac-utils         i686         0.9-14.el6              c6-media          40 k
21  lm_sensors         i686         3.1.1-10.el6            c6-media         122 k
22
23 Transaction Summary
24 ================================================================================
25 Install       2 Package(s)
26
27 Total download size: 162 k
28 Installed size: 415 k
29 Is this ok [y/N]: y
30 Downloading Packages:
31 --------------------------------------------------------------------------------
32 Total                                           2.0 MB/s | 162 kB     00:00
33 Running rpm_check_debug
34 Running Transaction Test
35 Transaction Test Succeeded
36 Running Transaction
37   Installing : lm_sensors-3.1.1-10.el6.i686                                 1/2
38   Installing : edac-utils-0.9-14.el6.i686                                   2/2
39
40 Installed:
41   edac-utils.i686 0:0.9-14.el6          lm_sensors.i686 0:3.1.1-10.el6
42
43 Complete!
Another useful characteristic of yum is its ability to identify in which package a command is located. One of the most helpful tools for a Linux administrator are the man pages, these provide the user with a lot of information about the different commands and configuration files of the system.
As we have performed a minimum install of CentOS, man will not be installed by default. Nevertheless we can identify the package to install thanks to the yum command.
1 [root@delphos ~]# man
2 -bash: man: command not found
3 [root@delphos ~]# yum --disablerepo=* --enablerepo=c6-media provides man
4 Loaded plugins: fastestmirror
5 Loading mirror speeds from cached hostfile
6  * c6-media:
7 man-1.6f-29.el6.i686 : A set of documentation tools: man, apropos and whatis
8 Repo        : c6-media
9 Matched from:
As we can see, the package to install is called - not surprisingly - man. In this case the name of the package is very intuitive, but it is not always like this and, in these cases, yum is very helpful. Now we just type “yum –disablerepo=* –enablerepo=c6-media install man”. And we can use man to obtain information about any command.
 1 [root@delphos ~]# yum --disablerepo=* --enablerepo=c6-media install man
 2 [root@delphos ~]# man ls
 3
 4 LS(1)                            User Commands                           LS(1)
 5
 6 NAME
 7        ls - list directory contents
 8
 9 SYNOPSIS
10        ls [OPTION]... [FILE]...
11
12 DESCRIPTION
13        List  information  about  the FILEs (the current directory by default).
14        Sort entries alphabetically if none of -cftuvSUX nor --sort  is  speci‐
15        fied.
16
17        Mandatory  arguments  to  long  options are mandatory for short options
18        too.
19
20        -a, --all
21               do not ignore entries starting with .
22
23        -A, --almost-all
24               do not list implied . And ..
25 .
26 .
27 .
2.5.- Graphical environment
2.5.1.- CentOS 6
After performing a minimal installation, there will be no graphical environment. If we want to start the server in graphic mode we’ll need to install a series of packages. We can combine the the required groups in the same yum command:
1 [root@localhost ~]# yum -y --disablerepo=* --enablerepo=c6-media groupinstall "D\
2 esktop" "Desktop Platform" "X Window System" "Fonts"
In this case we specified the “-y” option in order not to be asked for confirmation before installing the software. As haven’t configured networking yet, we’ll need to install from the CD repository by specifying the –disablerepo and –enablerepo options.
Once the required packages have been installed we can switch to graphical mode with the init 5 command.
1 [root@localhost ~]# init 5
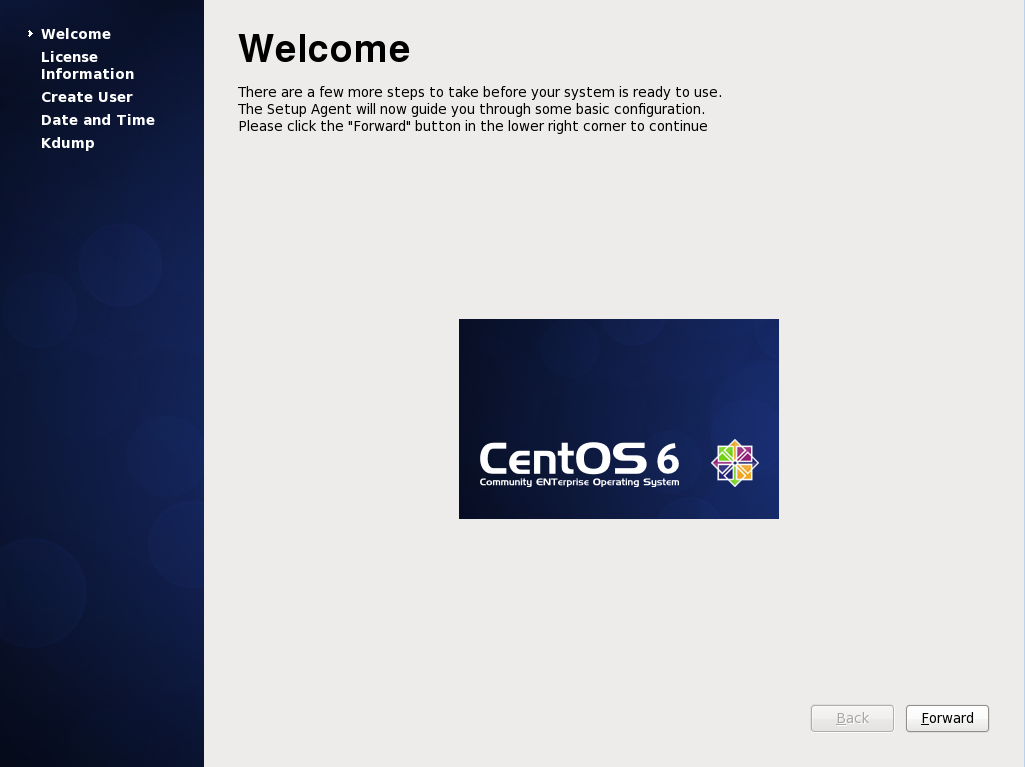
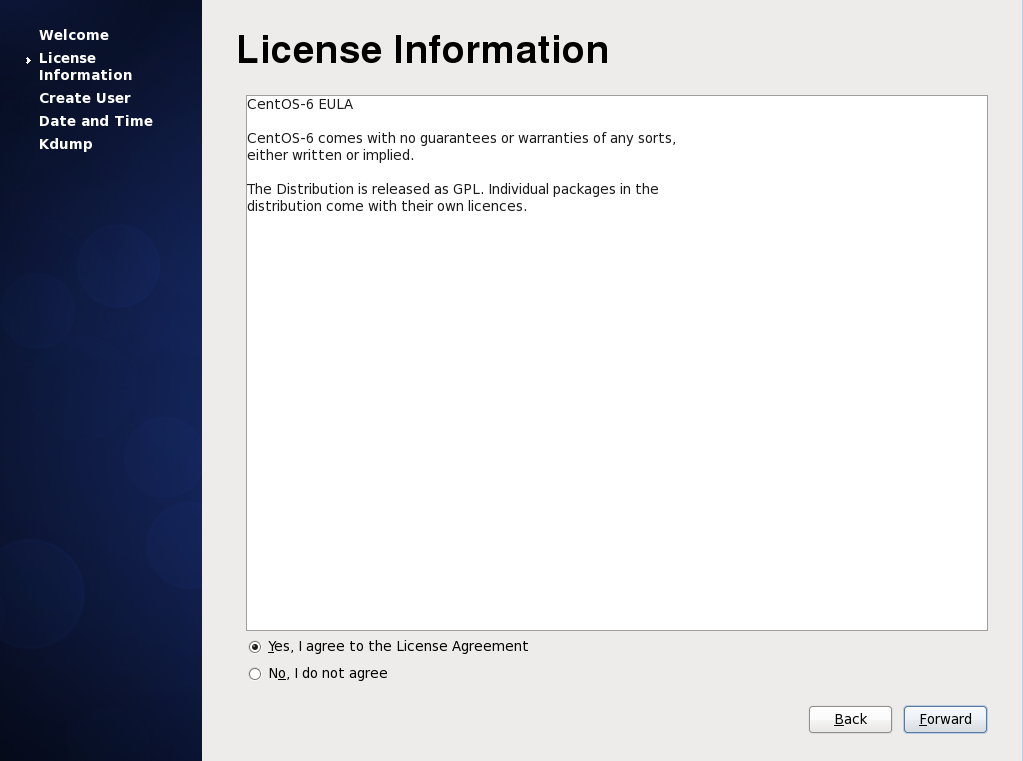
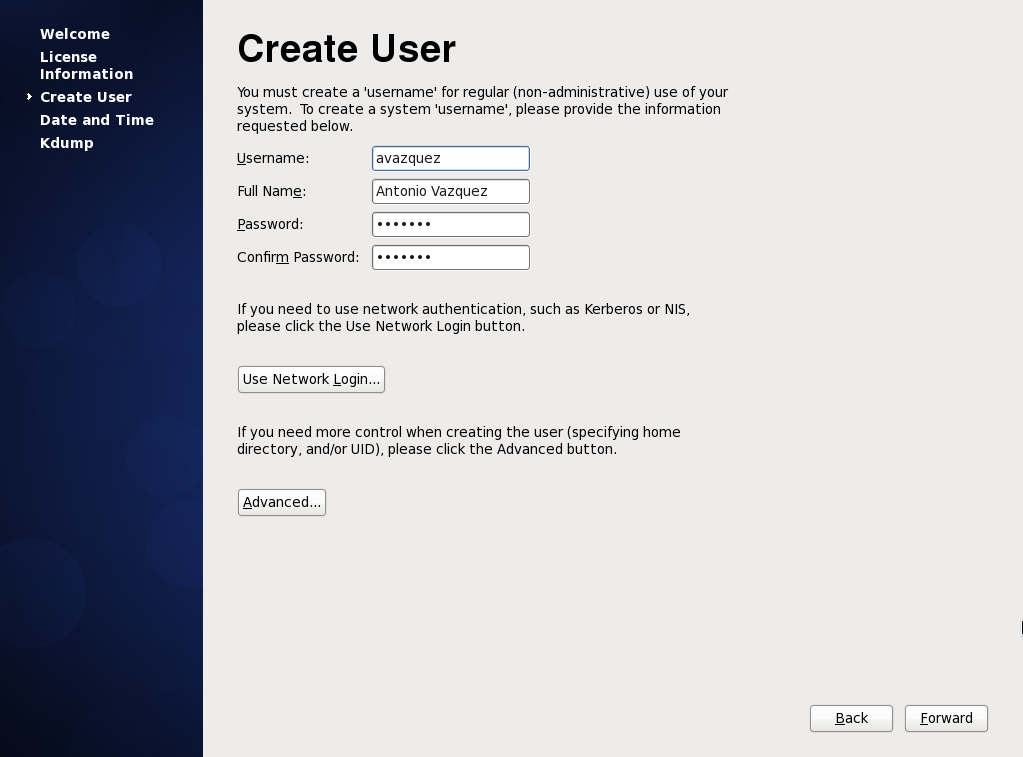
The first time we’ll see a welcoming screen (Fig. 34) and the usual license information (Fig. 35). Next, the system will demand to create a normal (non root) user (Fig. 36) .
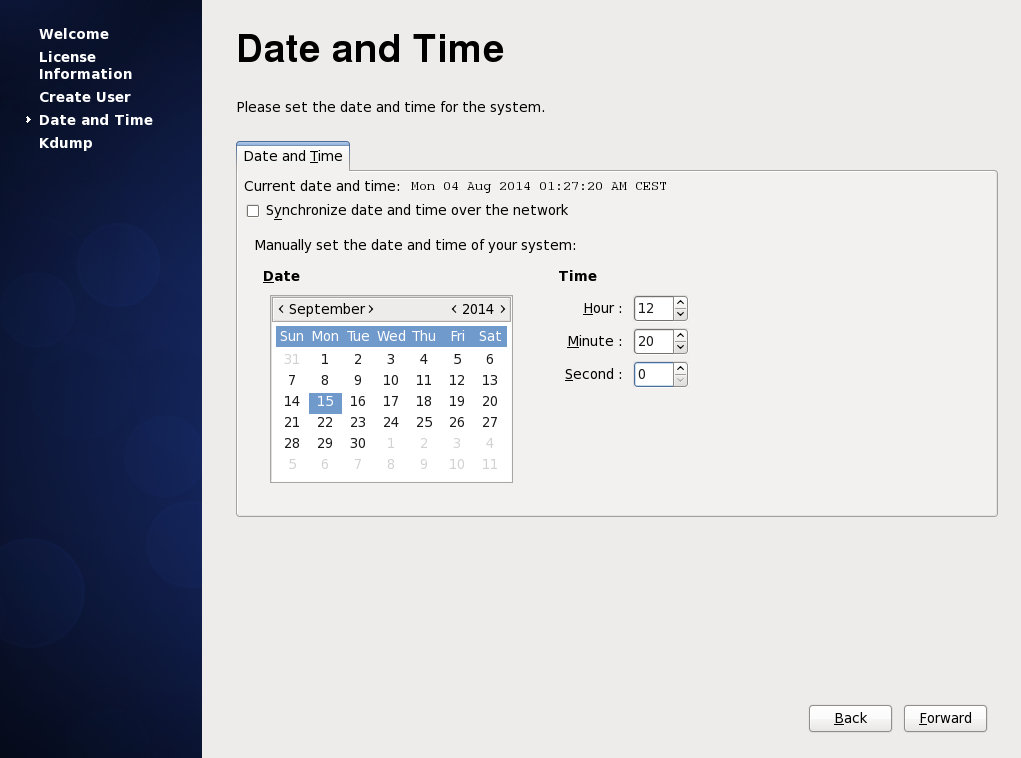
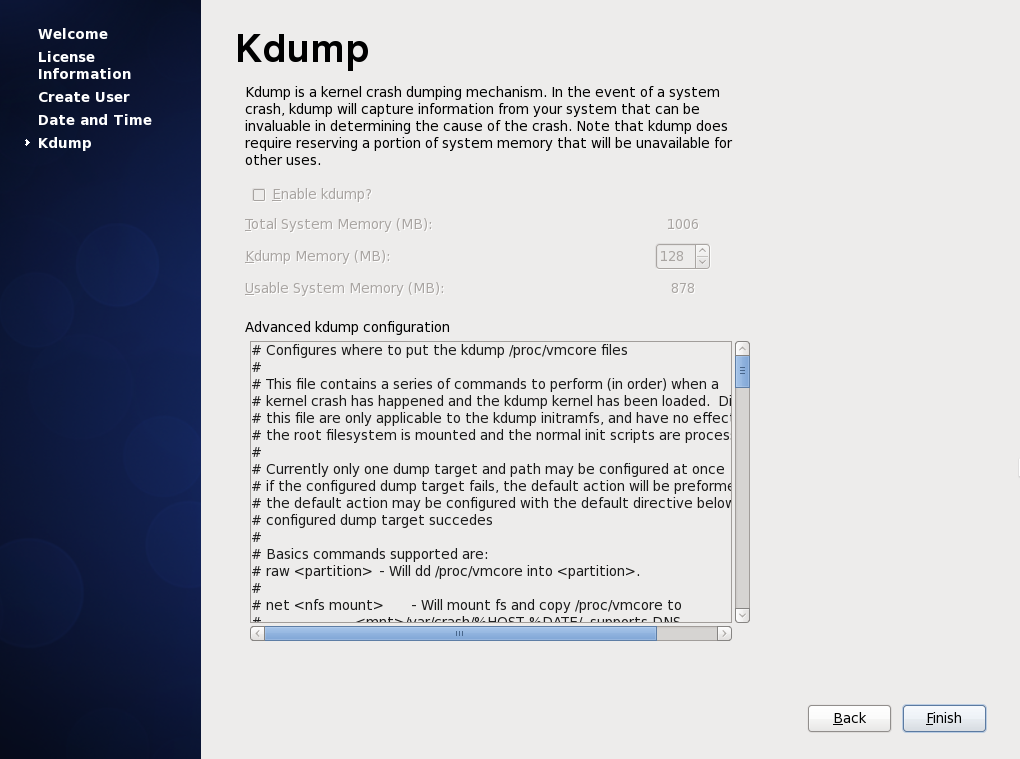
Then we’ll have to enter or confirm the information about the date and time (Fig. 37) and activate Kdump (Fig. 38), if we want to and we have enough memory. Kdump can be used to help troubleshooting a potential kernel crash. The way to use Kdump is beyond the scope of this book.
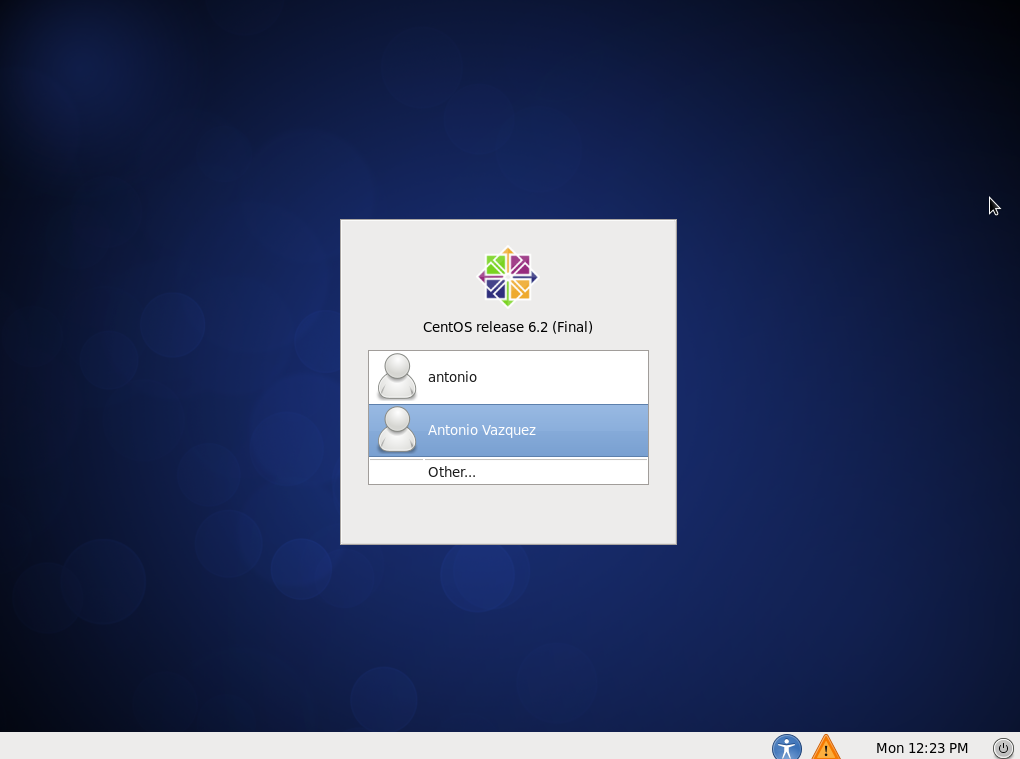
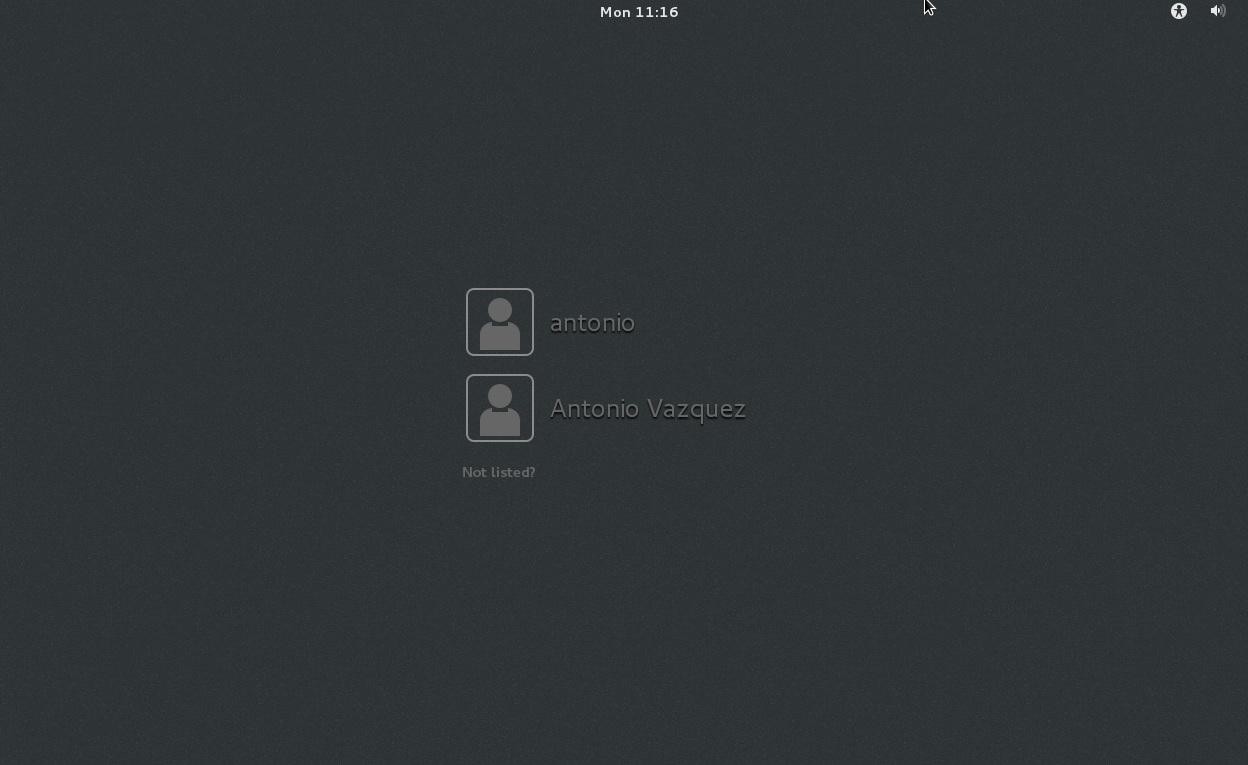
Finally we see the graphical login screen (Fig. 39).
2.5.2.- CentOS 7
If we’re using CentOS 7 the packages we need to install are these:
1 [root@CentOS7 ~]# yum --disablerepo=* --enablerepo=c7-media group install "X Win\
2 dow System"
3 [root@CentOS7 ~]# yum --disablerepo=* --enablerepo=c7-media group install "Gnome\
4  Desktop"
We can only use the local repository we created in the section 2.4.2, which searches for the software packages in the local CD/DVD. Later, when we configure networking, we can use the default network repositories instead.
When the installation finishes we can launch the graphical desktop with startx.
1 [root@CentOS7 ~]# startx
After a moment we’ll see this (s. Fig 40).
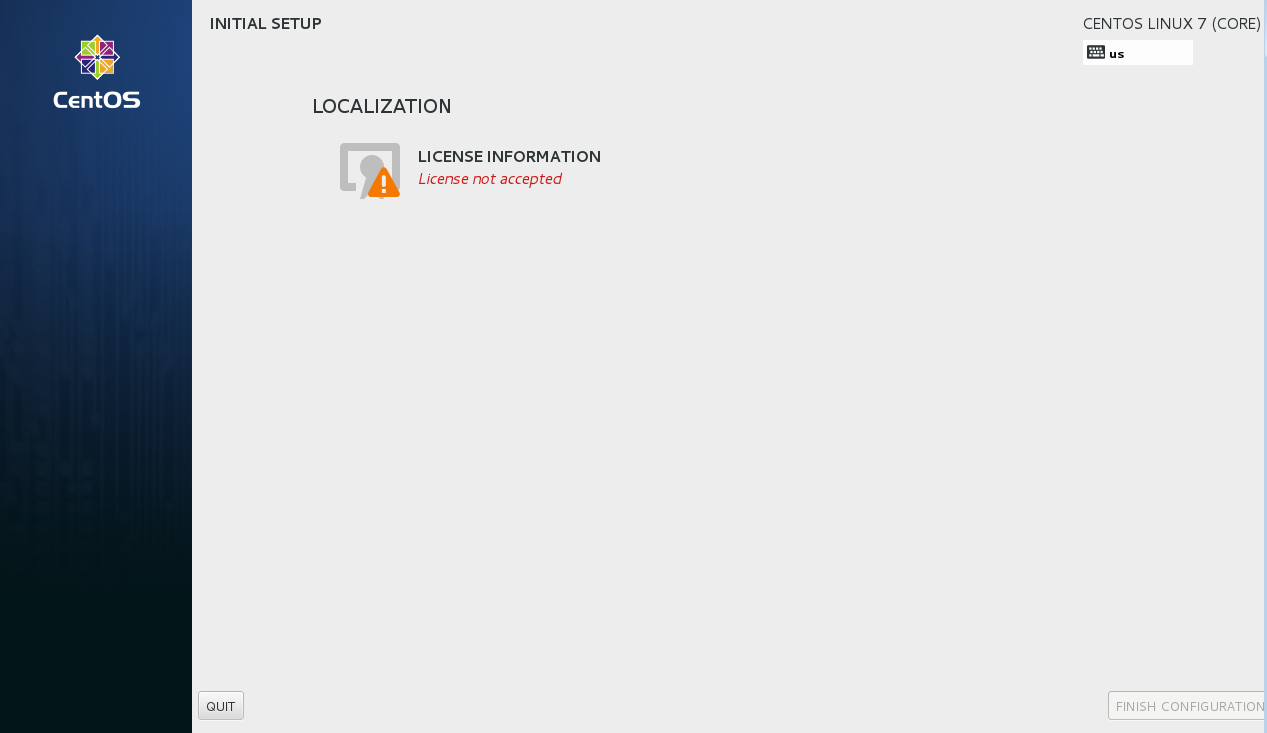
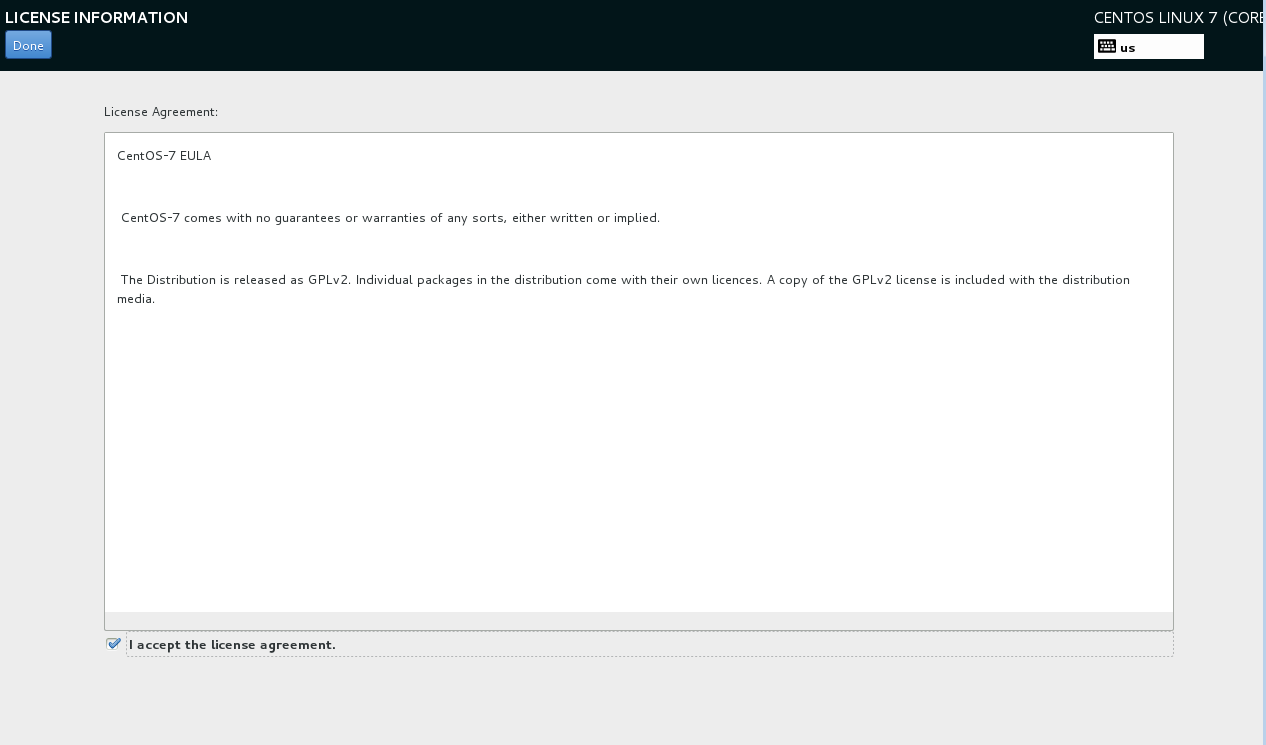
As we can see, the license information is missing, so we click on “LICENSE INFORMATION” and accept he license (s. Fig. 41).
After accepting the license and pressing the “Done” button, we can see that now the license’s been accepted (s. Fig. 42).
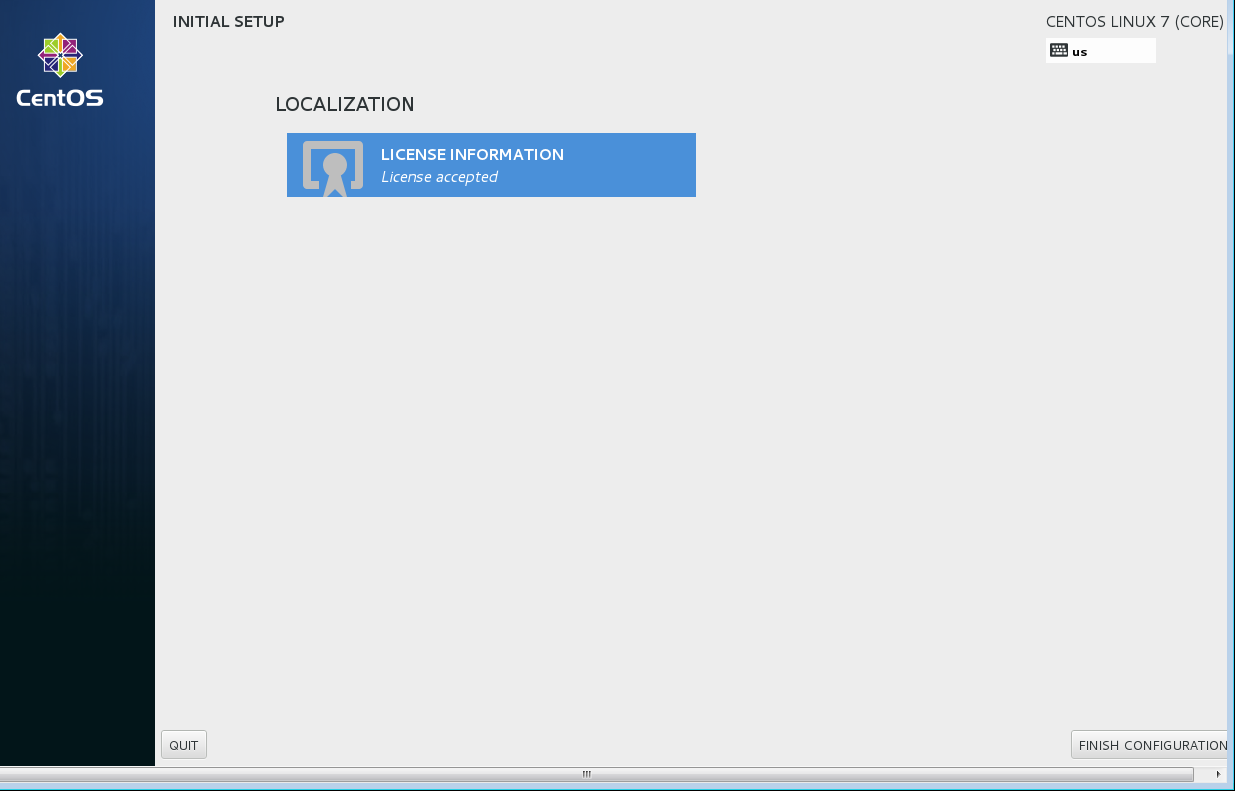
We click on “Finish configuration” and we access the graphical login screen (Fif. 43).
2.6.- Other useful commands
2.6.1.- chmod
Every file in a Linux system has a set of permissions associated, that is, not every user can read or modify the file. Some users might open the file and execute it (if it is a binary or a script file), some others might modify its content, etc… Traditionally every file in Linux has three sets of permissions associated, for the owner, the group and the rest of the users. We can see these permissions with the ls -l command. For example…
1 [root@localhost named]# ls -l /etc/init.d/named
2 -rwxr-xr-x. 1 root root 6806 Dec  7  2011 /etc/init.d/named
In this case, the owner(root) can read (r), write(w) and execute(x) the /etc/init.d/named script file. The group(root) can only read it and execute it. And the rest of the users can read and execute the file too.
If for some reason we need to change the permissions we can do it with chmod. We need to say what set of permissions we want to modify: u (owner), g (group), o (other) or a(all three). We also specify whether we want to add (+) or remove(-) the permission. Let’s see a couple of examples.
1 [root@localhost named]# chmod o+w /etc/init.d/named
2 [root@localhost named]# ls -l /etc/init.d/named
3 -rwxr-xrwx. 1 root root 6806 Dec  7  2011 /etc/init.d/named
We have added(+) the write(w) permission to the rest of users(other).
1 [root@localhost named]# chmod o-w /etc/init.d/named
2 [root@localhost named]# ls -l /etc/init.d/named
3 -rwxr-xr-x. 1 root root 6806 Dec  7  2011 /etc/init.d/named
And now we reverted the situation by removing(-) the write(w) permission.
2.6.2.- tee
We’ve already seen we can redirect the output of a command to a file.
 1 [root@delphos ~]# ls /var/ > var_folder.txt
 2 [root@delphos ~]# cat var_folder.txt
 3 cache
 4 db
 5 empty
 6 games
 7 lib
 8 local
 9 lock
10 log
11 mail
12 named
13 nis
14 opt
15 preserve
16 run
17 spool
18 tmp
19 www
20 yp
But sometimes we might be interested in watching the output of a command while redirecting it to another file. We can do this with tee.
 1 [root@delphos ~]# ls /var/ | tee var_folder.txt
 2 cache
 3 db
 4 empty
 5 games
 6 lib
 7 local
 8 lock
 9 log
10 mail
11 named
12 nis
13 opt
14 preserve
15 run
16 spool
17 tmp
18 www
19 yp
20 [root@delphos ~]# cat var_folder.txt
21 cache
22 db
23 empty
24 games
25 lib
26 local
27 lock
28 log
29 mail
30 named
31 nis
32 opt
33 preserve
34 run
2.6.3.- rm
Sometimes we need to remove files or directories, to do it we can use rm. For instance, to remove a file called file_to_delete.txt we’d simply type:
1 [root@delphos ~]# rm file_to_delete.txt
2 rm: remove regular empty file `file_to_delete.txt'? y
By default, rm asks for confirmation before deleting a file, but this can be overridden by using the -f parameter. If we want to delete a folder, we’ll have to use the -r(recursive) parameter.
1 [root@delphos ~]# rm -f file_to_delete.txt
2 rm: descend into directory `folder_to_delete'? y
3 rm: remove regular file `folder_to_delete/one.txt'? y
4 rm: remove regular file `folder_to_delete/two.txt'? y
5 rm: remove regular file `folder_to_delete/three.txt'? y
2.7.- SELinux
SELinux (Security Enhaced Linux) is a mandatory access control (MAC) security mechanism implemented in the kernel.It was developed by the NSA. It creates another layer of protection against unauthorized access and limits the damage a hacker could do to the system.
In every Linux system, SELinux could be in one of these three states:
- Disabled. SELinux is not executing and it won’t perform any action.
- Permissive. SELinux is monitoring the system behaviour and it logs the activity, but it won’t restrict any action the system performs.
- Enforcing. SELinux is executing and, depending on the configuration, it might block certain actions performed by processes.
We can see if SELinux is executing with the following command:
1 [root@localhost named]# sestatus
2 SELinux status:                 enabled
3 SELinuxfs mount:                /selinux
4 Current mode:                   enforcing
5 Mode from config file:          enforcing
6 Policy version:                 24
7 Policy from config file:        targeted
In this case, we can see that SELinux is enabled and in enforcing mode. When in enforcing mode SELinux will block any action that is not allowed by the SELinux settings. We could switch the current mode to permissive, which will permit any action SELinux would normally block but also writes a log with details about every action executed that violated SELinux settings. This permissive mode is very useful when tuning SELinux. We can switch to this mode with setenforce.
1 [root@centosv6 ~]# setenforce permissive
We can check that the change was sucessful either with the getenforce or the sestatus command.
1 [root@centosv6 ~]# getenforce
2 Permissive
3 [root@centosv6 ~]# sestatus
4 SELinux status:                 enabled
5 SELinuxfs mount:                /selinux
6 Current mode:                   permissive
7 Mode from config file:          enforcing
8 Policy version:                 24
9 Policy from config file:        targeted
It is possible to disable completely SELinux too. We can achieve it by editing the /etc/sysconfig/selinux file. There should be a line beginning with “SELINUX=” which could take three values: enforcing, permissive or disabled. When assigning it the value “disabled” SELinux will be disabled next time the computer is rebooted.
SELinux assigns “labels” to processes, files and folders. According to these labels, usually called contexts, the processes will be allowed or not to perform certain actions.
We can check the security context of any folder with the command ls -Z.
1 [root@centosv6 ~]# ls -Z /home/
2 drwx------. antonio antonio unconfined_u:object_r:user_home_dir_t:s0 antonio
3 drwx------. jose    jose    unconfined_u:object_r:user_home_dir_t:s0 jose
Different folders have different contexts associated.
1 [root@centosv6 ~]# ls -Z /var/www/
2 drwxr-xr-x. root root system_u:object_r:httpd_sys_script_exec_t:s0 cgi-bin
3 drwxr-xr-x. root root system_u:object_r:httpd_sys_content_t:s0 error
4 drwxr-xr-x. root root system_u:object_r:httpd_sys_content_t:s0 html
5 drwxr-xr-x. root root system_u:object_r:httpd_sys_content_t:s0 icons
For instance, in order for apache to access the html files of a Web site, the folder should have the httpd_sys_content_t context assigned. We must take this into account when configuring any service on CentOS, and of course we should also assign read, write and/or execute permissions when necessary.
If we need to change the context of a file or folder we can use chcon.
1 [root@centosv6 ~]# mkdir test
2 [root@centosv6 ~]# ls -Zd test
3 drwxr-xr-x. root root unconfined_u:object_r:admin_home_t:s0 test
4 [root@centosv6 ~]# chcon -t httpd_sys_content_t test/
5 [root@centosv6 ~]# ls -dZ test
6 drwxr-xr-x. root root unconfined_u:object_r:httpd_sys_content_t:s0 test
We can also see the context associated to a running process with ps -Z.
1 [root@CentOS7 ~]# ps -Z
2 LABEL                             PID TTY          TIME CMD
3 unconfined_u:unconfined_r:unconfined_t:s0-s0:c0.c1023 40884 pts/0 00:00:00 bash
4 unconfined_u:unconfined_r:unconfined_t:s0-s0:c0.c1023 45546 pts/0 00:00:01 ps
SELinux also keeps by default a series of boolean values that influence the behaviour of the system. We can get a list of these values with the getsebool command.
 1 [root@centosv6 ~]# getsebool -a
 2 abrt_anon_write --> off
 3 abrt_handle_event --> off
 4 allow_console_login --> on
 5 allow_cvs_read_shadow --> off
 6 allow_daemons_dump_core --> on
 7 allow_daemons_use_tcp_wrapper --> off
 8 allow_daemons_use_tty --> on
 9 allow_domain_fd_use --> on
10 allow_execheap --> off
11 allow_execmem --> on
12 .
13 .
14 .
We can change any of these boolean values with setsebool.
1 [root@centosv6 ~]# setsebool abrt_anon_write on
2 [root@centosv6 ~]# getsebool abrt_anon_write
3 abrt_anon_write --> on
The change will take effect inmediately, but when the server is rebooted again, the parameter will be assigned its former value. In order to make the change permanent we need to add “-P” to the above command.
1 [root@centosv6 ~]# setsebool -P abrt_anon_write on
Another useful tool when managing SELinux is semanage. Usually it is not installed by default, so if we want to use it we’ll have to install the policycoreutils-python package.
With semanage we can get a list of the different contexts.
 1 [root@centosv6 ~]# semanage fcontext -l
 2 SELinux fcontext                                   type               Context
 3
 4 /                                                  directory          system_u:o\
 5 bject_r:root_t:s0
 6 /.*                                                all files          system_u:o\
 7 bject_r:default_t:s0
 8 /[^/]+                                             regular file       system_u:o\
 9 bject_r:etc_runtime_t:s0
10 /\.autofsck                                        regular file       system_u:o\
11 bject_r:etc_runtime_t:s0
12 /\.autorelabel                                     regular file       system_u:o\
13 bject_r:etc_runtime_t:s0
14 /\.journal                                         all files          <<None>>
15 /\.suspended                                       regular file       system_u:o\
16 bject_r:etc_runtime_t:s0
17 /a?quota\.(user|group)                             regular file       system_u:o\
18 bject_r:quota_db_t:s0
19 /afs                                               directory          system_u:o\
20 bject_r:mnt_t:s0
21 /bin                                               directory          system_u:o\
22 bject_r:bin_t:s0
23 /bin/.*                                            all files          system_u:o\
24 bject_r:bin_t:s0
25 /bin/alsaunmute                                    regular file       system_u:o\
26 bject_r:alsa_exec_t:s0
27 /bin/bash                                          regular file       system_u:o\
28 bject_r:shell_exec_t:s0
29 /bin/bash2                                         regular file       system_u:o\
30 bject_r:shell_exec_t:s0
31 /bin/d?ash                                         regular file       system_u:o\
32 bject_r:shell_exec_t:s0
33 .
34 .
35 .
We can also get a list of SELinux booleans with a short description.
 1 [root@centosv6 ~]# semanage boolean -l
 2 SELinux boolean                State  Default Description
 3
 4 ftp_home_dir                   (off  ,  off)  Allow ftp to read and write files \
 5 in the user home directories
 6 smartmon_3ware                 (off  ,  off)  Enable additional permissions need\
 7 ed to support devices on 3ware controllers.
 8 xdm_sysadm_login               (off  ,  off)  Allow xdm logins as sysadm
 9 xen_use_nfs                    (off  ,  off)  Allow xen to manage nfs files
10 mozilla_read_content           (off  ,  off)  Control mozilla content access
11 ssh_chroot_rw_homedirs         (off  ,  off)  Allow ssh with chroot env to read \
12 and write files in the user home directories
13 tftp_anon_write                (off  ,  off)  Allow tftp to modify public files \
14 used for public file transfer services.
15 allow_console_login            (on   ,   on)  Allow direct login to the console \
16 device. Required for System 390
17 spamassassin_can_network       (off  ,  off)  Allow user spamassassin clients to\
18  use the network.
19 .
20 .
21 .
Along the book we’ll use these tools to configure SELinux to allow the execution of different network services.