5. January 2014
- Updating the GitHub repos for the 1.6.0 release of the Eclipse Fortify Plugin
- Saga to sign an eclipse plugin with a code cert
- Fixing Coding Signing issue where Eclipse Plugin didn’t install in Indigo
- Eclipse Groovy script to remove the ‘busy’ image from the WebBrowser Editor
- Viewing Eclipse and SWT objects (Workbench, Display and Shell) using Groovy’s ObjectBrowser and using TeamMentor’s Plugin ObjectBrowser
Updating the GitHub repos for the 1.6.0 release of the Eclipse Fortify Plugin
As you can see by the recent eclipse related posts, I have been working on a Plugin for Eclipse that shows TeamMentor guidance to users that have access to the Fortify Eclipse plugin (and *.fpr files). We are now in the final stages of releasing the first public version (1.6.0) which is actually made of two parts: An Eclipse Plugin builder (which is Open Source) and a small ‘Fortify Specific’ code-mapping script. Very soon these will be in separate projects, but for now they are all hosted at the TeamMentor/TeamMentor_Eclipse_Plugin.
This post is just to document the current GitHub development model and where to find the main parts of this release.
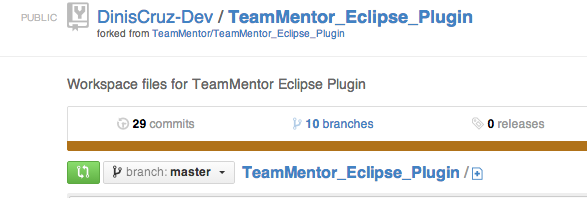
As mentioned above, the master version of the code is at TeamMentor/TeamMentor_Eclipse_Plugin which currently looks like this:
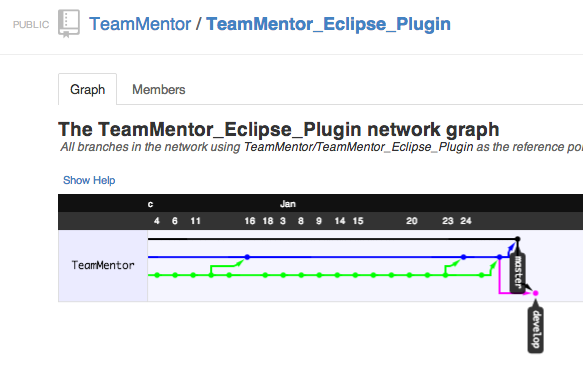
One interesting point here is that for this release I did not use my main GitHub DinisCruz account, but used instead a much less powerful GitHub DinisCruz-Dev account.
To see this in action, note how the Pull Request commits (into the master and develop branch) are made using the DinisCruz account:
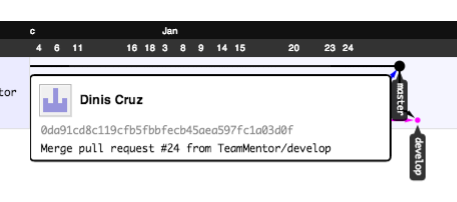
… and the development commits are made using the DinisCruz-Dev account:
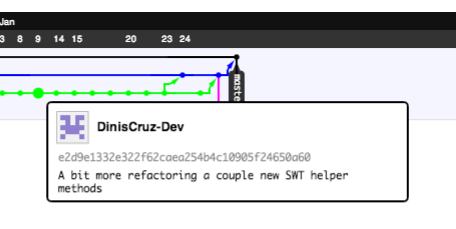
What I did was to fork into the DinisCruz-Dev account, the TeamMentor/TeamMentor_Eclipse_Plugin repo:
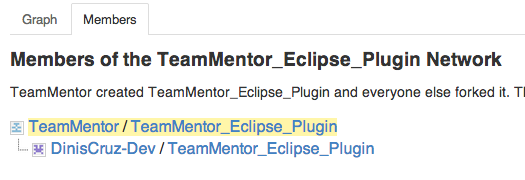
… which was then used during development (which in practice means that the DinisCruz-Dev account does NOT have commit privileges to the release version of the code base)
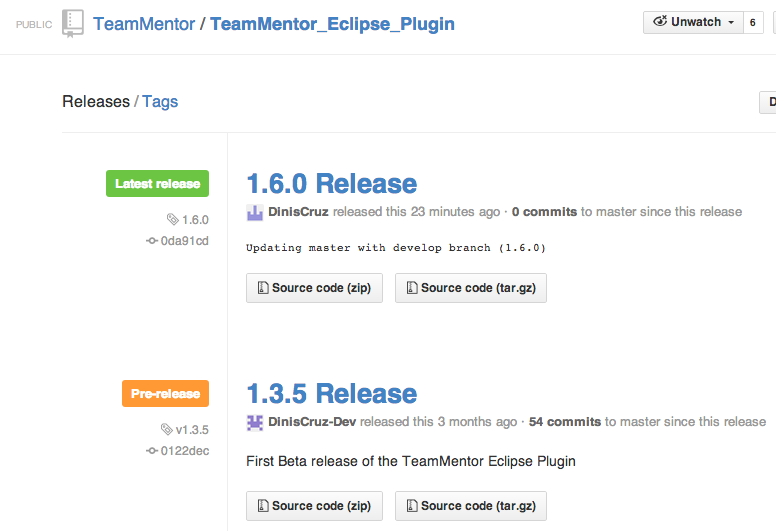
In terms of the 1.6.0 release, I also added a Git Tag to it (now possible to do via the GitHub web UI), so that this version can be easily accessed and downloaded from the repo’s Releases page:
In order to help installation and deployment of this plugin in Eclipse, there is also this Eclipse Update site repo TeamMentor/TeamMentor_Eclipse_Plugin_Deploy
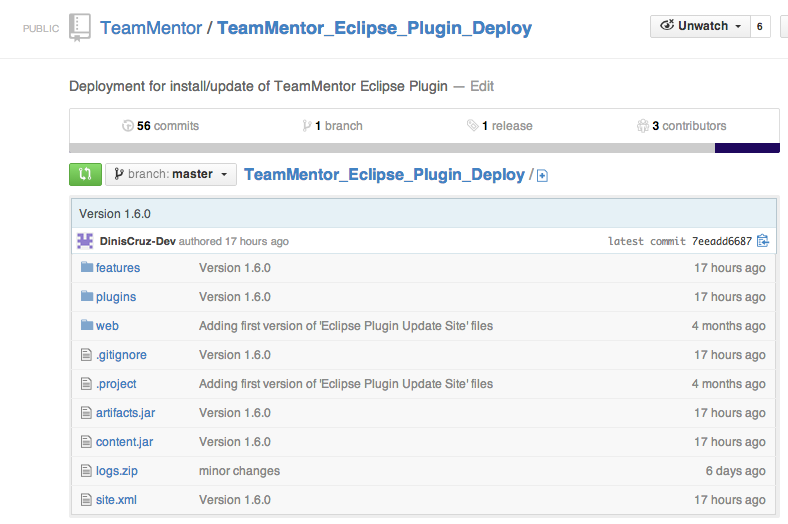
… which also contains the v.1.6.0 release tag:
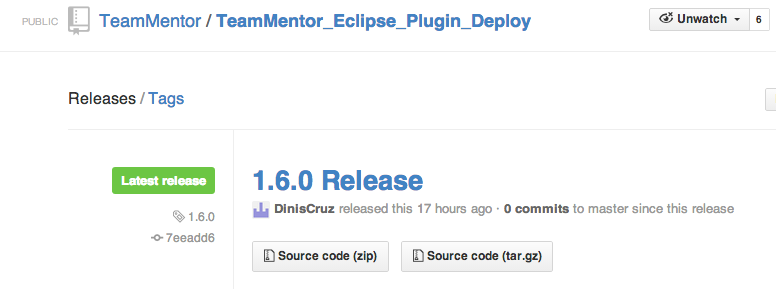
… and can be used inside eclipse using a local clone of this repo, or via this temp update site
https://eclipse-plugin-builder.scm.azurewebsites.net (see more detailed installation instructions at: TeamMentor Plugin and Builder v1.5.6 (Source Code and Eclipse Update site) ).
Now that this release is out of the way, I will try to write a number of blog posts that show how it works and how powerful the Eclipse Plugin Builder is (for example to add support for more tools or easily create eclipse plugins to help developers to write better/securer code)
Saga to sign an eclipse plugin with a code cert
Signing an Eclipse Plugin with a code cert should be simple right?
Well this is probably one of those cases that maybe it is obvious for others with more knowledge on how java code signing works, but I’ve spend the good part of two days trying to sign an eclipse plugin, and finally I was able to get it to work.
I will start with the solution (as executed in OSX), and then talk about the problem:
1) MK (SI’s tech guru), created the SecurityInnovationInc.csr and SecurityInnovationInc.key files using
openssl req -new -newkey rsa:2048 -nodes -out SecurityInnovationInc.csr -keyout SecurityInnovationInc.key -subj “/C=US/ST=Massachusetts/L=/O=Security Innovation Inc./CN=SecurityInnovationInc.”
2) MK then sent the SecurityInnovationInc.csr to Global Sign (as part of their Code-Signing cert service)
3) After a bit (I think about a day or so) MK received from Global Sign two files: intermediate.cer.txt and OS201311137236.cer.txt
4) MK then send me (via a protected channel) a zip with the following files
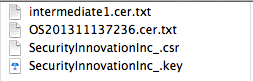
5) After:
a) renaming the intermediate.cer.txt into intermediate.cer.txt
b) renaming OS201311137236.cer.txt into OS201311137236.cer and
c) downloading the GlobalSign Root CA cert from here into GSRoot.cer
I used the cat command to create the server-cert.txt file:
cat OS201311137236.cer intermediate1.cer GSRoot.cer > server-cert.txt
6) With the server-cert.txt I used openssl to create a PKCS12 keystore (server-cert.pkcs12 ) using:
openssl pkcs12 -export -inkey SecurityInnovationInc.key -in server-cert.txt -out server-cert.pkcs12
7) At this stage I was able to verify the PKCS12 keystore (server-cert.pkcs12) using:
keytool -v -list -keystore server-cert.pkcs12 -storetype pkcs12
8) Next with the PKCS12 keystore (server-cert.pkcs12), I was able to create the Java keystore (server-cert.jks), using:
keytool -importkeystore -srckeystore server-cert.pkcs12 -destkeystore server-cert.jks -srcstoretype pkcs12 -deststoretype JKS
9) And finally sign the designer jars using:
jarsigner -keystore server-cert.jks artifacts.jar “1”
10) UPDATE: After I did this, the installation happened as expected on Kepler, but failed on Indigo, The reason is because Indigo doesn’t support SHA256 which is what is used by default by Java 7 (v1.7.0_45-b18) version of JarSigner tool. The solution is to use use the -sigalg and -digestalg options to explicitly use SHA1 (the command bellow also uses the timestamp.dll as TSA (Time Stamping Authority))
jarsigner -keystore server-cert.jks -tsa http://timestamp.globalsign.com/scripts/timestamp.dll -digestalg SHA1 -sigalg SHA1withRSA content.jar “1”
I hope this helps other who are faced with the same challenge.
So what was the problem?
First there is massive soup of keystores, Cert types and other Cert related ‘things’ in play here, with lots of names for the same thing (See the SSL Converter article for a nice list of ‘possible conversions’).
After much reading and mucking about, I think the root cause was the fact that MK didn’t use the java’s keytool to generate the Java keystore as described in Java CodeSigning JKS Method - Certificate Generation and Installation (he used OpenSSL).
This means that I when I tried to create the Java keystore as described in Java CodeSigning JKS Method - Certificate Generation and Installation , I didn’t work because I wasn’t able to import the private cert for SecurityInnovation_.crt.
Another problem was that I didn’t have the GlobalSign root CA, which is needed to so that the verification chain works ok.
The solution (as described above) was to:
- create a flat file with the 3 certs (OS201311137236.cer , intermediate1.cer and GSRoot.cer)
- use the flat file to create a PKCS12 keystore (server-cert.pkcs12)
- use the PKCS12 keystore to create a Java keystore (server-cert.jks)
- use the Java keystore to sign the Eclipse plugin Jars
Simple once we know how to :)
I went through a ton of different errors, and for reference here are the tabs I had opened when I finally was able to figure out the solution:
- How to convert .pfx file to keystore with private key?
- I am trying to import a private key generated outside of Java into my keystore with keytool.
- keytool - Key and Certificate Management Tool
- Converting .pfx Files to .jks Files
- Import a PKCS#12 File into a Java Keystore
- How to use SSL with a client certificate in Java
- Can a Java key store import a key pair generated by OpenSSL?
- Import client self signed cert into java keystore
- jarsigner - JAR Signing and Verification Tool
- Java CodeSigning JKS Method - Certificate Generation and Installation
- Install GlobalSign Root CA Certificate
- SSL Converter
Fixing Coding Signing issue where Eclipse Plugin didn’t install in Indigo
As mentioned in the Saga to sign an eclipse plugin with a code cert the problems didn’t finish after the plugin was signed OK.
During the final QA stage Roman reported that he was Unable to install plugin on Indigo.
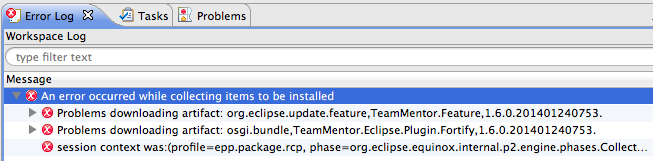
I was able to replicate that issue on a clean install of Indigo, where I got the following error when trying to install the TeamMentor Plugin:
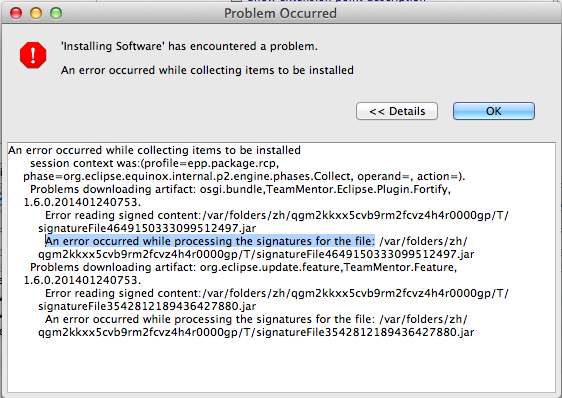
… and
A bit of research took me to the Install of plugin fails when signed by Java 1.7 jarsigner page, which provided the following explanation:
A plugin that is signed with the Java 1.7 jarsigner tool cannot be installed into Eclipse. In 1.7, the jarsigner tool uses the SHA256 algorithm, which doesn’t appear to be supported by Eclipse.
The solution was found at Signing an Eclipse Plugin with Java 7 and described in step 10 of Saga to sign an eclipse plugin with a code cert:
Use the jarsigner’s -sigalg and -digestalg options to explicitly sign using SHA1:
jarsigner -keystore server-cert.jks -tsa http://timestamp.globalsign.com/scripts/timestamp.dll -digestalg SHA1 -sigalg SHA1withRSA content.jar “1”
After that was done (and all 4 jars where signed (the content, artifacts, plugin and feature)), I was able to install the extension ok in Indigo.
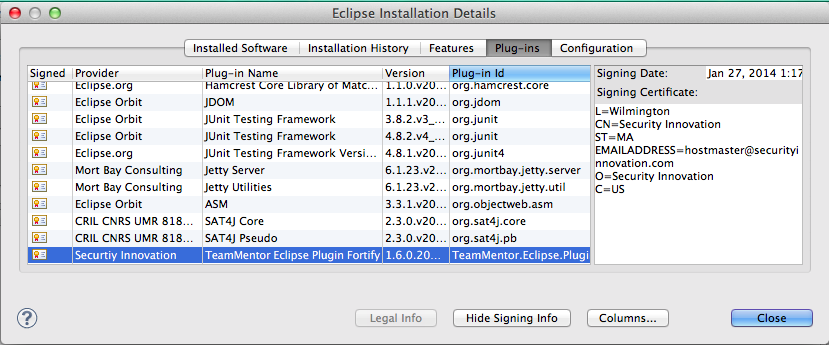
Here is the Plugin shown in Eclipse’s Installed Software view
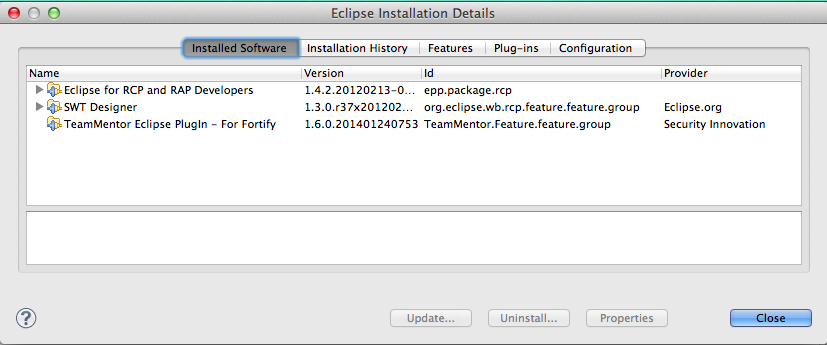
And here are the signature cert details of the plugin installed:
Eclipse Groovy script to remove the ‘busy’ image from the WebBrowser Editor
Now that I’m doing AngularJS and Firebase development inside Eclipse, there was a little ‘thing’ that was starting to drive me crazy: The animation icon on the top right of the Eclipse WebBrowser!
Apart from the mosaic 2000s look (which is kinda ok), there is a big problem with pages that keep running for a while: the animation doesn’t stop!
This means that if you are developing inside Eclipse, there is this ‘thing’ (i.e. the top right icon) that keeps moving and demand my brain’s attention:
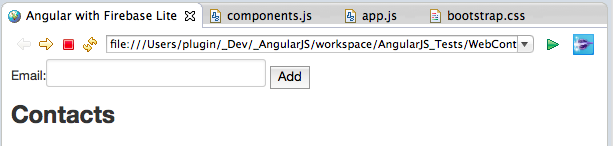
The icons keep animating like this: 


Since there didn’t seem to be an preference or option to disable this behavior, it was time to open up the Eclipse Grovy REPL Scripting Environment and fix it with a script :)
The solution
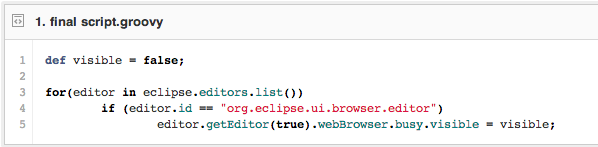
After a quick prototyping, I come up with this script to remove all icons from all opened WebBrowser editors (gist here):
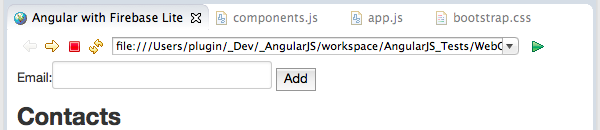
After execution the icon is not there anymore :)
How I found the solution
Here are the steps I took to find the _busy _object to set the visible value to false
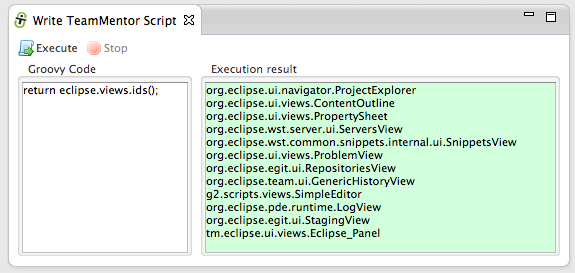
1) in the Grovy REPL I started by getting a list the ids of all current opened Eclipse views, but there didn’t seem to be any web browser in there:
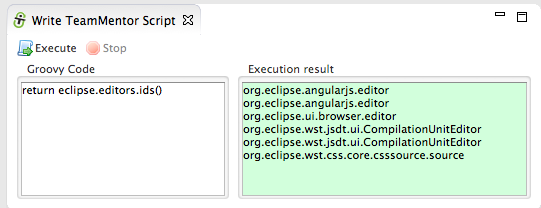
2) then I looked at the list the ids of all current opened editors, and found one that sounded promising: org.eclipse.ui.browser.editor
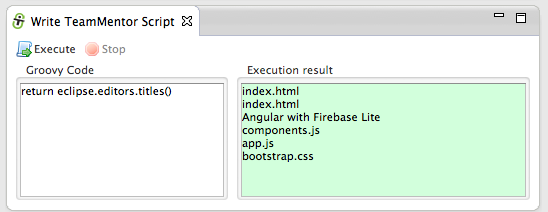
3) to confirm that that was the one I wanted, I looked at the titles of the current editors, and confirmed that the browser window I want to capture was there (the title was “Angular with Firebase Lite”);
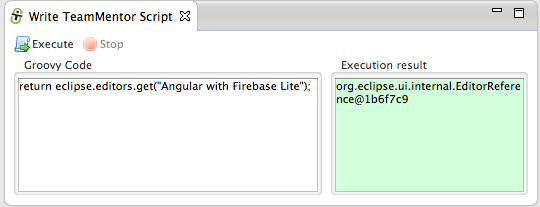
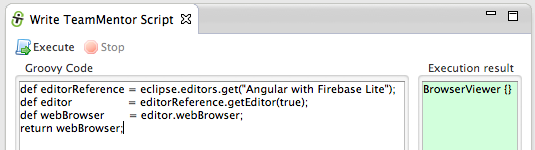
4) now that I knew the title, it was easy to get an EditorReference to it:
5) everytime I have an object reference that I want to take a look, I call the show({object}) viewer, since that will give me a nice TreeViewer of all methods, fields and properties ( see Viewing Eclipse and SWT objects (Workbench, Display and Shell) using Groovy’s ObjectBrowser and using TeamMentor’s Plugin ObjectBrowser for more details how this works)
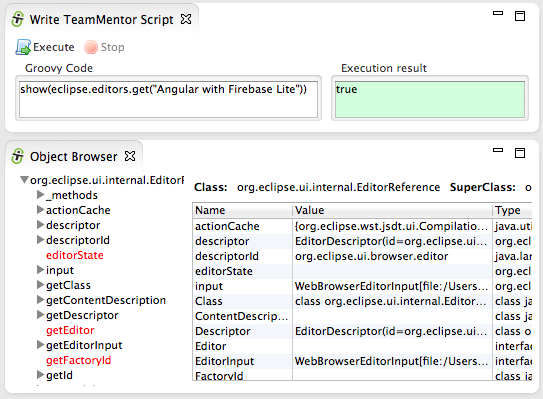
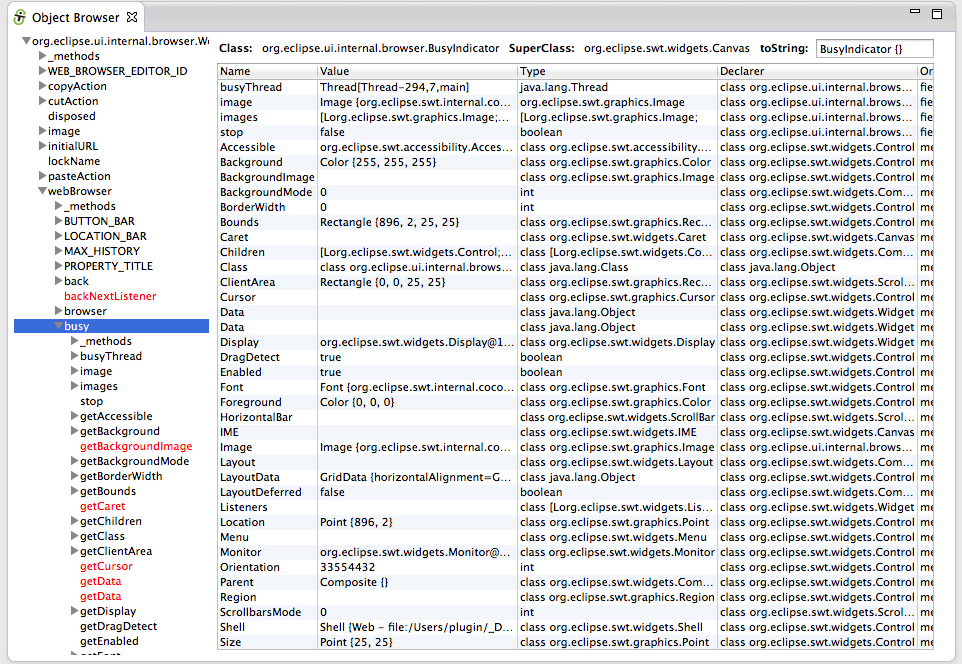
6) in this case we don’t want the EditorReference object. What we really want is the actually editor, which can be retrieved by invoking the getEditor(true) method (note how the object we are currently seeing in the Object Browser is the org.eclipse.ui.internal.WebBrowserEditor)
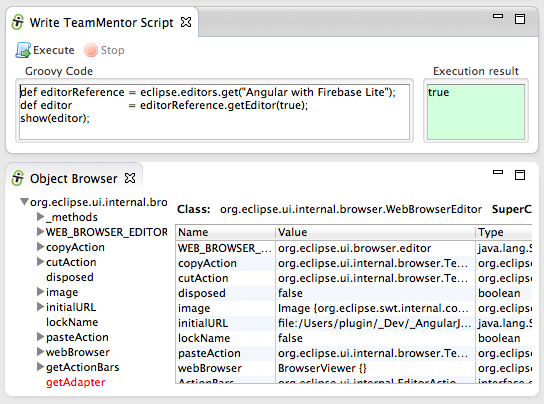
Here is a better view of this object:
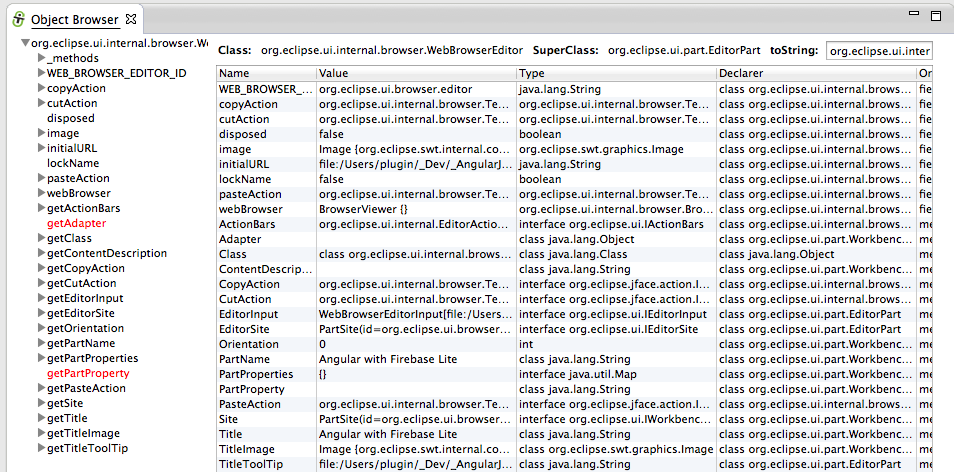
7) looking at the org.eclipse.ui.internal.WebBrowserEditor object, the one that called my attention was the webBrowser field (which is an org.eclipse.ui.internal.browser.BrowserViewer object)
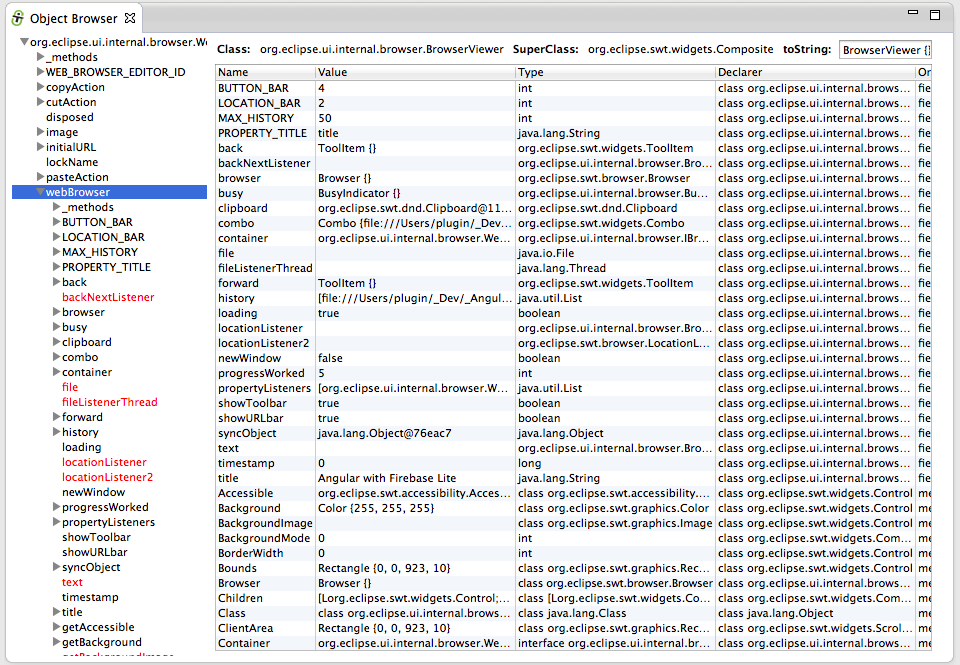
8) Inside the webBrowser object I found the busy field (which is an org.eclipse.ui.internal.browser.BusyIndicator object)
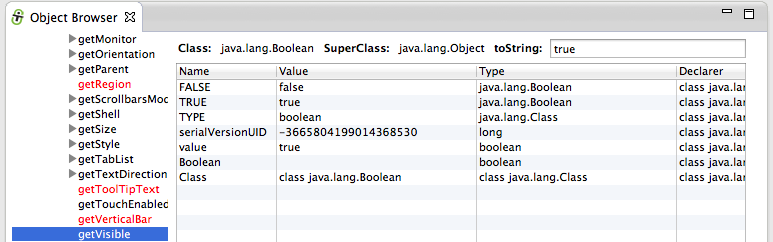
9) and finally inside the busy object I found the visible property (ie the getVisible and setVisible methods)
10) back in the REPL, it was time to do the same thing programmatically.
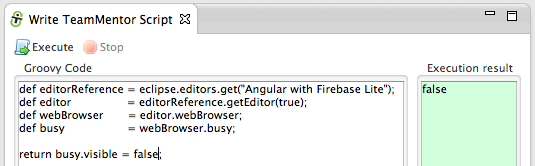
First I got a reference to the webBrowser field:
… and then the busy field:
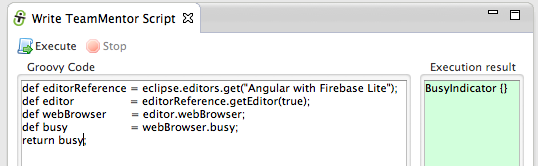
11) Once I had the reference to the busy field, it was easy to make it invisible (by just setting the visible property to false)
12) final step was to write a generic script that would work on all opened browser editor windows (a robust script would use the same trick I used in the integration with the Fortify plugin, where a callback is received on every new view opened (i.e. we could wait for new instances of the org.eclipse.ui.browser.editor to be opened, and apply the fix then))

To demonstrate the script in action, here it is the browser before:
… and here it is after:
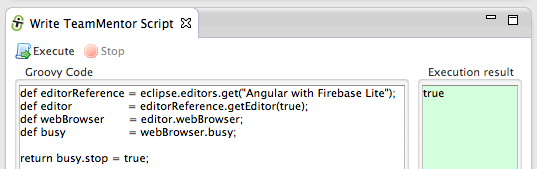
Note: another way to to stop the constant animation was to just set the stop value to false, but this would only work for the current opened page (i.e. the animation would be back on page reload)
Viewing Eclipse and SWT objects (Workbench, Display and Shell) using Groovy’s ObjectBrowser and using TeamMentor’s Plugin ObjectBrowser
Using the Groovy REPL included in TeamMentor’s Eclipse Plugin (see update site and more info here, here, and here) it is possible to view in real time a number of Eclipse/SWT objects (for example the Workbench, Display or Shell)
Using Groovy’s ObjectBrowser:
Let’s start with Groovy’s ObjectBrowser which I used to use just about every day, since it gave me access to a live view of an particular Object’s Fields, Properties (from getters) and Methods.
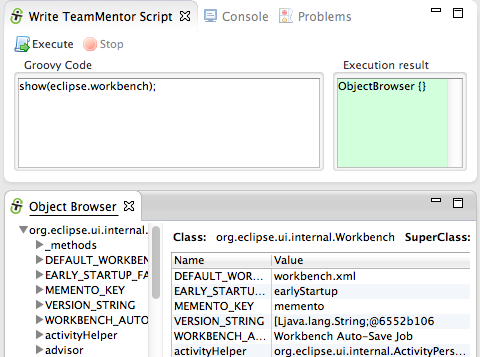
To see it in action, open the Write TeamMentor Script view (if don’t have access to it , see install instructions here) which is basically a Groovy REPL (Read Eval Print Loop):

In this Groovy REPL environment, you can write Groovy code that accesses the actual Eclipse objects from the running Eclipse instance:
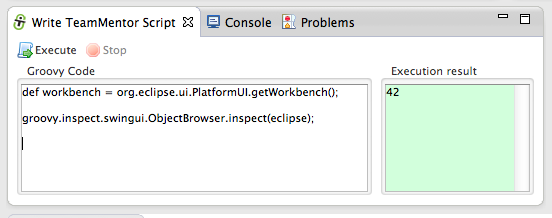
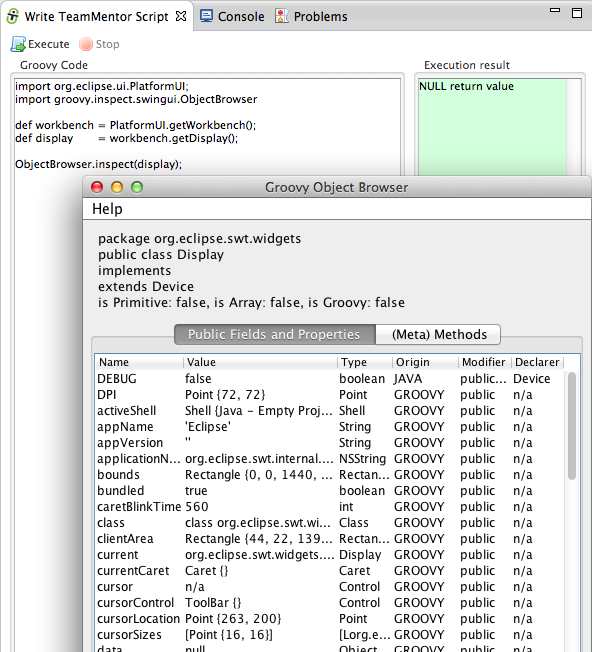
In the script above we feed the workbench variable to Groovy’s ObjectBrowser, which when executed will look like this:
One of the problems with the Groovy’s ObjectBrowser (an Swing UI shell), is that it doesn’t allow you to zoom-in into inner/child objects.
So for example if you wanted to see the details of the Display object, which is exposed by the Workbench object, you would have to do something like this:
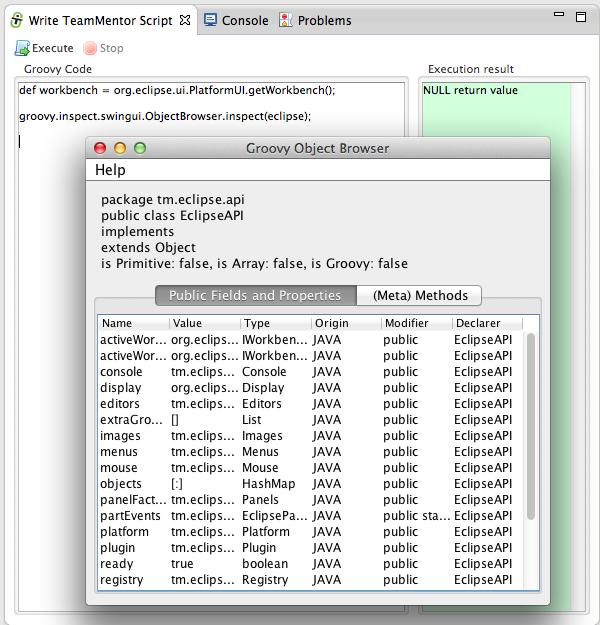
TIP: The Groovy REPL is injected with an live instance of the EclipseAPI object which exposes a number of these objects.
For example we could use the ObjectBrowser to see the workbench, display and activeShell objects like this (using the objects exposed by eclipse.workbench, eclipse.display and eclipse.shell):
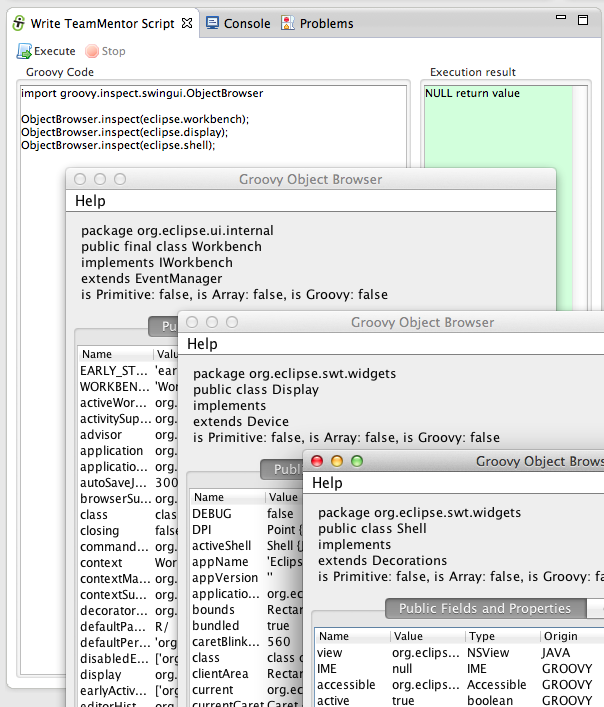
In fact, the ObjectBrowser.inspect({object}) is also injected as Groovy method, so we can just use inspect({Object}):

Using TeamMentor’s Plugin ObjectBrowser
Like I mentioned above, although I used to use the Groovy Object browser a lot, I didn’t like its limitations, and eventually I was able to use the simpler SWT API (also shared by this plugin) to create a better version.
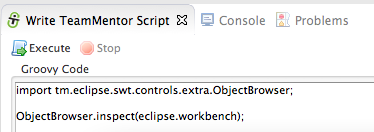
To see it in action, you can use this script:
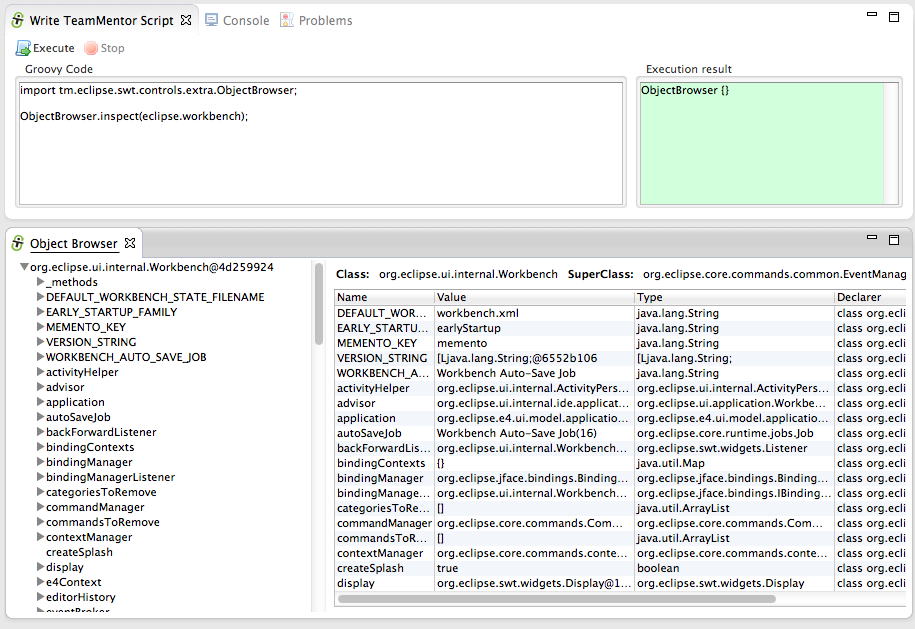
…which will show the new version of the ObjectBrowser inside a native Eclipse view:
… that can be moved around inside Eclipse (as any other Eclipse view), or even opened up in a popup Shell:
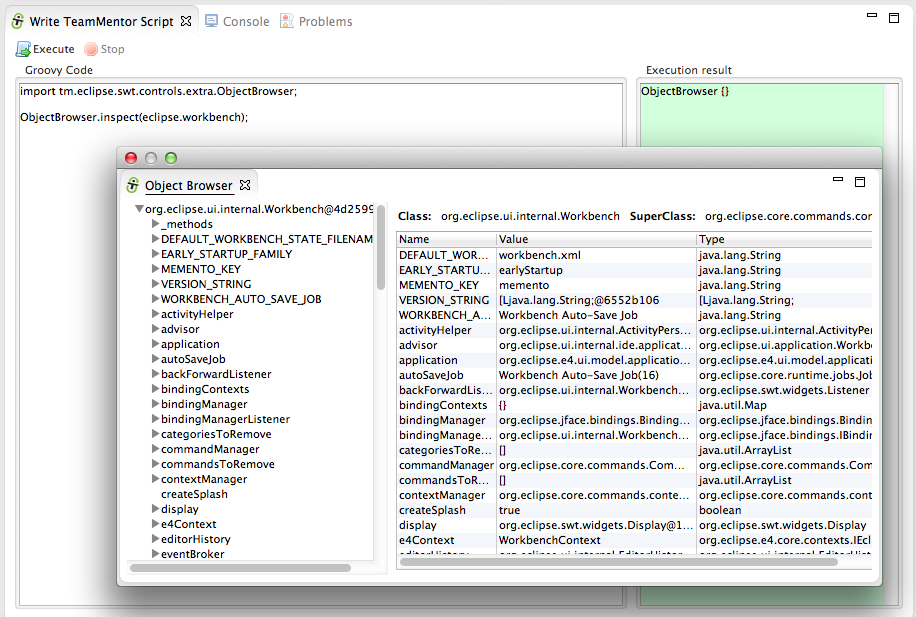
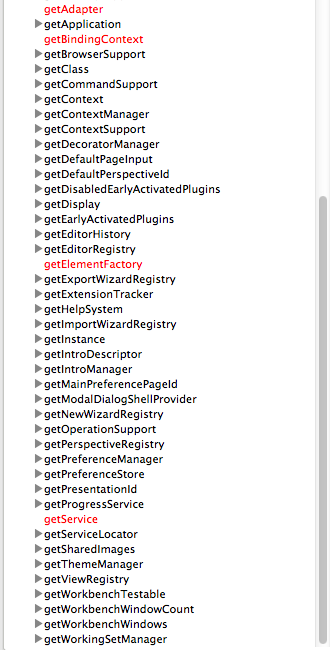
This version of the ObjectBrowser (as the Groovy one) takes any object as input, and uses refection to show the fields, getters and methods.
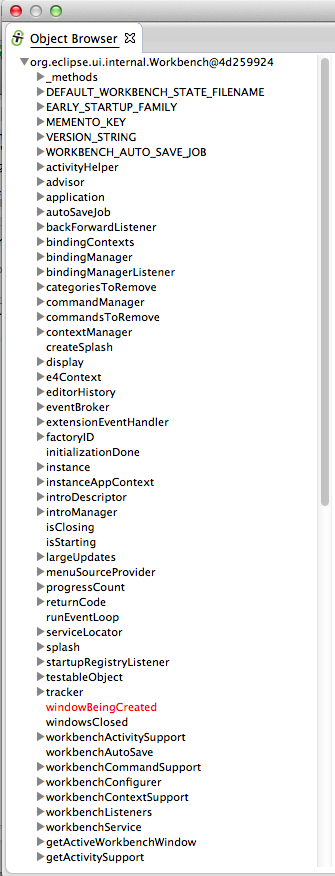
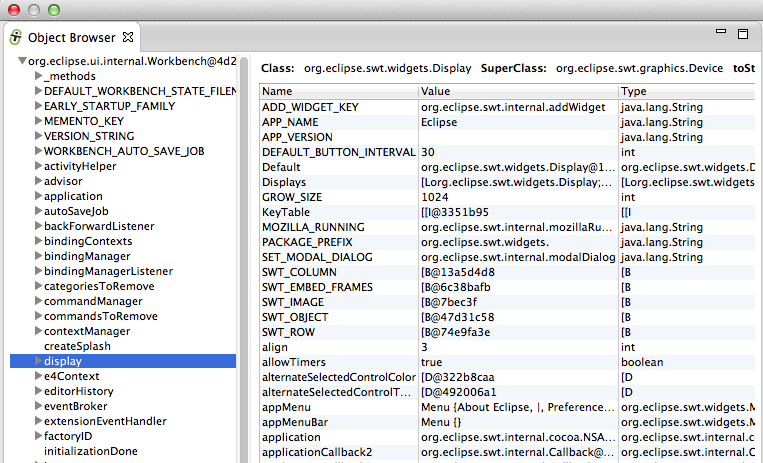
On the left-hand side you can see the initial object provided (in this case the live Eclipse workbench object), which is quite a nice, big and juicy object:
One right-hand side we see a table that shows the fields and getters for the currently selected treeview node
In this case (when ObjectBrowser opens for the first time), the target shown will be the Eclipse’s Workbench object:
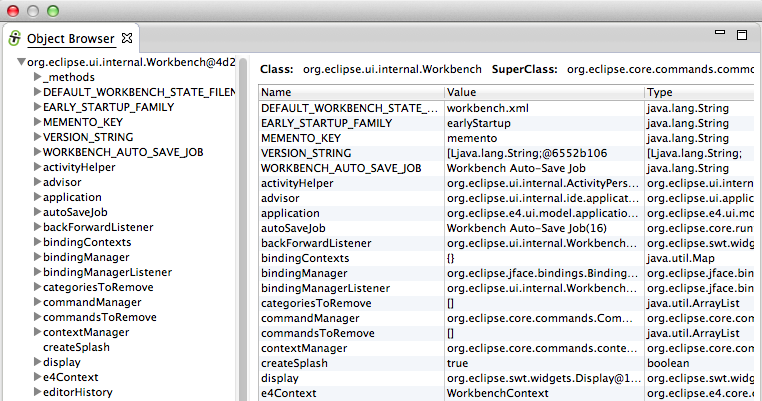
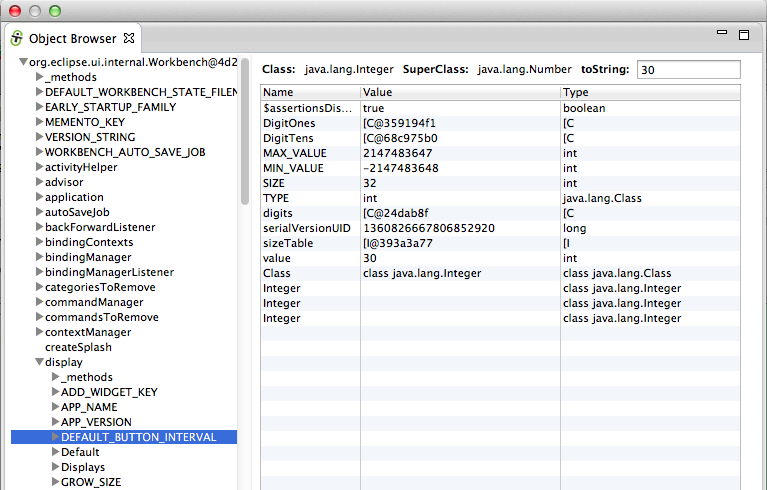
But instead of having to load the ObjectBrowser again to see the details of an another _Workbench _object (like the Display), we can just select it form the left-hand side treeview, and its contents will be shown on the right-hand side table:
In fact, you can even expand that node, and selecte other nodes to see the values of its fields and getters.
For example there is the Display object (which is exposed by the Workbench object):
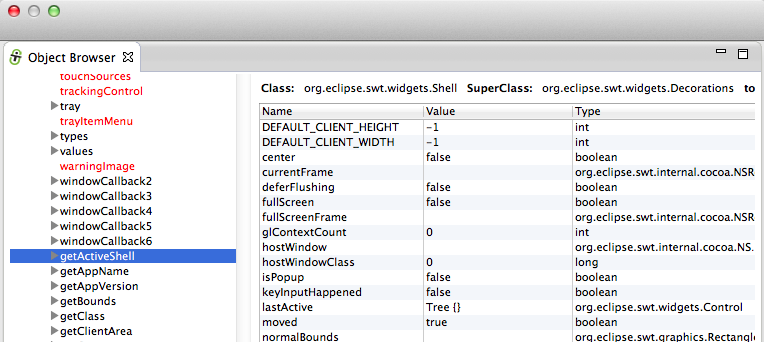
For example here is the current activeShell object (also shown in the Groovy ObjectBrowser screenshots):
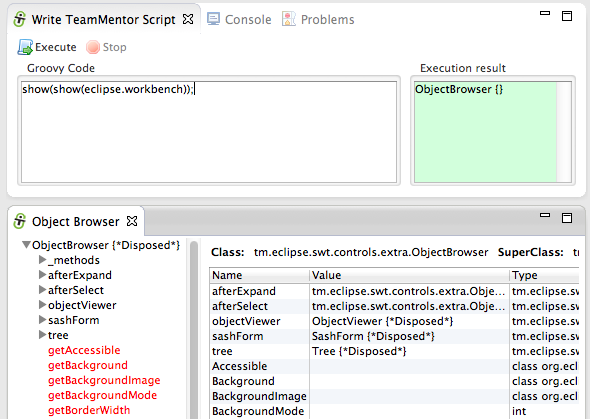
TIP: As with the Groovy ObjectBrowser inspect({Object}) injected method, there is also a show({Object}) method that will open the TeamMentor’s ObjectBrowser view directly (with no need to add extra java packages imports):
For fun, you can use the ObjectBrowser to see the fields, getters and methods from an ObjectBrowser :)
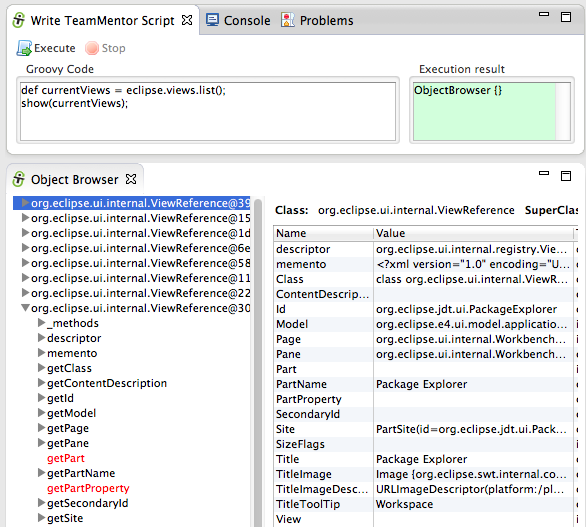
Also useful is the fact that if a Collection (or Array) is given to ObjectViewer, the left-hand-side treeview will show each Collection item on its root.
For example, here are all the current visible/active Eclipse views in the current workbench (the eclipse.views.list() API call will be explained in another blog post)
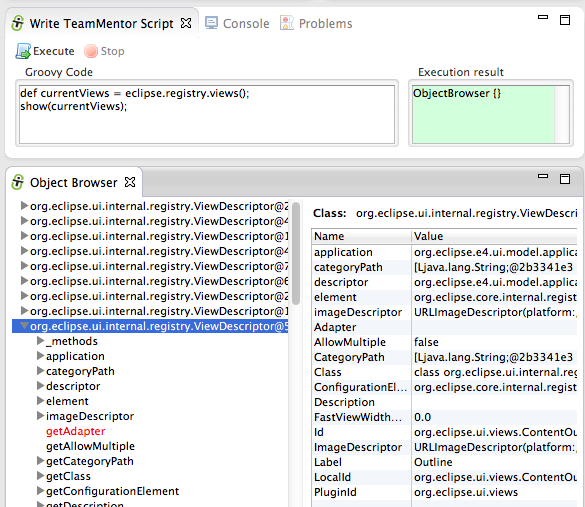
Here are all the Eclipse views that are currently registered (and available) on this instance of Eclipse:
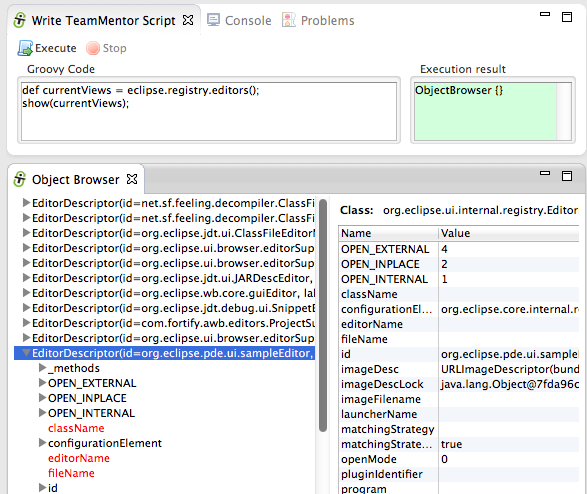
And finally here are all the Eclipse Editors that are currently registed (note that the instance of Eclipse I used to take these screenshots didn’t have the Groovy plugin installed, which is why the Groovy Editor doesn’t show in the list below):
That’s it for this post!
Thanks for reading and I hope you see the value in this ObjectBrowser. I would love to have some feedback, so please take it for a spin, and let me know what what you think of it :)
You can use this update site to install it on Eclipse Indigo, Juno or Kepler (x32 , x64, Java 6 or Java 7)
Alternatively you run it from the source code or install it offline using a clone of the update site files