ListView
ListView is a ViewGroup that displays a list of items that could be scrollable. We had an interaction with a ListView using the ListActivity. We would see few more things about ListView in this chapter.
Binding Data to ListView
Previously we had an encounter with ListActivity which had a ListView, and we used a ListActivity for displaying data or collection. Here we would use theListView control and bind data or collection to it.
We would need a template for the ListView, so let’s add one.
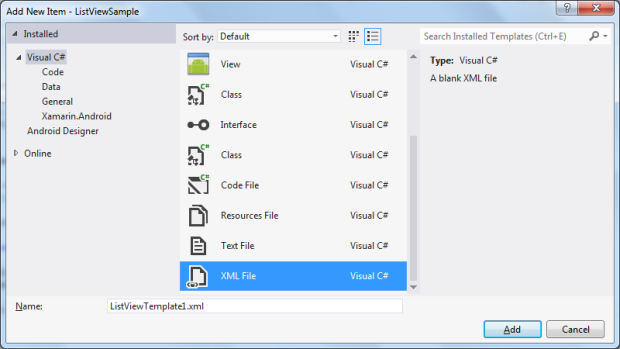
Add an XML file to the Layout folder.

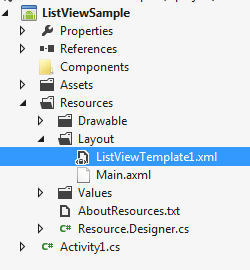
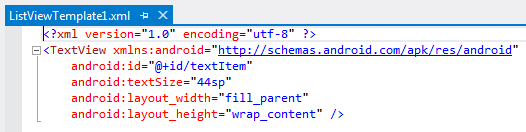
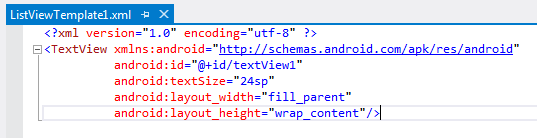
Add a TextView in the XML file. This is for ListView template.
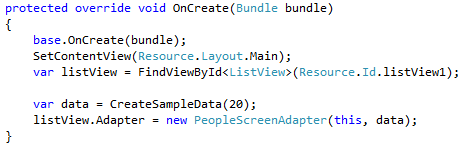
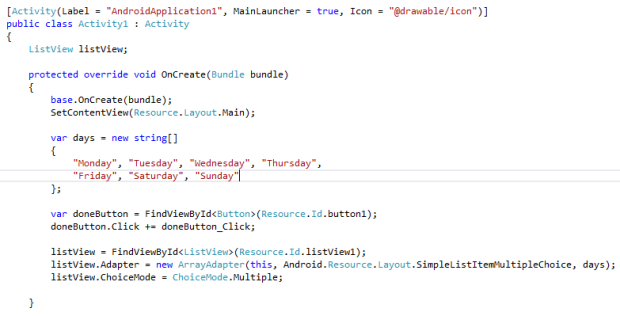
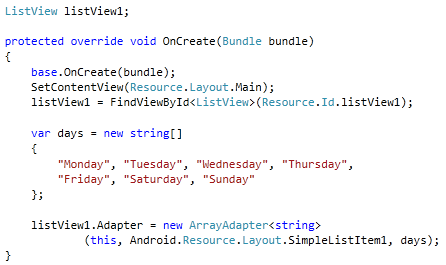
And as you see in the below image, the Activity1 is inherited from Activity class unlike our last post where we inherited from ListActivity. Rest of the code is self-explanatory. We are setting the Adapter property of the ListView with ArrayAdapter.

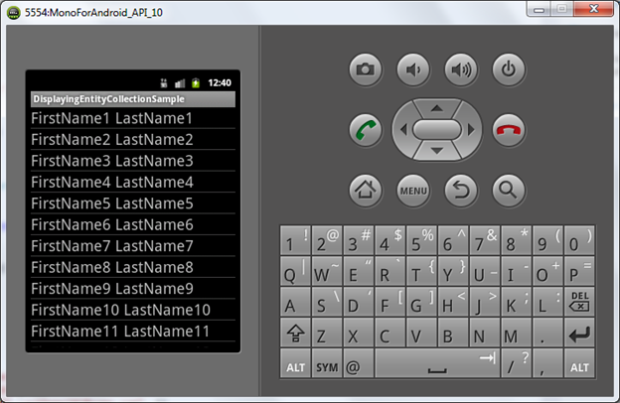
Now, let’s run the application and see the ListActivity in action.
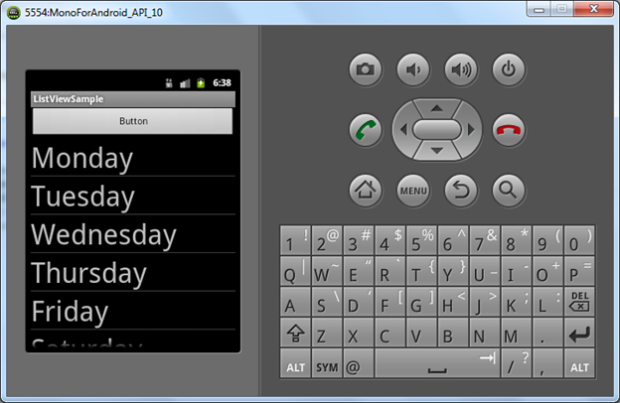
As you see, unlike ListActivity, we have other controls in the Activity.
Display Entity Collection
In real time, we would be displaying a collection of entity. Here, we would display a collection of some entity in ListView.
Let’s start with creating the following Person entity.
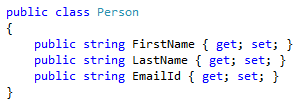
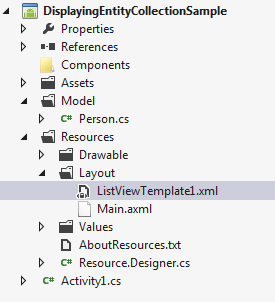
The Person entity class is located under Model.

Now let’s add the ListView template XML file under Layout folder.
Keep a TextView for now inside the XML file.
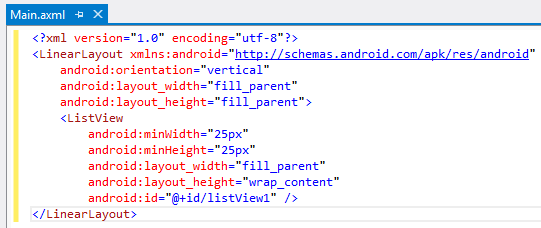
Add a ListView control to the Main Layout.
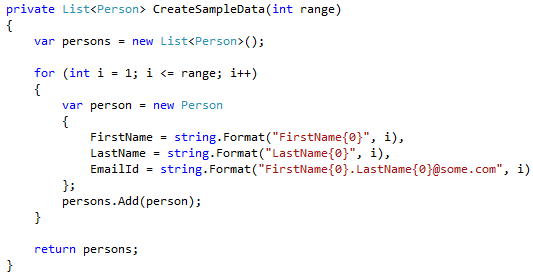
The following method would generate sample data.
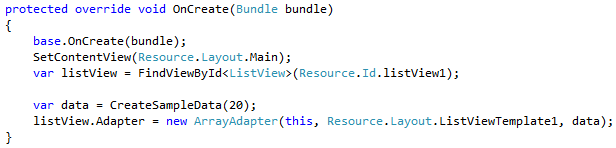
Now in Activity1, we would get the ListView control and set the data by using following code.
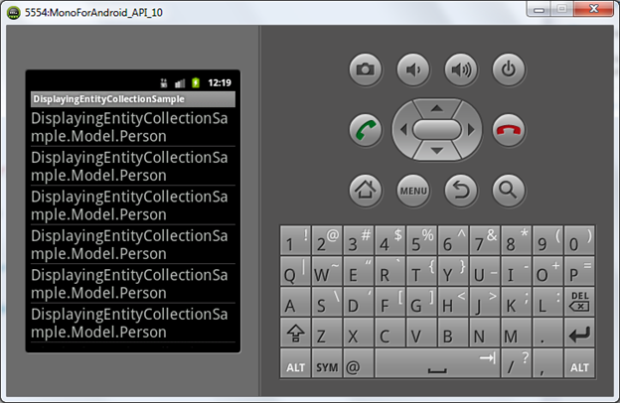
Let’s run the application. Oops, the entity class name is displayed instead of data. That means we need to do a different way to display data.
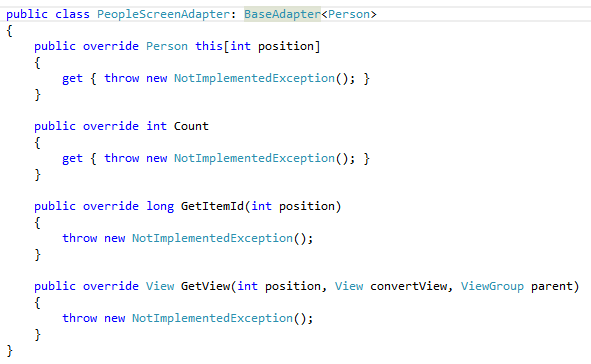
Not so difficult, just create another class which would be derived from the abstract class BaseAdapter. The following properties and methods are implemented once you inherit the class.
The following modifications are done to the class, which is self-explanatory.
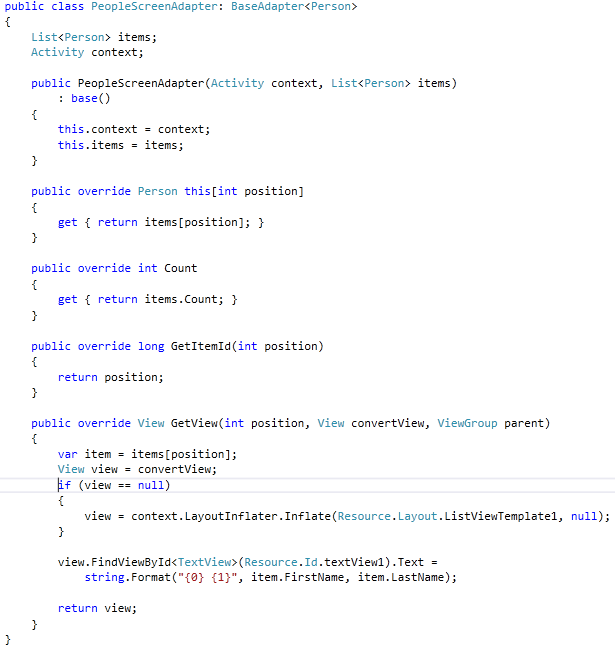
And back to Activity1, and do the following for displaying data in ListView.
Well, it has displayed with a single TextView inside the template.
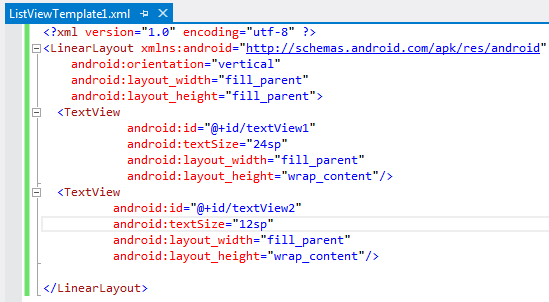
How about displaying Email Id below the Full Name. This will require a change in the ListViewTemplate1 change. Following are the changes.
And in the Screen Adapter class, GetView would be changed like this.
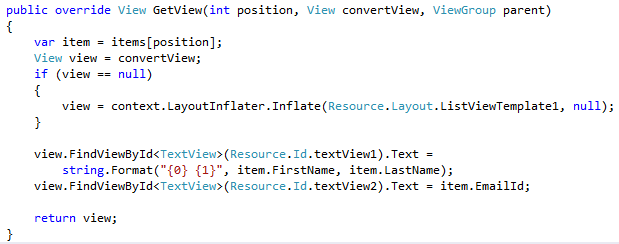
Now run the application, and you would see the Email Id is also displayed.
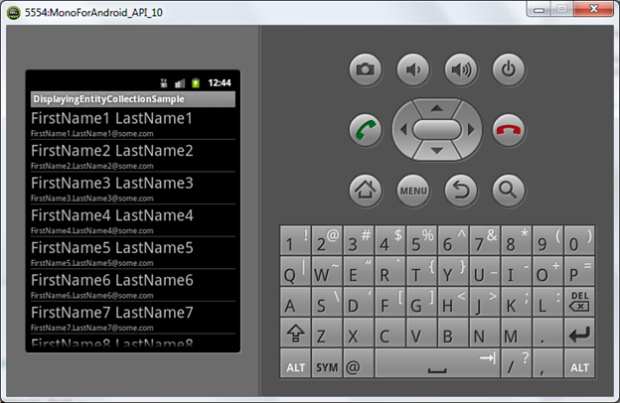
As you see a in the above output, two TextView controls are displayed.
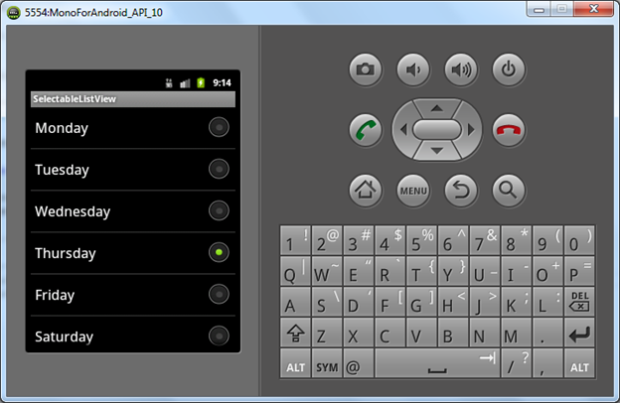
Selective ListView
Here we would see how to display a collection in ListView and select one or many items.
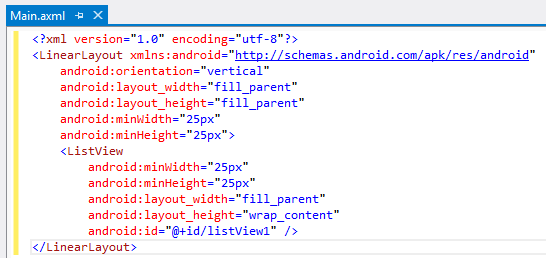
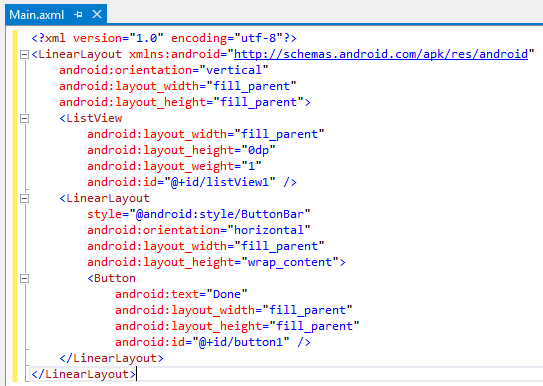
As we are going to have a ListView, the following is the simple layout.
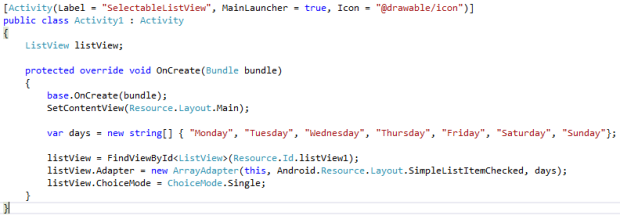
Now instead of creating a layout for the ListView content, we would use some from the Android.Resource . And adding the ChoiceMode property to the ListView.
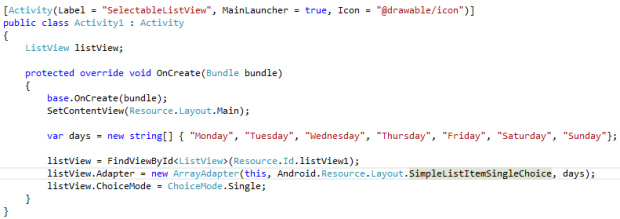
Here is the view, with single selection mode with Radio Buttons.
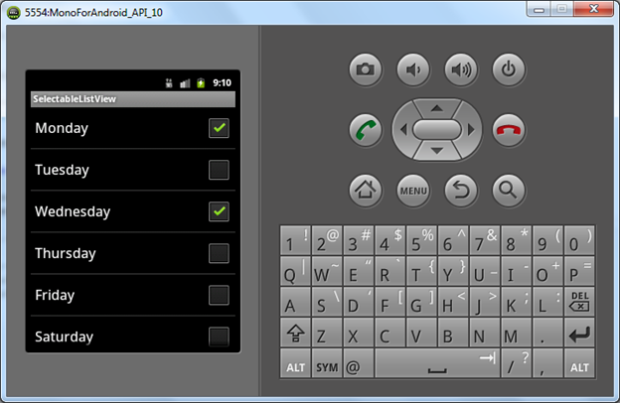
We have a CheckBox style instead of RadioButton, here are the changes.
And you would get the Check image instead of the RadioButton.

Now, let’s try for the multiple selections. Also you need to change the ChoiceMode to Multiple.
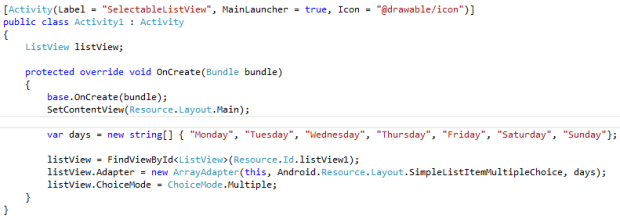
And you would get the multiple checked items.
The choice modes are clearly useful for having single or multiple choice interactions from user.
Get Selected Items from ListView
Previously we had seen to display a list where user could select single or multiple. Here we would see, how to get the selected items from the screen activity where a list of options are displayed.
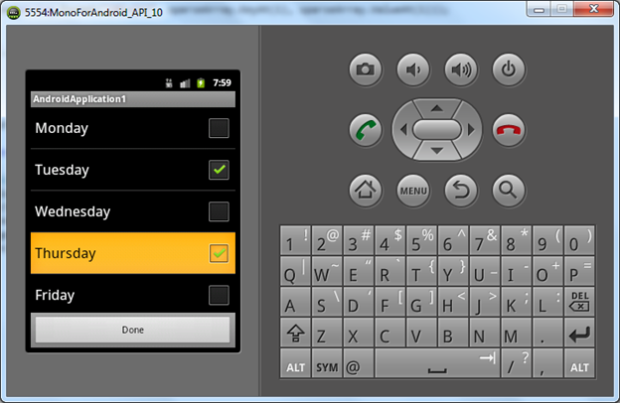
The following is the layout for displaying the Multiple Selectable ListView with a button.
Now we would bind data to the ListView.
Also we would make it Multiple Selectable with SelectOption as Multiple.
And we would subscribe to the click event of the Button.
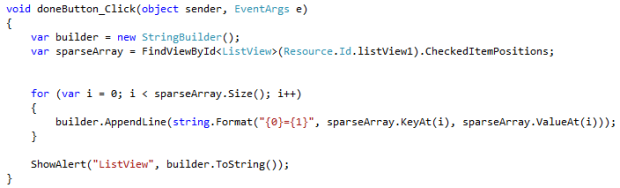
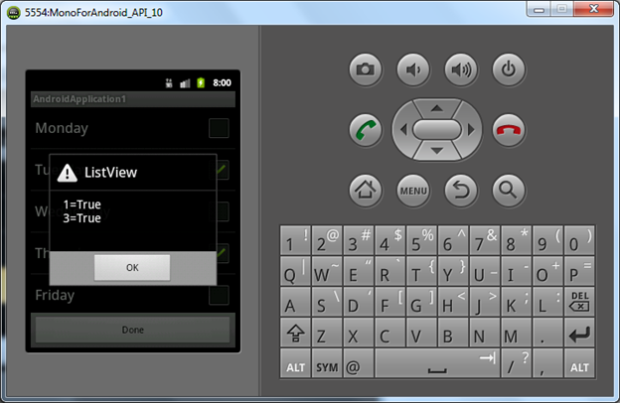
In the button click event handler, we would do as following to get the selected data out of ListView.
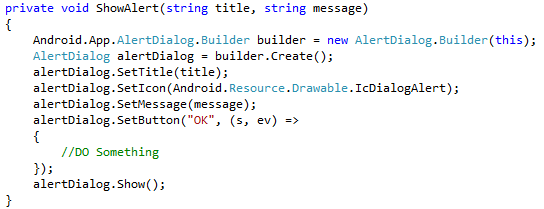
ShowAlert is a helper method to show alerts with easy, here is the code for that too.
Now run the application. You could see the fixed.
As on button click, the selected items positions with respect to the collection is displayed.
The selected items are displayed in the alert dialog, but you might find out that, even if a selection is made and reverted back; the item’s state was registered as false or true. In that case we need to check based on the true values in the collection.
ListView in a ScrollView Issue
In Windows Phone application development, use of ListBox and ScrollViewer have no issues in scrolling the content. But in Android using both are not advisable. They might behave differently.
Here we would explore that, and find out how we try to fix this.
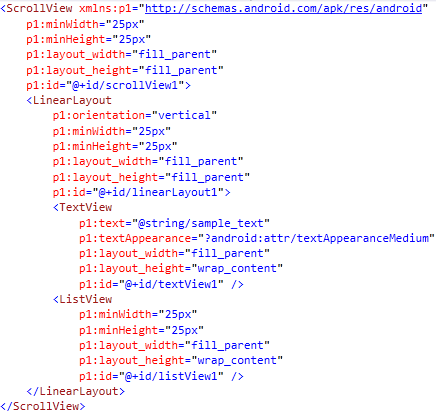
The above layout consists of a ScrollView as the parent ViewGroup, which has two elements in it. A TextView and a ListView. For the issue to happen, we would have some long text in the TextView.
Now we would bind data to the Adapter of the ListView so that data would be displayed. Now let’s run the application.
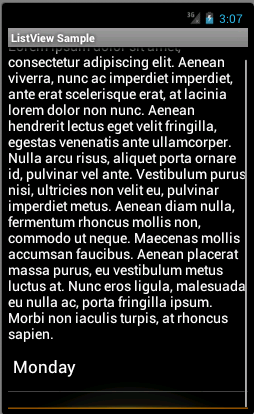
As you see in the above output, the TextView is scrolled to the end, and the ListVIew is partially displayed. To confirm that, you also notice that, we have a scrollbar scrolled to the end of the view. Also the bottom reached orange display is displayed. Enough confirmation, now to fix that we need a method which does the following.
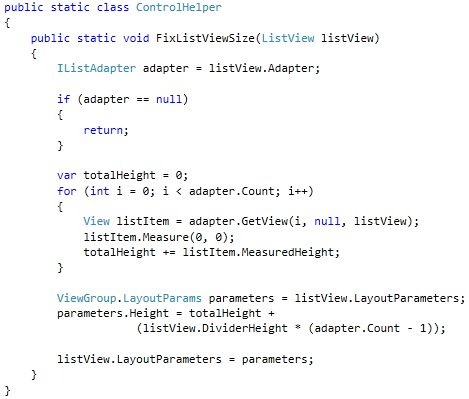
As you see in the above method, individually takes the item from the adapter and adds to the total. And finally it assigns to the height of the ViewGroup.
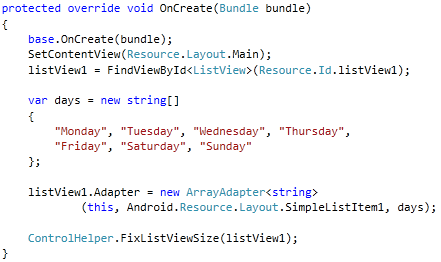
To use the above method, we need to call it, just after you assign adapter of the ListView.
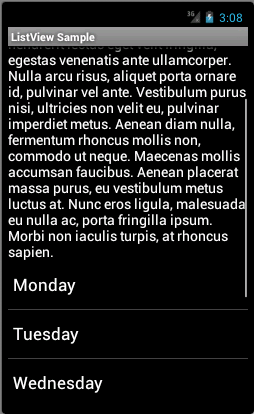
Now, the above output looks fixed. The ScrollBar is still in the middle, that means we have some items to display from the ListView.
A quick note though, this has been tested with Android 4.0 and above, the results were successful.
Selective ListActivity
In Activity chapter, we had a glance to look at the ListActivity, also in this chapter we have seen a selective ListView. Now we would combine it and provide a selective ListActivity.
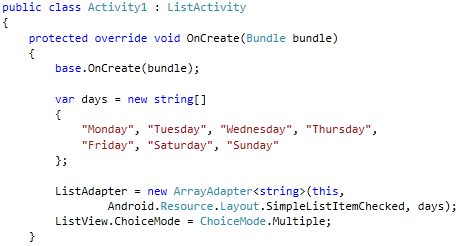
As you see in the above code display, we are assigning the ArrayAdapter to the ListAdapter property of the ListActivity class. It has also the property for ChoiceMode. You could assign your required choice mode and it would work like ListView.

The above output shows the implementation of selective in the ListActivity.
Selective ListActivity with Entity
Previously, we have seen that, binding a string array to the ListAdapter and displaying data. If you have an entity collection, how do we bind?
Consider WeekdayItem is the entity.

As you see in the above class, it has two properties Id and Name.
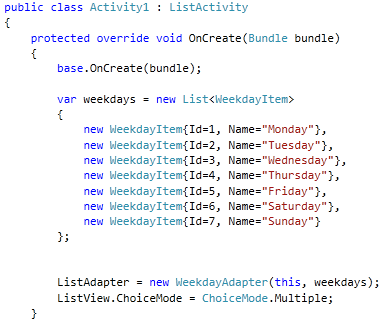
Now we would have a sample collection of WeekdayItem as List<WeekdayItem>. Using an custom adapter class we are binding the data. Let’s check the WeekdayAdapter class.</WeekdayItem>
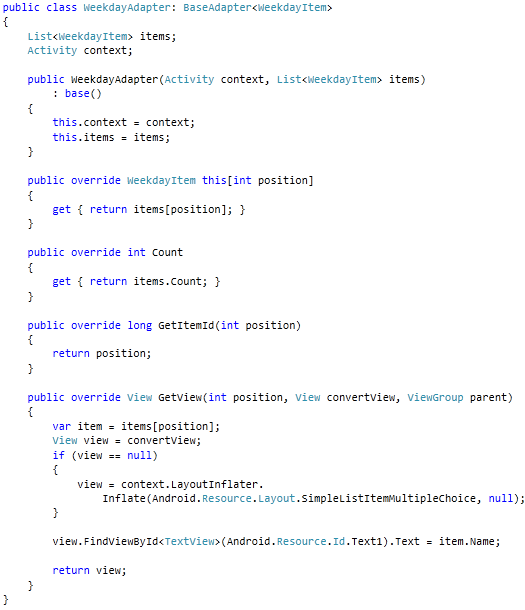
It is derived from BaseAdapter abstract class. Now in the GetView overridden method, we are finding the TextView and displaying the day name.
Notice that we have used an Android Resource Layout. And to find out the TextView inside it we are using the Resource Id Text1.
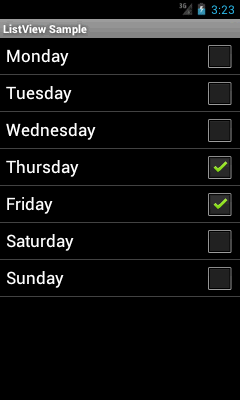
In the above output, the entity collection is successfully displayed in the ListActivity.
Context Menu in ListView Item
Here, we would see how we add context menu to the ListView Item. Let’s have the layout like below.
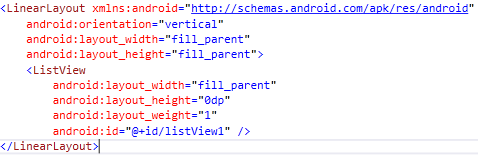
In the above layout, we have taken ListView to display the data.
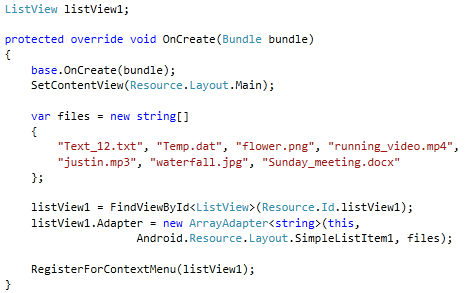
Now, let’s have a file collection and display it in the ListView. Also we would call RegisterForContextMenu method which takes the ListView.
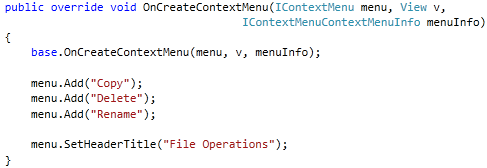
We need to override the OnCreateContextMenu method and add the menu items and also the title of the context menu. As we are having the files displayed, let’s have a menu for file operations.
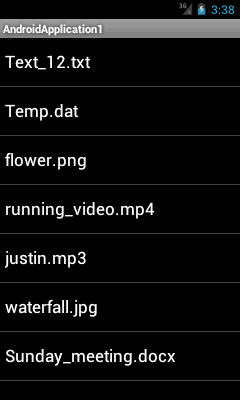
Now, the above output is for displaying file names in the ListView.
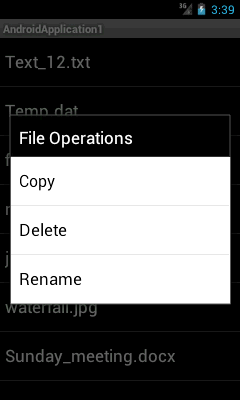
Now, Tap and Hold; then the context menu would be displayed like above.
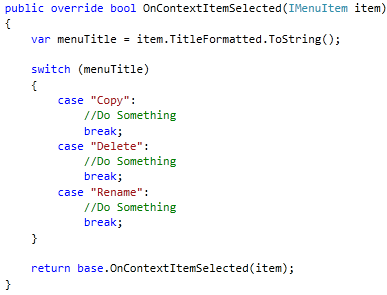
To know which context menu item you have selected; you could use the above code to find it out.
Get ListView Item with Context menu selection
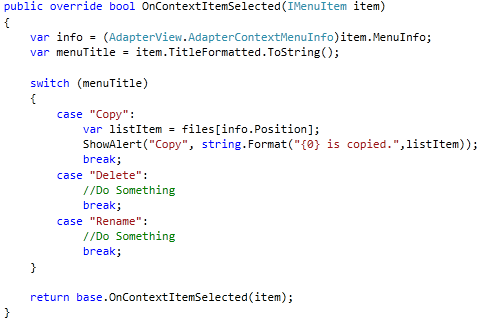
Also to operate on the ListView item on context menu selection is required.
In the above code display, the IMenuItem type is type casted to AdapterView.AdapterContextMenuInfo. This would give us the position of the item in the Adapter. Which we could find out in our code.
Displaying selective Image in ListView
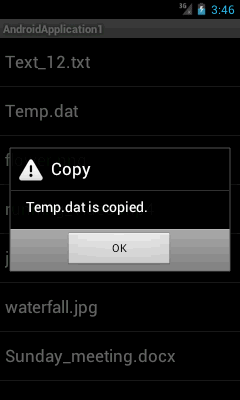
The above output shows that, the Temp.data file was tapped to display the context menu. And the copy menu was selected from the context menu. The dialog box confirms that.
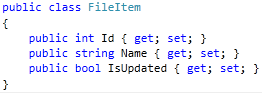
In some scenarios, you need to display a image (change the image source) based on some value. For example stock prices go up, then up arrow; and when coming down, down arrow image. Here we would follow up on our previous example.
As you see in the above FileItem entity class a bool IsUpdated property is present. As the name suggests it determines whether the file is synced or not.
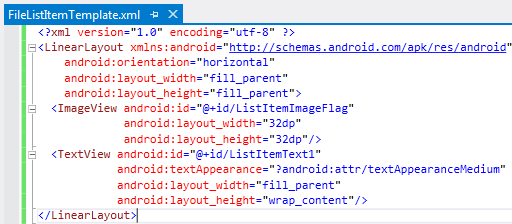
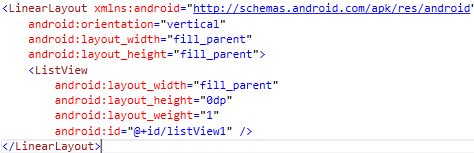
Let’s have the above ListView layout. Also we require an item template for the ListView.
The above layout shows that, we have an ImageView and a TextView in the template.
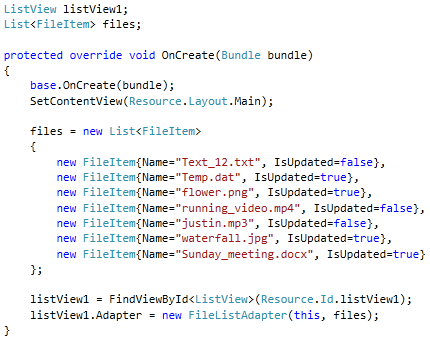
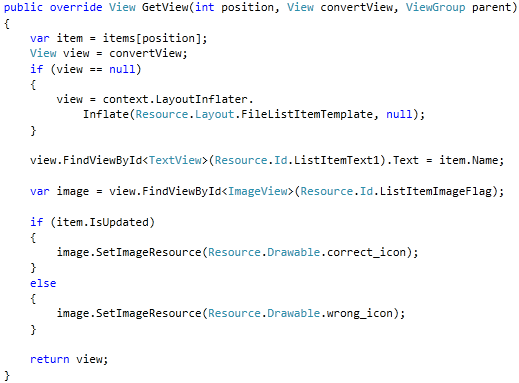
In the above GetView method from the custom adapter class, finding out the TextView and assigns the text to it. Also the ImageView’s image is changed. Assume that you have added two different images for the flag display. The Resource is set by using the SetImageResource method.
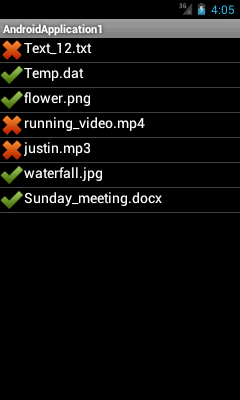
The above output consists of the selective image display based on the condition check.
Conclusion
In this chapter we have seen ListVIew specifically. Different scenarios with ListView were presented with their solution approach.