Dialogs and Toast
A dialog is a small window that is prompted to the user to make a decision or enter additional information. We have 3 types of dialogs defined in Android system.
Alert Dialog
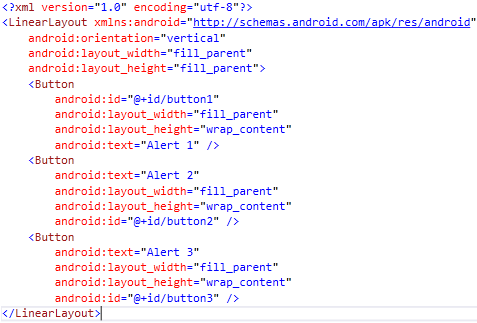
This is a type of dialog, where content is displayed with a dialog title and a button. The following layout is for the example of displaying alert dialogs. We have three buttons.
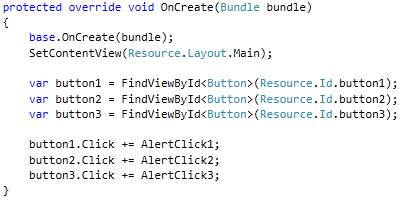
The following code is very simple; we are getting the controls from the layout and subscribing to the respective click events.
Single Button Alert Dialog
In the following example the basic single button dialog is displayed.
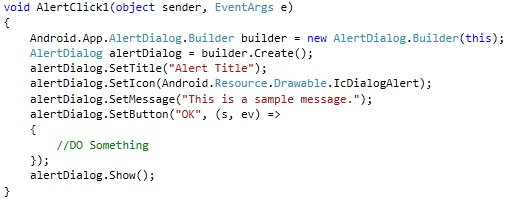
As you see in the above code snippet, we are creating a builder. The builder is assigned to AlertDialog object. Then we are setting Title, Icon, and Message. Also we are setting the button OK. A single button is mandatory for displaying dialogs. Now, subscribing to the click event if you need to do something here.
Two Buttons Alert Dialog
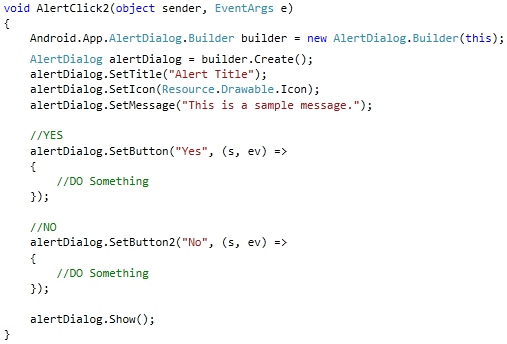
The following code snippet is for creating two buttons in Alert Dialog. As you see in the below code snippet; we are setting buttons using SetButton and SetButton2. This is same as first button; the second button is considered here as Negative and the first as positive.
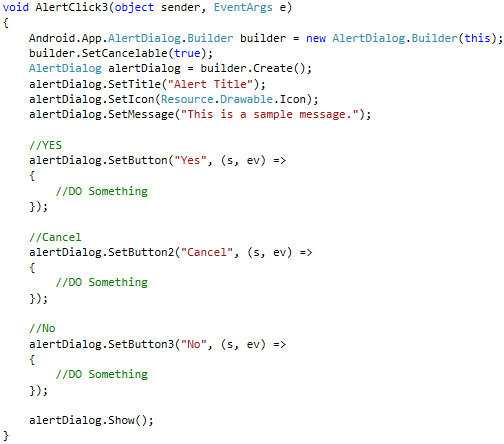
Three Buttons Alert Dialog
The following code snippet would help you understand creating three buttons in Alert Dialog. From previous code, we have added another SetButton3. Here the SetButton is considered as positive, SetButton3 as negative and the SetButton2 as neutral.
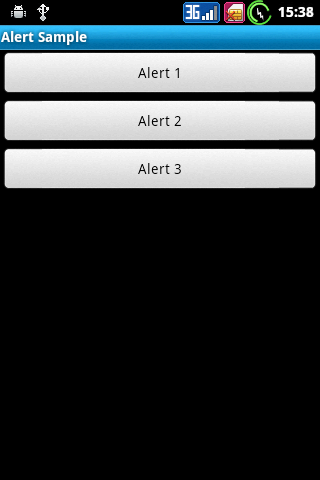
Let’s run the application and you would see the first screen where all three buttons are there.
Let’s click the first button.
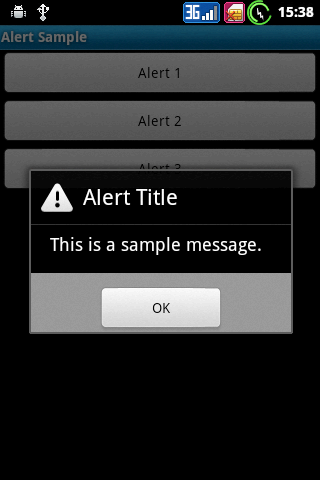
A simple alert dialog with a Title, Message and a button is displayed.
Now clicking the second button.

An icon is displayed with the title; also we have two buttons displayed. This dialog could be used for confirmations.
And finally we would click on the third button.
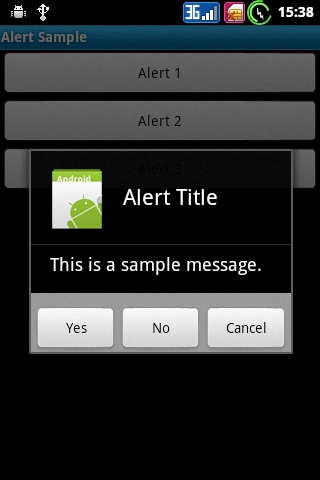
Three buttons are displayed here; this is where you would take user’s interaction properly.
Date Picker Dialog
We have a DatePickerDialog, which would help to pick a date. The following example would help you how we use it.
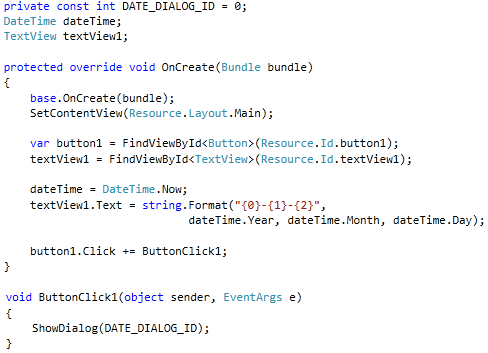
As you see in the above code, we are declaring a DateTime, a TextView and an Int variable. Then the button’s click event is subscribed. In the button click event handler we are calling the method ShowDialog which takes the int value. The int value is here to distinguish a dialog from each other; in case you have more than one dialog.
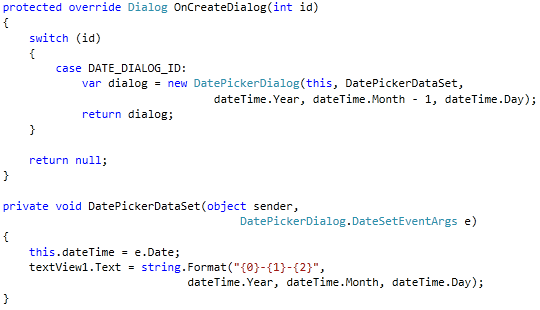
In the above code snippet; we are overriding OnCreateDialog method from the Activity class. It takes the integer Id as parameter. As we discussed previously there could be multiple dialogs in a single activity; so we would be using a switch case scenario. Also we are creating a new dialog of type DatePickerDialog. The DatePickerDialog takes the context, the event handler on set, the year, the month and the day as parameters.
You might notice that, the month is subtracted by 1; this is because you don’t subscribe it by 1, the next month would be displayed. It might be from Android itself.
We would run the application and click on the button.

The date picker dialog is displayed. You could select the date and click on set to set the date and click on cancel to cancel this operation.
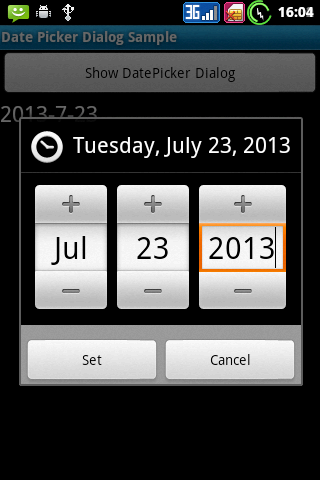
On set click the date is set to the text view.

Time Picker Dialog
TimePickerDialog is almost similar in using as using DatePickerDialog. The following example would help you using it.
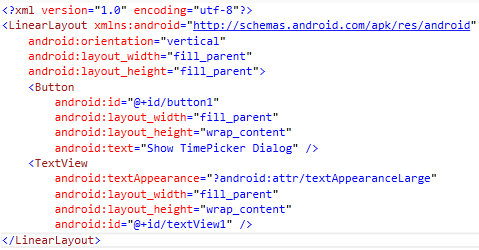
As you see below; we have a button and a TextView in the layout. The button is to bring up the dialog and text view is where the value would be set.
Now similar to the Previous DatePickerDialog example, we would have an integer variable for Id, an integer variable for hour and one for minute, then TextView variable. Instead of taking hour and minute as integer variables; you could take a TimeSpan variable and use the Hour and Minute properties from it.
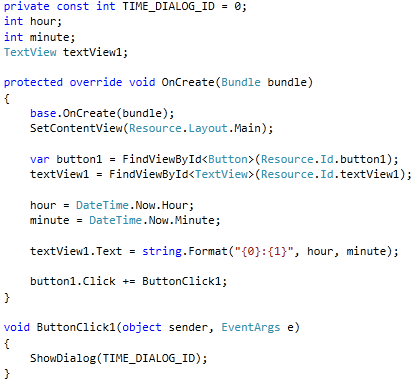
As you see in the above code, the hour and minute are set to current hour and minute values. Also in the button’s click event we are calling the method ShowDialog, to show the dialog with the id.
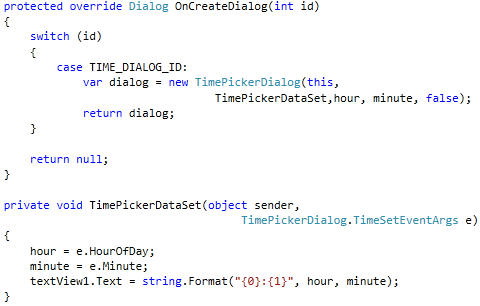
As we discussed previously, we are having the overridden method OnCreateDialog from Activity class where Id is the parameter for identifying dialogs in the activity. And on TimePickerDataSet handler we are setting the selected values.
Let’s run the application.

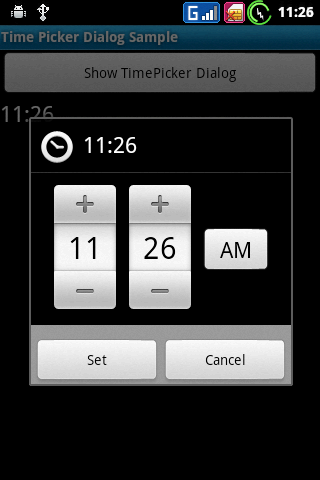
On click of the button, the following Timer Picker dialog is displayed. You notice that the AM/PM changer is also available. This is because we had set the final parameter in creating the TimePickerDialog object. The final parameter is for identifying the 24 hour format or 12 hour format.
On setting the time the value is set in the handler; where the values are taken from the TimeSetEventArgs.

Toast
A toast is a simple feedback about an operation in a small popup. It only fills the amount of space required for the message and the current activity remains visible and interactive. Toasts automatically disappear after a timeout.
We have seen dialogs which take user interaction, but in case of toasts user interaction is not needed. For example: you have created some task successfully and you want to notify the user that it’s a success.
The following example would help you to use it.
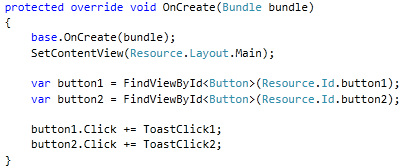
As you see in the above code snippet; familiar code is written where two buttons are extracted from the layout and the respective click events are subscribed.
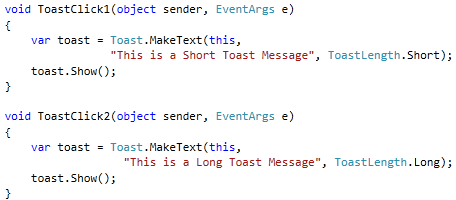
As you see in the above code snippet; two toasts are displayed; the first toast is of short length and the second is longer in length.
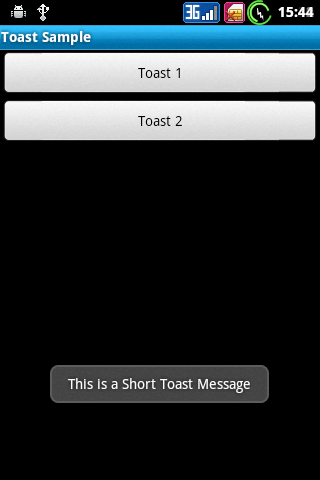
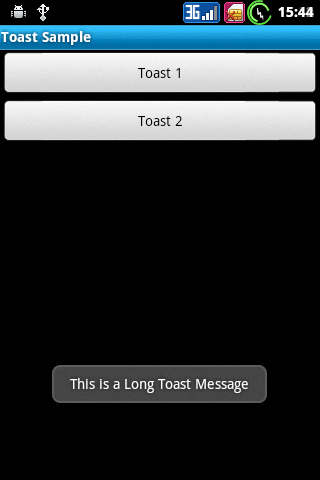
Let’s run the application.
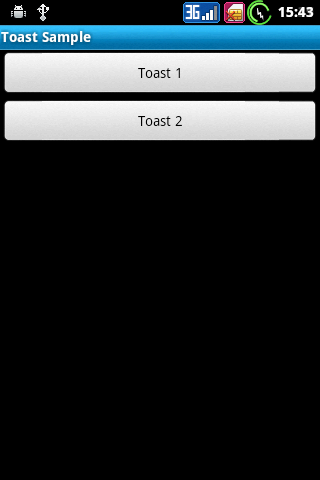
On click of the specific buttons the short and long toast is displayed.
Conclusion
In this chapter we have seen that dialogs are used for getting some interaction from the user. The simple alert dialog could be used for displaying messages. Toasts should be used in case you are doing some operation and user waits whether it’s a success or failure.