1. Introduction
Selenium is a free and open-source library for automated testing web applications. Selenium was originally created in 2004 by Jason Huggins, it merged with another test framework WebDriver in 2011 (that’s why is named ‘selenium-webdriver’) led by Simon Stewart at Google (update: Simon now works at Facebook). As WebDriver is a W3C standard, it gains support from all major browser vendors, as a result, Selenium WebDriver quickly becomes the de facto framework for automated testing web applications.
1.1 Selenium language bindings: Java, C#, JavaScript, Python and Ruby
Selenium tests can be written in multiple programming languages such as Java, C#, Python, JavaScript and Ruby (the core ones). Quite commonly, I heard the saying such as “This is a Java project, so we shall write tests in Java as well”. I disagree. Software testing is to verify whether a programmer’s work meets customer’s needs. In a sense, testers are representing customers. Testers should have more weight on deciding the test syntax than programmers. Plus, why would you mandate that your testers should have the same programming language skills as the programmers. In my subjective view, scripting languages such as Ruby and Python are more suitable for test scripts than compiled languages such as C# and Java (Confession: I have been programming in Java for over 10 years). By the way, we call them test scripts, for a reason.
All examples in this book are written in Selenium with Ruby binding. This does not mean this book is limited to testers/developers who know Ruby. As you will see in the examples below, the use of Selenium in different bindings are very similar. Once you master one, you can apply it to others quite easily. Take a look at a simple Selenium test script in five different language bindings: Java, C#, JavaScript, Python and Ruby.
Java:
import org.openqa.selenium.By;
import org.openqa.selenium.WebDriver;
import org.openqa.selenium.WebElement;
import org.openqa.selenium.chrome.ChromeDriver;

public class GoogleSearch  {
  public static void main(String[] args) {
    // Create a new instance of the html unit driver
    // Notice that the remainder of the code relies on the interface,
    // not the implementation.
    WebDriver driver = new ChromeDriver();

    // And now use this to visit Google
    driver.get("http://www.google.com");

    // Find the text input element by its name
    WebElement element = driver.findElement(By.name("q"));

    // Enter something to search for
    element.sendKeys("Hello Selenium WebDriver!");

    // Submit the form based on an element in the form
    element.submit();

    // Check the title of the page
    System.out.println("Page title is: " + driver.getTitle());
  }
}
C#:
using System;
using OpenQA.Selenium;
using OpenQA.Selenium.Chrome;
using OpenQA.Selenium.Support.UI;

class GoogleSearch
{
  static void Main()
  {
    IWebDriver driver = new ChromeDriver();
    driver.Navigate().GoToUrl("http://www.google.com");
    IWebElement query = driver.FindElement(By.Name("q"));
    query.SendKeys("Hello Selenium WebDriver!");
    query.Submit();
    Console.WriteLine(driver.Title);
  }
}
JavaScript:
var webdriver = require('selenium-webdriver');
var driver = new webdriver.Builder()
    .forBrowser('chrome')
    .build();

driver.get('http://www.google.com/ncr');
driver.findElement(webdriver.By.name('q')).sendKeys('webdriver');
driver.findElement(webdriver.By.name('btnG')).click();
driver.wait(webdriver.until.titleIs('webdriver - Google Search'), 1000);
console.log(driver.title);
Python:
from selenium import webdriver

driver = webdriver.Chrome()
driver.get("http://www.google.com")

elem = driver.find_element_by_name("q")
elem.send_keys("Hello WebDriver!")
elem.submit()

print(driver.title)
Ruby:
require "selenium-webdriver"

driver = Selenium::WebDriver.for :chrome
driver.navigate.to "http://www.google.com"

element = driver.find_element(:name, 'q')
element.send_keys "Hello Selenium WebDriver!"
element.submit

puts driver.title
1.2 Cross-browser testing
The biggest advantage of Selenium over other web test frameworks, in my opinion, is that it supports all major web browsers: Firefox, Chrome and Internet Explorer/Edge. The browser market nowadays is more diversified (based on the StatsCounter, the usage share in May 2021 for Chrome, Firefox, Safari, IE/Edge and are 68.8%, 7.2%, 9.7% and 9.9% respectively). It is logical that all external facing websites require serious cross-browser testing. Selenium is a natural choice for this purpose, as it far exceeds other commercial tools and free test frameworks.
Chrome
To run Selenium tests in Google Chrome, you’ll need both the Chrome browser and ChromeDriver installed. As of Selenium v4.12 and Chrome v155, the new Selenium Manager handles ChromeDriver installation automatically. However, it’s still helpful to know how to install ChromeDriver manually, just in case.
Installing ChromeDriver is easy: go to ChromeDriver site.
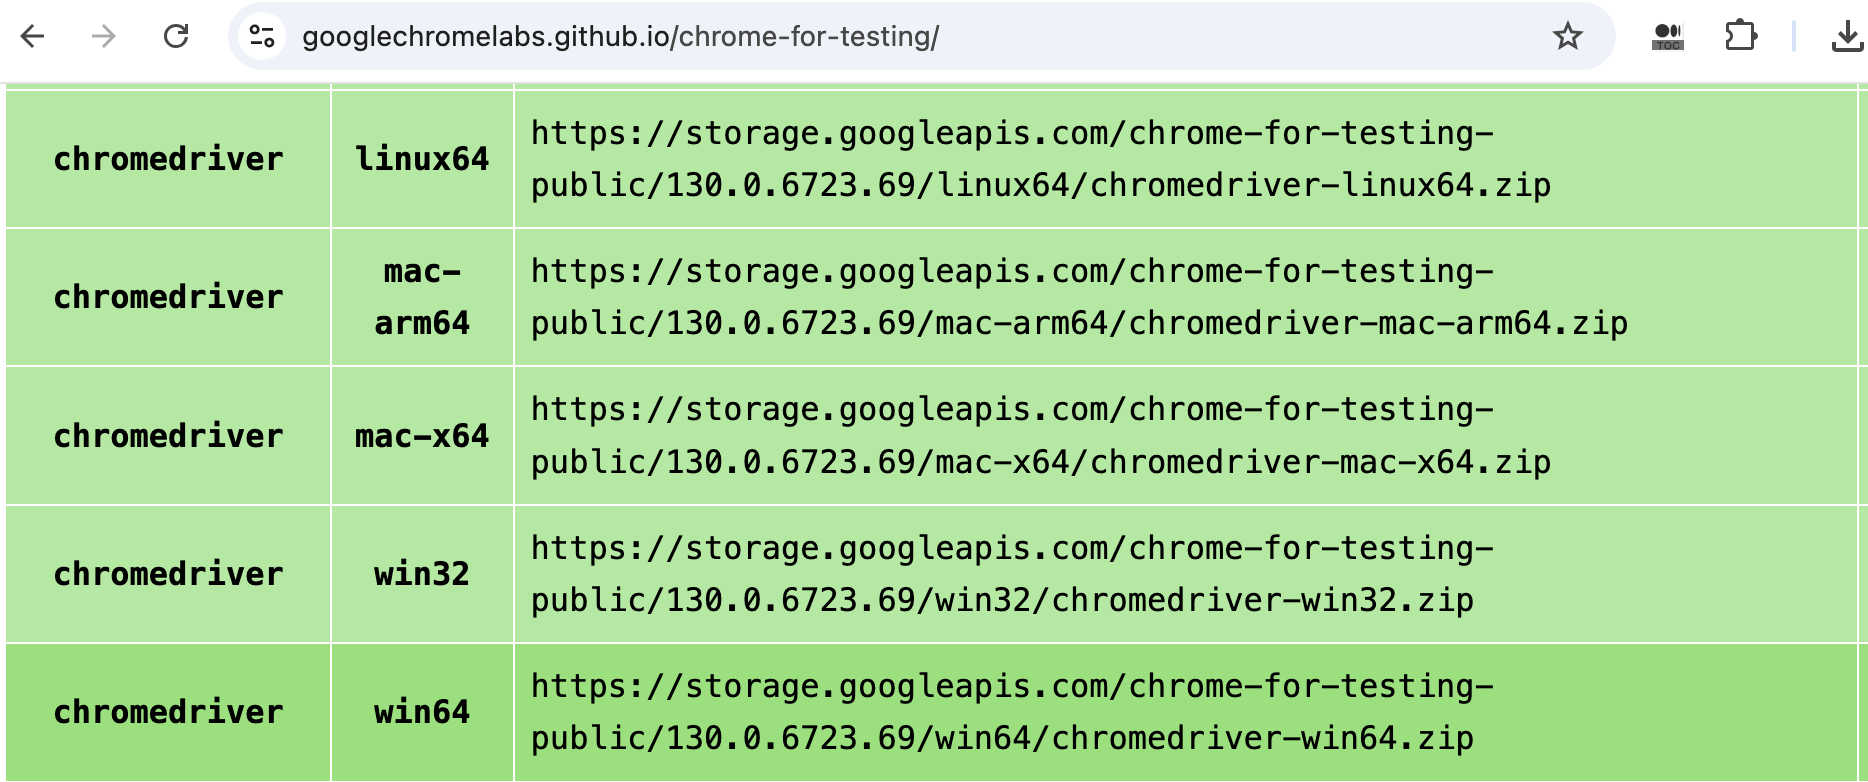
Download the one matching your browser and target platform, unzip it and put chromedriver executable in your PATH. To verify the installation, open a command window (terminal for Unix/Mac), execute command chromedriver, You should see output similar to the following:
The test script below opens a website in a new Chrome browser window and closes it one second later.
require 'selenium-webdriver'
driver = Selenium::WebDriver.for(:chrome)
driver.navigate.to("https://agileway.com.au/demo")
sleep 1 # wait 1 second
driver.quit
For readers who can’t wait to see the test running, below is the command you need to use to execute a test, which you can download from the book’s site (Ruby and selenium-webdriver gem need to be installed first. See instructions towards the end of this chapter).
> ruby ch01_open_chrome.rb
If the test execution failed with “unknown error: cannot find Chrome binary”, this means Selenium is unable to detect Chrome browser in the default location. We can set it via browser options, as below.
the_chrome_options = Selenium::WebDriver::Chrome::Options.new
# Another option: "C:\Program Files (x86)\Google\Chrome\Application\chrome.exe"
the_chrome_options.binary = "C:\\Program Files\\Google\\Chrome\\Application\\chrome.exe"

if Selenium::WebDriver::VERSION =~ /^3/
  driver = Selenium::WebDriver.for(:chrome, :options => the_chrome_options)
else
  # the syntax for Selenium WebDriver 4
  driver = Selenium::WebDriver.for(:chrome, :capabilities => the_chrome_options)
end
Firefox
Selenium tests require Gecko Driver to drive Firefox. The test script below will open a website in a new Firefox window.
require 'selenium-webdriver'
driver = Selenium::WebDriver.for(:firefox)
driver.navigate.to("https://agileway.com.au/demo")
Safari
SafariDriver is pre-installed with macOS. To allow remote automation in Safari, you must turn on WebDriver support:
- To enable the Develop menu in the Safari browser, click Safari > Preferences > Advanced tab. Select the Show Develop Menu checkbox. The Develop menu appears in the menu bar.
- To enable Remote Automation click Develop > Allow Remote Automation in the menu bar.
- Authorize safaridriver. To permit this, run /usr/bin/safaridriver once manually and complete the authentication prompt.
require 'selenium-webdriver'
driver = Selenium::WebDriver.for(:safari)
driver.navigate.to("https://whenwise.agileway.net")
Edge
Mircosoft Edge Chromium is like Google Chrome in the context of test automation, except installing Microsoft Edge WebDriver instead of ChromeDriver.
driver = Selenium::WebDriver.for(:edge)
1.3 RSpec
The above scripts drive browsers, strictly speaking, they are not tests. To make effective use of Selenium scripts for testing, we need to put them in a test syntax framework that defines test structures and provides assertions (performing checks in test scripts). Typical choices are:
- xUnit Unit Test Frameworks such as JUnit (for Java), NUnit (for C#) and minitest (for Ruby).
- Behaviour Driven Frameworks such as RSpec and Cucumber (for Ruby).
In this book, I use RSpec, the de facto Behaviour Driven Development (BDD) framework for Ruby. Here is an example.
require 'selenium-webdriver'

describe "Selenium Recipes - Start different browsers" do

  it "Start Chrome" do
    driver = Selenium::WebDriver.for(:chrome)
    driver.navigate.to("http://travel.agileway.net")
    sleep 1
    driver.quit
  end

  it "Start FireFox" do
    driver = Selenium::WebDriver.for(:firefox)
    driver.navigate.to("http://travel.agileway.net")
    expect(driver.title).to eq("Agile Travel")
    sleep 1
    driver.quit
  end

  it "Start Edge" do
    driver = Selenium::WebDriver.for(:edge)
    driver.get("http://travel.agileway.net")
    sleep 1
    expect(driver.page_source).to include("User Name")
    driver.quit
  end

end
The keywords describe and it define the structure of a RSpec test script.
-
describe "..."doDescription of a collection of related test cases
-
it "..." doIndividual test case.
expect().to statements are called rspec-expectations, which are used to perform checks (also known as assertions).
Typical RSpec test script
The above example test script shows the basic structure and assertions in RSpec. However, we typically don’t write a test case explicitly for multiple browsers, instead, we focus on test scenarios like the one below.
load File.dirname(__FILE__) + '/../test_helper.rb'

describe "Selenium Recipes - Start different browsers" do
  include TestHelper

  before(:all) do
    @driver = Selenium::WebDriver.for(:chrome)
  end

  before(:each) do
    @driver.navigate.to("http://travel.agileway.net")
  end

  after(:all) do
    @driver.quit
  end

  it "Invalid Login" do
    @driver.find_element(:id, "username").send_keys("agileway")
    @driver.find_element(:id, "password").send_keys("changeme")
    @driver.find_element(:xpath,"//input[@value='Sign in']").click
    expect(@driver.page_source).to include("Invalid email or password")
  end

  it "Login successfully" do
    @driver.find_element(:id, "username").send_keys("agileway")
    @driver.find_element(:id, "password").send_keys("testwise")
    @driver.find_element(:xpath,"//input[@value='Sign in']").click
    expect(@driver.page_source).to include("Signed in!")
  end

end
In this test script, we see another RSpec feature.
-
before()andafter()hooks.Optional test statements run before and after each or all test cases. Using these hooks effectively can help you writing the test scripts that are more concise, and more importantly, easier to maintain.
You will find more about RSpec from its home page. However, I honestly don’t think it is necessary. The part used for test scripts is not much and quite intuitive. After studying and trying out some examples, you will be quite comfortable with RSpec.
As a general good practice, all test scripts include a common test helper
(include TestHelper) which loads required libraries and defines a set of reusable functions that are available to all test cases. For more on designing maintainable test scripts, refer to my other book: Practical Web Test Automation.
1.4 Run recipe scripts
Test scripts for all recipes can be downloaded from the book site. They are all in a ready-to-run state. I include the target web pages/sites as well as Selenium test scripts. There are two kinds of target web pages: local HTML files and web pages on a live site. Running tests written for a live site requires Internet connection.
Run tests in TestWise
TestWise is a functional testing Integration Development Environment (IDE) that supports Selenium WebDriver. While TestWise is commercial software, you may use it for free with a limit on test execution per start. You are permitted to use TestWise this way (completely free) for your personal learning and work.
Installing TestWise is easy, it only takes a couple of minutes to download and install. TestWise Ruby Edition is the only software you need for learning with this book (or developing Selenium test scripts for your work). If you are new to Selenium WebDriver, I would suggest you use TestWise while learning the recipes in this book, a dedicated test automation IDE will help you focus better on Selenium WebDriver.
In this book, I refer to TestWise when editing or executing test scripts. If you have a preferred testing IDE or code/script editors, such as Aptana Studio, Visual Studio Code or Sublime Text, go for it. It shall not affect your learning this book or running recipe test scripts.
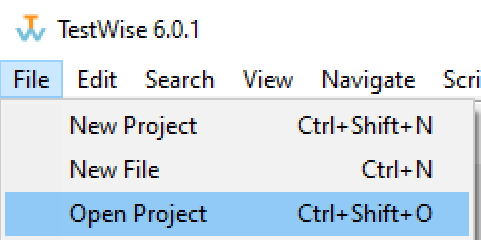
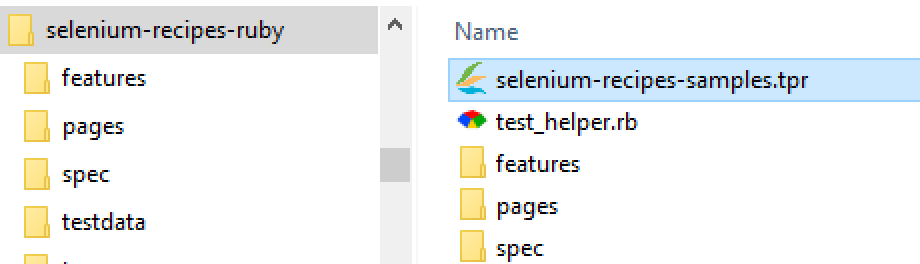
To open recipe test scripts in TestWise (after you download the recipe tests (a zip file) from the book site and unzip to a folder), close the currently opened project if there is one. Select menu File → Open Project,
select the project file selenium-recipes-scripts\selenium-recipes-samples.tpr
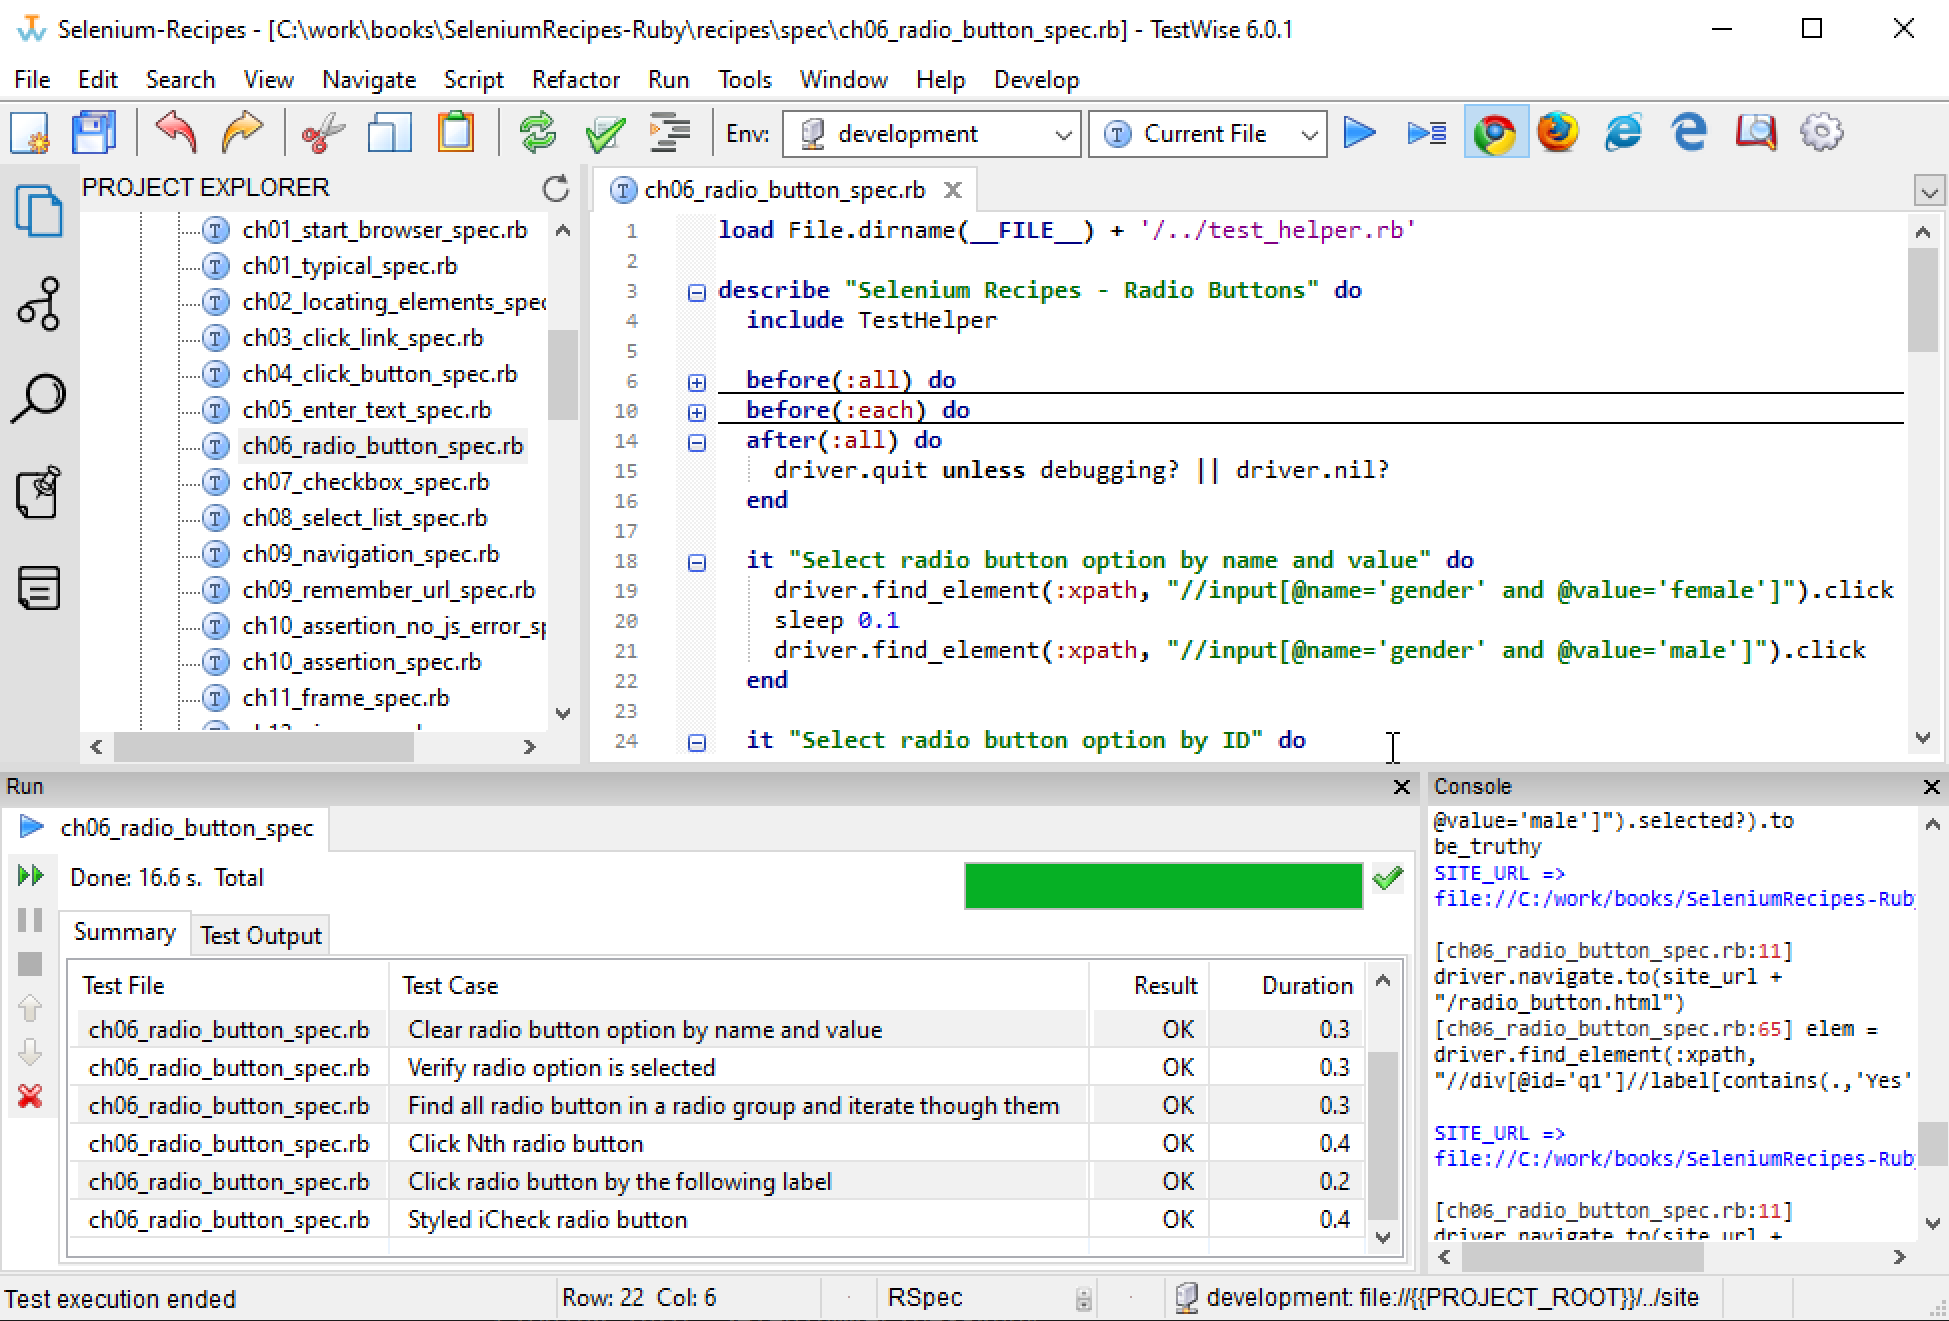
The TestWise window (after loading a test project) should look like the following:
Find a test case
You can locate the recipe either by following the chapter or searching by name. There are about 200 test cases in one test project. Here is the quickest way to find the one you want in TestWise.
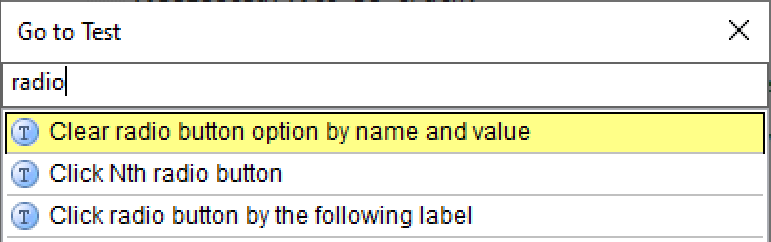
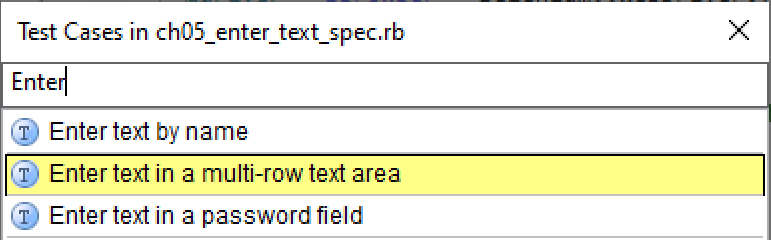
Select menu ‘Navigation’ → ‘Go to Test Case..’.
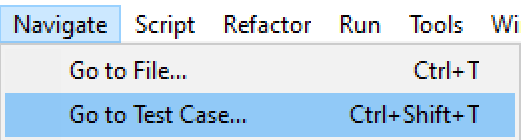
A pop-up window lists all test cases in the project for your selection. The finding starts as soon as you type.
Within a test script file (opened in the editor), press Ctrl+F12 to show and select test cases inside it.
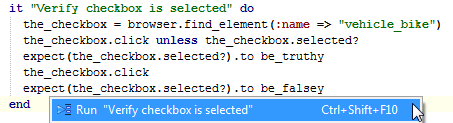
Run individual test case
Move caret to a line within a test case (between it "..." do and end). Right mouse click and select “Run '...'”.
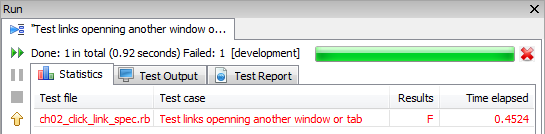
The below is a screenshot of the execution panel when one test case failed,
Run all test cases in a test script file
You can also run all test cases in the currently opened test script file by clicking the blue triangle button on the toolbar.

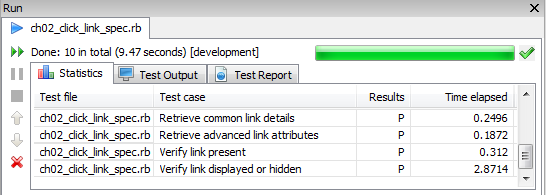
The below is a screenshot of the execution panel when all test cases in a test script file passed,
Run tests from command line
One advantage of open-source test frameworks, such as Selenium, is FREEDOM. You can edit the test scripts in any text editors and run them from a command line.
You need to install Ruby first, then install RSpec and your preferred web test driver and library (known as Gem in Ruby). Basic steps are:
- install Ruby interpreter
Window installer: https://rubyinstaller.org, recommend this distribution: Ruby+Devkit 2.6.8-1 (x64).
Linux/macOS: included or compile from source. You may also use a Ruby version manager, e.g. rbenv to install and use a specific version of Ruby.
- install RSpec
> gem install rspec
- install test framework gem(s)
> gem install selenium-webdriver
Once the installation (takes about 1 minute) is complete, we can run an RSpec test from the command line. You need to have some knowledge of typing commands in a console (Unix) or command window.
To run test cases in a test script file (named google_spec.rb), enter command
> rspec google_spec.rb
Run multiple test script files in one go:
> rspec first_spec.rb second_spec.rb
Run an individual test case in a test script file, supply a line number in a chosen test case range.
> rspec google_spec.rb:30
To generate a test report (HTML) after test execution:
> rspec -fh google_spec.rb > test_report.html
The command syntax is identical for macOS and Linux platforms.