Hello, Playdate!
A common tradition when learning programming is to output some simple text to the screen that says “Hello, World!” While it is a bit trivial, it’s a great starting place because you get to familiarize yourself with some key concepts of a given language or programming toolkit. We’ll learn about how to structure your games for Playdate, write some basic Lua, position text on the screen, build your game, and run it on the simulator and device.
On your computer, create a new folder called helloPlaydate and then a folder within it called source.
Then open your project folder in your text editor and create a main.lua file within the source folder.
source/main.lua is the primary entrypoint into your game. While larger games will use multiple files to organize everything, for our initial simple games, we’ll write all of our code in source/main.lua.
Type the following code into source/main.lua:
1 function playdate.update()
2   playdate.graphics.drawText("Hello, Playdate!", 40, 40)
3 end
This is the simplest form of a Playdate game. playdate.update() is a special function that gets called once every frame. By default, Playdate games run at 30 frames per second (FPS). Virtually all games run in a loop, processing 30, 60, or even 120 times per second. Movement in games appears smooth to the human eye because the refresh cycle is so quick.
The game loop runs over and over and over while the game is active, handling input, updating the world, playing audio, and drawing graphics to the screen. Your game reacts to the passage of time via the update loop that runs every frame.
Any code within the function we defined gets called each frame. The code in our function says to draw the text "Hello, Playdate!" at the x position of 40 pixels and the y position of 40 pixels. Functions have parameters that are separated by commas. So the first parameter is the text we want to be drawn. The second is the x coordinate where the text should be placed. And the third is the y coordinate.
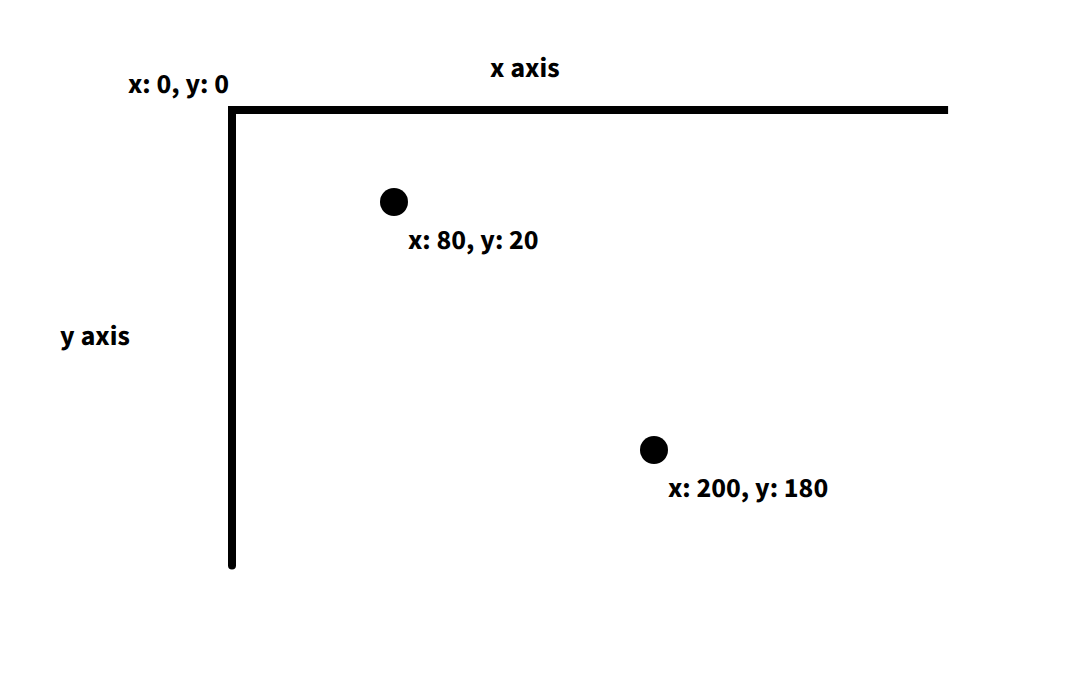
Let’s run our game, and then we’ll dive more into coordinates, as they’re a key part of game development.
When you installed the Playdate SDK, a command line program called pdc was installed. pdc stands for Playdate Compiler, and it’s what takes your game’s source code and assets and builds your game into a file that a Playdate console can play.
In Visual Studio Code, click the Terminal top menu dropdown and select New Terminal. This will open up a terminal within Visual Studio Code in your current folder. Type this command and press :
1 pdc source HelloPlaydate.pdx
That command says: use the Playdate Compiler (pdc) to build our source folder for our game and output it as a file named HelloPlaydate.pdx.
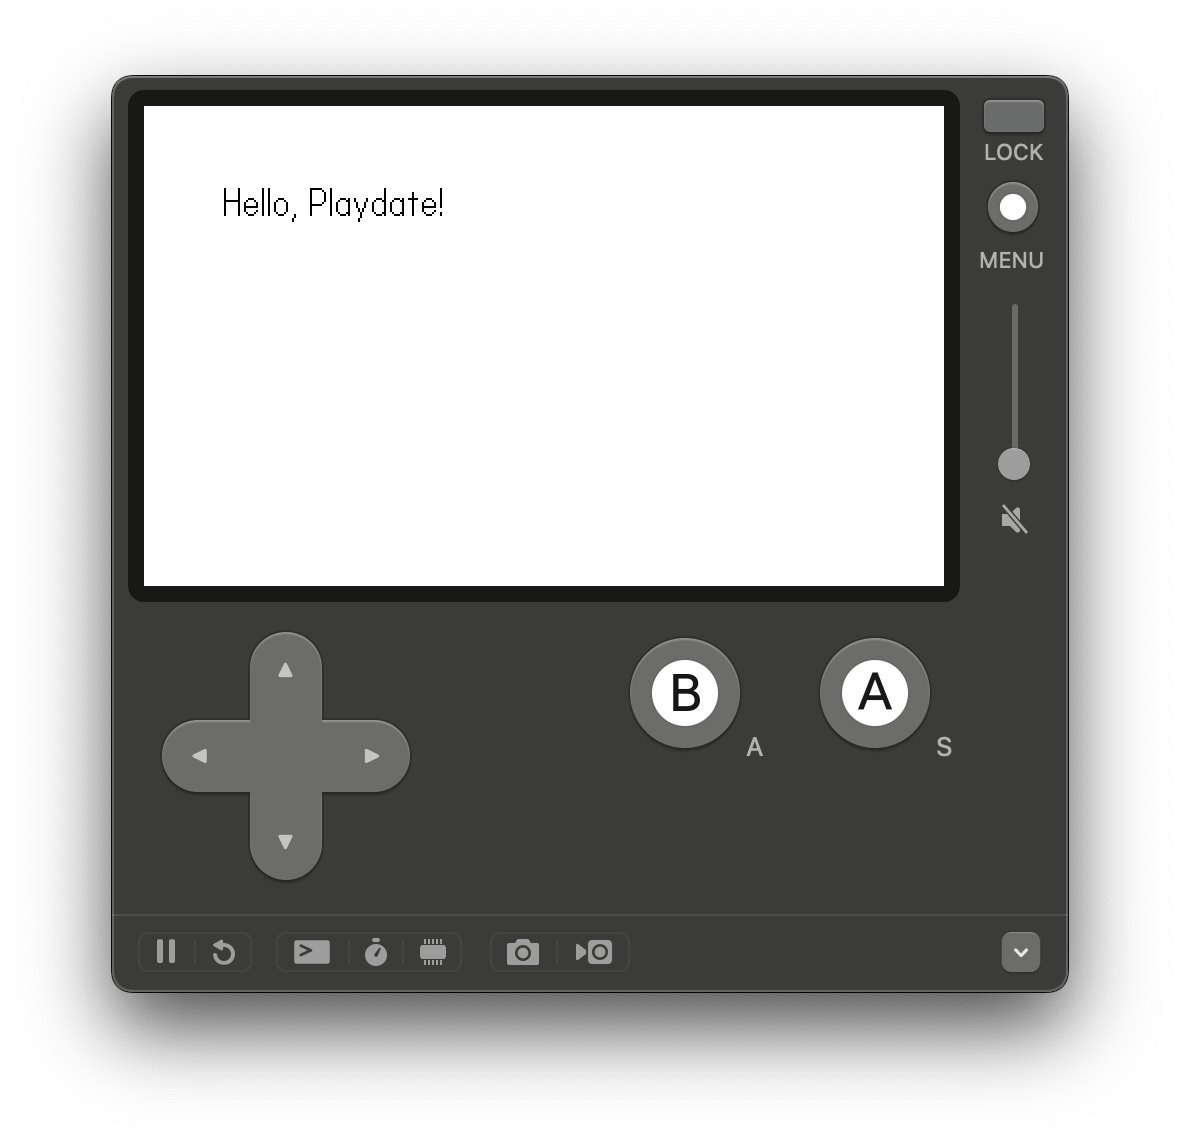
In Visual Studio Code’s Explorer side menu, right-click on the newly created HelloPlaydate.pdx and reveal it in Finder (macOS), Explorer (Windows), or your file manager (Linux). Double-click HelloPlaydate.pdx in your file manager and the game will launch in the Playdate Simulator, rendering the text we typed in.
If you’ve got a Playdate console, plug it into your computer and unlock it. In the Playdate Simulator, click the Device menu option and select Upload Game to Device. This will copy and run the game on your console!
Games you upload to your device are listed on the Home screen in the Sideloaded section. So you’ll be able to play your games even when your device is not connected to your computer.
We’ve got our game running on the Playdate Simulator and the device in just three lines of code and one command—not bad! These fundamentals of structuring a project and running your game are essential, and the Playdate team has made it as easy as possible.
Try changing the text around and see what happens. Make your game draw "Hello, World" instead.
Counting Frames
Understanding the passage of time and the game loop is really important, so let’s illustrate that with a simple example building upon our helloPlaydate game.
Update source/main.lua to be the following:
1 local updates = 0
2
3 function playdate.update()
4   updates += 1
5
6   playdate.graphics.clear()
7   playdate.graphics.drawText("Hello, Playdate", 40, 40)
8   playdate.graphics.drawText("Updates: " .. updates, 40, 60)
9 end
Compile and run the game (command: pdc source HelloPlaydate.pdx).
You’ll see the number of updates rapidly increase. It increments by 30 every second. We created a local variable called updates to keep track of how many times the function playdate.update() is called. A variable is a programming construct that stores data we can read and change over time. A common variable in a game would be the player’s health. As they take damage, their health decreases.
At the beginning of the playdate.update() function we add 1 to the updates variable. updates += 1 is shorthand for updates = updates + 1. The += operator takes the existing variable’s value and adds the right-hand side to it.
playdate.graphics.clear() clears the screen. Without it, each frame overwrites the previous and the text doesn’t clear from the previous screen. This wasn’t a problem in our initial helloPlaydate game because the text wasn’t moving or changing. But because updates is incrementing and changing, we must clear the screen each frame.
Finally, the second drawText call says to draw the string "Updates: " and append the updates variable to it using the .. operator. We draw it at the same x position so that it is aligned with the "Hello, Playdate" text but draw it 20 pixels lower at y position 60. This makes it so that the two pieces of text don’t overlap each other.
While our updates variable isn’t too interesting, we’ve used it as a way to learn about variables and better understand how the game loop runs over and over.
Moving the Text
Let’s use player input to change variables and move the text around the screen using the d-pad. Similar to how we tracked the number of updates, we’ll introduce two new variables for the text’s x and y position.
Update the source/main.lua code to be the following:
 1 local updates = 0
 2 local x = 40
 3 local y = 40
 4
 5 function playdate.update()
 6   updates += 1
 7
 8   playdate.graphics.clear()
 9   playdate.graphics.drawText("Hello, Playdate", x, y)
10   playdate.graphics.drawText("Updates: " .. updates, 40, 60)
11 end
If you compile and run your game in the Playdate Simulator, you’ll notice nothing has changed from before. Great! That was our goal.
We’ve refactored our code—which means we’ve adjusted the code without changing the functionality. By putting the x and y positions of where we draw the "Hello, Playdate" text into variables, they’ll be easy to change.
Now in each loop of the game, we’ll need to check to see if the player is pressing any of the d-pad buttons. If they are, then we’ll change the x and y position of where the text is drawn.
Update source/main.lua to the following:
 1 local updates = 0
 2 local x = 40
 3 local y = 40
 4
 5 function playdate.update()
 6   updates += 1
 7
 8   if playdate.buttonIsPressed(playdate.kButtonUp) then
 9     y -= 2
10   end
11   if playdate.buttonIsPressed(playdate.kButtonDown) then
12     y += 2
13   end
14   if playdate.buttonIsPressed(playdate.kButtonLeft) then
15     x -= 2
16   end
17   if playdate.buttonIsPressed(playdate.kButtonRight) then
18     x += 2
19   end
20
21   playdate.graphics.clear()
22   playdate.graphics.drawText("Hello, Playdate", x, y)
23   playdate.graphics.drawText("Updates: " .. updates, 40, 60)
24 end
The new code in playdate.update() checks whether the d-pad button for each direction (up, down, left, and right) is pressed. If it is, then we change our variable accordingly. For moving up, we subtract 2 pixels from the y variable. For moving down, we add 2 pixels to the y variable. And so on. -= works just like += but with subtraction instead of addition.
Conditional checks using if ... then ... end are a fundamental part of programming. We check whether some condition is true and act on it. In these cases, we check for a button being pressed. A nice aspect of Lua is that it reads like the English language. If the up button is pressed, then subtract from the y position.
Try changing the value of 2 and seeing what happens.
The text will move around faster or slower because it’s moving more or fewer pixels each frame.
Bonus: Refactor the code to extract the speed into a variable so that you only need to change it in one place rather than four.
Player Input to Change Greeting
Let’s add one more feature to our greeting learning exercise: the ability to change who we’re greeting when the A button is pressed. We’ll check for input and then select a random name from a list and update what we’re drawing.
 1 local updates = 0
 2 local x = 40
 3 local y = 40
 4 local names = { "Playdate", "Goku", "Bulma", "Piccolo" }
 5 local name = names[1]
 6
 7 function playdate.update()
 8   updates += 1
 9
10   -- snip: movement code hidden
11
12   if playdate.buttonJustPressed(playdate.kButtonA) then
13     name = names[math.random(#names)]
14   end
15
16   playdate.graphics.clear()
17   playdate.graphics.drawText("Hello, " .. name, x, y)
18   playdate.graphics.drawText("Updates: " .. updates, 40, 60)
19 end
A handful of new concepts are present in the code above. We’ve got a new variable named names with a bunch of strings between curly braces. This is known as a table. A table is a way to group together a collection of different data.
Then we’ve got the name variable, which is assigned to the value at index 1 of the names table, which in this case is "Playdate".
We check to see if playdate.kButtonA is pressed. But notice we use playdate.buttonJustPressed instead of buttonIsPressed. There’s a subtle but important difference between the two: buttonJustPressed returns false if the button is held down, meaning it needs to be pressed again to select another random name. If we used buttonIsPressed and held down the A button, the name would keep changing each game loop. (Give it a try and see!)
If the button is just pressed, then we change the variable name to be a random entry in the names table. The math.random(#names) code says: give us a random index between 1 and the number of entries in the names table. Sometimes the name won’t change because of the luck of the draw—the random index landed on the same name again.
Finally, we use the name variable when we draw our greeting using string concatenation: playdate.graphics.drawText("Hello, " .. name, x, y).
Bonus #1: Add some more names to the names table.
Bonus #2: Make pressing the B button reset the updates counter.
A Gentle Introduction
Drawing, moving, and changing some text may seem a bit basic, but I promise you that these concepts are absolutely fundamental to making games. We went over the game loop, functions, variables, conditionals, and tables. These core data structures and control flow mechanisms will be used over and over again. And we got our little greeting game working on the Playdate Simulator and the console itself.
Next we’ll move on to coding our first actual game! We’ll make a single-player tennis game where you move your paddle with the crank.