Raspberry Pi Versions
In the words of the totally awesome Raspberry Pi foundation;
The Raspberry Pi is a low cost, credit-card sized computer that plugs into a computer monitor or TV, and uses a standard keyboard and mouse. It’s capable of doing everything you’d expect a desktop computer to do, from browsing the internet and playing high-definition video, to making spreadsheets, word-processing, playing games and learning how to program in languages like Scratch and Python.
There are (at time of writing) twelve different models on the market. The A, B, A+, B+, ‘model B 2’, ‘model B 3’, ‘model B 3+’, ‘model B 4’ (which I’m just going to call the B2, B3, B3+ and 4 respectively), ‘model A+’, ‘model A+ 3’ , the Zero and Zero W. A lot of projects will typically use either the the B2, B3, B3+ or the 4 for no reason other than they offer a good range of USB ports (4), 1024 - 4096 MB of RAM, an HMDI video connection (or two) and an Ethernet connection. For all intents and purposes either the B2, B3, B3+ or 4 can be used interchangeably for the projects depending on connectivity requirements as the B3, B3+ and 4 have WiFi and Bluetooth built in. For size limited situations or where lower power is an advantage, the Zero or Zero W is useful, although there is a need to cope with reduced connectivity options (a single micro USB connection) although the Zero W has WiFi and Bluetooth built in. Always aim to use the latest version of the Raspbian operating system (or at least one released on or after the 14th of March 2018). For best results browse the ‘Downloads’ page of raspberrypi.org.
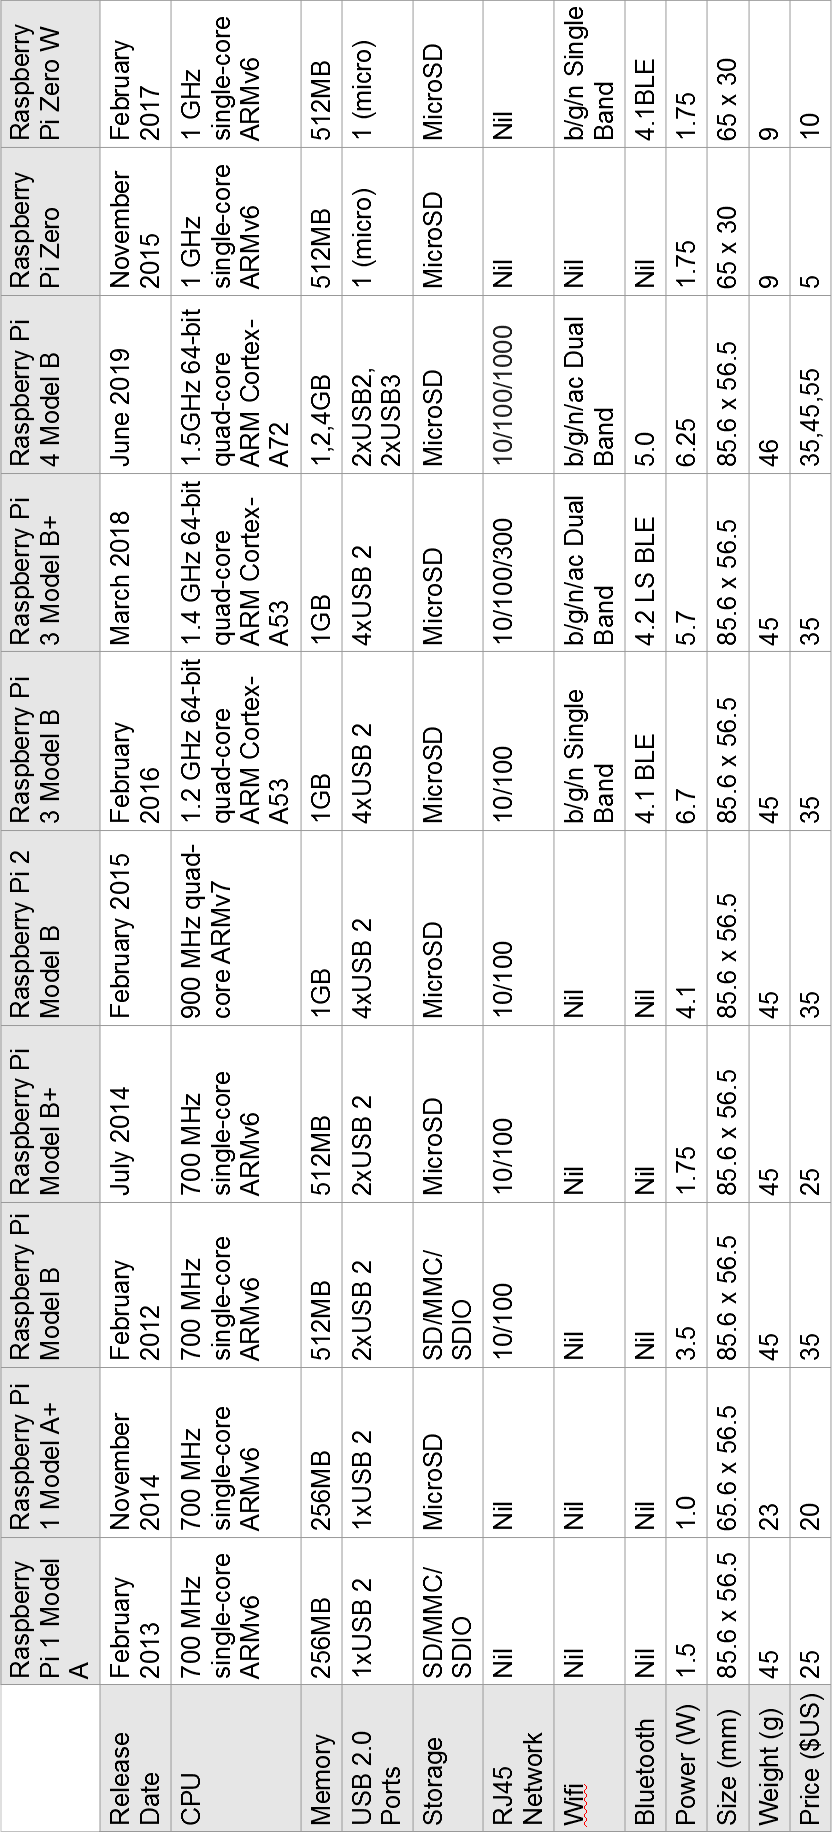
Version Comparison
Raspberry Pi Zero
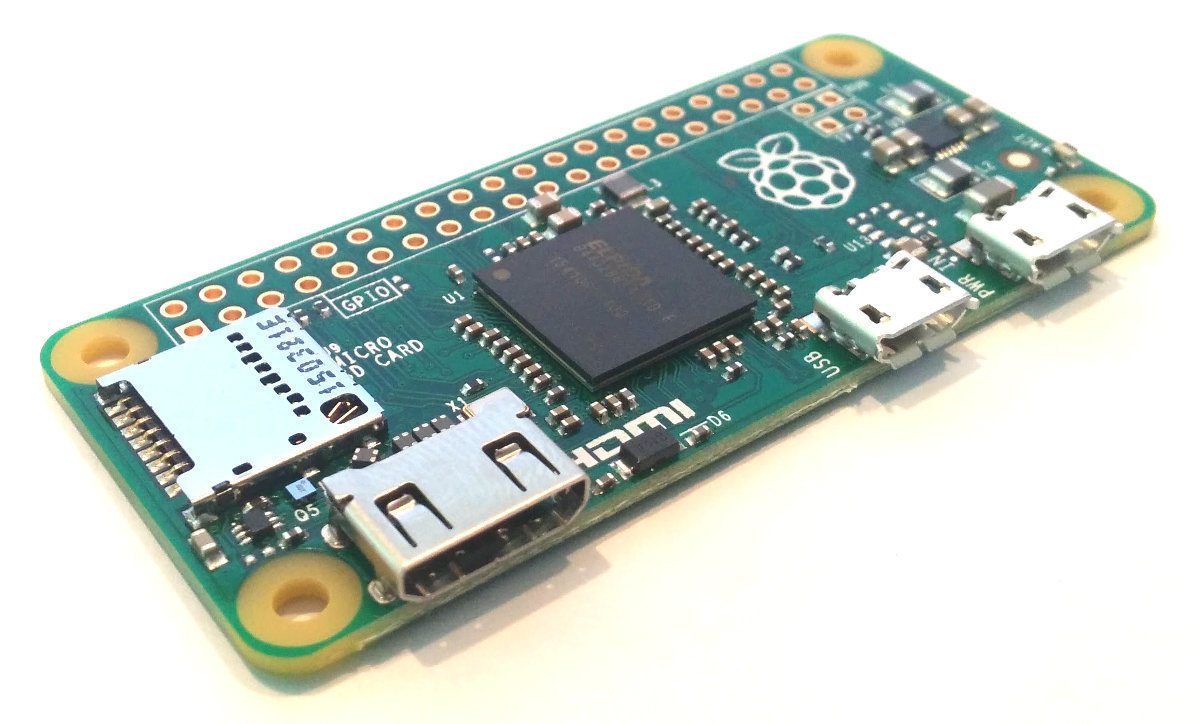
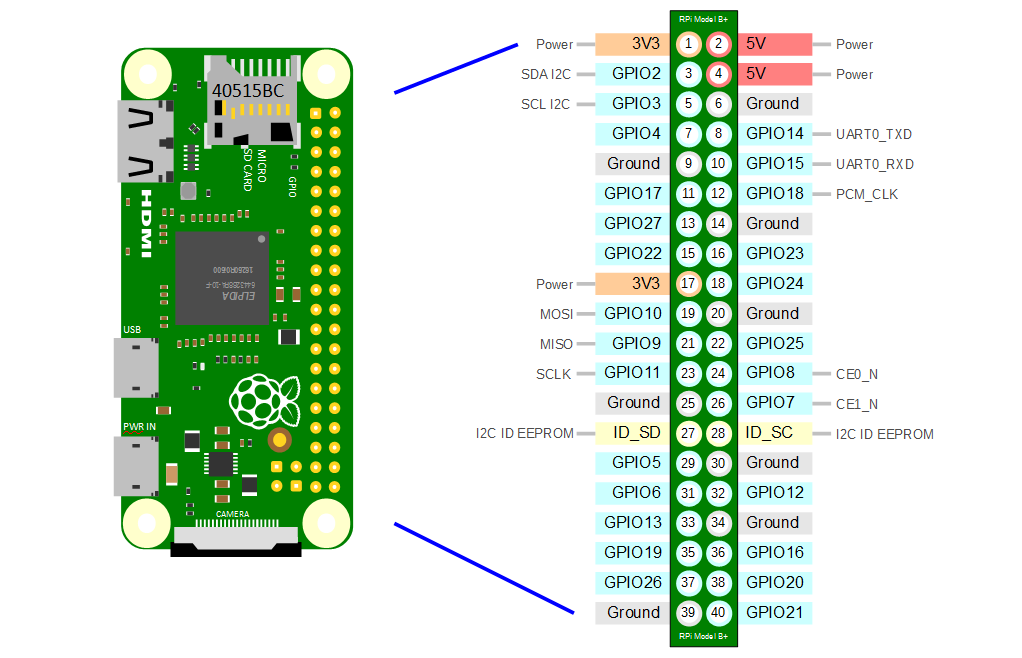
The Raspberry Pi Zero has been designed to scale to as small a size as practical while retaining the standard 40 pin GPIO header arrangement. It is 65 x 30 x 5mm and weighs 9g. Like the Models A, A+, B and B+ it is powered by a Broadcom BCM2835 ARM11.
To make the Zero as small as possible there have been some significant connectivity changes. There is a mini-HDMI connector with a single Micro-USB connector for peripherals and another dedicated to applying power. The other striking difference is that while the GPIO ports remain and are configured the same, the header pins themselves have not been soldered onto the board. These connector choices mean that the 5mm thickness provides ample opportunities for applications where thickness is an issue.
In May of 2016, a new version of the Pi Zero (ver 1.3) was announced that includes a camera port on one of the narrower edges.
At the end of February 2017 the Pi Zero W (‘W’ for Wireless) was released that added WiFi and Bluetooth connectivity. This is the model that would be recommended for a simple network enabled solution.

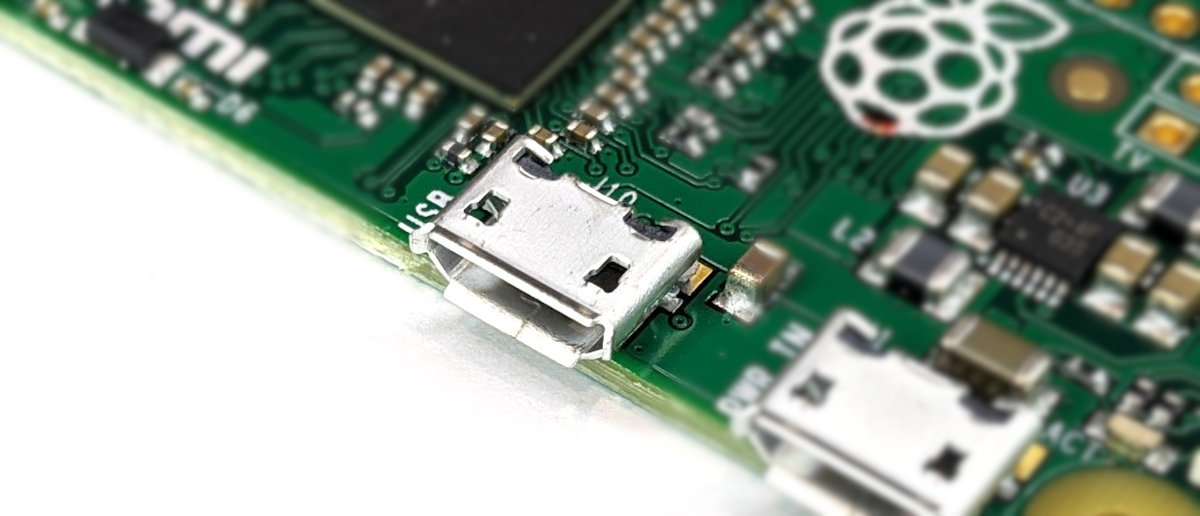
USB Port
It includes 1 x Micro-USB Port
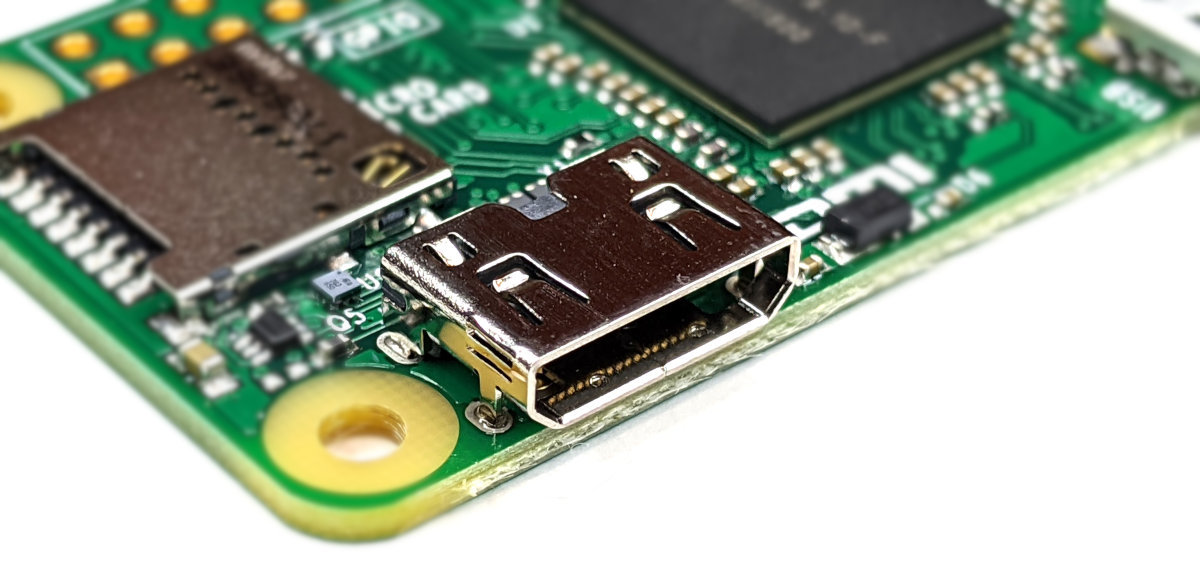
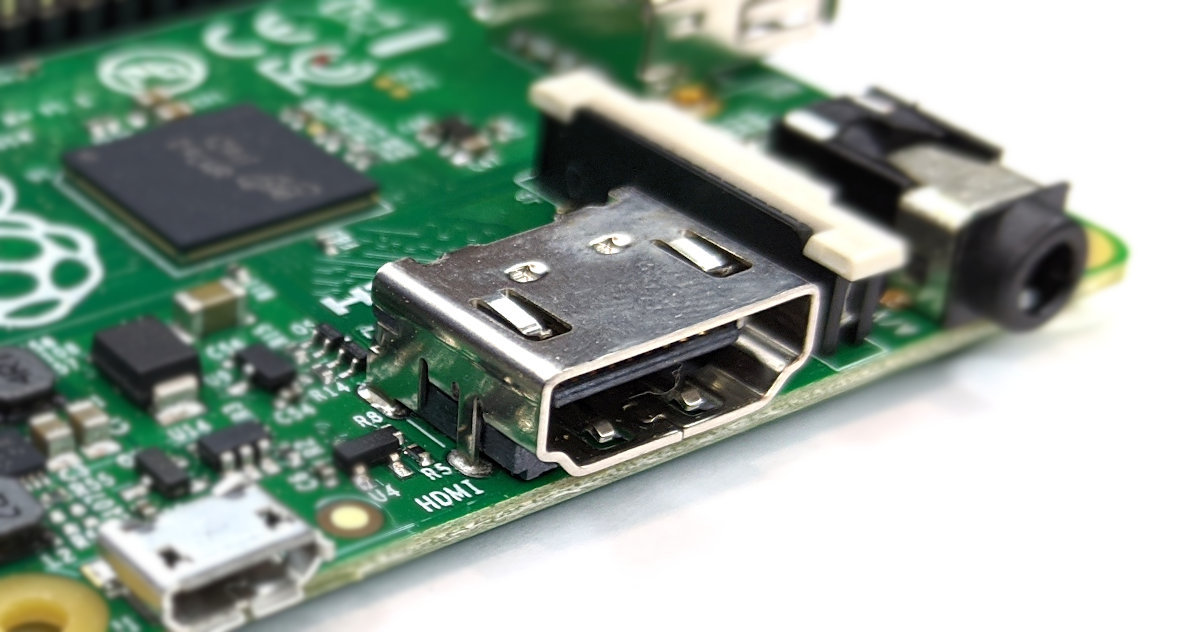
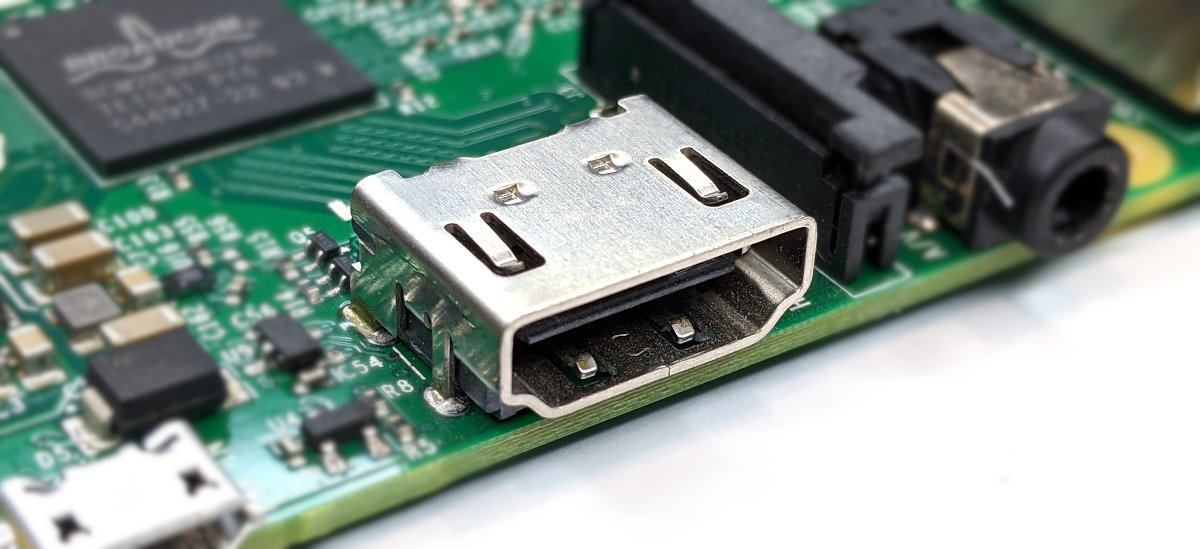
Video Out
Integrated Videocore 4 graphics GPU capable of playing full 1080p HD video via a mini-HDMI video output connector. HDMI resolutions up to 1080p at 60fps are supported.
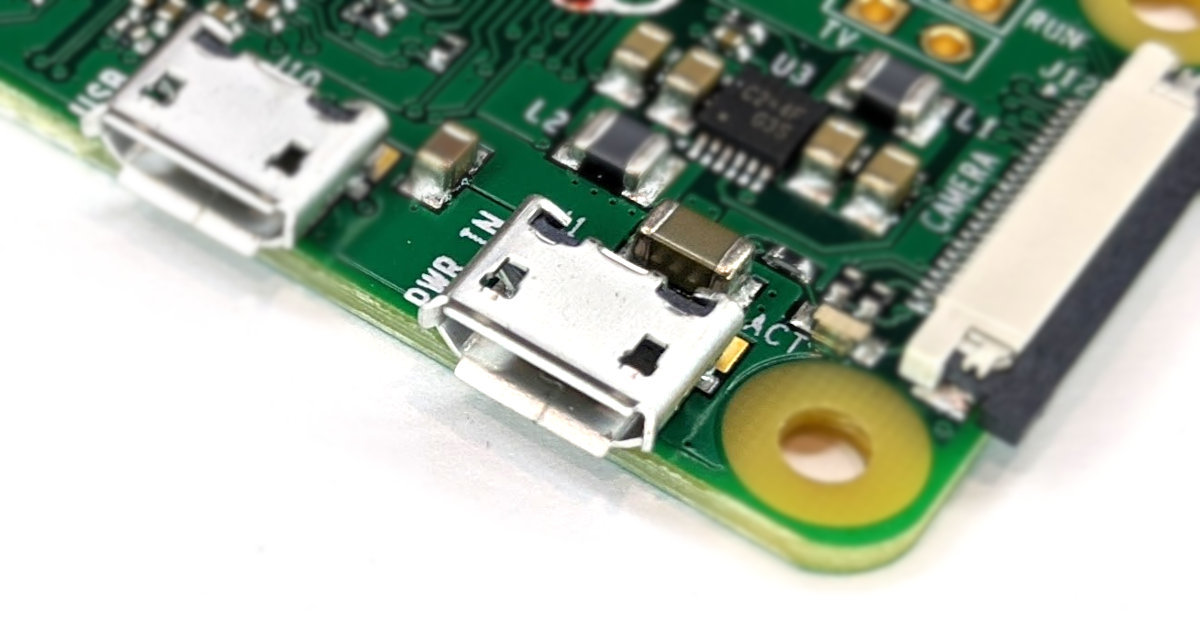
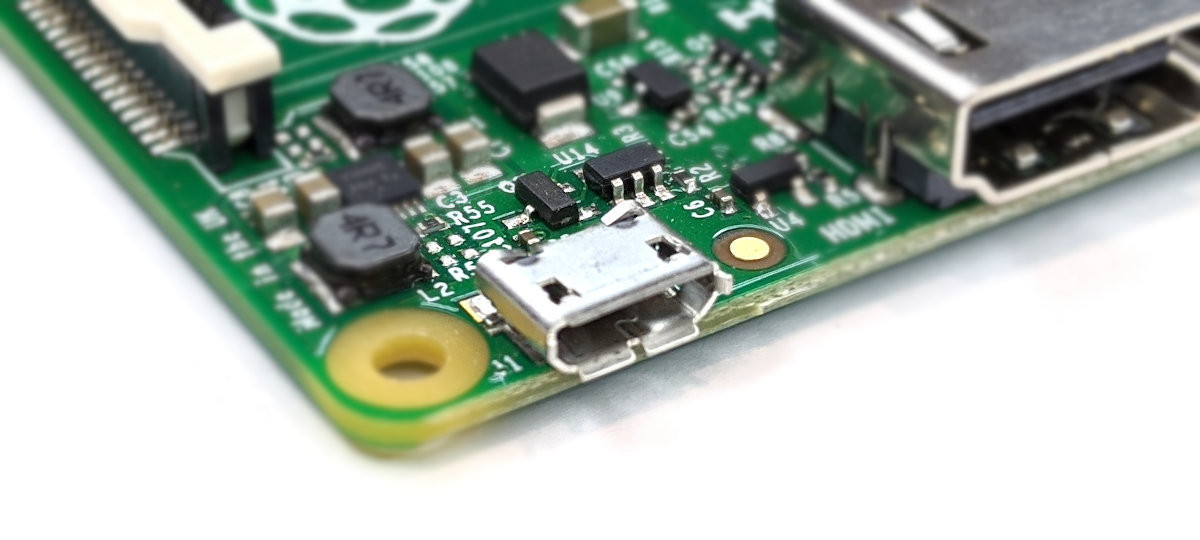
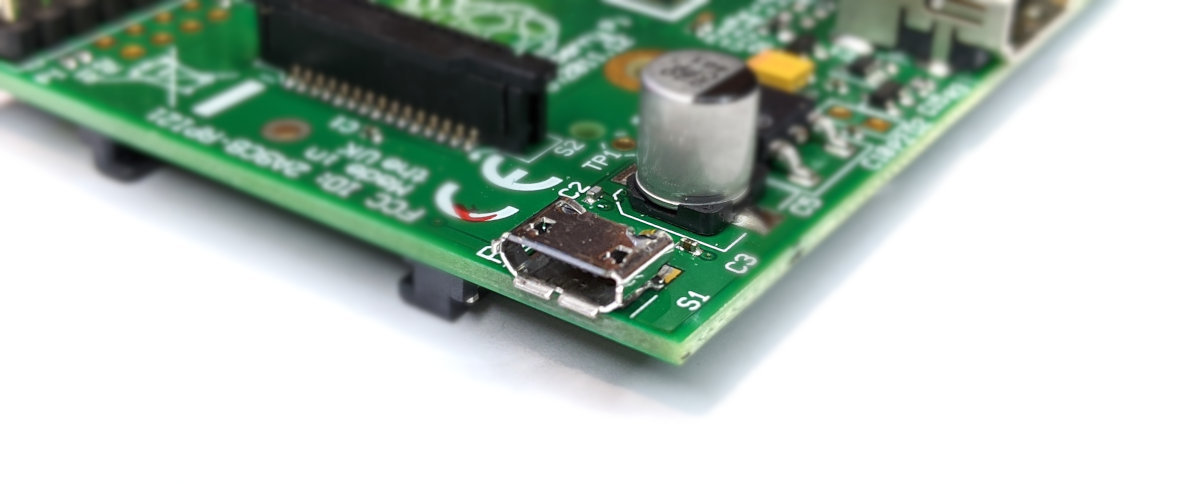
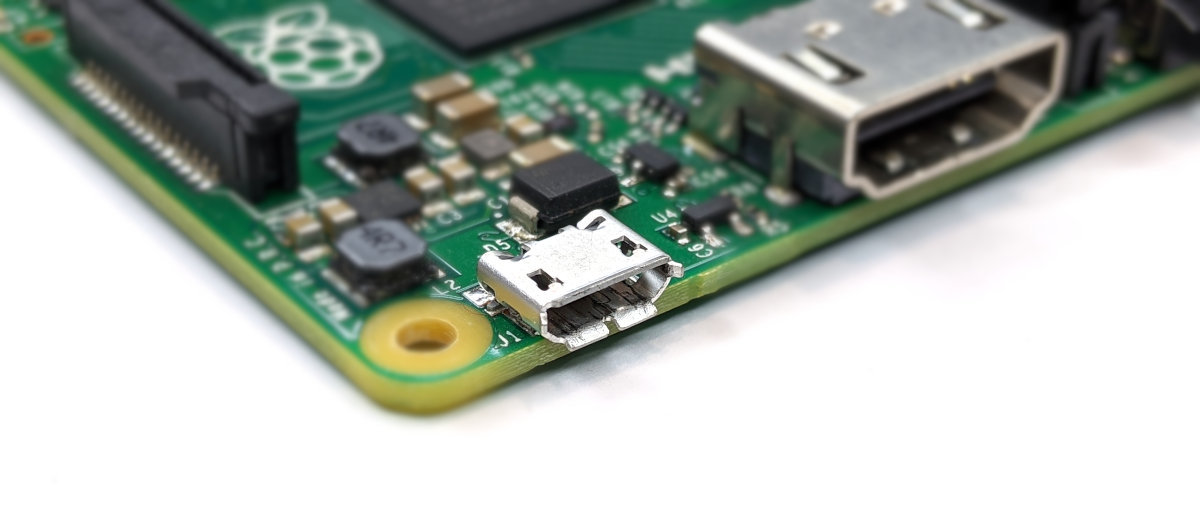
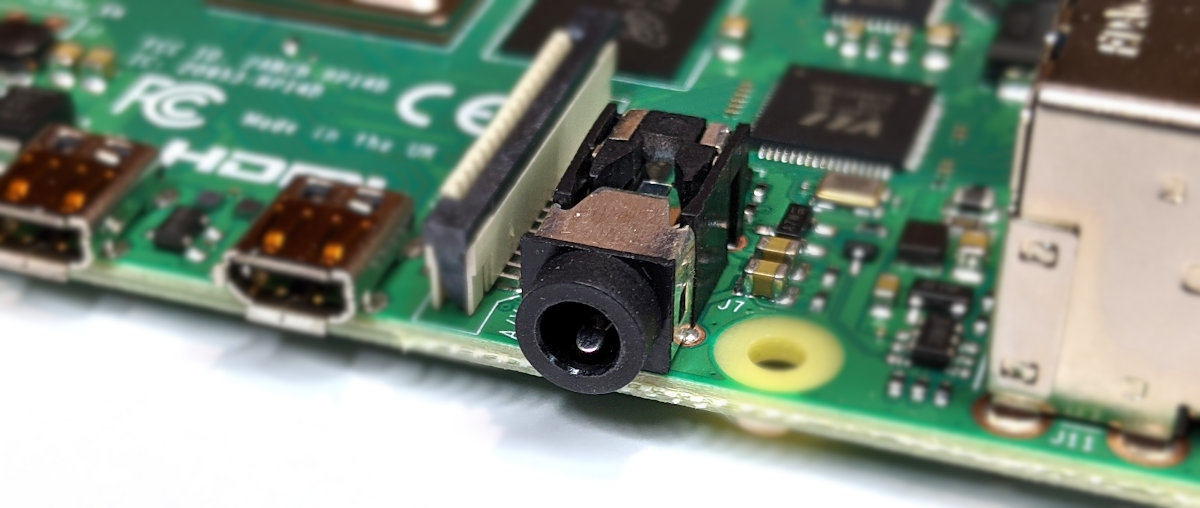
USB Power Input Jack
The board includes a 5V Micro-USB Power Input Jack.
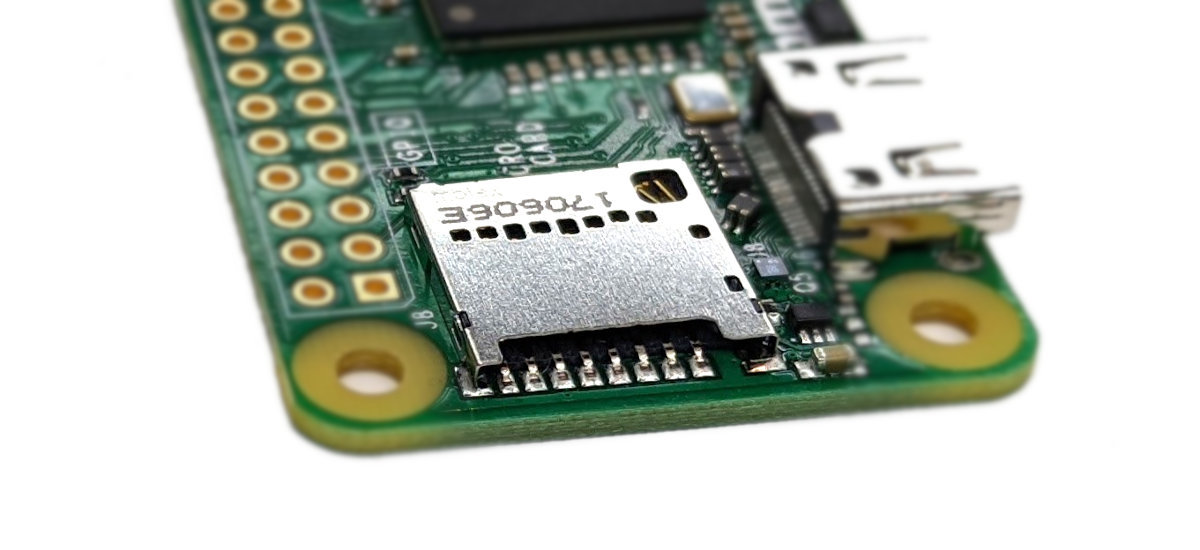
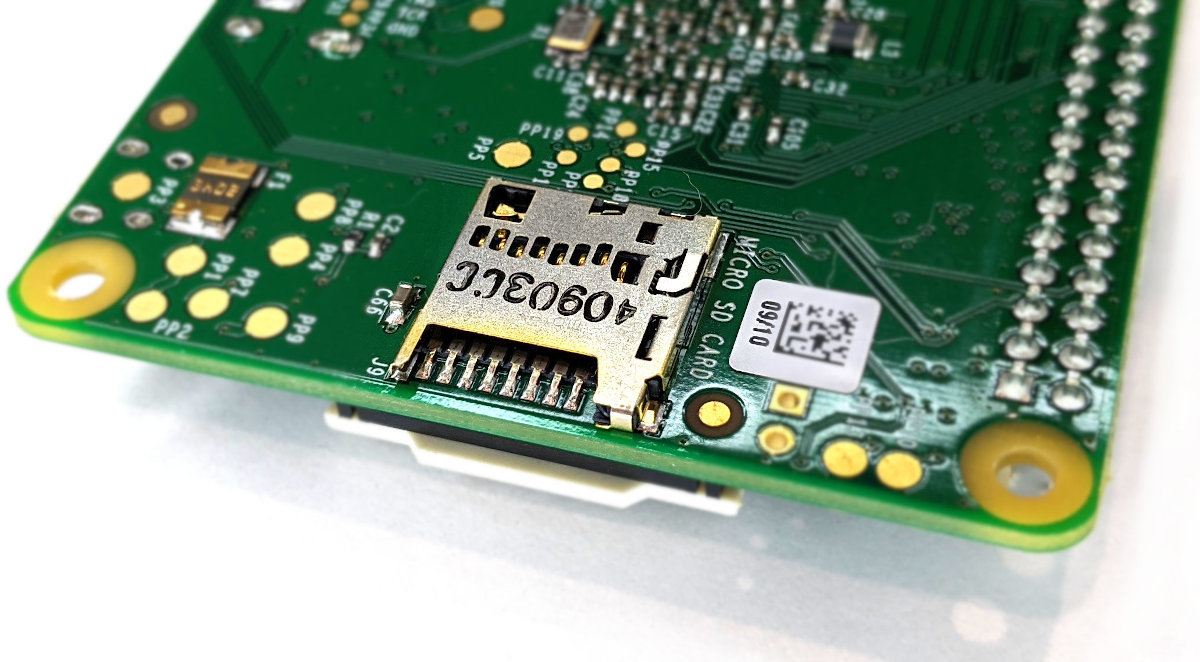
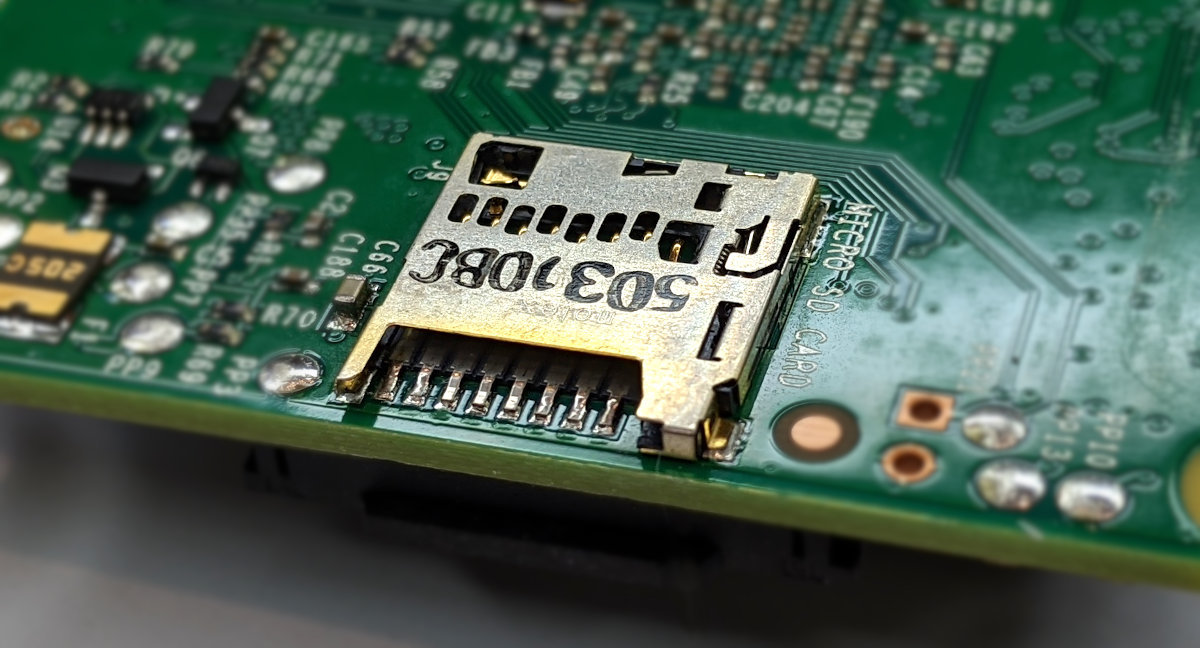
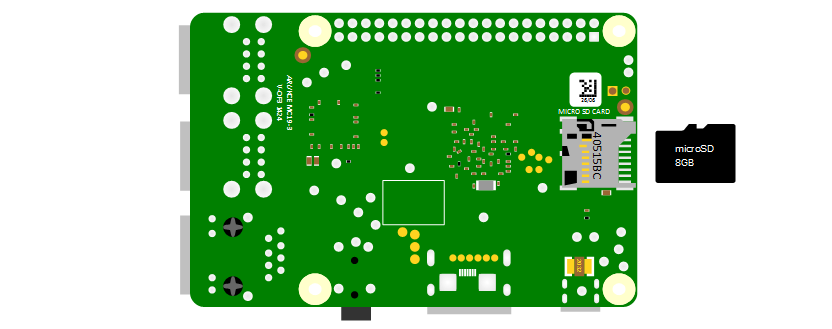
MicroSD Flash Memory Card Slot
The Pi Zero includes a push-push microSD card socket. This is on the ‘topside ‘of the board unlike most of the other more standard models which locate the memory card socket on the ‘underside’.
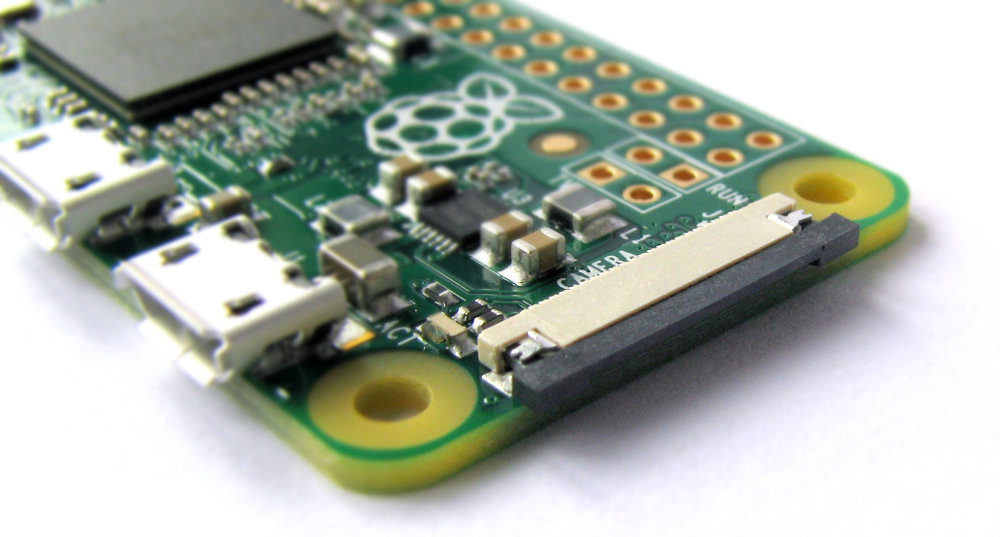
MIPI Camera Interface
Versions of the Pi Zero from 1.3 onwards includes a fine-pitch FPC connector for connecting a camera. This is a different size connector to that used on the A and B, 2, 3 models. so just be aware that you will want a specific cable to ensure a satisfactory fit.
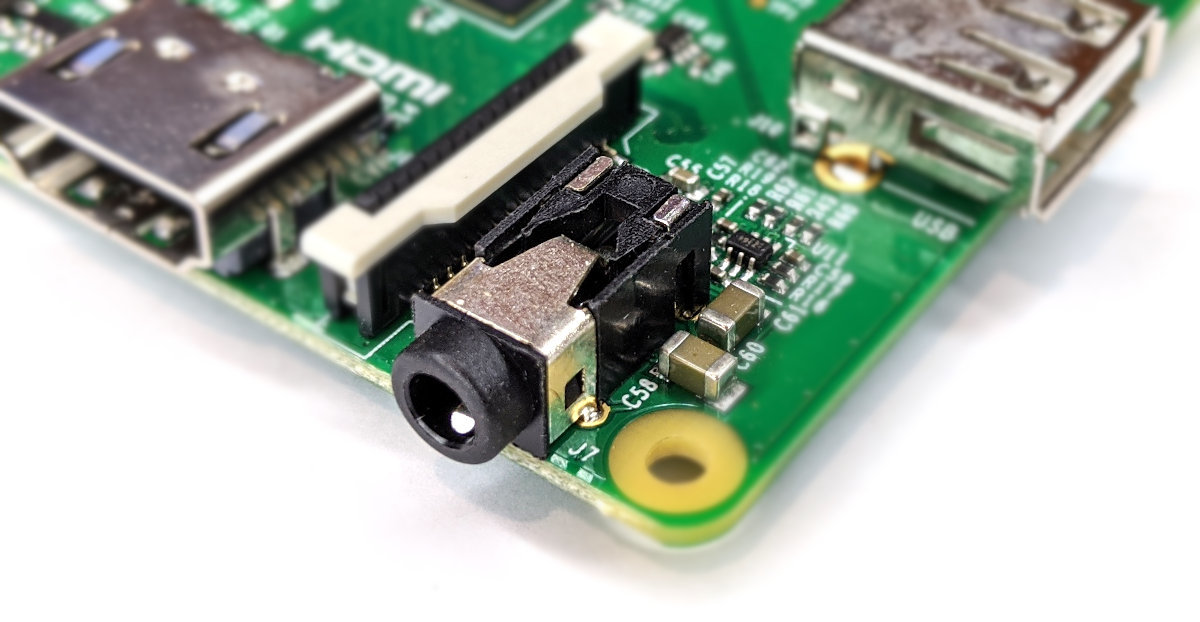
Stereo and Composite Video Output
The Zero does not include a connector for composite video out, but it does have two solder points where composite output could be soldered. There is no audio output available from the Zero other than via the mini HDMI connector, so this is not really a board designed for easy composite or audio output.
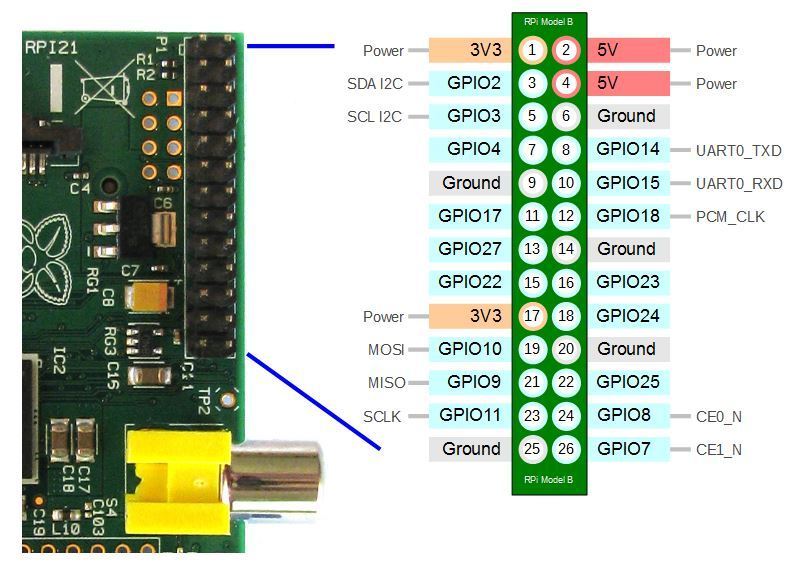
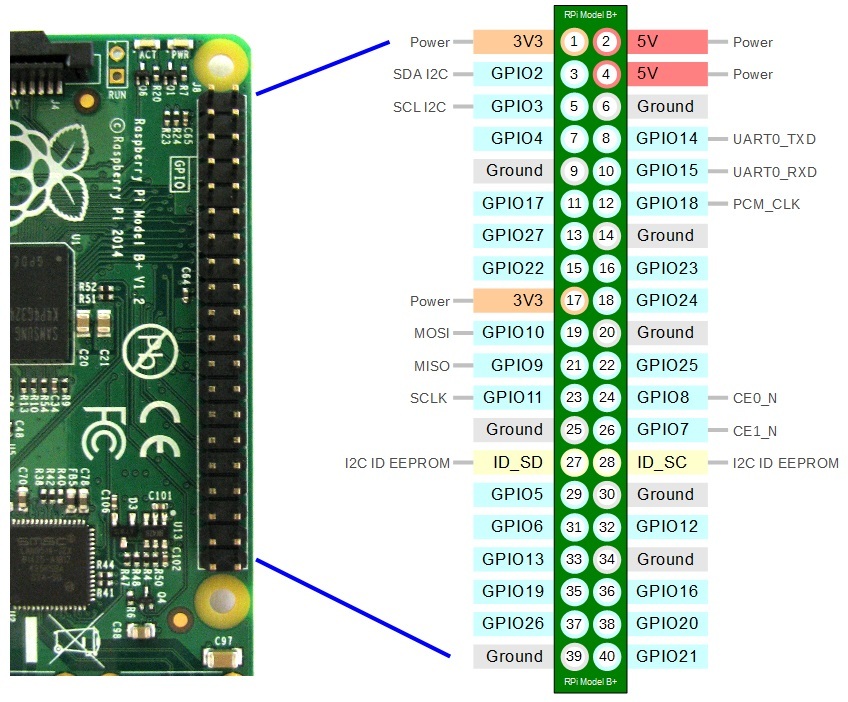
40 Pin Header
The Raspberry Pi Zero includes a 40-pin, 2.54mm header expansion slot (Which allows for peripheral connection and expansion boards).
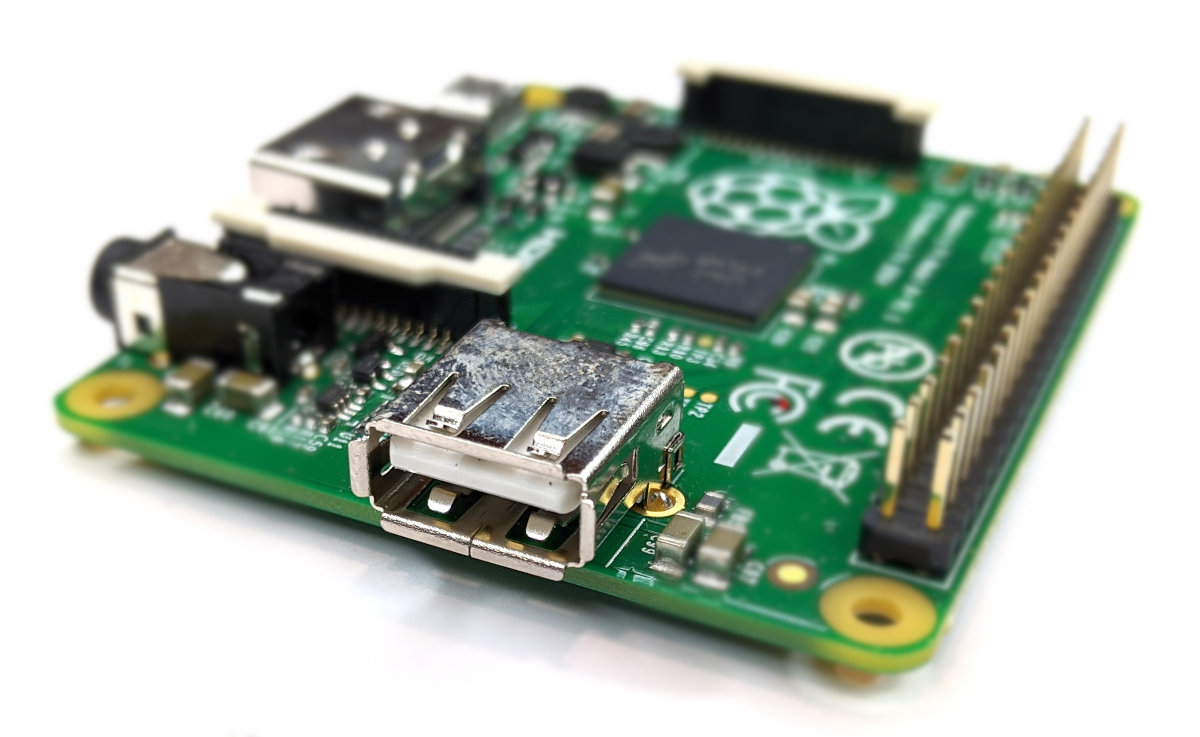
Raspberry Pi A+
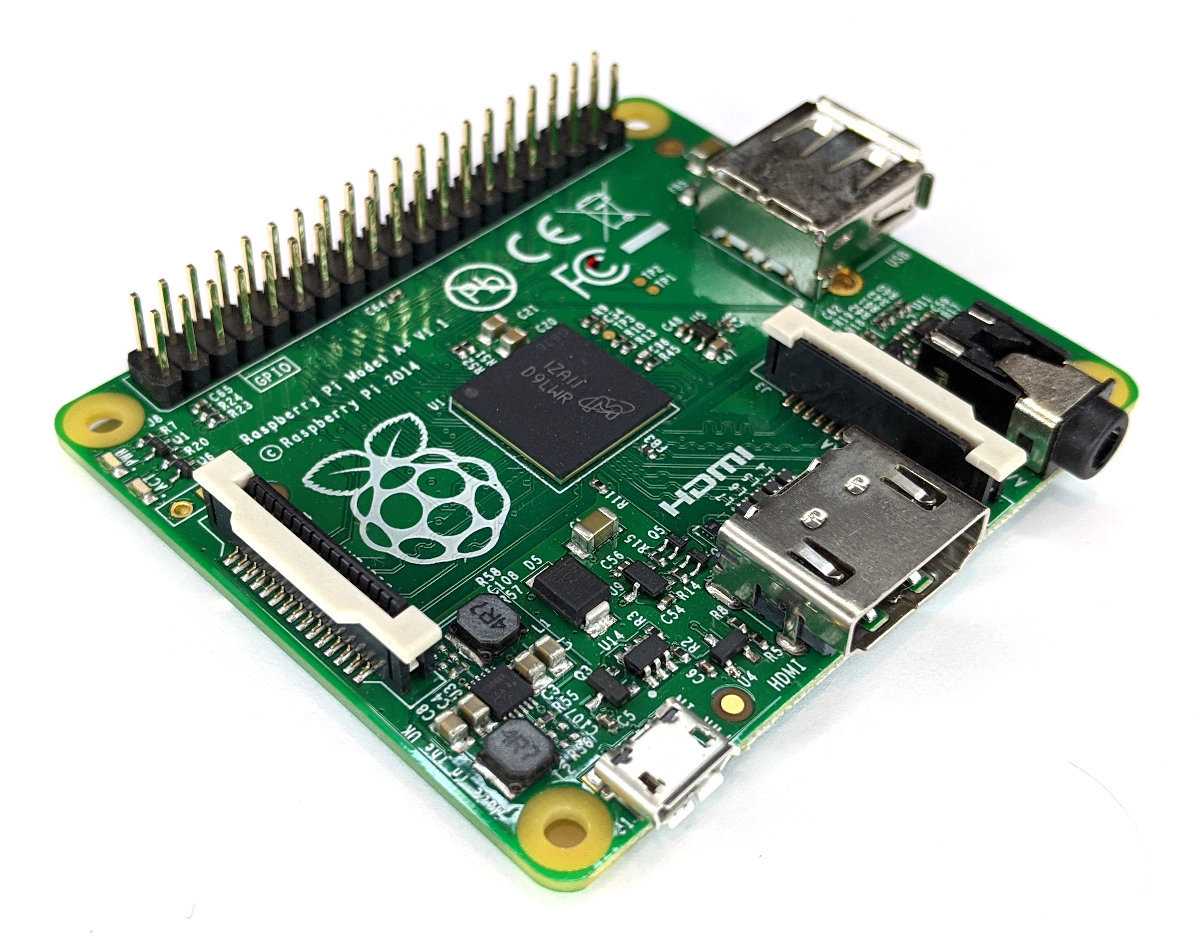
The model A+ of the Raspberry Pi is the most modern version of the lower-spec model of the Raspberry Pi line. It replaced the original Model A in November 2014. It is 65 x 56 x 10mm, weighs 23g and is powered by a Broadcom BCM2835 ARM11 700Mhz with 256MB RAM.
USB Port
It includes 1 x USB Port (with a maximum output of 1.2A)
Video Out
Integrated Videocore 4 graphics GPU capable of playing full 1080p HD video via a HDMI video output connector. HDMI standards rev 1.3 & 1.4 are supported with 14 HDMI resolutions from 640×350 to 1920×1200 plus various PAL and NTSC standards.
USB Power Input Jack
The board includes a 5V 2A Micro USB Power Input Jack.
MicroSD Flash Memory Card Slot
The A+ Raspberry Pi includes a push-push microSD card socket. This is on the ‘underside ‘of the board.
Stereo and Composite Video Output
The A+ includes a 4-pole (TRRS) type connector that can provide stereo sound if you plug in a standard headphone jack and composite video Output with stereo audio if you use a TRRS adapter.
40 Pin Header
The Raspberry Pi A+ includes a 40-pin, 2.54mm header expansion slot (Which allows for peripheral connection and expansion boards).

Raspberry Pi B
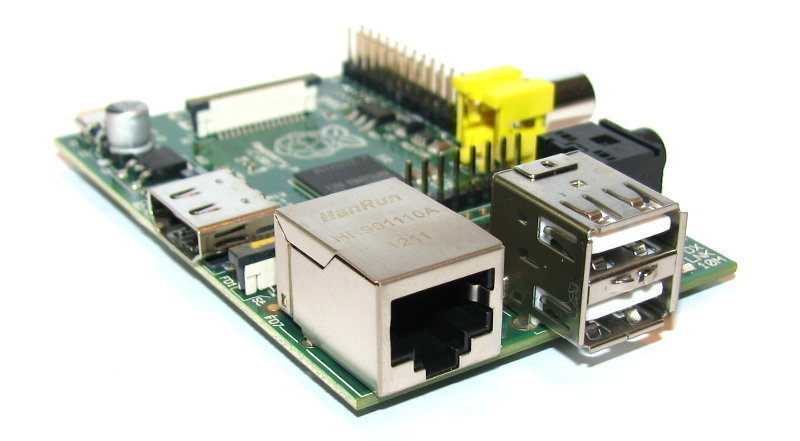
The model B of the Raspberry Pi is the precursor to the B+ variant of the Raspberry Pi line. It was replaced by the model B+ in July 2014. It is 85mm x 56mm (which does not include protruding connectors), weighs 45g and is powered by a Broadcom BCM2835 ARM11 700Mhz with 512MB RAM on variants supplied after October 2012 (Revision 2) or 256MB prior to that time (Revision 1).
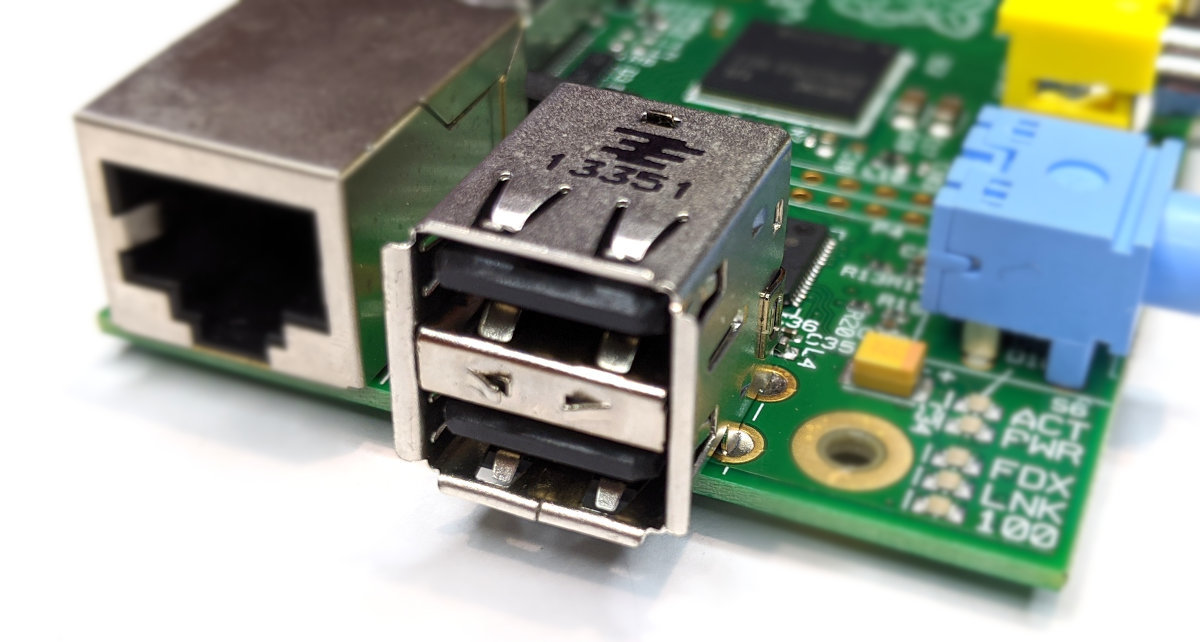
USB Ports
It includes 2 x USB Ports (with a maximum output of 1.2A)
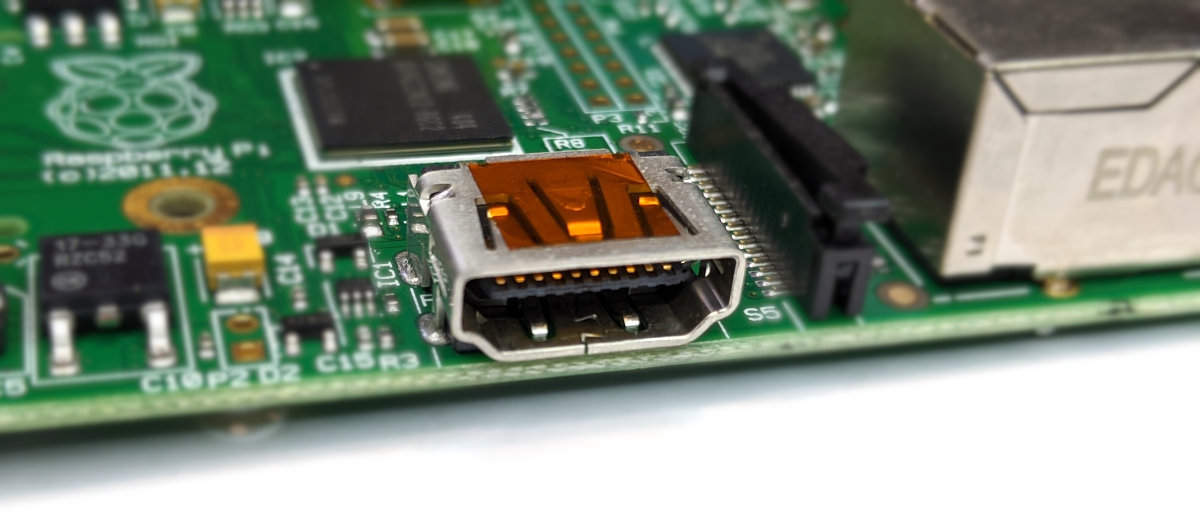
HDMI Video Out
Integrated Videocore 4 graphics GPU capable of playing full 1080p HD video via a HDMI video output connector. HDMI standards rev 1.3 & 1.4 are supported with 14 HDMI resolutions from 640×350 to 1920×1200 plus various PAL and NTSC standards.
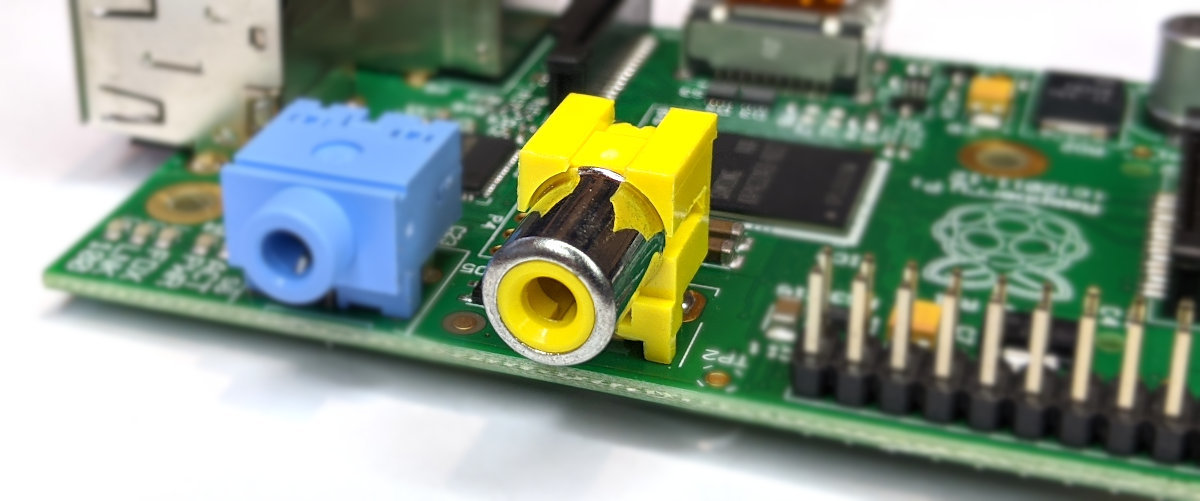
Composite Video Out
An RCA Composite video connector capable of supplying either NTSC or PAL video.
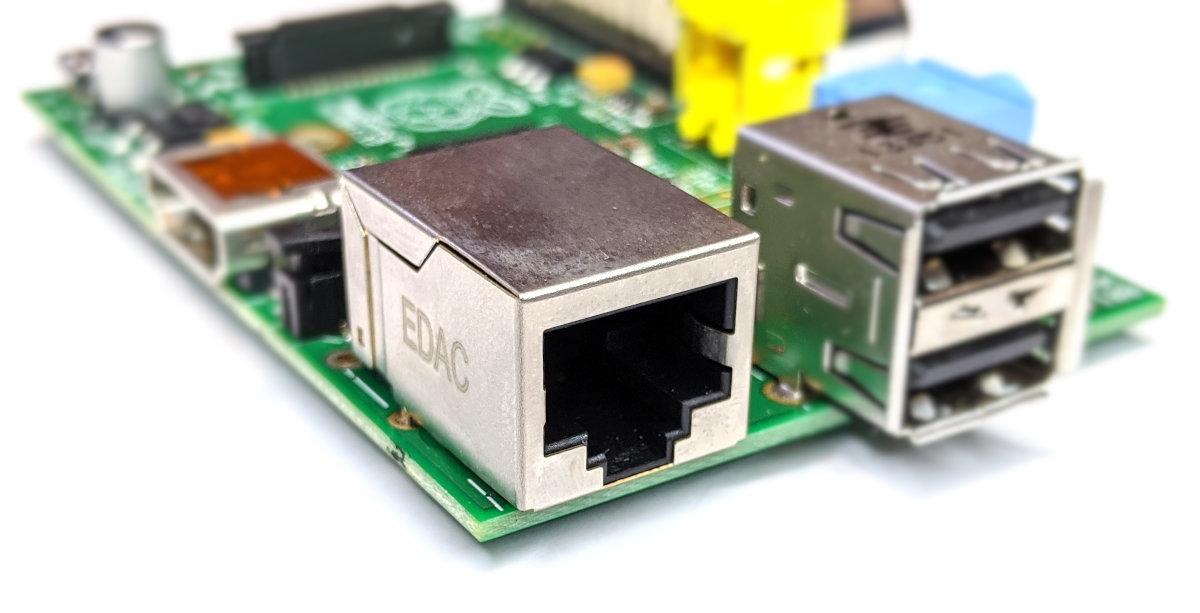
Ethernet Network Connection
There is an integrated 10/100Mb Ethernet Port for network access.
USB Power Input Jack
The board includes a 5V 2A Micro USB Power Input Jack.
SD Flash Memory Card Slot
The B Raspberry Pi includes a full size SD/MMC/SDIO memory card slot. This is on the ‘underside ‘of the board.
When a full size SD card is fitted it protrudes some considerable distance from the edge of the board.
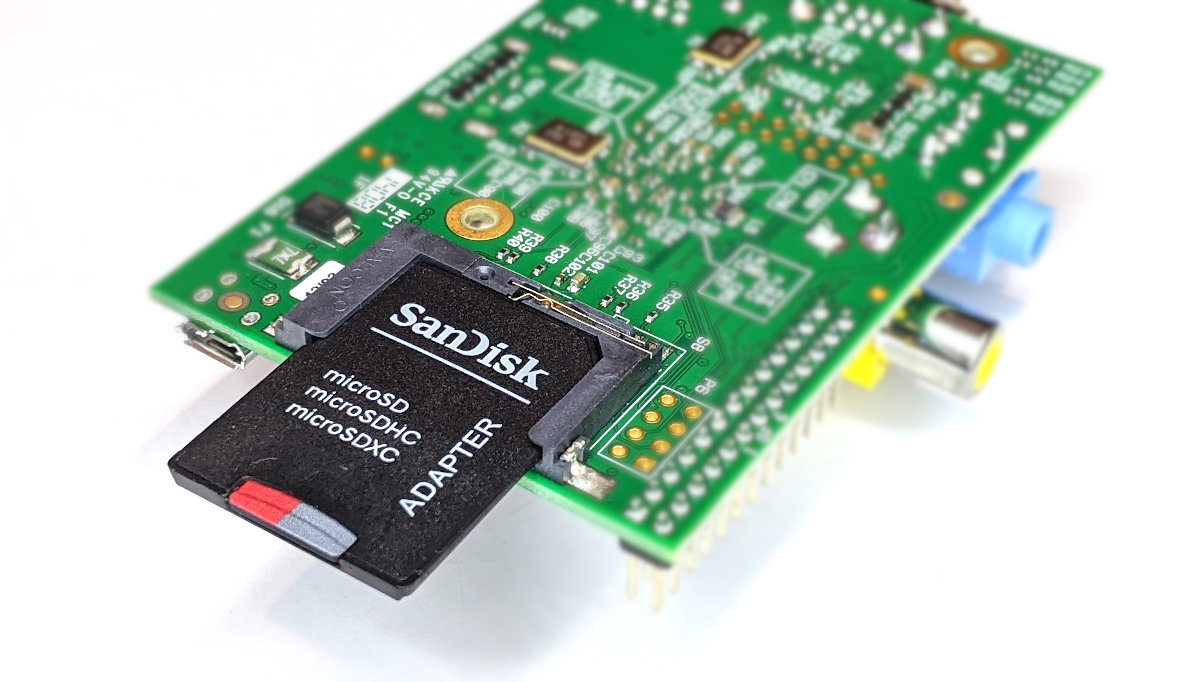
There are low profile adapters that will allow microSD cards to be used that avoid this overhang.
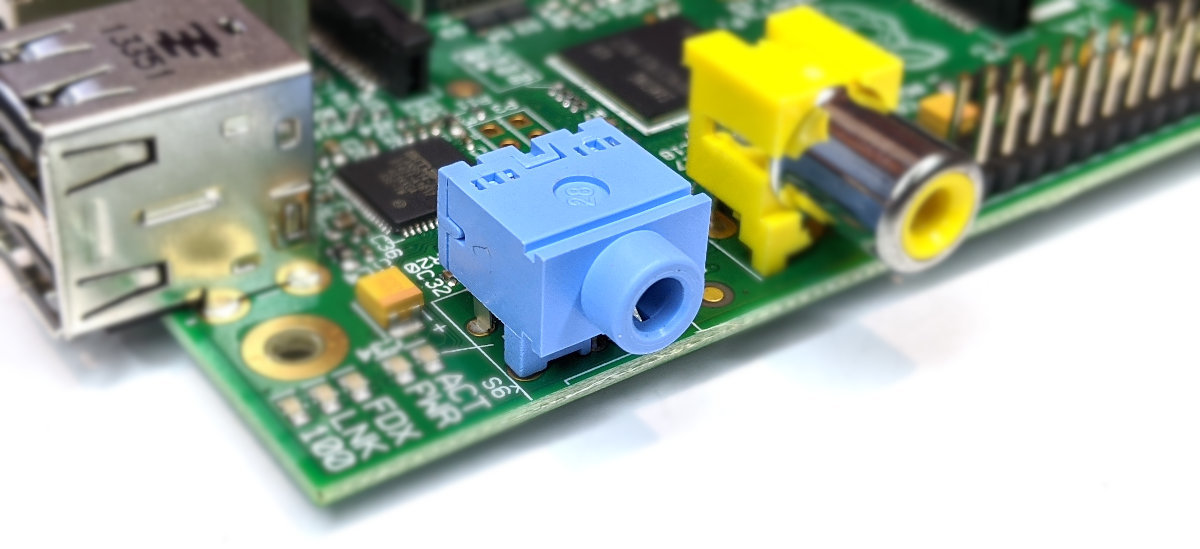
Audio Output
The B model includes a 3.5mm stereo jack connector for audio output.
26 Pin Header
The Raspberry Pi model B includes a 26-pin, 2.54mm header expansion slot (Which allows for peripheral connection and expansion boards).
Raspberry Pi B+, 2 B and 3 B
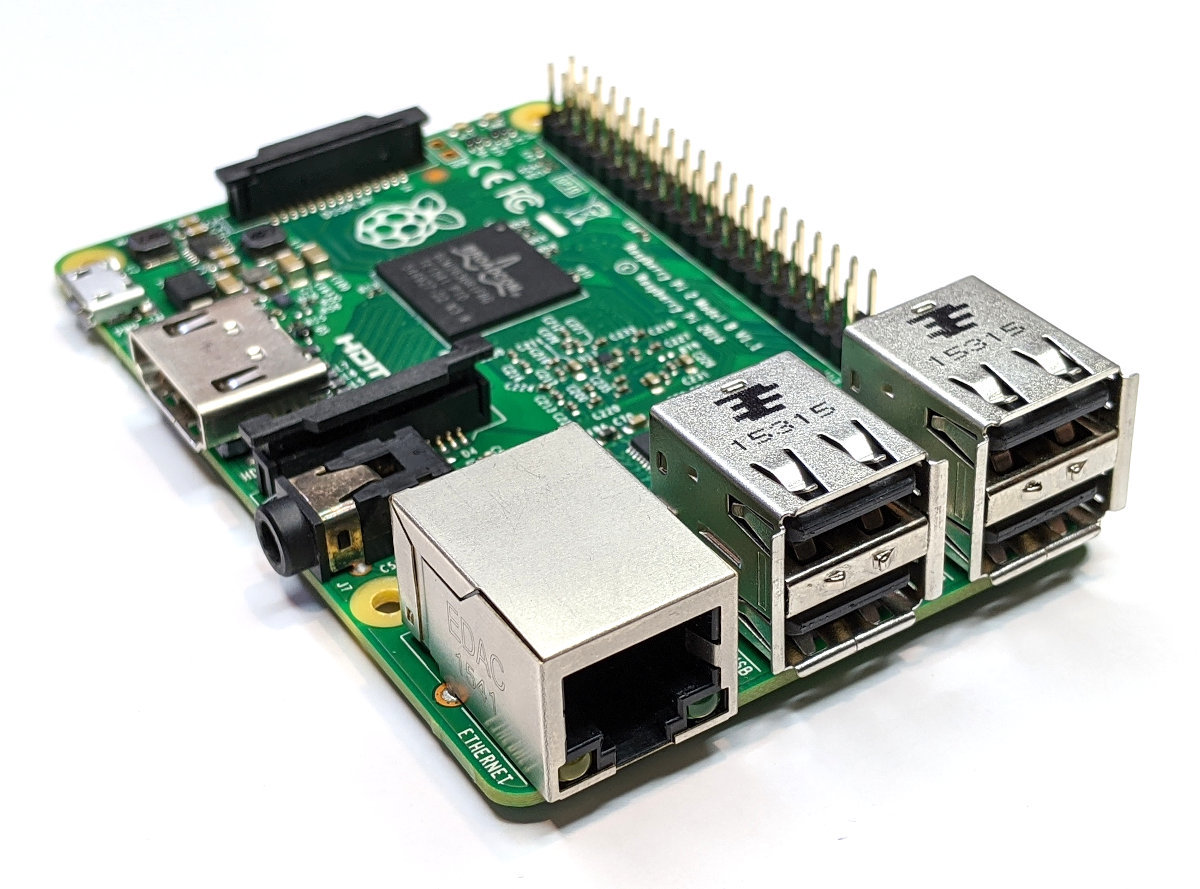
The model B+, 2 B and 3 B all share the same form factor and have been a consistent standard for the layout of connectors since the release of the B+ in July 2014. They 85 x 56 x 17mm, weighs 45g and are powered by Broadcom chipsets of varying speeds, numbers of cores and architectures (see the comparison chart for more details).
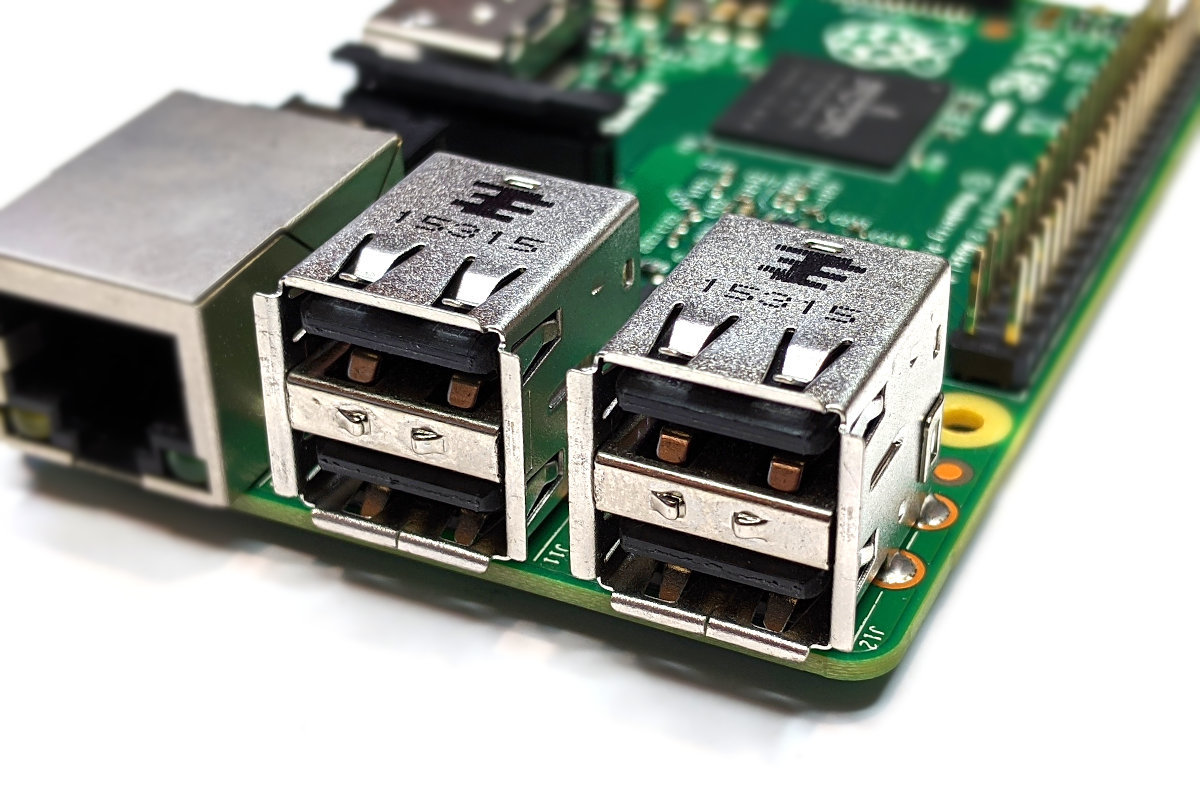
USB Ports
They include 4 x USB Ports (with a maximum output of 1.2A)
Video Out
Integrated Videocore 4 graphics GPU capable of playing full 1080p HD video via a HDMI video output connector. HDMI standards rev 1.3 & 1.4 are supported with 14 HDMI resolutions from 640×350 to 1920×1200 plus various PAL and NTSC standards.
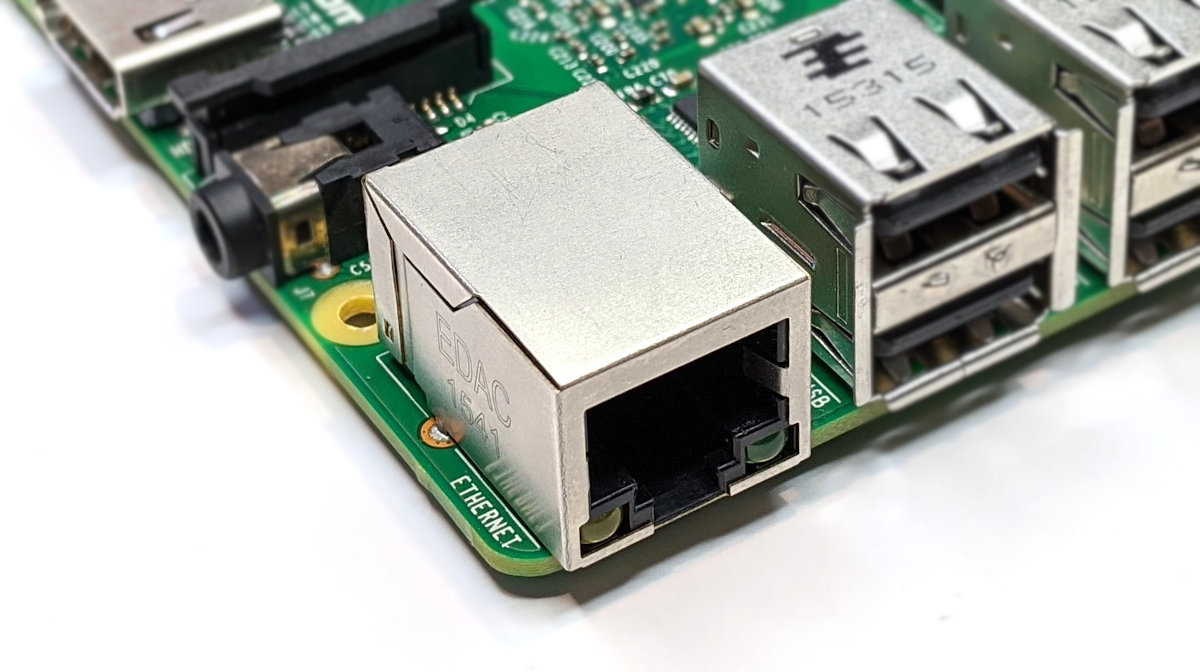
Ethernet Network Connection
There is an integrated 10/100Mb Ethernet Port for network access.
USB Power Input Jack
The boards include a 5V 2A Micro USB Power Input Jack.
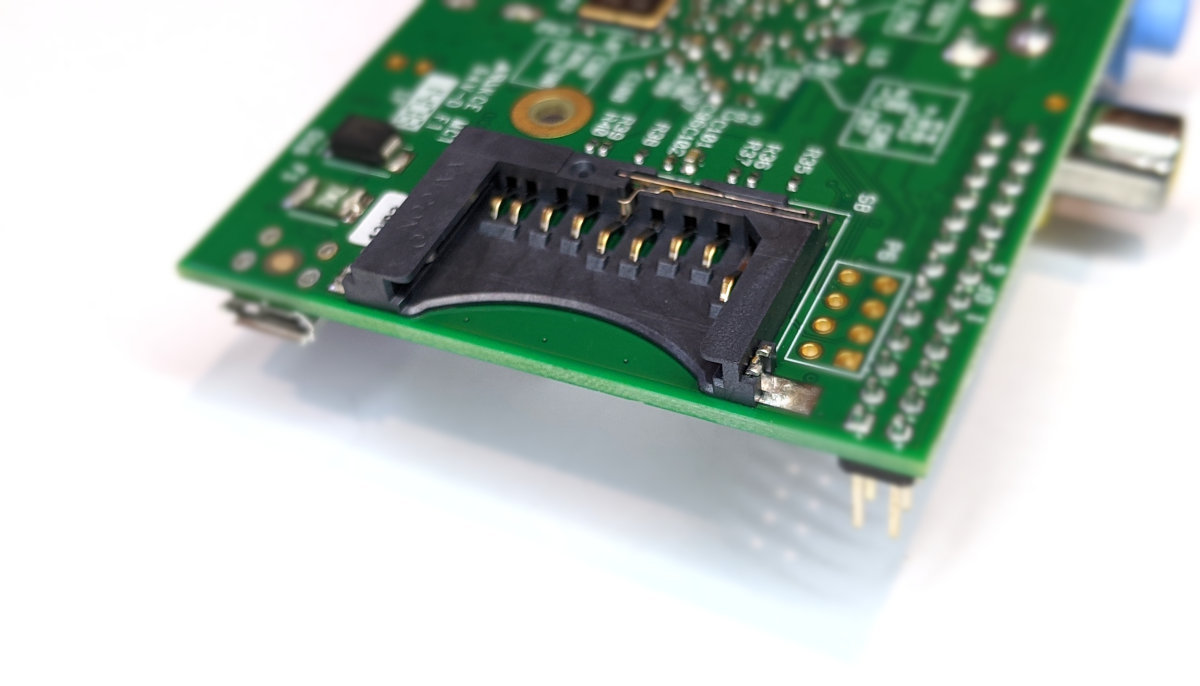
MicroSD Flash Memory Card Slot
There is a push-push microSD card socket. This is on the ‘underside ‘of the board.
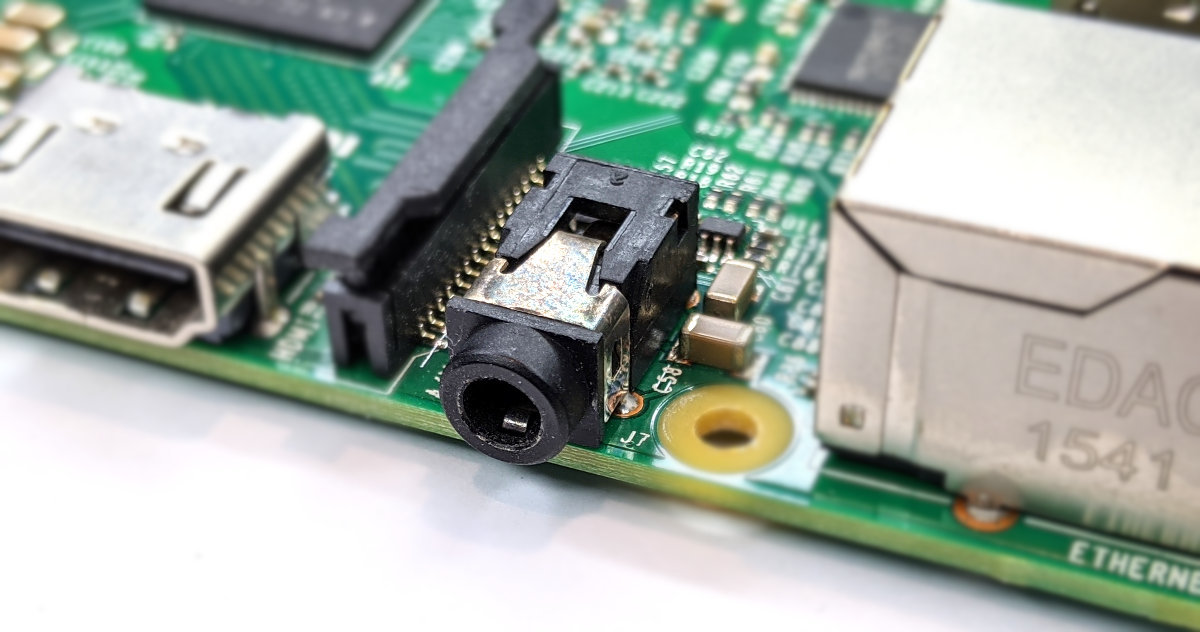
Stereo and Composite Video Output
The B+, 2 B and 3 B includes a 4-pole (TRRS) type connector that can provide stereo sound if you plug in a standard headphone jack and composite video Output with stereo audio if you use a TRRS adapter.
40 Pin Header
The Raspberry Pi B+, 2 B and 3 B includes a 40-pin, 2.54mm header expansion slot (Which allows for peripheral connection and expansion boards).
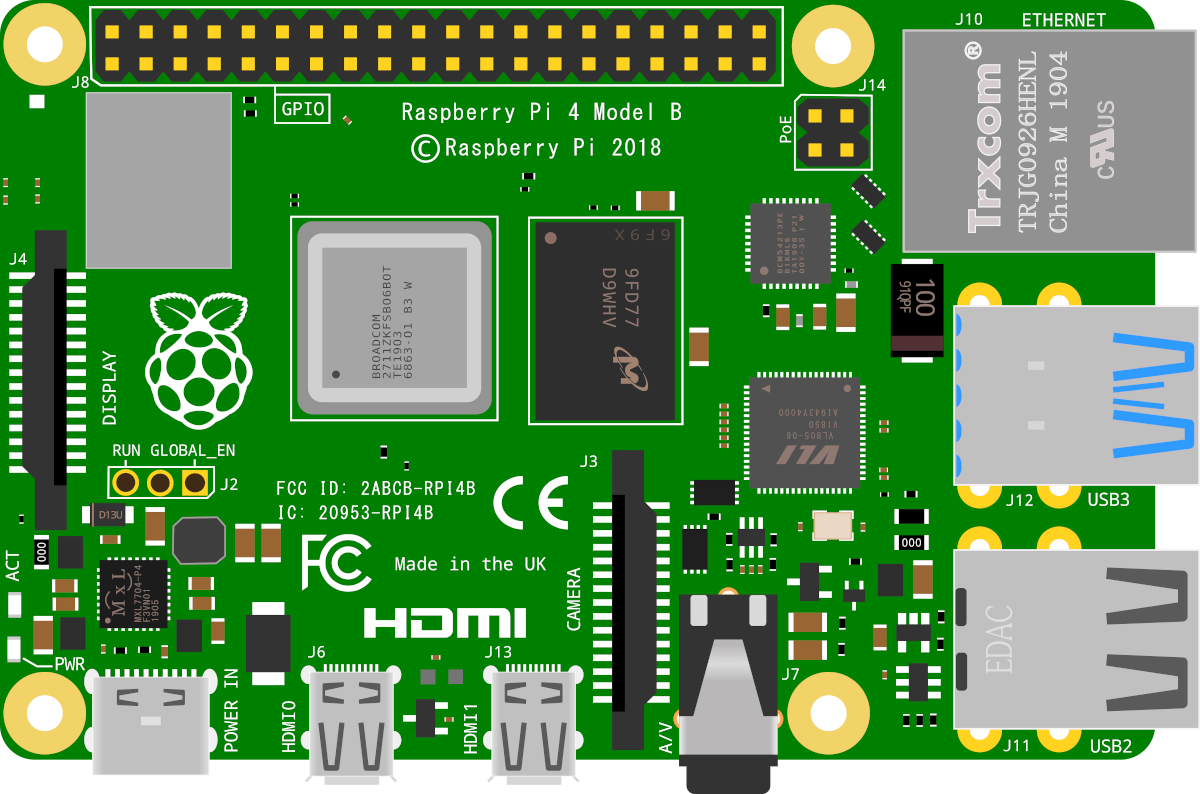
Raspberry Pi B 4
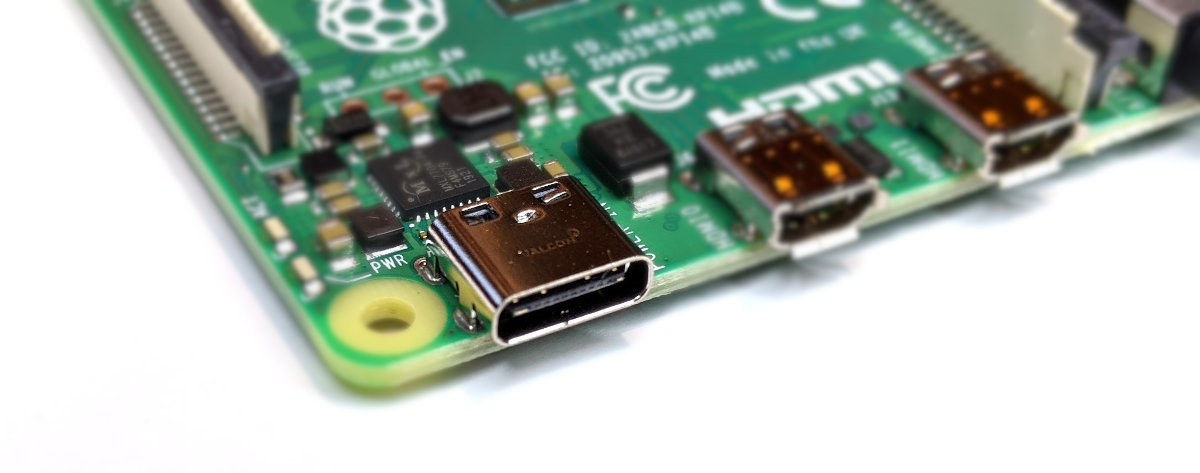
The model B 4 has the same sized circuit board as the B, B+, 2 and 3 but there are some significant connector changes (types and locations). In terms of capability, this version saw something of a major improvement with Gigabit Ethernet, dual displays and USB 3. It also sees a change in power connector with a USB C connection instead of a Micro USB. This change is mirrored by an increase in the minimum recommended power supply being increased to 3A. As well, the version of Bluetooth was increased to v5.
When it was first released in mid June 2019, options for 1, 2 and 4GB of memory were available. However, in May 2020, the 1GB version was discontinued and an 8GB version added.
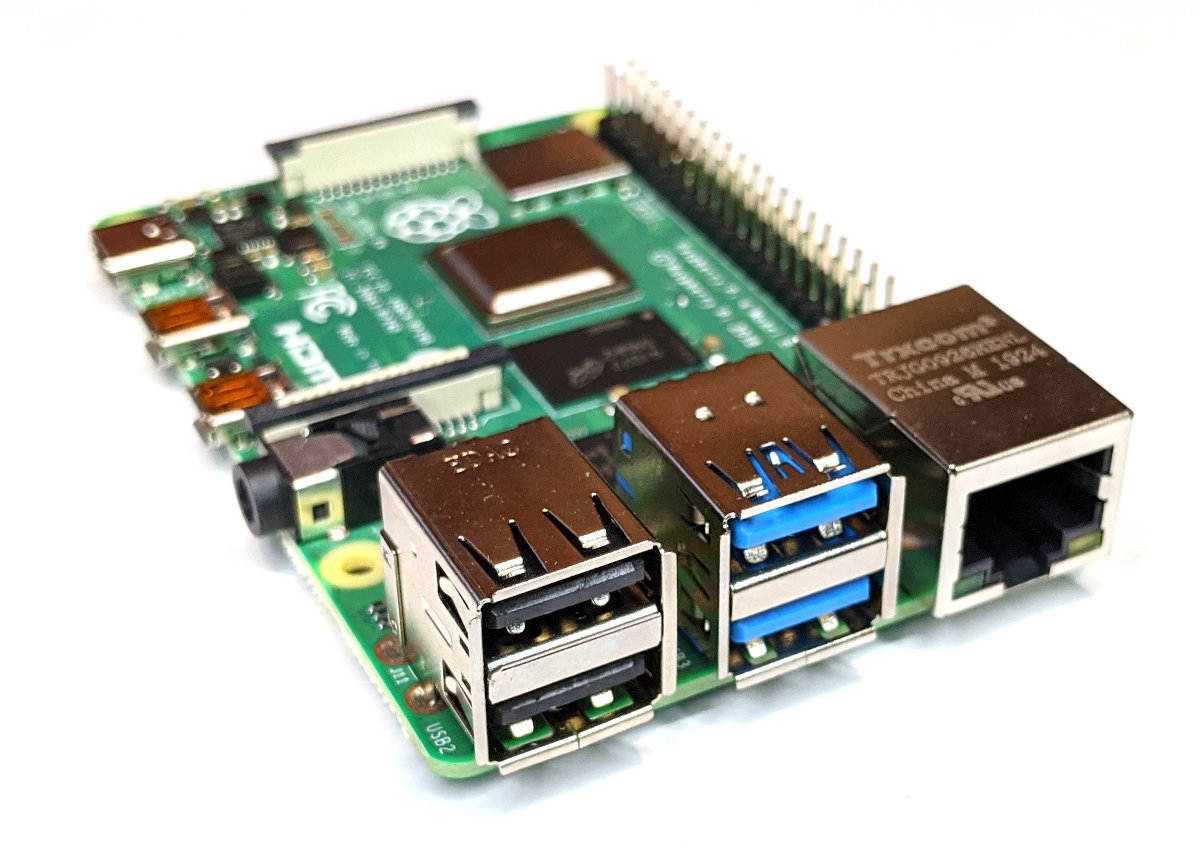
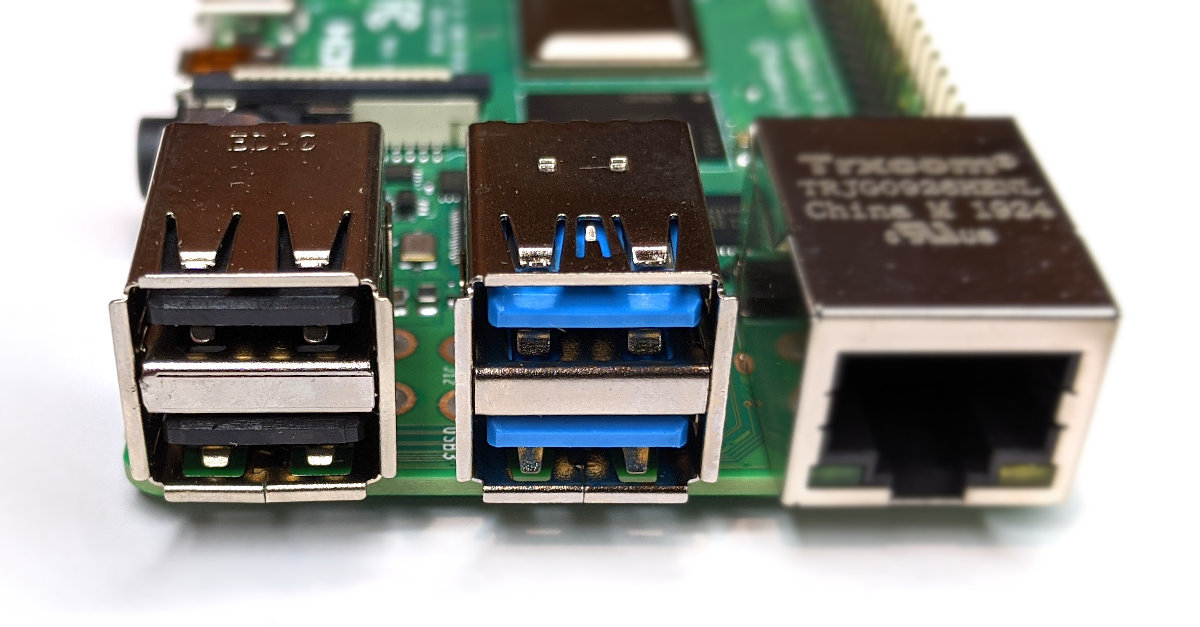
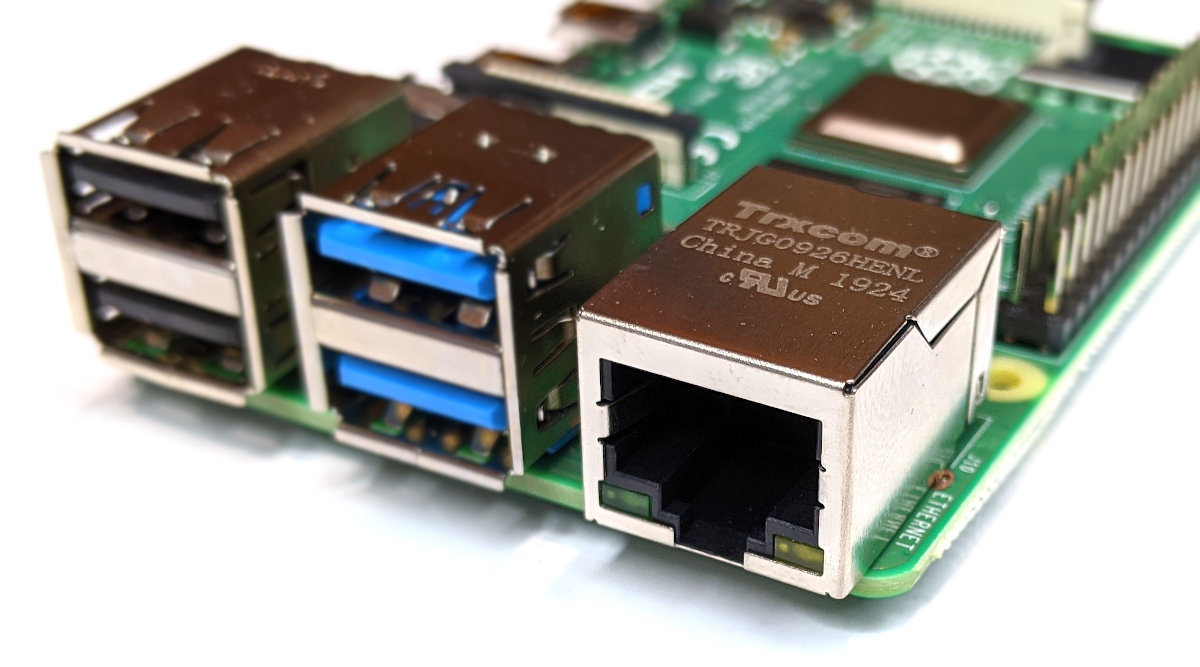
USB Ports
The USB and Ethernet ports have been swapped around. While there are still four ports, two are USB 2 and the other two are USB 3. This enables options for connecting high speed data transfer devices for the first time. The USB 3 ports are easily identified by the blue locator stub.
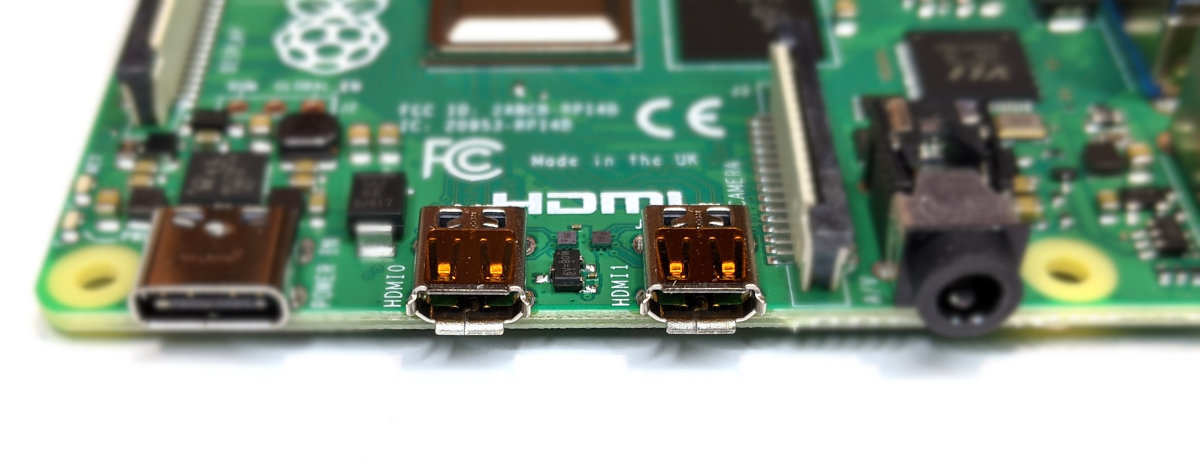
Video Out
The full sized HDMI connector of the previous versions has been replaced by dual micro-HDMI connectors. This allows the board to output dual displays running at 30 frames per second and 4K resolution. These new connectors are HDMI revision 2.0 compliant.
All of this is made possible via the integrated VideoCore 6 graphics GPU rnning at 500MHz.
Ethernet Network Connection
As mentioned earlier, this is the first Raspberry Pi board that supports Gigabit Ethernet for network access.
USB-C Power Input Jack
The board includes a 5V, USB-C input jack for power. The use of a power supply capable of delivering 3A (15W) is recommended.
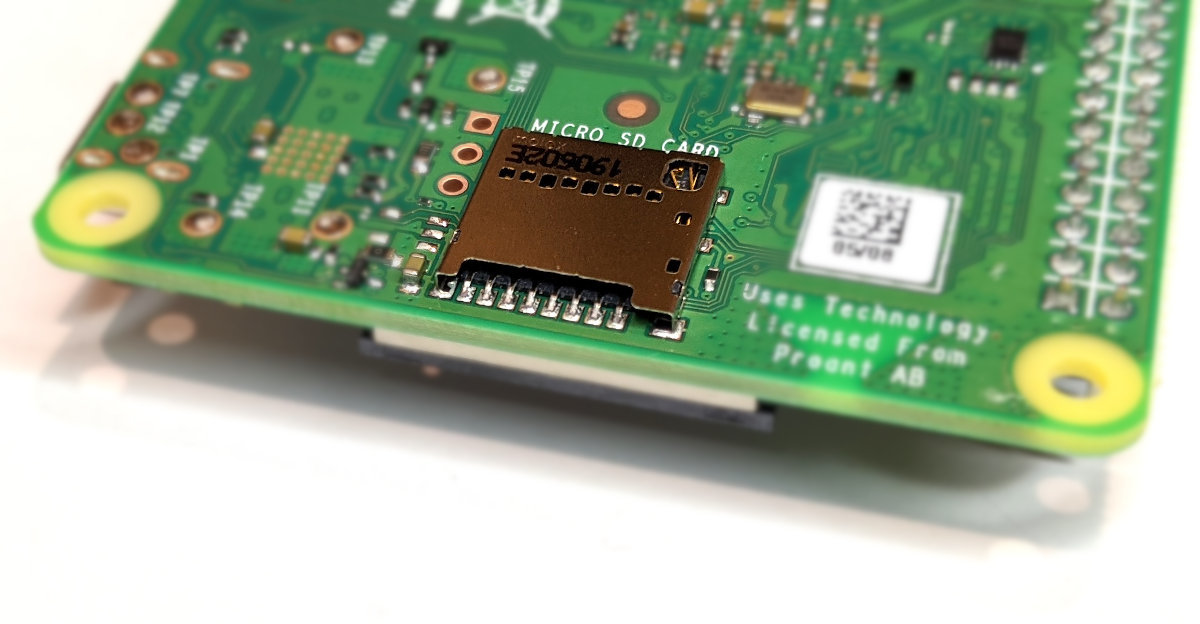
MicroSD Flash Memory Card Slot
There is a push-push microSD card socket. This is on the ‘underside ‘of the board.
Stereo and Composite Video Output
The B 4 included the same 4-pole (TRRS) type connector as the B+, 2 B and 3 B . This can provide stereo sound if you plug in a standard headphone jack and composite video output with stereo audio if you use a TRRS adapter.
40 Pin Header
The Raspberry Pi B 4 still utilises the 40-pin, 2.54mm header for peripheral connection and expansion boards. But that header now includes an additional 4× UART, 4× SPI, and 4× I2C connectors.
SD Card
The Raspberry Pi needs to store the Operating System and working files on a MicroSD card (actually a MicroSD card for the A+, B+ B2, B3 and Zero models and a full size SD card if you’re using an A or B model).

The MicroSD card receptacle is on the rear of the board and is of a ‘push-push’ type which means that you push the card in to insert it and then to remove it, give it a small push and it will spring out.
This is the equivalent of a hard drive for a regular computer, but we’re going for a minimal effect. We will want to use a minimum of an 8GB card (smaller is possible, but 8 is recommended). Also try to select a higher speed card if possible (class 10 or similar) as it is anticipated that this should speed things up a bit.
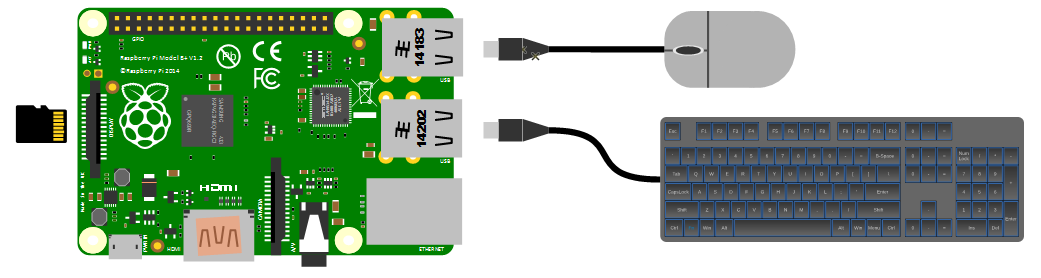
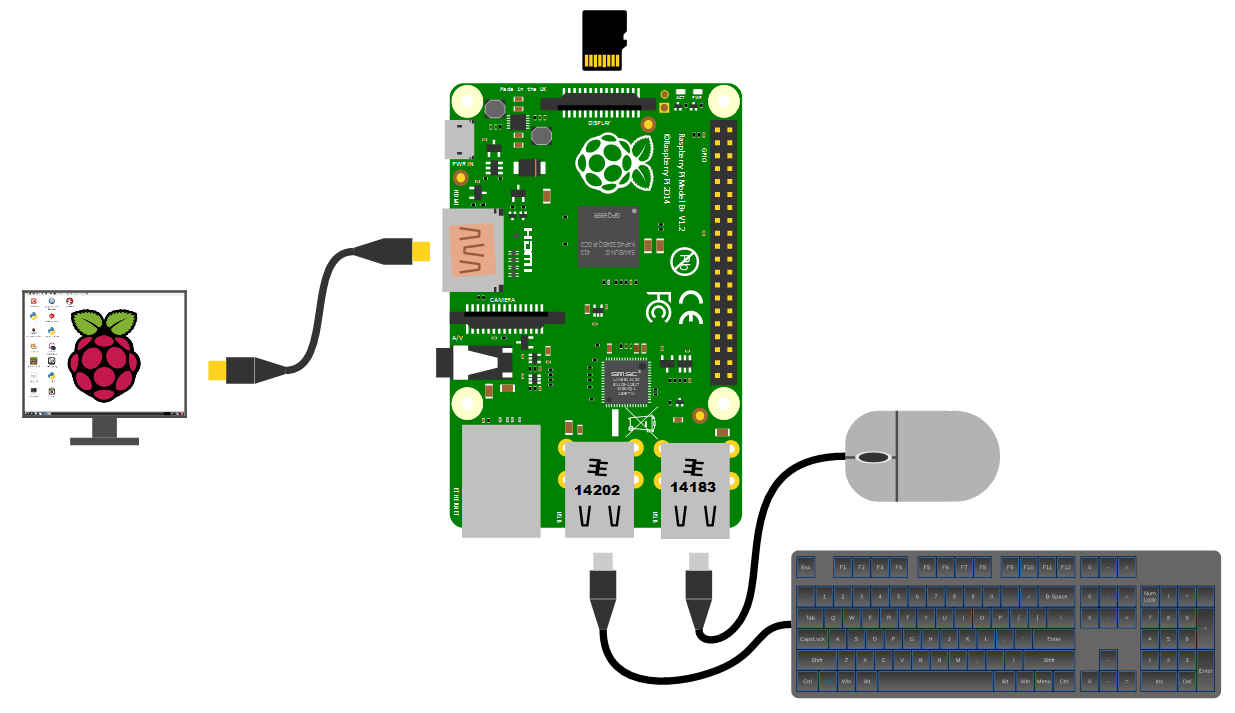
Keyboard / Mouse
While we will be making the effort to access our system via a remote computer, we will need a keyboard and a mouse for the initial set-up. Because the B+, B2 and B3 models of the Pi have 4 x USB ports, there is plenty of space for us to connect wired USB devices.
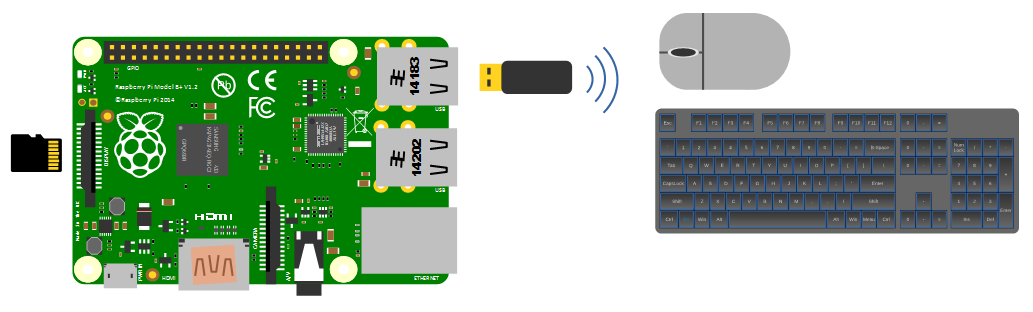
A wireless combination would most likely be recognised without any problem and would only take up a single USB port, but if we will build towards a remote capacity for using the Pi (using it headless, without a keyboard / mouse / display), the nicety of a wireless connection is not strictly required.
Video
The Raspberry Pi comes with an HDMI port ready to go which means that any monitor or TV with an HDMI connection should be able to connect easily.
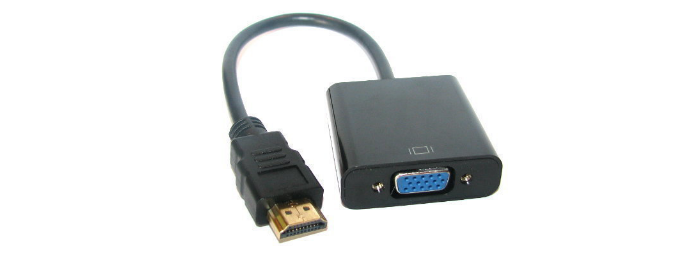
Because this is kind of a hobby thing you might want to consider utilising an older computer monitor with a DVI or 15 pin D connector. If you want to go this way you will need an adapter to convert the connection.
Network
The B+, B2 and B3 models of the Raspberry Pi have a standard RJ45 network connector on the board ready to go. In a domestic installation this is most likely easiest to connect into a home ADSL modem or router.
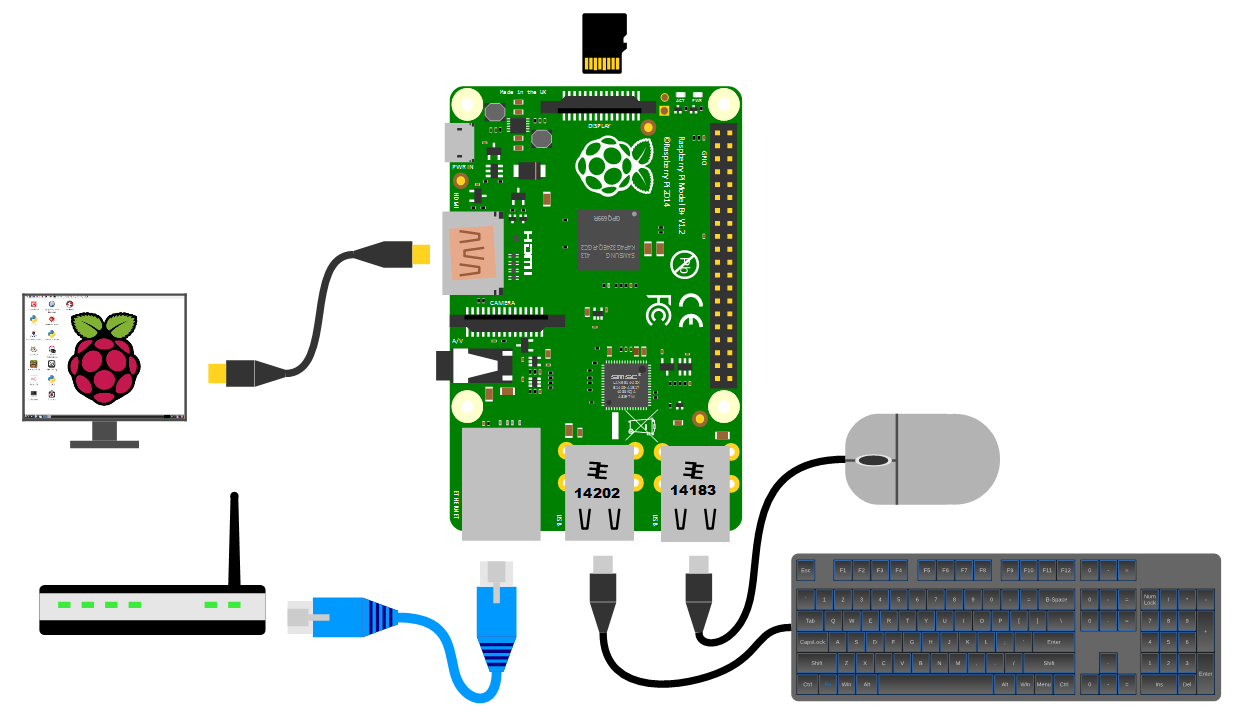
This ‘hard-wired’ connection is great for a simple start, but we will work through using a wireless solution later in the book.
Power supply
The Pi can be powered up in a few ways. The simplest is to use the micro USB port to connect from a standard USB charging cable. You probably have a few around the house already for phones or tablets.
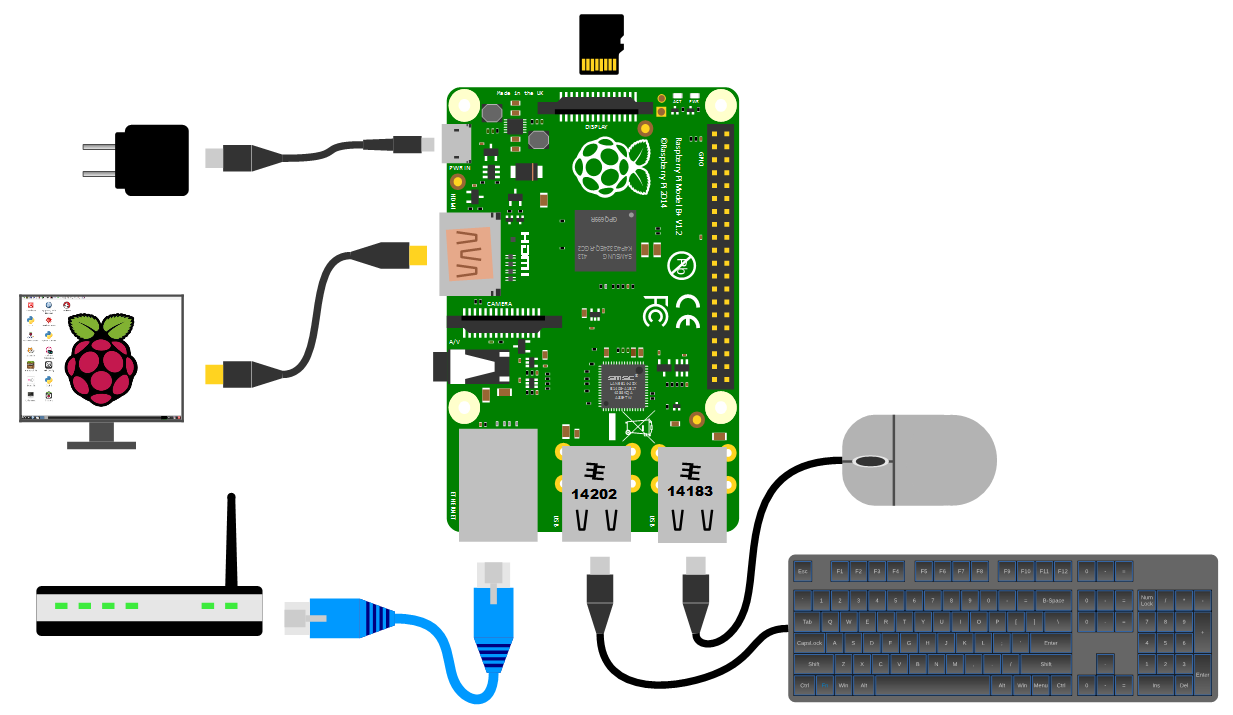
It is worth knowing that depending on what use we wish to put our Raspberry Pi to we might want to pay a certain amount of attention to the amount of current that our power supply can supply. The A+, B+ and Zero models will function adequately with a 700mA supply, but with the version 2 and 3 models of the Pi, or if we want to look towards using multiple wireless devices or supplying sensors that demand increased power, we should consider a supply that is capable of an output up to 2.5A.
Cases
We should get ourselves a simple case to sit the Pi out of the dust and detritus that’s floating about. There are a wide range of options to select from. These range from cheap but effective to more costly than the Pi itself (not hard) and looking fancy.
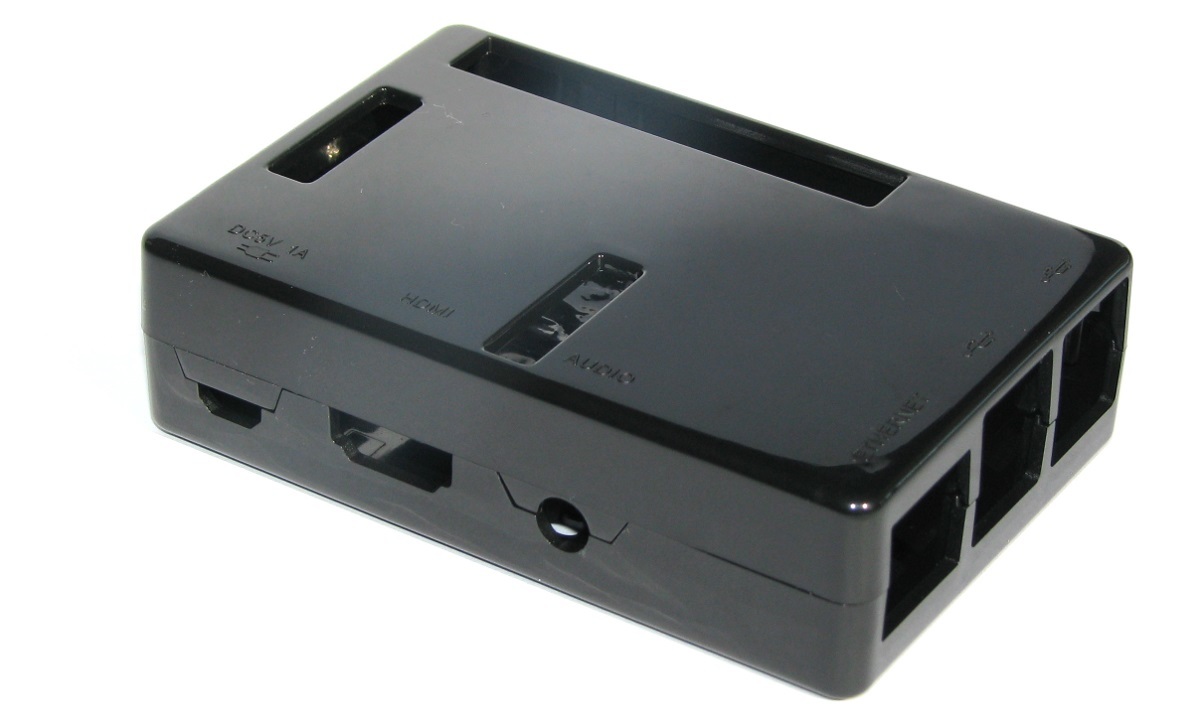
You could use a simple plastic case that can be brought for a few dollars;
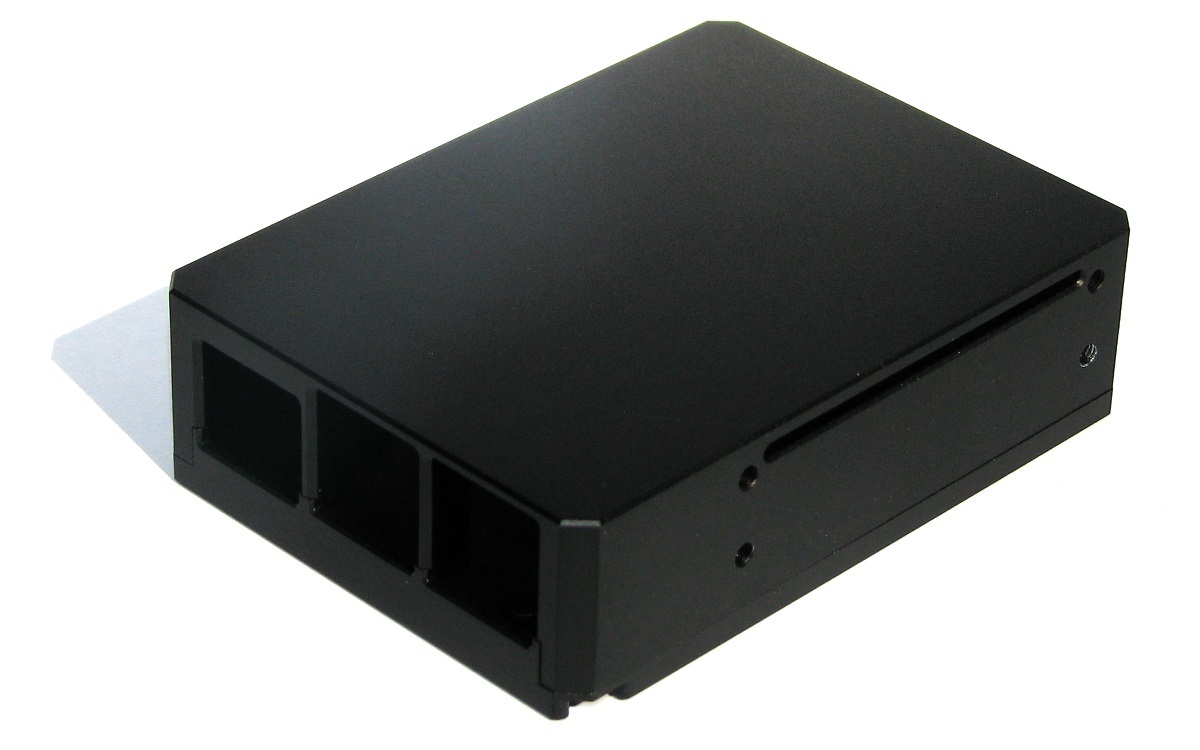
At the high end of the market is a high quality aviation grade anodized aluminium case from ebay seller sauliakasas This will cost you more than the Pi itself, but it is a beautiful case;
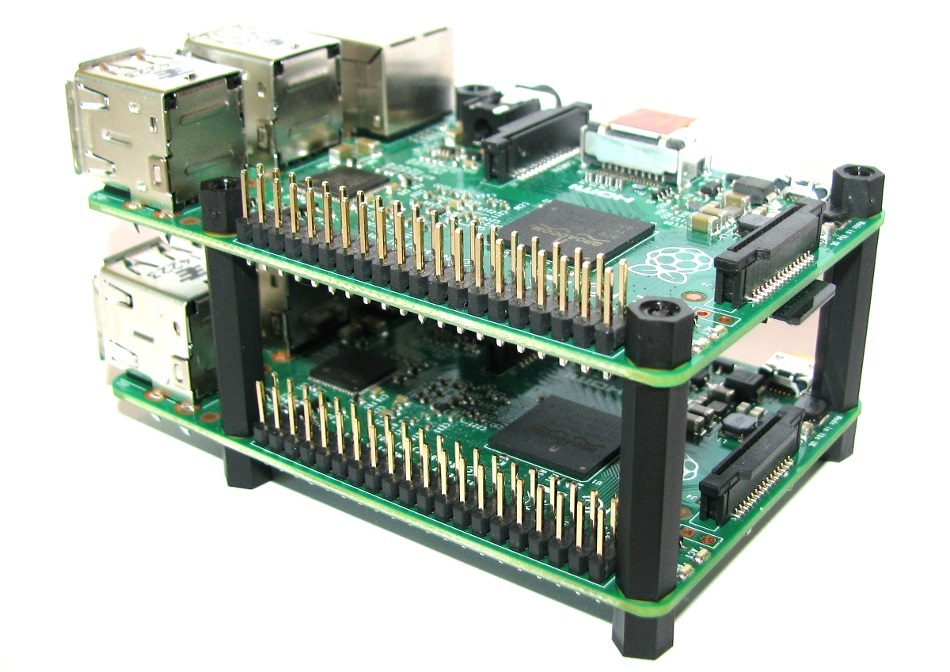
Or nylon stand-offs to create a simple but flexible stack o’ Pi;
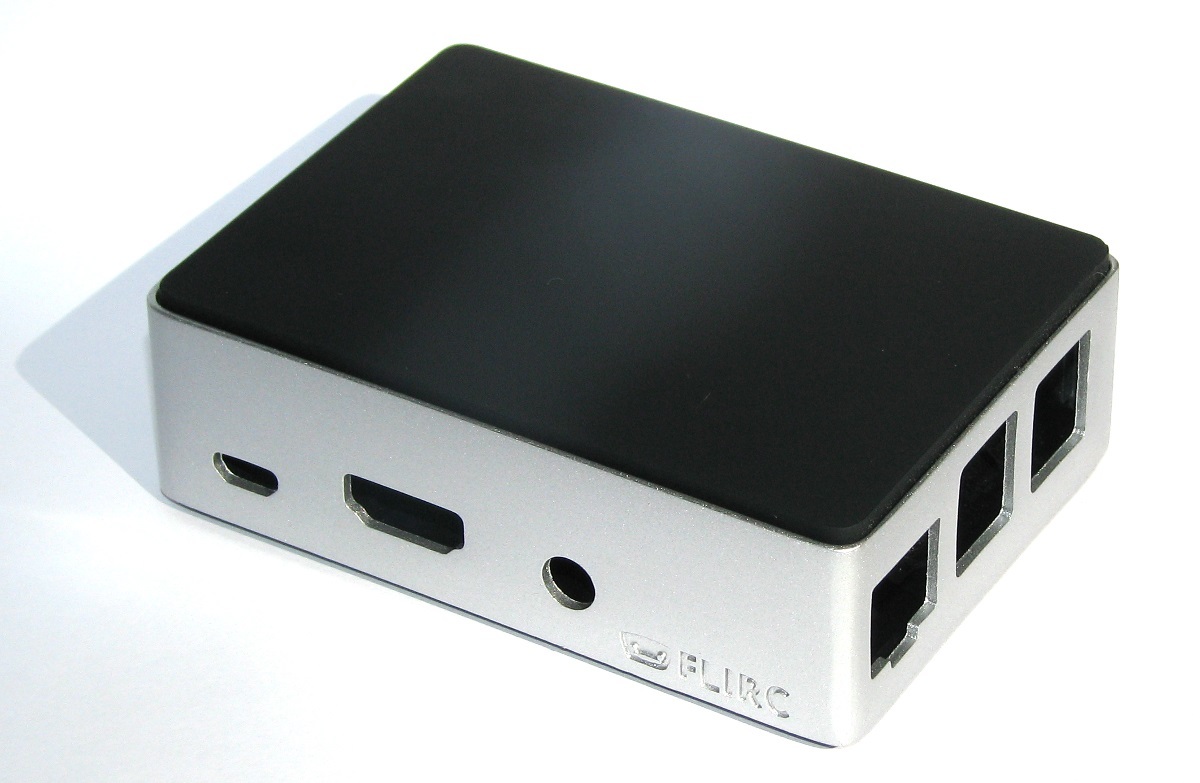
You could look at the stylish Flirc Raspberry Pi Case which is very popular with media centre distributions;
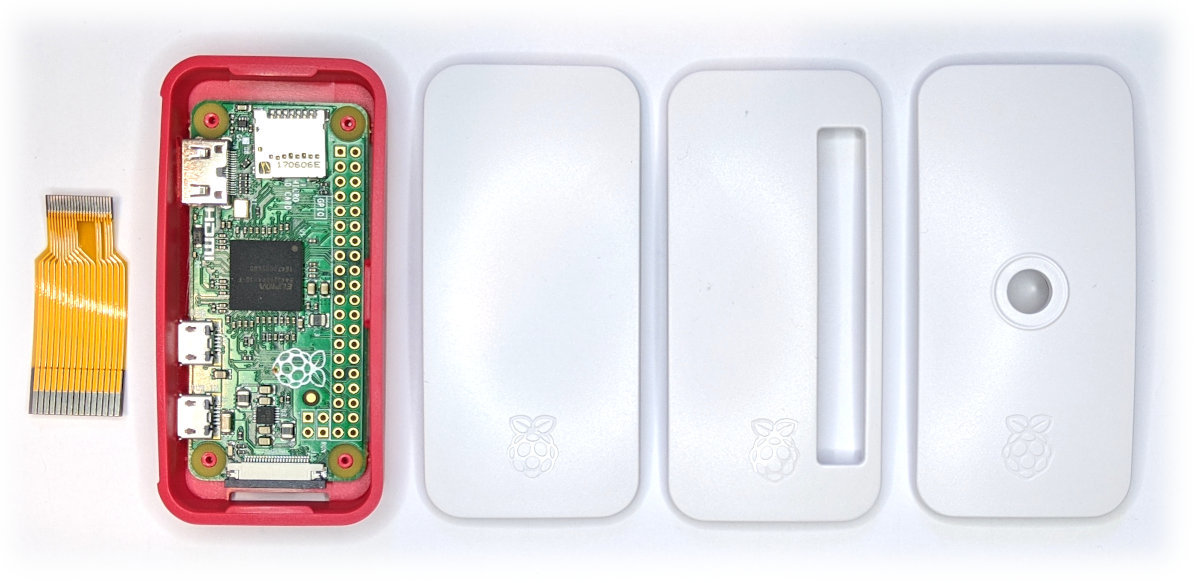
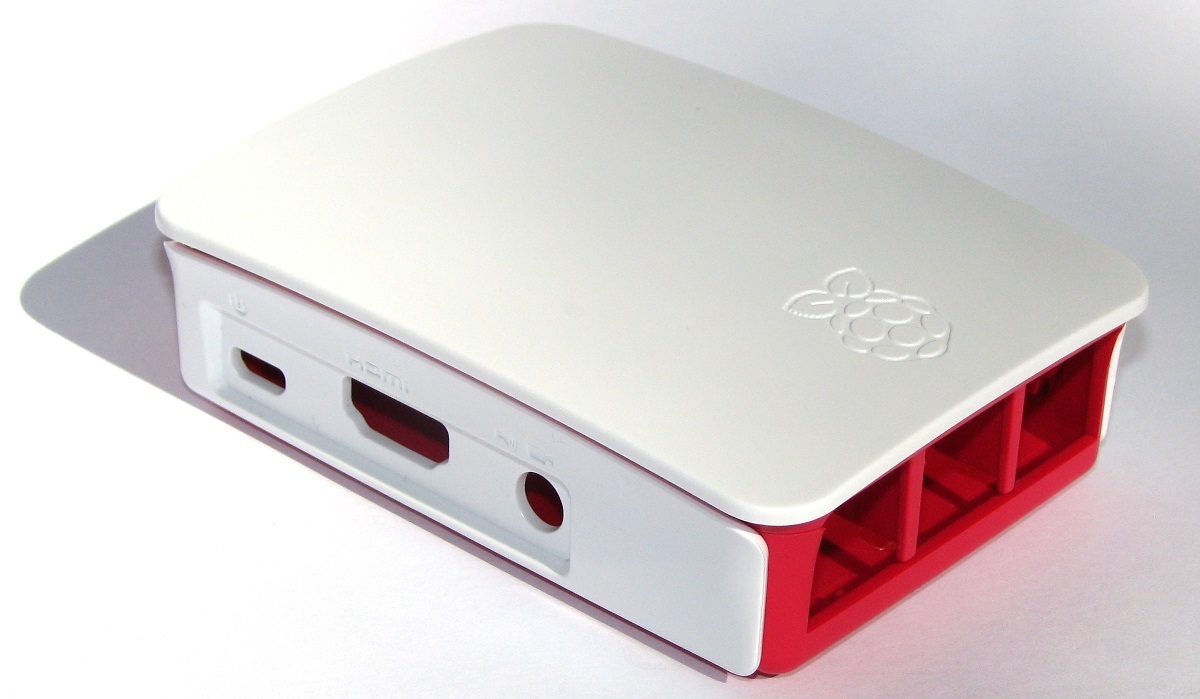
For a sense of style, a very practical design and a warm glow from knowing that you’re supporting a worthy cause, you could go no further than the official Raspberry Pi case that includes removable side-plates and loads of different types of access. All for the paltry sum of about $9.
Likewise for the Pi Zero, the official case is very practical and includes three different lids to accommodate a solid finish or ones with cut-outs to suit GPIO pins or a camera. It even includes a short camera cable to suit.