Chapter 1: Ebiten Basics
This chapter introduces Ebiten, explains how to use it in Go, and walks through a complete example that loads and displays a texture (the Go Gopher icon) on screen.
If you have never used Ebitengine: do not worry. We assume no prior knowledge. Every function is explained, every step is detailed. By the end of this chapter you will understand how a minimal Ebitengine program works and how to display an image on screen. The concepts here, the game loop, loading assets, and drawing, are the foundation for everything that follows in this book.
Before diving into Ebitengine, you need Go installed. The following sections cover installation and a quick sanity check. If you already have Go 1.24 or later, you can skip to What Is Ebiten?.
In this chapter, we will cover the following topics:
- Installing Go and Ebitengine and verifying the toolchain
- Understanding Ebitengine’s game loop and its
Update,Draw, andLayoutmethods - Creating a Go module and structuring a minimal project
- Embedding an image asset with
go:embedand decoding it at startup - Drawing a sprite and positioning it with the
GeoMtransform - The screen coordinate system Ebitengine uses
Technical requirements
- Go: version 1.24 or later, from go.dev/dl. This chapter walks you through installing it if you do not have it yet.
- Ebitengine: v2.9.x. This chapter walks you through adding it to your module.
- Assets: the Go Gopher icon (
golang_icon.png), used as the image you draw on screen. - Code: the complete, runnable project for this chapter lives in
ch01/.
Getting Go on your machine
If Go isn’t installed yet, here’s how to get it. The official downloads are at go.dev/dl. You need Go 1.24 or later for Ebitengine, the examples in this book assume that minimum. We’ll go through each platform; pick the one that matches your setup.
Windows
On Windows, the easiest route is the MSI installer. Download the file named something like go1.24.x.windows-amd64.msi (or arm64 if you’re on an ARM machine), double-click it, and follow the wizard. The installer puts Go in C:\Program Files\Go and adds it to your system PATH automatically.
Important: After installation, close any existing Command Prompt or PowerShell windows and open a new one. The PATH is read when the terminal starts, so old windows won’t see the new go command.
In the new terminal, run:
1 # Run from: (any directory) — verify Go installation
2 go version
You should see something like go version go1.24.x windows/amd64. If you get “go: command not found” or similar, the PATH wasn’t updated; you may need to log out and back in, or add C:\Program Files\Go\bin to your user PATH manually (Settings → System → About → Advanced system settings → Environment variables).
If you use WSL (Windows Subsystem for Linux): Go can run inside WSL as well. Install it using the Linux instructions below. When we run Ebitengine later, you’ll typically want to target Windows (GOOS=windows) so the game opens a native window rather than trying to use Linux graphics inside WSL.
macOS
Two options. The official route: download the .pkg from go.dev/dl (choose amd64 for Intel Macs, arm64 for Apple Silicon), run it, and you’re done. The installer places Go in /usr/local/go and sets up your PATH.
If you use Homebrew, you can instead run:
1 # Run from: (any directory) — macOS Homebrew install
2 brew install go
Homebrew installs to a different location, but the result is the same. Open a new Terminal window (or a new tab) and run:
1 # Run from: (any directory) — verify Go installation
2 go version
You should see something like go version go1.24.x darwin/arm64 (Apple Silicon) or darwin/amd64 (Intel). If go isn’t found, check that Homebrew’s bin directory is in your PATH, Homebrew usually prints the exact path when you run brew install go.
Linux
Linux offers the most flexibility. Here are a few approaches.
Official tarball (works on any distro): Download the .tar.gz from go.dev/dl. If you have an old Go installation, remove it first (sudo rm -rf /usr/local/go). Then extract:
1 # Run from: (directory containing the downloaded tarball)
2 sudo tar -C /usr/local -xzf go1.24.x.linux-amd64.tar.gz
Replace the filename with the one you downloaded. Next, add Go’s bin directory to your PATH. Open ~/.bashrc (or ~/.profile, or ~/.zshrc if you use Zsh) and add:
1 # Add to ~/.bashrc or ~/.zshrc
2 export PATH=$PATH:/usr/local/go/bin
Save the file, then run source ~/.bashrc (or the appropriate file) or open a new terminal. Run go version to confirm.
Package manager (simpler, but version may vary): Many distros ship Go. On Ubuntu or Debian:
1 # Run from: (any directory) — Ubuntu/Debian
2 sudo snap install go --classic
On Fedora:
1 # Run from: (any directory) — Fedora
2 sudo dnf install golang
On Arch:
1 # Run from: (any directory) — Arch
2 sudo pacman -S go
Check the installed version with go version. If it’s older than 1.24, use the tarball method instead to get a newer release.
Verifying the installation
Whatever route you took, run:
1 # Run from: (any directory) — verify installation
2 go version
If you see go version go1.24.x (or higher) followed by your OS and architecture, you’re good. Ebitengine will work with that. If the command fails or the version is too old, revisit the steps for your platform, most issues come from a missing or incorrect PATH.
Troubleshooting
“go: command not found”, The go binary isn’t in your PATH. On Windows, run the installer again and ensure “Add to PATH” is checked, then restart your terminal (or log out and back in). On Linux and macOS, double-check that you’ve added /usr/local/go/bin (or the correct path) to your shell config file and that you’ve sourced it or opened a new terminal.
Wrong or old version, If you have multiple Go installs (e.g., an old tarball plus a package manager install), they can conflict. Remove the old one and keep a single installation. On Linux, which go shows which binary is used; go env GOROOT shows the installation directory.
Permission denied on Linux, If you get permission errors when running go, make sure the Go binary and your project folder are readable. Avoid installing to /usr/local/go without sudo if you don’t have write access there; alternatively, extract Go to $HOME/go and add $HOME/go/bin to your PATH.
Proxy or corporate network, If go get or go mod download fails behind a corporate firewall, you may need to set GOPROXY, GOPRIVATE, or GONOSUMDB. For most home setups, the defaults work fine.
A quick sanity check: Hello, world
If you’ve just installed Go or want to double-check your setup, run through a quick “Hello, World!”
Create a folder, add a main.go file:
1 // File: main.go (standalone sanity check — create in new project folder)
2 package main
3
4 import "fmt"
5
6 func main() {
7     fmt.Println("Hello, World!")
8 }
From that folder, run go run main.go. You should see “Hello, World!” in the terminal. If so, you’re ready to move on. (For a real project you’d run go mod init gopher-survivor first; we’ll do that when we create the actual game in this chapter.)
What is Ebiten?
Ebiten (now officially called Ebitengine) is an open-source 2D game library for the Go programming language. In a nutshell: it gives you a window, a game loop that calls your code every frame, and the primitives to draw images, handle input, and play audio. You write game logic in Go; Ebitengine handles the low-level graphics, platform integration, and the rhythm of Update, Draw. It is not a full engine with editors or physics, it is a library you compose into your own architecture.
History and creator
Ebiten was created by Hajime Hoshi, a software engineer and CTO at Odencat in Tokyo, Japan. He started the project to bring a simple, productive 2D game development experience to Go. The library has grown into a mature, production-ready engine with thousands of stars on GitHub and has been used in commercial games. Hoshi has received the Google Open Source Peer Bonus award for his contributions. The project is licensed under the Apache 2.0 license.
What can you build with it?
Ebiten is suited for a wide range of applications:
- 2D games: Platformers, top-down shooters, puzzle games, RPGs, arcade classics.
- Tools and visual applications: Level editors, animation preview tools, data visualizations.
- Web games: Compile to WebAssembly and run in the browser with the same codebase.
- Mobile games: Deploy to iOS and Android with native performance.
- Desktop games: Windows, macOS, Linux, and even Nintendo Switch (with additional tooling).
Notable examples include Fishing Paradiso, a commercial game built with Ebiten that has been downloaded over 2 million times. The engine is designed to scale from simple prototypes to full commercial releases.
How is it structured?
Ebiten is organized into a set of packages, each focused on a specific concern:
| Package | Purpose |
|---|---|
github.com/hajimehoshi/ebiten/v2 |
Core package: game loop, ebiten.Image, basic input and drawing. |
ebiten/v2/ebitenutil |
Utilities: debug printing, loading images from file, drawing simple shapes. |
ebiten/v2/inpututil |
Input helpers: “just pressed” detection, touch events, gamepad. |
ebiten/v2/audio |
Audio playback; supports WAV, MP3, OGG. |
ebiten/v2/text |
Text rendering with fonts. |
ebiten/v2/vector |
Vector graphics: lines, rectangles, circles (GPU-accelerated). |
Architectural principles:
- Universal image system: Everything drawable is an
ebiten.Image, the screen, offscreen buffers, sprites, tiles. They all behave the same: you draw one image onto another. This uniformity simplifies rendering and makes it easy to add effects (render to texture, then draw the texture). - Single-threaded game loop:
Layout,Update, andDrawrun one after the other on a single goroutine. No locks are needed inside these methods; your game logic stays simple and predictable. - Minimal abstraction: Ebiten gives you building blocks (images, transforms, input) rather than a full engine. You compose them into your own architecture, which is exactly what this book does as we build our framework.
Features and capabilities
Ebitengine provides a focused set of features that cover the essentials of 2D game development:
| Feature | Description |
|---|---|
| Game loop |
Update, Draw, and Layout, you implement these three methods; Ebitengine handles timing, vsync, and window management. |
| Rendering | Draw images (sprites, tiles, textures) with position, scale, rotation, and color modulation. Everything is an ebiten.Image; you draw one image onto another. GPU-accelerated via OpenGL, Metal, DirectX, or WebGL. |
| Input | Keyboard, mouse, touch, and gamepad. The core package offers basic input; inpututil adds “just pressed” detection and touch events. |
| Audio | Play WAV, MP3, and OGG files. The ebiten/v2/audio package handles playback and streaming. |
| Text | Render text with custom fonts via ebiten/v2/text. |
| Vector graphics |
ebiten/v2/vector provides GPU-accelerated shapes: lines, rectangles, circles, paths. Useful for UI, debug overlays, and simple graphics. |
| Offscreen rendering | Create render targets and draw to them, then draw the result to the screen. Enables post-processing, minimaps, and layered rendering. |
Ebitengine does not provide a built-in physics engine, a scene graph, or an entity-component system. You build those yourself, or use third-party libraries, which gives you full control. That minimalism is intentional: the library stays small and you stay in charge.
Key characteristics
- Pure Go: Written in Go with minimal C dependencies (mainly for window creation and graphics backends).
- Simple API: The core interface has just three methods:
Update,Draw, andLayout. - Cross-platform: Windows, macOS, Linux, FreeBSD, Web (WebAssembly), iOS, Android.
- Performance: Uses hardware acceleration (OpenGL, Metal, DirectX, WebGL) and batches draw calls automatically.
Ebiten is ideal for 2D games, tools, and visual applications. Throughout this book, we will build a complete game framework on top of Ebiten, learning both the library and the concepts that power real game engines.
Installing Ebitengine
Ebitengine is a Go library, so installation is straightforward: add it to your project with go get. You must, however, satisfy a few prerequisites.
1. Go
Install Go 1.24 or later. Ebitengine requires this minimum version.
2. C compiler (except on Windows)
Ebitengine uses both Go and C. A C compiler is required on macOS, Linux, and FreeBSD. On Windows, no C compiler is needed, Ebitengine uses pure-Go rendering there.
- macOS: Run
clangin the terminal; a dialog will prompt installation if needed. If you see anxcrunerror, runxcode-select --install. - Linux: Install GCC, e.g.
apt install gccon Ubuntu. - FreeBSD: Run
pkg install clang.
3. Platform-specific dependencies
On Linux and FreeBSD, you need development libraries for graphics, input, and audio. Examples:
- Debian / Ubuntu:
sudo apt install libc6-dev libgl1-mesa-dev libxcursor-dev libxi-dev libxinerama-dev libxrandr-dev libxxf86vm-dev libasound2-dev pkg-config - Fedora:
sudo dnf install libglvnd-devel libXrandr-devel libxcursor-devel libxinerama-devel libXi-devel libXxf86vm-devel alsa-lib-devel pkg-config - Arch Linux:
sudo pacman -S mesa libxrandr libxcursor libxinerama libxi pkg-config
macOS and Windows typically need no extra packages.
4. Verify your setup
Run the official rotating Gophers example:
1 # Run from: (any directory) — verify Ebitengine
2 go run github.com/hajimehoshi/ebiten/v2/examples/rotate@latest
If a window appears with a rotating Gopher image, your environment is correctly configured.
On WSL (Windows Subsystem for Linux), you must target Windows when running:
1 # Run from: (any directory) — WSL
2 GOOS=windows go run github.com/hajimehoshi/ebiten/v2/examples/rotate@latest
Supported platforms and architectures
Ebitengine runs on many platforms and CPU architectures:
| Platform | Architectures | Notes |
|---|---|---|
| Windows | amd64, arm64, 386 | No C compiler needed on amd64/arm64 |
| macOS | amd64, arm64 | Intel and Apple Silicon |
| Linux | amd64, arm64, 386, arm, loong64, ppc64le, riscv64, s390x | Requires dev libraries above |
| FreeBSD | amd64, arm64 | Less tested by the author |
| Web | wasm (WebAssembly) | Run in the browser |
| Android | amd64, arm64 | Mobile app; may need 386/arm for older devices |
| iOS | amd64 (simulator), arm64 | Mobile app |
Cross-compilation: You can cross-compile to Windows and WebAssembly easily. For other targets (e.g. Linux from Windows), cross-compilation is difficult because of Cgo and platform-specific build requirements, building on the target platform or in a CI environment is usually simpler.
WebAssembly: To build for the web:
1 # Run from: ch01 (or project root)
2 GOOS=js GOARCH=wasm go build -o game.wasm .
You then serve game.wasm and a small JavaScript loader (Ebitengine provides one) from a web server.
The Ebiten Game interface
To create a game with Ebiten, you implement the ebiten.Game interface. An interface in Go is a contract: it specifies which methods your type must have. Ebitengine calls these methods automatically. You do not call them yourself; you just implement them.
1 // Interface: ebiten.Game (from Ebitengine library)
2 type Game interface {
3     Update() error
4     Draw(screen *ebiten.Image)
5     Layout(outsideWidth, outsideHeight int) (int, int)
6 }
Understanding the game loop
A game runs in a loop: over and over, the engine updates the game state and draws the screen. This happens dozens of times per second so the player sees smooth animation. Ebitengine controls this loop for you; your job is to provide the logic in three methods.
The three methods explained
Update() error, Game logic
- When it is called: Every tick. By default, Ebitengine runs at 60 ticks per second (60 TPS), so
Updateis called 60 times per second. - What it does: You put all your game logic here: moving characters, checking keyboard input, updating scores, running physics, and so on. Think of it as “what happens each moment in the game.”
- Return value: Return
nilto continue; return an error to stop the game (for example, when the player quits). - Important: Do not draw anything here. Drawing happens only in
Draw.
Draw(screen *ebiten.Image), Rendering
- When it is called: Every frame. The number of frames per second (FPS) depends on your display and hardware; it can be 60, 120, or more.
- What it does: You draw everything the player should see. The
screenparameter is the image that will be shown in the window. You draw sprites, shapes, and text onto it. - Important: Do not update game state here. Keep
Drawfast and focused on drawing only.
Layout(outsideWidth, outsideHeight int) (int, int), Screen size
- When it is called: When the window is created or resized.
- Parameters:
outsideWidthandoutsideHeightare the actual window size in pixels. - Return value: You return the logical size you want for your game. Ebitengine then scales your drawing to fit the window. For example, if you return
(640, 480), your game “thinks” it has a 640×480 canvas; Ebitengine stretches or shrinks it to match the real window.
Tick vs frame: A tick is one step of game logic; a frame is one drawn image. At 60 TPS, Update runs 60 times per second. Draw typically runs as often as the display allows (often 60 or 120 FPS). For most 2D games, 60 updates per second is enough; the logic stays stable even if the frame rate varies.
The Update, Draw flow: how the loop works
Understanding the order and rhythm of the game loop is essential.
Here is how Ebitengine runs your game.
Sequence of execution:
When you call ebiten.RunGame(game), Ebitengine enters a loop. Each iteration looks like this:
1 1. Layout (if needed)  —  window created or resized?
2 2. Update              —  run your game logic (60 times/sec by default)
3 3. Draw                —  render the current state to the screen
4 4. Swap buffers        —  show the new frame to the player
5 5. Repeat
Layout is called only when the window is first created or when the user resizes it. Update and Draw run every iteration. There is no separate “physics step” or “input step”; you do all of that inside Update. Input, movement, collisions, AI, and timers belong in Update. Drawing belongs in Draw.
Why separate Update and Draw?
- Determinism: Game logic runs at a fixed rate (60 TPS). If you tied logic to frames, a slow machine would run the game slower, enemies would move slower, timers would stretch. With fixed TPS, one second of game time is always one second of logic, regardless of frame rate.
- Performance: Drawing can run at the display’s refresh rate (60, 120, 144 Hz). On a high-refresh monitor,
Drawruns more often thanUpdate. The screen looks smoother; the logic stays consistent. - Simplicity: One place for logic, one place for rendering. No mixing concerns. No risk of reading input in the middle of a draw.
Timing in practice:
| Setting | Default | Meaning |
|---|---|---|
| TPS (ticks per second) | 60 | How often Update is called. You can change it with ebiten.SetTPS(). |
| Max FPS | Unlimited |
Draw runs as often as possible, up to the display refresh rate (vsync on) or higher (vsync off). |
| Uncapped FPS | , | If vsync is off, Draw can run hundreds of times per second. Update still runs at TPS. |
How Ebitengine manages timing: The engine works hard to keep Update running at a stable 60 calls per second, regardless of how fast or slow your machine is. It waits or adjusts between ticks so that one second of real time corresponds to 60 ticks of game logic. For drawing, Ebitengine typically syncs with the monitor’s refresh rate (vsync): if your display runs at 60 Hz, you get 60 frames per second; at 120 Hz, you get 120 frames. This separation means your game logic stays deterministic and predictable, while the visuals stay smooth. You do not need to write any timing code yourself, Ebitengine handles it.
Rule of thumb: Read input and change game state in Update. In Draw, only read the current state and render it. Do not mutate state in Draw, you would get inconsistent behavior if Draw is called multiple times between Update calls (which can happen when FPS > TPS).
Creating a Go module for your project
Before writing any code, you need a Go module. If you are new to Go: a module is a collection of Go source files that form a unit. It has a name (a “module path”), a go.mod file that lists dependencies, and one or more packages. When you want to use an external library like Ebitengine, you add it as a dependency of your module. The go.mod file records which libraries you use and their versions, so your project can be built consistently on any machine.
Create the project directory
Create a directory for your game. The name is up to you; for this book we use gopher-survivor:
1 # Run from: (parent of project directory)
2 mkdir gopher-survivor
3 cd gopher-survivor
Initialize the module
Run go mod init with a module path. The path identifies your module and should be unique, convention is to use a URL you control, e.g. github.com/yourusername/gopher-survivor:
1 # Run from: ch01 (or project root)
2 go mod init github.com/yourusername/gopher-survivor
You can use any path (example.com/gopher-survivor, gopher-survivor, etc.) as long as you do not publish the module publicly. You can change it later.
This creates a go.mod file:
1 module github.com/yourusername/gopher-survivor
2
3 go 1.24
moduleis the import path for packages in this project.gois the minimum Go version required.
Add Ebitengine as a dependency
Add Ebitengine to your module:
1 # Run from: ch01
2 go get github.com/hajimehoshi/ebiten/v2
Go downloads the library and records it in go.mod and go.sum:
1 module github.com/yourusername/gopher-survivor
2
3 go 1.24
4
5 require github.com/hajimehoshi/ebiten/v2 v2.9.9
From now on, you can import Ebitengine in your code with "github.com/hajimehoshi/ebiten/v2". When you run go build or go run, Go ensures the dependency is available.
Project structure
We split the code into two packages: game (the Game struct and its methods, in game.go and settings.go) and cmd (the entry point with main). The game package contains the game logic; cmd contains the program that starts the loop and turns embedded bytes into an *ebiten.Image. Static files such as the Gopher PNG live under assets/; the next section shows how you bake them into the binary with go:embed so you do not rely on the working directory at runtime.
Building the code step by step
We will build a small program that loads the Go Gopher icon from a PNG file and draws it centered on the screen. Follow each step: create the files, add the code, and read the explanation. By the end you will have a complete, runnable program.
Create game.go, package and the game struct
Inside ch01/, create a file named game.go. It defines the game package, the Game struct and its methods. Add the following:
 1 // File: ch01/game.go
 2 package game
 3
 4 import (
 5     "github.com/hajimehoshi/ebiten/v2"
 6 )
 7
 8 // Game holds the game state and implements the ebiten.Game interface.
 9 type Game struct {
10     gopherImage *ebiten.Image
11 }
12
13 // NewGame creates a new Game with the given gopher image.
14 func NewGame(gopherImage *ebiten.Image) *Game {
15     return &Game{gopherImage: gopherImage}
16 }
What we added:
package game: This file belongs to thegamepackage. We separate game logic from the entry point (main).import "github.com/hajimehoshi/ebiten/v2": We need the core Ebitengine package forebiten.Image,DrawImageOptions, and the game loop.type Game struct { gopherImage *ebiten.Image }: TheGamestruct holds our game data. The fieldgopherImagestores the loaded texture. We load it once at startup and reuse it every frame inDraw. In Ebitengine, everything drawable is anebiten.Image, the screen, sprites, textures. You draw one image onto another.NewGame(gopherImage *ebiten.Image) *Game: A constructor that creates aGamewith the loaded image. SincegopherImageis unexported, other packages use this function to create aGame.
Store the screen size: settings.go
Rather than scatter magic numbers such as 640 and 480 through the code, keep the logical screen size in one place. Inside ch01/, next to game.go, create settings.go:
 1 // File: ch01/settings.go
 2 package game
 3
 4 // settings holds all tunable parameters for the game.
 5 // Changing a value here is the only edit needed to adjust the configuration.
 6 type settings struct {
 7     ScreenWidth  int
 8     ScreenHeight int
 9 }
10
11 // Settings is the single source of truth for all game parameters.
12 var Settings = settings{
13     ScreenWidth:  640,
14     ScreenHeight: 480,
15 }
What we added:
Settings: A struct that groups tunable parameters. For now it holds only the logical screen size, but as the game grows you add fields here instead of sprinkling constants across files.Settings: A single package-level value: the one source of truth for these numbers.Draw,Layout, and thecmdentry point all readSettings.ScreenWidthandSettings.ScreenHeight, so changing the window size is a one-line edit.
Because settings.go belongs to the same game package as game.go, the Settings value is available to every method on Game without an import.
Implement Update in game.go
Add this method to game.go, right after the NewGame function:
1 // File: ch01/game.go
2 // Update is called every tick (default 60 times per second).
3 func (g *Game) Update() error {
4     return nil
5 }
What we added:
func (g *Game) Update() error: This method is part of theebiten.Gameinterface. Ebitengine calls it 60 times per second. Here you would put game logic: input, movement, collisions. For this example we only display a static image, so we do nothing.return nil:nilmeans “no error”; the game continues. If you return an error, Ebitengine stops the loop and exits.
Implement Draw in game.go
Add this method after Update. Draw receives the screen as an *ebiten.Image; we draw our texture onto it.
 1 // File: ch01/game.go
 2 func (g *Game) Draw(screen *ebiten.Image) {
 3     gopherWidth := float64(g.gopherImage.Bounds().Dx())
 4     gopherHeight := float64(g.gopherImage.Bounds().Dy())
 5     x := (float64(Settings.ScreenWidth) - gopherWidth) / 2
 6     y := (float64(Settings.ScreenHeight) - gopherHeight) / 2
 7
 8     op := &ebiten.DrawImageOptions{}
 9     op.GeoM.Translate(x, y)
10     screen.DrawImage(g.gopherImage, op)
11 }
Getting the image size: Bounds(), Dx(), Dy()
g.gopherImage.Bounds()returns aimage.Rectanglethat describes the image’s bounds (its minimum and maximum X and Y coordinates)..Dx()returns the width in pixels (right minus left)..Dy()returns the height in pixels (bottom minus top).- We convert to
float64becauseTranslateand other transform functions usefloat64coordinates. This allows sub-pixel positioning when scaling.
Centering the image
- To center the Gopher horizontally, we place its left edge at
(float64(Settings.ScreenWidth) - gopherWidth) / 2. We castSettings.ScreenWidth(anint) tofloat64so it mixes with the float widths; dividing by two leaves equal space on both sides. - Similarly, vertically:
(float64(Settings.ScreenHeight) - gopherHeight) / 2.
ebiten.DrawImageOptions
- This struct controls how an image is drawn: where, at what size, with what rotation, and with optional color effects.
- We create an empty one with
&ebiten.DrawImageOptions{}. By default, the image is drawn at full size, no rotation, at position (0, 0).
GeoM and Translate(x, y float64)
GeoMis a 2D affine transformation matrix. It can represent translation (moving), scaling, and rotation.Translate(x, y)adds a translation: it moves the image so that its top-left corner ends up at(x, y).- You can chain multiple transforms: for example,
ScalethenTranslateto draw a scaled image at a given position. Order matters: transforms apply from right to left in the matrix.
Coordinate system and GeoM: a closer look
Understanding how Ebitengine handles coordinates and the GeoM matrix is essential for positioning, scaling, and rotating sprites correctly.
The coordinate system
Ebitengine uses a coordinate system that may differ from what you learned in mathematics:
| Aspect | Ebitengine | Traditional math |
|---|---|---|
| Origin | Top-left corner (0, 0) | Often center or bottom-left |
| X axis | Increases to the right | Same |
| Y axis | Increases downward | Usually increases upward |
So a point at (100, 200) is 100 pixels from the left edge and 200 pixels below the top edge. This matches how 2D images and most graphics APIs work: the first row of pixels is at y=0, the second at y=1, and so on.
Each ebiten.Image has its own coordinate system. When you draw onto the screen, the screen’s top-left is (0, 0). When you draw onto an offscreen image, that image’s top-left is (0, 0). The destination image defines the coordinate space.
Why Y goes down: In image formats (PNG, JPEG) and framebuffers, rows are stored top-to-bottom. Pixel (0, 0) is the first pixel; pixel (0, 1) is the second row. Mapping this directly to coordinates makes rendering straightforward: no need to flip or invert.
What is GeoM?
GeoM (Geometry Matrix) is Ebitengine’s way of specifying where and how to draw an image. It is a 2D affine transformation matrix, a 3×3 matrix where the last row is always (0, 0, 1):
1 [a   b   tx]
2 [c   d   ty]
3 [0   0   1 ]
- a, b, c, d: Control scaling and rotation. A 2×2 matrix alone cannot move the origin; it can only scale and rotate around (0, 0).
- tx, ty: Translation: how much to shift the image in X and Y. These allow moving the image to any position.
The matrix defines a mapping: for each point (x, y) in the source image, it computes where that point ends up in the destination. By adjusting the matrix, you control position, scale, and rotation in one unified way.
Identity matrix: A new GeoM starts as the identity matrix (no transformation). In that state, the image is drawn at (0, 0), its top-left corner at the destination’s top-left.
GeoM operations: Translate, Scale, Rotate
GeoM provides three main methods; each left-multiplies a new transformation into the matrix:
| Method | Effect | Origin (pivot point) |
|---|---|---|
Translate(x, y) |
Moves the image by x pixels right, y pixels down | , |
Scale(sx, sy) |
Scales the image by sx in X, sy in Y | Top-left corner |
Rotate(angle) |
Rotates by the given angle (radians) | Top-left corner |
Translate: op.GeoM.Translate(100, 50) moves the image so its top-left corner ends up at (100, 50) in the destination. Positive x = right; positive y = down.
Scale and Rotate: The origin for both is the top-left corner of the image. If you scale by 2, the image grows to the right and downward from that corner. If you rotate, the top-left corner stays fixed and the rest of the image spins around it. To rotate around the center, you typically: translate to center, rotate, then translate back.
Order of operations
When you chain operations, the order matters. Each method left-multiplies a new transformation into the matrix. The first operation you call is applied first to the image (to each pixel); the last is applied last.
1 // File: ch01/game.go — GeoM usage example
2 op.GeoM.Scale(2, 2)         // Applied first: scale 2x (origin at top-left)
3 op.GeoM.Translate(100, 100)  // Applied second: move the scaled image to (100, 100)
4 // Result: image is scaled, then moved. The scaled image's top-left ends at (100, 100).
If you reversed the order (Translate then Scale), you would move first, then scale, and the translation would be scaled too, so the top-left would end up at (200, 200) instead of (100, 100). A common pattern is: Scale → Rotate → Translate (scale and rotate around the top-left origin, then move to the final position).
screen.DrawImage(src *ebiten.Image, op *DrawImageOptions)
- Purpose: Draws
srcontoscreenusing the options inop. - Parameters:
src, The image to draw (our Gopher).op, How to draw it (position, scale, rotation, etc.).- Important: In Ebitengine, drawing is always “draw one image onto another.” The screen is an image; your sprites are images. You compose them by calling
DrawImagerepeatedly.
Implement Layout in game.go
Add this method after Draw:
1 // File: ch01/game.go
2 func (g *Game) Layout(outsideWidth, outsideHeight int) (int, int) {
3     return Settings.ScreenWidth, Settings.ScreenHeight
4 }
What we added: Layout is called when the window is created or resized. We return the logical size from Settings (640×480); Ebitengine scales our drawing to fit the real window. A fixed logical size keeps positions and layouts consistent.
Embedding the PNG with go:embed
Your main package will decode PNG bytes and pass an *ebiten.Image into NewGame. You could read golang_icon.png from disk at runtime, but then the path depends on the working directory and how you ship the game. For a small icon, embedding is simpler: the Go toolchain copies the file into the executable at compile time, and your code reads a []byte variable. After go build, you do not need to ship the PNG next to the binary unless you want to.
Go provides this through the embed package and the //go:embed directive (available since Go 1.16). You put the directive in a source file in the same directory as the file you embed (or use a path relative to that file).
Create assets/embed.go in your assets folder:
1 // File: ch01/assets/embed.go
2 package assets
3
4 import _ "embed"
5
6 //go:embed golang_icon.png
7 var GopherPNG []byte
What this does:
import _ "embed"- A blank import ofembedregisters the compiler support for//go:embed. You do not callembedfrom your code; the directive does the work.//go:embed golang_icon.png- Tells the compiler to readgolang_icon.pngfrom theassetsdirectory (same folder as this.gofile) and initialize the variable on the next line with its raw bytes.var GopherPNG []byte- Holds the PNG file exactly as on disk. Other packages importyourmodule/assetsand useassets.GopherPNGlike any[]byteslice (for example withbytes.NewReaderandimage.Decode).
Important:
go:embedreads the file at compile time.golang_icon.pngmust exist inassets/before you rungo buildorgo run; otherwise the build fails.
Tip: You can embed multiple files or whole folders; see the embed package documentation for patterns and constraints.
Create cmd/main.go - decode the embedded PNG and start the game
Create a cmd folder and inside it a new file main.go. The entry point decodes assets.GopherPNG (from assets/embed.go above), converts the result to *ebiten.Image, creates the game, and starts Ebitengine:
 1 // File: ch01/cmd/main.go
 2 package main
 3
 4 import (
 5     "bytes"
 6     "image"
 7     _ "image/png"
 8     "log"
 9
10     "book/ch01"
11     "book/ch01/assets"
12
13     "github.com/hajimehoshi/ebiten/v2"
14 )
15
16 func main() {
17     img, _, err := image.Decode(bytes.NewReader(assets.GopherPNG))
18     if err != nil {
19         log.Fatalf("failed to decode embedded gopher image: %v", err)
20     }
21     eimg := ebiten.NewImageFromImage(img)
22
23     g := game.NewGame(eimg)
24
25     ebiten.SetWindowSize(game.Settings.ScreenWidth, game.Settings.ScreenHeight)
26     ebiten.SetWindowTitle("Chapter 1: Hello Ebiten - Go Gopher")
27
28     if err := ebiten.RunGame(g); err != nil {
29         log.Fatal(err)
30     }
31 }
What each part does:
import "book/ch01": Imports the chapter package that definesGame,NewGame, andSettings.assets.GopherPNG- The[]bytefilled by//go:embedinassets/embed.go(see Embedding the PNG withgo:embed).image.Decode(bytes.NewReader(...)): Decodes those bytes into a genericimage.Image.ebiten.NewImageFromImage(img): Converts the decoded image into an*ebiten.Image, which Ebitengine can draw efficiently.g := game.NewGame(eimg): Creates the game and passes it the loaded texture.ebiten.SetWindowSize(...): UsesSettings.ScreenWidthandSettings.ScreenHeightfrom the chapter package, keeping window size in one place.ebiten.RunGame(g): Starts the game loop and repeatedly callsLayout,Update, andDraw.
Add the asset and run
Create an assets folder at the project root if you have not already (you need it for embed.go). Place the Go Gopher icon as golang_icon.png in that folder next to embed.go. From your project directory, run:
1 # Run from: ch01
2 go run ./cmd
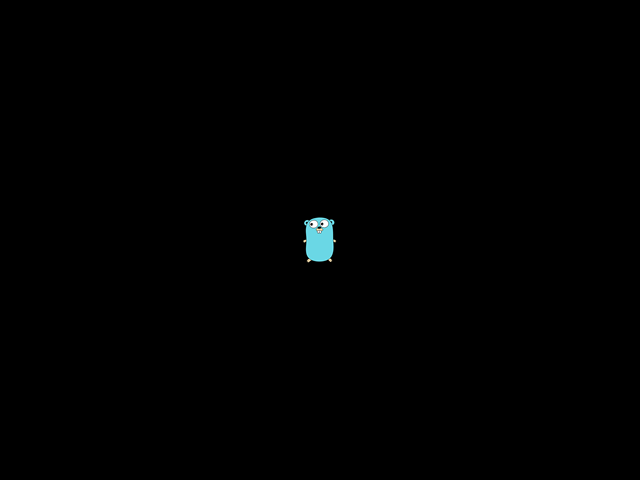
A window opens with the Go Gopher centered on the screen. You have built your first Ebitengine program.
Running the chapter
The full ch01 project brings these pieces together: game.go holds the Game struct and its methods, settings.go the logical window size, assets/embed.go the embedded PNG, and cmd/main.go the entrypoint.
Run it with:
1 # Run from: ch01
2 go run ./cmd
The following screenshot shows the result of this chapter:
Summary
In this chapter, you learned:
go mod init: creates a Go module and ago.modfile.go get: adds a dependency to the module.//go:embedand theembedimport: bake static files into the binary as[]byte(or anembed.FS) at compile time.ebiten.Game: the interface you implement withUpdate,Draw, andLayout.Update(): called every tick; put game logic here.Draw(screen): called every frame; put all drawing here.Layout(): returns the logical screen size; Ebitengine scales it to the window.image.Decode+ebiten.NewImageFromImage: decode embedded image bytes and convert them to an*ebiten.Image.ebiten.Image: the type for every drawable image in Ebitengine.- The coordinate system: origin at the top-left; Y increases downward; each image has its own coordinate space.
GeoM: the affine matrix for position, scale, and rotation.Translatemoves;ScaleandRotateuse the top-left as pivot.screen.DrawImage: draws one image onto another.
Get the code: the complete, runnable project for this chapter is in the ch01 directory of the companion GitHub repository.