0 Project setup
Introduction
This chapter is focused on organizing our project to keep a tidy file structure. It will allow us to get a good start, and test the installation of Phaser. It is worth mentioning that we’ll be using Phaser v2.3, available here for download.
0.1 File system
- Create the following file structure: an empty
index.htmlfile and four additional directories;css,img,js, andsnd, respectively. As we can see, it’s a standard file structure for web development. As games grow, teams tend to specialize the file structure but right now it’s not our case:1game2|index.html3+---css4+---img5+---js6\---snd - Add the phaser
.jsfile in thejs/directory. Here we will store all of our scripting files:1+---js2|phaser.min.js - Modify the
index.htmlwith the following code. This declares the type of document, its character encoding, includes thephaser.jsfile in the html, and creates a place for the game to be rendered:1<!DOCTYPE html>2<htmllang="en">3<head>4<metacharset="UTF-8">5<title>html5 Breaker game</title>6<scripttype="text/javascript"src="js/phaser.min.js"></script>7</head>8<body>9<divid="phaser_game"></div>10</body>11</html> - Create a file named
main.jsin the corresponding directory. This file will store the initialization code of our game:1// game's global variable2vargame;3// after everything is loaded, then4window.onload=function(){5// initialize the game object6game=newPhaser.Game(640,400,Phaser.AUTO,'phaser_game');7}; - Now include the previous file into the html file with the proper
<script>tag. It must be included below the phaser include:1<scripttype="text/javascript"src="js/phaser.min.js"></script>2<scripttype="text/javascript"src="js/main.js"></script> - Finally, test the game by running it in the browser. If we open the browser’s JavaScript console, we can read a message from the Phaser API stating that it is initialized and everything runs smoothly.
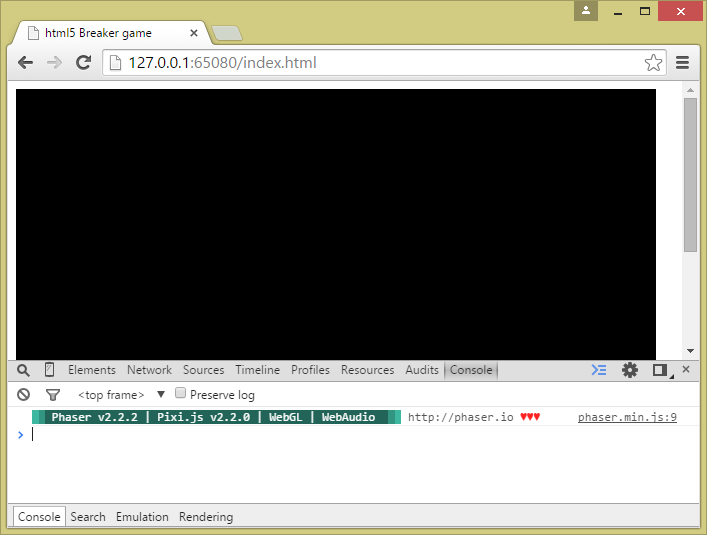
Phaser output message
0.2 Empty game
Now that we know how to set up an empty Phaser project, I can tell you that inside the downloadable content there is a directory called 00empty_game with the previous code, plus all the images and sounds that we will use to build our game.
In case you’re getting the book from Amazon, you can download the at: http://jorge.palacios.co/brick-breaker-book-resources/
In the following chapters we will build our game, starting from the core mechanics.
00_emptygame
 1 00empty_game
 2 |   index.html
 3 |
 4 +---css
 5 |       styles.css
 6 |
 7 +---img
 8 |       ball.png
 9 |       bg_black.png
10 |       bg_blue.png
11 |       brick_green.png
12 |       brick_purple.png
13 |       brick_red.png
14 |       brick_yellow.png
15 |       logo_game.png
16 |       logo_icon_square.png
17 |       paddle.png
18 |       progress_full.png
19 |       progress_void.png
20 |       star.png
21 |
22 +---js
23 |       main.js
24 |       phaser.map
25 |       phaser.min.js
26 |
27 \---snd
28         bgm_electric_air.ogg
29         fx_firework.ogg
30         fx_hit_brick.wav
31         fx_hit_paddle.wav
32         fx_lose.ogg
33         fx_lose_life.ogg
34         fx_win.ogg