I A simple form-based application: Unit Doctor
1. Problem description
We want to write an application to convert measures from various units to other units. We imagine that it will support an extensive collection of conversions, e.g., from centimeters to yards, from Fahrenheit degrees to Celsius, from HP to KW. You may check out the source code for this example at https://github.com/xpmatteo/unit-doctor.
2. Examples
The feature we want to implement is “convert a number from one unit to another”. To clarify what we want to do to ourselves and our customer, it’s a good idea to write down a few examples (a.k.a. scenarios) of how the feature will work.
Example: inches to cm
Given the user selected “in” to “cm”
When the user types 2
Then the result is “2.00 in = 5.08 cm”
Example: Fahrenheit to Celsius
Given the user selected “F” to “C”
When the user types 50
Then the result is “50.00 F = 10.00 C”
Example: unsupported units
Given the user selected “ABC” to “XYZ”
Then the result is “I don’t know how to convert this”
Note that by writing down the examples we clarified what exactly the customer expects to see: how numbers are formatted, what the result message should look like.
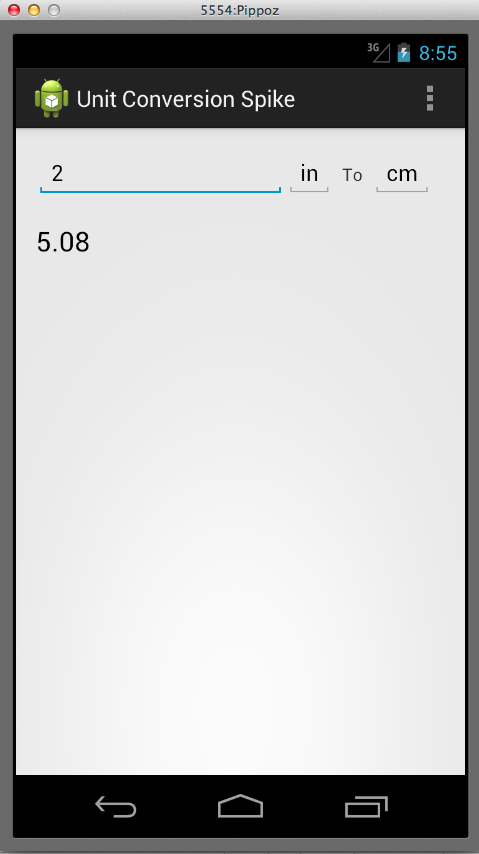
3. Start with a spike
When you are using APIs you’re not familiar with, it’s better to do a spike before you start doing real TDD.
The goal of our spike is to understand how to receive text from the Android API and how to position form elements in a layout. Trying to implement just the “inches to cm” and the “unsupported units” scenarios should give us enough understanding.
package name.vaccari.matteo.unitconversionspike;

import android.app.Activity;
import android.os.Bundle;
import android.view.*;
import android.widget.*;


public class MyActivity extends Activity implements View.OnKeyListener {

    private EditText inputNumber;
    private TextView outputNumber;

    @Override
    protected void onCreate(Bundle savedInstanceState) {
        super.onCreate(savedInstanceState);
        setContentView(R.layout.activity_my);

        getEditText(R.id.inputNumber).setOnKeyListener(this);
        getEditText(R.id.fromUnit).setOnKeyListener(this);
        getEditText(R.id.toUnit).setOnKeyListener(this);
    }

    @Override
    public boolean onKey(View v, int keyCode, KeyEvent event) {
        String input = getEditText(R.id.inputNumber).getText();
        String fromUnit = getEditText(R.id.fromUnit).getText();
        String toUnit = getEditText(R.id.toUnit).getText();
        getEditText(R.id.result).setText(" Hello! " + input + fromUnit + toUnit);
        return false;
    }

    private EditText getEditText(int id) {
        return (EditText) findViewById(id);
    }

    private String getEditTextContent(int id) {
        return getEditText(id).getText().toString();
    }
}
<RelativeLayout xmlns:android="http://schemas.android.com/apk/res/android"
    xmlns:tools="http://schemas.android.com/tools"
    android:layout_width="match_parent"
    android:layout_height="match_parent"
    android:paddingLeft="@dimen/activity_horizontal_margin"
    android:paddingRight="@dimen/activity_horizontal_margin"
    android:paddingTop="@dimen/activity_vertical_margin"
    android:paddingBottom="@dimen/activity_vertical_margin"
    tools:context=".MyActivity">

    <EditText
        android:layout_width="200dp"
        android:layout_height="wrap_content"
        android:inputType="numberDecimal"
        android:id="@+id/inputNumber"
        android:layout_alignParentTop="true"
        android:layout_alignParentLeft="true"
        android:layout_alignParentStart="true" />

    <EditText
        android:layout_width="wrap_content"
        android:layout_height="wrap_content"
        android:id="@+id/fromUnit"
        android:layout_toRightOf="@+id/inputNumber"
        android:text="in"/>

    <TextView
        android:layout_width="wrap_content"
        android:layout_height="wrap_content"
        android:text="  To  "
        android:id='@+id/to'
        android:layout_toRightOf="@id/fromUnit"
        android:layout_alignBaseline="@id/fromUnit" />

    <EditText
        android:layout_width="wrap_content"
        android:layout_height="wrap_content"
        android:id="@+id/toUnit"
        android:layout_toRightOf="@+id/to"
        android:text="cm"/>

    <TextView
        android:layout_width="wrap_content"
        android:layout_height="wrap_content"
        android:textAppearance="?android:attr/textAppearanceLarge"
        android:text="Result"
        android:id="@+id/result"
        android:layout_below="@+id/inputNumber"
        android:layout_alignParentLeft="true"
        android:layout_alignParentStart="true"
        android:layout_marginTop="20dp" />
</RelativeLayout>
As expected, the spike exercise permit us to learn (among other things):
- How to change the result at every keypress
- How to use a
RelativeLayout
In general, we’ll use in this book the spike technique as an help to discover the correct point where to place the boundary bewteen android dependent and android independent code.
4. Continue with an end-to-end acceptance test
The first step after the optional spike is to write an end-to-end acceptance test. The rules for an acceptance tests are
- Business talk: write at the same level of abstraction as the examples that were discussed with the customer.
- Ignore them: when the ATs pass, then the feature is complete. Therefore it will take some time before all the ATs pass. We will ignore all the non-passing ATs until they pass. (Ignore means that we comment them out, or we use some other trick to temporarily remove them from the build.)
- Pass once, pass forever. When an AT passes, it means that some bit of functionality is present in the system. From this moment onward, the AT must stay green forever. The AT now works as a non-regression test.
Workflow
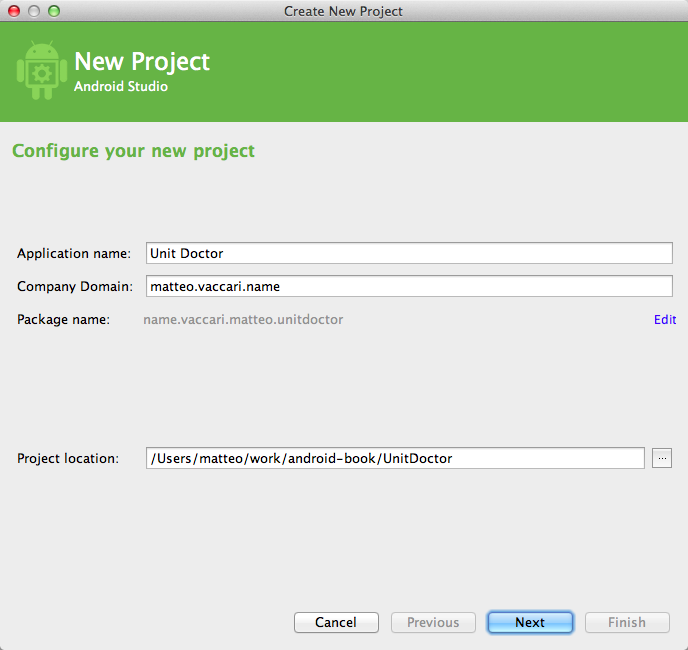
Step 0: new project
We create a new project (remember, we don’t want to “evolve” the spike!). I use Android Studio and I let it set up the new project with its wizard. I invent a fancy name and I call it “Unit Doctor”.
Step 1: write the test as it should read
Android Studio set up a source folder named src/androidTest. I create a new Java class there.
 1 package name.vaccari.matteo.unitdoctor;
 2
 3 import android.test.ActivityInstrumentationTestCase2;
 4
 5 public class UnitConversionAcceptanceTest
 6     extends ActivityInstrumentationTestCase2<MainActivity> {
 7
 8   public UnitConversionAcceptanceTest() {
 9     super(MainActivity.class);
10   }
11
12   public void testInchesToCentimeters() throws Exception {
13     givenTheUserSelectedConversion("in", "cm");
14     whenTheUserEnters("2");
15     thenTheResultIs("2.00 in = 5.08 cm");
16   }
17 }
The test is written in the same language as the original example, by imagining that we have implemented the three methods at lines 13-15.
Step 2: implement the helper methods
We assume at first that the UI is similar to what we developed in the spike. So our first implementation of the testing language is quite simple.
public void testInchesToCentimeters() throws Exception {
  givenTheUserSelectedConversion("in", "cm");
  whenTheUserEnters("2");
  thenTheResultIs("2.00 in = 5.08 cm");
}

private void givenTheUserSelectedConversion(String fromUnit, String toUnit) {
  getField(R.id.fromUnit).setText(fromUnit);
  getField(R.id.toUnit).setText(toUnit);
}

private void whenTheUserEnters(String inputNumber) {
  getField(R.id.inputNumber).setText(inputNumber);
}

private void thenTheResultIs(String expectedResult) {
  assertEquals(expectedResult, getField(R.id.result).getText());
}

private TextView getField(int id) {
  return (TextView) getActivity().findViewById(id);
}
The test does not compile yet, because the identifiers like R.id.fromUnit etc. are not yet defined.
Step 3: implement other scenarios
We implement a few other significant scenarios. This way we check that the testing language that we are developing is expressive enough.
public void testFahrenheitToCelsius() throws Exception {
    givenTheUserSelectedConversion("F", "C");
    whenTheUserEnters("50");
    thenTheResultIs("50.00 F = 10.00 C");
}

public void testUnknownUnits() throws Exception {
    givenTheUserSelectedConversion("ABC", "XYZ");
    thenTheResultIs("I don't know how to convert this");
}
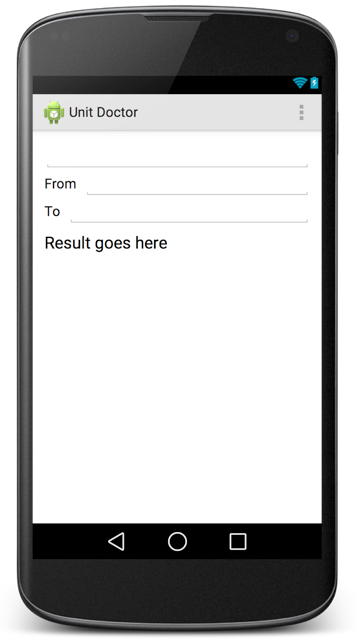
Step 4: implement just enough layout so that we can see the test fail
We turn to editing the layout file so that we can fix all the IDs. This is the time in which the layout designer specialist (but not us) can express himself.
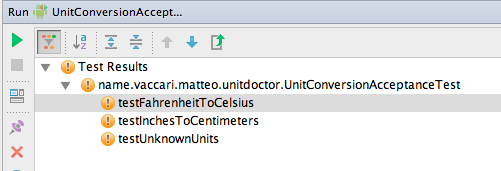
Now we can run the tests and see them all fail
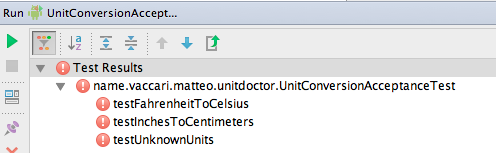
But are they failing for the expected reason?
The error message is “Only the original thread that created a view hierarchy can touch its views.” So it fails because we can only touch an element of the UI, such as when we call setText() on the text fields, using the main thread of the application. The easiest way to solve the problem, for now, is to annotate the tests with @UiThreadTest. We do so, and now we check that the error message is what we expect:
We also observe that Android Studio colors the exclamation point differently (yellow for failures and red for errors), to tell us that the tests produce failures, not errors.
5. Shift to TDD
Now that we have some failing acceptance tests, we leave them be. We now shift to a faster gear by starting to write some unit tests.
Unit tests live in their own module
In order to do this we will start by assuming that we have a kernel of the application that does not need to use Android at all. For this reason we open a new module inside the project. (If I were using Eclipse, I would start a new project in the workspace.) We call the new module UnitDoctorCore.
The project structure so far then is:
- “UnitDoctor” project
- “app” module, where Android-dependent code lives
- “UnitDoctorCore” module, where the pure, Android-free logic of the program lives
We make sure that “app” depends on “UnitDoctorCore”, so that code in “app” can use objects defined in “UnitDoctorCore”. The latter must not depend on “app”: the application logic should not depend on the GUI or other infrastructure details.
Our test list
TDD should start with a test list: a list of all the operations that we should support. Right now we have
- Convert in to cm
- Convert F to C
- Report conversion not supported
from the acceptance tests. It’s clear that some additional operations we need are
- Convert input number to double
- Format output message
Now we choose one test from the list. One that seems interesting is “Convert in to cm”, so we do that first. We want to write a test for this operation and the question is: “which object will support this operation?”
We will use a technique called presenter-first. We assume that we have an object that represents the whole application. We give it the name of the application: UnitDoctor. We also assume that we will have a “view” object, that represents the Android GUI. The gist of what we want to test is
If the view says that the inputs are 1.0, “in” and “cm”
When we are asked to perform a conversion
Then we should tell the view that the result is 2.54.
The responsibilities of the “view” object are to return what the user has entered, and to show the results to the user.
This is the first test. If you find the syntax weird, look for an explanation in the JMock appendix.
10   @Rule
11   public JUnitRuleMockery context = new JUnitRuleMockery();
12
13   UnitDoctorView view = context.mock(UnitDoctorView.class);
14   UnitDoctor unitDoctor = new UnitDoctor(view);
15
16   @Test
17   public void convertInchesToCm() throws Exception {
18     context.checking(new Expectations() {{
19       allowing(view).inputNumber(); will(returnValue(1.0));
20       allowing(view).fromUnit(); will(returnValue("in"));
21       allowing(view).toUnit(); will(returnValue("cm"));
22       oneOf(view).showResult(2.54);
23     }});
24
25     unitDoctor.convert();
26   }
Notes:
- We have defined an interface UnitDoctorView. This interface is being mocked here.
- The whole point of “mocking” is to define how the object we are testing, the UnitDoctor, interacts with its collaborator (the UnitDoctorView).
- We don’t have yet an implementation for UnitDoctorView. Yet we are able to make progress on the UnitDoctor by mocking the collaborator.
- We don’t want UnitDoctor to decide how to format the string to the user; so we just tell the view what is the number to show, and delegate the actual formatting to the view itself.
In order to make this test compile, we have defined the interface
public interface UnitDoctorView {
  double inputNumber();
  String fromUnit();
  String toUnit();
  void showResult(double result);
}
Making this test pass is easy:
public class UnitDoctor {
  private UnitDoctorView view;

  public UnitDoctor(UnitDoctorView view) {
    this.view = view;
  }

  public void convert() {
    double inputNumber = view.inputNumber();
    view.showResult(inputNumber * 2.54);
  }
}
The next test forces us to take also the units into account. Looking at our test list we choose “Report conversion not supported”.
@Test
public void showsConversionNotSupported() throws Exception {
  context.checking(new Expectations() {{
    allowing(view).inputNumber(); will(returnValue(anyDouble()));
    allowing(view).fromUnit(); will(returnValue("XYZ"));
    allowing(view).toUnit(); will(returnValue("ABC"));
    oneOf(view).showConversionNotSupported();
  }});

  unitDoctor.convert();
}

private double anyDouble() {
    return Math.random();
}
This forces us to add method showConversionNotSupported to the UnitDoctorView interface. We make it pass with
public void convert() {
  double inputNumber = view.inputNumber();
  if (view.fromUnit().equals("in") && view.toUnit().equals("cm"))
    view.showResult(inputNumber * 2.54);
  else
    view.showConversionNotSupported();
}
Continuing down this path we add another test (not shown) to add support for Fahrenheit-to-Celsius:
public void convert() {
  double inputNumber = view.inputNumber();
  if (view.fromUnit().equals("in") && view.toUnit().equals("cm"))
    view.showResult(inputNumber * 2.54);
  else if (view.fromUnit().equals("F") && view.toUnit().equals("C"))
    view.showResult((inputNumber - 32) * 5.0/9.0);
  else
    view.showConversionNotSupported();
}
This chain of ifs we don’t like, but we’ll leave it be for the moment. We have implemented the logic for our original examples, so our priority now is to see the application running!
6. Wait…. and the view?
We’d love to see the application running now, but there’s a snag… where is the implementation of the UnitDoctorView? There are three things to remind us that we have yet to do this:
- there’s no way to see the application working without it
- there’s no way to pass the acceptance tests without it
- there are still things left to do in our test list:
- (DONE) Convert in to cm
- (DONE) Convert F to C
- (DONE) Report conversion not supported
- Convert input number to double
- Format output message
We pick “convert input number to double” from the list and write:
public class AndroidUnitDoctorViewTest extends AndroidTestCase {

  public void testReturnInputValues() throws Exception {
    EditText inputNumberField = new EditText(getContext());
    inputNumberField.setText("3.14159");

    AndroidUnitDoctorView view
        = new AndroidUnitDoctorView(inputNumberField);

    assertEquals(3.14159, view.inputNumber());
  }
Notes:
- We must interact with the elements of the user interface. Therefore this test needs to be in the “app” module.
- In the “app” module we must use JUnit 3, while in the “Core” module we can use JUnit 4
- In order to create an EditText we need an Android
Context. The easiest way to get one is to extendAndroidTestCase. - The name of the class is obtained by prefixing a qualifier “Android-“ to the name of the interface. This is much better than using the “-Impl” suffix (bleah!) or adding an “I-“ prefix to the interface name (also bleah!). So,
AndroidUnitDoctorViewmeans “the Android implementation ofUnitDoctorView”. - The interface
UnitDoctorViewlives in the UnitDoctorCore module, while its implementationAndroidUnitDoctorViewlives in the “app” module. This is correct: the interface talks exclusively in terms of the application domain language, so it belongs in the “core” module. Also, interfaces belong to their clients, not to their implementations, so it’s OK that they live near the clients.
Making the above test pass is easy:
public class AndroidUnitDoctorView implements UnitDoctorView {
  private TextView inputNumberField;

  public AndroidUnitDoctorView(TextView inputNumberField) {
    this.inputNumberField = inputNumberField;
    this.fromUnitField = fromUnitField;
    this.toUnitField = toUnitField;
    this.resultField = resultField;
  }

  @Override
  public double inputNumber() {
    String inputString = inputNumberField.getText().toString();
    return Double.valueOf(inputString);
  }
  // ...
}
Next test: “Format output message”
public class AndroidUnitDoctorViewTest extends AndroidTestCase {

  EditText inputNumberField;
  TextView fromUnitField;
  TextView toUnitField;
  TextView resultField;
  AndroidUnitDoctorView view;

  @Override
  public void setUp() throws Exception {
    super.setUp();
    inputNumberField = new EditText(getContext());
    fromUnitField = new TextView(getContext());
    toUnitField = new TextView(getContext());
    resultField = new TextView(getContext());
    view = new AndroidUnitDoctorView(inputNumberField, fromUnitField, toUnitField, resultF\
ield);
  }

  public void testSetsResult() {
    inputNumberField.setText("3.14159");
    fromUnitField.setText("A");
    toUnitField.setText("B");

    view.showResult(1.123456789);

    assertEquals("3.14 A = 1.12 B", resultField.getText());
  }
Notes
- We extended the constructor of
AndroidUnitDoctorViewto accept all the UI elements it needs to talk to - We moved creation of these elements to a shared
setUpmethod
Making this pass is still easy:
public class AndroidUnitDoctorView implements UnitDoctorView {
  private TextView inputNumberField;
  private TextView fromUnitField;
  private TextView toUnitField;
  private TextView resultField;

  public AndroidUnitDoctorView(TextView inputNumberField, TextView fromUnitField, TextView\
 toUnitField, TextView resultField) {
    this.inputNumberField = inputNumberField;
    this.fromUnitField = fromUnitField;
    this.toUnitField = toUnitField;
    this.resultField = resultField;
  }

  @Override
  public void showResult(double result) {
    String message =
        String.format("%.2f %s = %.2f %s",
            inputNumber(), fromUnit(), result, toUnit());
    resultField.setText(message);
  }

  @Override
  public String fromUnit() {
    return fromUnitField.getText().toString();
  }

  @Override
  public String toUnit() {
    return toUnitField.getText().toString();
  }
  // ...
We still have to implement UnitDoctorView.showConversionNotSupported(). We write a test (not shown) and make it pass (also not shown, but see [Appendix: Unit Doctor]{#appendix-unit-doctor} for complete code listings.)
Now we are ready to see the app running, right? Are we there yet?
7. The main partition
Not so fast… we still haven’t bound the UnitDoctor object and its view to the Android application. Even if we forget to do this, we’ll be reminded because:
- The acceptance tests still don’t pass
- We can run the application, but it does not convert anything yet.
We need a place to instantiate the UnitDoctor and its AndroidUnitDoctorView. This will be our “main function”. Our “main function” is the first place where the Android O.S. gives control to our own code. In practice this is the onCreate() of MainActivity.
Our “main function” has the following responsibilities:
- Instantiate the UnitDoctor and its view
- Call the UnitDoctor whenever the user changes something
package name.vaccari.matteo.unitdoctor;

import android.app.Activity;
import android.os.Bundle;
import android.text.*;
import android.view.*;
import android.widget.TextView;

import name.vaccari.matteo.unitdoctor.core.UnitDoctor;


public class MainActivity extends Activity implements TextWatcher {
  private UnitDoctor doctor;

  @Override
  protected void onCreate(Bundle savedInstanceState) {
    super.onCreate(savedInstanceState);
    setContentView(R.layout.activity_main);

    TextView inputNumberField = (TextView) findViewById(R.id.inputNumber);
    TextView fromUnitField = (TextView) findViewById(R.id.fromUnit);
    TextView toUnitField = (TextView) findViewById(R.id.toUnit);
    TextView resultField = (TextView) findViewById(R.id.result);
    AndroidUnitDoctorView view = new AndroidUnitDoctorView(inputNumberField, fromUnitField\
, toUnitField, resultField);

    doctor = new UnitDoctor(view);

    inputNumberField.addTextChangedListener(this);
    fromUnitField.addTextChangedListener(this);
    toUnitField.addTextChangedListener(this);
  }

  @Override
  public void beforeTextChanged(CharSequence s, int start, int count, int after) {
  }

  @Override
  public void onTextChanged(CharSequence s, int start, int before, int count) {
    doctor.convert();
  }

  @Override
  public void afterTextChanged(Editable s) {
  }
}
We let MainActivity implement TextWatcher so that the MainActivity itself will listen for any change in the text fields.
Now that we have implemented our “main” we run all the Android tests, including the acceptance tests. And… they still fail!!!
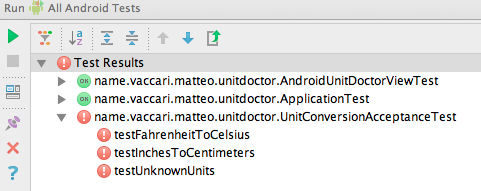
What happened? We have an exception:
It seems we forgot to take care of the case when the inputNumber field contains an empty string. Oh well, the fix is simple: first we write a new unit test for AndroidUnitDoctorView:
public void testDoesNotBreakWhenInputFieldIsEmpty() throws Exception {
  inputNumberField.setText("");
  assertEquals(0.0, view.inputNumber());
}
We add the necessary IF to the production code, and then run again all the tests. And … they all pass!!!
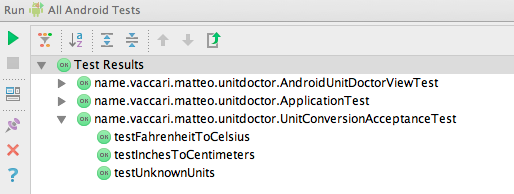
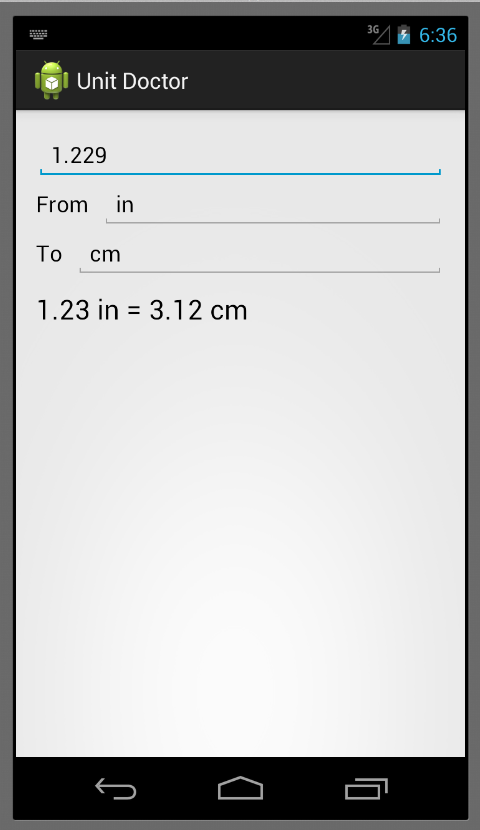
Now that the ATs are passing, we fire the app on the emulator… and it works.
8. The compile-time project structure
- Project UnitDoctor
- Module app
- Source folder “src/main/java”
- Class
AndroidUnitDoctorView - Class
MainActivity
- Class
- Source folder “src/androidTest/java”
- Class
AndroidUnitDoctorViewTest - Class
UnitConversionAcceptanceTest
- Class
- Source folder “src/main/res”
- Layout
activity_main.xml
- Layout
- Source folder “src/main/java”
- Module UnitDoctorCore
- Source folder “src/main/java”
- Class
UnitDoctor - Interface
UnitDoctorView
- Class
- Source folder “src/test/java”
- Class
UnitDoctorTest
- Class
- Source folder “src/main/java”
- Module app
9. What now?
We have started a project with tests. Now our options are open: we can improve the UI or we can improve the core functions of the application. The clean separation that we enforced on view and domain model means that we can add more conversion logic, with full confidence that the new logic will be “picked up” by the user interface.