2. The Prefix: For Before We Begin
Tmux is designed to let you work fast and efficiently, without getting in your way. To that end, it will ignore anything you type until you hit the <prefix> key combination, which by default is <ctrl>b.
The default <prefix> is kind of a problem. <ctrl>b is a weird key combination to hit with either hand. Even if you have already mapped <Caps Lock> to be an additional <ctrl> key10, it’s still taking your hands away from home row.
So, we’re going to jump right into setting up a tmux config file that will make your life better. We’ll be talking much more about your config file when we get to the Configuration is Fun chapter, but for now we’re going to make a couple of small changes to get you started. Tmux looks for configuration commands in a file called .tmux.conf in your user directory11. Using your favorite editor open this file, or create it if it doesn’t exist. We’re going to add two lines:
Save that, and start (or re-start) tmux. What we’ve just done is tell tmux that we want to use <ctrl>a for our prefix command, and we want to stop using <ctrl>b for anything. If you’re using <caps lock> as an extra <ctrl> key the advantages of this new prefix are obvious: the a key is right next to the <caps lock> key12
Again, we’ll get more into the syntax of config file stuff in a bit, but let’s take our new tmux config for a test drive.
A Tour of the Tmux
Let’s start with a quick dash into and out of tmux. I’m going to take it as read that you’ve already installed tmux, and you’re ready to go.
Start tmux with the tmux command in any terminal window. As we saw in the last chapter, the only visual clue that you’re in tmux is the bar across the bottom of the screen, which is nice and all, but doesn’t actually help us do anything. This is where we start using our <prefix> key. For starters, let’s split the screen in half. Enter the following command:
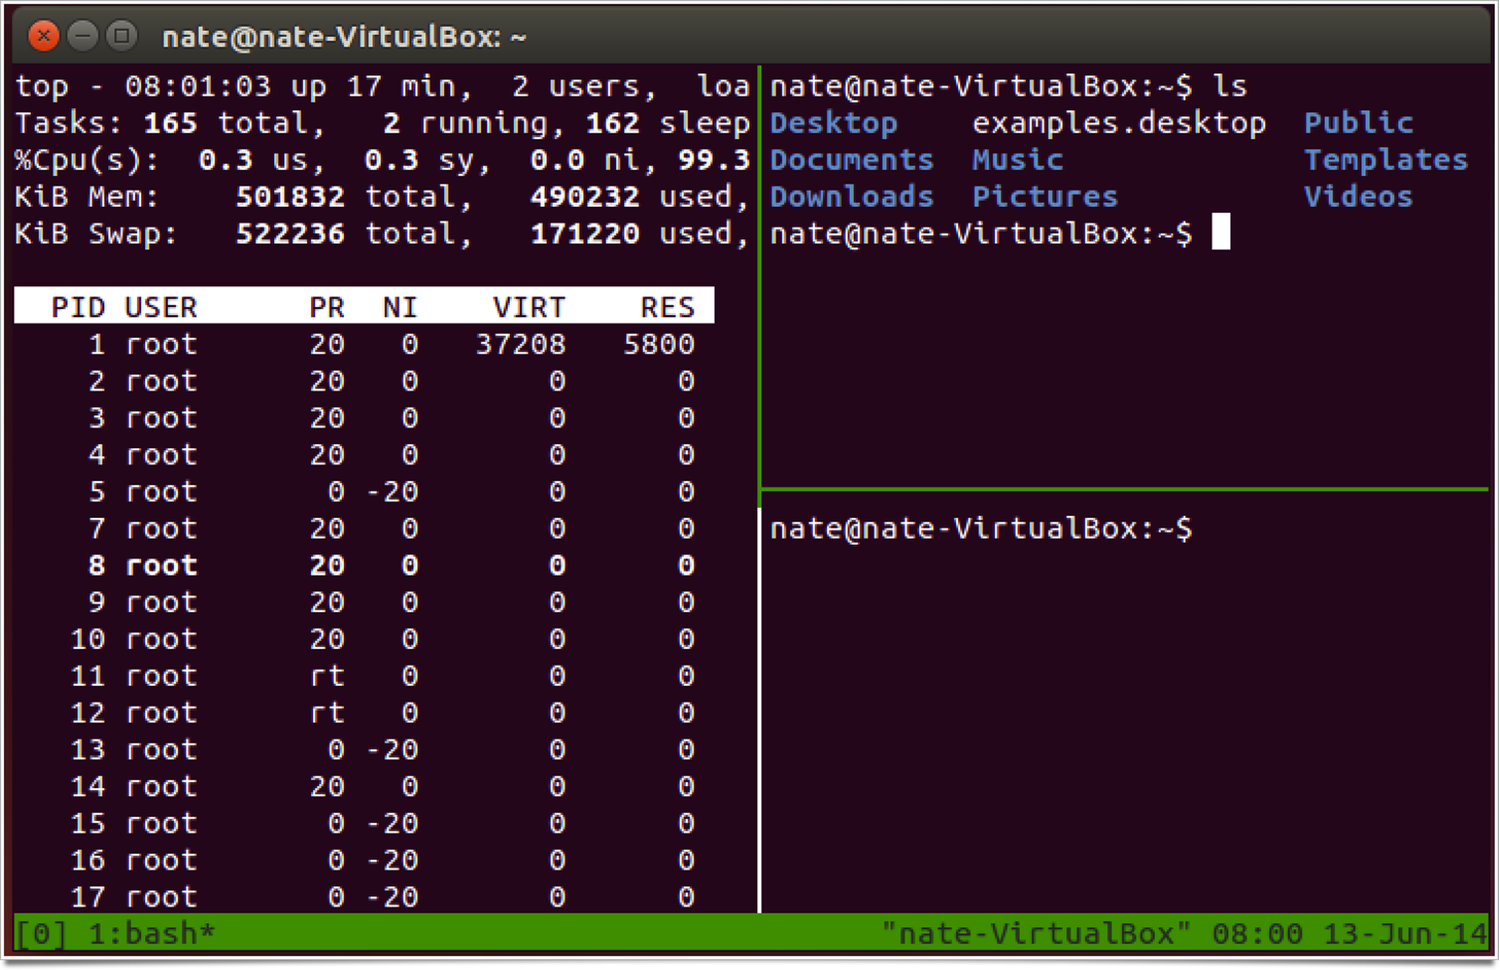
Your screen should now look a little something like this:

And even better, they are separate processes. Anything going on in the first pane is completely independent of anything going in the second pane. But first you need to be able to switch between the two. By default you do this by hitting <prefix> and then an arrow button. When you open a second pane your focus jumps to that pane, so press <prefix> <left arrow> to jump to the first pane. Just for fun run the top command in this window, then hit <prefix> <right arrow> to jump back to the second pane and run something there. Maybe just hit “ls”, it doesn’t matter. You’re on your way to tmux awesomeness.
But you can do more than two panes! While you’re in your second pane hit
And now you’ve got this:
And we can keep doing this theoretically forever. But that trick is getting old, we want to move on. Let’s say you want to leave your tmux session for a while. Maybe you’re using vim to write fan fiction at work. It doesn’t matter. To exit a session simply hit
And you’re back to the regular command line. The “d” in this case stands for “detach”, because that’s what you’re doing: detaching yourself from tmux. This is a handy trick, especially if you’re using tmux on a remote computer because you can detach, close your ssh session, then reconnect to the server and reattach to that session and everything will be right where you left it. But we’ll get into that more in the chapter on Sessions. For now we can see what sessions we have running by typing
At the command line. Unless you’ve been doing some exploring without me13 you should only have one session on that list:
0: 1 windows (created Fri Jun 13 07:43:25 2014) [80x23]
I love this because it gives you all kinds of information you don’t really need,14 but it does tell you the one thing you need to know right at the beginning: the name of the session. In this case it’s named “0”. Not the most inventive name, but what do you expect from tmux? Let’s re-attach to session 0 by entering the command
Again, don’t worry too much about what that means yet, we’ll talk about all this session stuff later. For now you should just see that you’re right back in the session we created earlier.
Okay, let’s end this chapter by closing down all these panes we created. For good or ill, this is a slightly key press intensive process by default. To kill the pane that currently has focus you press
And tmux will prompt you to make sure you actually want to do this. Press y to confirm and that pane will go away. Do this three times and when you kill the last pane you also kill the entire tmux session, and get dumped back out the plain ol’ command line.
Confirm the entire session is dead by typing “tmux ls” again. You should get the message
Meaning “tmux isn’t running right now, friend.”
Okay, we’ve done some good work here. Before we dive back in let’s define some terms.