2 Visio Interface and Layout
2.1 Clearing the Visio Interface
The Visio interface is configured for general use by people with little expertise and is cluttered up with toolbars that have no relevance to network engineers and making serious diagrams. Fortunately, Visio can easily be changed to give us more screen space. Getting the maximum amount of clean and uncluttered screen space will improve the way you work, make your drawing more visible and this makes it easier for you to use. This will improve your productivity and improve your sanity.
This chapter covers my suggestions for configuring the Visio interface.
Create a Document using the Detailed Network Diagram
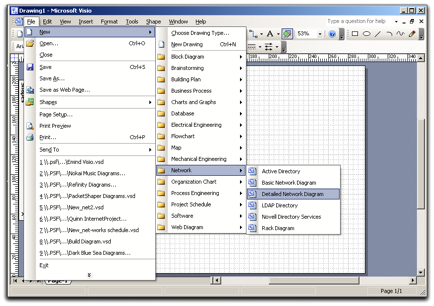
Creating a New Document
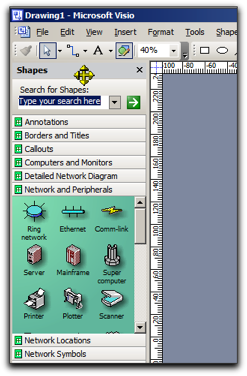
Lets start by creating a new document using the Detailed Network Diagram template so that we have a diagram open on the screen.
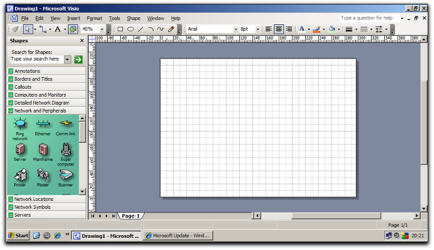
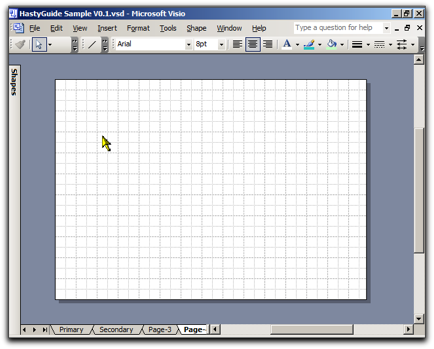
A New Document
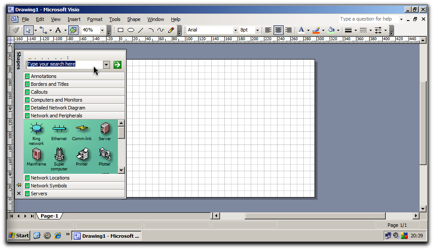
When you create a new document using the Detailed Network Diagram template, the default page looks like this. This view shows ALL the tools and makes for a cluttered interface. This can reduce your efficiency and encourage mistakes.
2.2 The Shape Window
The Shape Window takes up a lot of space in your Visio screen and stops you from working efficiently. A Networking person only needs to use the Shape Window a few times to get the shapes onto the page, and after that you don’t use it much at all.
Visio allows the Shape Window to the use to perform several different actions. It can ‘float’ freely within the Visio window, attach to the side, top or bottom, and auto-hide. All of these items give you the maximum amount of screen real estate which makes it easier and faster to get drawings finished.
Hiding the Shape Window
Hiding the Shape Window
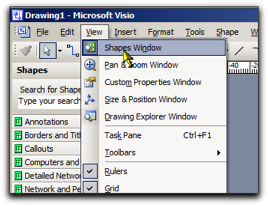
At the left of your screen, the Shape Window takes up quite a bit of space. For Network Diagrams, the Shape Window is only used occasionally and if we could ‘hide’ it away then this would provide more screen space and improve your efficiency.
You can hide the Shape Window from the Menu by using View, Shapes Window [Alt-V,N].
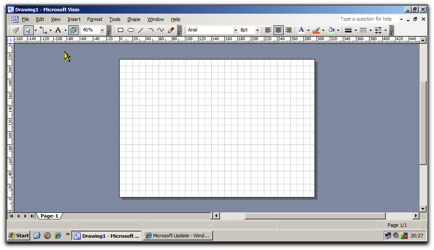
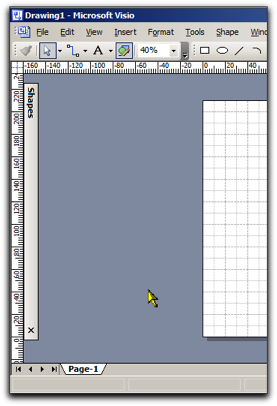
More Screen Real Estate
And now the screen is a lot less cluttered. The Shape Windows is a very useful tool, and showing / hiding the Palette isn’t very effective. You can unhide the Shape Window from the Menu by using View, Shapes Window [Alt-V,N].
There is a better way by floating the Shape Window
Floating the Shape Window
Goto Shape Window Title Bar
Click on the Title Bar of the Shape Windows and keep the mouse button down and drag the Window away from the left until it ‘floats’ free on the screen
Hold the Button and Drag the Shape Window off the Toolbar
Keep holding the mouse button down and then move it gently back to the left side and it will reattach. It will not take up the entire left side. It might take a couple of attempts to get this right.

Reattach to the Left side
Notice that the menu bar has now shifted to the left to provide feedback that the Shape Window is now ‘stuck’ there
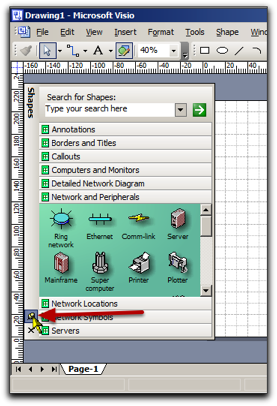
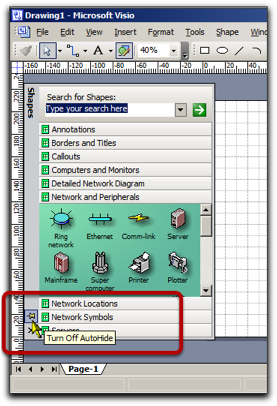
Use the Push Pin to Lock It Into Place
Look for the Push Pin in the bottom left corner of the screen, click it once to enable the Autohide function.
Enable Autohide
The Push Pin icon will change to show that the Shape Window is not longer ‘pinned’ in place.
And the Shape Window will ‘roll up’ to the left.
And now you have a lot more space on the screen. Anytime you want to access the Shape Window, you can click on the bar and it will open out to show you all the shapes that you are using.
Screen is less cluttered for better space usage
And then the window will rollup after a short delay.

|
Window Can Get Stuck OpenI find that the Visio Shape Window will occasionally get stuck in the ‘open’ position. As far I can tell, this is a ‘feature’ since it happens on every installation I have ever used. It that Visio occasionally gets confused and you can clear the status by clicking on the Pin twice, then drag a shape off the Shape Window, or by clicking into the Window. That usually works. |
2.3 Turn off the Rulers and Gridlines
Continuing with the theme of decluttering your screen we can make the interface more focussed.
Turn off the Rulers and Grid
Screen is cluttered by the Rulers and Grid lines
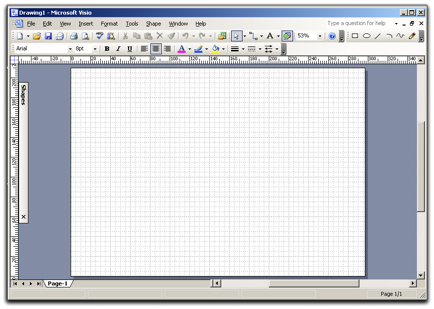
The rulers around the outside of the working space are not useful for network diagrams since we have no reason to measure the distance between items.. For most of the time, you should turn them off so that your screen is uncluttered. You can turn off the rulers by Pressing Alt-V, then R on the keyboard, or by selecting View, Rulers.
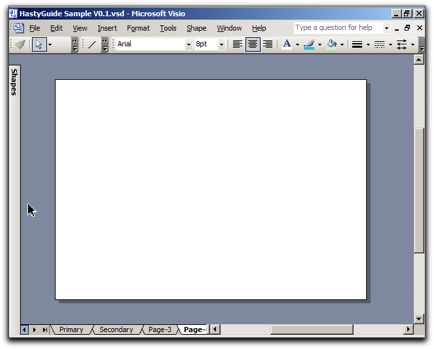
See, Much Better
With the Rulers removed the screen looks a lot less cluttered.
Removing the Grid Lines
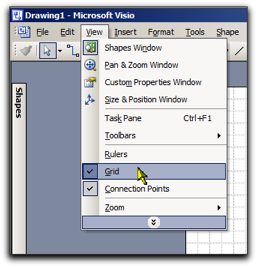
Select View, Grid [Alt-V,G] to disable the grid
More Conducive to Good Diagrams
Some people prefer to have the grid on the screen so that they can align the shapes. It is preferable to use the automatic alignment tools in Visio which is covered in a later section.
2.4 Removing Buttons from the Toolbar
Removing Buttons from the Toolbar
Do You Really Need All Of Those Buttons ?
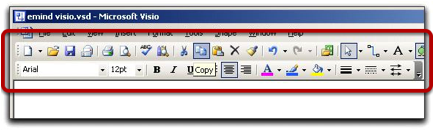
By default, Visio displays two tools bars across the top of the menu. These toolbars are consistent across all Microsoft Office products and are probably there to make you “feel nice” when you start Visio. But many of the buttons on the toolbar are never used, and more sophisticated users will use keyboard shortcuts instead of the buttons.
For example, the Copy button on the toolbar is never used since you should always use Ctrl-C. And Ctrl-V will always be used instead of Paste.
Use the Keyboard, Luke
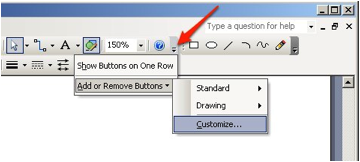
So we can edit the buttons on display, by customising the toolbar. One way is to click on the small arrow at the end of every toolbar.
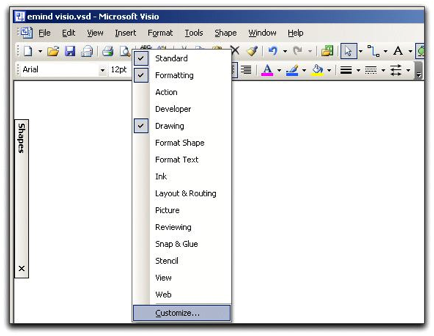
The other way is to right-cick on any toolbar and select the Customize option at the bottom:
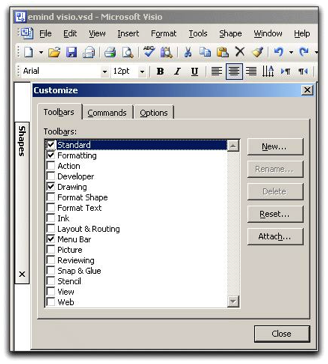
Selecting either of these options will then bring up the window shown here.
Now to edit the toolbar by “ripping” the buttons you don’t want into the window, that is, you need to click wiht the mouse, hold the mouse button down and drag the menu button off the Toolbar. I would recommend removing the button until you match the toolbars shown above. If you have certain functions that you like to use, then leave those in. These buttons are the just enough to fit in a single line on most screens.

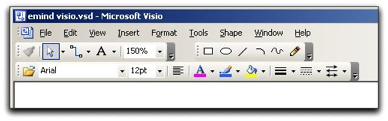
Much Better
Now we can move them side by side across the top so that we have more space for diagrams. The goal is to have only a single row of buttons to make more screen space.
2.5 Reset the Toolbar and Buttons to Default
You can always reset the toolbars back to their default settings if you aren’t happy with what you’ve done.
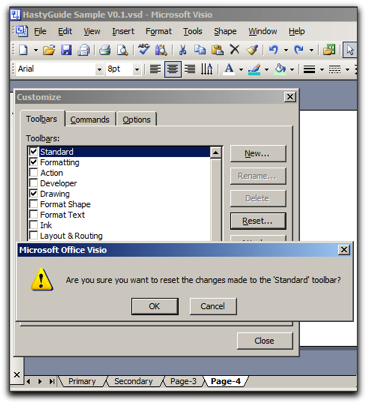
You can always get back to the defaults. Safe to play around.
If you delete a button and want to restore it, the simplest method is to reset the toolbar back to the default and then repeat the button deletion. By pressing the Reset button and select OK on the popup.
2.6 Turn off the Status Bar
Turn off the Status Bar

More clutter! It’s got to go.
A the bottom of your Visio screen is a status bar. It is not useful when doing network diagrams so lets remove it.
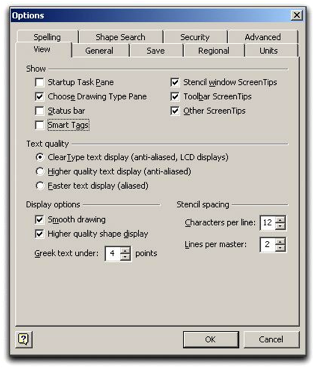
Go to Tools, Options, View and deselect the Status Bar box and click OK. The status bar will no longer appear at the bottom of the screen.