Chapter 1. Meet Keystone.js
This chapter will introduce Keystone.js along with its merits. We will cover how to install MongoDB and Node.js that are needed create the IncTicket application using Keystone.js and run it.
This chapter will cover the following points:
- Introduction to Keystone.js
- Installing MongoDB
- Installing Node.js
- Useful development and debugging tools
Why use Keystone.js
Before we begin installing and using Keystone.js, we will first look at why we use Keystone.js framework over other frameworks available online. Simply put, Keystone.js provides a standardized set of components that allow for fast and easy development of web applications that can be quickly developed, maintained and extended.
Keystone.js has a number of key features that makes it worth using including:
- Modularity - Keystone will configure express - the de facto web server for node.js - for you and connect to your MongoDB database using Mongoose, the leading ODM package.
- Auto-generated Admin UI - Whether you use it while you’re building out your application, or in production as a database content management system, Keystone’s Admin UI will save you time and make managing your data easy.
- Session Management - Keystone comes ready out of the box with session management and authentication features, including automatic encryption for password fields.
- Email Sending - Keystone makes it easy to set up, preview and send template-based emails for your application. It also integrates with Mandrill.
- Form Processing - Want to validate a form, upload an image, and update your database with a single line? Keystone can do that, based on the data models you’ve already defined.
- Database Fields - IDs, Strings, Booleans, Dates and Numbers are the building blocks of your database. Keystone builds on these with useful, real-world field types like name, email, password, address, image and relationship fields.
What is Keystone.js Best for?
Keystone.js is a generic content management framework, meaning that it can be used for developing a variety of web applications using Javascript. Because of its modular architecture and clean separation of various functionality, it is especially suitable for developing large-scale applications such as portals, forums, content management systems (CMS), e-commerce projects, RESTful Web services, and so on.
Keystone.js Versions
Keystone.js currently has two major versions available: 0.3.x and 0.4. At the time of writing this book, Version 0.3.x is the current generation of the framework and is in active development mode. Version 0.4 is work in progress, adopting the latest technologies and protocols, including Mongoose 4, elemental UI and core changes.
Installing MongoDB and Node.js
Let’s start by looking at the process of installing MongoDB on a windows workstation. MongoDB is an open source, document-oriented database that is designed to be both scalable and easy to work with. MongoDB stores data in JSON-like documents with dynamic schema instead of storing data in tables and rows like a relational database, for example MySQL.
Let’s install MongoDB database in a standalone mode. This is the quickest way to start a MongoDB server for the purpose of development.
How to install MongoDB
- Navigate to the downloads page on the MongoDB official website, http://www.mongodb.org/downloads.
- Click on the download link for the latest stable release Zip Archive under Windows 32-bit or 64-bit depending on your machine architecture.
Find the architecture of your machine by typing in the following command into the command prompt:
1 wmic os get osarchitecture
The output will be similar to:
1 OSArchiecture
2 64-bit
- Once the download completes, move the ZIP archive to the C:\ drive and extract it.
- Rename the extracted folder (mongodb-win32-xxx-a.b.c where a.b.c is the version number) to mongodb.
- Create the default database path (c:\data\db). This is the location where the database files used by mongodb will reside.
1 c:\>mkdir data\db
- To start the mongodb database, Open a CMD prompt window, and enter the following commands:
1 c:\> cd mongodb\bin
2 c:\mongodb\bin>mongod
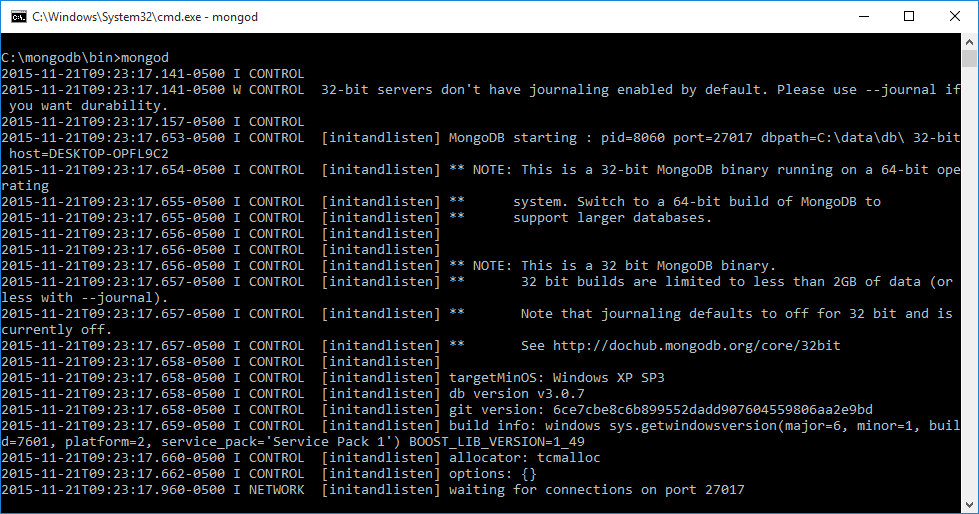
If you find the console log indicating [initandlisten] waiting for connections on port 27017, then the MongoDB server has started up correctly and is ready to accept connections from client.
How to install Node.js
Next, we will look at the process of installing Node.js on a windows workstation. Node.js is an open-source, cross-platform runtime environment for developing web applications. Node.js applications are written in JavaScript and can be run within the Node.js runtime on OS X, Microsoft Windows, Linux and a variety of other operating systems.
- Navigate to the downloads page on the Node.js official website, https://nodejs.org/en/download/.
- Click on the download link for the latest stable release .MSI under Windows 32-bit or 64-bit depending on your machine architecture.
Find the architecture of your machine by typing in the following command into the command prompt:
1 wmic os get osarchitecture
The output will be similar to:
1 OSArchiecture
2 64-bit
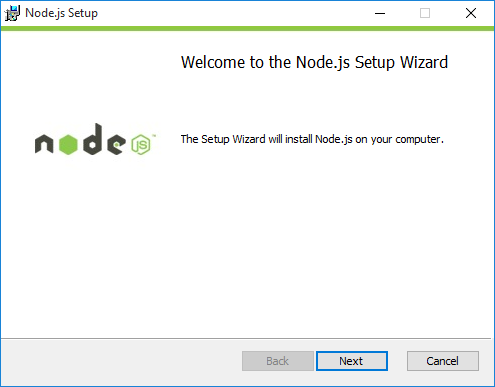
- Once the download is complete, double-click on the .msi file, which will launch the Node installer.
- Proceed through each step of the installation wizard.
Node.js Installer - At the custom setup screen during the installation, make sure that the wizard installs NPM (Node Package Manager) and configures the PATH environment variable along with installing the Node.js runtime. This should be enabled by default for all install.
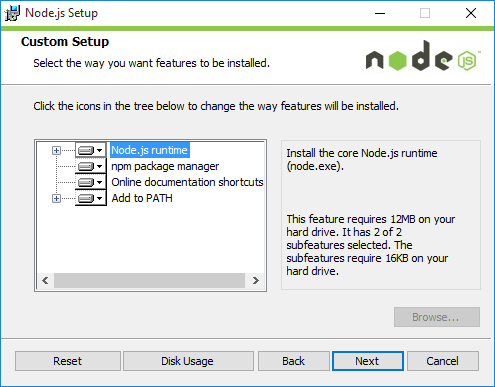
Node.js Installer
Once these steps have been completed, both Node and npm should be installed on your system.
Testing whether Node.js is installed properly
After going through the Node.js installation wizard, let’s run a quick test to ensure everything is working properly.
Run the following commands on a new command prompt window. You might need to open a new instance of command prompt for the PATH variable changes to take effect.
1 c:\> node --version
2     v4.2.2
3
4 c:\> npm --version
5     2.14.7
If the Node installation was successful, you will see the version number that was installed as an output on the screen as a response to running the above commands.
Useful Development and Debugging Tools.
I would like to introduce a couple of useful tools that make it really easy for us to develop Node.js and MongoDB based web applications. The first is Visual Studio Code, a code editor that offers excellent Node.js development and debugging support. It is free and available on multiple platforms - Linux, Mac OSX, and Windows. Visual Studio Code can be used for building and debugging modern web and cloud applications and includes great built-in support for C#, and Node.js development with TypeScript and JavaScript. It includes tooling for web technologies such as HTML, CSS, Less, Sass, and JSON. Code also integrates with package managers and repositories, and builds and other common tasks to make everyday workflows faster. Dowload Visual Studio Code from https://code.visualstudio.com/.
We can open up any folder on our filesystem using Visual Studio Code and get to editing files directly. Let us explore the GUI to get a better understanding of the various features.
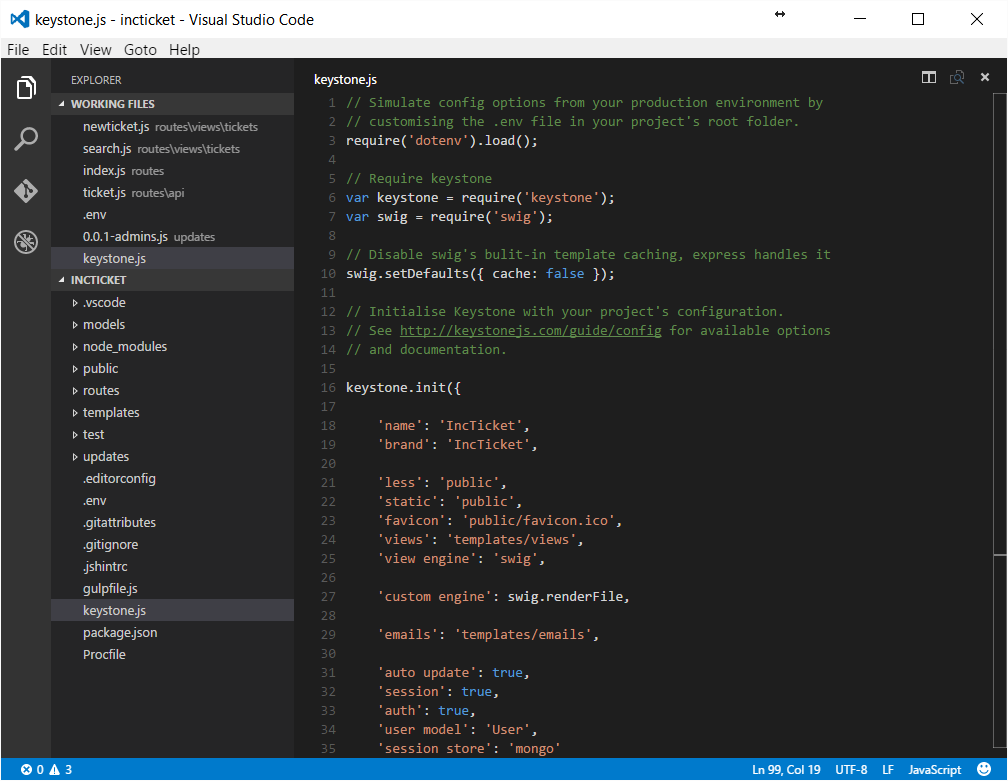
The left pane has two sections; the first one has icons for the file explorer, file search, git integration and for debugging. The screenshot shows the explorer pane open. Visual Studio Code lists the files that are currently being worked upon in the working files section. Below the working files section is the list of files in the current directory that can be opened up for editing. The main area of the editor shows the file being edited and allows for multiple files to be opened at a time. The editor also has a split view allowing us to look at two files side by side.
Debugging in Visual Studio Code is very easy. To start off, we need to define a launch configuration that can tell the editor about the starting point to our app and other configuration data. Below is the configuration setting we can use to debug Keystone.js
 1 {
 2 	"version": "0.2.0",
 3 	"configurations": [
 4 		{
 5 			"name": "Launch",
 6 			"type": "node",
 7 			"request": "launch",
 8 			"program": "${workspaceRoot}/keystone.js",
 9 			"stopOnEntry": false,
10 			"args": [],
11 			"cwd": "${workspaceRoot}",
12 			"runtimeExecutable": null,
13 			"runtimeArgs": [
14 				"--nolazy"
15 			],
16 			"env": {
17 				"NODE_ENV": "development"
18 			},
19 			"externalConsole": false,
20 			"sourceMaps": false,
21 			"outDir": null
22 		},
23 		{
24 			"name": "Attach",
25 			"type": "node",
26 			"request": "attach",
27 			"port": 5858,
28 			"sourceMaps": false,
29 			"outDir": null,
30 			"localRoot": "${workspaceRoot}",
31 			"remoteRoot": null
32 		}
33 	]
34 }
Set the configuration information by clicking on the debug icon on the left pane and then click the gear icon on the top bar. Once the configuration information is set, hit F5 to launch the application in debug mode.
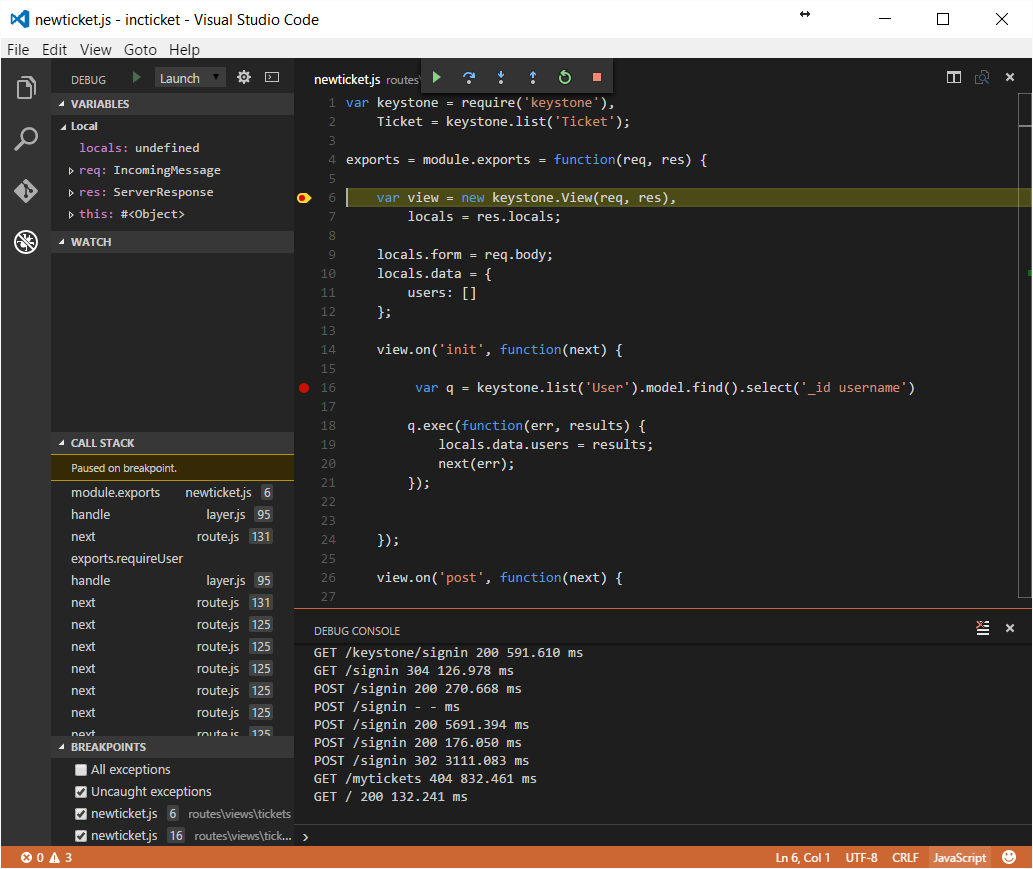
As shown above, we can set breakpoints in code, add variables to watch and inspect the call stack. At the bottom of the editor is the node console where we can see any console interactions like console.log in our application. The node console also allows us to inspect variables inline.
Get more information on in-depth features of Visual Studio Code at https://code.visualstudio.com/docs.
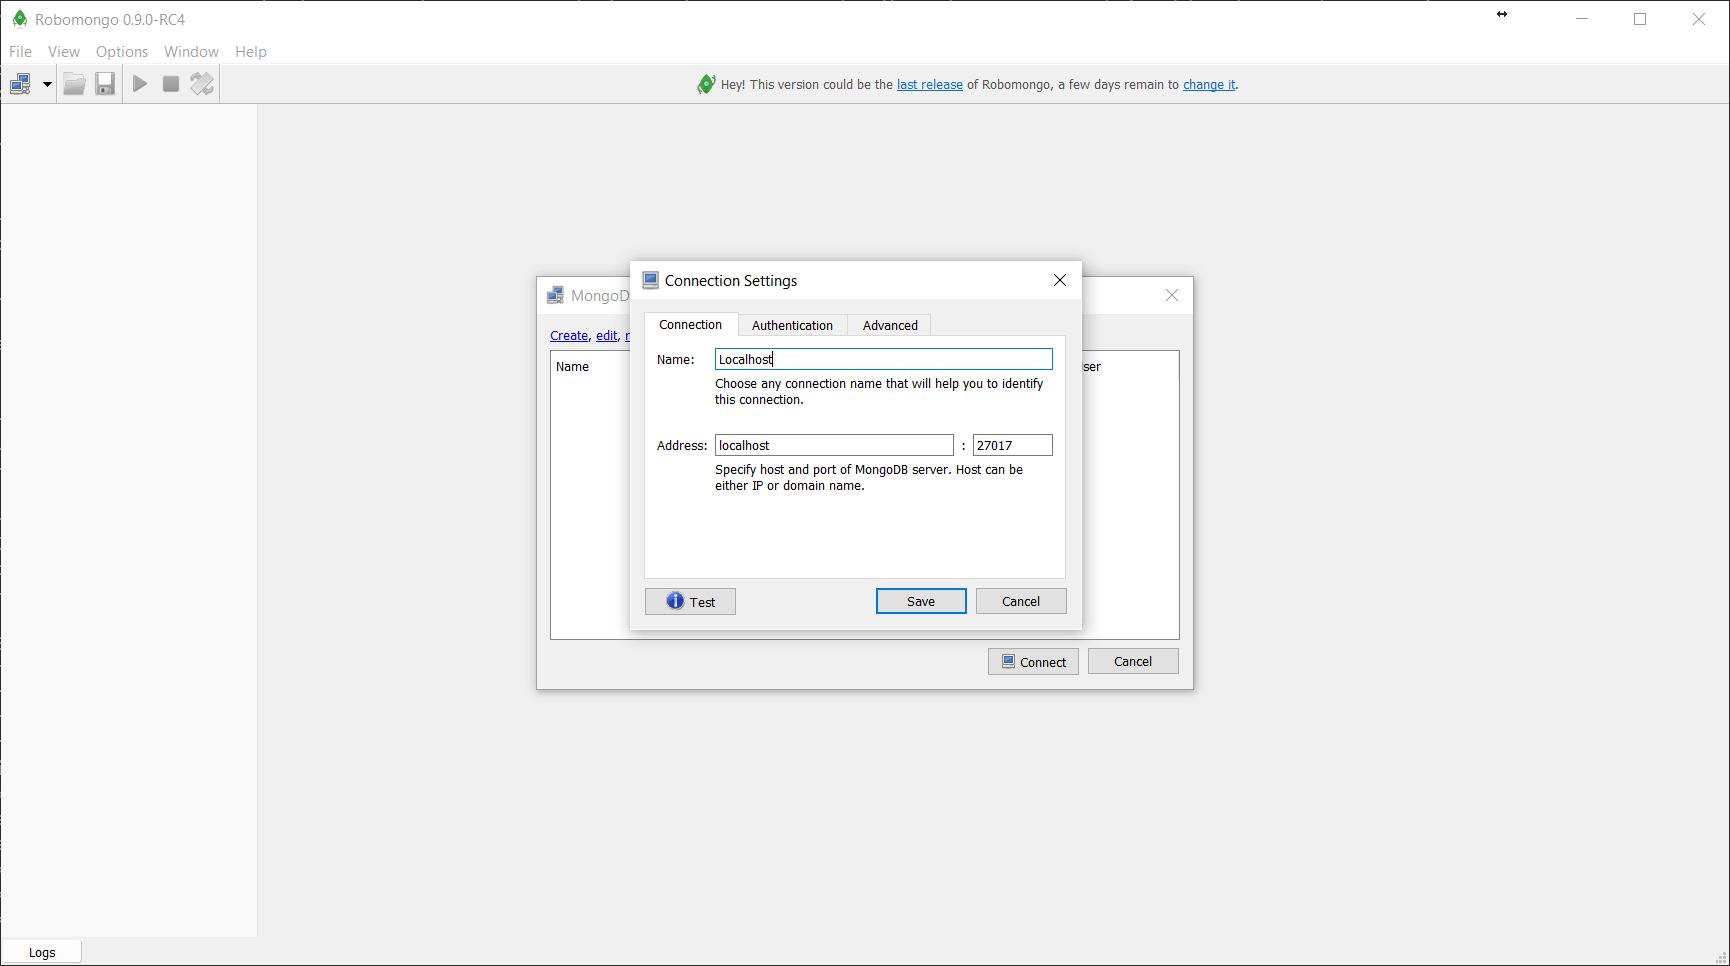
The next tool is Robomongo. Robomongo is a desktop application that allows us to manage MongoDB databases. Robomongo runs on Mac OS X, Windows, and Linux and is free!. It allows you to create new databases and view collections and to run queries. It has all the features that the native MongoDB shell provides such as multiple connections, multiple results, and autocompletion. Download and install Robomongo from http://robomongo.org.
If you have MongoDB running locally, we can create a new connection as shown below:
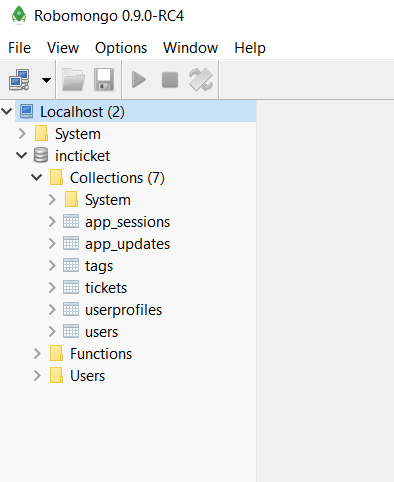
After connecting to the instance, we can browse all the collections using the sidebar.
We can issue queries against our MongoDB and collections using the query bar and visually inspect the returned documents.

Summary
We have reached the end of the second chapter and we’ve covered the necessary requirements to begin building the IncTicket application. Onwards!