Chapter 3: Editing Lisp
Because Lisp is a very interactive language in order to make full use of it, you need an interactive IDE. Users of the commercial Lisps(acl and LispWorks) can enjoy full feature IDEs, but in the Open Source world we are currently limited. The best options are Emacs and Vim with Slime and slimv(Superior Lisp interaction mode for Emacs/Superior Lisp interaction mode for Vim) or the new Emacs mode Sly(a fork of Slime with many improvements). A port of Slime is in progress for Atom, but it isn’t very feature complete yet and it’s github page claims it’s still in Beta. If you don’t want to use Emacs or Vim you might find this project interesting. Other than that there is the CCL IDE, but it only works on OS X. The last and least effective option is to write it like you would any other popular language. Write code in any editor you chose, compile manually, run and edit again. This option essentially nullifies a good chunk of Lisps advantages, at that point you might as well be writing in Blub. If you go with this option you will still have the power of the Common Lisp language, but not of the Common Lisp system. Lisp code wants to be developed interactively. Never the less, if you are a beginner and already use an editor that doesn’t have an interactive lisp mode and you don’t want to switch just yet, you can choose this option, at least for now. Eventually though you’ll want to use the best tools available.
I highly recommend Emacs though. In this chapter I’ll introduce it and Slime, as well as spend a bit of time discussing Sly as an alternative option. If Emacs isn’t your thing you could skip this chapter.
Emacs
More than a mere text editor, Emacs is a rabbit hole of power. On the pyramid of editors, Emacs stands on top as the One True Editor. And the reason for that is very simple, having been born in the Lisp world it embodies the idea that a system should be completely modifiable, extensible and inspectable. Pretty much all of Emacs can be modified while it’s running, it’s self-documenting, you can pull up the documentation for every key binding, every interactive command and you can jump to the source of pretty much every part of the system and edit it(at least the parts written on Lisp, the core of Emacs is in C). If there was ever a tool designed to adapt to you, rather than you to it, it’s Emacs. Throughout the decades millions of lines of Emacs Lisp code has been written in Emacs extensions. Everything from simple syntax high-lighting modes for programming languages to a full-blown text based web browser, email client, IRC client and who knows what else. People sometimes joke that Emacs is an OS and not an editor, but that joke is at least partially true. Other than common lisp itself, Emacs is one of the few bits of 80s Lisp Machines tech that survived into the modern world.
Getting started
TBW: Installation on various platforms
A quick note about notation: Ctrl and Alt is usually written as C and M in most Emacs tutorials, so Ctrl-s would be written as C-s and Alt-x would be written as M-x. The reason M is used is because on old systems Alt used to be called Meta and all emacs literature still calls it that. When you read the word Meta anywhere in relation to Emacs it simply means Alt. Sometimes to trigger a command more than one combination is used, for example saving a file is done with the key chord C-x C-s, which would mean you press the Ctrl key at the same time as x, and then you press Ctrl at the same time as s, alternatively, you can hold down Ctrl and then press x followed by s. This is a different command than C-x s in which case you type C-x followed by s. Emacs includes an interactive tutorial that will get you started with the most common editing commands as well as most of the relevant terminology. This is a prerequisite for the rest of the chapter. Once you start Emacs you can access it by typing C-h t(you press C-h, let go and then you type t). Spend some time with it and come back to this book. In the next section I’ll show you how to customize Emacs.
A few more notes
As you’ve noticed in the tutorial the way you move around a file in Emacs is with the C-p, C-n, C-b and C-f keys. These do the same things as the arrow keys. It’s a trade-off, unlike the arrow keys they are key combinations rather than a single stroke, but unlike the arrow keys they are on the keyboard itself rather than on the side, in other words you don’t have to remove your hand from the typing position. Touch-typists will find the emacs key-bindings faster, especially with a little practice. Some users even disable the arrow keys. What I did wasn’t as dramatic. I simply put a sticky note above my arrow keys and practiced using the emacs keys.
Another point to make is that the key-chords are in fact a bit awkward. Pressing Ctrl all the time could hurt your pinkie finger. There are two solutions to this problem. One is to rebind Caps Lock to Ctrl. Many emacs users do this since Caps Lock is closer to the home row of the keyboard and it makes tying key chords much easier and doesn’t stress the pinkie as much. The other option is to swap the Alt and Ctrl keys. On the keyboards on which emacs was developed the Ctrl keys were on either side of the Space key and the user could press them with their thumbs rather than use their pinkies. This is the better option in my opinion. My own personal set up binds the Alt keys to Ctrl and I use the Win keys(with the Windows logo) to Alt. This is done in the KDE keyboard settings(the desktop environment I use).
TBW: Write an explanation on how to do these things for various platforms
A basic Emacs setup
The entry point for most Emacs customization is the file ~/.emacs. I’ve created an example .emacs file for your use based on my own customizations. You can find the file here. I’ve included it below. It’s heavily commented and I urge you to read it carefully before you decide to use it. It’s part of this tutorial:
  1 ;;;;;;;;;;;;;;;;;;;;;;;;;;;;;;;;;;;;;;;;;;;;;;;;;;;;;;;;;;;;;;;;;;;;;;;;;;;;;;;
  2 ;; .emacs                                                                    ;;
  3 ;; Author: Pavel Penev                                                       ;;
  4 ;; Licence: MIT                                                              ;;
  5 ;;;;;;;;;;;;;;;;;;;;;;;;;;;;;;;;;;;;;;;;;;;;;;;;;;;;;;;;;;;;;;;;;;;;;;;;;;;;;;;
  6
  7 ;; This file describes a basic Emacs setup. Feel free to modify it to
  8 ;; your liking.
  9
 10 ;;;;;;;;;;;;;;;;;;;;;;;;;;;;;;;;;;;;;;;;;;;;;;;;;;;;;;;;;;;;;;;;;;;;;;;;;;;;;;;
 11 ;; Section I: Generic settings                                               ;;
 12 ;;;;;;;;;;;;;;;;;;;;;;;;;;;;;;;;;;;;;;;;;;;;;;;;;;;;;;;;;;;;;;;;;;;;;;;;;;;;;;;
 13
 14 ;; The following 3 lines disable unnecessary GUI elements, in this case the
 15 ;; menu bar, the tool bar and the scroll bar. If you wish, you can comment out
 16 ;; the menu-bar and keep it, but eventually I recommend you disable it.
 17
 18 (if (fboundp 'menu-bar-mode) (menu-bar-mode -1))
 19 (if (fboundp 'tool-bar-mode) (tool-bar-mode -1))
 20 (if (fboundp 'scroll-bar-mode) (scroll-bar-mode -1))
 21
 22 ;; Sometimes the mini-buffer becomes multi-line, and it can be a bit annoying as
 23 ;; you type in it. This makes it stay one line.
 24
 25 (setq resize-mini-windows nil)
 26
 27 ;; We don't need the Emacs splash screen. You can keep it on if you're into
 28 ;; that sort of thing
 29
 30 (setq inhibit-splash-screen t)
 31
 32 ;;; global-linum-mode adds line numbers to all open windows, In my opinion
 33 ;;; there is no reason not to have this enabled.
 34
 35 (global-linum-mode)
 36
 37 ;;; Emacs comes with a built-in text based browser. Since I use the browse-url
 38 ;;; function most often to browse documentation, I've set it to eww, the Emacs
 39 ;;; Web Browser. It works well for that purpose. If you would prefer to use a
 40 ;;; graphical browser, you can change this line.
 41
 42 (setq browse-url-browser-function 'eww-browse-url)
 43
 44 ;;; I prefer to make the default font slightly smaller.
 45
 46 (set-face-attribute 'default nil :height 90)
 47
 48 ;; Show matching parentecies globaly.
 49
 50 (show-paren-mode 1)
 51
 52 ;; Use UTF-8 by default
 53 (set-language-environment "UTF-8")
 54
 55 ;; Don't ring the bell. It saves some annoyance
 56
 57 (setq ring-bell-function 'ignore)
 58
 59 ;; If you're one of the heathens who prefers tabs over spaces, you should
 60 ;; remove the following line. It makes indentation use spaces.
 61 (setq-default indent-tabs-mode nil)
 62
 63 ;;; A simple backup setup. Makes sure I don't foo~ and #.foo files in
 64 ;;; directories with files you edit.
 65
 66 (setq
 67  backup-by-copying t      ; don't clobber symlinks-
 68  backup-directory-alist
 69  '(("." . "~/.saves"))    ; don't litter my fs tree
 70  auto-save-file-name-transforms
 71  `((".*" ,temporary-file-directory t))
 72  delete-old-versions t
 73  kept-new-versions 6
 74  kept-old-versions 2
 75  version-control t)       ; use versioned backups
 76
 77
 78 ;; Set up emacs server. This allows you to run emacs in the background and
 79 ;; connect to it with emacs client. It reduces startup time significantly. If
 80 ;; the server is not running, it starts it.
 81
 82 (load "server")
 83
 84 (unless (server-running-p)
 85   (server-start))
 86
 87 ;;; ido-mode, or Interactively DO mode, adds lots of improvements when working
 88 ;;; with buffers of files. You can read more about it at:
 89 ;;; https://www.emacswiki.org/emacs-test/InteractivelyDoThings
 90 (require 'ido)
 91 (ido-mode t)
 92
 93 ;;;;;;;;;;;;;;;;;;;;;;;;;;;;;;;;;;;;;;;;;;;;;;;;;;;;;;;;;;;;;;;;;;;;;;;;;;;;;;;
 94 ;; Section II: Packages                                                      ;;
 95 ;;;;;;;;;;;;;;;;;;;;;;;;;;;;;;;;;;;;;;;;;;;;;;;;;;;;;;;;;;;;;;;;;;;;;;;;;;;;;;;
 96
 97 ;; Elpa, the default package repository for emacs is fairly conservative, so
 98 ;; we'll add the melpa and marbaraie repositories
 99 (require 'package)
100 (add-to-list 'package-archives
101 	     '("marmalade" . "http://marmalade-repo.org/packages/"))
102
103 (add-to-list 'package-archives
104              '("melpa" . "http://melpa.org/packages/") t)
105
106 ;; You can install packages by typing M-x package-install <package-name>. I
107 ;; recomend you install the following packages: smex, which adds an improved
108 ;; version of M-x. I highly recomend this. You can read more about smex at:
109 ;; https://github.com/nonsequitur/smex/
110
111 ;; Another ofthen used mode is magit, which is an interface to git, allowing
112 ;; you to manage your repos through emacs. You can read more about it at:
113 ;; http://magit.vc/ It is one of the most useful modes available for emacs
114
115 ;;;;;;;;;;;;;;;;;;;;;;;;;;;;;;;;;;;;;;;;;;;;;;;;;;;;;;;;;;;;;;;;;;;;;;;;;;;;;;;
116 ;; Section III: Global Key Bindings                                          ;;
117 ;;;;;;;;;;;;;;;;;;;;;;;;;;;;;;;;;;;;;;;;;;;;;;;;;;;;;;;;;;;;;;;;;;;;;;;;;;;;;;;
118
119 ;; By default C-x o is bound to 'other window, but I find I use it much more
120 ;; ofther than open-line, which is bound to C-o, so I swap their definitions
121 (global-set-key (kbd "C-o") 'other-window)
122 (global-set-key (kbd "C-x o") 'open-line)
123
124 ;; M-0..3 are bound to 'digit-argument. To be used with C-u. I don't use them
125 ;; ofthen, so I prefer to rebind them to the window commands, since M-1 is
126 ;; easyer to type than C-x 1.
127 (global-set-key (kbd "M-1") 'delete-other-windows)
128 (global-set-key (kbd "M-2") 'split-window-vertically)
129 (global-set-key (kbd "M-3") 'split-window-horizontally)
130 (global-set-key (kbd "M-0") 'delete-window)
131
132 ;; Set the enter key to newline-and-indent which inserts a new line and then
133 ;; indents according to the major mode. This is very convenient.
134 (global-set-key (kbd "<RET>") 'newline-and-indent)
135
136 ;; If you have installed smex, you can uncomment the following lines. To
137 ;; activate it without restarting Emacs select the lines and type M-x eval-regio\
138 n:
139
140 ;; (require 'smex)
141
142 ;; (global-set-key (kbd "M-x") 'smex)
143 ;; (global-set-key (kbd "M-X") 'smex-major-mode-commands)
144 ;; (global-set-key (kbd "C-c C-c M-x") 'execute-extended-command)
Slime
The Superior Lisp Interaction Mode for Emacs is the most widely used IDE for Common Lisp development. It augments Emacs with an editing mode, a REPL, a debugger and an object inspector, as well as referencing facility allowing you to jump to various points in Lisp source code.
Installation
The easiest way to install slime is to use Quicklisp and Roswell. From the command line do this:
1 $ ros -Q -e '(ql:quickload :quicklisp-slime-helper)' -q
This line will tell roswell to start Lisp with Quicklisp loaded and evaluate the expression (ql:quickload :quicklisp-slime-helper) which installs Slime and then quit.
Slime has two parts, The emacs part called slime and the Common Lisp part called swank. In order for Emacs to know where slime is, we must add the following line to our .emacs file:
1 (load (expand-file-name "~/.roswell/impls/ALL/ALL/quicklisp/slime-helper.el"))
Now we must tell slime how to start a Lisp repl with the following code
1 (setf slime-lisp-implementations
2       `((sbcl ("ros" "-Q" "-l" "~/.sbclrc" -L "sbcl" "run"))
3         (ccl  ("ros" "-Q" "-l" "~/.ccl-init.lisp" "-L" "ccl-bin" "run"))))
4
5 (setf slime-default-lisp 'sbcl)
6
7 (setq slime-net-coding-system 'utf-8-unix)
The first form is a list of installed Lisp implementations and how to start them. By default Roswell doesn’t load the implementation init files(.sbclrc and .ccl-init.lisp in this case) so we include them with the -l options. With the -L option we specify which implementation we want to start. The second form sets SBCL as the default. When you start slime this is the one that will be used. In order to start slime with a different implementation you could do M-- M-x slime ccl and a repl running ccl will start up. The last form tells slime to use utf-8 when it’s communicating with the Lisp process.
Next Let’s modify the way buffers with Lisp code behave:
 1 (defun lisp-hook-fn ()
 2   (interactive)
 3   ;; Start slime mode
 4   (slime-mode)
 5   ;; Some useful key-bindings
 6   (local-set-key [tab] 'slime-complete-symbol)
 7   (local-set-key (kbd "M-q") 'slime-reindent-defun)
 8   ;; We set the indent function. common-lisp-indent-function
 9   ;; will indent our code the right way
10   (set (make-local-variable lisp-indent-function) 'common-lisp-indent-function)
11   ;; We tell slime to not load failed compiled code
12   (setq slime-load-failed-fasl 'never))
13
14 ;; Finally we tell lisp-mode to run our function on startup
15 (add-hook 'lisp-mode-hook 'lisp-hook-fn)
The function lisp-hook-fn is set up to be called whenever lisp-mode is activated in emacs, it starts slime-mode sets up a few key bindings and alters a few settings. This code makes the Tab key use the slime auto-completion function instead of the default one. It also binds M-q to the lisp-indent-function Whenever you type M-q while the point is in a lisp block of code it will re-indent it according to the lisp convention. For that reason we set the lisp-indent-function to common-lisp-indent-function. We also tell slime to never load code that failed compilation.
The Slime repl
The Slime repl is one of it’s most central features. You might have noticed that SBCL and CCL both have very simple repls, and are generally unsuited for interactive work. The slime repl on the other hand is much more feature complete. It starts up automatically when you type M-x slime.
This is how it looks like when you start it:
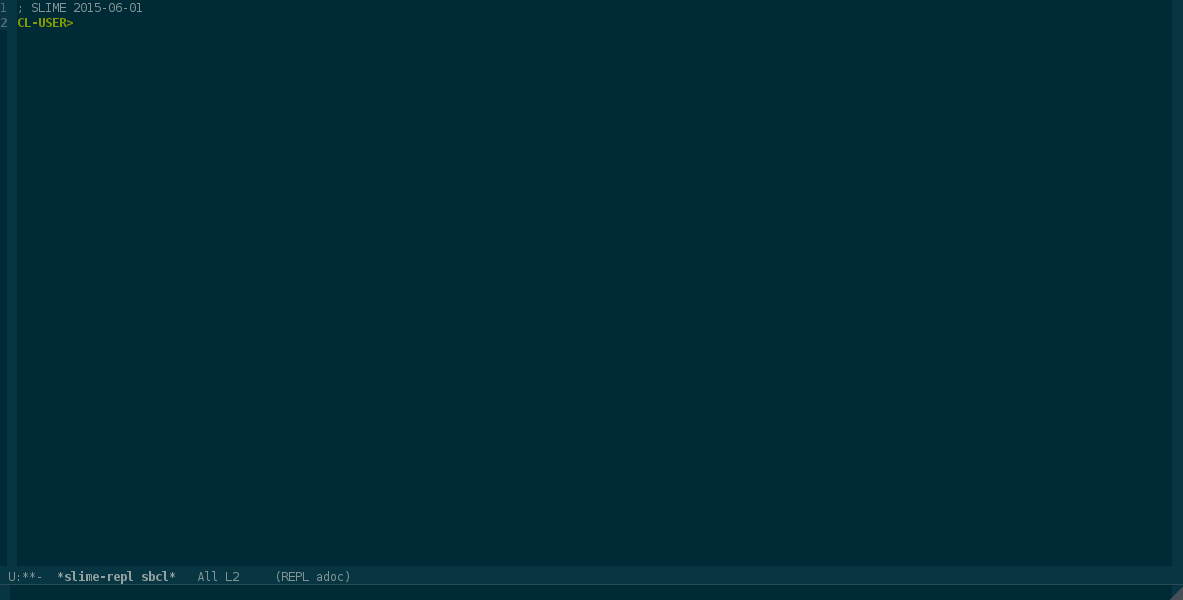
A new buffer called *slime-repl sbcl* is created where the repl lives. Notice the repl prompt is CL-USER>. This signifies that by default you are in the CL-USER package. If you change the package, for example with in-package the prompt will change to reflect that.
In the repl you have features like auto-completion bound to the Tab character, and a full history. You can move up and down the history with the arrow keys or with M-p and M-n. You can also search the history up and down with M-s and M-r which function very similarly to the Emacs built-in commands C-s and C-r.
Slime also displays the argument lists for functions and macros in the mini-buffer, for example if you type (mapcar in the repl, the mini-buffer will display (mapcar function list &rest more-lists) telling you how to use the function.
Slime also includes a bunch of built in shortcuts you can activate by pressing the ,(comma) key, when you press it you will be prompted in the mini-buffer for a command. One such a command is !p which sets the current package, for example , !p foo-package will set the current package to foo-package. Note that the package must be defined. You also get auto-complete with Tab in this prompt. For a complete list of commands see here
Editing Lisp code
Paredit
TBW
Navigation
Slime includes a function to go to the definition of a symbol and edit it called slime-edit-definition, by default it’s bound to M-.. You can use it as many times as you wish, and when you are done you can go back to the previous location you were editing with the command slime-pop-find-definition-stack bound to M-,.
Compilation and evaluation.
When you are editing lisp code you would want to run your code. There are several ways to do this. The first one you already know about, you can use ql:quickload to load your project into Lisp, but while you’re editing code you’ll want to re-compile individual files or even individual code blocks. Slime includes functions to help you with this.
First let’s talk briefly about running lisp code. There are two ways you can run lisp code, the first is to evaluate it, the second is to compile and load it. When you tell slime to evaluate your code it sends it to Lisp and calls eval on it. Depending on how eval is implemented your implementation might directly interpret the code, or it might compile it first. For example by default SBCL compiles all code unless you enable the interpreter explicitly. When you tell slime to compile your code it sends it to Lisp and runs compile on it.
Here are some of the available evaluation commands:
-
C-x C-ewill evaluate the last expression before the point and display the result in the mini-buffer. -
C-M-xwill evaluate the top-level form where the point is in, for example if you’re in the middle of editing adefunform it will evaluate it. Again the result will be displayed in the mini-buffer. -
C-c C-rwill do the same to a selected region.
Generally you would use these commands if you want to see the result of evaluation in the mini-buffer. For example evaluating (+ 1 2) would display 3, but compiling it will simply tell you that compilation was finished and not the result.
Additionally another useful evaluation command is C-c C-j it evaluates the last expression by copying it to the repl and displaying the result there.
Compilation works slightly differently. When your code is compiled and run, you will only see a “compilation finished” message as well as a summary of how many notes, warnings and errors you got.
The most common compilation commands are:
-
C-c C-ccompiled the top-level form. It works similarly toC-M-x. You’ll be using this one the most often when working with lisp code. -
C-c C-kcompiles the whole file.
Generally when you’re working with lisp code you will be recompiling functions as you edit them and testing the results in the repl. When you compile code you get the result of the compilation printed in the *slime-compilation* buffer. This is where all of the compiler notes(errors and warnings) will be displayed. Let’s look at an example, suppose I have a file with the following lisp intentionally wrong function:
1 (defun foo (foo)
2   (let (nil)))
Now I put the point anywhere in that form and type C-c C-c the *slime-compilation* buffer will pop-up with the following contents:
 1 cd /home/pav/example/
 2 1 compiler notes:
 3
 4 foo.lisp:1:1:
 5   style-warning:
 6     The variable FOO is defined but never used.
 7     --> PROGN SB-IMPL::%DEFUN SB-IMPL::%DEFUN SB-INT:NAMED-LAMBDA
 8     ==>
 9       #'(SB-INT:NAMED-LAMBDA FOO
10             (FOO)
11           (BLOCK FOO
12             (LET (())
13               )))
14
15
16 foo.lisp:2:3:
17   error: NIL names a defined constant, and cannot be used as a local variable.
18
19 Compilation failed.
We see 1 style warning and 1 error. The style warning states that the variable foo is never used even though we defined it. This is valid code, but could be a sign of a bug. The error states that the symbol NIL cannot be used as a local variable in let. Notice the warnings and notes also include the file name and the position, those lines are links to the file position where the note occurred. For example you could click with the mouse on them and they will bring you to the offending code.
The compilation buffer includes custom keyboard commands to navigate it. The commands M-p and M-n will go through all of the notes. If you typed C-c C-c in this buffer it will bring you to the offending code as if you clicked on the link. Notice also in the code buffer that the wrong code is marked with colored underlines: Yellow for a warning and red for an error. Once you’re done with the compiler buffer you can quit it with the q key.
The Slime debugger
TBW
The Slime inspector
Slime includes an inspector witch which you can inspect values in your running system. Suppose we have the following code:
1 (defparameter *list* (list "Hello" 'world))
Our list contains a string and a symbol. If you compiled this code you can inspect the variable by moving the point to the name *list* and typing C-c I. The inspector buffer will pop up and it will look something like this:
1 #<CONS {10037829B7}>
2 --------------------
3 A proper list:
4 0: "Hello"
5 1: WORLD
This tells you that the object you’re inspecting is a cons cell and is a proper list, followed by it’s contents. You can use the Tab key to move between the inspectable values in the buffer and descent into them. For example if you type Tab the point will move to the value "Hello" if you now type Return you will inspect that value. It will look like this:
 1 #<(SIMPLE-ARRAY CHARACTER (5)) {100378293F}>
 2 --------------------
 3 Dimensions: (5)
 4 Element type: CHARACTER
 5 Total size: 5
 6 Adjustable: NIL
 7 Fill pointer: NIL
 8 Contents:
 9 0: #\H
10 1: #\e
11 2: #\l
12 3: #\l
13 4: #\o
This tells us that the string is a simple array of characters, it has 5 elements and we can do the same again. Type Tab until the point is on the H character and press Return:
1 #<STANDARD-CHAR {4849}>
2 --------------------
3 Char code: 72
4 Lower cased: #\h
5 Upper cased: @2=#\H
You can go on like this, but how do you go back? The l key will pop you back up. Pressing it a couple of times will get you back to the inspector for *list*. You can quit the inspector with q.
### Other useful information
Here are some other useful features you might want to know about:
-
C-c C-d dwill describe a symbol. A buffer with a description of the symbol will pop-up. -
C-c C-d fwill do the same but for functions. -
C-c C-d awill runslime-apropos, it will search the defined symbols with the string you supply it. -
C-c C-d hwill look-up a symbol in the hyperspec and display the result in a web browser. You’ll be using this one a lot. -
C-c C-mandC-c M-mare bound toslime-macroexpand-1andslime-macroexpand-allrespectively. A buffer will open with the macro expansion.
Sly
TBW