Automation
Time is a key factor in productivity. This chapter will explore some ways to automate your development workflow so you spend less time working and more time making awesome. You’ll be introduced to ‘task runners’ which help automate repetitive tasks. You’ll also discover ways to speed up the process of laying foundations for new projects, and you’ll pick up a few other tips to help you be a more efficient developer.
Task Runners
Task runners, also known as ‘task automation frameworks’, help you manage and execute sets of defined tasks. A task can be seen as any repetitive action you have to take when developing for the web. Tasks can include actions such as copying a file between directories or checking your JavaScript for syntax errors.
With a task runner, you can build, preview and test your application much more easily than if you did all the work yourself. The strongest attribute of task runners is their flexibility, which means you can configure and run pre-defined tasks exactly how you want. Furthermore, if you can’t find a pre-defined task that meets your needs, you can even write your own.
In this chapter you’ll learn a bit about the popular task runners Grunt, Gulp, CodeKit and Yeoman, including how to install them and how to configure them to meet your specific needs.
Grunt

Grunt is one of a front-end developer’s best friends and is the most popular and widely used task runner. It is a framework based on JavaScript and has a thriving ecosystem. In addition, there are a huge number of plugins available for Grunt. If you’re not sure where to start with task runners, then start here.
Installing Grunt
Let’s work through the installation together. We’ll install Grunt using npm from the command line. (If you haven’t done so already, please read the Dependency Management chapter first to learn more about how to set up and use npm.)
The first tool we’re going to install is Grunt’s command line interface, grunt-cli. It’s worth noting that this does not actually install Grunt itself. It only provides us global access to the grunt keyword from the command line which is then used to load and run the version of Grunt that has been installed locally within the project. It is important to remember to install grunt-cli globally but grunt locally. For more information on global vs local installation, check out this article over at the official NodeJS blog.
We’ll head over to our command line and run:
1 npm install -g grunt-cli
To verify that Grunt CLI was installed successfully and that we can access the grunt command we’ll run the following:
1 grunt --version
Now let’s install Grunt. We’ll need to navigate to our project’s root directory first:
1 npm install grunt --save-dev
This will install Grunt locally and save a dependency reference to it from within the package.json file.
The Gruntfile
Now that we’ve installed Grunt, it’s time to introduce Gruntfile.js. Like package.json for npm, the Gruntfile belongs in the root directory of our project. It defines our project and task configurations and tells Grunt which plugins we want to use to run these tasks. We’re not going to define any tasks just yet but let’s create the bare bones of the Gruntfile so that we can add to it later. Create Gruntfile.js in the project’s root directory and add the following:
1 module.exports = function(grunt) {
2   // Project configuration.
3   grunt.initConfig();
4
5   // Default tasks.
6   grunt.registerTask('default', []);
7 };
You’ll notice that this file, as the file name suggests, is a JavaScript file. All we’ve done here is called initConfig which initializes our Grunt configuration. This is where we will define our tasks later. We’ve also called registerTask to initialize a set of tasks labelled default. There are no actual tasks here yet but Grunt requires us to define this for it to run. After saving Gruntfile.js we can try running grunt in the command line from the project root. We should get a shiny green message stating:
1 Done, without errors.
This means Grunt was able to run all of the tasks defined in default without failure.
Yay! We’ve just run Grunt for the first time. The more you use Grunt, the more you’ll love it!
Popular Plugins
There are thousands of plugins available in the open source community for Grunt. But there are a few that have become staples for the modern front-end developer. Depending on the project, you may not need all of these, but it doesn’t hurt to know about them. Obviously, these are only a select few and may not include everyone’s favorites.
Watch, LiveReload and Connect
Quite possibly the most popular plugin is Watch. It allows you to run specified tasks whenever a watched file changes. So, for example, you could minimize your CSS files whenever one of them changes or run JavaScript tests whenever you save script changes. The Watch plugin only does the ‘watching’ part. You have to specify exactly which tasks are to be run when a file change is detected.
To install Watch, we’ll run the following from the command line:
1 npm install grunt-contrib-watch --save-dev
Edit the Gruntfile.js so that the plugin gets loaded:
 1 module.exports = function(grunt) {
 2   // Project configuration.
 3   grunt.initConfig();
 4
 5   // Load our Grunt plugins.
 6   grunt.loadNpmTasks('grunt-contrib-watch');
 7
 8   // Default tasks.
 9   grunt.registerTask('default', []);
10 };
All we have done here is use the loadNpmTasks callback to tell Grunt to load the Watch plugin.
To demonstrate how to use Watch, let’s set up something cool using LiveReload and Connect. We’ll set up a local web server that will automatically refresh any browser viewing our web site when a file change occurs. This is great because it means we don’t have to refresh every time a change is made to one of the files. The official homepage for LiveReload describes the tool as “A happy land where browsers don’t need a refresh button”!.
Usually, when setting up a local web server you have to configure software system-wide. You may have used tools such as MAMP or you may have configured a local LAMP stack yourself. But a good alternative is to use a more lightweight approach to testing web applications using a combination of Watch, Connect and LiveReload plugins.
Connect is an HTTP web server framework built for NodeJS. It’s a lightweight static web server that provides plugins known as ‘middleware’. Connect comes with a bunch of middleware such as session support, a cookie parser and more.
There is a Grunt plugin for Connect which allows us to start a Connect web server so let’s get that installed:
1 npm install grunt-contrib-connect —save-dev
We now need to tell Grunt when and how to use the plugin. Every plugin you install should have a README file available in its root directory (in this case, node_modules/grunt-contrib-connect/README.md) which will outline how to configure the task. Let’s edit our Gruntfile.js again to set up the connect task:
 1 module.exports = function(grunt) {
 2   // Project configuration.
 3   grunt.initConfig({
 4 	// Defines our Connect web server.
 5     connect: {
 6       server: {
 7         options: {
 8           port: 9000,
 9           hostname: 'localhost',
10           base: ['dist/']
11         },
12       },
13     },
14   });
15
16   // Load our Grunt plugins.
17   grunt.loadNpmTasks('grunt-contrib-watch');
18   grunt.loadNpmTasks('grunt-contrib-connect');
19
20   // Default tasks.
21   grunt.registerTask('default', []);
22
23   // Running `grunt server` runs our Connect server until terminated.
24   grunt.registerTask('server', ['connect:server:keepalive']);
25 };
Here, we told Grunt to load the plugin using loadNpmTasks exactly as we did with Watch. Task configurations are added within the initConfig callback. We’ve defined a task called connect that has a sub-task called server containing the settings for the task. We’ve defined our Connect server to run on port 9000 at http://localhost:9000 and to serve the folder dist (short for distribution).
As described in the code comment near the bottom, running grunt server from the command line will launch the Connect server until terminated (made possible through the keepalive parameter). You will then be able to access the web application by pointing your browser to http://localhost:9000. However, there is currently no dist folder so let’s move on to creating that and an example index.html:
1 mkdir dist
2 cd dist
3 touch index.html
Open up index.html to add some basic HTML such as the following:
 1 <!doctype html>
 2 <html>
 3   <head>
 4     <meta charset=“utf-8">
 5     <title>My App</title>
 6   </head>
 7   <body>
 8     <p>Hello world! Welcome to my application.</p>
 9   </body>
10 </html>
Now, if you go to the command line, run grunt server and then point your browser to http://localhost:9000 you should see the “Hello world” message.
To finish, we need to configure the Watch task so that when any change occurs in index.html, a browser refresh is triggered. Let’s update our Gruntfile.js to look something like this:
 1 // Project configuration.
 2 grunt.initConfig({
 3   // Defines our Connect web server.
 4   connect: {
 5     server: {
 6       options: {
 7         port: 9000,
 8         hostname: 'localhost',
 9         base: ['dist/'],
10         livereload: true
11       },
12     },
13   },
14
15   // Watch our files for changes.
16   watch: {
17     options: {
18       livereload: true
19     },
20     html: {
21       files: ['dist/index.html'],
22       tasks: []
23     }
24   },
25 });
26
27 // Load our Grunt plugins.
28 grunt.loadNpmTasks('grunt-contrib-watch');
29 grunt.loadNpmTasks('grunt-contrib-connect');
30
31 // Default tasks.
32 grunt.registerTask('default', ['watch']);
33
34 // Running `grunt server` runs our Connect server until terminated.
35 grunt.registerTask('server', ['connect:server:keepalive']);
The first thing you may notice is we’ve added our watch task configuration. We’ve set up a sub-task called html that watches for changes to index.html. We haven’t actually told Watch to execute any specific tasks once a change is detected. However, we’ve enabled the livereload boolean both in the Connect and Watch options. This basically tells Connect and Watch to use LiveReload in tandem. Connect comes complete with the connect-livereload middleware Node package and, as of recently, Watch now comes with LiveReload server functionality included so all we need to do is set those two booleans. Lastly, we updated our default task so that the watch task is run.
To test this, you’re going to need two terminal windows. In the first, run grunt server and in the second run grunt. You should see the following status messages respectively:
1 Running "connect:server:keepalive" (connect) task
2 Waiting forever...
3 Started connect web server on http://localhost:9000
And:
1 Running "watch" task
2 Waiting...
Make sure your browser is looking at http://localhost:9000 and then make a change to the “Hello world” message in your index.html. Don’t forget to save the file! Once you save the file, switch back over to your browser and you’ll see that the page had refreshed (probably before you even made it back over) and reflects the change you made. Neat huh?
The power of Watch really shines when you start to configure it for larger front-end applications. For many, it becomes the center of their automation workflow - the trigger to every task. It really is a great plug-in.
Copy and Concat
As programmers, we aim to develop our projects to be as modular as possible. This quickly leads to a lot of files and one of the biggest challenges is keeping on top of them all. Copy and Concat are a couple of the handiest file management plugins to know about.
Copy
Copy simply allows you to copy files and folders from Grunt. Copy has endless uses but for the purposes of demonstration let’s create an example scenario. Let’s say that we want to copy src/index.html to dist/index.html as part of our Grunt build process because the dist folder is the one that is to be served by our web server and src is where we actually edit our code. Obviously with a real application there would likely be more files to copy than just a single file but let’s roll with this anyway.
Before getting started, don’t forget to install the plugin:
1 npm install grunt-contrib-copy --save-dev
This is how we might go about setting up our Gruntfile.js to reflect this scenario:
 1 module.exports = function(grunt) {
 2   // Project configuration.
 3   grunt.initConfig({
 4     copy: {
 5       html: {
 6         files: [
 7           {
 8             src: ['src/index.html'],
 9             dest: 'dist/index.html'
10           }
11         ]
12       }
13     },
14   });
15
16   // Load our Grunt plugins.
17   grunt.loadNpmTasks('grunt-contrib-copy');
18
19   // Default tasks.
20   grunt.registerTask('default', ['copy:html']);
21 };
We’ve set up a sub-task within our copy task configuration called html which will copy index.html for us. This allows us to add the copy:html task to our default task list. Simply entering copy as the task name would have also worked as that would trigger Grunt to execute all of its sub-tasks, but it’s preferable to explicitly call the name of the sub-task you wish to execute to prevent any issues in the future when you expand on your configurations.
To test, make sure that the src/index.html file exists and then simply run grunt from the command line. You should see the following success message:
1 Running "copy:html" (copy) task
2 Copied 1 files
3
4 Done, without errors.
To specify more advanced file paths, such as using wildcards and matching on file extensions, read the official documentation on Globbing Patterns within Grunt. Copy also has some useful options such as encoding to use a specific file encoding when copying or mode to specify copied file permissions.
Concat
Concat lets you concatenate files. Concatenation is the act of joining things together. When optimizing your applications for performance, looking at techniques to reduce the number of requests is extremely important. By concatenating files together, you are able to reduce the number of requests required by clients to get at your code.
To install Concat, we’ll run the following from our project folder:
1 npm install grunt-contrib-concat --save-dev
Let’s say we want to concatenate all of the JavaScript files that we have within the folder src/js into a single file. This is how we would go about setting up our Gruntfile.js:
 1 module.exports = function(grunt) {
 2   // Project configuration.
 3   grunt.initConfig({
 4   	// Concatenate all JavaScript files.
 5     concat: {
 6       js: {
 7         src: ['src/js/*.js'],
 8         dest: 'dist/scripts.js'
 9       },
10     },
11   });
12
13   // Load our Grunt plugins.
14   grunt.loadNpmTasks('grunt-contrib-concat');
15
16   // Default tasks.
17   grunt.registerTask('default', ['concat:js']);
18 };
You can test this by adding a bunch of JavaScript files in to the src/js folder and then running grunt. You may notice that Concat could possibly nullify the need for Copy as you can specify the destination of the concatenated file. However, if you wanted to run other tasks on the concatenated file before moving it to the dist folder, you may well still need Copy.
One configuration option of Concat that you can use is banner. It allows you to set a string header that will be prepended to the beginning of the concatenated file. It is worth noting that the header string is processed using grunt.template.process.
Here is an example of how to set up a banner in Gruntfile.js for a typical application:
 1 module.exports = function(grunt) {
 2   // Project configuration.
 3   grunt.initConfig({
 4     pkg: grunt.file.readJSON('package.json'),
 5
 6     // The banner is placed at the head of our concatenated JavaScript file.
 7     banner: '/*! \n* <%= pkg.title || pkg.name %> - v<%= pkg.version %>' +
 8             '\n* Copyright (c) <%= grunt.template.today("yyyy") %> <%= pkg.autho\
 9 r %> ' +
10             '\n* <%= pkg.homepage ? pkg.homepage : "" %> ' +
11             '\n*/ \n\n',
12
13     // Concatenate all JavaScript files.
14     concat: {
15       options: {
16         banner: '<%= banner %>'
17       },
18       js: {
19         src: ['src/js/*.js'],
20         dest: 'dist/scripts.js'
21       },
22     },
23   });
24
25   // Load our Grunt plugins.
26   grunt.loadNpmTasks('grunt-contrib-concat');
27
28   // Default tasks.
29   grunt.registerTask('default', ['concat:js']);
30 };
What this does is load in the package.json JSON file into a variable called pkg which is then used to fill out banner. Depending on how your package.json is set up, you should see something like this at the top of the outputted scripts.js file:
1 /*!
2 * myApp - v0.0.0
3 * Copyright (c) 2014 Joe Fender
4 * http://www.myapp.com
5 */
Linting with JSHint and CSSLint
Linting is the process of analyzing code for potential errors. In traditional methods, you would see JavaScript errors in the console if something went wrong. However, by linting your code, you are able to get feedback on your coding quality directly within your Grunt build process. Most linters will give you more information about syntax errors than your traditional browser console. Linting your code is highly recommended as it can save a lot of time debugging syntax errors.
JSHint
For JavaScript, we use grunt-contrib-jshint. To install JSHint, we’ll run this from our project folder:
1 npm install grunt-contrib-jshint --save-dev
This Grunt plugin passes through all of the options you set in its configuration task directly to JSHint. That means you will want to be reading the official JSHint documentation for a list of supported options.
Here is an example of how we go about setting up our own typical JSHint configuration in Gruntfile.js:
 1 module.exports = function(grunt) {
 2   // Project configuration.
 3   grunt.initConfig({
 4     pkg: grunt.file.readJSON('package.json'),
 5
 6     // Configures JavaScript linting. See http://www.jshint.com/docs/options/
 7     // for more on the available options.
 8     jshint: {
 9       js: {
10         files: {
11           src: ['src/js/*.js']
12         },
13         options: {
14           curly: true,
15           immed: true,
16           newcap: true,
17           noarg: true,
18           sub: true,
19           boss: true,
20           eqnull: true,
21           strict: false,
22           globalstrict: true,
23           globals: {
24             angular: false
25           }
26         }
27       }
28     }
29   });
30
31   // Load our Grunt plugins.
32   grunt.loadNpmTasks('grunt-contrib-jshint');
33
34   // Default tasks.
35   grunt.registerTask('default', ['jshint']);
36 };
We’ve told JSHint to check all of the JavaScript files in the src/js folder as part of our default task list. To test this, create an example JavaScript file that has a deliberate syntax error. Such as:
1 var example = {
2   bar: 'bar',
3   foo: 'foo'
4 }
Run grunt and you will see the following:
 1 Running "jshint:js" (jshint) task
 2
 3    src/js/example.js
 4       4 |}
 5           ^ Missing semicolon.
 6
 7 >> 1 error in 1 file
 8 Warning: Task "jshint:files" failed. Use --force to continue.
 9
10 Aborted due to warnings.
JSHint found the missing semicolon and gave us a very clear indication of where the syntax error was. Because there was an error, it aborted the Grunt build process.
If you have a build process that takes several seconds to complete, bring your linter task as far towards the front of the list as you can so that you’ll get snappier feedback about possible syntax errors. That way, you’re not wasting Grunt’s or your own time going through a bunch of tasks that you’ll just have to go through again once you fix the syntax error.
CSSLint
For CSS, grunt-contrib-csslint is recommended. As with JSHint, view the CSSLint documentation for a full list of configuration options. To install CSSLint we’ll run this command:
1 npm install grunt-contrib-csslint --save-dev
Here is an example Gruntfile.js to get CSSLint working with default settings:
 1 module.exports = function(grunt) {
 2   // Project configuration.
 3   grunt.initConfig({
 4     // Configures CSS linting. See https://github.com/CSSLint/csslint
 5     // for more on the available options.
 6     csslint: {
 7       css: {
 8         src: ['src/css/*.css']
 9       }
10     }
11   });
12
13   // Load our Grunt plugins.
14   grunt.loadNpmTasks('grunt-contrib-csslint');
15
16   // Default tasks.
17   grunt.registerTask('default', ['csslint']);
18 };
To test CSSLint create a broken css file in src/css - perhaps something like this:
1 .boo {
2   height: 100px;
3   widths: 100px;
4 }
After running grunt you should be greeted with this lovely warning message:
1 Running "csslint:css" (csslint) task
2 Linting src/css/example.css...ERROR
3 [L3:C3]
4 WARNING: Unknown property 'widths'. Properties should be known (listed in CSS3
5 specification) or be a vendor-prefixed property. (known-properties)
6 Browsers: All
7 >> 1 file lint free.
8
9 Done, without errors.
It is worth noting that unlike JSLint, the Grunt build process will not fail when there is a code warning. This seems to be a design decision.
Minification with UglifyJS and CSSMin
Minification is the process of removing unnecessary characters from code (such as white space and comments) to reduce its file size. There are lots of plugins available that offer different types of minification but a couple of favorites are UglifyJS and CSSMin.
UglifyJS
UglifyJS is a JavaScript compressor and minifier. To install UglifyJS, we’ll run this command from our project root:
1 npm install grunt-contrib-uglify --save-dev
We can set up the uglify task in our Gruntfile.js with only a few lines:
 1 module.exports = function(grunt) {
 2   // Project configuration.
 3   grunt.initConfig({
 4     // Minifies our JavaScript files.
 5     uglify: {
 6       js: {
 7         files: {
 8           'dist/scripts.min.js': ['src/js/*.js']
 9         }
10       }
11     },
12   });
13
14   // Load our Grunt plugins.
15   grunt.loadNpmTasks('grunt-contrib-uglify');
16
17   // Default tasks.
18   grunt.registerTask('default', ['uglify']);
19 };
In the above example we’ve configured our uglify task to look for all JavaScript files in src/js and compress them all into the outputted dist/scripts.min.js. By default, UglifyJS will not only remove white space and comments but will also try to simplify the code by grouping together code of similar functionality (such as variable declarations) and by deleting unused functions.
Check out all of the task configuration options available in the plugin README, especially mangle. By setting this to true, UglifyJS reduces the names of local variables and functions to single letters. This can greatly minimize the amount of text used in the JavaScript file, thus reducing the outputted file size.
CSSMin
CSSMin is probably the most popular CSS minifier Grunt plugin. It uses clean-css to perform the actual compression.
To install CSSMin, we’ll run this command from our project root:
1 npm install grunt-contrib-cssmin --save-dev
Here is an example cssmin task for our Gruntfile.js that will take all of the CSS files in src/css and minify them into a single file, dist/styles.min.css:
 1 module.exports = function(grunt) {
 2   // Project configuration.
 3   grunt.initConfig({
 4     // Minifies our CSS files.
 5     cssmin: {
 6       css: {
 7         files: {
 8           'dist/styles.min.css': ['src/css/*.css']
 9         }
10       }
11     },
12   });
13
14   // Load our Grunt plugins.
15   grunt.loadNpmTasks('grunt-contrib-cssmin');
16
17   // Default tasks.
18   grunt.registerTask('default', ['cssmin']);
19 };
If you look at the UglifyJS example we did previously, you’ll notice that they are very similar. Yay for standardization!
Gulp

At the time of writing this book, gulp.js is the new kid on the block. Just like Grunt, Gulp is a task runner. They basically do the same thing. Some of the key differences are:
- Gulp calls itself ‘The streaming build system’. It harnesses Node’s streams to greatly increase build times. For more on streams, check out the stream handbook.
- Gulp has a simpler API. It has you writing JavaScript code instead of writing configurations in Grunt.
- Gulp plugins are written for one specific task only, whereas Grunt plugins can often do multiple things. You can find a searchable list of Gulp plugins here.
Installing Gulp
Installing Gulp is fairly simple using npm. Let’s install Gulp globally.
1 npm install gulp -g
Next, navigate to your project root folder (or create one if you haven’t already) and make sure you have a package.json set up. Don’t forget, you can do this by running npm init or by referring to the Dependency Management chapter of this book. Then, run the following command:
1 npm install gulp --save-dev
This will also install Gulp but this time locally. The important part is that we make a reference to it in the devDependencies section of package.json by using the --save-dev parameter.
Why did we install Gulp both globally and locally? Well, we first install Gulp globally so that we can access the gulp command anywhere from the command line. However, this can make deployment difficult because there is no local package installed in the project repository. We install Gulp locally to create a dependency on it in our package.json. It also allows you to install different versions of Gulp simultaneously. It’s worth noting that when you run gulp in the project directory, the locally installed version will be used.
Example Usage
To demonstrate how to use Gulp, let’s set up a task to uglify JavaScript files using the gulp-uglify plugin. We’ll start by installing the pluign:
1 npm install gulp-uglify --save-dev
Just as with Grunt, Gulp also has a single file for defining tasks. We’ll create a file called gulpfile.js in the root of our project and use something like the following snippet to get started:
1 var gulp = require('gulp'),
2 	uglify = require('gulp-uglify');
3
4 // This task uglifies our JavaScript files.
5 gulp.task('compress', function() {
6   gulp.src('src/js/*.js')
7     .pipe(uglify())
8     .pipe(gulp.dest('dist'))
9 });
You’ll want to create a few dummy JavaScript files in the src/js folder to test with. From the command line, run gulp compress to run the compress task that you defined. You should then see the following status messages:
1 [11:36:18] Using gulpfile ~/myApp/gulpfile.js
2 [11:36:18] Starting 'compress'...
3 [11:36:18] Finished 'compress' after 8.87 ms
If you look in the dist folder, you’ll notice that each of the JavaScript files we created have been uglified but unlike the Grunt plugin they have not been concatenated. This is because Gulp maintains the ideal that each plugin should only do one thing. So if we wanted to concatenate first and then uglify we would firstly need to install the gulp-concat plugin:
1 npm install gulp-concat --save-dev
Then, we could update our gulpfile.js to look something like this:
 1 var gulp = require('gulp'),
 2   uglify = require('gulp-uglify'),
 3   concat = require('gulp-concat');
 4
 5 // This task concatenates and uglifies our JavaScript files.
 6 gulp.task('compress', function() {
 7   gulp.src('src/js/*.js')
 8     .pipe(concat('scripts.js'))
 9     .pipe(gulp.dest('dist'))
10     .pipe(uglify())
11     .pipe(gulp.dest('dist'))
12 });
Now, once you run gulp compress, you will end up with a single concatenated and uglified file at dist/scripts.js.
Before moving on from Gulp, we need to know how to set up file watching. Grunt required us to download a separate plugin to do this, whereas Gulp includes watch functionality from the get-go. Let’s say we want to watch for any changes to our JavaScript files and run the compress task once that occurs. We would need to alter our gulpfile.js as shown below:
 1 var gulp = require('gulp'),
 2   uglify = require('gulp-uglify'),
 3   concat = require('gulp-concat');
 4
 5 // This task concatenates and uglifies our JavaScript files.
 6 gulp.task('compress', function() {
 7   gulp.src('src/js/*.js')
 8     .pipe(concat('scripts.js'))
 9     .pipe(gulp.dest('dist'))
10     .pipe(uglify())
11     .pipe(gulp.dest('dist'))
12 });
13
14 // Watch our files for changes.
15 gulp.task('watch', function() {
16   gulp.watch('src/js/*.js', ['compress']);
17 });
18
19 // The default task is used when `gulp` is called from the command line.
20 gulp.task('default', ['compress', 'watch']);
We’ve set up a new task called watch which is fairly self-explanatory. Also, to simplify things further, we have defined another new task called default which runs our other tasks. So all we need to do now is hop over to the command line and run gulp. Now, whenever we make any changes to our JavaScript files, the compress task will run automagically.
Gulp is simple and fast. Once you learn its API, the idea of code over config is a very welcome one. We’ve only touched the surface of how powerful Gulp can be. For more information, read the official documentation.
So which one should you be using? Probably Grunt. Gulp is still on the bleeding edge. Its ecosystem needs more time before it should be considered as a replacement for Grunt. That being said, Gulp is an excellent tool and hopefully will continue to develop.
CodeKit

CodeKit is a Mac app created by Bryan Jones. It aims to take a lot of the pain out of setting up an automated workflow by providing an array of the most common and useful features for web developers:
- Has a built in web server which supports live browser refreshing across all of your devices.
- Watches for code file changes and compiles them with linting and minification.
- Has built in Bower support for installing and managing components.
The most appealing part of CodeKit is that it is very easy to get up and running. All you need to do is install the app and it just works. There is no fumbling through configuration files trying to figure out why your build script isn’t working correctly. On top of that, the app’s UI is cleanly designed and a pleasure to use.
Remember though that CodeKit is a Mac only app, so if you are working with other developers you may want to check they can actually run it before diving in.
To find out more, watch these demonstration videos on the CodeKit homepage. Although there is a free trial, the app requires you to purchase a one time license for full use.
Yeoman

Yeoman defines a powerful workflow that helps you kickstart new projects by installing and configuring almost everything you could need to start developing your web applications. It greatly reduces the amount of time you need to write boilerplate code so that you can start developing sooner.
Yeoman provides an ecosystem of ‘generators’ which can be used for setting up the foundations of different types of applications. The generators are opinionated, meaning that although best standards are followed for the most part, they may not be perfectly configured for your specific needs.
There is a reason for leaving Yeoman until last. It can be quite tempting to use a generator to lay the scaffolding for your application without actually knowing everything that it is doing. Ideally, you should learn at least the basics of all the different tools that Yeoman installs and configures before actually using Yeoman. That way, it is much easier for you to configure your application after Yeoman has done its magic.
The Yeoman workflow is comprised of three separately maintained tools: Yo, Bower and Grunt. Yo is the name of the actual scaffolding app from Yeoman, Bower is covered in the Dependency Management chapter of this book and Grunt has been covered at the beginning of this chapter.
Installing Yo
Yo offers web application scaffolding, utilizing scaffolding templates referred to as generators. All we need is npm to install Yo:
1 npm install yo -g
Once Yo is installed, you will need to pick a generator best suited to your requirements. As an example let’s install generator-angular, which utilizes a bunch of features that may be required of a typical AngularJS front-end web application workflow:
1 npm install generator-angular -g
As is the case with Yo, we install generators globally so that they can be accessed from anywhere in the command line. Once the generator is installed, we can create a new directory for our project and from within it run:
1 yo angular
You will be prompted with a few questions which will allow you to configure which tools will be installed. Once answered, sit back and relax as Yo takes care of downloading, installing and configuring everything. There is a lot of text scroll during this process so make sure your terminal window is full screen so that people around you think you’re working in the matrix.
Once complete, you’ll want to spend some time looking through all of the files and folders that have now been placed in your project root. In this particular generator, a whole bunch of tasks have been defined in your Gruntfile.js from which you can learn a lot about some of the best practices used in the developer community.
There are literally hundreds of generators available, many of which are unofficial and contributed by the community. You can view the list over at the Yeoman official page.
Other Tips
The goal of this chapter is to help you become the most efficient developer you can be. To help you on your way, here are a few tips and tricks to make your life a little easier.
z
The more projects you work on, the more frustrating it can be to navigate between all of their directories in the command line. Enter ‘z’, a handy bash script that helps you to jump around directories in the command line. It tracks your most frequently used directories and allows you to navigate them by simply entering part of their name. For example:
1 z myApp
For example, this may take you to /var/www/myApp if that is a directory that you frequently access.
To install, grab the z.sh file from https://github.com/rupa/z and write something like this in your $HOME/.bashrc or $HOME/.zshrc:
1 . /path/to/z.sh
Alfred.app
Alfred, perhaps named after the famous butler of Batman, is a Mac app that can be used as a replacement for the OS X Spotlight. Among many other useful productivity tasks, Alfred helps you save time by letting you search the web or your computer for files and applications with a few keystrokes. Alfred comes highly recommended to any hardcore Mac user. However, it is worth noting that Apple made some great changes to the OS X Spotlight in Yosemite and you may find that sufficient enough.
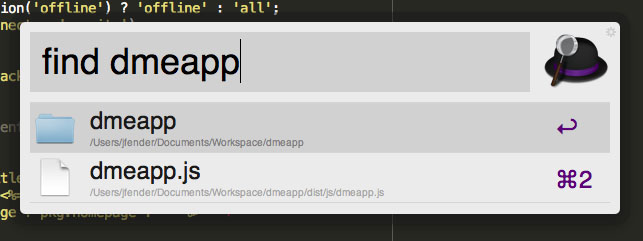
Alfred boosts productivity
Chrome DevTools
One of the strongest attributes of the Google Chrome browser is its set of Developer Tools - more commonly known as DevTools. They are a set of web debugging tools directly accessible from within your browser. Although other browsers, such as Firefox, do come complete with their own set of tools for developers, Chrome probably provides the best implementation. If you’ve not used DevTools before, go ahead and install Chrome and read the overview documentation.
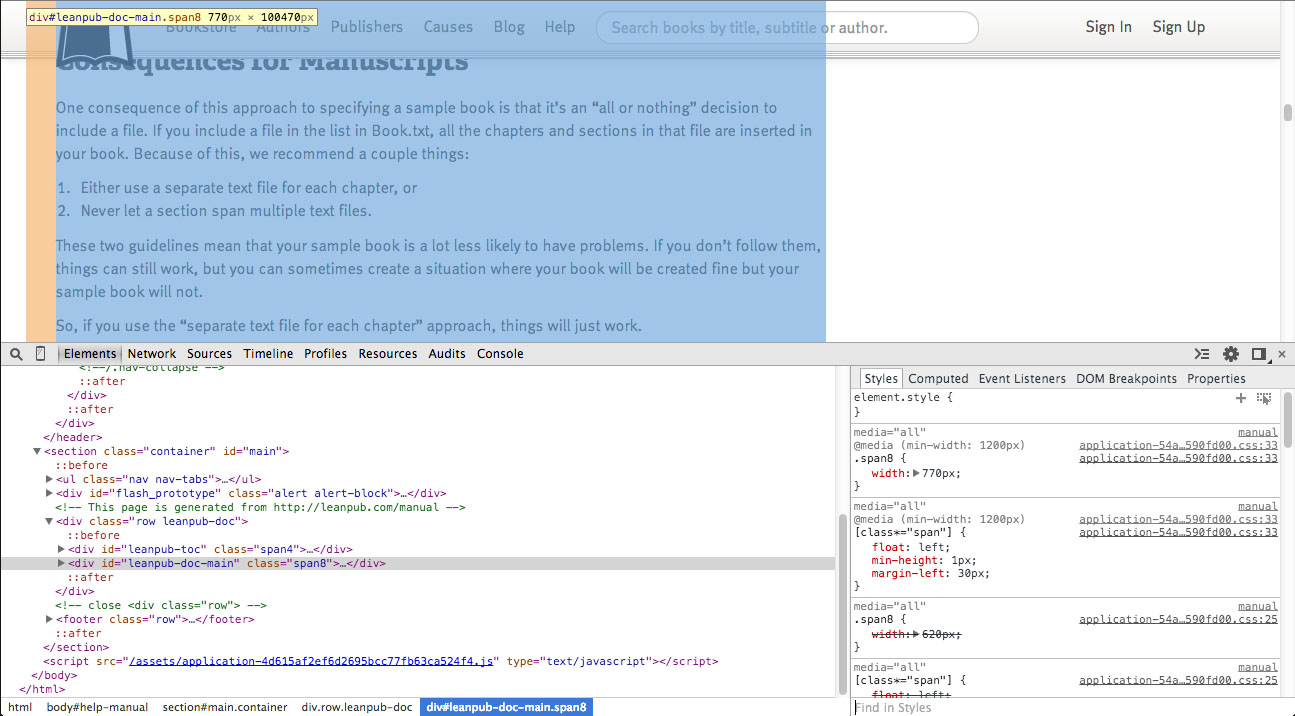
Chrome DevTools is the essential web page debugging tool
Sublime Text
Looking for a new text editor? Something with a super slick interface and huge range of features? Look no further. Sublime Text for Mac is quickly becoming one of the most popular text editors for developers.
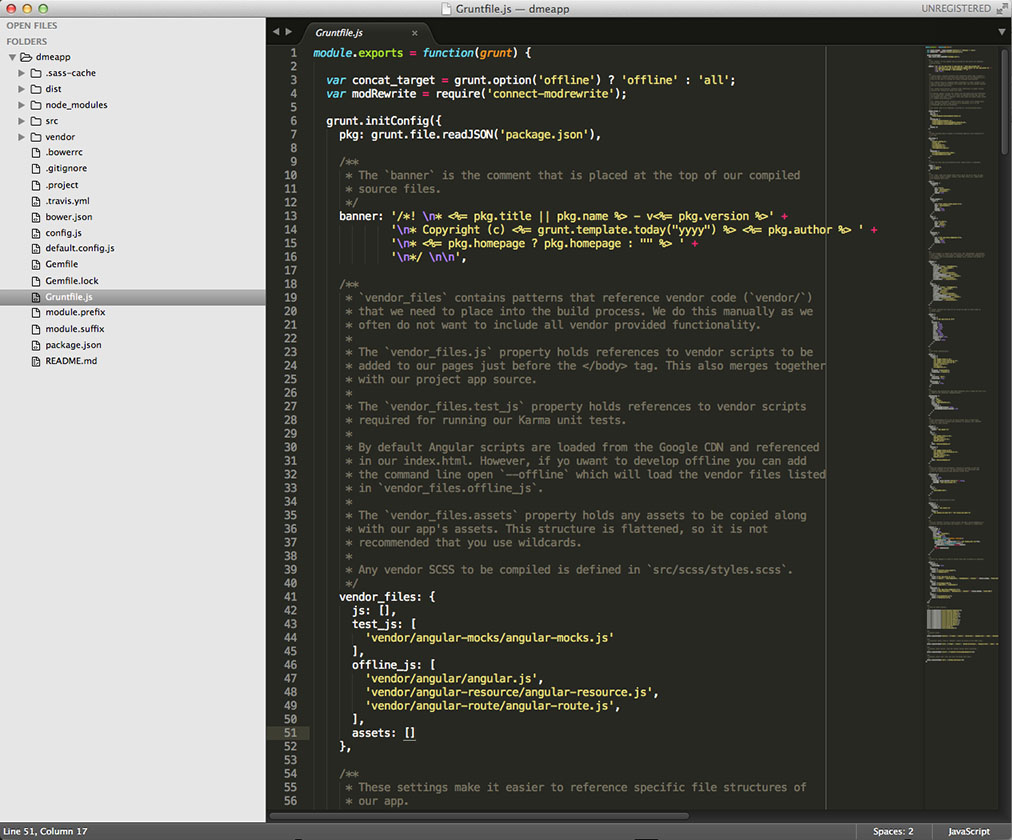
Sublime Text has a super slick interface
Its flagship feature, ‘Goto Anything’, has quickly become one of the main reasons for developers falling in love with Sublime Text. By simply pressing Command-P you can quickly navigate to any file in your project. For a full list of its features, and guidelines on how to install, check out the official homepage.
Summary
In this chapter, we took a fairy detailed look at the task runner Grunt and touched on other options such as Gulp and CodeKit. You’ve seen how important task runners can be, and how they can help you become a more efficient developer. We then looked at a few tips and tricks to speed up your workflow when developing.