3. Getting Started
Choosing your TypeScript editor
In the last chapter, I described what TypeScript is and how it relates to JavaScript.
In this section, I’m going to talk a little bit about the tools you’ll need in order to work with TypeScript.
Actually, I don’t really need an entire section because the answer is simple: since TypeScript is just a superset of JavaScript, you’ll almost certainly end up using the same tools to work with TypeScript as you already use to work with JavaScript today!
TypeScript is a compiled (or “transpiled”) language, so you will need at least two tools to work with TypeScript: a text editor, and the TypeScript compiler.
Technically speaking, you can use any text editor you want, however you’re probably going to want an editor that understands TypeScript well enough to offer some nice features such as syntax highlighting and auto-complete functionality built in.
Lucky for us, TypeScript has been around long enough and gained enough popularity that your favorite JavaScript editor almost certainly has some kind of TypeScript support either built-in or available as an extension. For most of the popular text editors such as Sublime Text, TextMate, Atom, Notepad++, Visual Studio Code, it’s as simple as searching in their library of extensions and installing the feature.
Then, of course, there are full-fledged Integrated Development Environments (or IDEs) such as Visual Studio, WebStorm, or Eclipse. Just like basic text editors, your favorite IDE will likely have great TypeScript support, but some of them may even have the TypeScript compiler built right in.
In the following sections I’m going to show you a couple of ways of installing TypeScript take make sure that one of them will be a good fit for you:
- The next section will be for you Visual Studio developers who like to have everything easily accessible right there in an nice IDE and integrated into the Visual Studio projects and solution structure that you already know and love. If this describes you, then you may never need to open up a command line to use TypeScript.
- The section after that, however, will be for everyone else. In that section, I’ll show you how to install the Node Package Manager (or NPM) and use it to install and execute the TypeScript command line interface while editing your TypeScript files in your text editor of choice, whether it’s TextMate, Atom, or the new cross-platform editor, Visual Studio Code.
In the rest of this book after these next two sections I will be using Visual Studio Code to edit my TypeScript files and the command-line interface to compile them. However, after you’ve installed TypeScript using one of these next two sections, you will be able to follow along with me throughout the rest of the course regardless of whether what text editor you choose or even which OS you’re running, be it Windows, Mac, or even Linux.
So, enough talk - choose one of the next two sections that applies to you and let’s get installing!
Installing TypeScript in Visual Studio
I mentioned in the last section that you can choose any editor that you wanted in order to work with TypeScript and that some editors had support for TypeScript already built-in. Considering that Microsoft created both the Visual Studio IDE and TypeScript, it should come as no surprise that Visual Studio offers great support for TypeScript built right in… well… kind of.
Let me clarify that a little bit. Visual Studio has been around a long time and there are several different versions still in wide-spread use today, and each of them offers varying levels of support for TypeScript.
If you’re using Visual Studio 2010 or older, I’m sorry, but there is no built-in TypeScript or extension that I’m aware of. If you really wanted to, you could jump to the next section and install the command line version of TypeScript, then use Visual Studio 2010 as your HTML and TypeScript editor, but frankly if that is your situation then there are a number of much better TypeScript editors available, and most of them are free.
If you’re using Visual Studio 2013, you didn’t get TypeScript support right out of the box, but you can install the TypeScript extension by visiting typescriptlang.org, then clicking the “Download” button at the top, and selecting “TypeScript for VS2013”.
This will bring you to the “TypeScript for Visual Studio 2013” extension page where you can download the extension and run it to enable full TypeScript support in Visual Studio 2013.
On the other hand, the latest Visual Studio release - Visual Studio 2015 - actually has full TypeScript support right out of the box, but it’s actually a little outdated so you’re going to want to install the most recent version of TypeScript on top of what Visual Studio already provides. You’ll follow the same steps to install the extension as you did with Visual Studio 2013, except you’ll choose the “TypeScript for VS 2015” option instead.
Once the extension is installed you should have everything you need in order to follow along with the course.
Installing the TypeScript Command Line Interface
If you’re reading this section, either you’re running on a Mac or Linux machine or you’re a Windows user and you’ve decided that you’re going to use a lightweight code editor instead of a full-blown IDE like Visual Studio.
Regardless of how you got here, I think you made a good choice. Many people find the command line interface rather daunting, but I find that once you get used to it it’s actually quite a nice and lightweight option.
In order to be truly cross-platform compatible, the TypeScript command line interface is actually built in NodeJS. Don’t worry - you won’t have to learn how to be a NodeJS developer in order to use the TypeScript command line, but you will need to install the Node Package Manager (or “NPM”), which comes included in the NodeJS installer.
To install NodeJS, simply visit nodejs.org and then choose the appropriate download for your environment. Feel free to install either the “mature” or “latest” version - as of this writing, TypeScript will work on either.
Once you’ve installed NPM, it’s time to use it to install TypeScript. In order to do so, simply jump into a command prompt: in Mac you can open Spotlight and search for “terminal”, and in Windows you can open the Start menu and search for either “Command Prompt” or “PowerShell” - either one will work fine, but personally I like PowerShell because it offers a resizable window and nicely-colored text highlighting.
Keep in mind that all of the commands I’ll show you in this book should be exactly the same, regardless of which OS or command prompt you’re using.
Once in the command prompt, type the following:
npm install -g typescript
This command tells the Node Package Manager to install the TypeScript compiler (and the “-g” option tells it to install it globally so the command will be available to you regardless of which project you’re working in. n Once it’s done, you can verify that everything worked by typing the command “tsc”.
tsc
Technically speaking, that’s all you need in order to compile TypeScript files into JavaScript, however in order to follow along with this book you’ll also need to open up a web page, and for that you’ll need a web server. You could probably get away with just saving the files to your local machine and opening them directly in your browser, but since we’re already at the command prompt and we already have NPM installed, let me introduce you to one of my trade secrets called “lite-server”.
Lite server is a little lightweight web server that not only serves your files for you, it also injects a little script into each of your page that listens for changes to those files. When the server detects a change, it refreshes the browser automatically. Trust me, web development is much more enjoyable when you don’t have to keep hitting “refresh” all the time.
To install lite-server, simply use the “npm install” command like you did for typescript, but install “lite-server” instead, like this:
npm install -g lite-server
Now that you’ve got all that installed, let’s move on to the next section to create our new project and configure it for TypeScript.
Configuring the TypeScript compiler
In this chapter, I’ve shown you how to get TypeScript installed on your local machine, and now it’s time to show you how to start up a new TypeScript project.
Now, you can use TypeScript anywhere that JavaScript is supported – on the client, server… heck, I can even code my Pebble smartwatch using JavaScript! However, I assume that the majority of the time you’re using TypeScript it’ll be to build web applications in the browser.
As such, our project starts by simply creating a new folder with an index.html file to host our generated JavaScript.
So, go ahead and create a folder to hold our project. Throughout this book I’ll be showing you how to build a Todo application, so let’s call the folder “TypeScriptTodo”.
mkdir TypeScriptTodo
cd TypeScriptTodo
Once I’ve created the folder, I’ll open it up in my favorite text editor, Visual Studio Code.
code .
Once I have the folder open in my editor, I’ll create a new HTML file named “index.html” and populate it with some markup:
<!doctype html>
<html lang="en">
<head>
    <title>TypeScript Todo App</title>
    <link rel="stylesheet" href="//maxcdn.bootstrapcdn.com/bootstrap/3.3.6/css/b\
ootstrap.min.css">
</head>
<body>
    <div id="container" class="container">
    </div>
    <script type="text/javascript" src="app.js"></script>
</body>
</html>
Other than the fact that I’ve linked to the Bootstrap UI framework stylesheet on line 5 to make my site look a little bit nicer, this is nothing but some boilerplate HTML. Notice how I have a link to a JavaScript file called app.js on line 10, even though this file doesn’t exist yet.
That file will be the JavaScript output from this new TypeScript file I’ll create, named app.ts.
Now with all this in place, it’s time to get the TypeScript compiler working!
Technically speaking, the simplest way to build compiler your TypeScript files is to jump into your command prompt and simply run the TSC command, passing in the names of all the TypeScript files you want to compile, like this:
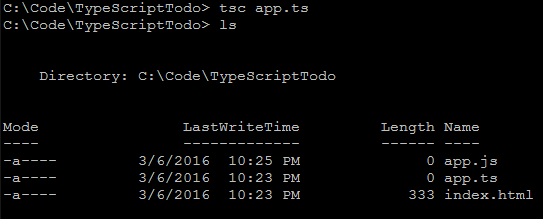
tsc app.ts
Even though the command doesn’t emit any output, I can see that it works because I now have an app.js file in the same folder.
I can even have the TypeScript compiler watch for changes to my files and recompile them automatically by passing in the “-w” option, like this:
tsc -w app.ts
When I pass in the “-w” option, TypeScript compiles my file, then tells me that it’s waiting for changes.
Then, I can go back to my editor, make some more changes…
var todo: string = "Pick up drycleaning";
And then look at the app.js file again…
var todo = "Pick up drycleaning";
and see that my changes have been compiled.
However, if I run the tsc command again I can see that the TypeScript compiler actually supports a whole lot more options than just “-w”.
And, if I wanted to make use of any of those options, I’d have to type them as command line parameters every time, which would get pretty old after a while.
In fact, if you’re using the full-blown Visual Studio IDE, you don’t have a command line, so where would you put these options!?
Luckily, there is a solution that solves both of these problems: the TypeScript configuration file, or tsconfig.json.
This file is just a simple JSON file, so just add a new file to the folder named tsconfig.json and, since the TypeScript configuration object is just a JSON object with configuration values, start by defining an empty JSON object:
{
}
Then, in the Visual Studio Code editor and the full-blown Visual Studio IDE, you can hit Ctl-Space to see the configuration options you have available to you.
Choose the first one, “compilerOptions”. Then, hit Ctl-Space again to see what compiler options are available:
{
    "compilerOptions": {

    }
}
There are a whole lot of configuration options - and we’ll see a lot of them in this book - but let’s start with the simplest one: the ECMAScript version that we want to target.
In order to do that, choose the “target” option.
{
    "compilerOptions": {
        "target": "es3"
    }
}
Once it’s added, we can delete the default value and hit Ctl-space again to see what other versions of ECMAScript we can target, and since we’re looking for ES5 compatibility, go ahead and pick the “es5” option.
{
    "compilerOptions": {
        "target": "es5"
    }
}
I’ll explore later how changing the target ECMAScript version changes the JavaScript that TypeScript generates, but for now I’m just going to save the file and go back to the command line to see how just having this configuration file in place changes how the compiler behaves.
When it starts, the TypeScript compiler looks for this tsconfig.json file in the root folder. If it finds it, it treats the whole folder - and all of its sub-folders - as one big project, and automatically detects any TypeScript files.
So, the biggest difference now is that we no longer have to tell TypeScript which files to compile - just type in “tsc -w” and it will find them, compile them, and wait for changes to any of them:
tsc -w
I can tell by the fact that the compiler isn’t showing any errors that it’s working, but just for the heck of it I can go change my app.ts file a bit to test it out…
let todo: string = 'Dryclean cape';
And I can go back to the command prompt and see from the output that everything is still working fine.
And that is how you create and configure your very first TypeScript project! Be sure to hold on to this folder because we’re going to be using it to build our sample application using TypeScript throughout the rest of this book. Also, make sure to keep that “tsc” task running in the background the whole time you’re working on the code samples in this book, because I will be!
Now that you’re all set up, why don’t you head on to the next chapter where I’ll show you all of the latest ECMAScript features that TypeScript makes available to you so that you can begin using this new project to implement tomorrow’s ECMAScript language features today.