2 Building Our Game Prototype
A Game Development method to quickly create and test game ideas.

Have you ever had an idea about a new game? But dealing with how to start programming such a project, selecting its components, data structures, and the logic flow is a daunting task if you’ve never had any experience with any of those things before — AND if truth be told, even for those seasoned game developers too! You want to test your idea before committing any time, energy, and possibly money to only those brilliant “Minimum Viable” gaming products (MVP) instead of a ““DUD”!”! You need a tool to evaluate your game ideas quickly — you need a “Game Prototyping Tool™”!
As you know, “Construct” is a versatile JavaScript Gaming Framework. It’s not just for creating games on your desktop browser or mobile devices. With Construct, you can bring any game genre to life, from 2D and “2.5D”, to 3D “Action Adventures,” platformers, Role-Playing Games (RPGs), Jigsaw puzzles, brain-teasers, the visual novel “Gamebooks”, and so much more! All you need is your Browser pointing at the “Construct Online Application editor”, an innovative game idea, and your imagination. Let’s explore the endless possibilities of creating a gaming prototype using Construct.
Let’s begin with a simple “top-down” game prototype with block artwork (easily substituted later!), a gamer’s avatar, some treasure, a room with exterior and interior walls, and an opponent. These elements are found in any typical “Rogue-like” Role-Playing Game (RPG). When we’re done, you’ll have a simplistic game prototype that looks something like the illustration (above).
Making some minor adjustments, we’ll use our game prototype for “3rd Person” and “Isometric” games as found in all platform genres, and even tweak the player’s “camera view” into a “1st Person” game similar to “Warlord’s Joust” (play it here)!
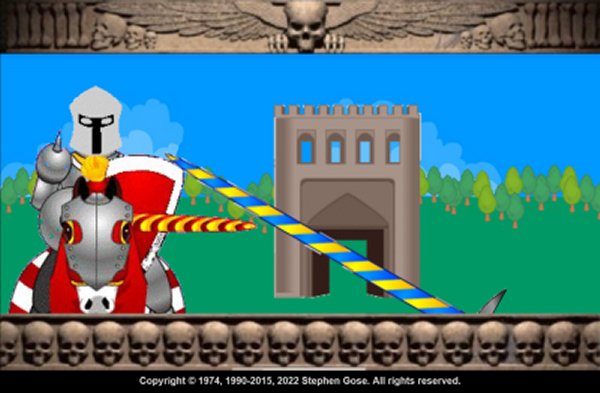
Play this “First Person” Joust here!
So then, “What’s a game prototype”, you asked?
Answer: It is an operational gaming foundation that can:
- Accept a player’s inputs;
- Move game elements and components;
- Transitions between game phases and translates “game actions” into visual “Heads Up Display” (HUD) feedback or information; and lastly
- Reacts to internal collisions.
2.1 Construct Game Production
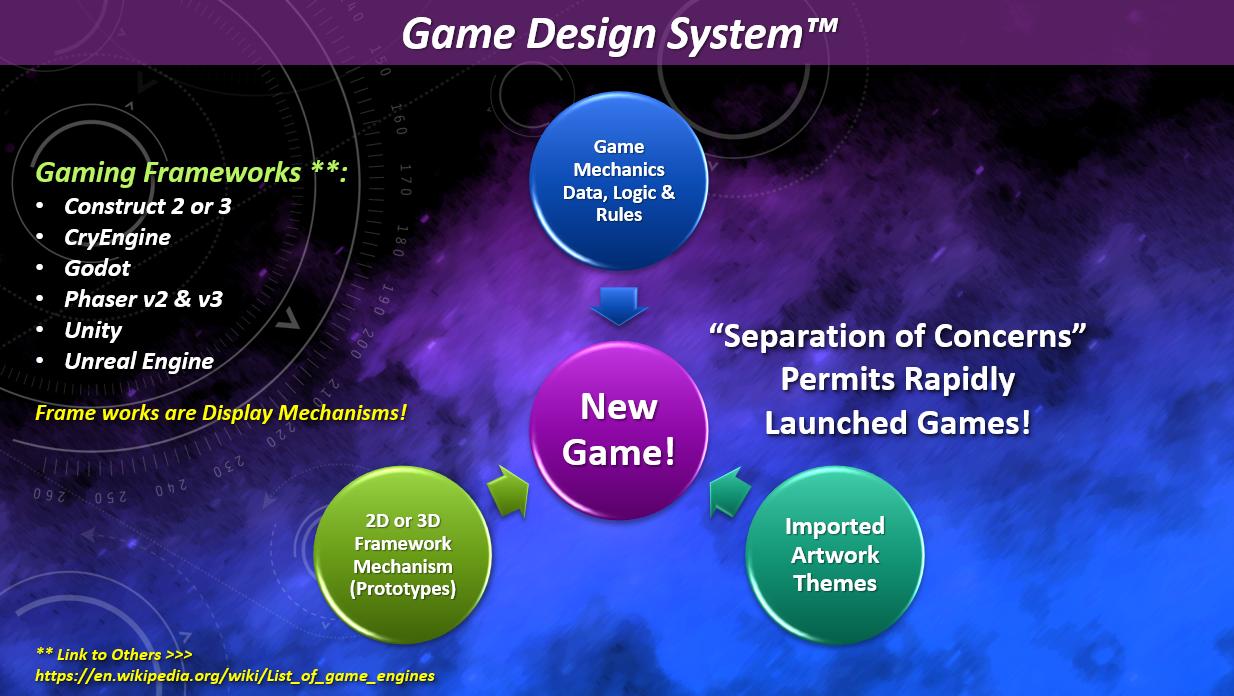
This starts our “step-by-step” Game Recipe™ that builds our “Construct3” (C3) game prototype (with your included artwork eventually!) — all of its logic, rules, and data structures (placed inside the “Event Sheets”) become its “Game Mechanics” (GM). The User Interface (UI) is found inside the Scenes, Layouts, and Layers of Construct’s “Game Framework Display Mechanisms” (GFDM). All you’ll need is your own “Artwork Theme Component” and assets; however, use mine in the FREE downloads for now. You’ll discover how quickly you can substitute “Artwork Themes” in Construct later in this tutorial.
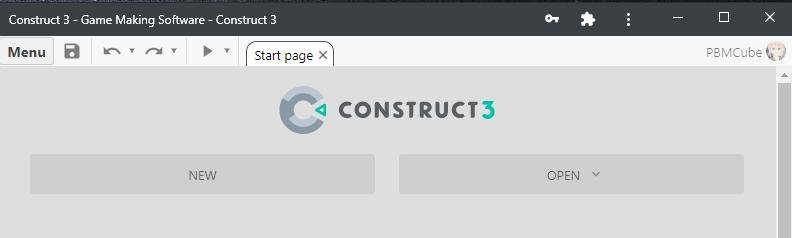
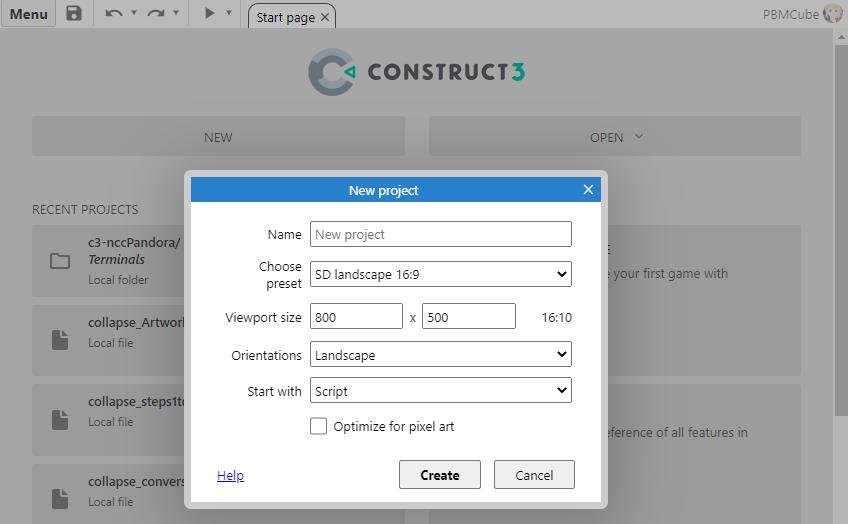
Let’s create a new game project in your Browser with just a single click. (I assume you’ve already read the “Beginner’s Guide to Construct 3” about how to do that? If not, take just a few minutes and review how to set up a new project, OR continue reading this lesson. Let’s begin with a “Blank New Project” …
2.2 “A Change of Scenery Helps Everything!”
Change the background color to anything you like! To do that:
Step #1 — Select the “Layer” tab in the right-hand “Projects Panel” and then select the “Background themes” layer (aka “BGThemes”).
Step #2 — Look at the left-hand panel “Layer Properties” and choose “Background Color”. It is a drop-down box full of color swatches. Pick one.
2.3 “Lions and Tigers and Bears! OH MY!”
Creating an Avatar, Monster(s), Treasure(s), and Walls!
To create a gamer’s “character representation” (aka “avatar”), we need to define a “sprite”, and to do that, we must have an image. We could load an image from our hard drive — but that means we must either make our own sprite using our image editing program — if we have such — OR find some graphics we could “freely” use from the Internet (such as “Game-Icons.net”, “CraftPix.net”, OR “GameDevMarket.net”).
Step #3 — Drag four “wall” icons onto the “play area”. Re-size each to fit the layout’s Northern, Eastern, Southern, and Western boundaries. Next, let’s add two interior walls and re-size them so our avatar can squeeze between them. (Doing all this helps us create a game environment for our avatar’s reactions.)
Step #4 — Place a monster icon and a treasure icon anywhere in the gaming area. Compare what you’ve accomplished in these examples:
2.4 “Yo Mama can’t dance & Yo Daddy don’t Rock ‘n Roll!”
Making our Avatar move, jiggle, and bump!
Step #5 — Click your avatar icon in the right-hand “Projects Panel > Object Type Properties” folder; you’ll see all the information about this avatar in the left-hand Panel called “Object Type Properties”. Click on the link “Add / Edit Behaviors”. A pop-up appears, then click “Add New”. Another pop-up opens with all the possible things this sprite can do. Search for “8-Directions” — or type “8” in the search box at the top. Once you’ve found the “8-Directions” behavior, double-click it. This behavior becomes a part of our avatar’s abilities.
Test what we have so far! At the top of our “Construct2 editor” is an arrow to play our game and a “bug symbol” for debugging things that don’t work correctly. In Construct3, only the “play arrow as a drop-down” exists. Click either its play or debug option. The Browser will open. Use your keyboard “arrow keys” and watch your avatar’s response. What did you discover? My avatar can walk through walls and monsters and escape the entire gaming area!! That’s NOT what I WANTED … Let’s fix that.
Step #6 — Our avatar needs a few more behaviors. Let’s first restrict it to the gameboard boundaries. Add another “New Behavior” called “Bound to layout”; our avatar stops at the gameboard edges. BUT, it’s still walking into the walls. So, let’s select the “wall” icon in the “Project Panel > Object Types”, you’ll notice that clicking here selects all the walls inside the gaming area. GREAT! Our walls need the “Solid” behavior. You know how to add a behavior, RIGHT?
2.5 ♫ Yo-Ho, Yo-Ho, a pirate’s life for me! ♫
Things that go bump in the night …
It’s time to create some “Game Mechanics” whenever our avatar bumps into a “treasure icon”. Let’s open “Event Sheet 1” and create a couple of global variables to hold the “amount of treasure discovered” and generate a “random amount” whenever this prototype starts.
Step #7 — Right-click inside “Event Sheet 1” and “Add a global variable” for the “treasure amount” and another for “treasure found”. (See the illustration below.)
Step #8 — Click “Add Event”. Select “System > On start of layout”. Add an action to this event #2. Select “System > Set value”. A pop-up will appear and you’ll type the information below.
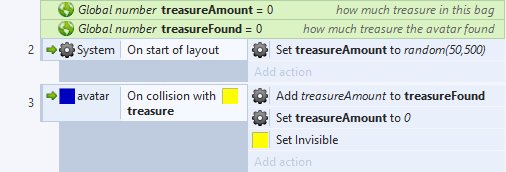
- Global variables hold the “amount of treasure generated”, and the “amount found”.
-
Event #2 — When this prototype starts, a random amount of treasure — from 50 to 500 coins — is generated for this gaming session and stored in the “
treasureAmount“ variable. - Event #3 — Whenever the avatar bumps into the treasure chest, we add that amount to its “treasure Found” variable and remove those coins from the “treasure Amount”. If we don’t do this, a clever gamer will repeatedly bump into the treasure chest and “earn(?)” a vast fortune! This is an crucial step because when we have more than one treasure chest, we want to add each of them to the avatar’s “amount found”. We also make this treasure chest disappear to show that it was discovered and prevent the avatar from “double dipping into the cookie jar”. (If you catch my meaning?)
Step #9 — This might be a good time to add a “Heads Up Display” (HUD) telling the gamer how much they discovered. A “HUD” could be a text object simply stating, “You found XXX coins”.
2.6 “None shall pass!”
Picking a fight!
Step #10 — It’s time to create some “Game Mechanics” whenever our avatar bumps into a “monster” icon. The monster needs the “Solid” behavior just like our walls. (Return to Step #6 if you’ve forgotten how to insert the “Solid” behavior.)
Now whenever our avatar bumps into a monster, it should stop — just like bumping into a wall. But we’ll move to a new layout to manage our game’s “Combat Phase”! Yes, we could keep combat on this same “Layout 1”, but where’s the fun in that?
Step #11 — Click on “Layout 1” in the right-hand “Projects Panel” and then right-click “Layout 1”. Then click “Duplicate”. This will create everything found in Layout 1 as a new layout. I’m naming my new layout “Combat-Gridless” and will also create a new “Event Sheet” for it. I’m calling this new “Event Sheet” — “es_combatGridless”. Review this new Combat layout and ensure its “Event Sheet” is appropriately linked. I’ve removed all the interior walls and plan to have three styles (3) of combat — 1) a grid-less; 2) a square checkerboard grid; and 3) a hexagonal grid. I also have a couple of tactical command buttons to help our gamers tell their avatar what to do.
This new layout has the same problems we encountered before — keeping the avatar inside its layout. However, to complicate things further in this Combat layout, I’m showing a “miniature zoomed-out room” with some Narration feedback text and a tactical combat menu. Can you correct those problems in this new Combat layout?? (Do you need help? Download the beginning and final examples below …)
- Construct 2 Steps #10 & #11 Starting example
- Construct 2 Steps #10 & #11 Ending example
- Construct 3 Steps #10 & #11 Starting example
- Construct 3 Steps #10 & #11 Ending example
At this point, we have a completed “Construct Game Prototype” — our Frankenstein!
- Use the “Ending” example (above) as your “starting point” for any new game development project.
- Select a game genre (from the next chapter).
- Replace our “primitive block artwork” with your “professionally designed” artwork theme(s) or with those freely available from “Game-Icons.net”, “CraftPix.net”, OR “GameDevMarket.net”.
- Insert your favorite gaming system rules as your Game Mechanics event sheet(s) — These rules define what players can do in the game, its goal, and how their gameplay is modified and updated.
- Create a “Content Management System” (CMS) (aka a “Game Shell”) around your core gameplay.