Setting Up Our Game
Firefox OS applications are a collection of HTML, CSS and Javascript files. While most business applications deal with all these three technologies, mobile web based game development tend to use much more Javascript than HTML and CSS because they tend to be based in Canvas or WebGL due to performance reasons. To build games we’re going to use the powerful Canvas API to display 2D graphics and Touch Events API for input. We’ll just use some HTML and CSS boilerplate to initialize things and then all the magic happens in Javascriptland.
Application Types
Firefox OS currently has two types of applications: hosted apps and packaged apps:
- Hosted Apps: Are hosted on a web server just like normal websites. This means that when the user launches a hosted app, its content is loaded from the remote server (or from the cache, if available).
- Packaged Apps: Are distributed as a zip file and copied to the device when installed. When the user launches a packaged app, its contents are loaded from the zip file instead of a remote server.
There are Pros and Cons to using each type. Games tend to use a lot of static resources such as image and sound files. If you use a hosted app then your user will need to download and cache all these files before playing. If instead you opt for a packaged app then all the static resources are bundled and copied to the device when the application is installed so there won’t be a need to download anything after the initial installation.
In this book we’ll use a packaged app approach. Its easier to develop since we don’t have to deal with cache and cache invalidation and the user doesn’t have to wait for things to load over the internet after the installation.
The Application Manifest
The manifest is a JSON file that describes aspects of an app. Usually this file is called manifest.webapp and lives next to your main HTML file that is usually called index.html.
 1 {
 2   "name": "Memos",
 3   "version": "1.1",
 4   "description": "A simple memo taking app",
 5   "launch_path": "/index.html",
 6   "permissions": {
 7     "storage": {
 8       "description": "Required for storing and retrieving notes."
 9       }
10   },
11   "developer": {
12     "name": "Andre Garzia",
13     "url": "http://andregarzia.com"
14   },
15   "icons": {
16     "60": "/style/icons/icon_60.png",
17     "128": "/style/icons/icon_128.png"
18   }
19 }
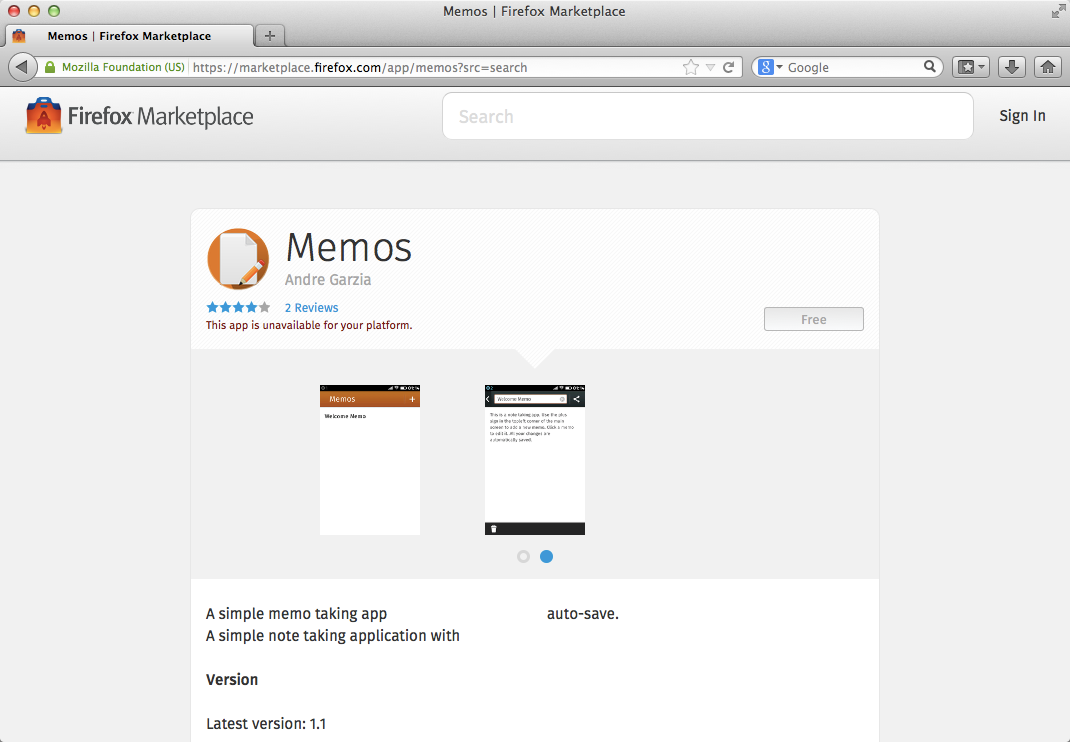
Above we can see the manifest for an application called memos6. Among other things it describes who created the application, which icons are used, what is the name of the app, what file is used to launch the app (in this case it is index.html), what hardware access permissions your app requires, etc. This file is used by Firefox OS to add the application to the device’s home screen and by the Firefox Marketplace to display the application on the catalog as we can see in the image below.
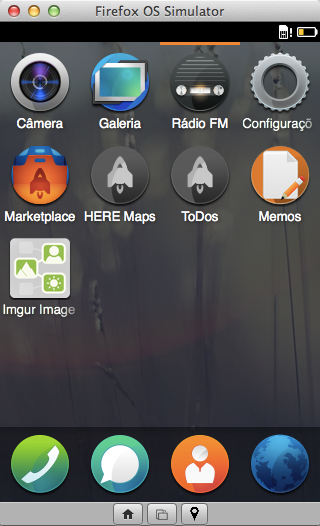
Note how the information from the manifest is used by the system to add the app to the homescreen, as we can see on the following screenshot.
By gathering your HTML, CSS, JavaScript, and a manifest file you already have an application ready to run on Firefox OS. With this in our mind lets begin building our application.
There Is No Place Like Home
Lets give Foxnoid a nice home in your computer. As we know, we’re going to build a collection of HTML, CSS, Javascript and static resource files. All these files will be organized inside a folder on your machine. Your first task is to create a “foxnoid” folder in your machine, all we do will happen inside this folder.
Below we’ll add some boilerplate just to load up our app to the point where we can focus on the Javascript part of things. Most frameworks include some boring code that you need to use to initialize everything.
Through the remaining of this chapter we’re going to write this initialization code. The game implementation itself is written in the following chapters.
Adding The Phaser Framework
Fetch the latest Phaser from phaser.min.js on GitHub and place it in a js folder inside foxnoid folder.
This file contains the whole Phaser framework in minifed form. By including this Javascript file in the HTML we’ll be able to use its features from our game.
The CSS
Since we’ll use Canvas to draw our game display we’re not going to rely on CSS to style things. Still we need to reset some values because different browsers assume certain values for margins and paddings. We want to zero these values so that we can fill the screen with the Canvas.
Create a css folder inside foxnoid folder and place a file called style.css inside it with the following content:
1 html, body {
2     background: #000;
3     display: block;
4     margin: 0;
5     padding: 0;
6 }
This will set the default background color and reset the needed values.
The HTML
As explained above we’re not going to do a lot of CSS and DOM. This game is just Canvas stuff so all our HTML needs is to include all the needed Javascript files and have a single div to hold our canvas.
Some games are better written with DOM others we’ll do pretty fine with Canvas. You can think of a canvas as a Television where image will be displayed. Programming with canvas is closer to building games for old DOS and Gameboys then structuring hypertext with HTML.
We’re going to change this HTML as we move thru the chapters but for now, create a file called index.html with the following content:
 1 <!DOCTYPE html>
 2 <html>
 3     <head>
 4         <meta charset="UTF-8" />
 5         <title>Foxnoid Game</title>
 6         <link rel="stylesheet" href="css/style.css" />
 7         <script defer src="js/phaser.min.js"></script>
 8     </head>
 9     <body>
10
11         <div id="game"></div>
12
13     </body>
14 </html>
This HTML does nothing besides giving us a place to hold our canvas and including Phaser.
Our Application Manifest
Create a file called manifest.webapp next to the index.html in the foxnoid folder containing the following:
 1 {
 2     "version": "0.1",
 3     "name": "Foxnoid",
 4     "description": "A game for Firefox OS",
 5     "launch_path": "/index.html",
 6     "developer": {
 7         "name": "Andre Alves Garzia",
 8         "url": "http://andregarzia.com"
 9     },
10     "installs_allowed_from": ["*"]
11 }
This is the minimum data needed to start our game development process. Be aware that before submitting an app to the Firefox Marketplace we’ll need to add some things to this file like icons. We’ll talk more about icons and static resources in the chapter about assets.
Summary
Your Foxnoid folder should look like this now:
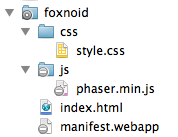
If it doesn’t then you can always fetch the Foxnoid source from the Foxnoid repository on Github just be aware that the version on github is a lot more complete than the one we have now.
Right now you should have a folder with some files that we’ll serve as a starting point for our game development. You should also know a bit about application types and manifests.
On the next chapter we’ll do some Javascripting to initialize our game.