Getting started
The first thing I like to do with any project is to get our build pipeline set up and start deploying code to our ‘production’ environment. To that end we need to look at building the simplest thing possible to validate our testing infrastructure works, our CI envinronment can pick up changes on commit and after a succesful build deploy the changes.
I will assume you have signed up and installed all of the software outlined in the What you will need section.
Setting up our project
Open up a terminal window and navigate to the location you want to store your project files.
I use a mac, so most of the commands listed here are *nix based and for the most part they shouls also work on a windows machine.
Once there let’s create a project folder and change into it:
1 > mkdir weatherly && cd weatherly
Let’s initilise our github repository:
1 > git init
2 > Initialized empty Git repository in /Users/gregstewart/Projects/github/weather\
3 ly/.git/
Before we go any further let’s create a .gitignore file in the root of our project and add the following lines to it:
1 node_modules
2 .idea
Once down let’s commit this change quickly:
1 > git add .gitignore
2 > git commit -m "Adding folders to the ignore list"
From a folder perspective I like to create a distribution folder and an app folder to hold the source, so let’s go ahead and add these folders as well.
1 > mkdir app
2 > mkdir dist
We’ll start by using bower to grab some of our front end dependencies. Let’s start by creating a bower.json file by typing bower init, fill in the details as you see fit, but here’s what I selected:
 1 {
 2 	name: 'weatherly',
 3 	version: '0.0.0',
 4 	authors: [
 5 		'Greg Stewart <gregs@tcias.co.uk>'
 6 	],
 7 	description: 'Building a web app guided by tests',
 8 	moduleType: [
 9 		'commonjs'
10 	],
11 	license: 'MIT',
12 	homepage: 'http://www.tcias.co.uk/',
13 	private: true,
14 	ignore: [
15 		'**/.*',
16 		'node_modules',
17 		'bower_components',
18 		'test',
19 		'tests'
20 	]
21 }
Everybody likes a bit of Bootstrap so let’s start with that package :
1 > bower install bootstrap --save
The --save flag at the end of the command means that the dependecy will be added to our bower.jon file during the installation of the package. We are doing this because we do not want to check in any external dependencies into our repository, instead at build/CI time we’ll restore these using bower.
So let’s edit our .gitignore file to make sure we don’t accidentally commit these files:
1 node_modules
2 .idea
3 bower_components
And let’s add this change to our repo:
1 > git add .gitignore
2 > git commit -m "Adding bower_components to the ignore list"
To round things off let’s install HTML5 boilerplate
1 > bower install html5-boilerplate
You may have noticed that I decided not to add this package to our bower.json file, simply because we’ll copy the files we need into our app folder:
1 > mv bower_components/html5-boilerplate/css app/
2 > mv bower_components/html5-boilerplate/img app/
3 > mv bower_components/html5-boilerplate/*.html app/
4 > mv bower_components/html5-boilerplate/*.png app/
5 > mv bower_components/html5-boilerplate/*.xml app/
6 > mv bower_components/html5-boilerplate/*.ico app/
7 > mv bower_components/html5-boilerplate/*.txt app/
In your editor of choice open up the app/index.html file and add the following:
 1 <!DOCTYPE html>
 2 <!--[if lt IE 7]>      <html class="no-js lt-ie9 lt-ie8 lt-ie7"> <![endif]-->
 3 <!--[if IE 7]>         <html class="no-js lt-ie9 lt-ie8"> <![endif]-->
 4 <!--[if IE 8]>         <html class="no-js lt-ie9"> <![endif]-->
 5 <!--[if gt IE 8]><!--> <html class="no-js"> <!--<![endif]-->
 6 	<head>
 7     	<meta charset="utf-8">
 8     	<meta http-equiv="X-UA-Compatible" content="IE=edge">
 9     	<title>Weatherly - Forecast for London</title>
10     	<meta name="description" content="">
11 	    <meta name="viewport" content="width=device-width, initial-scale=1">
12
13         <!-- Place favicon.ico and apple-touch-icon.png in the root directory -->
14
15     	<link rel="stylesheet" href="css/main.css">
16 	</head>
17 	<body>
18     	<!--[if lt IE 7]>
19         	<p class="browsehappy">You are using an <strong>outdated</strong> brows\
20 er. Please <a href="http://browsehappy.com/">upgrade your browser</a> to improve\
21  your experience.</p>
22     	<![endif]-->
23
24     	<!-- Add your site or application content here -->
25     	<div class="container">
26         	<div class="header">
27             	<ul class="nav nav-pills pull-right">
28                 	<li class="active"><a href="#">Home</a></li>
29                 	<li><a href="#">About</a></li>
30                		<li><a href="#">Contact</a></li>
31             	</ul>
32             	<h3 class="text-muted">test</h3>
33         	</div>
34
35         	<div class="jumbotron">
36             	<h1>London Right Now</h1>
37             	<p class="temperature">14 degrees</p>
38             	<p>Mostly cloudy - feels like 14 degrees</p>
39         	</div>
40
41         	<div class="row marketing">
42             	<div class="col-lg-6">
43                 	<h4>NEXT HOUR</h4>
44                 	<p>Mostly cloudy for the hour.</p>
45
46                 	<h4>NEXT 24 HOURS</h4>
47                		<p>Mostly cloudy until tomorrow afternoon.</p>
48             	</div>
49         	</div>
50
51         	<div class="footer">
52             	<p><span class="glyphicon glyphicon-heart"></span> from Weatherly</\
53 p>
54         	</div>
55
56     	</div>
57     	<p></p>
58
59     	<script src="//ajax.googleapis.com/ajax/libs/jquery/1.10.2/jquery.min.js"><\
60 /script>
61     	<script>window.jQuery || document.write('<script src="js/vendor/jquery-1.10\
62 .2.min.js"><\/script>')</script>
63
64     	<!-- Google Analytics: change UA-XXXXX-X to be your site's ID. -->
65     	<script>
66         	(function(b,o,i,l,e,r){b.GoogleAnalyticsObject=l;b[l]||(b[l]=
67                	 function(){(b[l].q=b[l].q||[]).push(arguments)});b[l].l=+new Da\
68 te;
69             	e=o.createElement(i);r=o.getElementsByTagName(i)[0];
70             	e.src='//www.google-analytics.com/analytics.js';
71             	r.parentNode.insertBefore(e,r)}(window,document,'script','ga'));
72         	ga('create','UA-XXXXX-X');ga('send','pageview');
73     	</script>
74 	</body>
75 </html>
If you open up the file in your browser you should see something like this hopefully:
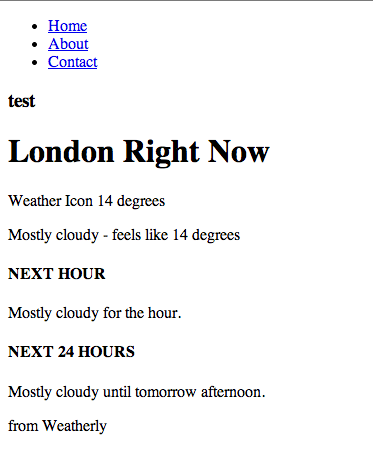
Rendered HTML
Not exactly something to write home about, but it’s enough for us to get started setting up our little server, writing a functional test and deploying something to our Heroku instance. We’ll make this a lot prettier later on in the book when we deal with setting up Grunt to build our JavaScript and CSS assets.
The last thing we’ll do is commit all of our changes to our local repository:
1 > git add .
2 > git commit -m "Added Bootstrap/Modernizr to bower.json, moved the skeleton of \
3 the HTML5 boilerplate to the app folder and created a base index page for our we\
4 ather forecat app."
At this stage it’s a good idea to also push the changes to our remote repository. If you have followed the What you will need section, you will hopefully have created a Github account. If not go ahead and to that now. Then create a repository called weatherly, here’s what I entered:

Creating your weatherly repository
To push our changes to the remote repository, you will need to tell your local repository where it is (be sure to replace the <account_name> with your actual account name):</account_name>
1 > git remote add origin https://github.com/<account_name>/weatherly.git
Now you can push your changes:
1 > git push -u origin master
Recap
Before we move on let’s just quickly recap what we have done so far:
- created our app folder structure
- initialised our git repo
- created a Git ignore file
- used bower to manage some of our front end dependencies:
- Bootstrap
- Modernizr
- HTML5 boilerplate
- created a very basic index.html page
- pushed all of the changes to our remote git repository