1.2 Installation and Configuration
1.2.1 Software Requirements
While WebdriverIO is a Node.js based system, there are a few other tools needed to run the tests. You’ll want:
- A text-editor (I use Sublime Text 3, but Atom, Webstorm and VSCode are other great options)
- A terminal/command line tool (I use iTerm with Oh My Zsh thrown on top)
- A WebDriver-compliant browser for testing (Chrome is what we’ll be using)
Optionally, you may also want to install Java 8. This will allow you to run selenium-standalone, which gives you the ability to test on different browsers in the same test run (e.g., both Firefox AND Chrome).
Installing Node.js
There are many great tutorials for how to install Node.js on a variety of systems. A quick search should bring up many results should you need additional help with this installation.
Overall though, there are two common ways to install Node.js.
Install via official site:
Go to nodejs.org and download the release labelled “Recommended For Most Users”. This will start with an even number (e.g., 10.19.0). Be aware that releases starting with odd numbers (e.g., 11.10.0) are not supported long term, so while they may have the latest features, they will stop recieving support and updates after 6 months. For more information on this, have a read through the Node.js release plan.
Install via a ‘version manager’
The main reason for using a version manager is “the future”. In “the future”, you’re probably going to want to update your version of Node.js to a more recent release. While it’s possible to manually uninstall the old version, then install the new one using the official site, it can be a little tedious to do so on a regular basis.
With a version manager, it takes care of this for you. You simply ask for the Node.js version you want, and it does all the grunt work.
Two popular version managers are:
Installation instructions are on both of those sites, so I won’t copy them over here (plus any copied instructions are likely to be out-of-date by the time you read this.)
Getting Your Terminal Ready
As I mentioned, you’ll need to know the basics of how to use a terminal/command prompt in order to take advantage of all the WebdriverIO has to offer.
All major Operating Systems provide a pre-installed terminal for you to use. These are:
- Windows 10: cmd.exe or Powershell
- Mac OSX: Terminal
- Linux: konsole, gnome-terminal, terminal or xterm
In the terminal of your choice, ensure you have Node.js installed correctly by running node -v in it. This should output the version number of Node.js that you have installed. If you see a message like command not found: node, then something went wrong with your installation and you’ll need to debug it.
A Note for Windows Users
The commands you use in the default Windows terminal (cmd.exe) are different from what I’ll be showing in my code samples.
Some examples:
- Instead of using
lsto print the contents of a directory, you need to usedir - Windows uses a back slash
\instead of a forward slash/for path commands (e.g.,node_modules\.bin\versusnode_modules/.bin/) - Windows users are also required to enter
.\before every function call that involes a path (e.g.,dir .\node_modules\.bin\instead ofls node_modules/.bin/) - The way you define environment variables is different (we’ll go into detail on this later)
For a more comprehensive list of differences, RedHat has put together a comparison chart.
I’ll try to provide the Windows equivalent the first time I introduce a command. However, if you’d like to stick with the commands that I use throughout the book, consider installing an alternative console. Here are some suggestions:
These terminals use bash-style commands, which is what I use in my examples.
1.2.2 Browsers and “Driving” Them
We normally use browsers by clicking with our mouse and typing with our keyboard. That works well for humans, but doesn’t make sense when trying to write automated tests.
Instead of building some sort of physical robot that can control a mouse and type on a keyboard, we invented software that mimics these actions. Selenium RC was one of the original tools to do this. WebDriver, which was also developed around the same time as Selenium RC, became a popular alternative. In 2009, the two teams combined forces to create Selenium WebDriver.
Over the years, standardization on the Selenium WebDriver commands occurred, and now there is an official W3C spec for WebDriver. The teams behind the browsers we use have also started to implement that spec (e.g., ChromeDriver), allowing the use of WebDriver commands outside of Selenium.
Recently, Chrome has released support for their own protocol called “Chrome DevTools”. WebdriverIO has added support for this protocol through the devtools package. The industry has evolved its tooling over the years and WebdriverIO has kept up giving you the flexibility to pick what works best.
This is why WebdriverIO has the tagline “Next-gen browser and mobile automation test framework for Node.js,” excluding any specific protocol. While you can use Selenium in your WebdriverIO tests, it’s really just about running commands through any protocol with support. WebdriverIO doesn’t want to box you in to a specific solution, and we appreciate that :)
Now, it’s important not to confuse terms, so to be clear, the following list contains many different things:
- WebDriver: A technical specification defining how tools should work.
- The Selenium Project: An organization providing tools used for automated testing.
- Selenium/Selenium WebDriver: Language-specific bindings for the WebDriver spec that are officially supported by the Selenium project, like the NPM package selenium-webdriver.
- Browser Driver: Browser specific implementations of the WebDriver spec (e.g., ChromeDriver, GeckoDriver, etc).
- Selenium Server: A proxy server used to assist a variety of browser drivers.
- Chrome Devtools Protocol: A protocol that allows for tools to instrument, inspect, debug and profile Chromium, Chrome and other Blink-based browsers. (Project Homepage)
- Puppeteer A Node.js library which provides a high-level API to control Chrome or Chromium over the DevTools Protocol.
- WebdriverIO: A test framework written in Node.js that provides bindings for tools like Selenium Server, Chrome DevTools (via Puppeteer) and WebDriver-based browser drivers (e.g., ChromeDriver).
That’s a fair number of terms to keep in mind. I don’t have a great suggestion for how to memorize everything, but maybe just reference this section when you need a good reminder.
What Do We Use?
Right now there are essentially two different approaches to how you can automate a browser. One uses the official W3C web standard (i.e., WebDriver) and the other uses native browser interfaces that some of the browsers expose (e.g., Chrome DevTools).
The WebDriver protocol is the de-facto standard automation technique. It allows you to not only automate all desktop browsers, but also run automation on mobile devices, desktop applications or even Smart TVs. This gives us a tremendous amount of power in being able to run our tests across a variety of systems.
On the other side of things, that are many native browser interfaces to run automation on. In the past, every browser had its own (often not documented) protocol. But these days a lot of browsers, including Chrome, Edge and soon Firefox, come with a somewhat unified interface revolving around the Chrome DevTools Protocol.
What are some differences between WebDriver and these native browser interfaces? Well, WebDriver provides true cross browser support and allows you to run tests on a large scale in the cloud using vendors like Sauce Labs. But native browser interfaces often allow for many more automation capabilities, like listening and interacting with network or DOM events. That said, they are usually limited to a single browser engine only. These native interfaces also run much faster than their WebDriver counterparts, as they’re a bit “closer to the metal”.
We’re going to take a minute to look at how to get set up with a few of these solutions. Throughout the book though, our examples will use the WebDriver protocol, since it’s the most popular standard in use as of this writing. Thankfully though, it’s very easy to switch between protocols in WebdriverIO, so we’re not boxing ourselves in by picking one or the other.
Using the Chrome DevTools Protocol
Starting with Version 6, WebdriverIO now provides support for the Chrome DevTools protocol by default. This means that to run a local test script, you don’t need to download a driver or Selenium. When running your test, WebdriverIO will first check if a browser driver is running and available. If not, it falls back to using Puppeteer (assuming you have a Chromium, Chrome or other Blink-based browser installed). Seeing that Chrome is the most popular browser in use as of the writing of this book, chances are you already have it installed.
To use the Chrome DevTools protocol for your tests, simply ensure you have Chrome (or an equivalent) installed. Everything else is handled by default.
How To Use a ‘Driver’?
If you are interested running your tests for a browser that isn’t based on the ‘Blink’ engine (or just prefer to stick with the WebDriver standard), you’ll want to use some sort of WebDriver-based browser driver. There are several WebDriver clients available, Selenium Server being the most popular. Let’s walk through setting up one of these clients so that you can start writing tests.
All major browsers have ‘drivers’ that mostly follow the WebDriver spec (unfortunately there are still differences between them).
Here are the drivers for each major browser:
- GeckoDriver for Firefox (v48 and above)
- ChromeDriver for Chromium
- EdgeDriver for Microsoft Edge
- SafariDriver for Safari (implemented as a Safari browser extension)
- IEDriver for Internet Explorer
To see how your favorite browser driver stacks up in regards to WebDriver support, check out the Web Platform Tests page. This site runs regular tests against clients implementing the WebDriver spec, and provides the results showing how well they support it.
There are drivers available for mobile testing (e.g., Appium), but they won’t be covered in this book.
Installing and Running ChromeDriver
Installation instructions for browser drivers, like ChromeDriver, can be found on their respective websites. However, in most cases, you can use Node.js-based tools to make installation simpler. You can find these tools on the npmjs.org website.
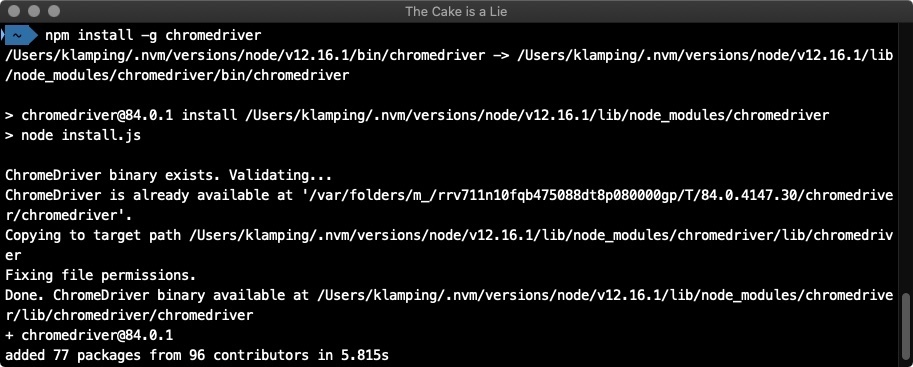
For example, you can download and run ChromeDriver using the NPM ChromeDriver package.
To install the tool, in a terminal, run:
Once installed, you can then start a ChromeDriver instance by running:
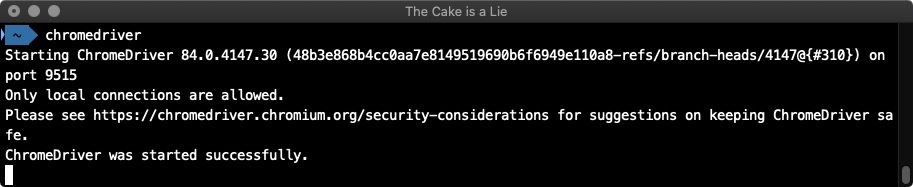
This instance will continue to run until you stop it. To do that, issue an ‘exit’ command by pressing the ctrl+c key combo.
Installing and Running the Selenium Standalone Server
First off, if you’re going to be using this method, you need to ensure you have a recent version of Java installed on your computer. Be sure to take care of that before trying the following. None of the content of this book requires a Selenium instance, so feel free to skip this section.
If you’re looking to run tests on a variety of browsers, you’ll probably want to check out what the Selenium Server project does. It offers a ‘hub’ that allows you to start multiple browser instances and control them all through one single location.
While it is possible to manually download and start a selenium server, there is an NPM tool called “selenium-standalone” that makes this much easier.
To install and use it, run the following command in your terminal:
This will make a global command available called selenium-standalone. With this command, we can do the following:
- Install the four supported WebDriver clients (ChromeDriver, FirefoxDriver, IEDriver, Microsoft Edge Driver)
- Start a Selenium Server that acts as a proxy to these clients
To run the install, issue this command:
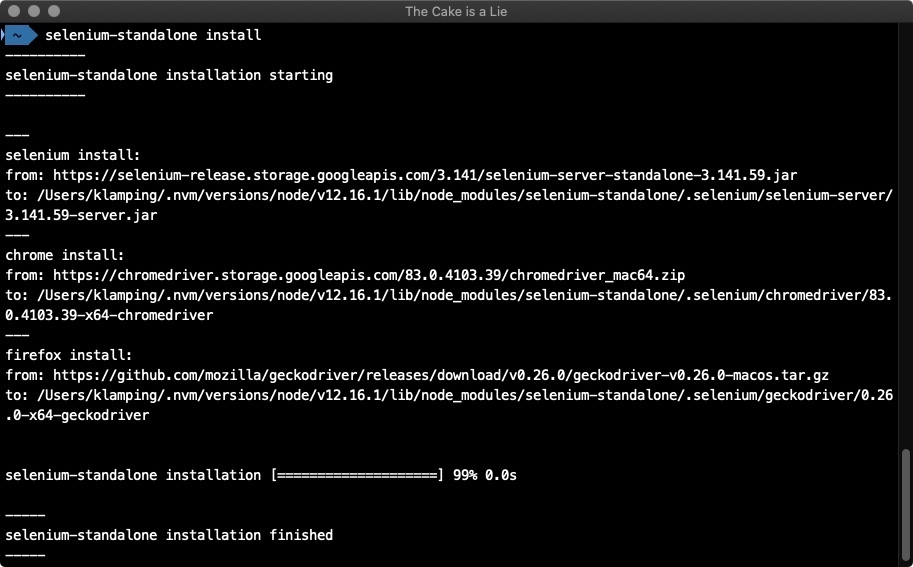
You should only need to do this once (although you may need to run it again after driver updates occur).
Then, to start your server, run:
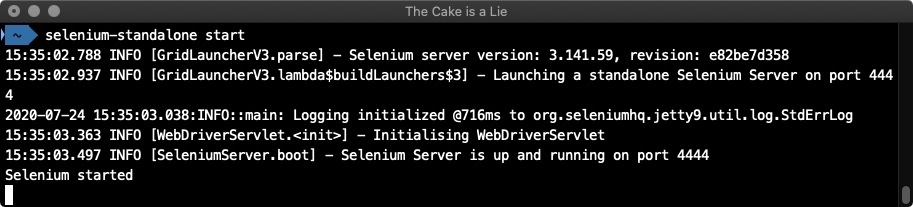
This server will run until it receives an exit command (similar to how ChromeDriver works). You can issue that command with the ctrl+c key combo.
We’ll talk more about using Chrome DevTools, the Selenium Standalone Server and ChromeDriver (including services to integrate them with WebdriverIO) in a little bit.
1.2.3 Installing WebdriverIO and Basic Usage
The time has finally come! We’ve laid all the groundwork to understand the nuts and bolts behind UI testing. Now it’s time to write some tests!
To start off, we’re going to create a new folder for our first example. In a directory of your choice, make a new folder called wdio-standalone:
Why wdio-standalone?
Well, WebdriverIO allows you to use it through two modes. The first, which we’re going through here, is called “standalone” mode. It’s meant as a simple way to use WebdriverIO, and allows you to build wrappers around the tool.
“Testrunner” mode, which we’ll cover in the next section, is a bit more complicated. It provides an entire set of tools and hooks for full-fledged integration testing. I mentioned that standalone mode allows you to build wrappers around it. Well, the testrunner is essentially that.
Right now, just to introduce you to WebdriverIO, we’re going to use the standalone runner. This is only for this exercise though, as we’ll be upgrading to the testrunner soon.
With all that said, let’s ‘move’ our terminal into this wdio-standalone folder:
cd wdio-standalone
(For Windows, it’s the same command for both actions)
Inside our new folder, we’re going to initialize it as an NPM project. This will allow us to save the project dependencies that we’ll be installing through NPM.
To do that, run:
The -y will answer ‘yes’ to all the prompts, giving us a standard NPM project. Feel free to omit the -y if you’d like to specify your project details.
With that out of the way, let’s install WebdriverIO:
Note: We include the @7 version number so that the version you install is compatible with the examples in this book. If you’d like, you can leave the @7 part off, but be warned that some code may not work.
Now is a good time to mention that WebdriverIO is split into multiple NPM packages. We’ll be looking at those packages in detail later on, but note that installing webdriverio via the command above does not give you everything.
What it does give us is a Node.js module that we can use inside of a Node.js file. Let’s use that.
First, we’ll create a new file called ‘test.js’:
On Windows, that command is:
Now we have an empty file to add our first test to. Go ahead and open that file up in the text editor of your choice.
Next, we’ll copy the example given on the official WebdriverIO website. Throw the following code into your test.js file and save it:
const { remote } = require('webdriverio');

(async () => {
    const browser = await remote({
        logLevel: 'trace',
        capabilities: {
            browserName: 'chrome'
        }
    })

    await browser.url('https://duckduckgo.com')

    const inputElem = await browser.$('#search_form_input_homepage')
    await inputElem.setValue('WebdriverIO')

    const submitBtn = await browser.$('#search_button_homepage')
    await submitBtn.click()

    console.log(await browser.getTitle()) // outputs: "Title is: WebdriverIO (Softwa\
re) at DuckDuckGo"

    await browser.deleteSession()
})().catch((e) => console.error(e))
Here’s a quick overview of the file:
- We load the
remoteobject from the WebdriverIO package. - We wrap our code in an
asyncfunction so we can useawaitstatements. - We create a new session using
remote, saving the reference to abrowserobject which we use to send commands. - We send a
urlcommand, requesting the browser go to the DuckDuckGo website. - We then get an ‘element reference’ to the search input textbox.
- We use that element to call as
setValuecommand, which enters ‘WebdriverIO’ into the textbox. - We get a second element, this time the ‘Search’ button.
- We trigger a mouse click action on that button.
- We then get the title of the page, logging it to the terminal
- The session is ended, since we’re done with our test.
- A simple catch hook is added in case anything goes wrong.
Okay, that’s what it does; let’s run it to see it in action.
To do that, we need to have a browser available to run in. This can be done via:
- The built-in support from a Chrome install using the Chrome DevTools protocol
- A specific browser driver, in this case ChromeDriver
- A Selenium server
In “Browsers and ‘Driving’ Them”, we covered each of these options. We looked at Chrome DevTools, how to install and run ChromeDriver, and how to install and use the ‘selenium-standalone’ NPM package. Now let’s put that knowledge to use.
Running Through Chrome DevTools
So long as you have Chrome (or a Blink-based browser installed), there’s really nothing you need to do here for installation/start-up. All you need to do is run your test file through the Node CLI. We do that by telling Node.js to execute our test file. That command looks like:
After a second, you should see a Chrome browser pop-up for a moment, and some similar output in your terminal:

Congrats, you’ve just run your first WebdriverIO test!
Notice that the first line says “Initiate new session using the devtools protocol”. That will change depending on which protocol you use.
If you choose to go with the DevTools protocol, support for the various commands does differ from WebDriver. While in general everything is supported the same, there are still differences which can cause hiccups along the way. The examples in this book are written using the WebDriver protocol, so if you choose to stick with the DevTools protocol, expect some differences.
Now let’s look at running via ChromeDriver.
Running in ChromeDriver
The basic idea is the same, although we do need to tweak our settings just a little bit.
This is a little technical, but by default, a ChromeDriver server uses port 9515 to listens for commands (e.g., http://localhost:9515)
But by default, WebdriverIO expects the WebDriver server to be running on port 4444.
So, we can either override the WebdriverIO defaults, or tell our ChromeDriver server to use port 4444.
It’s most useful to see how to overwrite the WebdriverIO defaults, so let’s do that next. If you are interested, you can do the latter by running chromedriver --port=4444 when starting the ChromeDriver server.
Back in your test.js file, take a look at lines 4-9:
const browser = await remote({
    logLevel: 'trace',
    capabilities: {
        browserName: 'chrome'
    }
})
What we’re doing here is creating a new remote WebDriver session and telling it that we want to open up the ‘chrome’ browser. We’ll get into capabilities at a later point, so don’t worry too much about it right now.
What we will worry about is how to customize that ‘remote’ session to use port 9515 instead of the default 4444.
When creating a new remote session, along with the ability to customize the browser capabilities, there are a number of other options available to us. The official documentation gives the entire list, but we’re going to focus on two specific options:
port
Port your driver server is on.
Type: Number
Default: 4444
path
Path to driver server endpoint.
Type: String
Default: /
We’re only going to be looking at the port option right now, but I wanted to mention both as they’re related and important to know about (which we’ll see when we get to the Selenium Standalone instructions.)
So to use a custom port, we pass it in as an option to the remote function:
const browser = await remote({
    port: 9515,
    logLevel: 'trace',
    capabilities: {
        browserName: 'chrome'
    }
})
Note that it’s a number, not a string (i.e., 9515 versus '9515'). If you try using a string, you will get an error of Error: Expected option "port" to be type of number but was string.
If you still have your ChromeDriver instance running from before, leave it up and running (you can check http://localhost:9515/ to see if it gives you a response). If not, start an instance in a separate terminal window.
With our WebdriverIO settings updated and ChromeDriver ready to go, we can call our test script again.
Run node test.js one more time and validate that it all works as expected. The output should be similar to before:
2020-07-18T15:29:43.175Z INFO webdriverio: Initiate new session using the
webdriver protocol 2020-07-18T15:29:43.183Z INFO webdriver: [POST]
http://localhost:9515/session 2020-07-18T15:29:43.183Z INFO webdriver: DATA {
capabilities: { alwaysMatch: { browserName: 'chrome' }, firstMatch: [ {} ] },
desiredCapabilities: { browserName: 'chrome' } } 2020-07-18T15:29:46.174Z INFO
webdriver: COMMAND navigateTo("https://webdriver.io/") 2020-07-18T15:29:46.175Z
INFO webdriver: [POST]
http://localhost:9515/session/8c1bfcbb0617b87676343fe9c658fc93/url
2020-07-18T15:29:46.175Z INFO webdriver: DATA { url: 'https://webdriver.io/' }
2020-07-18T15:29:48.210Z INFO webdriver: COMMAND getTitle()
2020-07-18T15:29:48.210Z INFO webdriver: [GET]
http://localhost:9515/session/8c1bfcbb0617b87676343fe9c658fc93/title
2020-07-18T15:29:48.524Z INFO webdriver: RESULT WebdriverIO · Next-gen browser
and mobile automation test framework for Node.js Title was: WebdriverIO ·
Next-gen browser and mobile automation test framework for Node.js
2020-07-18T15:29:48.525Z INFO webdriver: COMMAND deleteSession()
2020-07-18T15:29:48.525Z INFO webdriver: [DELETE]
http://localhost:9515/session/8c1bfcbb0617b87676343fe9c658fc93
While there are a few differences from before, the important one is the first line. See how it says it’s using the WebDriver protocol? That’s how we can know things are working as we want.
If it still mentioned that it was using the DevTools protocol, then we wouldn’t actually be using ChromeDriver, as WebdriverIO is falling back using the Chrome DevTools installation. If that’s the case, make sure you have your port information correct and the file saved.
Running Through Selenium Standalone
Note: Selenium Standalone is not the same thing as WebdriverIO Standalone mode. They simply share the same name to describe their “independent” nature.
If you already have your Selenium server running from before, great! If not, open up a new terminal window and run selenium-standalone start.
Aside from seeing the server running in your terminal, you can check that you have a Selenium instance up and running by visiting the following URL in your browser: http://localhost:4444/wd/hub
You should see a website looking a lot like this:
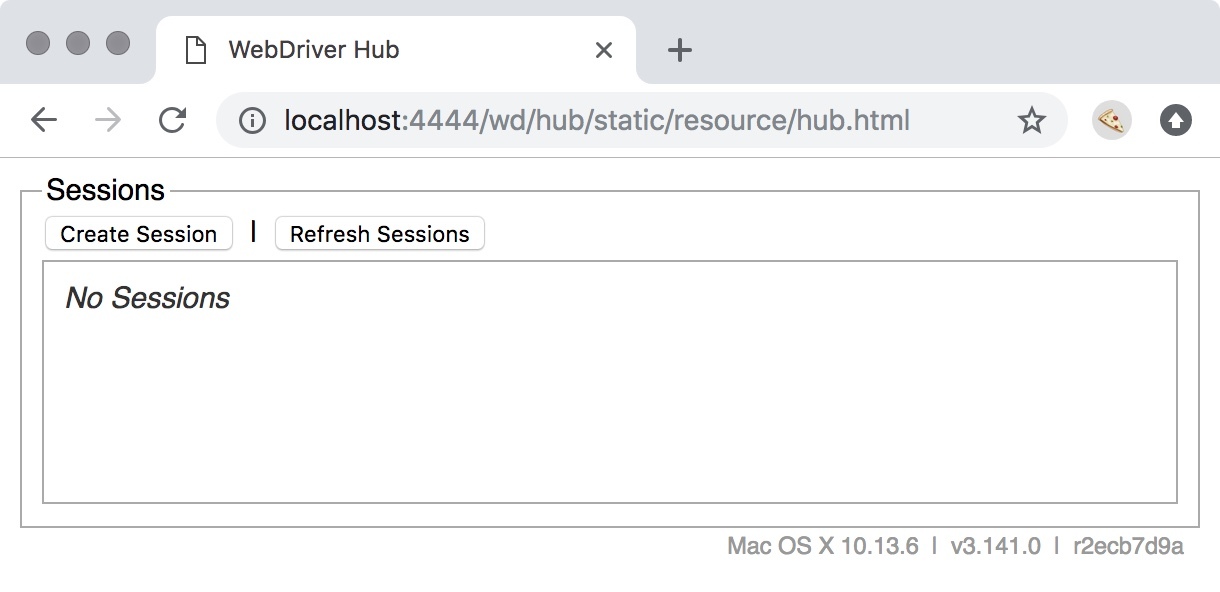
Note: If you get a 404 error, something went wrong while starting your server, and you’ll need to resolve it before proceeding.
The next thing we need to do is configure WebdriverIO to use the Selenium server.
Unlike ChromeDriver, when you start Selenium, it runs on port 4444 by default. That means we can comment out or remove the port option we had for our ChromeDriver usage.
That said, Selenium waits for requests to come through the /wd/hub URL endpoint/path (hence http://localhost:4444/wd/hub being mentioned before). But if you recall from our options, WebdriverIO doesn’t have that at it’s default path option (which is just /).
To use Selenium, we’ll need to update that path setting to match where Selenium defaults to:
const browser = await remote({
    path: '/wd/hub',
    logLevel: 'trace',
    capabilities: {
        browserName: 'chrome'
    }
})
Running our test once more with node test.js, you should see similar output:
2020-07-18T15:33:51.348Z INFO webdriverio: Initiate new session using the webdri
ver protocol
2020-07-18T15:33:51.356Z INFO webdriver: [POST] http://localhost:4444/wd/hub/ses
sion
2020-07-18T15:33:51.356Z INFO webdriver: DATA { capabilities:
   { alwaysMatch: { browserName: 'chrome' }, firstMatch: [ {} ] },
  desiredCapabilities: { browserName: 'chrome' } }
2020-07-18T15:33:54.807Z INFO webdriver: COMMAND navigateTo("https://webdriver.i
o/")
2020-07-18T15:33:54.807Z INFO webdriver: COMMAND navigateTo("https://webdriver.i
o/")
2020-07-18T15:33:54.808Z INFO webdriver: [POST] http://localhost:4444/wd/hub/ses
sion/8e71129f6b0b4cb3cd09bd17b06bd6ca/url
2020-07-18T15:33:54.808Z INFO webdriver: DATA { url: 'https://webdriver.io/' }
2020-07-18T15:33:57.275Z INFO webdriver: COMMAND getTitle()
2020-07-18T15:33:57.275Z INFO webdriver: [GET] http://localhost:4444/wd/hub/sess
ion/8e71129f6b0b4cb3cd09bd17b06bd6ca/title
2020-07-18T15:33:57.288Z INFO webdriver: RESULT WebdriverIO · Next-gen browser a
nd mobile automation test framework for Node.js
Title was: WebdriverIO · Next-gen browser and mobile automation test framework f
or Node.js
2020-07-18T15:33:57.289Z INFO webdriver: COMMAND deleteSession()
2020-07-18T15:33:57.289Z INFO webdriver: [DELETE]
 http://localhost:4444/wd/hub/session/8e71129f6b0b4cb3cd09bd17b06bd6ca
Again, line one shows that we’re using the WebDriver protocol. And notice on line two that it posts to http://localhost:4444/wd/hub/session, using the path we provided.
If instead of that output you see an error that includes RequestError: connect ECONNREFUSED 127.0.0.1:4444, this means your Selenium server wasn’t running. Start it back up and try again.
Leaving It at That
This will be the end of our little test file. We’re not going to be updating it anymore, and will in fact be leaving this whole wdio-standalone folder behind.
Why? Because we’re moving on to a much better way of using WebdriverIO through its test runner. That’s coming up next.