1. PHPUnit Hello World
1.1 安装LAMP环境
在Ubuntu上安装LAMP环境非常简单,两条命令即可。
1 bob@Bob-VirtualBox:~$ sudo apt install tasksel
2 bob@Bob-VirtualBox:~$ sudo tasksel install lamp-server
验证 Apache
浏览器打开 http://localhost

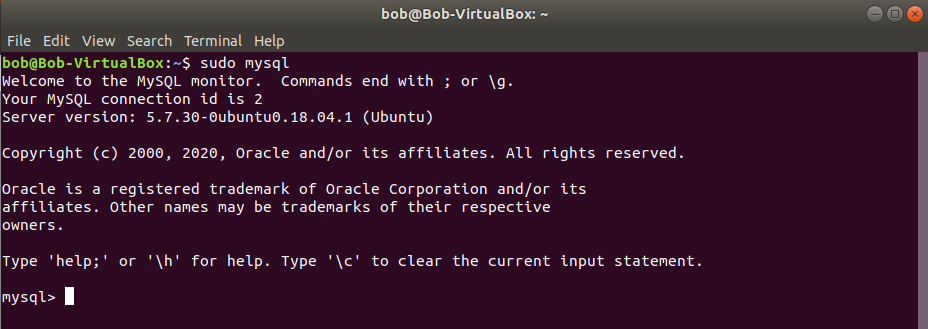
验证 MySQL
1 bob@Bob-VirtualBox:~$ sudo mysql
验证 PHP
为了方便后续开发,我们将 Apache 默认目录 /var/www 的权限修从 root 修改为当前用户。
1 bob@Bob-VirtualBox:~$ ls -ld /var/www/
2 drwxr-xr-x 3 root root 4096 Jun 29 15:56 /var/www/
3 bob@Bob-VirtualBox:~$ sudo chown -R $USER:$USER /var/www/
4 bob@Bob-VirtualBox:~$ ls -ld /var/www/
5 drwxr-xr-x 3 hgy hgy 4096 Jun 29 15:56 /var/www/
Apache 默认的 VirtualHost 配置把 DocumentRoot 指向了 /var/www/html ,我们把它修改成 /var/www ,这样我们可以在 /var/www 目录下建不同的目录,把不同项目的代码区分开。
1 bob@Bob-VirtualBox:~$ sudo replace /var/www/html /var/www -- /etc/apache2/sites-avai\
2 lable/000-default.conf
3 bob@Bob-VirtualBox:~$ sudo systemctl reload apache2.service
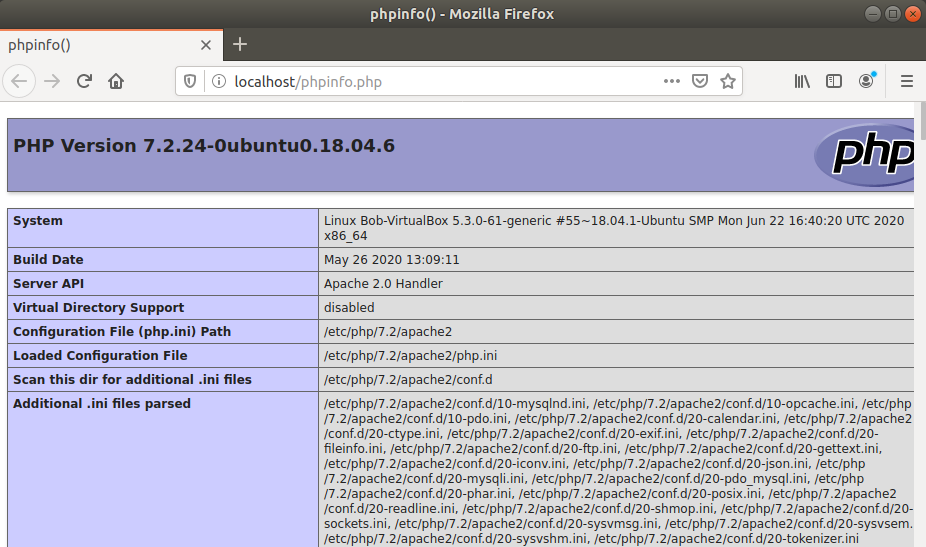
我们使用 phpinfo() 函数来验证 PHP 是否安装好了。
1 bob@Bob-VirtualBox:~$ echo '<?php phpinfo();' > /var/www/phpinfo.php
浏览器打开 http://localhost/phpinfo.php
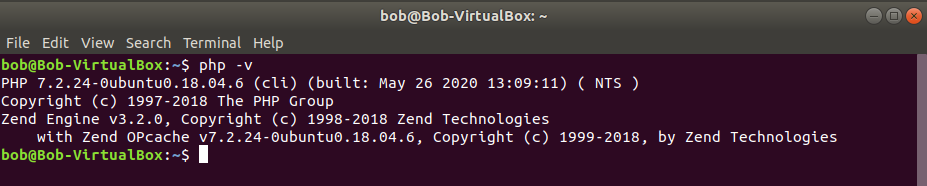
验证 PHP CLI
1 bob@Bob-VirtualBox:~$ php -v
1.2 安装PHPUnit
PHPUnit的安装也非常简单,同样两条命令就安装好了。
1 bob@Bob-VirtualBox:~$ wget -O phpunit https://phar.phpunit.de/phpunit-8.phar
2 bob@Bob-VirtualBox:~$ chmod +x phpunit
验证 phpunit
1 ./phpunit --version

现在使用 phpunit 必须输入相对路径或绝对路径,这样有点麻烦,因为我们会很多次地执行 phpunit 。我们将其加入到当前用户的 ~/bin 目录里,这样直接输入 phpunit 就可以了。
1 bob@Bob-VirtualBox:~$ mkdir bin
2 bob@Bob-VirtualBox:~$ mv phpunit bin/
退出(Logout)当前用户,再登录进来,或者直接重启一下系统。现在直接输入 phpunit 就可以了。
1 bob@Bob-VirtualBox:~$ phpunit --version

1.3 Hello World
现在,让我们写一个简单的 Hello World 程序。
我们在 /var/www 目录下新建一个名为 hello-world 的子目录。
1 bob@Bob-VirtualBox:~$ mkdir /var/www/hello-world
然后用你喜欢的编辑器编写如下代码,保存到 /var/www/hello-world/hello.php 。
1 <?php
2
3 echo 'Hello World';
浏览器打开 http://localhost/hello-world/hello.php

我们让这个 hello world 程序稍微复杂一点点。
 1 <html>
 2 <head>
 3 <meta charset="utf-8">
 4 </head>
 5 <body>
 6
 7 <?php
 8
 9 if ($_GET) {
10     echo 'Hello ', isset($_GET['username']) && $_GET['username'] ? $_GET['username']\
11  : 'World';
12 }
13
14 ?>
15
16 <form>
17     Input your name: <input type="text" name="username">
18     <input type="submit" value="Submit">
19 </form>
20
21 </body>
22 </html>
再次打开 http://localhost/hello-world/hello.php

直接点击“Submit”按钮

输入你的名字再次点击“Submit”按钮

OK,我们的 Hello World 程序运行地很好。
那么,怎么使用PHPUnit对其进行自动化测试呢?
作者确实看到过有人使用一些工具类库,通过写代码启动了一个浏览器,访问要测试的网址,然后判断打开的页面里是否有期望的内容。比如:
1 from selenium import webdriver
2
3 browser = webdriver.Firefox()
4 browser.get('http://localhost')
5
6 assert 'Hello' in browser.title
作者也看到一些MVC开发框架提供的测试方法,比如 Zend Framework 1 的 Zend_Test 类,在测试代码里直接驱动MVC框架运行,模拟浏览器的请求过程,最终获取到页面输出,然后同样判断页面里是否有期望的内容。
 1 class UserControllerTest extends Zend_Test_PHPUnit_ControllerTestCase
 2 {
 3     public function setUp()
 4     {
 5         $this->bootstrap = array($this, 'appBootstrap');
 6         parent::setUp();
 7     }
 8
 9     public function appBootstrap()
10     {
11         $this->frontController
12              ->registerPlugin(new Bugapp_Plugin_Initialize('development'));
13     }
14
15     public function testValidLoginShouldGoToProfilePage()
16     {
17         $this->request->setMethod('POST')
18               ->setPost(array(
19                   'username' => 'foobar',
20                   'password' => 'foobar'
21               ));
22         $this->dispatch('/user/login');
23         $this->assertRedirectTo('/user/view');
24
25         $this->resetRequest()
26              ->resetResponse();
27
28         $this->request->setMethod('GET')
29              ->setPost(array());
30         $this->dispatch('/user/view');
31         $this->assertRoute('default');
32         $this->assertModule('default');
33         $this->assertController('user');
34         $this->assertAction('view');
35         $this->assertNotRedirect();
36         $this->assertQuery('dl');
37         $this->assertQueryContentContains('h2', 'User: foobar');
38     }
39 }
这些方法给人的第一印象是 沉重 。我们不打算这样做。
作者在2012年刚开始探索TDD时,就使用过Zend_Test,并且不只是写个Hello World,而是真实地应用在了OurATS招聘管理系统的一个功能上。
这种测试方法看起来简单,实战时能把开发者累死(心累)。
主要在三方面:
- 开发者要了解MVC框架运行的细节,这样才能把浏览器请求转换为驱动MVC框架运行的代码。
- 开发者需要查看最终生成的html代码,然后才能精确定位期望的内容在哪里。并且如果页面改版,虽然呈现的主要内容还在,但显示的位置、样式都已经发生了变化,测试代码就跑不过了,要重写。
- 测试写起来很繁琐。因为期望的内容往往不是一个点,而每个点除了本身的内容外,还需要考虑如何定位到这个点。
我们的做法是,通过重新组织代码,提炼出核心逻辑,让其易于测试。然后只测试这个核心逻辑,而核心逻辑之外的代码,并不通过PHPUnit测试。
这种做法看似不严谨,因为我们没有测试完整的功能,但实际上却是测试得以落地的关键。具体为什么,我们先不展开分析,本书将通过实战项目让读者领会这一点。
1.4 Hello World 重构
hello.php 核心逻辑是:
接收用户的输入,如果用户输入了username,就返回 Hello username ,否则,返回 Hello World 。
新建一个文件 /var/www/hello-world/func.php
 1 <?php
 2
 3 function sayHello(array $data)
 4 {
 5     if (isset($data['username']) && $data['username']) {
 6         return 'Hello ' . $data['username'];
 7     }
 8
 9     return 'Hello World';
10 }
在 hello.php 中调用 sayHello
 1 <html>
 2 <head>
 3 <meta charset="utf-8">
 4 </head>
 5 <body>
 6
 7 <?php
 8
 9 if ($_GET) {
10     include __DIR__ . '/func.php';
11     echo sayHello($_GET);
12 }
13
14 ?>
15
16 <form>
17     Input your name: <input type="text" name="username">
18     <input type="submit" value="Submit">
19 </form>
20
21 </body>
22 </html>
再次访问 http://localhost/hello-world/hello.php ,直接点击“Submit”,输入名字再次点击”Submit“,和重构前运行的一样,完全没问题。
1.5 Hello World Test
现在,我们可以为这个 Hello World 程序写测试了。
新建一个文件 /var/www/hello-world/sayHelloTest.php
 1 <?php
 2
 3 class sayHelloTest extends PHPUnit\Framework\TestCase
 4 {
 5     public function testEmptyInput()
 6     {
 7         $data = array();
 8         $this->assertEquals('Hello World', sayHello($data));
 9     }
10
11     public function testEmptyUsername()
12     {
13         $data = array('username' => '');
14         $this->assertEquals('Hello World', sayHello($data));
15     }
16
17     public function testSayHello()
18     {
19         $data = array('username' => 'Bob');
20         $this->assertEquals('Hello Bob', sayHello($data));
21     }
22 }
然后执行这个测试
1 bob@Bob-VirtualBox:~$ cd /var/www/hello-world/
2 bob@Bob-VirtualBox:/var/www/hello-world$ phpunit sayHelloTest.php
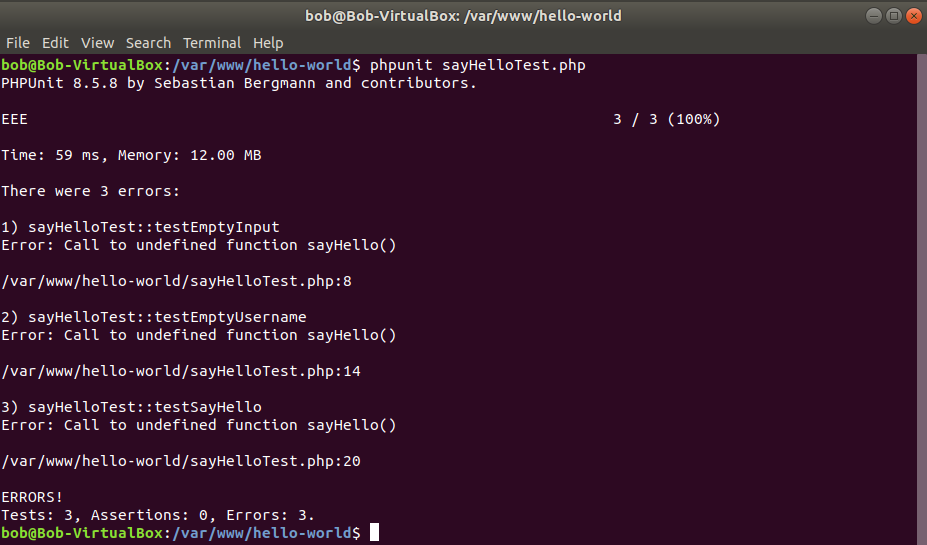
报错了 Error: Call to undefined function sayHello() 。
这是因为我们的测试代码里没有 include 'func.php'; 。
我们可以使用 phpunit 的参数 --bootstrap 来解决这个问题。
1 --bootstrap <file> A PHP script that is included before the tests run
/var/www/hello-world/bootstrap.php
1 <?php
2
3 include __DIR__ . '/func.php';
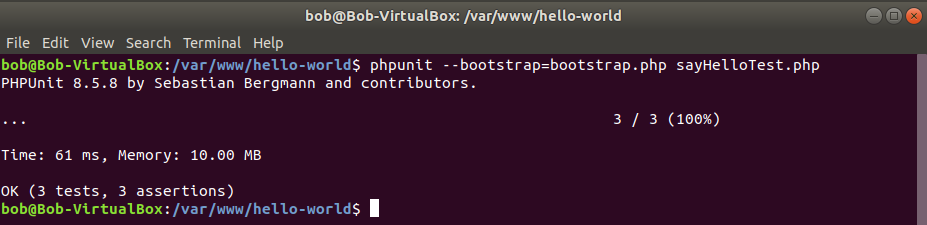
加上 --bootstrap 参数再次执行
1 bob@Bob-VirtualBox:/var/www/hello-world$ phpunit --bootstrap=bootstrap.php sayHelloT\
2 est.php
1.6 phpunit.xml
在上一小节,我们要运行 sayHelloTest.php ,需要将其作为命令行参数传递给 phpunit,并且还要加上参数 --bootstrap=bootstrap.php ,如果要运行多次的话,就太不方便了。phpunit 可以通过配置文件 phpunit.xml 使得我们只需要在当前目录执行 phpunit 就可以运行该目录下的所有测试。
新建文件 /var/www/hello-world/phpunit.xml
1 <phpunit bootstrap="bootstrap.php" stopOnFailure="true" cacheResult="false">
2     <testsuites>
3         <testsuite name="All">
4             <directory>.</directory>
5         </testsuite>
6     </testsuites>
7 </phpunit>
stopOnFailure 的作用是如果遇到失败的测试 phpunit 是继续执行下去,还是立即停止执行,我们将其设为 true,这样方便我们修正错误。
cacheResult 的作用 phpunit 的使用文档里说明的有点模糊,默认值为 true ,导致运行 phpunit 后,会在当前目录生成一个隐藏文件 .phpunit.result.cache ,我们先把它设为 false ,如果后边有用到和 cache 相关的功能,再把它打开。
testsuite 是把多个测试组织在一块的一个办法,对于大多数项目,我们可以直接把所有测试都归到一个 testsuite 里去,这里我们把当前目录下的所有测试(实际上只有一个 sayHelloTest.php )归到一个名为 All 的 testsuite 里。
phpunit 依赖 php-xml 扩展来读取 phpunit.xml,Ubuntu上执行下边的命令来安装 php-xml 扩展。
1 bob@Bob-VirtualBox:/var/www/hello-world$ sudo apt install php-xml
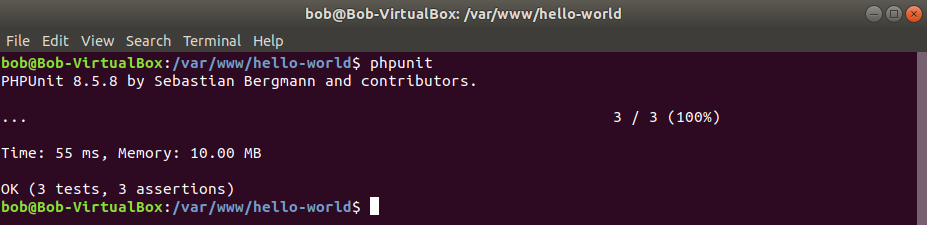
我们再次运行下测试,这次只用执行 phpunit 就好了,phpunit 会在当前目前下寻找 *Test.php 文件,然后自动执行里边的测试方法。
1.7 本章小结
本章我们准备好了基础的开发测试环境,并通过一个 Hello World 程序引出了作者的一个基础测试理论。
作者有一个英文名叫Bob,我们暂且把这个理论称作 Bob Test Theory 1 :
通过重新组织代码,提炼出核心逻辑,让其易于测试。然后只测试这个核心逻辑,而核心逻辑之外的代码,并不通过 PHPUnit 测试。
然后我们写了3个测试用例来测试 sayHello(array $data) ,并通过使用 phpunit.xml 简化了测试的执行。
本章代码
https://github.com/heguangyu5/PHPUnit-in-Action-Code/tree/chapter01/hello-world